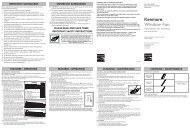
OWNER'S MANUAL - Sears
OWNER'S MANUAL - Sears
OWNER'S MANUAL - Sears

Create successful ePaper yourself
Turn your PDF publications into a flip-book with our unique Google optimized e-Paper software.
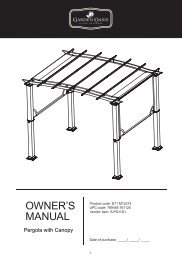
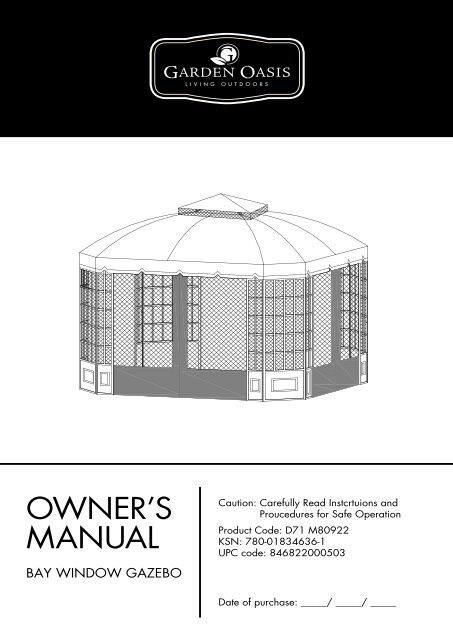
OWNER’S<br />
<strong>MANUAL</strong><br />
BAY WINDOW GAZEBO<br />
Caution: Carefully Read Instcrtuions and<br />
Proucedures for Safe Operation<br />
Product Code: D71 M80922<br />
KSN: 780-01834636-1<br />
UPC code: 846822000503<br />
Date of purchase: _____/ _____/ _____
Warning:<br />
1. When assembling and using this product, basic safety precautions should always be followed<br />
to reduce the risk of personal injury and damage to equipment. Please read all instructions<br />
before assembly and use.<br />
2. Some parts may contain sharp edges, wear protective gloves if necessary. At least four or more<br />
people are recommended for safe assembly.<br />
3. Keep all children and pets away from assembly area.<br />
4. Begin assembly not less than 6 feet from any obstruction such as fence, garage, house,<br />
overhanging branches, laundry line or electrical wires.<br />
5. Install on level ground. This gazebo cannot be permanently staked or attached to concrete floor<br />
or platform. This gazebo is intended for decorative and sunshade purposes only and is not meant<br />
to withstand inclement weather including high winds, rain and snow. Gazebo fabric is water<br />
resistant, not water proof and may leak during exposure to precipitation.<br />
6. Check all nuts and bolts for tightness before and during usage.<br />
7. Keep all flame and heat sources away from this gazebo fabric. This gazebo is made with fabric<br />
that meets CPAI-84 specifications for flame resistance. It is not fire proof. The fabric will burn if left<br />
in continuous contact with any flame source. The application of any foreign substance to the gazebo<br />
fabric may render the flame-resistant properties ineffective.<br />
P1
GAZEBO PARTS LIST<br />
NO PART DESCRIPTION<br />
A<br />
B1<br />
B2<br />
C1<br />
C2<br />
E<br />
F<br />
G1<br />
G2<br />
H1<br />
H2<br />
J<br />
K1<br />
K2<br />
N<br />
Big screen<br />
Left Screen<br />
Right Screen<br />
Long Bar<br />
Short Bar<br />
Larger Roof Connector<br />
Top Roof Supporter<br />
Corner Supporting Bar-Long<br />
Corner Supporting Bar-Short<br />
Side Supporting Bar-Long<br />
Side Supporting Bar-Short<br />
Center Hook<br />
Larger Canopy<br />
Top Canopy<br />
Mosquito Netting<br />
QTY<br />
4<br />
4<br />
4<br />
2<br />
2<br />
1<br />
4<br />
4<br />
4<br />
2<br />
2<br />
1<br />
1<br />
1<br />
1<br />
P2
HARDWARE PACK<br />
NO PART DESCRIPTION QTY<br />
AA<br />
BB<br />
CC<br />
DD<br />
EE<br />
WW<br />
M6×25mm Screw<br />
M6×20mm Screw<br />
M6 Washer<br />
Stake<br />
Plastic ring for<br />
mosquito netting<br />
SPARE HARDWARE PACK<br />
16<br />
20<br />
36<br />
8<br />
48<br />
M6 Wrench 1<br />
NO PART DESCRIPTION QTY<br />
AA<br />
BB<br />
CC<br />
EE<br />
M6×25mm Screw<br />
M6×20mm Screw<br />
M6 Washer<br />
Plastic ring for<br />
mosquito netting<br />
Snap link<br />
Touch up paint<br />
Assembly Tools Required: a ladder and a hammer (not provided)<br />
2<br />
4<br />
6<br />
4<br />
3<br />
1<br />
P3
BAY WINDOW GAZEBO ASSEMBLY INSTRUCTION<br />
Step: 1<br />
Fig. 1-1 & Fig. 1-2, Screens setup: Insert the Left Screen (B1) into the Big Screen (A), pull it down to<br />
fix them; then use AA, CC to secure B1 & A; repeat the same process for B2 & A attachment. Don’t<br />
tighten the screws completely at this time.<br />
Fig. 1-3, Frame setup: Connect the Long Bar (C1) and the assembled screens with Screw (BB) and<br />
Washer (CC); repeat the same process for Short Bars (C2) and the Screens, until you get the<br />
complete frame setup as shown in Fig. 1. Don’t tighten any of the screws completely at this time.<br />
P4
BAY WINDOW GAZEBO ASSEMBLY INSTRUCTION<br />
Fig. 2-4<br />
C2<br />
B1<br />
Step: 2<br />
E<br />
G1<br />
G1<br />
Fig. 2-1 Fig. 2-2 Fig. 2-3<br />
A<br />
J<br />
G2<br />
C2<br />
B1<br />
H1<br />
G2<br />
F<br />
G1<br />
A<br />
B2<br />
C1<br />
Fig. 2-5<br />
Fig. 2-1: Screw Center Hook (J) into the Larger Roof Connector (E) and secure properly.<br />
E<br />
Fig. 2-2: Connect Top Roof Supporter (F) with Larger Roof Connector (E). Attention here: the end of<br />
Label “→F” affixed on Larger Roof Connector (E) is used to assemble F.<br />
Fig. 2-3 & 2-4: A ladder is needed for this step--- When placing Larger Roof Connector (E), please<br />
make sure that, the middle connecting end of E labeled with “→H2” should be directed to Long Bar<br />
(C1); while the part labeled with the logo “→H1” be directed to Short Bar (C2). Connect one end of<br />
the Corner Supporting Bar (G1&G2) and Top Roof Supporter (F), and fix the other end of (G1&G2)<br />
with Big Screen (A).<br />
Fig. 2- 5 & 2-6: Connect one end of Side Supporting Bar (Long) (H1) and Larger Roof Connector (E),<br />
and secure the other end of (H1) to the Short Bar (C2) with Screws (BB) and Washers (CC).<br />
Fig. 2-7: Do the same for Side Supporting Bar (short) (H2) and Larger Roof Connector (E), then fix<br />
them with Long Bar (C1) using (BB) and (CC), to complete top frame assembly.<br />
E<br />
H1<br />
F<br />
G1<br />
G2 G2<br />
B2<br />
C1<br />
C1<br />
H1<br />
H2<br />
BB<br />
CC<br />
Fig. 2-6 C2<br />
Fig. 2-7<br />
H2<br />
G2<br />
B1<br />
F<br />
G1<br />
A<br />
BB<br />
CC<br />
Fig. 2<br />
C1<br />
P5
BAY WINDOW GAZEBO ASSEMBLY INSTRUCTION<br />
Step: 3<br />
N<br />
K1<br />
Fig.<br />
3-1<br />
EE<br />
A,B1,B2,C1,C2<br />
Fig.<br />
3-3<br />
Fig.<br />
3-2<br />
Fig.<br />
3-4<br />
Fig. 3-1: Put Larger Canopy (K1) on to the top frame. Don’t unfold it completely at this time.<br />
Fig. 3-2: Put on Top Canopy (K2) to Top Roof Supporter (F); tie the netting of Top canopy together<br />
with the straps on Larger Canopy (K1).<br />
Unfold Larger Canopy completely, and attach the hooks on the canopy to the holes in screens.<br />
Put the gazebo in a correct position/direction; tighten all the screws with Wrench (WW) properly.<br />
Fig. 3-3: Attach Mosquito netting (N) onto Screen (A B1, B2) and Long and Short bar (C1&C2)<br />
with Plastic Rings (EE). Pay attention to the difference of two sides with different length.<br />
Fig. 3-4: Secure the completely assembled product on the ground with Stake (DD).<br />
K2<br />
K1<br />
Fig 3<br />
DD DD<br />
P6
BAY WINDOW GAZEBO ASSEMBLY INSTRUCTION<br />
Care & Maintenance<br />
Our steel components for garden accessories and furniture are treated with rust inhibiting paint that<br />
protects it from rusting. However, due to the nature of steel, surface oxidation (rusting) will occur once<br />
these protective coatings are scratched. This is a natural process and is not a defect! To minimize this<br />
condition, we recommend care when assembling & handling the product to prevent scratching the paint.<br />
Should any scratching or damage occur, we recommend immediate touch-up with rust inhibiting paint,<br />
which is included in the package. Surface rust can also be easily removed with a very light application<br />
of common cooking oil. If surface oxidation (rusting) occurs and if no measure is taken to prevent this,<br />
the oxidation may start dripping on to deck or patio and cause damaging stains, which may be difficult<br />
to remove. This can be prevented if the measure is taken to keep the product from oxidizing.<br />
Limited Warranty<br />
The item is warranted to be free from defects in material or workmanship for a period of 1 year.<br />
However, we don't reimburse for transportation or delivery costs, or compensate the individual or any<br />
outside party for assembling or disassembling the product.<br />
This limited warranty is extended to the original purchaser and applies to defects in materials and<br />
workmanship of your item, provided the item is maintained with care and used only for personal,<br />
residential purposes.<br />
Exclusions<br />
Items used for commercial, contract, or other non-residential purposes, or items damaged due to acts<br />
of nature, vandalism, misuse, or improper assembly are not covered. Corrosion or rusting of hardware<br />
is not covered. Proof of purchase (dated register receipt) is required for warranty claims. Warranty is<br />
to the original purchaser and is non-transferable. Any replacement of warranted items will be in the<br />
original style and color, or a similar style and color if the original is unavailable or has been discontinued.<br />
As some states do not allow exclusions or limitations on an implied warranty, the above exclusions and<br />
limitations may not apply. This warranty gives you specific rights, and you may also have other rights,<br />
which vary from state to state.<br />
Important<br />
Please do not return this product to the store. For technical assistance on assembly or replacement parts,<br />
call Sunjoy Industries at (866) 578-6569 from 8:30 AM to 5:30 PM EST Monday to Friday, for expedited<br />
replacement parts order, fax the attached completed customer service replacement form to<br />
1-740-283-3549, or send email to sears@sunjoygroup.com for assistance.<br />
Made in China<br />
P7