Sony KDL55BX520 BRAVIA LCD HDTV Set Up Guide - static ...
Sony KDL55BX520 BRAVIA LCD HDTV Set Up Guide - static ...
Sony KDL55BX520 BRAVIA LCD HDTV Set Up Guide - static ...

Create successful ePaper yourself
Turn your PDF publications into a flip-book with our unique Google optimized e-Paper software.
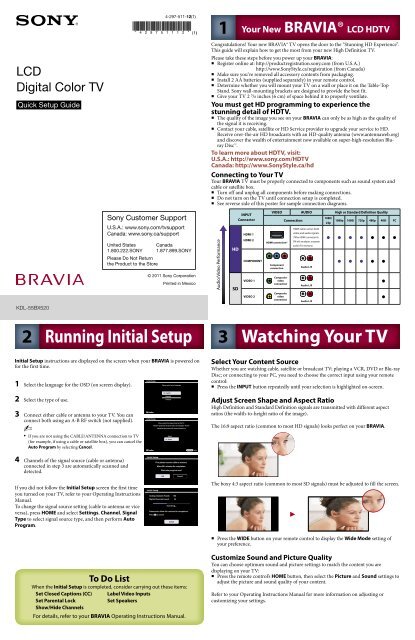
<strong>LCD</strong><br />
Digital Color TV<br />
Quick <strong>Set</strong>up <strong>Guide</strong><br />
KDL-55BX520<br />
2<br />
Initial <strong>Set</strong>up instructions are displayed on the screen when your <strong>BRAVIA</strong> is powered on<br />
for the first time.<br />
1 Select the language for the OSD (on screen display).<br />
2 Select the type of use.<br />
3 Connect either cable or antenna to your TV. You can<br />
connect both using an A-B RF switch (not supplied).<br />
~<br />
•<br />
If you are not using the CABLE/ANTENNA connection to TV<br />
(for example, if using a cable or satellite box), you can cancel the<br />
Auto Program by selecting Cancel.<br />
4 Channels of the signal source (cable or antenna)<br />
connected in step 3 are automatically scanned and<br />
detected.<br />
If you did not follow the Initial <strong>Set</strong>up screen the first time<br />
you turned on your TV, refer to your Operating Instructions<br />
Manual.<br />
To change the signal source setting (cable to antenna or vice<br />
versa), press HOME and select <strong>Set</strong>tings, Channel, Signal<br />
Type to select signal source type, and then perform Auto<br />
Program.<br />
4-297-511-12(1)<br />
<strong>Sony</strong> Customer Support<br />
U.S.A.: www.sony.com/tvsupport<br />
Canada: www.sony.ca/support<br />
United States<br />
1.800.222.SONY<br />
Please Do Not Return<br />
the Product to the Store<br />
Canada<br />
1.877.899.SONY<br />
© 2011 <strong>Sony</strong> Corporation<br />
Running Initial <strong>Set</strong>up<br />
Initial <strong>Set</strong>up<br />
To Do List<br />
When the Initial <strong>Set</strong>up is completed, consider carrying out these items:<br />
<strong>Set</strong> Closed Captions (CC) Label Video Inputs<br />
<strong>Set</strong> Parental Lock <strong>Set</strong> Speakers<br />
Show/Hide Channels<br />
For details, refer to your <strong>BRAVIA</strong> Operating Instructions Manual.<br />
Conrm Conrm<br />
Initial <strong>Set</strong>up<br />
Initial <strong>Set</strong>up<br />
Initial <strong>Set</strong>up<br />
Printed in Mexico<br />
Please select your language:<br />
English<br />
Español<br />
Français<br />
First please connect cable or antenna.<br />
Allow 50+ minutes for completion.<br />
Start auto program now?<br />
OK Cancel<br />
Analog Channels Found: 106<br />
Digital Chennels Found: 24<br />
Searching...<br />
Please wait. Allow 50+ minutes for completion.<br />
Press to cancel.<br />
Please select the type of use for this TV.<br />
"Retail" optimizes the picture for store display. "Home"<br />
optimizes the picture for normal home use.<br />
Retail<br />
Home<br />
Conrm Conrm RETURN Back<br />
Cancel<br />
Select Your Content Source<br />
Whether you are watching cable, satellite or broadcast TV; playing a VCR, DVD or Blu-ray<br />
Disc; or connecting to your PC, you need to choose the correct input using your remote<br />
control:<br />
Press the INPUT button repeatedly until your selection is highlighted on-screen.<br />
■<br />
Adjust Screen Shape and Aspect Ratio<br />
High Definition and Standard Definition signals are transmitted with different aspect<br />
ratios (the width-to-height ratio of the image).<br />
The 16:9 aspect ratio (common to most HD signals) looks perfect on your <strong>BRAVIA</strong>.<br />
The boxy 4:3 aspect ratio (common to most SD signals) must be adjusted to fill the screen.<br />
■<br />
Press the WIDE button on your remote control to display the Wide Mode setting of<br />
your preference.<br />
Customize Sound and Picture Quality<br />
You can choose optimum sound and picture settings to match the content you are<br />
displaying on your TV:<br />
■<br />
3<br />
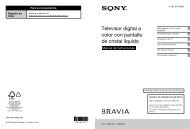
Your New <strong>BRAVIA</strong>® <strong>LCD</strong> <strong>HDTV</strong><br />
Congratulations! Your new <strong>BRAVIA</strong>® TV opens the door to the “Stunning HD Experience”.<br />
This guide will explain how to get the most from your new High Definition TV.<br />
Please take these steps before you power up your <strong>BRAVIA</strong>:<br />
■<br />
■<br />
Register online at: http://productregistration.sony.com (from U.S.A.)<br />
http://www.<strong>Sony</strong>Style.ca/registration (from Canada)<br />
Make sure you’ve removed all accessory contents from packaging.<br />
Install 2 AA batteries (supplied separately) in your remote control.<br />
Determine whether you will mount your TV on a wall or place it on the Table-Top<br />
Stand. <strong>Sony</strong> wall-mounting brackets are designed to provide the best fit.<br />
Give your TV 2 3 /8 inches (6 cm) of space behind it to properly ventilate.<br />
■<br />
You must get HD programming to experience the<br />
stunning detail of <strong>HDTV</strong>.<br />
■<br />
The quality of the image you see on your <strong>BRAVIA</strong> can only be as high as the quality of<br />
the signal it is receiving.<br />
■ Contact your cable, satellite or HD Service provider to upgrade your service to HD.<br />
Receive over-the-air HD broadcasts with an HD-quality antenna (www.antennaweb.org)<br />
and discover the wealth of entertainment now available on super-high-resolution Bluray<br />
Disc.<br />
To learn more about <strong>HDTV</strong>, visit:<br />
U.S.A.: http://www.sony.com/<strong>HDTV</strong><br />
Canada: http://www.<strong>Sony</strong>Style.ca/hd<br />
Connecting to Your TV<br />
Your <strong>BRAVIA</strong> TV must be properly connected to components such as sound system and<br />
cable or satellite box.<br />
■<br />
Turn off and unplug all components before making connections.<br />
Do not turn on the TV until connection setup is completed.<br />
See reverse side of this poster for sample connection diagrams.<br />
Audio/Video Performance<br />
1<br />
HD<br />
SD<br />
INPUT<br />
Connector<br />
HDMI 1<br />
HDMI 2<br />
COMPONENT<br />
VIDEO 1<br />
VIDEO 2<br />
VIDEO AUDIO High or Standard Definition Quality<br />
HDMI connection*<br />
Component<br />
connection<br />
Composite<br />
video<br />
connection<br />
Composite<br />
video<br />
connection<br />
Connection<br />
HDMI cable carries both<br />
video and audio signals.<br />
(*When HDMI is connected to<br />
DVI with an adapter, a separate<br />
audio L/R is necessary.)<br />
Audio L/R<br />
Audio L/R<br />
Audio L/R<br />
Watching Your TV<br />
Press the remote control’s HOME button, then select the Picture and Sound settings to<br />
adjust the picture and sound quality of your content.<br />
Refer to your Operating Instructions Manual for more information on adjusting or<br />
customizing your settings.<br />
1080/<br />
24p<br />
1080p 1080i 720p 480p 480i PC<br />
z z z z z z z<br />
z z z z z<br />
z<br />
z
Cable/Antenna<br />
HD Basic Connection with A/V Receiver<br />
Splitter<br />
Rear of TV<br />
SAT<br />
(dish)<br />
Required Cable Types for Connection<br />
Audio (L/R)<br />
HD Cable Box or<br />
HD Satellite Receiver<br />
HD <strong>BRAVIA</strong>® Sync Basic Connection<br />
Cable/Antenna<br />
Splitter<br />
AC IN<br />
Coaxial<br />
AM<br />
HDMI<br />
HD15<br />
Composite<br />
Rear of TV<br />
SAT IN DVD IN VIDEO 2/BD IN OUT<br />
HDMI<br />
DIGITAL<br />
L L<br />
R R<br />
OPT IN OPT IN COAX IN AUDIO IN AUDIO IN AUDIO IN<br />
ANTENNA SAT VIDEO 1 DVD<br />
SA-CD/CD TV VIDEO 1 DMPORT<br />
HDMI<br />
OUT<br />
*Signifies a <strong>BRAVIA</strong> Sync capable device.<br />
SPEAKERS<br />
FRONT R FRONT L SUR R SUR L CENTER SUBWOOFER<br />
COMPONENT<br />
VIDEO OUT<br />
VIDEO<br />
AUDIO 5.1CH OUTPUT<br />
OUT Y<br />
OUT<br />
FRONT REAR CENTER<br />
VIDEO<br />
DIGITAL OUT<br />
PCM/DTS/DOLBY DIGITAL<br />
COAXIAL OPTICAL<br />
L<br />
L<br />
PB/CB<br />
S VIDEO<br />
PR/CR<br />
SAT (dish)<br />
R<br />
R<br />
WOOFER<br />
*Blu-ray Disc<br />
*A/V Receiver<br />
Blu-ray Disc/DVD<br />
DVI-to-HDMI<br />
Component<br />
Mini-Pin Audio<br />
A/V Receiver<br />
Digital Optical Audio<br />
HD Cable Box or<br />
HD Satellite Receiver<br />
HD Basic Connection with Home Theater System<br />
Notes on Connection:<br />
■<br />
■<br />
Your TV is equipped with multiple HDMI inputs; connect your incoming signal<br />
source (HD Cable Box, HD Satellite Box, or DVD) with HDMI or component<br />
video for the best possible picture quality.<br />
If your connecting equipment has DVI output instead of HDMI output, you<br />
must use DVI-to-HDMI cable for the video and also connect an audio cable for<br />
the sound.<br />
Notes on Connection:<br />
Connecting a PC to Your <strong>BRAVIA</strong>® TV<br />
■<br />
■<br />
Rear of TV Side Panel<br />
Connect PC’s audio output when using an HD15 connection.<br />
Press PC’s FUNCTION Key + Select Output to transmit to TV.<br />
When using an HD15 connection, adjust TV’s Pitch and Phase to correct<br />
sharpness.<br />
Refer to your <strong>BRAVIA</strong>® Operating Instructions Manual for more information.<br />
PC Connection with SD VCR/DVD<br />
Notebook PC<br />
PC<br />
or<br />
Home Theater System<br />
HD Antenna<br />
or<br />
Splitter<br />
Cable/Antenna<br />
2<br />
VIDEO IN<br />
VIDEO<br />
(MONO)<br />
L<br />
AUDIO<br />
R<br />
Blu-ray Disc/DVD<br />
Cable/SAT (dish)<br />
SD Cable Box or<br />
SD Satellite Receiver<br />
Rear of TV Side Panel<br />
2<br />
VIDEO IN<br />
VIDEO<br />
(MONO)<br />
L<br />
VCR DVD<br />
VCR/DVD Combo<br />
AUDIO<br />
R