elite Panaboard software guide for Mac - Panasonic Business
elite Panaboard software guide for Mac - Panasonic Business
elite Panaboard software guide for Mac - Panasonic Business

You also want an ePaper? Increase the reach of your titles
YUMPU automatically turns print PDFs into web optimized ePapers that Google loves.
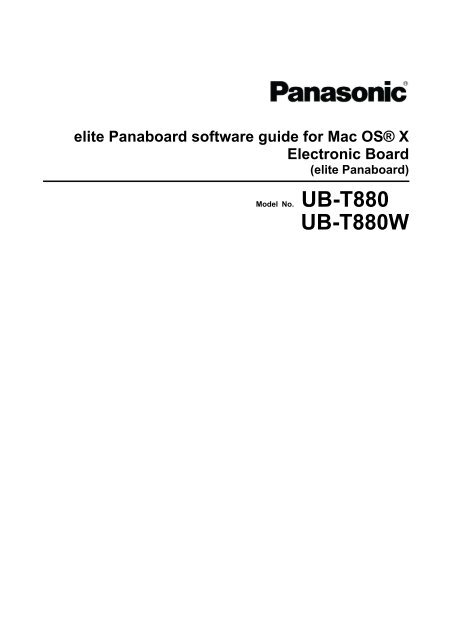
<strong>elite</strong> <strong>Panaboard</strong> <strong>software</strong> <strong>guide</strong> <strong>for</strong> <strong>Mac</strong> OS® X<br />
Electronic Board<br />
(<strong>elite</strong> <strong>Panaboard</strong>)<br />
Model No. UB-T880<br />
UB-T880W
Table of Contents<br />
Installing the <strong>elite</strong> <strong>Panaboard</strong> <strong>software</strong> ...................................................... 4<br />
Installing the <strong>software</strong>................................................................................................................................. 4<br />
Removing the <strong>software</strong> ............................................................................................................................... 5<br />
Operation ....................................................................................................... 6<br />
Finger Operation .......................................................................................................................................... 6<br />
Electronic Pen Operation............................................................................................................................ 6<br />
Multiple User Operation .............................................................................................................................. 7<br />
Usage Limits................................................................................................................................................. 7<br />
Per<strong>for</strong>ming Calibration ................................................................................. 9<br />
Per<strong>for</strong>ming Calibration................................................................................................................................ 9<br />
Re-calibrating ............................................................................................................................................. 10<br />
Using the <strong>elite</strong> <strong>Panaboard</strong> <strong>software</strong> .......................................................... 11<br />
Starting the <strong>elite</strong> <strong>Panaboard</strong> <strong>software</strong> ..................................................................................................... 11<br />
Select Function Menu................................................................................................................................12<br />
Calibration .................................................................................................................................................. 12<br />
Settings ....................................................................................................................................................... 13<br />
Close ........................................................................................................................................................... 14<br />
Line.............................................................................................................................................................. 14<br />
Shapes ........................................................................................................................................................ 15<br />
Mouse.......................................................................................................................................................... 15<br />
Marker (Black Marker / Red Marker / Blue Marker / Green Marker) ...................................................... 15<br />
Insert Image (only White Background mode) ......................................................................................... 15<br />
Eraser .......................................................................................................................................................... 15<br />
Text.............................................................................................................................................................. 16<br />
White Background ..................................................................................................................................... 16<br />
All Clear....................................................................................................................................................... 18<br />
Undo ............................................................................................................................................................ 18<br />
Redo ............................................................................................................................................................ 18<br />
Refresh........................................................................................................................................................ 18<br />
Capture........................................................................................................................................................ 19<br />
Recorder ..................................................................................................................................................... 19<br />
Print ............................................................................................................................................................. 20<br />
On-Screen Keyboard ................................................................................................................................. 20<br />
Help ............................................................................................................................................................. 21<br />
Quit .............................................................................................................................................................. 21<br />
Electronic Pen Operation ........................................................................... 22<br />
Drawing Menu ............................................................................................................................................ 23<br />
Line.............................................................................................................................................................. 23<br />
Shapes ........................................................................................................................................................ 23<br />
Close ........................................................................................................................................................... 23<br />
Settings ....................................................................................................................................................... 24<br />
Pen (Marker / Highlighter / Eraser)........................................................................................................... 25<br />
All Clear....................................................................................................................................................... 26<br />
Troubleshooting.......................................................................................... 27<br />
― 2 ―
Abbreviations<br />
• <strong>Mac</strong>® refers to <strong>Mac</strong> computer.<br />
• <strong>Mac</strong> OS® refers to <strong>Mac</strong> operating system <strong>software</strong>.<br />
• Windows® refers to the Microsoft® Windows® operating system.<br />
Trademarks<br />
• <strong>Mac</strong> and <strong>Mac</strong> OS are trademarks of Apple Inc., registered in the U.S. and other countries.<br />
• Intel is a trademark of Intel Corporation in the U.S. and other countries.<br />
• Microsoft and Windows are either registered trademarks or trademarks of Microsoft Corporation in the<br />
United States and other countries.<br />
• All other trademarks identified herein are the property of their respective owners.<br />
System Requirements<br />
• A <strong>Mac</strong> computer with an Intel processor<br />
• 2 GB of RAM<br />
• <strong>Mac</strong> OS X version 10.5.8, 10.6.8, 10.7.1<br />
• A free USB 2.0 port<br />
• XGA (1024 x 768) Display or more<br />
Interface<br />
USB 2.0<br />
― 3 ―
Installing the <strong>elite</strong> <strong>Panaboard</strong> <strong>software</strong><br />
The <strong>elite</strong> <strong>Panaboard</strong> <strong>software</strong> must be installed on every computer being connected to the <strong>elite</strong> <strong>Panaboard</strong>.<br />
Note<br />
• Don’t connect the <strong>elite</strong> <strong>Panaboard</strong> to the computer until the driver installation is completed.<br />
Installing the <strong>software</strong><br />
1. Double-click the <strong>elite</strong> <strong>Panaboard</strong> installer [<strong>elite</strong> <strong>Panaboard</strong> UB-T8.mpkg].<br />
2. Follow the on-screen instructions.<br />
If you select [Customize] in the "Install <strong>elite</strong> <strong>Panaboard</strong> UB-T8" screen, you will be able to select custom<br />
settings.<br />
Note<br />
• If "<strong>elite</strong> <strong>Panaboard</strong> <strong>software</strong>" is not installed, the Select Function Menu cannot be used.<br />
3. Restart the computer.<br />
Restart the computer if you are prompted to do so.<br />
After the <strong>elite</strong> <strong>Panaboard</strong> <strong>software</strong> has been installed, the following application will be found in the<br />
[<strong>Panasonic</strong>] folder of the Applications folder:<br />
[<strong>elite</strong> <strong>Panaboard</strong> <strong>software</strong>] folder (only when <strong>elite</strong> <strong>Panaboard</strong> <strong>software</strong> is installed)<br />
• <strong>elite</strong> <strong>Panaboard</strong> <strong>software</strong> – start <strong>elite</strong> <strong>Panaboard</strong> <strong>software</strong><br />
• Uninstall <strong>elite</strong> <strong>Panaboard</strong> <strong>software</strong> – uninstall <strong>elite</strong> <strong>Panaboard</strong> <strong>software</strong><br />
[<strong>elite</strong> <strong>Panaboard</strong> UB-T8] folder<br />
• <strong>elite</strong> <strong>Panaboard</strong> Calibration – used to calibrate the <strong>elite</strong> <strong>Panaboard</strong><br />
• Uninstall <strong>elite</strong> <strong>Panaboard</strong> UB-T8 – uninstall <strong>elite</strong> <strong>Panaboard</strong> driver and Calibration utility<br />
Be<strong>for</strong>e using the <strong>elite</strong> <strong>Panaboard</strong>, it must be calibrated. Calibration is described in the "Per<strong>for</strong>ming<br />
Calibration" section.<br />
Note<br />
• Change settings as follows to use the On-Screen Keyboard.<br />
For <strong>Mac</strong> OS X 10.5.8:<br />
Select [Keyboard Viewer] check box in [System Preferences] – [International] – [Input Menu].<br />
For <strong>Mac</strong> OS X 10.6.8 or 10.7.1:<br />
Select [Show Keyboard & Character Viewer in menu bar] check box in [System Preferences] –<br />
[Keyboard] – [Keyboard].<br />
― 4 ―
Removing the <strong>software</strong><br />
If it is necessary to uninstall the <strong>elite</strong> <strong>Panaboard</strong> <strong>software</strong>, follow the procedure below.<br />
1. Double-click the following uninstaller.<br />
• To remove the <strong>elite</strong> <strong>Panaboard</strong> <strong>software</strong>:<br />
“Uninstall <strong>elite</strong> <strong>Panaboard</strong> <strong>software</strong>” in the [<strong>Panasonic</strong>] – [<strong>elite</strong> <strong>Panaboard</strong> <strong>software</strong>] folder, in<br />
the Applications folder.<br />
• To remove the driver and Calibration utility:<br />
“Uninstall <strong>elite</strong> <strong>Panaboard</strong> UB-T8” in the [<strong>Panasonic</strong>] – [<strong>elite</strong> <strong>Panaboard</strong> UB-T8] folder, in the<br />
Applications folder.<br />
2. Restart the computer.<br />
The computer must be restarted to complete the <strong>software</strong> removal.<br />
― 5 ―
Operation<br />
With the UB-T880 series, up to 3 people can simultaneously draw the board using either an electronic pen<br />
or their fingers. Please pay attention to the following points when operating with your fingers or an electronic<br />
pen.<br />
• Finger Operation<br />
• Electronic Pen Operation<br />
• Multiple User Operation<br />
Finger Operation<br />
Note<br />
• The <strong>elite</strong> <strong>Panaboard</strong> detects a change in electrostatic capacitance when touched by a finger. For this<br />
reason, it may not react to fingernails, gloved hands, etc.<br />
• When both a persons finger and the electronic pen are used simultaneously, the <strong>elite</strong> <strong>Panaboard</strong> will<br />
not recognize them as separately operations, but will treat both as if the same operation was occurring.<br />
After operating with the electronic pen, wait 1 second or more be<strong>for</strong>e operating the board with a finger.<br />
Touch<br />
Touch the screen board with a finger.<br />
Click (tap)<br />
Tap the screen board with a finger.<br />
Right-click (press and hold)<br />
Place a finger on the board until the computer make a sound, and then select the right-click function menu<br />
while keeping your finger on the screen.<br />
Double-click (double tap)<br />
Tap the screen board twice with a finger.<br />
Drag<br />
Place a finger on the screen board, and then move it.<br />
Right drag<br />
Place a finger on the screen board until the computer makes a sound, and then move it.<br />
Electronic Pen Operation<br />
Note<br />
• The <strong>elite</strong> <strong>Panaboard</strong> detects a change in electrostatic capacitance when touched by a finger. For this<br />
reason, it may not react to the electronic pen if a glove is worn.<br />
• You cannot use more than one electronic pen at the same time.<br />
• When both the electronic pen and a persons finger is used simultaneously, the <strong>elite</strong> <strong>Panaboard</strong> will not<br />
recognize them as separately operations, but will treat both as if the same operation was occurring.<br />
After operating with a finger, wait 1 second or more be<strong>for</strong>e using the electronic pen.<br />
Drag<br />
Place the tip of the electronic pen on the screen board, and then move it.<br />
― 6 ―
Drawing function<br />
The Selection Dial can be used to change the color being drawn, and can be used to erase the displayed<br />
drawing.<br />
Mouse function<br />
Setting the Selector Dial to Mouse lets you per<strong>for</strong>m the same operations as using your finger.<br />
While holding down the menu button, touch the pen to the screen board<br />
The Drawing Menu appears from where a number of different functions can be selected.<br />
(The Drawing Menu is not displayed while the Selector Dial is set to Mouse.)<br />
Press the up button<br />
Per<strong>for</strong>ms the same function as pressing the Page Up key on the computer.<br />
Press the down button<br />
Per<strong>for</strong>ms the same function as pressing the Page Down key on the computer.<br />
Multiple User Operation<br />
With the UB-T880 series, multiple users can draw the screen board at the same time.<br />
Limits to simultaneous operation<br />
• A maximum of 3 touch spot points are allowed at any one time.<br />
The UB-T880 series can detect up to 3 spots at the same time. Touching more than 3 spots at the<br />
same time can result in erroneous operation.<br />
• During operation, avoid touching spots erroneously while working.<br />
The UB-T880 series detects where the board is touched. Erroneous operation can occur in the<br />
following situations:<br />
– Per<strong>for</strong>ming operations while touching the screen board.<br />
– Per<strong>for</strong>ming operations while the hand that was holding the pen is still touching the screen board.<br />
• Do not touch a spot that is close (within 10 cm [4 in.]) to where you are operating.<br />
Touching multiple points within a close area (10 cm [4 in.]) may be recognizes as a single touched<br />
point, or if in freehand line mode cause connections or intersections of other drawn lines.<br />
Usage Limits<br />
Do not do any of the following, as they might result in erroneous operation:<br />
• Do not operate 2 or more <strong>elite</strong> <strong>Panaboard</strong>s in close proximity to each other.<br />
Using multiple electronic pens at the same time can cause erroneous operation.<br />
• Do not connect 2 or more <strong>elite</strong> <strong>Panaboard</strong>s to a single computer.<br />
They will not operate correctly.<br />
Note<br />
• The mouse position is reset and may move on the left-upper corner when the power is turned off or the<br />
USB cable is disconnected. In this case, a function specified by Active Screen Corners may be<br />
per<strong>for</strong>med.<br />
• When turn the power switch on after turning off or reconnect the USB cable, wait 5 seconds or more.<br />
• When screen saver is executed during use, change time <strong>for</strong> screen saver starting.<br />
― 7 ―
• When the <strong>elite</strong> <strong>Panaboard</strong> is used while peripherals connected to the USB hub are operating, the<br />
response of the <strong>elite</strong> <strong>Panaboard</strong> may be delayed and the electronic pen may malfunction. If such<br />
problems occur, connect the peripherals directly to the computer.<br />
• When the monitor resolution is changed, shut down the <strong>elite</strong> <strong>Panaboard</strong> <strong>software</strong>, and then per<strong>for</strong>m<br />
calibration again.<br />
― 8 ―
Per<strong>for</strong>ming Calibration<br />
Calibration refers to setting up the <strong>elite</strong> <strong>Panaboard</strong> and projector so that lines and comments drawn with a<br />
persons finger or the Electronic Pen are displayed in the correct position. Be sure to per<strong>for</strong>m calibration<br />
be<strong>for</strong>e use.<br />
After setting up the <strong>elite</strong> <strong>Panaboard</strong>, project an image onto the screen board and use the <strong>elite</strong> <strong>Panaboard</strong><br />
Calibration utility installed on the computer to per<strong>for</strong>m calibration.<br />
The following changes will bring the position of projection out of alignment with the position of a persons<br />
finger or the Electronic Pen, and you will need to recalibrate the equipment.<br />
• The location of the projector changed.<br />
• The location of the <strong>elite</strong> <strong>Panaboard</strong> changed.<br />
• The image area or placement was changed due to changes in the zoom, focus, etc.<br />
• The resolution of the projector or the computer changed.<br />
Per<strong>for</strong>ming Calibration<br />
1. Turn on the <strong>elite</strong> <strong>Panaboard</strong>.<br />
2. Connect the <strong>elite</strong> <strong>Panaboard</strong> to the computer with the USB cable.<br />
The <strong>elite</strong> <strong>Panaboard</strong> Calibration utility will be launched.<br />
Note<br />
• If the <strong>elite</strong> <strong>Panaboard</strong> Calibration utility does not appear automatically, double-click the <strong>elite</strong><br />
<strong>Panaboard</strong> Calibration icon in the [<strong>Panasonic</strong>] – [<strong>elite</strong> <strong>Panaboard</strong> UB-T8] – [<strong>elite</strong> <strong>Panaboard</strong><br />
Calibration] in your Applications folder.<br />
― 9 ―
3. Calibrate the equipment by touching the center of the indicated points following the<br />
instructions on the screen.<br />
• Touch the screen board at a right angle with a finger not to detect other fingers. Do not do so, as this<br />
may result in misalignment.<br />
• After touching the indicated point correctly, the next point will display automatically.<br />
4. Choose whether to save the calibration settings, and then click [OK].<br />
When calibration has finished normally, a completion dialog box is displayed.<br />
If the <strong>elite</strong> <strong>Panaboard</strong> and projector are fixed so that they will not move (If Wall mounted), select the<br />
[Always use this calibration in<strong>for</strong>mation.] button, and click [OK] to skip calibration the next time the <strong>elite</strong><br />
<strong>Panaboard</strong> driver is started.<br />
Re-calibrating<br />
Calibration will have to be redone in the following cases;<br />
• The location of the projector changed.<br />
• The location of the <strong>elite</strong> <strong>Panaboard</strong> changed.<br />
• The image area or placement was changed due to changes in the zoom, focus, etc.<br />
• The resolution of the projector or the computer changed.<br />
The <strong>elite</strong> <strong>Panaboard</strong> Calibration utility can be run again at any time by clicking the calibration icon on the<br />
Select Function Menu or by double-clicking the <strong>elite</strong> <strong>Panaboard</strong> Calibration icon, in the [<strong>Panasonic</strong>] – [<strong>elite</strong><br />
<strong>Panaboard</strong> UB-T8] – [<strong>elite</strong> <strong>Panaboard</strong> Calibration] in the Applications folder.<br />
― 10 ―
Using the <strong>elite</strong> <strong>Panaboard</strong> <strong>software</strong><br />
If the <strong>elite</strong> <strong>Panaboard</strong> <strong>software</strong> is installed on the computer it can be used.<br />
Starting the <strong>elite</strong> <strong>Panaboard</strong> <strong>software</strong><br />
1. Double-click the <strong>elite</strong> <strong>Panaboard</strong> <strong>software</strong> icon, in the [<strong>Panasonic</strong>] – [<strong>elite</strong> <strong>Panaboard</strong><br />
<strong>software</strong>] folder in the Applications folder.<br />
<strong>elite</strong> <strong>Panaboard</strong> <strong>software</strong> starts.<br />
Note<br />
• When you click the <strong>elite</strong> <strong>Panaboard</strong> <strong>software</strong> icon many times, multiple <strong>elite</strong> <strong>Panaboard</strong> <strong>software</strong> may<br />
start. In this case, terminate unnecessary <strong>elite</strong> <strong>Panaboard</strong> <strong>software</strong>.<br />
• To display the Select Function Menu, click the Menu Start Tab (left side: / right side: ) on the screen<br />
with a persons finger<br />
Example of the Select Function Menu<br />
• To display the Drawing Menu, touch the screen board while holding the menu button on the electronic<br />
pen.<br />
Example of the Drawing Menu<br />
Note<br />
• The Drawing Menu is not displayed while the Selector Dial of the electronic pen is set to Mouse.<br />
― 11 ―
Select Function Menu<br />
Clicking on one of the Menu Start Tabs displaying the Select Function Menu, which then can be used to<br />
switch between the various functions. These functions can be used to draw or edit text and graphics.<br />
Calibration Close<br />
Settings<br />
Line Mouse<br />
Shapes<br />
Black Marker Blue Marker<br />
Red Marker<br />
Green Marker Eraser<br />
Insert Image (Available only in<br />
Text<br />
All Clear<br />
White Background mode)<br />
White Background<br />
Open*<br />
Previous Page*<br />
Save As*<br />
Save*<br />
Undo Refresh<br />
Redo<br />
Capture Print<br />
Recorder<br />
On-Screen Keyboard Quit<br />
Help<br />
Set Background*<br />
Next Page*<br />
*Appear only in<br />
White Background mode<br />
Calibration<br />
Calibrate the position of the image projected on the screen so that characters and lines drawn are<br />
displayed in the correct position.<br />
The projected image will become misaligned if the <strong>elite</strong> <strong>Panaboard</strong> or projector is moved. If this happens,<br />
per<strong>for</strong>m calibration again to correctly realign the <strong>elite</strong> <strong>Panaboard</strong> and projector.<br />
1 Click (Calibration) in the Select Function Menu.<br />
Note<br />
• To per<strong>for</strong>m Calibration, refer to "Per<strong>for</strong>ming Calibration".<br />
― 12 ―
Settings<br />
The setting <strong>for</strong> the following tools can be changed: Marker, Line, Shapes, Text, Tab Position. Line width<br />
and color, <strong>for</strong> each, can be selectively changed.<br />
1 Click (Settings) in the Select Function Menu.<br />
• The "Settings" window is displayed.<br />
2 Click the tab <strong>for</strong> the settings to be changed.<br />
Black Marker / Red Marker / Blue Marker / Green Marker tab<br />
Line<br />
Set the thickness and/or color <strong>for</strong> the marker.<br />
Change the thickness by moving the scroll bar right or left.<br />
Click (Set line color), and the "Select Color" window is displayed in which then the color can<br />
be changed.<br />
Transparency<br />
This is where the marker transparency level can be set. The level of transparency can be changed<br />
by moving the scroll bar right or left.<br />
Line tab<br />
Line<br />
This is where the line thickness and/or color can be set.<br />
Change the thickness by moving the scroll bar right or left.<br />
Click (Set line color), and the "Select Color" window is displayed in which then the color can<br />
be changed.<br />
Transparency<br />
Set the level of transparency <strong>for</strong> the line. You can change the level of transparency by moving the<br />
scroll bar right or left.<br />
― 13 ―
Close<br />
Shapes tab<br />
Shapes<br />
This is where the property of the shape is set.<br />
If [No Fill] is selected, then all drawn shapes will be transparent.<br />
If [No Line] is selected, then all drawn shapes will be filled without a frame.<br />
Click (Set fill color), and the "Select Color" window is displayed in which then the color inside<br />
of shapes can be changed (except [No Fill] is selected).<br />
Line<br />
This is where the shape outline thickness and/or color can be set (except [No Line] of Shapes is<br />
selected).<br />
The line thickness can be changed by moving the scroll bar right or left.<br />
Click (Set line color), and the "Select Color" window is displayed in which then the color can<br />
be changed.<br />
Transparency<br />
Set the level of transparency <strong>for</strong> the shape. You can change the level of transparency by moving<br />
the scroll bar right or left.<br />
Text tab<br />
Text<br />
This is where the property of the text is set. Changes to the font type, font size, etc of the text can<br />
be changed here.<br />
Click (Set font color), and the "Select Color" window is displayed in which you can change the<br />
color.<br />
Transparency<br />
This is where the transparency of the text is set. Changes to the transparency level can be done by<br />
moving the scroll bar right or left.<br />
Tab Position tab<br />
Specify the display position of the Menu Start Tabs.<br />
Click (Close) in the Select Function Menu.<br />
Line<br />
Draw straight lines.<br />
1 Click (Line) in the Select Function Menu.<br />
• A list of line style selections will display.<br />
2 Select the line style, and then draw a line by dragging.<br />
Note<br />
• After drawing, the mouse pointer returns to the previous drawing mode (Mouse, Marker, Eraser).<br />
― 14 ―
Shapes<br />
Draw a variety of pre-defined shapes.<br />
1 Click (Shapes) in the Select Function Menu.<br />
• A list of shape selections will display.<br />
2 Select a shape, and then draw a shape by dragging.<br />
Note<br />
• After drawing, the mouse pointer returns to the previous drawing mode (Mouse, Marker, Eraser).<br />
Mouse<br />
Mouse operations is the same as if using the mouse on the computer itself.<br />
1 Click (Mouse) in the Select Function Menu.<br />
• The following can be done:<br />
– Click (tap)<br />
– Right-click (press and hold)<br />
– Double-click (double tap)<br />
– Drag<br />
– Right-drag<br />
Marker (Black Marker / Red Marker / Blue Marker / Green Marker)<br />
Draw free-<strong>for</strong>m lines <strong>for</strong> pictures and characters.<br />
1 Click one of (Black Marker) / (Red Marker) / (Blue Marker) / (Green Marker)<br />
on the Select Function Menu.<br />
• A list to select the line style is displayed.<br />
2 Select a line style, and then draw on the screen board.<br />
Note<br />
• Depending on the drawing method and the drawing speed, freehand lines may appear wavy or<br />
crooked, etc.<br />
Insert Image (only White Background mode)<br />
In White Background mode only, insert an image file. For details, refer to "Insert an Image File in White<br />
Background mode".<br />
Eraser<br />
This is used to erase drawings displayed on the screen.<br />
1 Click (Eraser) in the Select Function Menu.<br />
• A list to select the eraser size is displayed.<br />
2 Select an eraser size, and then drag over the areas you want to erase.<br />
Note<br />
• When many lines or other objects are drawn, the eraser operation speed may slow down.<br />
― 15 ―
Text<br />
Add and edit text in text edit mode.<br />
1 Click (Text) in the Select Function Menu.<br />
• A list to select the text style is displayed.<br />
2 Select the text style.<br />
• The mouse pointer changes to a text insertion bar.<br />
3 Click or drag at the location where the text is to be inserted.<br />
• A text box is displayed.<br />
4 Enter text into the text box.<br />
5 Click the outside of the text box to leave text edit mode.<br />
Note<br />
• A letter except English may change unreadable characters.<br />
White Background<br />
This can be used to turn the displayed desktop into a whiteboard, which can be used to give<br />
supplementary explanations.<br />
To enable White Background mode<br />
1 Click (White Background) in the Select Function Menu.<br />
• The displayed desktop will change to a all white board.<br />
• The current page number is displayed in (White Background) icon of the Select Function<br />
Menu.<br />
Insert an Image File in White Background mode<br />
1 Click (Insert Image) in the Select Function Menu.<br />
• The sub-menu is displayed.<br />
2 Click [Load image] of the sub-menu.<br />
• The "Choose the image" window is displayed.<br />
3 Select the image to insert, and click [Open].<br />
Insert an Image from the Gallery in White Background mode<br />
1 Click (Insert Image) in the Select Function Menu.<br />
• The sub-menu is displayed.<br />
2 Click [Image gallery...] of the sub-menu.<br />
• The "Image gallery" window is displayed.<br />
(The Gallery images shown are <strong>for</strong> illustrative purpose only. The actual contents may vary.)<br />
3 Select the gallery to insert, and click [OK].<br />
― 16 ―
To open data created in White Background mode<br />
1 Click (Open) in the Select Function Menu.<br />
• The "Load file" window is displayed.<br />
2 Go to where the file is saved, and then select the desired file, and click [Open].<br />
• The specified file will be opened.<br />
Note<br />
• When a White Background data which is saved on a system with different screen resolution<br />
settings is opened, it is scaled to match current screen resolution settings.<br />
To save data created in White Background mode<br />
1 Click (Save) in the Select Function Menu.<br />
• The file is saved, overwriting the old file.<br />
Save an Open File under a Different Name<br />
1 Click (Save As) in the Select Function Menu.<br />
• The "Save As..." window is displayed.<br />
2 Specify the folder and name <strong>for</strong> the file, and click [Save].<br />
• Saving the White Background data in the proprietary data <strong>for</strong>mat (.pmb) enables the same data to<br />
be viewed again in White Background mode.<br />
To change the page in White Background mode<br />
1 Click (Next Page) or (Previous Page) in the Select Function Menu.<br />
• The current page number is displayed in (White Background) icon of the Select Function<br />
Menu.<br />
• Up to a maximum of 10 pages can be used in White Background mode.<br />
Background setup in White Background mode<br />
1 Click (Set Background) in the Select Function Menu.<br />
• The "Set Background" windows is displayed.<br />
2 Select the gallery to set as the background, and click [OK].<br />
• If [No image in background] are selected, do not set the background.<br />
• Click [Set background color], and the "Select Color" window is displayed in which then the<br />
background color can be changed.<br />
• The Gallery images shown are <strong>for</strong> illustrative purpose only. The actual contents may vary.<br />
― 17 ―
To exit White Background mode<br />
1 While in White Background mode, click (White Background) in the Select Function Menu.<br />
Note<br />
• White Background mode will exit.<br />
• In the Select Function Menu select (Mouse), and then select a drawing object by clicking it. Use<br />
the frame around the object to move it, resize it. (To select multiple objects, drag the mouse to specify<br />
the selection area. In this case, you can only move it.)<br />
You can easily operate it with the mouse on the computer itself because you can confirm a shape of<br />
the mouse cursor.<br />
• When exiting the <strong>elite</strong> <strong>Panaboard</strong> <strong>software</strong> and there is unsaved data, a confirmation window is<br />
displayed.<br />
All Clear<br />
This is used to clear all drawn data from the screen.<br />
1 Click (All Clear) in the Select Function Menu.<br />
• A confirmation window is displayed.<br />
2 Select [Erase] to clear the objects.<br />
• All objects on the screen are cleared.<br />
• To cancel the All Clear operation, click [Cancel].<br />
Undo<br />
Click (Undo) in the Select Function Menu.<br />
• The previous action is undone.<br />
Redo<br />
Redo can be used to reverse a previously action that was undone.<br />
1 Click (Redo) in the Select Function Menu.<br />
• The action that was previously undone with the [Undo] command is redone.<br />
Refresh<br />
If any lines, shapes, text, or other objects that have been drawn disappear, this function redisplays them in<br />
their original positions.<br />
1 Click (Refresh) in the Select Function Menu.<br />
• The objects previously drawn on the board will be displayed again.<br />
― 18 ―
Capture<br />
Save the screen displayed on the desktop and all drawing data as an image file.<br />
1 Click (Capture) in the Select Function Menu.<br />
• The "Save image to file" window is displayed.<br />
2 Specify the folder and name <strong>for</strong> the file, and select a file <strong>for</strong>mat.<br />
• The following [Files of type] <strong>for</strong>mats can be selected.<br />
– PNG file (.png)<br />
– JPEG file (.jpg, .jpeg)<br />
– TIFF file (.tif, .tiff)<br />
– BMP file (.bmp)<br />
3 Click [Save].<br />
Recorder<br />
A movie recording of the projected images and any operations can be created with this feature.<br />
1 Click (Recorder) in the Select Function Menu.<br />
• The “Recorder” window will display.<br />
Start recording.<br />
Recording starts when the button is clicked.<br />
Stop recording and save.<br />
The "Save video file" window is displayed. Specify the folder and file name and save the<br />
file.<br />
Pause recording.<br />
Record a specific area of the screen, specified by dragging a red frame.<br />
Drag a frame around the desired area to record.<br />
Configure the video quality and other settings <strong>for</strong> recording.<br />
Specifying the video quality and other settings<br />
When selecting (Open preferences), the Settings screen will display.<br />
― 19 ―
Temporary Folder:<br />
Select a folder where the temporary files, used <strong>for</strong> the recording, will be saved. Insure that there is<br />
enough free space to save the files.<br />
Quality:<br />
Select the video quality.<br />
Expected recording time:<br />
This value is an estimate of the recording time based on the current settings.<br />
When setting "Quality" and "Temporary Folder", use the estimated time displayed as a reference.<br />
Audio Device:<br />
Note<br />
Select the audio device.<br />
• To record audio, a microphone must be attached to the computer.<br />
• Depending on the computer's operating environment, some drawings or audio may not be recorded.<br />
• In <strong>Mac</strong> OS X 10.7.1, it may not be recorded correctly. Please confirm whether it is recorded correctly<br />
be<strong>for</strong>ehand.<br />
Print<br />
Print the screen and all drawing data displayed on the desktop.<br />
1 Click (Print) in the Select Function Menu.<br />
• The "Print" window is displayed.<br />
2 Click [Print].<br />
• Printing starts.<br />
On-Screen Keyboard<br />
The On-Screen Keyboard is a virtual keyboard that appears on the desktop image that is projected on the<br />
<strong>elite</strong> <strong>Panaboard</strong>. Enter characters by clicking on the keys of the On-Screen Keyboard.<br />
1 Click (On-Screen Keyboard) in the Select Function Menu.<br />
2 To enter characters into a active application move the text cursor to the location where the input<br />
is to be accomplished.<br />
3 Click characters on the On-Screen Keyboard.<br />
Note<br />
• You can not click characters while pressing the Shift key on the <strong>elite</strong> <strong>Panaboard</strong>. Use Caps Lock key<br />
in <strong>Mac</strong> OS X 10.6.8 or 10.7.1.<br />
• Change settings as follows to use the On-Screen Keyboard.<br />
For <strong>Mac</strong> OS X 10.5.8:<br />
Select [Keyboard Viewer] check box in [System Preferences] – [International] – [Input Menu].<br />
For <strong>Mac</strong> OS X 10.6.8 or 10.7.1:<br />
Select [Show Keyboard & Character Viewer in menu bar] check box in [System Preferences] –<br />
[Keyboard] – [Keyboard].<br />
― 20 ―
Help<br />
Viewing Help<br />
Display the <strong>elite</strong> <strong>Panaboard</strong> <strong>software</strong> help.<br />
1 Click (Help) in the Select Function Menu.<br />
• The sub-menu is displayed.<br />
2 Click [Help] of the sub-menu.<br />
Viewing About<br />
Display the <strong>elite</strong> <strong>Panaboard</strong> <strong>software</strong> in<strong>for</strong>mation.<br />
1 Click (Help) in the Select Function Menu.<br />
• The sub-menu is displayed.<br />
2 Click [About] of the sub-menu.<br />
Quit<br />
Quit the <strong>elite</strong> <strong>Panaboard</strong> <strong>software</strong>.<br />
1 Click (Quit) in the Select Function Menu.<br />
― 21 ―
Electronic Pen Operation<br />
The electronic pen can be used to draw and erase any previously drawn object on the desktop.<br />
Notice<br />
• To avoid operating errors, do not touch the penpoint when the electronic pen is not in use.<br />
Note<br />
• You can use more than 1 pen, but not at the same time.<br />
• As the drawing amount increases, the drawing and other operation speed may become slower.<br />
• When both the electronic pen and a finger are used simultaneously, the <strong>elite</strong> <strong>Panaboard</strong> will not<br />
recognize them as separately operations, but will treat both as if the same operation was occurring.<br />
If operating with a finger, wait 1 second or more be<strong>for</strong>e using the electronic pen.<br />
The following operations can be per<strong>for</strong>med with the electronic pen:<br />
• Use the Selector Dial to select a function <strong>for</strong> the electronic pen.<br />
Draws with a marker in the selected color.<br />
Marker line thickness and other settings can be specified in the<br />
Black / Red / Blue / Green<br />
Drawing Menu.<br />
Eraser<br />
Yellow / Yellowish Green / Pink<br />
Mouse<br />
Erases marker lines that have been drawn.<br />
Highlights with a highlighter in the selected color.<br />
Highlighter line thickness and other settings can be specified in<br />
the Drawing Menu.<br />
Operates in the same way as using a persons finger.<br />
Note<br />
• This function can not be used with the electronic pen which<br />
has two “Eraser” in the Selector Dial.<br />
Puts the electronic pen in low-power mode.<br />
The pen detects motion to turn itself on or off automatically. If not<br />
Low-Power Mode<br />
using the electronic pen <strong>for</strong> periods of time, set it to low-power<br />
mode to prevent battery consumption.<br />
• Per<strong>for</strong>ms the same function as pressing the Page Up key on a computer, remotely.<br />
• Per<strong>for</strong>ms the same function as pressing the Page Down key on a computer, remotely.<br />
• Touch the screen board with the pen while holding this button to display the Drawing Menu.<br />
(The Drawing Menu will not display while the Selector Dial is set to Mouse.)<br />
Note<br />
• The navigation buttons will work as long as the electronic pen is within the approximate range of 10m<br />
(30 ft.) of the <strong>elite</strong> <strong>Panaboard</strong> (without obstructions).<br />
― 22 ―
Drawing Menu<br />
The Drawing Menu appears when the <strong>Panaboard</strong> is touch and simultaneous pressing the menu button on<br />
the electronic pen.<br />
Line Close<br />
Shapes<br />
Settings<br />
All Clear<br />
Pen<br />
Note<br />
• The Drawing Menu is not displayed while the Selector Dial of the electronic pen is set to Mouse.<br />
• The Drawing Menu is displayed 1 at a time <strong>for</strong> each electronic pen, and the operation is available <strong>for</strong> the<br />
electronic pen that displayed the menu.<br />
Line<br />
Draw straight lines.<br />
1 Touch (Line) in the Drawing Menu.<br />
• A selection of line styles will display.<br />
2 Select the line style, and then draw a line by dragging.<br />
Note<br />
• Lines are drawn in the color that is selected with the electronic pen's Selector Dial.<br />
• Straight line drawing can not be done when either the Highlighter or Eraser tool is selected on the<br />
electronic pen's Selector Dial. Drawing/erasing will be per<strong>for</strong>med according to the selected function.<br />
• After drawing, the operation will return to the previously selected drawing mode.<br />
Shapes<br />
Draw a variety of pre-defined shapes.<br />
1 Touch (Shapes) in the Drawing Menu.<br />
• A list to select the shape is displayed.<br />
2 Select a shape, and then draw a shape by dragging.<br />
Note<br />
• Shapes are drawn in the color that is selected with the electronic pen's Selector Dial.<br />
• Shape drawing can not be done when either the Highlighter or Eraser tool is selected on the<br />
electronic pen's Selector Dial. Drawing/erasing will be per<strong>for</strong>med according to the selected function.<br />
• After drawing, the operation will return to the previously selected drawing mode.<br />
Close<br />
Close the Drawing Menu.<br />
1 Touch (Close) in the Drawing Menu.<br />
― 23 ―
Settings<br />
The following tools setting can be changed: Marker, Highlighter, Line, Shapes. Line width or color setting<br />
can be changed within each function.<br />
1 Touch (Settings) in the Drawing Menu.<br />
• The "Settings" window is displayed.<br />
2 Touch the tab <strong>for</strong> the settings to be changed.<br />
Black Marker / Red Marker / Blue Marker / Green Marker tab<br />
Line<br />
Set the thickness <strong>for</strong> the marker.<br />
Change the thickness by moving the scroll bar right or left.<br />
Transparency<br />
This is where the marker transparency level can be set. The level of transparency can be changed<br />
by moving the scroll bar right or left.<br />
Note<br />
• Because the color is set with the Selector Dial of the electronic pen, you can not change the color<br />
by clicking (Set line color).<br />
Yellow Highlighter / Yellowish Green Highlighter / Pink Highlighter tab<br />
Line<br />
Set the thickness <strong>for</strong> the highlighter.<br />
Change the thickness by moving the scroll bar right or left.<br />
Note<br />
• Because the color is set with the Selector Dial of the electronic pen, you can not change the color<br />
by clicking (Set line color).<br />
― 24 ―
Line tab<br />
Line<br />
Set the thickness <strong>for</strong> the line.<br />
Change the thickness by moving the scroll bar right or left.<br />
Transparency<br />
Set the level of transparency <strong>for</strong> the line. You can change the level of transparency by moving the<br />
scroll bar right or left.<br />
Note<br />
• Because the color is set with the Selector Dial of the electronic pen, you can not change the color<br />
by clicking (Set line color).<br />
Shapes tab<br />
Shapes<br />
This is where the property of the shape is set.<br />
If [No Fill] is selected, then all drawn shapes will be transparent.<br />
If [No Line] is selected, then all drawn shapes will be filled without a frame.<br />
Click (Set fill color), and the "Select Color" window is displayed in which then the color inside<br />
of shapes can be changed (except [No Fill] is selected).<br />
Line<br />
This is where the shape outline thickness can be set (except [No Line] of Shapes is selected).<br />
Change the thickness by moving the scroll bar right or left.<br />
Transparency<br />
Set the level of transparency <strong>for</strong> the shape. You can change the level of transparency by moving<br />
the scroll bar right or left.<br />
Note<br />
• Because the color is set with the Selector Dial of the electronic pen, you can not change the<br />
outline color by clicking (Set line color).<br />
3 After making changes to the settings, touch [OK] to finish.<br />
Pen (Marker / Highlighter / Eraser)<br />
Draw or erase with the tool that is selected with the electronic pen's Selector Dial: Marker / Highlighter /<br />
Eraser. Use the Selector Dial to switch between colors when using the Marker or Highlighter tool.<br />
Marker<br />
Draw free-<strong>for</strong>m lines <strong>for</strong> pictures and characters.<br />
1 Select the color <strong>for</strong> the Marker tool with the Selector Dial.<br />
2 Touch (Pen) in the Drawing Menu.<br />
• A list to select the line style is displayed.<br />
3 Select a line style, and then draw on the screen board.<br />
Note<br />
• Depending on the drawing method and the drawing speed, freehand lines may appear wavy or<br />
crooked, etc.<br />
― 25 ―
Highlighter<br />
This can be used to emphasize lines, shapes, text and other object on the page. The background<br />
desktop image and objects will be displayed through the highlighter.<br />
1 Select the color <strong>for</strong> the Highlighter tool with the Selector Dial.<br />
2 Touch (Pen) in the Drawing Menu.<br />
• A selection of line thickness will display.<br />
3 Select a thickness <strong>for</strong> the line, and then draw on the screen board.<br />
Eraser<br />
This is used to erase drawings displayed on the screen. Free-<strong>for</strong>m lines can be erased in parts.<br />
1 Select the Eraser tool with the Selector Dial.<br />
2 Touch (Pen) in the Drawing Menu.<br />
• A list of selectable eraser sizes will display.<br />
3 Select an eraser size, and then drag over the areas to be erased with the electronic pen.<br />
Note<br />
• When many lines or other objects are drawn, the eraser operation speed may become slower.<br />
All Clear<br />
This function will clear all drawn data from the screen.<br />
1 Touch (All Clear) in the Drawing Menu.<br />
• A confirmation window is displayed.<br />
2 Touch [Erase] to clear the objects.<br />
• All objects on the screen are cleared.<br />
• To cancel the All Clear operation, click [Cancel].<br />
― 26 ―
Troubleshooting<br />
Refer to the following table to help solve common problems. If the problem persists, contact your dealer.<br />
Symptom Possible cause and solution<br />
• The power to the electronic board is not turned on.<br />
The computer does not → Turn on the power to the electronic board.<br />
recognize the electronic board. • The USB cable is disconnected.<br />
→ Correctly connect the USB cable.<br />
The <strong>elite</strong> <strong>Panaboard</strong> response is • Other applications or anti-virus <strong>software</strong> are active.<br />
delayed.<br />
→ Shut down the other applications and anti-virus <strong>software</strong>.<br />
• The position of the electronic board or projector has changed.<br />
• The projector zoom was changed.<br />
The operation position is → Per<strong>for</strong>m calibration again.<br />
misaligned.<br />
• The monitor resolution was changed.<br />
Freehand lines are drawn<br />
connected or intersecting.<br />
→ Shut down the <strong>elite</strong> <strong>Panaboard</strong> <strong>software</strong>, and then per<strong>for</strong>m<br />
calibration again.<br />
• You touched multiple points in a close area (within 10 cm [4 in.])<br />
while drawing.<br />
→ Do not draw simultaneously in a close area (within 10 cm [4 in.]).<br />
• Per<strong>for</strong>ming operations while leaving your hand on the screen<br />
board.<br />
• Per<strong>for</strong>ming operations with your finger while another part of your<br />
hand is touching the screen board.<br />
Drawing data is lost or displayed • Per<strong>for</strong>ming operations while the hand that was holding the pen is<br />
in the wrong location.<br />
still touching the screen board.<br />
• Touching more than 3 spots on the screen board at one time.<br />
→ Check that none of the above is causing the problem.<br />
If misalignment is not caused by any of the above, per<strong>for</strong>m<br />
calibration again.<br />
• You are using the electronic pen and your finger simultaneously.<br />
→ If you use the electronic pen while operating the <strong>elite</strong> <strong>Panaboard</strong><br />
with your finger, the result is the same as when touching the <strong>elite</strong><br />
<strong>Panaboard</strong> with your finger. After operating with your finger, wait 1<br />
second or more be<strong>for</strong>e using the electronic pen.<br />
• Other applications or anti-virus <strong>software</strong> are active.<br />
→ Shut down the other applications and anti-virus <strong>software</strong>.<br />
The electronic pen does not • The battery is almost drained.<br />
work.<br />
→ Replace the electronic pen's battery with a new battery.<br />
(Buttons do not function.) • The electronic pen's Selector Dial is set to [Low-Power Mode].<br />
(Lines written with the electronic → Change the item selected with the Selector Dial.<br />
pen are broken or colors • Peripherals are connected to the USB hub.<br />
change.)<br />
→ Connect the peripherals directly to the computer.<br />
• Another electronic board is nearby.<br />
→ Use the [Electronic Pen Registration Tool] on Windows computer<br />
to register the electronic pen.<br />
• The electronic pen is not registered or the electronic pen is<br />
registered another electronic board.<br />
→ Use the [Electronic Pen Registration Tool] on Windows computer<br />
to register or unregister the electronic pen.<br />
The message "The pen battery<br />
is low. Replace the battery<br />
soon" appears on the computer<br />
screen.<br />
Replace the electronic pen's battery with a new battery.<br />
― 27 ―<br />
20110902