
Create successful ePaper yourself
Turn your PDF publications into a flip-book with our unique Google optimized e-Paper software.
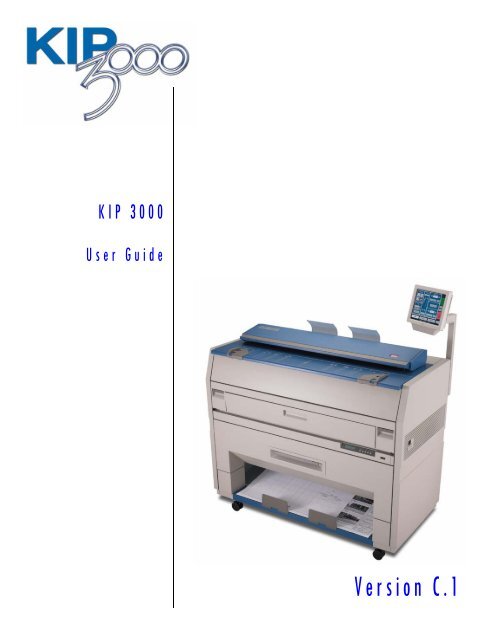
<strong>KIP</strong> <strong>3000</strong><br />
User Guide<br />
Version C.1
Thank you for purchasing the <strong>KIP</strong><strong>3000</strong> Multi-Function Printer.<br />
This USER'S MANUAL contains functional and operational explanations for the <strong>KIP</strong><strong>3000</strong>.<br />
Please read this USER'S MANUAL carefully before using the Printer.<br />
Please keep this USER'S MANUAL for future reference.<br />
1. When this product is installed in North America.<br />
This device complies with part 15 of the FCC Rules. Operation is subject to the following two<br />
conditions: (1) This device may not cause harmful interference, and (2) this device must<br />
accept any interference received, including interference that may cause undesired operation.<br />
2. When this product is installed in Europe<br />
This equipment complies with the requirements in Pub.22 of CISPR Rules for a Class B<br />
computing device.<br />
Operation of this equipment in a residential area may cause unacceptable interference to radio<br />
and TV reception requiring the operator to take whatever steps are necessary to correct the<br />
interference.<br />
Do not install Machine around other electronic equipment or other precision instruments.<br />
Other devices may be effected by electrical noise during operation.<br />
If the Machine is installed near other electronic equipment, such as a TV or a radio,<br />
interference to said equipment, such as noise or flickering, may occur.<br />
Use a separate power line and install the PRINTER as far as possible from said equipment.<br />
As an ENERGY STAR ® Partner, Katsuragawa Electric Co., Ltd. has determined<br />
that this product meets the ENERGY STAR ® guidelines for energy efficiency.<br />
The International ENERGY STAR ® Office Equipment Program is an international program that<br />
promotes energy saving through the penetration of energy efficient computers and other office<br />
equipment. The program backs the development and dissemination of products with functions that<br />
effectively reduce energy consumption. It is an open system in which business proprietors can<br />
participate voluntarily. The targeted products are office equipment such as computers, monitors,<br />
printers, facsimiles, copiers, scanners, and multifunction devices. Their standards and logos are<br />
uniform among participating nations.<br />
The symbol shown indicates that this product conforms to Directive<br />
2002/96/EC of the European Parliament and the council of 27 January<br />
2003 on waste electrical and electronic equipment (WEEE) and does not<br />
apply to countries outside of EU.<br />
(1)
Safety Warnings<br />
The following warnings are very important in order to safely use this product.<br />
These notes are important in preventing danger to the operator or operation of the printer.<br />
The following symbols are found throughout the USER’S Manual and have the following meaning:<br />
WARNING<br />
This WARNING mark means that there is a possibility of death or serious<br />
injury if you ignore or do not follow the said instruction.<br />
CAUTION<br />
This CAUTION mark means that there is a possibility of injury or physical<br />
damage if you ignore or do not follow the said instruction.<br />
When marked with this symbol, “DO NOT ATTEMPT”<br />
When marked with this symbol, “pay close attention to”<br />
(2)
WARNING<br />
Ground the product with a correct ground source or you may be electrically<br />
shocked.<br />
1. The Power source should be as follows:<br />
In U.S.A. : 120V plus6% or minus10%, 50/60Hz, 15A or higher<br />
In Europe : 220-240V plus6% or minus10%, 50/60Hz, 10A or higher<br />
2. Use a circuit with a dedicated breaker.<br />
3. Install the product as close to the wall outlet as possible.<br />
4. If you wish to move the printer, please contact your service personnel.<br />
1. Do not remove the screw and do not open the cover if not instructed to<br />
do so in this User’s Manual. If you ignore this warning, you may be burnt<br />
or receive an electric shock due to a hot item or electrically charged part<br />
inside of the printer.<br />
2. Do not disassemble or tamper with the printer.<br />
It may result in a fire or an electrical shock.<br />
1. Do not plug in the printer into a multi-wire connector in which some other<br />
equipment is plugged into.<br />
It may cause a fire due to outlet overheating.<br />
2. Do not damage the Power Cord by stepping on or placing heavy items<br />
on it.<br />
If the Power Cord is damaged, it may cause a fire or you may receive<br />
an electric shock. REPLACE THE CORD IF DAMAGED!<br />
1. Do not put a flower vase, a flowerpot or any water-filled item on the<br />
product.<br />
Spilt water could cause a fire or an electric shock.<br />
2. If the product generates an abnormal smell or noise, turn it off and<br />
unplug it from the wall electrical outlet immediately.<br />
Do not throw the toner into a fire or other sources of heat, as it can<br />
explode.<br />
(3)
CAUTION<br />
Do not install the printer in a humidified room or a dusty room.<br />
Also, do not install the printer on an unstable floor as injuries may occur.<br />
1. Unplug the printer before you move it.<br />
The power cord may be damaged and it may result in a fire or electric<br />
shock.<br />
2. If you do not use the printer for a long duration (holidays, company<br />
shutdown) turn off and unplug the printer from the outlet for safety.<br />
Do not pull the cord when you unplug the printer as you may damage the<br />
Power Cord.<br />
There are hot items inside of the printer.<br />
Take great care not to touch these items when you remove mis-fed media.<br />
Ventilate the room well if you print in a small area.<br />
(4)
TABLE OF CONTENTS<br />
Section 1 Basic Printer Functions<br />
Section 2 Copy Mode – Mono<br />
Section 3 Copy Mode – Color<br />
Section 4 Scan Mode – Mono<br />
Section 5 Scan Mode – Color<br />
Section 6 Job Info Mode<br />
Section 7 Help – Configuration<br />
Section 8 Windows Drivers<br />
Section 9 AutoCAD Drivers<br />
Section 10 <strong>KIP</strong> Request<br />
Section 11 <strong>KIP</strong> PrintNet<br />
Section 12 Reporting Package - PRP<br />
Section 13 Connectivity<br />
(1)
Section 1<br />
Basic Printer Functions<br />
1.0 Before System Use 1- 1<br />
1.1 Installation Requirements 1- 2<br />
1.2 Prohibited Originals 1- 3<br />
1.3 Key Features 1- 4<br />
1.4 Specifications 1- 5<br />
1.5 Exterior Views 1- 8<br />
1.5.1 Front View 1- 8<br />
1.5.2 Rear View 1- 9<br />
1.5.3 Operator Panel 1- 10<br />
Copy Mode 1- 10<br />
Scan Mode 1- 11<br />
Job Info Screen 1- 12<br />
? - Information / Help Screen 1- 13<br />
1.6 Optional Accessories 1- 14<br />
2.0 Operation Details 1- 15<br />
2.1 Turning on the <strong>KIP</strong><strong>3000</strong> 1- 15<br />
2.2 Turning off the <strong>KIP</strong><strong>3000</strong> 1- 16<br />
2.3 Roll Media Replacement 1- 16<br />
2.4 Toner Installation 1- 21<br />
2.5 Cut Sheet Media Placement 1- 25<br />
2.6 Emergency Stop of a Copy or Scan 1- 27<br />
2.7 Dehumidify the Roll Media (option) 1- 28<br />
3.0 Error Messages 1- 29<br />
3.1 Operational Errors 1- 29<br />
3. 1. 1 Paper mis-feed errors 1- 29<br />
3. 1. 1. 1 Deck is jam / Feeding Jam 1- 29<br />
3. 1. 1. 2 Manual Jam 1- 32<br />
3. 1. 1. 3 Internal Transport Jam 1- 33<br />
3. 1. 1. 4 Fuser Jam 1- 34<br />
3. 1. 1. 5 Accessory Jam 1- 35<br />
3. 1. 1. 6 Original Jam 1- 36<br />
3. 1. 2 Others 1- 37<br />
3. 1. 2. 1 Deck is open 1- 37<br />
3. 1. 2. 2 Accessory Error 1- 37<br />
3. 1. 2. 3 Manual Set 1- 37<br />
3. 1. 2. 4 Cutter Set 1- 38<br />
3. 1. 2. 5 Toner Empty 1- 38<br />
3. 1. 2. 6 Paper Empty 1- 38<br />
3. 1. 2. 7 Door opened during printing 1- 39<br />
3.2 Call Service Errors 1- 40<br />
4.0 User Maintenance 1- 41<br />
4.1 User Maintenance 1- 41<br />
4. 1. 1 Scanner 1- 41<br />
4. 1. 2 Print Engine 1- 43<br />
4. 1. 3 Touch Screen 1- 45<br />
1-1<br />
Section 1 Basic Printer Functions
1. 1 Installation Requirements<br />
The following conditions are required for the installation of the equipment.<br />
1. Power source should be rated as:<br />
120V +6% or -10%, 50/60Hz, 15A or higher<br />
2. The equipment must be on a dedicated circuit.<br />
3. The outlet must be near the equipment and easily accessible.<br />
1. Make sure to connect this equipment to a properly grounded outlet.<br />
2. The outlet shall be installed near the equipment and shall be easily accessible.<br />
Site Environmental Conditions<br />
Temperature Range<br />
10 C to 30 C<br />
50 F to 86 F<br />
Humidity Range<br />
20% to 85% RH. (NON CONDENSING)<br />
Keep the printer away from water sources, boilers, humidifiers or refrigerators.<br />
1. The installation site must not have any open flames, dust or ammonia gases.<br />
2. The equipment must not be exposed to the air vents from heating/cooling systems.<br />
3. The equipment should not be exposed to the direct sunlight.<br />
Please draw curtains to block any sunlight.<br />
When you open the printer (Upper Half), do not expose the Photoconductive Drum<br />
to strong (intense) light as this will damage the Drum.<br />
Ozone will be generated while this equipment is in use, although the quantity generated<br />
is within all safe levels. (see certifications) Ventilate the room, if so required.<br />
Keep ample space around the equipment to ensure comfortable operation.<br />
(Refer to the following figure.) The floor must be level and the strength must be ample to<br />
sustain the weight of the equipment.<br />
45cm / 18”<br />
or wider<br />
(Rear)<br />
(Front)<br />
<strong>KIP</strong><strong>3000</strong><br />
1-2<br />
60cm / 24” or larger<br />
when the standard tray is installed<br />
80cm / 32” or larger<br />
45cm / 18”<br />
or wider<br />
Section 1 Basic Printer Functions
1. 2 Prohibited Originals<br />
To duplicate or copy any type of document is not permitted! It may be illegal if you possess copies<br />
of certain types of documents. We recommend you investigate if you have the legal right to copy /<br />
scan a document prior to performing these functions.<br />
Originals prohibited from copying / scanning (by law)<br />
1. You cannot duplicate/copy Currency (Bill, Money, Bank Note, etc.), Government issued<br />
Negotiable Instruments (National Bonds, Security, Local Debt Bonds, etc.).<br />
2. You cannot duplicate/copy Foreign Currency or Foreign Negotiable Instruments.<br />
3. You cannot duplicate/copy unused postal stamps or government postcards without<br />
permission to replicate from the Government.<br />
4. You cannot duplicate/copy Government issued revenue stamps or certificate stamps, which<br />
are issued by Liquor Tax Acts or the Commodity Tax Acts.<br />
Other Notable Items<br />
1. You are warned by the government not to copy / scan, private issued securities (stock<br />
certificate, draft, check, goods ticket, etc.), commutation ticket or book of tickets, excluding that<br />
some specific companies can copy such originals it requires for its own business.<br />
2. We recommend you not freely copy / scan government issued passports, public or private<br />
issued licenses, automobile inspection certifications, ID and tickets (passes or meal).<br />
Law To Reference Items Prohibited to Duplicate<br />
Regulations to control fake currency and<br />
bonds.<br />
Currency (Bill, Money, Bank Note, etc.),<br />
Government issued Negotiable Instruments<br />
(National Bonds, Security, Local Debt Bonds,<br />
etc.)<br />
Control Law against Forged or Fake Foreign Currency or Foreign Negotiable<br />
Foreign Currency, Bill, Bank Note and Bond Instruments<br />
Forged postal stamps control law Unused postal stamps or government postcards<br />
Forged revenue stamp control law Government issued revenue stamps, and<br />
certificate stamps prescribed by Liquor Tax Act<br />
or Commodity Tax Act<br />
Currency similarity securities Control Law Private issued securities (stock, draft, check,<br />
goods ticket, etc.), commutation or book tickets<br />
Originals protected by Copyright<br />
It is prohibited to copy / scan:<br />
books, music, paintings, maps, drawings, movie and pictures which are protected<br />
by copyright.<br />
1-3<br />
Section 1 Basic Printer Functions
1. 3 Key Features<br />
The <strong>KIP</strong> <strong>3000</strong> is a single footprint Multi-Function Printer which can copy, scan and print.<br />
Advanced drivers and comprehensive print utilities make the <strong>KIP</strong> <strong>3000</strong> an advanced, easy to use<br />
system. (some functions may be optional)<br />
The scan and print speeds are up to 60mm/sec or up to 4 landscape “D” prints/minute.<br />
<strong>KIP</strong> HDP technology generates no waste toner.<br />
The combination of the <strong>KIP</strong> HDP Plus imaging system with mono-component minute toner<br />
produces high definition lines, distinctive greyscale and consistent blacks.<br />
The maximum paper width is 914mm or 36” wide, and the minimum is 279mm or 11”.The<br />
maximum paper length is 3.6m or 11.8’ (with 36” paper), and the minimum is 210mm or 8.5”.<br />
Up to 600dpi print and scan resolutions, with an advanced Image Process System, produces the<br />
highest quality images.<br />
Copier Features<br />
• Easy Touch screen control panel<br />
• Collated Sets copying<br />
• Real-time image preview<br />
• Recall/reprint previous jobs<br />
• 600x600DPI copy quality<br />
• Integrated Accounting and Reports for all copying, network printing, scanning<br />
• Network ready copier<br />
• Simple Operator assistance for every day tasks (toner replacement procedure)<br />
• Image stamping<br />
• All hardware/software included for instant upgrade from Digital Copier to Network<br />
Printer to Scan-to-File system.<br />
• Information center displays all support information, meter readings, and serial number.<br />
• Color Copy to third party inkjet is optional<br />
Network Printer Features (Optional)<br />
• Standard TCP/IP connectivity<br />
• Direct support for vector file formats: HPGL1/2, HP-RTL, Calcomp 906/907<br />
• <strong>KIP</strong> <strong>3000</strong> DWF format support<br />
• Direct support for raster file formats: TIF Group 3/4, Cals Group 4, Uncompressed<br />
Grayscale/Color TIF,<br />
• Optional <strong>KIP</strong> <strong>3000</strong> PDF format support: PS/PDF file format.<br />
• Standard Windows Driver for <strong>KIP</strong> Script (PS output) and <strong>KIP</strong>-GL (HPGL/2,RTL output)<br />
• Standard AutoCAD Drivers<br />
• Unlimited site license of <strong>KIP</strong> Request allows users to group supported formats together<br />
for printing collated sets.<br />
• Integrated Accounting in all <strong>KIP</strong> Drivers/Request for all network printing.<br />
• Integrated <strong>KIP</strong> <strong>3000</strong> Web Printing (web server)<br />
• Open architecture ASCII Job Ticket for third party applications<br />
Scan-to-File Features<br />
• Scan directly to PDF, TIF Group 4, Cals Group 4<br />
• Scan to file to FTP or personal inbox on the <strong>KIP</strong> <strong>3000</strong><br />
• Selected resolution – up to 600 DPI optical<br />
• Automatic original size recognition<br />
• Retrieve scanned image files with <strong>KIP</strong> Request<br />
• Color scanning is optional<br />
1-4<br />
Section 1 Basic Printer Functions
1. 4 Specifications<br />
General<br />
Subject Specification<br />
Model <strong>KIP</strong><strong>3000</strong><br />
Configuration Console<br />
Maximum power 1500W (Including Scanner & IPS)<br />
consumption<br />
Acoustic noise Idling Max. 52db<br />
Printing Max. 60db<br />
Impulse sound Max. 65db<br />
Ozone Max. 0.1ppm (Measurement method under UL Standard)<br />
Dimensions 1244mm (W) x 600mm (D) x 1100mm (H) or<br />
50” x 24” x 44”<br />
(Operation Panel is not included in these dimensions)<br />
Weight 210 kg or 462 lbs (1 roll)<br />
217 kg or 478 lbs (2 roll)<br />
Environmental condition Temperature:<br />
for usage<br />
10 to 32 Centigrade or<br />
50 to 86 Fahrenheit<br />
Humidity:<br />
20 to 85% RH<br />
Input power In U.S.A. : 120V plus/minus 10%, 50/60Hz, 10A<br />
In Europe : 220-240V plus 6% or minus 10%, 50/60Hz, 6A<br />
NOTE : specifications subject to change without notice<br />
1-5<br />
Section 1 Basic Printer Functions
Printer<br />
Subject Specification<br />
Model <strong>KIP</strong> <strong>3000</strong><br />
Configuration Console – Single Footprint<br />
Printing method LED Array Electro-Photography<br />
Photoreceptor Organic Photoconductive Drum<br />
Print speed 60mm per second<br />
(Metric) 2 A0 / minute<br />
(Inch) 2 E or 4 D Landscape / minute<br />
Print head LED Array – Calibrated<br />
Resolution 600dpi x 600dpi<br />
Print width Maximum 914mm or 36”<br />
Minimum 279mm or 11”<br />
Print length Maximum<br />
(Standard) 3.6m or 11.8’<br />
(Option) 24m or 75’<br />
Minimum 210mm or 8.5”<br />
NOTE<br />
If the page is longer than 3.6m, image quality, function and<br />
reliability are not guaranteed.<br />
Warm up time Less than 5<br />
First print time 24 seconds (D Landscape)<br />
32 seconds (E)<br />
Fusing method Heat - Pressure Rollers<br />
Development method Dry, non-magnetic mono-component toner<br />
Media Plain Paper 64 to 80g/m 2 - US Bond (20lbs)<br />
Tracing Paper US Vellum (20lbs)<br />
Film 4 MIL<br />
Recommend media for electro-photography process<br />
Storage of consumables Store toner from 0 to 35 C ( 32 to 95 F ) and within the humidity<br />
range from 10 to 85% RH.<br />
NOTE : specifications subject to change without notice<br />
1-6<br />
Section 1 Basic Printer Functions
Scanner<br />
Subject Specification<br />
Scanning method Contact Image Sensor (CIS) (5 – A4)<br />
Light source LED<br />
Setting of original Face up<br />
Starting point of scan Center<br />
Scan width Max. : 914.4mm or 36”<br />
Min. : 275.0mm or 11”<br />
Transportable original Max. : 932.2mm or 36.7”<br />
width<br />
Min. : 275.0mm or 11”<br />
Scan length Max. : 3.6m or 19.7’ (Including the margin area)<br />
Min. : 210mm or 8.5” (Including the margin area)<br />
Margin area 3mm from leading edge and trailing edge<br />
Optical resolution 600dpi<br />
Digital resolution Max. : 600dpi<br />
Min. : 100dpi<br />
Original transportation Sheet through type<br />
Transportable original Max. : 0.65mm<br />
thickness<br />
Min. : 0.05mm<br />
NOTE : specifications subject to change without notice<br />
1-7<br />
Section 1 Basic Printer Functions
1. 5 Exterior Views<br />
1. 5. 1 Front view<br />
8<br />
9<br />
10<br />
7<br />
11<br />
6<br />
12<br />
No. Name Function<br />
1 Main Switch Turns on / off the <strong>KIP</strong> <strong>3000</strong>.<br />
2 Original Guides Assists the user to feed originals into the scanner.<br />
3 User Interface Operation Panel, with many user operations.<br />
4 Emergency Stop Button Press this button when you would like to stop copying or<br />
scanning in an emergency situation.<br />
5 Original Return Guides Guides return the originals to the user.<br />
6 Scanner Images the original for all scans or copies.<br />
7 Original Table Open this cover to replace the Toner Cartridge.<br />
Place the original to feed into the Scanner to make a<br />
scan or copy.<br />
8 Engine Unit Levers Press up on the handles to open the printer engine.<br />
9 Cut Sheet - Bypass Feeds a sheet of cut sheet media.<br />
10 Roll Deck Roll media installed here.<br />
1 Roll - standard<br />
2 Rolls - optional.<br />
11 Print Tray Copies / prints are placed here. (standard configuration)<br />
Optional Stacking / Folding devices are available<br />
12 Counter Counts the total amount printed.<br />
(also see Operational Panel - Info Screen)<br />
1-8<br />
5<br />
4<br />
Section 1 Basic Printer Functions<br />
3<br />
2<br />
1
1. 5. 2 Rear view<br />
2<br />
3<br />
4<br />
5<br />
No. Name Function<br />
1 Exit Cover Open the Exit Cover when you remove the paper<br />
mis-fed inside of the Fuser Unit.<br />
2 LAN Port Connect the LAN Cable here to connect the <strong>KIP</strong><strong>3000</strong> to<br />
the network. (Do not connect a telephone line.)<br />
Note:<br />
There may also be a serial port in this area for folder<br />
connection ( optional device )<br />
3 Dehumidify Heater Switch Turn on the Dehumidify Heater with this switch when you<br />
(Option)<br />
would like to dry the paper in the humid season.<br />
4 Inlet Socket Connect the Power Cord here.<br />
5 Breaker It is possible to shut off supplying the AC power.<br />
6 Print Guide Trays These trays guide the prints to the Print Tray.<br />
1-9<br />
6<br />
Section 1 Basic Printer Functions<br />
1
3<br />
1. 5. 3 Operator Panel<br />
Copy Mode<br />
2<br />
1<br />
No. Name Function<br />
1 Mode Selects the “Mode” of the system. (Copy Mode for this<br />
screen shown)<br />
2 Media Displays Media type and quantity installed. Includes Cut<br />
Sheet Functions and Media Selection<br />
3 Original Type User Selects the type of original to copy. Also select<br />
Eng/Arch Modes here. (Color Copy is selected here if<br />
enabled)<br />
4 Quality Select Auto or Manual Image adjustments<br />
5 Copy Count Select the quantity of prints and sets designation.<br />
6 Advanced Settings Invert , mirror, stamps, folds, and edge adjustments<br />
preformed / displayed in this button (sub screen)<br />
7 Reset Clears the image buffer and resets the system to default<br />
settings.<br />
8 View Last The last scan / job can be viewed<br />
9 Recall Job Images can be recalled from the last job for reprint.<br />
Please note that a time limit may be set to recall or this<br />
feature may be disabled by the administrator to prevent<br />
any unauthorized copies.<br />
10 Interrupt Pauses the network print jobs to print any copy jobs<br />
11 Zoom Manual and automatic zoom ratios set.<br />
12 Log Off Log off current user if Accounting enabled<br />
1-10<br />
4<br />
Section 1 Basic Printer Functions<br />
5<br />
6<br />
7<br />
8<br />
9<br />
10<br />
11<br />
12
2<br />
3<br />
Scan Mode<br />
5<br />
4<br />
1<br />
6<br />
No. Name Function<br />
1 Mode Selects the “Mode” of the system. (Scan Mode for this<br />
screen shown)<br />
2 Original Size Use automatic settings or manually set width, length and<br />
rotation of the images.<br />
3 Original Type User Selects the type of original to copy. Also select<br />
Eng/Arch Mode selected here. (Color Scan is selected<br />
here if enabled)<br />
4 Quality Select Auto or Manual Image adjustments<br />
5 Resolution Scroll through image resolution (DPI) of the scanner.<br />
6 Format Scroll through file formats.<br />
7 Advanced Settings Invert, mirror, stamps, and edge adjustments preformed<br />
/ displayed in this button (sub screen)<br />
8 Reset Resets the system to default settings.<br />
9 Mailbox Select where the image will be stored after the scan<br />
(local setting, FTP etc.).<br />
1-11<br />
7<br />
Section 1 Basic Printer Functions<br />
9<br />
8
2<br />
Job Info Screen<br />
3<br />
No. Name Function<br />
1 Mode Selects the “Mode” of the system. (Job Mode for this<br />
screen shown)<br />
2 User Name – Job # Display the User and any user info of the job ID. A job<br />
can be selected for other functions noted below.<br />
3 Media Information Displays Width, Type and amount remaining per roll deck<br />
4 Status Shows the current status of a job and media selection.<br />
5 Type Displays a copy or network print job<br />
6 Total Displays the total number of prints and current number<br />
printed.<br />
7 To Top After a job is selected (see #2) the position can be<br />
changed to the next job printed.<br />
8 Pause Pauses printer to allow media change, etc<br />
9 Delete After a job is selected (see #2) it can be removed from<br />
printing.<br />
10 Up/Down Scrolls through pages in the queue if so available.<br />
1-12<br />
1<br />
4 5 6<br />
Section 1 Basic Printer Functions<br />
7<br />
8<br />
9<br />
10
3<br />
2<br />
Information / Help Screen<br />
No. Name Function<br />
1 Mode Selects the “Mode” of the system. (Info/Help Mode for<br />
this screen shown)<br />
2 Meter – Versions Display the current meter counts as well as all<br />
Software/Firmware versions, IPS number, Host Name/IP<br />
(The area may vary depending on <strong>KIP</strong> printer model)<br />
3 <strong>KIP</strong> Contact Shows the contact information for the <strong>KIP</strong> Service and<br />
<strong>KIP</strong> Supplies provider.<br />
4 User Guide User Guides for details on system functions and<br />
operations.<br />
5 Configurations Allows user “set up” of the system.<br />
6 Print This Screen Allows the current screen with version and counter<br />
values to be printed on the <strong>KIP</strong> printer.<br />
7 Service Allows advanced “set up” of the system. Usually for<br />
technical purposes only. Pass-code required.<br />
8 Color Config Configures the optional color scan and color copy<br />
features.<br />
1-13<br />
1<br />
Section 1 Basic Printer Functions<br />
4<br />
5<br />
6<br />
7<br />
8
1. 6 Options - Accessories<br />
Please contact your Authorized Reseller for the following options available for the <strong>KIP</strong> <strong>3000</strong>:<br />
1) Network Printing<br />
Adds the functions of network printing (TCP/IP) from Windows and CAD applications. Includes<br />
Windows/PS drivers, AutoDesk Drivers, “Request” job submission utility and “<strong>KIP</strong> PrintNet” for<br />
web based submissions.<br />
2) Color Copy to Inkjet<br />
Allows color copy to a third party wide format inkjet device.<br />
3) Monochrome Scanning<br />
Adds the function of scan to file, local IPS drive, local LAN PCs or FTP sites in a variety of file<br />
formats.<br />
4) Color Scanning<br />
Scan to file in color to a local IPS drive, local LAN PCs or FTP sites in a variety of file formats.<br />
5) PDF / PS Printing<br />
Allows direct PDF and Postscript file format printing from various applications including <strong>KIP</strong><br />
Request.<br />
6) Roll Deck 2<br />
Second roll of media for increased productivity<br />
7) Print Tray - Slant Stacker - Vertical Stacker<br />
To accommodate a larger quantity of prints than the standard front feeding print tray, rearward<br />
stacking systems are available for the <strong>KIP</strong> <strong>3000</strong>.<br />
8) Folding (<strong>KIP</strong>Fold)<br />
Fan and crossfold function for copies and network prints.<br />
9) Dehumidifier<br />
Roll Deck Dehumidifier for locations with excess or high humidity<br />
All <strong>KIP</strong> <strong>3000</strong> options and accessories are subject to change without notice. Please contact your<br />
local Authorized Reseller for details on current available options for the <strong>KIP</strong> <strong>3000</strong>.<br />
1-14<br />
Section 1 Basic Printer Functions
2.1 Turning on the <strong>KIP</strong> <strong>3000</strong><br />
1. Ensure the <strong>KIP</strong> <strong>3000</strong> is plugged into a dedicated<br />
wall outlet.<br />
WARNING<br />
(1) Do not handle the Power Plug with wet hands, or you may receive an electrical shock.<br />
(2) Make sure to ground the machine for your safety.<br />
(3) Do not plug the printer into a multi-plug connector in which other devices are<br />
plugged into. It may overheat the outlet and may result in a fire.<br />
(4) The outlet must comply with 120V, plus 6% & minus 10%, 15A, and 50/60Hz<br />
2. There is a Power Switch on the right side of<br />
<strong>KIP</strong><strong>3000</strong>.<br />
Switch to the “ I ” position to turn on the <strong>KIP</strong><strong>3000</strong>.<br />
1-15<br />
Power Switch<br />
3. The Operation Panel commences to operate, and the Copy Mode Screen will appear in<br />
approximately 1 minute. A Ready Indicator on the Copy Mode Screen will flash during the<br />
warm up process.<br />
Ready Indicator<br />
4. When the Ready Indicator stops flashing, the <strong>KIP</strong> <strong>3000</strong> is ready to copy/scan/print.<br />
Section 1 Basic Printer Functions
2. 2 Turning off the <strong>KIP</strong> <strong>3000</strong><br />
1. There is a Power Switch on the right side of<br />
<strong>KIP</strong><strong>3000</strong>.<br />
Switch to the “ O ” position to turn off the <strong>KIP</strong> <strong>3000</strong>.<br />
CAUTION<br />
2. 3 Roll Media Replacement<br />
1. Open the Roll Deck (1).<br />
Remove the Roll Spool (2) with paper core from the Roll Deck.<br />
1-16<br />
Power Switch<br />
The <strong>KIP</strong><strong>3000</strong> print engine and UI look to be shut down when you turn off <strong>KIP</strong><strong>3000</strong>, the<br />
controller PC embedded inside of <strong>KIP</strong><strong>3000</strong> is still operating for shutdown in approximately<br />
two minutes after Power Switch operation.<br />
Do not unplug the <strong>KIP</strong><strong>3000</strong> before the controller PC’s shutdown. Doing so may damage<br />
data or the device.<br />
NOTE<br />
A paper mis-feed may occur as a roll of media is spend.<br />
1<br />
2<br />
Section 1 Basic Printer Functions
NOTE<br />
Please confirm that the machine has finished the printing completely before opening the Roll<br />
Deck. If you open the deck while its is still printing, a paper mis-feed will occur.<br />
2. Press down the Lever (3) to release the paper core, and then pull out the Roll Spool (2) from<br />
the paper core.<br />
3<br />
3. Loosen the knob (4), slide the position of Paper Guide (5) according to the width of roll paper<br />
you will set the Paper Guide (5) tightening the knob (4).<br />
4<br />
NOTE<br />
There are Size Guides (6) on the Roll Spool.<br />
As the Paper Guide is provided with the<br />
triangle mark (7), place the Paper Guide so that<br />
the triangle meets the line of Size Guide.<br />
1-17<br />
6<br />
2<br />
Section 1 Basic Printer Functions<br />
5<br />
7
4. Pressing down on the Lever (3), insert the Roll Spool (2) to the core of new roll paper.<br />
NOTE<br />
5. Install the Roll Spool with new roll paper to the<br />
Roll Deck.<br />
2<br />
Be careful of the winding direction of the roll paper at this time.<br />
3<br />
6. Insert the leading edge of roll paper under the Guide Plate (8) until the edge touches the<br />
feeding roller. Then rotate the Paper Feeding Knob (9) clockwise so that the feeding rollers<br />
catch the roll paper.<br />
8<br />
1-18<br />
9<br />
Section 1 Basic Printer Functions
NOTE<br />
For Roll 2, rotate the Paper Feeding Knob<br />
on the rear side (10).<br />
7. When the feeding rollers catch the paper, pull the middle of the Guide Plate 6 (11) out.<br />
Rotate the Paper Feeding Knob (9) again until the leading edge comes out in 8”.<br />
11<br />
9<br />
8. Slide the Cutter Knob (12) fully from one side to<br />
another side to cut the leading edge.<br />
Remove the paper portion.<br />
NOTE<br />
1-19<br />
Leading edge<br />
of roll paper<br />
Slide the Cutter Knob completely until it is stopped at the right or left end.<br />
If not, a paper jam may occur.<br />
12<br />
10<br />
Section 1 Basic Printer Functions
9. Rewind the roll paper to place the leading edge as the following photo.<br />
10. Close the Roll Deck (1).<br />
NOTE<br />
Be sure to close the Roll Deck fully until it is locked at the correct position.<br />
A paper jam may occur if it is not locked firmly.<br />
11. On the Operator Panel, a screen will automatically appear after the deck is closed to define the<br />
media width and type. Please select the width, and type for each roll deck and then select the<br />
“OK” button to confirm the selection.<br />
1-20<br />
1<br />
Place the leading<br />
edge here.<br />
Section 1 Basic Printer Functions
2. 4 Toner Installation<br />
When toner installation is required, the Operator Panel will display a “Toner Required” screen<br />
(in the “Copy” and “Job Info” Screens)<br />
To replace the toner cartridge, please follow these steps:<br />
Please note that the replacement procedure can also be displayed on the Operator Panel for<br />
easier access, by pressing “User Guide : Changing Toner” on the screen)<br />
1. Open the Toner Hatch (1).<br />
1<br />
2. Slide the green Lever (2) to the right to unlock the Toner Cartridge.<br />
(Lever (2) is held automatically.)<br />
1-21<br />
2<br />
Section 1 Basic Printer Functions
3. Pressing down the Cartridge Lock Lever (3), rotate<br />
the body (4) of cartridge to the arrow direction<br />
a few revolutions until it stops. You will “close” the<br />
toner supplying hole of the cartridge.<br />
NOTE<br />
The toner may drop from the toner supplying<br />
hole, and it may scattered into the machine or<br />
on the floor if you remove the Toner Cartridge<br />
without closing the toner supplying hole (5).<br />
4. Pressing down the Cartridge Lock Lever (3), bring<br />
up the left side of the Toner Cartridge first , and<br />
then remove the whole cartridge from the machine.<br />
5. Shake the new Toner Cartridge several times left<br />
and right to make the toner smooth.<br />
1-22<br />
5<br />
3<br />
3 4<br />
Section 1 Basic Printer Functions
6. There is a pin (6) on the left side of cartridge, and there is a groove (7) on the machine side.<br />
Pressing down the Cartridge Lock Lever (3), fit the pin (6) to the groove (7).<br />
NOTE<br />
Please confirm that the Cartridge Lock Lever (3) firmly locks the Toner Cartridge at the<br />
correct position.<br />
Good No good<br />
7. Rotate the body (3) of the cartridge to the arrow direction a few revolutions to open the toner<br />
supplying hole. Confirm that the projection (8) if fitted into the notch (9).<br />
1-23<br />
3<br />
7<br />
6<br />
Press down completely.<br />
4<br />
Section 1 Basic Printer Functions<br />
8<br />
9
NOTE<br />
It is not necessary to lock the cartridge with the Lever (2).<br />
It rotates and locks the cartridge with closed the Toner Hatch.<br />
8. Close the Toner Hatch (1).<br />
9. Press “OK” on the Operator Panel to continue copying or printing.<br />
1-24<br />
1<br />
2<br />
Section 1 Basic Printer Functions
2. 5 Cut Sheet Media Placement<br />
1. Select Cut Sheet Bypass Button on the Operator Panel. (Copy Mode)<br />
2. Select the size of the sheet, and the media type (not shown)<br />
3. Or use “Custom” to select a width.<br />
1-25<br />
Section 1 Basic Printer Functions
4. Select a standard length or use a “Custom Length”.<br />
5. Confirm the cut sheet size by pressing enter.<br />
6. Open the Cut Sheet Feeder (1).<br />
1-26<br />
1<br />
Section 1 Basic Printer Functions
6. There are size markings on the table.<br />
Insert the cut sheet paper on the table along with the associated size mark, and then insert<br />
it into the Feeder referencing the size marks.<br />
When the paper is inserted far enough, the machine automatically sets the paper at the<br />
proper position.<br />
7. Continue with normal copy / print functions. See User Guide “Copy” or “Print” sections.<br />
2. 6 Emergency Stop of a Copy or Scan<br />
If ever so required, press the Stop Button (1) on the Scanner to immediately stop the original while<br />
making a copy or a scan.<br />
1-27<br />
1<br />
Section 1 Basic Printer Functions
2. 7 Dehumidifying the Roll Media<br />
If the roll paper is extremely humidified, it may cause several kinds of defective print.<br />
Defective prints you will experience most will be “crease of paper” and “loss of image”.<br />
Turn on the Dehumidify Heater if the room air has too much humidity (65% or higher) to prevent<br />
the above kinds of print defect.<br />
You may be able to fix the above kinds of problem.<br />
NOTE<br />
Normal Print<br />
Normal Print<br />
If the media is humidified ;<br />
If the media is humidified ;<br />
<strong>KIP</strong><strong>3000</strong> is equipped with the Dehumidify Heater (optional in U. S. A.)<br />
If needed, contact the service personnel for detail.<br />
To turn on the Dehumidify Heater, press the H side of the Dehumidify Heater Switch on the rear.<br />
(Press its L side to turn off.)<br />
1-28<br />
H (ON)<br />
L (OFF)<br />
Crease of paper<br />
Loss of image<br />
Dehumidify Heater Switch<br />
Section 1 Basic Printer Functions
3. 1 Operational Errors<br />
3. 1. 1 Paper mis-feed errors<br />
Some message will be indicated on the LCD in case of a paper jam.<br />
Any of the following messages will be indicated.<br />
Feeding Jam<br />
Manual Jam<br />
Reg. Jam<br />
Internal Jam<br />
Fuser Jam<br />
Accessory Jam<br />
3. 1. 1. 1 Deck jam / Feeding Jam<br />
Either of “Deck is jam” or “Feeding Jam” is indicated when the roll paper is mis-fed in the Roll Deck.<br />
1. Open the Roll Deck, and then rewind the roll paper.<br />
1-29<br />
Section 1 Basic Printer Functions
2. Insert the leading edge of roll paper under the under the Guide Plate (1) until the edge touches<br />
the feeding roller.<br />
Then rotate the Paper Feeding Knob (2) clockwise so that the feeding rollers catch the roll<br />
paper.<br />
NOTE<br />
The leading edge should be trimmed with a cutter in case of an extreme crease.<br />
For Roll 2, rotate the Paper Feeding Knob<br />
on the rear side (3).<br />
7. When the feeding rollers catch the paper, fold the middle of the Guide Plate 6 (4) outside.<br />
Rotate the Paper Feeding Knob (2) again until the leading edge comes out in 100 millimeters.<br />
2<br />
4<br />
1<br />
1-30<br />
2<br />
Leading edge<br />
of roll paper<br />
3<br />
Section 1 Basic Printer Functions
4. Slide the Cutter Knob (5) fully from one side to<br />
another side to cut the leading edge.<br />
Remove the paper portion.<br />
NOTE<br />
Slide the Cutter Knob completely until it is stopped at the right or left end.<br />
If not there, a paper jam may occur.<br />
5. Rewind the roll paper a little to place the leading edge as the following photo.<br />
6. Close the Roll Deck.<br />
NOTE<br />
Be sure to close the Roll Deck fully until it is locked at the correct position.<br />
A paper jam may occur if it is not locked firmly.<br />
1-31<br />
5<br />
Place the leading<br />
edge here.<br />
Section 1 Basic Printer Functions
3. 1. 1. 2 Manual Jam<br />
1. Pull up the Lever 2 (1) to open the Engine Unit.<br />
1<br />
NOTE<br />
Do not open the Engine Unit when the Scanner Unit is opened.<br />
If the Scanner Unit is opened, it will hit the bottom of User Interface.<br />
2. Remove the mis-fed paper pulling frontward.<br />
3. Close the Engine Unit.<br />
NOTE<br />
Be sure to close the Engine Unit firmly until it is locked at the correct position.<br />
The mis-fed paper can be replaced with a new one, or be inserted at the opposite edge to<br />
the feeder. An extreme crease may cause a paper jam.<br />
1-32<br />
Section 1 Basic Printer Functions
3. 1. 1. 3 Reg. Jam / Internal Jam<br />
1. Pull up the Engine Unit Open Levers (1) to open the Engine Unit.<br />
1<br />
NOTE<br />
Do not open the Engine Unit when the Scanner Unit is opened.<br />
If the Scanner Unit is opened, it will hit the bottom of User Interface.<br />
2. Remove the mis-fed paper.<br />
3. Close the Engine Unit firmly.<br />
NOTE<br />
Be sure to close the Engine Unit firmly until it is locked at the correct position.<br />
1-33<br />
Section 1 Basic Printer Functions
3. 1. 1. 4 Fuser Jam<br />
1. Pull up the Engine Unit Open Levers (1) to open the Engine Unit.<br />
1<br />
NOTE<br />
Do not open the Engine Unit when the Scanner Unit is opened.<br />
If the Scanner Unit is opened, it will hit the bottom of User Interface.<br />
2. Remove the mis-fed paper if seen.<br />
3. Close the Engine Unit firmly.<br />
Refer to the next page when the mis-fed paper cannot be seen or removed.<br />
NOTE<br />
Be sure to close the Engine Unit firmly until it is locked at the correct position.<br />
1-34<br />
Section 1 Basic Printer Functions
4. Open the Exit Cover (2).<br />
5. Remove the jammed paper pulling to the rear side.<br />
WARNING<br />
3. 1. 1. 5 Accessory Jam<br />
2<br />
There are extremely hot parts inside the Exit Cover.<br />
Do not touch any parts in the Heater Unit. or you will be burnt.<br />
Also be careful not to get burnt when you touch the printing paper as it may be very hot.<br />
NOTE<br />
If removed a mis-fed paper inside the Exit Cover, scattered toner can be adhered to the next<br />
print.<br />
The printing paper is mis-fed in the optional device such as Auto Stacker or Folder.<br />
Remove the mis-fed paper making reference to the User’s Manual of concerning device.<br />
1-35<br />
Section 1 Basic Printer Functions
3. 1. 1. 6 Original Jam<br />
1. Open the Scanner Unit pulling up the Levers (1), and then remove the original.<br />
2. Move the Scanner Unit to the rear side slightly to unlock, and then close it.<br />
1-36<br />
1<br />
Section 1 Basic Printer Functions
3. 1. 2 Others<br />
3. 1. 2. 1 Deck open<br />
This message is indicated when the Roll Deck is opened.<br />
Close it firmly.<br />
1-37<br />
Roll Deck<br />
3. 1. 2. 2 Accessory Error<br />
Any error occurs in the optional device such as Auto Stacker or Folder.<br />
Clear the error making reference to the User’s Manual of concerning device.<br />
3. 1. 2. 3 Manual Set<br />
This message is indicated when a cut sheet paper is inserted to the Bypass Feeder during<br />
warming up.<br />
Remove it from the Bypass Feeder.<br />
Bypass Feeder<br />
Section 1 Basic Printer Functions
3. 1. 2. 4 Cutter Set<br />
This message is indicated when the Cutter Knob is not located at the correct position.<br />
Open the Roll Deck, and slide the Cutter Knob fully to the left or right to align the Cutter Knob with<br />
the end of the railing.<br />
Incorrect (Not placed at the end) Correct (Placed at the left or right end)<br />
3. 1. 2. 5 Toner Empty<br />
This message is indicated when the Toner Cartridge is<br />
emptied with the toner.<br />
Replace the Toner Cartridge with the new one making<br />
reference to [2. 4 Replacement of Toner Cartridge] on<br />
the page 2-10.<br />
3. 1. 2. 6 Paper Empty<br />
Cutter Knob Cutter Knob<br />
This message is indicated when the roll paper in use is<br />
emptied.<br />
Replace roll paper with the new one making reference to<br />
[2. 3 Replacement of Roll Paper] on the page 2-5.<br />
1-38<br />
Toner Cartridge<br />
Roll paper<br />
Section 1 Basic Printer Functions
3. 1. 2. 7 The door opened during the print<br />
This message is indicated when the Roll Deck is opened during printing by accident.<br />
Close the Roll Deck.<br />
If the paper is mis-fed inside the machine, remove it.<br />
1-39<br />
Roll Deck<br />
Section 1 Basic Printer Functions
3. 2 Call Service Errors<br />
In case the following Error Codes for a serious failure appear in the screen;<br />
PLEASE CALL YOUR TRAINED SERVICE PERSONNEL TO RESOLVE THE ERRORS.<br />
No operation should be done by the customer.<br />
Error Code Error Indication<br />
E - 000 Fuser Low Temp<br />
E - 001 Fuser Over Temp<br />
E - 002 Fuser Low Temp<br />
E - 003 Temp Not Rise<br />
E - 010 Motor1 Error<br />
E - 011 Motor2 Error<br />
E - 012 Motor3 Error<br />
E - 020 Counter Error<br />
E - 031 1st Error<br />
E - 032 AC Error<br />
E - 033 Tr Error<br />
E - 034 Bias Error<br />
E - 040 Cutter Error<br />
E - 050 FPGA Error<br />
E - 070 Dev Error<br />
If any of the above errors appear:<br />
1. Turn off <strong>KIP</strong><strong>3000</strong>, and turn it on after an interval of 3 minutes or more.<br />
2. If the same error code appears, turn off <strong>KIP</strong><strong>3000</strong>, and then unplug the printer from the<br />
wall outlet after an interval of four minutes for shutdown. Call your service personnel.<br />
1-40<br />
Section 1 Basic Printer Functions
4. 1 User Maintenance<br />
4. 1. 1 Scanner<br />
Clean each Scan Glass, Feeding Rollers and Guide Plates once per a week, as the scan/copy<br />
image may become defective if these parts are dirty.<br />
1. Turn off <strong>KIP</strong><strong>3000</strong>.<br />
2. Open the Scanner Unit pulling up the Levers (1).<br />
2. Wipe each Scan Glass (2) and Feeding Rollers (3) with a soft cloth.<br />
Use equal volume mixture of water and a neutral detergent.<br />
NOTE<br />
3<br />
3<br />
Do not use organic solvent, glass cleaner and anti-static spray for the cleaning.<br />
1<br />
2<br />
1-41<br />
Section 1 Basic Printer Functions
3. Wipe both the Upper Guide Plate (4) and the Lower Guide Plate (5) with a soft dry cloth.<br />
4. Move the Scanner Unit a little to the rear side to unlock, and then close it.<br />
4<br />
5<br />
1-42<br />
Section 1 Basic Printer Functions
4. 1. 2 Print Engine<br />
Clean each Guide Film and Guide Plate once per a week, as the toner or paper dust may<br />
accumulates on such part which may result in a defective print image.<br />
1. Turn off <strong>KIP</strong><strong>3000</strong>.<br />
2. Open the Engine Unit pulling up the Engine Unit Open Levers (1).<br />
1<br />
2. Wipe each Guide Film (2) and Guide Plate (3) with a soft dry cloth to remove the toner or paper<br />
dust.<br />
2<br />
1-43<br />
3<br />
Section 1 Basic Printer Functions
NOTE<br />
(1) There is a Photoconductive Drum (large green cylinder) in the machine, which is right<br />
above the Guide Film.<br />
You will have to replace the Drum if it is damaged, as it is a very important part in<br />
creating the print image.<br />
Please take care of the following matters when you make cleaning.<br />
a.) Do not touch the drum.<br />
Adhering a fingermark or sebum on the Drum may cause defective printing.<br />
b.) Take off such metal accessories as watch or ring.<br />
You will have to replace the Drum if you damage the Drum scratching with such<br />
accessories.<br />
c.) Do not leave the Upper Unit open for more than 10 minutes as the Drum is very<br />
sensitive to light. (Direct sunlight is very harmful.)<br />
3. Close the Engine Unit.<br />
Photoconductive Drum<br />
(2) Do not use water, organic solvent and alcohol for the cleaning.<br />
1-44<br />
Section 1 Basic Printer Functions
4. 1. 3 Touch Screen<br />
Clean the Touch Screen once per a week.<br />
1. Wipe the Touch Screen with a dry cloth.<br />
NOTE<br />
Do not use water, alcohol, organic solvent and glass cleaner for the cleaning.<br />
1-45<br />
Section 1 Basic Printer Functions
Section 2<br />
Copy Mode - Monochrome<br />
1. 0 Copy Mode - Monochrome............................................................................................. 2- 3<br />
1.1 Main Screen - General ................................................................................................. 2- 3<br />
1.2 Simple Copying ............................................................................................................ 2- 4<br />
1.2.1 Select Copy Mode .................................................................................................... 2- 4<br />
1.2.2 Select Size Mode ..................................................................................................... 2- 4<br />
1.2.3 Select Original Image Type ...................................................................................... 2- 5<br />
1.2.4 Copy Count .............................................................................................................. 2- 5<br />
1.2.5 Media........................................................................................................................ 2- 6<br />
1.2.6 Length ...................................................................................................................... 2- 6<br />
1.2.7 Size .......................................................................................................................... 2- 7<br />
1.2.8 Insert Original........................................................................................................... 2- 7<br />
2. 0 Operation Details ............................................................................................................ 2- 8<br />
2.1 Main Screen ................................................................................................................. 2- 8<br />
2.2 Original......................................................................................................................... 2- 8<br />
2.2.1 Original Size Mode ................................................................................................... 2- 8<br />
2.2.2 Original Type............................................................................................................ 2- 9<br />
2.3 Quality .......................................................................................................................... 2- 9<br />
2.3.1 Automatic ................................................................................................................. 2- 9<br />
2.3.2 Threshold ................................................................................................................. 2-10<br />
2.3.3 Density ..................................................................................................................... 2-10<br />
2.3.4 Sharpness ................................................................................................................ 2-10<br />
2.3.5 Dither........................................................................................................................ 2-10<br />
2.4 Copy Count .................................................................................................................. 2-11<br />
2.4.1 Arrows - Count Increase / Decrease ....................................................................... 2-11<br />
2.4.2 Number Pad - Count Increase / Decrease ............................................................... 2-11<br />
2.4.3 Set Copy................................................................................................................... 2-11<br />
2.4.4 Clear......................................................................................................................... 2-12<br />
2.5 Advanced Settings ...................................................................................................... 2-13<br />
2.5.1 Mirror........................................................................................................................ 2-13<br />
2.5.2 Invert ........................................................................................................................ 2-13<br />
2.5.3 Fold .......................................................................................................................... 2-14<br />
2.5.4 Stamp....................................................................................................................... 2-15<br />
2.5.5 Leading Edge Adjustment ........................................................................................ 2-16<br />
2.5.6 Trailing Edge Adjustment ......................................................................................... 2-17<br />
2.6 Width ............................................................................................................................ 2-17<br />
2.6.1 Auto.......................................................................................................................... 2-18<br />
2.6.2 Manual Roll Selection............................................................................................... 2-18<br />
2.6.3 Enabling Cutsheet.................................................................................................... 2-19<br />
2.6.4 Cut Sheet ................................................................................................................. 2-19<br />
2.6.5 Copying to Multiple Cutsheets.................................................................................. 2-20<br />
2.6.6 Media Remaining ..................................................................................................... 2-20<br />
2.6.7 Installing Roll Media ................................................................................................. 2-21<br />
2.7 Length ..........................................................................................................................2-22<br />
2.7.1 Auto.......................................................................................................................... 2-22<br />
2.7.2 Standard................................................................................................................... 2-22<br />
2.8 Size – Zoom ................................................................................................................. 2-24<br />
2.8.1 Preset Percentages.................................................................................................. 2-25<br />
2.8.2 Percentage Key Pad ................................................................................................ 2-25<br />
2.8.3 Page Size Zoom....................................................................................................... 2-26<br />
2-1<br />
Section 2 Copy Mode - Monochrome
2.8.4 Auto Zoom................................................................................................................ 2-27<br />
2.8.5 Clear......................................................................................................................... 2-27<br />
2.9 Start.............................................................................................................................. 2-27<br />
2.10 View Last...................................................................................................................... 2-27<br />
2.11 Recall Job .................................................................................................................... 2-27<br />
2.12 Stop / Reset ................................................................................................................. 2-28<br />
2.13 Interrupt........................................................................................................................ 2-28<br />
2.14 Rescan ......................................................................................................................... 2-28<br />
2.15 Log Off .........................................................................................................................2-28<br />
2-2<br />
Section 2 Copy Mode - Monochrome
3<br />
1. 0 Copy Mode - Monochrome<br />
2<br />
1.1 Main Screen - General<br />
1<br />
No. Name Function<br />
1 Mode Selects the “Mode” of the system. (Copy Mode for this<br />
screen shown)<br />
2 Media Displays Media type and quantity installed. Includes Cut<br />
Sheet Functions and Media Selection<br />
3 Original Type User Selects the type of original to copy. Also select<br />
Eng/Arch Modes here. (Color Copy is selected here if<br />
enabled)<br />
4 Quality Select Auto or Manual Image adjustments<br />
5 Copy Count Select the quantity of prints and sets designation.<br />
6 Advanced Settings Invert , mirror, stamps, folds, and edge adjustments<br />
preformed / displayed in this button (sub screen)<br />
7 Reset Clears the image buffer and resets the system to default<br />
settings.<br />
8 View Last The last scan / job can be viewed<br />
9 Recall Job Images can be recalled from the last job for reprint.<br />
Please note that a time limit may be set to recall or this<br />
feature may be disabled by the administrator to prevent<br />
any unauthorized copies.<br />
10 Interrupt Pauses the network print jobs to print any copy jobs<br />
11 Zoom Manual and automatic zoom ratios set.<br />
12 Log Off Displayed if Accounting enabled to Log off current user<br />
13 Length Sets the length of the copy<br />
2-3<br />
4<br />
13<br />
5<br />
Section 2 Copy Mode - Monochrome<br />
6<br />
7<br />
8<br />
9<br />
10<br />
11<br />
12
1.2 Simple Copying<br />
To copy, please follow these basic steps. The following chapters have details on<br />
adjustments and parameters that the user can change to modify the copies as<br />
required.<br />
1.2.1 Select Copy Mode<br />
On the lower region of the Operator Panel, select “COPY”.<br />
1.2.2 Select Size Mode<br />
Select whether the document is an engineering or architectural size document. This<br />
will allow the automatic width detection to function.<br />
Engineering widths = 34, 22, 17, 11, and 8.5 inches<br />
Architecture widths = 36, 30, 24, 18, 12, and 9 inches<br />
2-4<br />
Section 2 Copy Mode - Monochrome
1.2.3 Select Original Image Type<br />
Set the original image type you will copy. The selections are:<br />
Line - used for simple line documents<br />
Line / Photo - used for a combination of lines & photos documents<br />
Grayscale - used for a combination of lines & areas of shade (CAD)<br />
originals<br />
Photo - used for photographic originals<br />
This will allow automatic image quality adjustments for the scan.<br />
1.2.4 Copy Count<br />
Press the arrow buttons to scroll through the number of copies required or press<br />
on the actual number to set the quantity with the number pad.<br />
2-5<br />
Section 2 Copy Mode - Monochrome
1.2.5 Media<br />
Selects automatic (for best possible fit) or manual roll selection.<br />
or<br />
1.2.6 Length<br />
Select Auto for automatic cut length (to the length of the original) or Standard Cut<br />
for a manual length. (A number pad will request the desired length to be entered)<br />
2-6<br />
Section 2 Copy Mode - Monochrome
1.2.7 Size<br />
Select<br />
a) AutoZoom to automatically zoom to the width of paper or<br />
b) press the arrow keys to scroll through presets ratios or<br />
c) press on the Zoom number to enter a ratio on the key pad<br />
1.2.8 Insert Original<br />
Using the guides on the feed table, center the original face up and push forward<br />
until the <strong>KIP</strong> <strong>3000</strong> accepts it.<br />
The <strong>KIP</strong> <strong>3000</strong> will automatically commence to copy. While this occurs the image<br />
will be displayed on the Operator Panel for your reference.<br />
2-7<br />
Section 2 Copy Mode - Monochrome
2. 0 Operation Details<br />
2.1 Main Screen<br />
The main Copy screen is selected with the Copy Button.<br />
This screen contains all user functions for copying. The following pages details the<br />
functions and settings of each button and sub screens that can be used to adjust the<br />
copy mode parameters to achieve the required result.<br />
2.2 Original<br />
This region allows the setting of the Size Mode (Engineering or Architectural) and the<br />
original image type.<br />
2.2.1 Original Size Mode<br />
This button is used to select the Size Mode of Engineering or Architectural.<br />
This will allow the automatic width detection system to determine the image width<br />
when an original is placed in the <strong>KIP</strong> <strong>3000</strong>.<br />
Engineering widths = 34, 22, 17, 11, and 8.5 inches<br />
Architectural widths = 36, 30, 24, 18, 12, and 9 inches<br />
2-8<br />
Section 2 Copy Mode - Monochrome
2.2.2 Original Type<br />
Select one of the four different predetermined original types. The selections are:<br />
a) Line - used for simple line documents<br />
b) Line / Photo - used for a combination of lines & photos documents<br />
c) Grayscale - used for a combination of lines & areas of shade (CAD)<br />
originals<br />
d) Photo - used for photographic originals<br />
Press the desired original setting from one of the four diagrams. This will allow<br />
automatic image quality adjustments for the next scan. Please note that the<br />
selection will be highlighted with a “black circle” and the icon will become white, as<br />
in the above example “Grayscale”.<br />
2.3 Quality<br />
This region is used to change the image quality settings from the automatic setting.<br />
2.3.1 Automatic<br />
For most copies, “Auto” should be selected. This will allow the copier to<br />
automatically determine the best image settings without any user intervention<br />
(please also note “Original” in 2.2)<br />
2-9<br />
Section 2 Copy Mode - Monochrome
2.3.2 Threshold<br />
To override the “Automatic” settings, “Threshold” can be<br />
adjusted. Deselect “Auto” to enable “Threshold”.<br />
Pressing the arrows manually adjusts the threshold. This<br />
will suppress or enhance the lines and images from the<br />
original.<br />
2.3.3 Density<br />
To override the “Automatic” settings, “Density” can be<br />
adjusted. Deselect “Auto” to enable “Density”.<br />
Pressing the arrows manually adjusts the background<br />
density. This will suppress or enhance the background from<br />
the original.<br />
2.3.4 Sharpness<br />
To override the “Automatic” settings, “Sharpness” can be<br />
adjusted. Deselect “Auto” to enable “Sharpness”.<br />
Pressing the arrows manually adjusts the line sharpness to<br />
remove rough lines or when photos are copied to allow for<br />
smoother graduations.<br />
2.3.5 Dither<br />
To override the “Automatic” settings, “Dither” can be<br />
adjusted. Deselect “Auto” to enable “Dither”.<br />
By pressing the dither button,<br />
a) None<br />
b) Fine<br />
c) Medium or<br />
d) Course<br />
This will change how the dots are arranged to create the<br />
final image of the copy. For fine lines a “Course” dither<br />
pattern may be desired. For Photos “None” may be desired.<br />
2-10<br />
Section 2 Copy Mode - Monochrome
2.4 Copy Count<br />
In this region the number of copies, and set copy / collation can be set.<br />
2.4.1 Arrows - Count Increase / Decrease<br />
Use the arrows to increase or decrease the total numbers of copies desired by one<br />
with each press of the button.<br />
In this example the arrow was pressed seven times to reach “8 copies”.<br />
2.4.2 Number Pad - Count Increase / Decrease<br />
Press the “number of copies” value (which is a button) to set the desired number of<br />
copies using a number pad. This will allow the quick entry of larger numbers.<br />
a) Press the numbers for the quantity desired.<br />
(up to 999)<br />
b) Select “Enter”.<br />
c) If an entry error was made press “C” to start<br />
again.<br />
d) If you wish to close the screen without<br />
changing the quantity press “Cancel”.<br />
2.4.3 Set Copy<br />
a) To enable collated sets or copy sets to be printed select the Set Copy button.<br />
b) As originals are scanned, the total number in the set is displayed.<br />
2-11<br />
Section 2 Copy Mode - Monochrome
c) Copying will not commence until the set is closed. To close a set, press the start<br />
button. The set with the total number of copies will be printed.<br />
An example of Set Copy:<br />
3 originals with 3 sets or copies<br />
2.4.4 Clear<br />
Press the clear button to reset the quantity to “1”.<br />
.<br />
2-12<br />
Originals<br />
1 2 3<br />
Copies<br />
Section 2 Copy Mode - Monochrome
2.5 Advanced Settings<br />
The Advanced Setting button contains the<br />
additional parameters on a sub screen:<br />
a) Mirror<br />
b) Invert<br />
c) Fold (if optional device connected)<br />
d) Stamp (Water Mark)<br />
e) Lead Edge Adjustment<br />
f) Trail Edge Adjustment<br />
When any of the adjustments / selections is selected, the selections will now be<br />
displayed on the main Copy screen<br />
2.5.1 Mirror<br />
Select this button to “mirror” a scan. This can be utilized on<br />
originals that may have the actual image on the reverse side such<br />
as older “sepia” or “film” documents.<br />
2.5.2 Invert<br />
Select this button to change a region of white to black and visa<br />
versa of a scanned document. This is normally used for “negative”<br />
documents or “blue prints”.<br />
2-13<br />
Section 2 Copy Mode - Monochrome
2.5.3 Fold<br />
Select “Fold” to display the fold sub screen. This will allow the selection of a “Fold<br />
Pattern” to be applied to the copy.<br />
a) Use the Arrow buttons to scroll through<br />
the available folds and select a desired<br />
fold from the list.<br />
b) The fold selected will be displayed in the button.<br />
c) Select OK.<br />
NOTE<br />
The list of “Folds” is loaded into Copy Mode by the system administrator or key operator.<br />
They can not be altered or modified in any manner on the UI.<br />
Please contact these persons for any additional stamps that may be required.<br />
Please see “<strong>KIP</strong> Request” for these functions.<br />
An optional <strong>KIP</strong> Folder must be purchased to enable these functions.<br />
2-14<br />
Section 2 Copy Mode - Monochrome
2.5.4 Stamp<br />
Select “Stamp” to display another sub screen. This will allow the selection of a<br />
“Stamp” or “Water Mark” to be placed on the scanned image. It will be imbedded into<br />
the image.<br />
a) Use the Arrow buttons to scroll through<br />
the available stamps and select the<br />
desired stamp from the list.<br />
b) The Stamp button will now display the stamp selected.<br />
c) Select OK.<br />
NOTE<br />
The list of “Stamps” is loaded into Copy Mode by the system administrator or key<br />
operator. They can not be altered or modified in any manner on the <strong>KIP</strong> printer’s<br />
UI.<br />
Please contact these persons for any additional stamps that may be required.<br />
Please see “<strong>KIP</strong> Request” for these functions.<br />
2-15<br />
Section 2 Copy Mode - Monochrome
2.5.5 Leading Edge Adjustment<br />
The leading edge of a copy can be altered. ( +/- 4” )<br />
a) additional void area can be placed on the lead edge of a scan or<br />
b) image can be removed (such as a binding strip or a file hanger)<br />
Image<br />
Leading Edge + Leading Edge -<br />
<strong>KIP</strong><br />
Scanner<br />
Original<br />
<strong>KIP</strong><br />
Image<br />
Scanner<br />
Copy<br />
Added margin<br />
To adjust the Leading Edge, use the arrows to denote the quantity you wish to add<br />
or remove.<br />
Touch the value displayed area to reset the quantity.<br />
2-16<br />
Deleted image<br />
<strong>KIP</strong><br />
Image<br />
Scanner<br />
Original<br />
Image<br />
Scanner<br />
Copy<br />
Section 2 Copy Mode - Monochrome
2.5.6 Trailing Edge Adjustment<br />
The trailing edge of each copy can be altered. ( +/- 4” )<br />
c) Additional void area can be placed on the bottom of a copy or<br />
d) Image can be removed (such as a binding strip or a file hanger)<br />
<strong>KIP</strong><br />
Image<br />
Scanner<br />
Original<br />
Trail edge + Trail Edge -<br />
<strong>KIP</strong><br />
Image<br />
Scanner<br />
Copy<br />
Added trailing margin<br />
To adjust the Trailing Edge, use the arrows to denote the quantity you wish to add<br />
or remove.<br />
Touch the value displayed area to reset the quantity.<br />
Make any of the required adjustments / selections and press “OK” to accept. The<br />
selections will now be displayed on the main Scan screen.<br />
2.6 Width<br />
This region allows automatic or manual roll selection, roll size display, cut sheet media,<br />
the roll amount remaining and to set the installed media type and width.<br />
2-17<br />
<strong>KIP</strong><br />
Image<br />
Scanner<br />
Original<br />
Deleted trailing image<br />
<strong>KIP</strong><br />
Image<br />
Copy<br />
Section 2 Copy Mode - Monochrome
2.6.1 Auto<br />
This default setting allows the copier to automatically select the best media roll<br />
width to print the image onto. It selects the roll noting the amount of image area to<br />
prevent surplus media consumption. (applies to the option - two or more roll model)<br />
Example:<br />
22” original<br />
36” and 24” bond media installed<br />
Original is 22” wide<br />
36” installed 24” Installed<br />
excess non-imaged media has the best image to media fit<br />
therefore this roll will be used<br />
2.6.2 Manual Roll Selection<br />
To select a roll deck, press the roll deck desired. Note that the roll information is<br />
displayed in the roll deck button.<br />
2-18<br />
Section 2 Copy Mode - Monochrome
2.6.3 Enabling Cutsheet<br />
Some <strong>KIP</strong> printers are equipped with a cut sheet feeder that can be enabled in the<br />
configuration menu of the UI.<br />
This can be accomplished by following these steps<br />
1. Select the (?) button in the bottom left corner of the user<br />
interface.<br />
2. Select the Configuration button from the Info/Help screen.<br />
3. Using the Left/Right arrows located at the bottom of the<br />
page scroll to page four (4).<br />
4. Change the Enable Cut Sheet button to “Yes”.<br />
2.6.4 Cut Sheet<br />
To copy onto a cut sheet of media:<br />
a) Select the CUT SHEET button on the main screen.<br />
b) Select the Output Size of the actual cut sheet paper that will be inserted into<br />
the Cut Sheet feeder.<br />
2-19<br />
Section 2 Copy Mode - Monochrome
Select desired settings from the main copy screen. Feed your original (s) into the<br />
<strong>KIP</strong> <strong>3000</strong>.<br />
c) Prepare Cut Sheet Feeder on your printer and WAIT until prompted by the UI.<br />
d) Insert the original into the Cut Sheet Feeder.<br />
Note:<br />
Only one cut sheet may be fed at a time and this function will time out after 3<br />
minutes if no paper is inserted.<br />
Note:<br />
DO NOT insert the cut sheet media into the feeder while printing from a roll deck,<br />
as this may cause the printer to jam.<br />
2.6.5 Copying to Multiple Cutsheets<br />
1. Follow steps above (2.6.4)<br />
2. After a short period of time the Printer will beep notifying the user to insert the<br />
cutsheet into the Cutsheet feeder, the Job Info button will also flash be flashing.<br />
3. Once the cutsheet has been printed there will be a short pause and the printer<br />
will start to beep again. Insert the next cutsheet into the printer<br />
4. Continue for multiples.<br />
Note:<br />
Only one cutsheet may be fed at a time and will time out after 3 minutes if no paper<br />
is inserted.<br />
Note:<br />
DO NOT insert the cut sheet media into the feeder while printing from a roll deck,<br />
as this may cause the printer to jam.<br />
2.6.6 Media Remaining<br />
The installed roll information is displayed in the button of the particular roll deck.<br />
Beside each deck is a volume of media that currently is left on the roll of media.<br />
Indicators will display full, ¾, ½, ¼ or empty.<br />
2-20<br />
Section 2 Copy Mode - Monochrome
2.6.7 Installing Roll Media<br />
When media is replaced or installed, a screen will automatically appear. This<br />
screen allows the setting of the media type and width. Please see the <strong>KIP</strong> Printer’s<br />
manual for the procedures to replace a roll of media.<br />
a) If no changes are required, press cancel<br />
b) If changes are required from the currently settings displayed, select the correct<br />
media type and size for each deck and press OK.<br />
This screen shows 36” bond for deck one and 30” Bond for Roll 2 deck. Scroll<br />
through the media choices at the bottom of each roll. Click on the graphical<br />
scissors to trim the desired roll deck.<br />
Media types settings noted above can be changed at any time by pressing the<br />
Media button on the main Copy Screen.<br />
2-21<br />
Section 2 Copy Mode - Monochrome
2.7 Length<br />
Two methods determine the length of the copy in the <strong>KIP</strong> printer. These two methods<br />
are Auto (may also be known as Synchro Cut or Automatic Cut) and Standard Cut.<br />
2.7.1 Auto<br />
This mode allows the media length to be determined by the<br />
original length. This also takes into consideration any<br />
enlargements or reductions that are applied to an image as<br />
well, to prevent excess media without image.<br />
NOTE<br />
Auto Length works in conjunction with Auto Roll<br />
noted in 2.6.1.<br />
2.7.2 Standard<br />
This mode allows the media length to be determined by a standard length or a<br />
length set manually by the user with a number pad.<br />
a) Select Standard Cut. A sub screen will appear. When Standard is used, the roll<br />
must also be selected.<br />
- If Auto Roll is selected in the Media region the following screen will appear,<br />
prompting the media to be selected. Select the roll.<br />
2-22<br />
Section 2 Copy Mode - Monochrome
- If a roll is already selected in Media, then the following screen appears now<br />
only requesting the length.<br />
b) Once the roll is determined (if so required) the length can now be set.<br />
- Standard Length<br />
- Auto Length<br />
- Custom Length<br />
c) Standard Length – use an industry<br />
standard length. Select the length and<br />
press Enter.<br />
d) Auto Length – uses the length of the<br />
original to determine the copy length.<br />
Select and press Enter.<br />
2-23<br />
Section 2 Copy Mode - Monochrome
e) Custom Length – set the custom length<br />
in the key pad and press enter<br />
f) The cut length will now be displayed in the main Copy screen in the Standard Cut<br />
button.<br />
2.8 Size – Zoom<br />
Image size / Zoom can be altered in this region on the UI. This includes automatic<br />
zooming, predetermined percentages, or ratio calculations to page size, and simply<br />
percentage increments.<br />
2-24<br />
Section 2 Copy Mode - Monochrome
2.8.1 Preset Percentages<br />
The <strong>KIP</strong> printer has several predetermined industry standard zoom percentages<br />
used for quick access. These can be access with the arrow buttons.<br />
The pre-programmed percentages are:<br />
50 - 66.7 - 70.7 - 100 - 141 - 150 - 200<br />
2.8.2 Percentage Key Pad<br />
To enter a percentage directly into the UI,<br />
a) Press on the Percentage value displayed (the number is a button).<br />
b) This will show a keypad to enter the value. (Please note that the button<br />
Manual on the side is a default.)<br />
c) Press the desired zoom value and press enter.<br />
2-25<br />
Section 2 Copy Mode - Monochrome
2.8.3 Page Size Zoom<br />
To enter a zoom percentage based on pages sizes into the UI:<br />
a) Press on the Percentage value displayed (the number is a button).<br />
This will show a keypad to enter the value.<br />
b) Select Standard button.<br />
c) Select the original page size by pressing onto the<br />
original page size button.<br />
d) Please note either Engineering or Architectural<br />
mode can be utilized by pressing on the button<br />
below the original page size.<br />
e) Select the desired Copy page size. Again please<br />
note either Engineering or Architectural mode can<br />
be utilized.<br />
f) Press Enter to confirm your selections or Cancel to restart.<br />
2-26<br />
Section 2 Copy Mode - Monochrome
2.8.4 Auto Zoom<br />
Press the Auto Zoom bottom to enable this function. Auto Zoom features works in<br />
conjunction with the roll selected to scale the image to the selected roll width.<br />
a) If a roll is selected in the Media region the<br />
zoom from the original will automatically fit the<br />
width of the selected roll.<br />
b) If a roll is not selected (Auto is currently<br />
selected), roll selection is requested prior to<br />
the function of Auto Zoom. If cut sheet is<br />
used then it will use the values set in the Cut<br />
Sheet button in Media.<br />
2.8.5 Clear<br />
To reset the percentage value to default, press the<br />
“C” button.<br />
2.9 Start<br />
The copier is always set to “Auto Start”. That is when an originally is<br />
inserted into the <strong>KIP</strong> <strong>3000</strong>, it will start without other user intervention.<br />
The start button is used when a job is recalled. The start button will “start”<br />
the job if depressed after ‘Recall”. (The name will change to “Re-print”)<br />
2.10 View Last<br />
The last documented scanned to be copied be viewed.<br />
2.11 Recall Job<br />
The last set or single copy can be recalled to be resized or to switch<br />
media type. After a job is recalled, make the required changes and then<br />
press “Start”.<br />
2-27<br />
Section 2 Copy Mode - Monochrome
2.12 Stop / Reset<br />
This button has two functions.<br />
1) Press the Stop button to stop the current scan. The original<br />
will be ejected automatically. If not, open Top Cover to<br />
remove the original.<br />
2) Press the Reset button to restore the “default settings” in<br />
Copy Mode. Some of the default settings are determined in<br />
the Information / Help Screen of the UI. (see Copy Mode<br />
Configurations chapter)<br />
2.13 Interrupt<br />
Network printing can be interrupted between collated sets of<br />
documents. Press the Interrupt button to pause the queue and<br />
allow a more urgent file to be copied. For example if a file is<br />
needed right away and there is a job in the queue that has 20<br />
sheets and 10 sets are being printed this can be interrupted<br />
when one of the sets finishes printing. After the urgent file is<br />
printed the sets will continue to print.<br />
2.14 Rescan<br />
This button only appears when “Set Copy” mode in enabled. It<br />
allows a user to rescan an original in a set as required. This<br />
may be due to skew or incorrect image quality settings of the<br />
previous scan.<br />
2.15 Log Off<br />
This button only appears when “Accounting” functions are<br />
enabled. This allows the current user to cease all <strong>KIP</strong> printer<br />
functions after the user has preformed the required copies.<br />
(after the code was entered to enable Coping)<br />
Please note that the <strong>KIP</strong> printer will also automatically logoff<br />
from the current user after 180 seconds of no copy function<br />
activities by a user.<br />
2-28<br />
Section 2 Copy Mode - Monochrome
Section 3<br />
Copy Mode - Color<br />
1.0 Copy Mode – Color ............................................................................................................3- 2<br />
1.1 Main Screen - General.........................................................................................................3- 2<br />
1.2 Simple Copying....................................................................................................................3- 3<br />
1.2.1 Select Copy Mode............................................................................................................3- 3<br />
1.2.2 Select Size Mode .............................................................................................................3- 3<br />
1.2.3 Select Original Image Type..............................................................................................3- 4<br />
1.2.4 Print Quality......................................................................................................................3- 4<br />
1.2.5 Copy Count ......................................................................................................................3- 5<br />
1.2.6 Original Size.....................................................................................................................3- 5<br />
1.2.7 Size ..................................................................................................................................3- 6<br />
1.2.8 Insert Original...................................................................................................................3- 6<br />
2.0 Operation Details ...............................................................................................................3- 7<br />
2.1 Main Screen.........................................................................................................................3- 7<br />
2.2 Original.................................................................................................................................3- 7<br />
2.2.1 Original Size Mode...........................................................................................................3- 7<br />
2.2.2 Original Type....................................................................................................................3- 8<br />
2.3 Print Quality .........................................................................................................................3- 8<br />
2.3.1 Line / Graphic Mode.........................................................................................................3- 8<br />
2.3.2 Draft / Normal / High Quaility ...........................................................................................3- 8<br />
2.4 Copy Count ..........................................................................................................................3- 9<br />
2.4.1 Arrows - Count Increase / Decrease ...............................................................................3- 9<br />
2.4.2 Number Pad - Count Increase / Decrease .......................................................................3- 9<br />
2.4.3 Set Copy ..........................................................................................................................3-10<br />
2.4.4 Clear.................................................................................................................................3-10<br />
2.5 Advanced Settings ...............................................................................................................3-10<br />
2.5.1 Mirror................................................................................................................................3-10<br />
2.5.2 Invert ................................................................................................................................3-10<br />
2.5.3 Leading Edge Adjustment ................................................................................................3-11<br />
2.5.4 Trailing Edge Adjustment .................................................................................................3-12<br />
2.6 Original Size.........................................................................................................................3-13<br />
2.6.1 Auto..................................................................................................................................3-13<br />
2.6.2 Manual .............................................................................................................................3-13<br />
2.6.3 Custom.............................................................................................................................3-14<br />
2.6.4 Rotation............................................................................................................................3-15<br />
2.7 Size – Zoom.........................................................................................................................3-15<br />
2.7.1 Preset Percentages..........................................................................................................3-15<br />
2.7.2. Percentage Key Pad ....................................................................................................3-16<br />
2.7.3. Page Size Zoom...........................................................................................................3-16<br />
2.7.4. Clear.............................................................................................................................3-17<br />
2.8. Start .....................................................................................................................................3-18<br />
2.9. View Last ............................................................................................................................3-18<br />
2.10. Recall Job ...........................................................................................................................3-18<br />
2.11. Stop / Reset .........................................................................................................................3-18<br />
2.12. Interrupt...............................................................................................................................3-18<br />
2.13. Rescan................................................................................................................................3-18<br />
2.14. Log Off ................................................................................................................................3-18<br />
3-1<br />
Section 3 Copy Mode – Color
1. 0 Copy Mode - Color<br />
1<br />
1.1 Main Screen - General<br />
2<br />
3<br />
No. Name Function<br />
1 Mode Select Color Mode from Mono Mode<br />
2 Original Size Select the size of the original in length and rotation<br />
3 Original Type User Selects the type of original to copy. Also select<br />
Eng/Arch Modes here.<br />
4 Print Quality Select the calibrated Quality (must be calibrated prior to<br />
use)<br />
5 Copy Count Select the quantity of prints and sets designation.<br />
6 Advanced Settings Invert , mirror, stamps, folds, and edge adjustments<br />
preformed / displayed in this button (sub screen)<br />
7 Reset Clears the image buffer and resets the system to default<br />
settings.<br />
8 View Last The last scan / job can be viewed<br />
9 Recall Job Images can be recalled from the last job for reprint.<br />
Please note that a time limit may be set to recall or this<br />
feature may be disabled by the administrator to prevent<br />
any unauthorized copies.<br />
10 Interrupt Pauses the network print jobs to print any copy jobs<br />
11 Zoom Manual and automatic zoom ratios set.<br />
12 Log Off Displayed if Accounting enabled to Log off current user<br />
4<br />
3-2<br />
5<br />
10<br />
11<br />
Section 3 Copy Mode – Color<br />
6<br />
7<br />
8<br />
9<br />
12
1.2 Simple Copying<br />
To copy, please follow these basic steps. The following chapters have details on adjustments<br />
and parameters that the user can change to modify the copies as required.<br />
Please note that a third party color printer, supported by <strong>KIP</strong>, must first be calibrated in<br />
the “?” screen under the “Color Config” button. Please see the “?” Section.<br />
1.2.1 Select Copy Mode<br />
On the lower region of the Operator Panel select “COPY” and then press the Color button if<br />
not already selected.<br />
1.2.2 Select Size Mode<br />
Select whether the document is an engineering or architectural size document. This will<br />
allow the automatic width detection to function.<br />
Engineering widths = 34, 22, 17, 11, and 8.5 inches<br />
Architecture widths = 36, 30, 24, 18, 12, and 9 inches<br />
3-3<br />
Section 3 Copy Mode – Color
1.2.3 Select Original Image Type - Input<br />
Set the original image type you will copy. The selections are:<br />
Line - used for simple color line documents<br />
Line / Photo - used for a combination of lines & photos color documents<br />
Photo - used for color photographic originals<br />
This will allow automatic image quality adjustments for the scan.<br />
1.2.4 Print Quality - Output<br />
The model of third party color printer will determine on the available Print Quality. Select<br />
“Graphics” or “Line Art” mode and then select “Draft, Normal or High Quality” mode for the<br />
printer.<br />
Please note that each Print Quality mode must be calibrated prior to its use. Please see<br />
Color Calibration in the “?” screen for greater details.<br />
3-4<br />
Section 3 Copy Mode – Color
1.2.5 Copy Count<br />
Press the arrow buttons to scroll through the number of copies required or press on the<br />
actual number to set the quantity with the number pad.<br />
1.2.6 Original Size<br />
This selects automatic (for best possible fit) or manual page size selection.<br />
or<br />
3-5<br />
Section 3 Copy Mode – Color
1.2.7 Size<br />
Select<br />
a) AutoZoom to automatically zoom to the width of paper or<br />
b) Press the arrow keys to scroll through presets ratios or<br />
c) Press on the Zoom number to enter a ratio on the key pad<br />
1.2.8 Insert Original<br />
Using the guides on the feed table, center the original face up and push forward until the<br />
<strong>KIP</strong> <strong>3000</strong> accepts it.<br />
The <strong>KIP</strong> <strong>3000</strong> will automatically commence to copy. While this occurs the image will be<br />
displayed on the Operator Panel for your reference.<br />
3-6<br />
Section 3 Copy Mode – Color
2. 0 Operation Details<br />
2.1 Main Screen<br />
The main Copy Color screen is selected with the Copy Button in the lower bar, then use the<br />
Mono / Color button in the upper left corner to select Color Mode.<br />
The following pages detail the functions and settings of each button and sub screen that can<br />
be used to adjust the color copy mode.<br />
2.2 Original<br />
This region allows the setting of the Size Mode (Engineering or Architectural) and the original<br />
image type.<br />
2.2.1 Original Size Mode<br />
This button is used to select the Size Mode of Engineering or Architectural.<br />
This will allow the automatic width detection system to determine the image width when an<br />
original is placed in the <strong>KIP</strong> <strong>3000</strong>.<br />
Engineering widths = 34, 22, 17, 11, and 8.5 inches<br />
Architectural widths = 36, 30, 24, 18, 12, and 9 inches<br />
3-7<br />
Section 3 Copy Mode – Color
2.2.2 Original Type - Input<br />
Select one of the three different predetermined original types. The selections are:<br />
a) Line - used for simple color line documents<br />
b) Line / Photo - used for a combination of color lines & photos<br />
c) Photo - used for color photographic originals<br />
Press the desired original setting from one of the three diagrams. This will allow automatic<br />
image quality adjustments for the scan. Please note that the selection will be highlighted<br />
with a “black circle” and the icon will become white, as in the above example “Line/Photo”.<br />
2.3 Print Quality - Output<br />
This region is used to change the image quality settings on the third party printer.<br />
2.3.1 Line / Graphic Mode<br />
The device you will copy to will determine the best setting. Each Quality mode has three<br />
sub modes. Each mode must be calibrated prior to use. Please see Color Calibration in the<br />
“?” screen.<br />
2.3.2 Draft / Normal / High Quaility<br />
This controls the settings of the printer and which mode of image<br />
quality will be used on the printer. Please see third party printer guide<br />
for details.<br />
3-8<br />
Section 3 Copy Mode – Color
2.4 Copy Count<br />
In this region the number of copies, and set copy / collation can be set.<br />
2.4.1 Arrows - Count Increase / Decrease<br />
Use the arrows to increase or decrease the total numbers of copies desired by one with<br />
each press of the button.<br />
In this example the arrow was press five times to reach “6 copies”.<br />
2.4.2 Number Pad - Count Increase / Decrease<br />
Press the “number of copies” value (which is a button) to set the desired number of copies<br />
using a number pad. This will allow the quick entry of larger numbers.<br />
a) Press the numbers for the quantity desired.<br />
(up to 999)<br />
b) Select “Enter”.<br />
c) If an entry error was made press “C” to<br />
start again.<br />
d) If you wish to close the screen without<br />
changing the quantity press “Cancel”.<br />
3-9<br />
Section 3 Copy Mode – Color
2.4.3 Set Copy<br />
Has no function in Color Copy Mode.<br />
2.4.4 Clear<br />
Press the “eraser” button to reset the quantity to “1”.<br />
2.5 Advanced Settings<br />
The Advanced Setting button contains the additional<br />
parameters on a sub screen:<br />
a) Mirror<br />
b) Invert<br />
c) Lead Edge Adjustment<br />
d) Trail Edge Adjustment<br />
When any of the adjustments / selections is selected, the<br />
selections will now be displayed on the main Copy<br />
screen.<br />
2.5.1 Mirror<br />
Select this button to “mirror” a scan. This can be utilized on originals that<br />
have the actual image on the reverse side such as older “sepia” or “film”<br />
documents.<br />
2.5.2 Invert<br />
Select this button to change a region of white to black and visa versa of a<br />
scanned document. This is normally used for “negative” documents or<br />
“blue prints”.<br />
3-10<br />
Section 3 Copy Mode – Color
2.5.3 Leading Edge Adjustment<br />
The leading edge of a copy can be altered. ( +/- 4” )<br />
a) additional void area can be placed on the lead edge of a scan or<br />
b) image can be removed (such as a binding strip or a file hanger)<br />
Leading Edge Leading Edge -<br />
<strong>KIP</strong><br />
Image<br />
Scanner<br />
Original<br />
<strong>KIP</strong><br />
Image<br />
Scanner<br />
Scan<br />
Added margin<br />
To adjust the Leading Edge, use the arrows to denote the quantity you wish to add or<br />
remove.<br />
Touch the value displayed area to reset the quantity.<br />
3-11<br />
<strong>KIP</strong><br />
Image<br />
Scanner<br />
Original<br />
Deleted image<br />
Image<br />
Scanner<br />
Scan<br />
Section 3 Copy Mode – Color
2.5.4 Trailing Edge Adjustment<br />
The trailing edge of each copy can be altered. ( +/- 4” )<br />
a) Additional void area can be placed on the bottom of a copy or<br />
b) Image can be removed (such as a binding strip or a file hanger)<br />
Trail<br />
edge +<br />
<strong>KIP</strong><br />
Image<br />
Scanner<br />
Origin<br />
al<br />
Cop<br />
y<br />
<strong>KIP</strong><br />
Image<br />
Scanner<br />
Trail<br />
Edge<br />
Origin<br />
al<br />
Deleted trailing<br />
image<br />
Cop<br />
y<br />
Added trailing<br />
margin<br />
To adjust the Trailing Edge, use the arrows to denote the quantity you wish to add or<br />
remove.<br />
Touch the value displayed area to reset the quantity.<br />
Make any of the required adjustments / selections and press “OK” to accept. The selections<br />
will now be displayed on the main Scan screen.<br />
3-12<br />
<strong>KIP</strong><br />
Image<br />
Scanner<br />
<strong>KIP</strong><br />
Image<br />
Section 3 Copy Mode – Color
2.6 Original Size<br />
This region allows automatic or manual roll detection of the original.<br />
2.6.1 Auto<br />
This default setting allows the <strong>KIP</strong> <strong>3000</strong> to automatically detect the width and length of the<br />
original. Please note the correct “Original Size Mode” in 2.2.1 must be select prior to the<br />
copy.<br />
2.6.2 Manual<br />
To select an original size manually, select Manual and a sub screen displays all current<br />
standard page sizes.<br />
3-13<br />
Section 3 Copy Mode – Color
2.6.3 Custom<br />
This mode allows the original width and length to be determined by the number pad.<br />
a) Set the width of the scan. Note that these are only Standard Sizes.<br />
b) Set a Standard Length or Custom Length – set the Custom length in the key pad<br />
and press enter.<br />
Standard Length Custom Length<br />
c) The cut length will now be displayed in the Manual button. In this example 18” width and a<br />
custom length of 25.8”.<br />
3-14<br />
Section 3 Copy Mode – Color
2.6.4 Rotation<br />
Select the rotation to save copy media. This function may be void dependent on the third<br />
party printer ability in media width and auto rotate function programmed in the printer.<br />
Example:<br />
D Size copy may waste less media if printed 36” wide (if the printer so supports this size<br />
and is installed in the printer) rather than 24” wide. If the user wishes to scan the document<br />
24” and then select a 270 degree or 90 degree rotation to print 36” width rather than 24”<br />
this can save media.<br />
Rotation available:<br />
2.7 Size – Zoom<br />
Image size / Zoom can be altered in this region of the <strong>KIP</strong> operator panel. This includes<br />
automatic zooming, predetermined percentages, or ratio calculations to page size, and simple<br />
percentage increments.<br />
2.7.1 Preset Percentages<br />
The <strong>KIP</strong> has several predetermined industry standard zoom percentages used for quick<br />
access. These can be access with the arrow buttons.<br />
The pre-programmed percentages are:<br />
50 - 66.7 - 70.7 - 100 - 141 - 150 - 200<br />
3-15<br />
Section 3 Copy Mode – Color
2.7.2. Percentage Key Pad<br />
To enter a percentage directly:<br />
a) Press on the Percentage value displayed (the number is a button).<br />
b) This will show a keypad to enter the value (please note that the button Manual on the<br />
side is a default).<br />
c) Press the desired zoom value and press enter.<br />
2.7.3. Page Size Zoom<br />
To enter a zoom percentage based on pages sizes into the UI:<br />
a) Press on the Percentage value displayed (the number is a button). This will show a<br />
keypad to enter the value.<br />
3-16<br />
Section 3 Copy Mode – Color
) Select Standard button.<br />
c) Select the original page size by pressing onto the<br />
original page size button.<br />
d) Please note either Engineering or Architectural mode<br />
can be utilized by pressing on the button below the<br />
original page size.<br />
e) Select the desired Copy page size. Again please note<br />
either Engineering or Architectural mode can be<br />
utilized.<br />
f) Press Enter to confirm your selections or Cancel to<br />
restart.<br />
2.7.4. Clear<br />
To reset the percentage value to default, press the “erase” button.<br />
3-17<br />
Section 3 Copy Mode – Color
2.8. Start<br />
The copier is always set to “Auto Start”. When the original is inserted into<br />
the <strong>KIP</strong> <strong>3000</strong> scanner, the process will begin without further user<br />
intervention.<br />
The start button is used when a job is recalled. The start button will “start”<br />
the job if depressed after ‘Recall” (the name will change to “Re-print”).<br />
2.9. View Last<br />
The last documented scanned to be copied be viewed.<br />
2.10. Recall Job<br />
No function in Color Copy Mode.<br />
2.11. Stop / Reset<br />
This button has two functions.<br />
1) Press the Stop button to stop the current scan. The original will be<br />
ejected automatically. If not, open Top Cover to remove the original.<br />
2) Press the Reset button to restore the “default settings” in Copy<br />
Mode. Some of the default settings are determined in the<br />
Information / Help Screen of the UI. (see Copy Mode<br />
Configurations chapter)<br />
2.12. Interrupt<br />
No function in Color Copy Mode.<br />
2.13. Rescan<br />
No Function in Color Copy Mode.<br />
2.14. Log Off<br />
This button only appears when “Accounting” functions are enabled. This<br />
allows the current user to cease all <strong>KIP</strong> functions after the user has<br />
preformed the required copies (after the code was entered to enable<br />
Coping).<br />
Please note that the <strong>KIP</strong> printer will also automatically log off the current user after 180<br />
seconds of no copy function activities by a user.<br />
3-18<br />
Section 3 Copy Mode – Color
Section 4<br />
Scan Mode - Monochrome<br />
1. 0 Scan Mode - Monochrome ............................................................................................. 4- 2<br />
1.1 Main Screen ................................................................................................................. 4- 2<br />
1.2 Simple Scanning .......................................................................................................... 4- 3<br />
1.2.1 Select Scan Mode .................................................................................................... 4- 3<br />
1.2.2 Select Size Mode ..................................................................................................... 4- 3<br />
1.2.3 Select Original Image Type ...................................................................................... 4- 4<br />
1.2.4 Select Format........................................................................................................... 4- 5<br />
1.2.5 Select Mailbox.......................................................................................................... 4- 6<br />
1.2.6 Insert Original........................................................................................................... 4- 6<br />
1.2.7 Retrieve the File ....................................................................................................... 4- 6<br />
2. 0 Operation Details ............................................................................................................ 4- 7<br />
2.1 Main Screen ................................................................................................................. 4- 7<br />
2.2 Original......................................................................................................................... 4- 7<br />
2.2.1 Original Size Mode ................................................................................................... 4- 7<br />
2.2.2 Original Type............................................................................................................ 4- 8<br />
2.3 Original Size................................................................................................................. 4- 8<br />
2.3.1 Automatic Size ......................................................................................................... 4- 8<br />
2.3.2 Manual Size.............................................................................................................. 4- 9<br />
2.3.3 Hard Drive Space Monitor........................................................................................ 4-10<br />
2.3.4 Rotation.................................................................................................................... 4-11<br />
2.4 Quality .......................................................................................................................... 4-11<br />
2.4.1 Automatic ................................................................................................................. 4-11<br />
2.4.2 Threshold ................................................................................................................. 4-11<br />
2.4.3 Density ..................................................................................................................... 4-12<br />
2.4.4 Sharpness ................................................................................................................ 4-12<br />
2.4.5 Dither........................................................................................................................ 4-12<br />
2.5 DPI ............................................................................................................................... 4-12<br />
2.6 Format..........................................................................................................................4-13<br />
2.7 Advanced Settings ....................................................................................................... 4-14<br />
2.7.1 Mirror........................................................................................................................ 4-14<br />
2.7.2 Invert ........................................................................................................................ 4-14<br />
2.7.3 Stamp....................................................................................................................... 4-15<br />
2.7.4 Leading Edge Adjustment ........................................................................................ 4-16<br />
2.7.5 Trailing Edge Adjustment ......................................................................................... 4-17<br />
2.8 Mailbox.........................................................................................................................4-18<br />
2.8.1 Selecting a Mailbox .................................................................................................. 4-18<br />
2.8.2 Removing a Mailbox................................................................................................. 4-18<br />
2.8.3 Creating a New Mailbox ........................................................................................... 4-19<br />
2.8.4 SMB Setup ............................................................................................................... 4-20<br />
2.8.4.1 Share Setup – Workstation/Server ...................................................................... 4-20<br />
2.8.4.2 Network Location (SMB/CIFS) – IPS Setup ........................................................ 4-21<br />
2.8.4.3 FTP Site............................................................................................................... 4-24<br />
2.9 Start.............................................................................................................................. 4-26<br />
2.10 Reset / Stop ................................................................................................................. 4-26<br />
2.11 Re-Scan ....................................................................................................................... 4-26<br />
2.12 View Last...................................................................................................................... 4-26<br />
2.13 Log Off .........................................................................................................................4-26<br />
4-1<br />
Section 4 Scan Mode - Monochrome
3<br />
2<br />
1. 0 Scan Mode - Monochrome<br />
1.1 Main Screen<br />
1<br />
4 5 6<br />
No. Name Function<br />
1 Mode Selects the “Mode” of the system. (Scan Mode for<br />
this screen shown)<br />
2 Original Size Use automatic settings or manually set width, length<br />
and rotation of the images.<br />
3 Original Type User Selects the type of original to scan. Also select<br />
either Eng/Arch Mode here.<br />
4 Quality Select Auto or Manual image adjustments<br />
5 DPI Scroll through final image resolution. (DPI)<br />
6 Format Scroll through formats the scanned file will be saved<br />
to.<br />
7 Advanced Settings Invert, mirror, stamps, and edge adjustments<br />
preformed / displayed in this button (sub screen)<br />
8 Reset / Stop Resets the system to default settings. Stops a scan<br />
in process<br />
9 Mailbox Select where the image will be stored after the scan<br />
(<strong>KIP</strong> printer, FTP, LAN PC etc).<br />
10 View Last View the last scanned image<br />
11 Rescan Rescans the last image (replaces)<br />
4-2<br />
Section 4 Scan Mode - Monochrome<br />
7<br />
9<br />
8<br />
10<br />
11
1.2 Simple Scanning<br />
To scan to file, please follow these basic steps.<br />
The following chapters have details on adjustments and parameters that the user can<br />
change to modify the scans.<br />
1.2.1 Select Scan Mode<br />
On the lower region of the UI, select “SCAN”.<br />
1.2.2 Select Size Mode<br />
Select whether the document is an engineering or architectural size document. This will<br />
allow the automatic width detection to function.<br />
Engineering widths = 34, 22, 17, 11, and 8.5 inches<br />
Architecture widths = 36, 30, 24, 18, 12, and 9 inches<br />
4-3<br />
Section 4 Scan Mode - Monochrome
1.2.3 Select Original Image Type<br />
Set the Original Image type you will scan. The selections are:<br />
Line - used for simple line documents<br />
Line / Photo - used for a combination of lines & photos documents<br />
Grayscale - used for a combination of lines & areas of shade (CAD) originals<br />
Photo - used for photographic originals<br />
This will allow automatic image quality adjustments for the scan.<br />
4-4<br />
Section 4 Scan Mode - Monochrome
1.2.4 Select Format<br />
Press the button to scroll through the file formats available.<br />
TIF-G4 - tif format Group 4 level compressed<br />
TLC - <strong>KIP</strong> format compressed<br />
CAL-G4 - Cals Group 4 level<br />
PDF - PDF Level 3<br />
DWF - Design Web Format (AutoCAD)<br />
Multipage TIF-G4 - Tif format Group 4 level compressed<br />
Multipage PDF - PDF Level 3<br />
Multipage DWF - Design Web Format (AutoCAD)<br />
Select the type you require which will save the file in this format.<br />
4-5<br />
Section 4 Scan Mode - Monochrome
1.2.5 Select Mailbox<br />
Select the location to where the file will be saved. Use the “Page Arrows” to view other<br />
choices currently available.<br />
NOTE<br />
The Mailboxes are predetermined by the system administrator or key operator.<br />
Please contact these persons for any additional locations that you may require. The<br />
“Mailbox” button will allow for additional location entries.<br />
1.2.6 Insert Original<br />
Using the guides on the feed table, center the original face up and push forward until the<br />
<strong>KIP</strong> <strong>3000</strong> accepts it.<br />
The <strong>KIP</strong> <strong>3000</strong> will automatically commence to scan. While this occurs the image will be<br />
displayed on the Operator Panel for your reference.<br />
1.2.7 Retrieve the File<br />
Depending on the “Mailbox” you may now access your scan from a PC connected to the<br />
LAN. This includes:<br />
a) from a FTP site (using Microsoft Windows Internet Explorer or other FTP<br />
software)<br />
b) from the “<strong>KIP</strong> IPS Mailbox” utilizing “<strong>KIP</strong> Request” to access the document.<br />
c) from SMB location on a remote network server or workstation<br />
Please see the User Guides of these applications for details on their function.<br />
4-6<br />
Section 4 Scan Mode - Monochrome
2. 0 Operation Details<br />
2.1 Main Screen<br />
The main SCAN screen is selected with the Scan Button.<br />
This screen contains all user functions for scanning to file. The following pages detail the<br />
functions and settings of each button and sub screen that can be used to adjust the scan<br />
parameters to achieve the required result.<br />
2.2 Original<br />
This region allows the setting of the Size Mode (Engineering or Architectural) and the<br />
Original Document type.<br />
2.2.1 Original Size Mode<br />
This button is used to select the Size Mode of Engineering or Architectural and Original<br />
Image type.<br />
This will allow the automatic width detection system to determine the image width when an<br />
original is placed in the <strong>KIP</strong> <strong>3000</strong>.<br />
(Eng) Engineering widths = 34, 22, 17, 11, and 8.5 inches<br />
(Arch) Architecture widths = 36, 30, 24, 18, 12, and 9 inches<br />
4-7<br />
Section 4 Scan Mode - Monochrome
2.2.2 Original Type<br />
Select one of the four different predetermined original types. The selections are:<br />
a) Line - used for simple line documents<br />
b) Line / Photo - used for a combination of lines & photos documents<br />
c) Grayscale - used for a combination of lines & areas of shade (CAD)<br />
originals<br />
d) Photo - used for photographic originals<br />
Press the desired original setting from one of the four diagrams. This will allow automatic<br />
image quality adjustments for the next scan. Please note that the selection will be<br />
highlighted with a “black” circle and the icon will become white, as in the above example<br />
“Grayscale”.<br />
2.3 Original Size<br />
This region is used to select the image size of the original being scanned.<br />
2.3.1 Automatic Size<br />
For most scans, “Automatic” should be selected. This will allow the <strong>KIP</strong> <strong>3000</strong> to<br />
automatically determine the width and length of the scan without any user intervention.<br />
(Please also note “Original Size Mode” in 2.2)<br />
4-8<br />
Section 4 Scan Mode - Monochrome
2.3.2 Manual Size<br />
To select an original size manually, select Manual and a sub screen displays all current<br />
standard page sizes.<br />
a) Select a desired size of the sheet.<br />
b) Or use “Custom” to select a width.<br />
c) Set a standard size width.<br />
4-9<br />
Section 4 Scan Mode - Monochrome
d) Select a standard size length or<br />
e) Select a custom length with the key pad.<br />
f) Press “Reset” to begin again,<br />
“Enter” to accept the settings or Cancel” to<br />
cancel “Manual” image size.<br />
g) The main Scan screen will now<br />
display the custom or manual size<br />
settings for the next image.<br />
2.3.3 Hard Drive Space Monitor<br />
Located on the main screen of the <strong>KIP</strong> printer Scan mode, the Disk Use<br />
monitor provides a real-time display of remaining disk space on the <strong>KIP</strong><br />
printer’s hard drive. The monitor shows both the used space and the space<br />
available for image storage on the drive.<br />
4-10<br />
Section 4 Scan Mode - Monochrome
2.3.4 Rotation<br />
The file can be saved rotated, from the actual feed direction. This can be used to reduce<br />
the scan time on certain orientation of originals, when they are archived.<br />
Press the “Rotation” button to select either one of four settings:<br />
2.4 Quality<br />
This region is used to change the image quality settings from the<br />
automatic setting.<br />
2.4.1 Automatic<br />
For most scans, “Auto” should be selected. This will allow the <strong>KIP</strong><br />
<strong>3000</strong> to automatically determine the best image settings without any<br />
user intervention. (Please also note “Original” in 2.2)<br />
2.4.2 Threshold<br />
To override the “Automatic” settings, “Threshold” can be adjusted.<br />
Deselect “Auto” to enable “Threshold”.<br />
Pressing the arrows manually adjusts the threshold. This will<br />
suppress or enhance the lines and images from the original.<br />
4-11<br />
Section 4 Scan Mode - Monochrome
2.4.3 Density<br />
To override the “Automatic” settings, “Density” can be adjusted.<br />
Deselect “Auto” to enable “Density”.<br />
Pressing the arrows manually adjusts the background density. This<br />
will suppress or enhance the background from the original.<br />
2.4.4 Sharpness<br />
To override the “Automatic” settings, “Sharpness” can be adjusted.<br />
Deselect “Auto” to enable “Sharpness”.<br />
Pressing the arrows manually adjusts the line sharpness to remove<br />
rough lines or when photos are scanned to allow for smoother<br />
graduations.<br />
2.4.5 Dither<br />
To override the “Automatic” settings, “Dither” can be adjusted.<br />
Deselect “Auto” to enable “Dither”.<br />
By pressing the dither button,<br />
a) None<br />
b) Fine<br />
c) Medium or<br />
d) Course<br />
This will change how the dots are arranged to create the final image<br />
of the scan. For fine lines a “Course” dither pattern may be desired.<br />
For Photos “None” may be desired.<br />
2.5 DPI<br />
Scroll through the DPI button to select the required scan resolution.<br />
Choices are 200, 300, 400 or 600 DPI.<br />
300 400<br />
4-12<br />
Section 4 Scan Mode - Monochrome
2.6 Format<br />
Press the “Format” button to toggle through the file formats available.<br />
TIF-G4 - tif format Group 4 level compressed<br />
TLC - <strong>KIP</strong> format compressed<br />
CAL-G4 - Cals Group 4 level<br />
PDF - PDF Level 3<br />
DWF - Design Web Format (AutoCAD)<br />
Multipage TIF-G4 - Tif format Group 4 level compressed<br />
Multipage PDF - PDF Level 3<br />
Multipage DWF - Design Web Format (AutoCAD)<br />
Select the file type required to save the image into this format.<br />
TLC Cals<br />
For a Multipage scan, select the desired Multipage format. Start button will prompt for next<br />
original.<br />
When finished scanning, select the Close File button to finalize the multipage file.<br />
4-13<br />
Section 4 Scan Mode - Monochrome
2.7 Advanced Settings<br />
The Advanced Setting button contains the additional parameters on a sub screen:<br />
a) Invert<br />
b) Mirror<br />
c) Stamp (Water Mark)<br />
d) Lead Edge Adjustment<br />
e) Trail Edge Adjustment<br />
Make any required adjustments / selections and press “OK” to accept. The selections will<br />
now be displayed on the main Scan screen.<br />
2.7.1 Mirror<br />
Select this button to “mirror” a scan. This can be utilized on originals that<br />
have the actual image on the reverse side such as older “sepia” or “film”<br />
documents.<br />
2.7.2 Invert<br />
Select this button to change a region of white to black and visa versa of a<br />
scanned document. This is normally used for “negative” documents or<br />
“blue prints”.<br />
4-14<br />
Section 4 Scan Mode - Monochrome
2.7.3 Stamp<br />
Select “Stamp” to display another sub screen. This will allow the selection of a “Stamp” or<br />
“Water Mark” to be placed on the scanned image. It will be embedded digitally into the<br />
image.<br />
a) Use the Arrow buttons to scroll<br />
through the available stamps and<br />
then select the stamp from the list.<br />
b) The Stamp button will now display the stamp<br />
selected.<br />
NOTE<br />
The list of “Stamps” is loaded into Scan Mode by the system administrator or key<br />
operator. They can not be altered or modified in any manner on the <strong>KIP</strong> printer’s<br />
UI.<br />
Please contact these persons for any additional stamps that may be required.<br />
Please see “<strong>KIP</strong> Request” for these functions.<br />
4-15<br />
Section 4 Scan Mode - Monochrome
2.7.4 Leading Edge Adjustment<br />
The leading edge of a scan can be altered. ( +/- 4” )<br />
a) additional void area can be placed on the lead edge of a scan or<br />
b) image can be removed (such as a binding strip or a file hanger)<br />
Image<br />
Leading Edge + Leading Edge -<br />
<strong>KIP</strong><br />
Scanner<br />
Original<br />
<strong>KIP</strong><br />
Image<br />
Scanner<br />
Scan<br />
Added margin<br />
To adjust the Leading Edge, use the arrows to denote the quantity you wish to add or<br />
remove.<br />
Touch the value displayed area to reset the quantity.<br />
4-16<br />
Deleted image<br />
<strong>KIP</strong><br />
Image<br />
Scanner<br />
Original<br />
Image<br />
Scanner<br />
Scan<br />
Section 4 Scan Mode - Monochrome
2.7.5 Trailing Edge Adjustment<br />
The trailing edge of a scan can be altered. ( +/- 4” )<br />
c) additional void area can be placed on the bottom of a scan or<br />
d) image can be removed (such as a binding strip or a file hanger)<br />
<strong>KIP</strong><br />
Image<br />
Scanner<br />
Original<br />
Trail edge + Trail Edge -<br />
<strong>KIP</strong><br />
Image<br />
Scanner<br />
Scan<br />
Added trailing margin<br />
To adjust the Trailing Edge, use the arrows to denote the quantity you wish to add or<br />
remove.<br />
Touch the value displayed area to reset the quantity.<br />
Make any of the required adjustments / selections and press “OK” to accept. The<br />
selections will now be displayed on the main Scan screen.<br />
4-17<br />
<strong>KIP</strong><br />
Image<br />
Scanner<br />
Original<br />
Deleted trailing image<br />
<strong>KIP</strong><br />
Image<br />
Scan<br />
Section 4 Scan Mode - Monochrome
2.8 Mailbox<br />
This region of the Scan screen allows the user to select where the files will be placed.<br />
2.8.1 Selecting a Mailbox<br />
a) Use the arrow keys to scroll through the list as needed.<br />
b) Select the location by pressing on it.<br />
2.8.2 Removing a Mailbox<br />
a) Press the “-“ button on the main Scan screen.<br />
b) Select which “Mailbox” you wish to remove.<br />
NOTE<br />
The “Mailbox” removed also removes<br />
all documents images with that folder.<br />
ENSURE YOU HAVE BACKED UP or<br />
DOWNLOADED ANY NECESSARY<br />
FILES IN THE FOLDER PRIOR TO<br />
REMOVING IT IN THE NEXT STEP!<br />
4-18<br />
Section 4 Scan Mode - Monochrome
c) Press “Remove”.<br />
2.8.3 Creating a New Mailbox<br />
a) Press the Mailbox Button.<br />
b) The Mailbox Setup screen is displayed.<br />
4-19<br />
Section 4 Scan Mode - Monochrome
c) Select Mailbox Name. A screen keyboard will be displayed.<br />
Enter the new Mailbox name.<br />
d) Enter the new location using standard protocols of networking for scans to the:<br />
2.8.4 SMB Setup<br />
IPS Mailbox<br />
Set a name for the location<br />
Examples:<br />
Dsmith<br />
B_Project<br />
Team_XYZ<br />
Michele<br />
Access to these folders and the scanned images is preformed from the <strong>KIP</strong><br />
Request application. Please see the User Guide of “<strong>KIP</strong> Request” for the<br />
retrieval function.<br />
FTP Locations<br />
Please contact your network administrator for details on how to configure<br />
and load FTP locations into the <strong>KIP</strong> printer Scan Mode. (Administrator /<br />
Service Functions of the <strong>KIP</strong> printer) Please see your network administrator<br />
for access to your FTP and the retrieval of the documents from the FTP.<br />
2.8.4.1 Share Setup – Workstation/Server<br />
When setting up a share at a workstation or server, it is necessary to have<br />
some information ahead of time.<br />
• User must have rights to share a folder<br />
• User must know where the access rights are held<br />
o Rights are local to the PC or Domain (Active Directory)<br />
• File and Print Sharing must be enabled within the Windows XP firewall<br />
settings<br />
• User must be able to read, write and modify the destination SMB<br />
folder<br />
• User must know login username and password<br />
4-20<br />
Section 4 Scan Mode - Monochrome
2.8.4.2 Network Location (SMB/CIFS) – IPS Setup<br />
Server Message Block/Common Internet File System (SMB/CIFS) allows the user to create a<br />
semi-permanent connection to a network resource for scan to file.<br />
Function Button Description<br />
Mailbox Name Descriptor to be displayed on SCAN screen (Preceded by SMB:)<br />
This will turn green when connected<br />
Destination<br />
IP address or NetBIOS name of destination workstation/server<br />
Server/Workstation<br />
Domain Name of authorization provider (Domain server or workgroup<br />
workstation)<br />
Share Path Shared resource on destination workstation/server<br />
Username Login credentials on destination workstation/server<br />
Password Password for supplied username on destination<br />
workstation/server<br />
Test SMB Maps a network drive to the destination workstation/server<br />
Within the SCAN screen, press the Mailbox button to create an SMB connection.<br />
a) Touch the SMB button to display the SMB Mailbox creation dialog.<br />
b) Press the Mailbox Name button to enter a descriptive name for the SMB scan to file<br />
location. This description will be displayed on the SCAN screen with the label of SMB:<br />
[Mailbox Name].<br />
c) Touch Destination Server/Workstation button to enter the NetBIOS name or IP address<br />
of the destination server or workstation that the <strong>KIP</strong> IPS will connect to in order to allow for<br />
scan to file.<br />
a. This must be a server or workstation that the <strong>KIP</strong> IPS has access to via TCP/IP.<br />
b. Please ensure that the <strong>KIP</strong> printer has been networked properly and is “pingable”<br />
from the destination server/workstation.<br />
4-21<br />
Section 4 Scan Mode - Monochrome
d) Touch Domain button to enter the client authorization information. This entry will work in<br />
conjunction with the Username/Password entries as defined in later steps.<br />
c. Some facilities will have user credentials (SAM) stored on a central authorization<br />
server (Domain Controller/Active Directory Server) that will grant connection access<br />
to the <strong>KIP</strong> IPS for shared resources. If the <strong>KIP</strong> IPS is connecting to a workstation<br />
(WS01) that is a part of the Acme.com domain, then the user would enter Acme in<br />
the Domain section. The <strong>KIP</strong> IPS would get authorization credentials from the<br />
SVR01 server in order to scan to the “Scans” folder on the WS01 workstation<br />
(SSmith’s PC).<br />
4-22<br />
Section 4 Scan Mode - Monochrome
d. If the <strong>KIP</strong> IPS is in a workgroup setting (No Domain Controller/Active Directory<br />
Server), the authorization credentials (SAM) will be supplied by the destination<br />
workstation/server (WS06). If the user is connecting to a shared resource on a<br />
workstation (Scans folder) with the NetBIOS (computer) name of WS06, the user<br />
would input WS06 for the Domain section. The <strong>KIP</strong> IPS would get the authorization<br />
credentials from the WS06 workstation.<br />
e) Touch the Share Path button to enter the name of the shared folder on the destination<br />
workstation or server.<br />
a. The shared folder on the destination workstation must be accessible by the user as<br />
supplied in the Username setting.<br />
b. These permissions should include the ability to write and modify on this shared<br />
folder.<br />
f) Username and Password should be set as an accessible login username from either the<br />
workgroup workstation/server or the authentication server/domain controller.<br />
g) Touching on Test SMB will make the <strong>KIP</strong> IPS attempt to establish a connection to the<br />
destination workstation/server.<br />
a. The connection is established when the SMB mailbox is selected and is<br />
disconnected when:<br />
i. Switching Formats<br />
ii. Pressing the STOP button<br />
iii. Switching menus (SCAN, COPY, JOB INFO, “?”)<br />
iv. Selecting another mailbox<br />
v. Creating another SMB mailbox<br />
vi. Reset timer expiration<br />
vii. Log off<br />
4-23<br />
Section 4 Scan Mode - Monochrome
It is possible to scan all file formats to an SMB location. Please note that color image data is much<br />
larger and may take considerable network resources in order to transfer from the IPS to the SMB<br />
location. (A full color, 600 DPI, tiff packbit can be several gigabytes in size).<br />
When scanning multi page documents (PDF, DWF and TIFF), the images are scanned to a<br />
temporary location on the IPS and then transferred to the SMB location once the Close File button<br />
has been pressed.<br />
SMB Locations<br />
Please contact your network administrator for details on how to configure SMB locations<br />
on the remote server or workstation.<br />
2.8.4.3 FTP Site<br />
To load and access FTP locations on the <strong>KIP</strong> device please follow these steps:<br />
a) In Request, enable Advance Features by selecting the Options menu and selection<br />
Advanced Features<br />
b) Click Options and then select Find <strong>KIP</strong> Printers and the Add a Printer to this List.<br />
Select Set FTP Address and enter the necessary FTP information<br />
4-24<br />
Section 4 Scan Mode - Monochrome
c) Send to the <strong>KIP</strong> IPS by using Transfer and then Upload Settings to Printer<br />
d) At the <strong>KIP</strong> IPS, enter (?) and then Service. Once you are in the Service menu, (password<br />
required) use the arrow keys at the bottom until “Import Settings” is shown (this will appear<br />
grayed out at first) touch the button labeled Touch. This will import any new FTP settings<br />
and will be displayed on the SCAN screen. These will be in the form FTP: [FTP<br />
Description].<br />
4-25<br />
Section 4 Scan Mode - Monochrome
2.9 Start<br />
No function at this time in Scan Mode.<br />
All scans in Scan Mode are “Auto Start”.<br />
2.10 Reset / Stop<br />
This button has two functions.<br />
1) Press the Stop button on the UI to stop the current scan. The original<br />
will be ejected automatically. If not, open Top Cover to remove the<br />
original.<br />
2) Press the Reset button to restore the “default settings” in Scan Mode.<br />
Some of the default settings are determined in the Information / Help Screen of the<br />
UI. (see Scan Mode Configurations chapter)<br />
2.11 Re-Scan<br />
If the scanned image was not satisfactory, you can replace the last image<br />
scan by selecting this button and proceeding with the scan procedure as<br />
normal.<br />
2.12 View Last<br />
Allows the last scan to be reviewed again on the UI.<br />
2.13 Log Off<br />
This button may be displayed if accounting is enabled. Press this button to<br />
log off the current user after scanning has been completed.<br />
4-26<br />
Section 4 Scan Mode - Monochrome
Section 5<br />
Scan Mode - Color<br />
1. 0 Scan Mode – Color.......................................................................................................... 5- 2<br />
1.1 Main Screen ................................................................................................................. 5- 2<br />
1.2 Simple Scanning .......................................................................................................... 5- 3<br />
1.2.1 Select Scan Mode .................................................................................................... 5- 3<br />
1.2.2 Select Size Mode ..................................................................................................... 5- 3<br />
1.2.3 Select Original Image Type ...................................................................................... 5- 3<br />
1.2.4 Select Format........................................................................................................... 5- 4<br />
1.2.5 Select Mailbox.......................................................................................................... 5- 4<br />
1.2.6 Insert Original........................................................................................................... 5- 5<br />
1.2.7 Retrieve the File ....................................................................................................... 5- 5<br />
2. 0 Operation Details ............................................................................................................ 5- 6<br />
2.1 Main Screen ................................................................................................................. 5- 6<br />
2.2 Original......................................................................................................................... 5- 6<br />
2.2.1 Original Size Mode ................................................................................................... 5- 6<br />
2.2.2 Original Type............................................................................................................ 5- 6<br />
2.3 Original Size................................................................................................................. 5- 7<br />
2.3.1 Automatic Size ......................................................................................................... 5- 7<br />
2.3.2 Manual Size.............................................................................................................. 5- 7<br />
2.3.3 Hard Drive Space Monitor........................................................................................ 5- 8<br />
2.3.4 Rotation.................................................................................................................... 5- 9<br />
2.4 DPI ............................................................................................................................... 5- 9<br />
2.5 Format..........................................................................................................................5- 9<br />
2.6 Advanced Settings ....................................................................................................... 5-10<br />
2.6.1 Mirror........................................................................................................................ 5-10<br />
2.6.2 Invert ........................................................................................................................ 5-10<br />
2.6.3 Leading Edge Adjustment ........................................................................................ 5-10<br />
2.6.4 Trailing Edge Adjustment ......................................................................................... 5-11<br />
2.7 Mailbox.........................................................................................................................5-12<br />
2.7.2 Removing a Mailbox................................................................................................. 5-12<br />
2.7.3 Creating a New Mailbox ........................................................................................... 5-13<br />
2.7.4 SMB Setup ............................................................................................................... 5-14<br />
2.7.4.1 Share Setup – Workstation/Server .................................................................... 5-14<br />
2.7.4.2 Network Location (SMB/CIFS) – IPS Setup ...................................................... 5-15<br />
2.7.4.3 FTP Site............................................................................................................. 5-18<br />
2.8 Start.............................................................................................................................. 5-20<br />
2.9 Reset / Stop ................................................................................................................. 5-20<br />
2.10 Re-Scan ....................................................................................................................... 5-20<br />
2.11 View Last..................................................................................................................... 5-20<br />
2.12 Log Off .........................................................................................................................5-20<br />
5-1<br />
Section 5 Scan Mode - Color
2<br />
1<br />
1. 0 Scan Mode – Color<br />
1.1 Main Screen<br />
3 4<br />
5<br />
No. Name Function<br />
1 Mode Selects “Color Mode” while in Scan mode<br />
2 Original Size Use automatic settings or manually set width, length<br />
and rotation of the image.<br />
3 Original Type User Selects the type of original to scan. Also select<br />
either Eng/Arch Mode here.<br />
4 Quality Select the original image type to be scanned - Input<br />
5 DPI Scroll through the image resolution. (DPI)<br />
6 Format Scroll through formats the file will be saved to -<br />
output<br />
7 Advanced Settings Invert, mirror, and edge adjustments preformed /<br />
displayed with this button (sub screen)<br />
8 Reset / Stop Resets the system to default settings. Stops a scan<br />
in process<br />
9 Mailbox Select where the image will be stored after the scan<br />
(<strong>KIP</strong> Mailbox, FTP, SMB)<br />
10 View Last View the last scanned image<br />
11 Rescan Rescans the last image (replaces)<br />
5-2<br />
6<br />
Section 5 Scan Mode - Color<br />
7<br />
9<br />
8<br />
10<br />
11
1.2 Simple Scanning<br />
To scan to file in color, please follow these basic steps. The following chapters have<br />
details on adjustments and parameters that the user can change to modify color scans.<br />
1.2.1 Select Scan Mode<br />
On the lower region of the UI, select “SCAN” then select Color Mode in the upper left<br />
corner.<br />
1.2.2 Select Size Mode<br />
Select whether the document is an engineering or architectural size document. This will<br />
allow the automatic width detection to function.<br />
Engineering widths = 34, 22, 17, 11, and 8.5 inches<br />
Architecture widths = 36, 30, 24, 18, 12, and 9 inches<br />
1.2.3 Select Original Image Type<br />
Set the original Image type you will scan. The selections are:<br />
Line - used for simple color line documents<br />
Line / Photo - used for a combination of color lines & photos<br />
Photo - used for color photographic originals<br />
5-3<br />
Section 5 Scan Mode - Color
This will allow automatic image quality adjustments for the color scan.<br />
1.2.4 Select Format<br />
Press the button to scroll through the<br />
file formats available.<br />
TIF Packbit<br />
JPEG<br />
PDF Color<br />
Select a desired file format.<br />
1.2.5 Select Mailbox<br />
Select the location to where the file will<br />
be saved. Use the “Page Arrows” to<br />
view other choices currently available.<br />
NOTE<br />
The Mailboxes are predetermined by the system administrator or key operator.<br />
Please contact these persons for any additional locations that you may require. The<br />
“Mailbox” button will allow for additional location entries.<br />
5-4<br />
Section 5 Scan Mode - Color
1.2.6 Insert Original<br />
Using the guides on the feed table, center the original face up and push forward until the<br />
<strong>KIP</strong> <strong>3000</strong> accepts it.<br />
The <strong>KIP</strong> <strong>3000</strong> will automatically commence to scan. While this occurs the image will be<br />
displayed on the Operator Panel for your reference.<br />
1.2.7 Retrieve the File<br />
Depending on the “Mailbox” you may now access your scan from a PC connected to the<br />
LAN. This includes:<br />
a) from a FTP site (using Microsoft Windows Internet Explorer or other FTP<br />
software)<br />
b) from the “<strong>KIP</strong> IPS Mailbox” utilizing “<strong>KIP</strong> Request” to access the document.<br />
c) from SMB Location on remote server or workstation<br />
Please see the User Guides of these applications for details on their function.<br />
5-5<br />
Section 5 Scan Mode - Color
2. 0 Operation Details<br />
2.1 Main Screen<br />
On the lower region of the UI, select “SCAN” then select Color Mode in the upper left<br />
corner.<br />
This screen contains all user functions for scanning to file in color. The following pages<br />
details the functions and settings of each button and sub screens that can be used to<br />
adjust the scan parameters to achieve the required result.<br />
2.2 Original<br />
This region allows the setting of the Size Mode (Engineering or Architectural) and the<br />
Original Document type.<br />
2.2.1 Original Size Mode<br />
This button is used to select the Size Mode of Engineering or Architectural.<br />
This will allow the automatic width detection system to determine the image width when an<br />
original is placed in the <strong>KIP</strong> <strong>3000</strong>.<br />
Engineering widths = 34, 22, 17, 11, and 8.5 inches<br />
Architectural widths = 36, 30, 24, 18, 12, and 9 inches<br />
2.2.2 Original Type<br />
Select one of the three different predetermined original types. The selections are:<br />
a) Line - used for simple color line documents<br />
b) Line / Photo - used for a combination of color lines & photos<br />
c) Photo - used for color photographic originals<br />
5-6<br />
Section 5 Scan Mode - Color
Press the desired original setting from one of the three diagrams. This will allow automatic<br />
image quality adjustments for the next scan. Please note that the selection will be<br />
highlighted with a “black circle” and the icon will become white, as in the above example<br />
“Line/Photo”.<br />
2.3 Original Size<br />
This region is used to select the image size of original being scanned.<br />
2.3.1 Automatic Size<br />
For most scans, “Automatic” should be selected. This will allow the <strong>KIP</strong> <strong>3000</strong> to<br />
automatically determine the width and length of the scan without any user intervention.<br />
(Please also note “Original Size Mode” in 2.2.)<br />
2.3.2 Manual Size<br />
To select an original size manually, select Manual and a sub screen displays all current<br />
standard page sizes.<br />
a) Select a size or press “custom”.<br />
5-7<br />
Section 5 Scan Mode - Color
) Or use Custom to select a width.<br />
c) Set the width of the scan. Note that these are only Standard Sizes.<br />
d) Set a Standard Length or Custom Length – set the Custom length in the key pad<br />
and press enter.<br />
Standard Length Custom Length<br />
e) The cut length will now be displayed in the Manual button. In this example 18” width<br />
and a custom length of 25.8”.<br />
2.3.3 Hard Drive Space Monitor<br />
Located on the main screen of the <strong>KIP</strong> printer Scan mode, the Disk Use<br />
monitor provides a real-time display of remaining disk space on the <strong>KIP</strong><br />
printer’s hard drive. The monitor shows both the used space and the space<br />
available for image storage on the drive.<br />
5-8<br />
Section 5 Scan Mode - Color
2.3.4 Rotation<br />
The file can be saved rotated from the actual feed direction. This can be used to reduce<br />
the scan time on certain orientation of originals, when they are archived.<br />
Press the “Rotation” button to select either one of four settings:<br />
2.4 DPI<br />
Scroll through the DPI button to select the required scan resolution.<br />
Choices are 200, 300, 400 or 600 DPI.<br />
300 400<br />
2.5 Format<br />
Press the “Format” button to scroll through the file formats available.<br />
TIF Packbit<br />
JPEG<br />
PDF Color<br />
Select the file type required to save the image into this format.<br />
5-9<br />
Section 5 Scan Mode - Color
2.6 Advanced Settings<br />
The Advanced Setting button contains the additional parameters on a sub screen:<br />
a) Mirror<br />
b) Invert<br />
c) Lead Edge Adjustment<br />
d) Trail Edge Adjustment<br />
When any of the adjustments / selections is selected, the selections will now be displayed<br />
on the main Scan screen.<br />
2.6.1 Mirror<br />
Select this button to “mirror” a scan. This can be utilized on originals that<br />
have the actual image on the reverse side such as older “sepia” or “film”<br />
documents.<br />
2.6.2 Invert<br />
Select this button to change a region of white to black and visa versa of a<br />
scanned document. This is normally used for “negative” documents or<br />
“blue prints”.<br />
2.6.3 Leading Edge Adjustment<br />
The leading edge of a scan can be altered. ( +/- 4” )<br />
a) additional void area can be placed on the lead edge of a scan or<br />
b) image can be removed (such as a binding strip or a file hanger)<br />
Image<br />
Leading Edge + Leading Edge -<br />
<strong>KIP</strong><br />
Scanner<br />
Original<br />
<strong>KIP</strong><br />
Image<br />
Scanner<br />
Scan<br />
Added margin<br />
5-10<br />
Deleted image<br />
<strong>KIP</strong><br />
Image<br />
Scanner<br />
Original<br />
Image<br />
Scanner<br />
Scan<br />
Section 5 Scan Mode - Color
To adjust the Leading Edge, use the arrows to denote the quantity you wish to add or<br />
remove.<br />
Touch the value displayed area to reset the quantity.<br />
2.6.4 Trailing Edge Adjustment<br />
The trailing edge of each scan can be altered. ( +/- 4” )<br />
c) additional void area can be placed on the bottom of a scan or<br />
d) image can be removed (such as a binding strip or a file hanger)<br />
<strong>KIP</strong><br />
Image<br />
Scanner<br />
Original<br />
Trail edge + Trail Edge -<br />
<strong>KIP</strong><br />
Image<br />
Scanner<br />
Scan<br />
Added trailing margin<br />
To adjust the Trailing Edge, use the arrows to denote the quantity you wish to add or<br />
remove.<br />
Touch the value displayed area to reset the quantity.<br />
Make any of the required adjustments / selections and press “OK” to accept. The<br />
selections will now be displayed on the main Scan screen.<br />
5-11<br />
<strong>KIP</strong><br />
Image<br />
Scanner<br />
Original<br />
Deleted trailing image<br />
<strong>KIP</strong><br />
Image<br />
Scan<br />
Section 5 Scan Mode - Color
2.7 Mailbox<br />
This region of the Scan screen allows the user to select where the color files will be placed.<br />
2.7.1 Selecting a Mailbox<br />
a) Use the arrow keys to scroll through the list as needed.<br />
b) Select the location by pressing on it.<br />
2.7.2 Removing a Mailbox<br />
a) Press the “-“ button on the main Scan screen.<br />
b) Select which “Mailbox” you wish to remove.<br />
NOTE<br />
The “Mailbox” removed also removes<br />
all documents images with that folder.<br />
ENSURE YOU HAVE BACKED UP or<br />
DOWNLOADED ANY NECESSARY<br />
FILES IN THE FOLDER PRIOR TO<br />
REMOVING IT IN THE NEXT STEP!<br />
5-12<br />
Section 5 Scan Mode - Color
c) Press “Remove”.<br />
2.7.3 Creating a New Mailbox<br />
a) Press the Mailbox Button.<br />
b) The Mailbox Setup screen is displayed.<br />
5-13<br />
Section 5 Scan Mode - Color
c) Select Mailbox Name. A screen keyboard will be displayed.<br />
Enter the new Mailbox name.<br />
d) Enter the new location using standard protocols of networking for scans to the:<br />
2.7.4 SMB Setup<br />
IPS Mailbox<br />
Set a name for the location<br />
Examples:<br />
Dsmith<br />
B_Project<br />
Team_XYZ<br />
Michele<br />
Access to these folders and the scanned images is preformed from the <strong>KIP</strong><br />
Request application. Please see the User Guide of “<strong>KIP</strong> Request” for the<br />
retrieval function.<br />
FTP Locations<br />
Please contact your network administrator for details on how to configure<br />
and load FTP locations into the <strong>KIP</strong> printer Scan Mode. ( Administrator /<br />
Service Functions of the <strong>KIP</strong> printer ) Please see your network administrator<br />
for access to your FTP and the retrieval of the documents from the FTP.<br />
2.7.4.1 Share Setup – Workstation/Server<br />
When setting up a share at a workstation or server, it is necessary to have<br />
some information ahead of time.<br />
• User must have rights to share a folder<br />
• User must know where the access rights are held<br />
o Rights are local to the PC or Domain (Active Directory)<br />
• File and Print Sharing must be enabled within the Windows XP firewall<br />
settings<br />
• User must be able to read, write and modify the destination SMB<br />
folder<br />
• User must know login username and password<br />
5-14<br />
Section 5 Scan Mode - Color
2.7.4.2 Network Location (SMB/CIFS) – IPS Setup<br />
Server Message Block/Common Internet File System (SMB/CIFS) allows the user to create a<br />
semi-permanent connection to a network resource for scan to file.<br />
Function Button Description<br />
Mailbox Name Descriptor to be displayed on SCAN screen (Preceded by SMB:)<br />
This will turn green when connected<br />
Destination<br />
IP address or NetBIOS name of destination workstation/server<br />
Server/Workstation<br />
Domain Name of authorization provider (Domain server or workgroup<br />
workstation)<br />
Share Path Shared resource on destination workstation/server<br />
Username Login credentials on destination workstation/server<br />
Password Password for supplied username on destination<br />
workstation/server<br />
Test SMB Maps a network drive to the destination workstation/server<br />
Within the SCAN screen, press the Mailbox button to create an SMB connection.<br />
a) Touch the SMB button to display the SMB Mailbox creation dialog.<br />
b) Press the Mailbox Name button to enter a descriptive name for the SMB scan to file<br />
location. This description will be displayed on the SCAN screen with the label of SMB:<br />
[Mailbox Name].<br />
c) Touch Destination Server/Workstation button to enter the NetBIOS name or IP address<br />
of the destination server or workstation that the <strong>KIP</strong> IPS will connect to in order to allow for<br />
scan to file.<br />
a. This must be a server or workstation that the <strong>KIP</strong> IPS has access to via TCP/IP.<br />
b. Please ensure that the <strong>KIP</strong> printer has been networked properly and is “pingable”<br />
from the destination server/workstation.<br />
d) Touch Domain button to enter the client authorization information. This entry will work in<br />
conjunction with the Username/Password entries as defined in later steps.<br />
5-15<br />
Section 5 Scan Mode - Color
c. Some facilities will have user credentials stored on a central authorization server<br />
(Domain Controller/Active Directory Server) that will grant connection access to the<br />
<strong>KIP</strong> IPS for shared resources. If the <strong>KIP</strong> IPS is connecting to a workstation (WS01)<br />
that is a part of the Acme.com domain, then the user would enter Acme in the<br />
Domain section. The <strong>KIP</strong> IPS would get authorization credentials from the SVR01<br />
server in order to scan to the “Scans” folder on the WS01 workstation (SSmith’s PC).<br />
5-16<br />
Section 5 Scan Mode - Color
d. If the <strong>KIP</strong> IPS is in a workgroup setting (No Domain Controller/Active Directory<br />
Server), the authorization credentials will be supplied by the destination<br />
workstation/server (WS06). If the user is connecting to a shared resource on a<br />
workstation (Scans folder) with the NetBIOS (computer) name of WS06, the user<br />
would input WS06 for the Domain section. The <strong>KIP</strong> IPS would get the authorization<br />
credentials from the WS06 workstation.<br />
e) Touch the Share Path button to enter the name of the shared folder on the destination<br />
workstation or server.<br />
a. The shared folder on the destination workstation must be accessible by the user as<br />
supplied in the Username setting.<br />
b. These permissions should include the ability to write and modify on this shared<br />
folder.<br />
f) Username and Password should be set as an accessible login username from either the<br />
workgroup workstation/server or the authentication server/domain controller.<br />
g) Touching on Test SMB will make the <strong>KIP</strong> IPS attempt to establish a connection to the<br />
destination workstation/server.<br />
a. The connection is established when the SMB mailbox is selected and is<br />
disconnected when:<br />
i. Switching Formats<br />
ii. Pressing the STOP button<br />
iii. Switching menus (SCAN, COPY, JOB INFO, ?)<br />
iv. Selecting another mailbox<br />
v. Creating another SMB mailbox<br />
vi. Reset timer expiration<br />
vii. Log off<br />
5-17<br />
Section 5 Scan Mode - Color
It is possible to scan all file formats to an SMB location. Please note that color image data is much<br />
larger and may take considerable network resources in order to transfer from the IPS to the SMB<br />
location. (A full color, 600 DPI, tiff packbit can be several gigabytes in size).<br />
When scanning multi page documents (PDF, DWF and TIFF), the images are scanned to a<br />
temporary location on the IPS and then transferred to the SMB location once the Close File button<br />
has been pressed.<br />
SMB Locations<br />
Please contact your network administrator for details on how to configure SMB locations<br />
on the workstation.<br />
2.7.4.3 FTP Site<br />
To load and access FTP locations on the <strong>KIP</strong> device please follow these steps:<br />
a) In Request, enable Advance Features by selecting the Options menu and selection<br />
Advanced Features<br />
b) Click Options and then select Find <strong>KIP</strong> Printers and the Add a Printer to this List.<br />
Select Set FTP Address and enter the necessary FTP information<br />
5-18<br />
Section 5 Scan Mode - Color
c) Send to the <strong>KIP</strong> IPS by using Transfer and then Upload Settings to Printer<br />
d) At the <strong>KIP</strong> IPS, enter (?) and then Service. Once you are in the Service menu, (password<br />
required) use the arrow keys at the bottom until “Import Settings” is shown (this will appear<br />
grayed out at first) touch the button labeled Touch. This will import any new FTP settings<br />
and will be displayed on the SCAN screen. These will be in the form FTP:[FTP Description].<br />
5-19<br />
Section 5 Scan Mode - Color
2.8 Start<br />
No function at this time in Scan Mode.<br />
All scans in Scan Mode are “Auto Start”.<br />
2.9 Reset / Stop<br />
This button has two functions.<br />
1) Press the Stop button to stop the current scan. The original will be<br />
ejected automatically. If not, open Top Cover to remove the original.<br />
2) Press the Reset button to restore the “default settings” in Scan Mode.<br />
Some of the default settings are determined in the Information / Help<br />
Screen of the UI. (see Scan Mode Configurations chapter)<br />
2.10 Re-Scan<br />
If the scanned image was not satisfactory, you can replace the last image<br />
scan by selecting this button and proceeding with the scan procedure as<br />
normal.<br />
2.11 View Last<br />
Allows the last scan to be reviewed again on the UI.<br />
2.12 Log Off<br />
This button may be displayed if accounting is enabled. Press this button to<br />
log off the current user after the scanning has been completed.<br />
5-20<br />
Section 5 Scan Mode - Color
Section 6<br />
Job Info Screen<br />
1. 0 Job Info Screen 6- 2<br />
1.1 Main Screen – Summary 6- 2<br />
2. 0 Operation Details 6- 3<br />
2.1 Job List - Main Screen 6- 3<br />
2.2 User Name 6- 4<br />
2.3 Job – Number 6- 4<br />
2.4 Status 6- 5<br />
2.5 Type 6- 5<br />
2.6 Total 6- 5<br />
2.7 Delete 6- 6<br />
2.8 Change of Media in a Print Job 6- 7<br />
2.9 To Top 6- 8<br />
2.10 Pause 6- 8<br />
2.11 Page Scroll 6- 9<br />
2.12 Media Information 6- 9<br />
2.13 Change Media Information 6- 10<br />
2.14 Job History 6- 11<br />
6-1<br />
Section 6 Job Info Screen
2<br />
1. 0 Job Info Screen<br />
1.1 Main Screen<br />
3<br />
11<br />
No. Name Function<br />
1 Mode Selects the “Mode” of the system. (Job Mode for this<br />
screen shown)<br />
2 User Name – Job # Display the User and any user info for the job ID. A job<br />
can be selected for other functions noted below.<br />
3 Media Information Displays and allows change of the Width and Type.<br />
Shows the amount remaining per roll deck. (two or four<br />
rolls depended on system)<br />
4 Status Shows the current status of a job and media selection.<br />
5 Type Displays a copy or network print job<br />
6 Total Displays the total number of prints and current number<br />
printed.<br />
7 To Top After a job is selected (see #2) the position in the queue<br />
can be changed to the next job printed.<br />
8 Pause Pauses printer to allow media change, etc<br />
9 Delete After a job is selected (see #2) it can be removed from<br />
printing.<br />
10 Up/Down Scrolls through pages in the queue if so available.<br />
11 Job Info/Job History Switch Switches between Job Info and Job History screen if<br />
enabled.<br />
6-2<br />
1<br />
4<br />
5<br />
6<br />
Section 6 Job Info Screen<br />
7<br />
8<br />
9<br />
10
2. 0 Operation Details<br />
The Job Info screen is used to view or manage the current copy or prints jobs on the <strong>KIP</strong><br />
5000.<br />
2.1 Job List - Main Screen<br />
All jobs that are currently printing or are waiting to print are displayed in this area.<br />
You may view a jobs details, (or for other functions described further in this manual) by<br />
selecting the job from the list<br />
6-3<br />
Section 6 Job Info Screen
2.2 User Name<br />
Displays the “Name” or the “owner” of the job<br />
This information is obtained from fields within:<br />
a) <strong>KIP</strong> Request<br />
b) <strong>KIP</strong> Windows Driver<br />
c) <strong>KIP</strong> AutoCAD Driver<br />
d) Or from the Accounting Fields on the copier when accounting is<br />
enabled<br />
Please see respective User Guides for detailed information<br />
An example screen from Request:<br />
2.3 Job Number<br />
Displays the “Job Number” or details regarding the job<br />
This information is obtained from fields within:<br />
e) <strong>KIP</strong> Request<br />
f) <strong>KIP</strong> Windows Driver<br />
g) <strong>KIP</strong> AutoCAD Driver<br />
h) Or from the Accounting Fields on the copier / scanner when<br />
accounting is enabled<br />
An example from Copy / Scan Accounting:<br />
6-4<br />
Section 6 Job Info Screen
2.4 Status<br />
Displays the current “Status” of a job.<br />
Displays one of the following:<br />
a) Processing – job is currently printing<br />
b) On Hold – puts the job in the queue but will not print until<br />
a valid media type is applied<br />
c) Vellum – Media required - Vellum<br />
d) Film – Media required - Film<br />
e) Bond – Media required - Bond<br />
2.5 Type<br />
Displays the source of the job, jobs can be sent from the network or come from the copier<br />
functions.<br />
For network jobs, the following symbol is displayed:<br />
For copy job the following symbol is displayed:<br />
2.6 Total<br />
Displays the number of prints, this includes:<br />
a) the quantity in each job<br />
b) the amount remaining , when a job is printing.<br />
6-5<br />
Section 6 Job Info Screen
2.7 Delete<br />
To remove a job from the Job list:<br />
a) Select the job to remove<br />
Another Screen will appear.<br />
b) Press the Delete button<br />
c) The job will be removed from the list.<br />
6-6<br />
Section 6 Job Info Screen
2.8 Change Media Type in Print Job<br />
To change the media type in a job that may be in the job list:<br />
a) Select the job<br />
b) Job Information screen will appear.<br />
c) Press the Bond, Vellum<br />
or Film button to set the<br />
new media type for this<br />
job.<br />
6-7<br />
Section 6 Job Info Screen
2.9 To Top<br />
If a job in the list is required urgently and there are other jobs in the list prior to it, the job<br />
can be moved to the top of the queue.<br />
a) Select the job from the list<br />
b) Press the “To Top” button<br />
c) The list will be updated with urgent job to be printed next.<br />
2.10 Pause<br />
To pause all print jobs (to replace paper or perform another task that<br />
may require the printer to pause) press the pause button.<br />
6-8<br />
Section 6 Job Info Screen
2.11 Page Scroll<br />
Arrows may appear in the lower right corner of the screen to scroll through<br />
the pages of jobs. Please note that the total number of pages will be<br />
displayed as well as the current page.<br />
2.12 Media Information<br />
At the top of the Job List Screen is the region that displays the current media loaded in <strong>KIP</strong><br />
5000. Please note that only rolls the printer has will be displayed.<br />
Amount Remaining Type<br />
Roll Deck Number Width<br />
a) Roll Deck Number<br />
b) Amount Remaining: shows the quantity of media in ¼ steps.<br />
Example: Roll 1 is full<br />
Roll 2 is ¼ full<br />
Roll 3 is ¾ full<br />
Roll 4 is also full<br />
If no media installed then all bars would be empty<br />
c) Type: Shows the media type ( set by User )<br />
Example: Roll 1 is Bond<br />
Roll 4 is Vellum<br />
d) Width: Shows the set width ( set by User )<br />
Example: Roll 1 is 30”<br />
Roll 2 is 36”<br />
Roll 3 is 24”<br />
Roll 4 is 11”<br />
6-9<br />
Section 6 Job Info Screen
2.13 Change Media Information<br />
At the top of the Job List Screen is the region that displays the current media loaded in <strong>KIP</strong><br />
<strong>3000</strong>. Please note that only rolls the printer has will be displayed.<br />
a) Touch any blank blue area of this region to the set media type and width in all roll<br />
decks<br />
b) Select the correct media width and type for each deck as required ( two roll model<br />
screen shown below )<br />
c) Select OK to set<br />
d) The new settings will be noted on the top of the Job Info Screen<br />
6-10<br />
Section 6 Job Info Screen
2.14 Job History<br />
<strong>KIP</strong> Job History can be used to call up and print jobs that were previously printed. By<br />
selecting a job from the Job History list, the job can be changed and resubmitted for<br />
printing.<br />
1. To use the <strong>KIP</strong> Job History select the Job Info Button and click on the Current<br />
Job button<br />
2. The Job History Information will now be displayed on the screen and select the<br />
job to be edited.<br />
3. Select the Edit Button to access the available options for the current selected job.<br />
6-11<br />
Section 6 Job Info Screen
4. Users have the option to change Accounting information, Media type, Number of<br />
Originals and number of sets. Or to delete the job from History.<br />
5. When all changes (if any) are complete select the Submit button to send the job<br />
to the printer.<br />
6-12<br />
Section 6 Job Info Screen
Section 7<br />
“?” Screen<br />
1.0 ? – Configuration Screen ...................................................................................7- 2<br />
1.1 Overview ...................................................................................................7- 2<br />
1.2 “?” Screen – General.................................................................................7- 3<br />
2.0 Main Screen - Details..........................................................................................7- 4<br />
2.1 Information Region ....................................................................................7- 4<br />
2.1.1 Meter A .....................................................................................7- 4<br />
2.1.2 Total Run ..................................................................................7- 5<br />
2.1.3 Meter B .....................................................................................7- 5<br />
2.1.4 Scan Count...............................................................................7- 5<br />
2.1.5 Scan Count- Temp ...................................................................7- 5<br />
2.1.6 Software version.......................................................................7- 5<br />
2.1.7 Firmware Version .....................................................................7- 5<br />
2.1.8 IPS Number ..............................................................................7- 5<br />
2.1.9 Machine Serial Number ............................................................7- 6<br />
2.2 Supplier / Technical Support .....................................................................7- 6<br />
3.0 User Guides.........................................................................................................7- 7<br />
4.0 Configuration.......................................................................................................7- 8<br />
4.1 Printer Density...........................................................................................7- 8<br />
4.2 Power Save Settings .................................................................................7- 9<br />
4.3 Default Mode .............................................................................................7- 9<br />
4.4 Master Lead / Trail Adjustment .................................................................7-10<br />
4.5 Test pattern ...............................................................................................7-11<br />
4.6 Options......................................................................................................7-11<br />
4.7 Network .....................................................................................................7-11<br />
4.8 Reset Timer...............................................................................................7-11<br />
4.9 Language ..................................................................................................7-12<br />
4.10 Inch or Metric Units ..................................................................................7-12<br />
4.11 Copy and Scan Menu Defaults.................................................................7-13<br />
4.12 Fold ..........................................................................................................7-14<br />
4.13 Cut Sheet .................................................................................................7-14<br />
4.14 Interrupt....................................................................................................7-14<br />
4.15 Reset Job Info ..........................................................................................7-15<br />
4.16 Reboot IPS...............................................................................................7-15<br />
4.17 Current Time ............................................................................................7-15<br />
5.0 Color Configuration ............................................................................................7-16<br />
5.1 Manufacturer .............................................................................................7-16<br />
5.2 Printer Model .............................................................................................7-16<br />
5.3 Media Type................................................................................................7-17<br />
5.4 Color Printer Destination IP.......................................................................7-17<br />
5.5 Color Printer Calibration ............................................................................7-18<br />
6.0 Other Buttons......................................................................................................7-20<br />
7-1 Section 7 “?” Screen
1.0 Help – Configuration Screen<br />
1.1 Overview<br />
The <strong>KIP</strong> printer has the ability to display information about the system and allow<br />
detailed configuration or setting of the <strong>KIP</strong> printer for Copy and Scan modes.<br />
It also has visual user guides which can assist the user in perform the functions<br />
of the <strong>KIP</strong> printer.<br />
To Enter the “Help – Configuration” screen press on the “?” on the bottom right of<br />
the <strong>KIP</strong> printer user interface and then press the CONFIGURATION button.<br />
Some of the configurable settings include:<br />
a) Language<br />
b) Sleep Timers<br />
c) Energy Star - Mode<br />
d) Reset Timer for Memory and Default Settings<br />
e) Printer Density<br />
f) Master Lead / Trail Edge<br />
g) Default Mode<br />
h) Units (Metric or Inch)<br />
i) Default Original Size Mode<br />
j) Quality / Scan Speed<br />
k) Number of Rolls<br />
l) Shading<br />
m) Test patterns<br />
n) Enable Options<br />
o) Network IP settings<br />
Some of the above settings will require access by the system administrator, key<br />
operator or a certified service technician.<br />
7-2 Section 7 “?” Screen
2<br />
3<br />
1.2 “?” Screen – General<br />
No. Name Function<br />
1 Mode Selects the “Mode” of the system. (Help Mode<br />
shown)<br />
2 Information Region Displays meter counts and version number of<br />
the system.<br />
3 Support / Supplies Displays the contact information for technical<br />
support and printer supplies.<br />
4 <strong>KIP</strong> System Guide Basic guide for features and functions<br />
5 Configuration Enters the settings and configurations modes.<br />
6 Configuration Enters the settings and configurations modes.<br />
7 Print This Screen Prints the main “?” screen on the <strong>KIP</strong> printer<br />
8 Service Password protected area for <strong>KIP</strong> authorized<br />
technician use.<br />
9 Color Config Configures the optional color scan and color<br />
copy features.<br />
7-3 Section 7 “?” Screen<br />
1<br />
4<br />
5<br />
6<br />
7<br />
8<br />
9
2.0 Main Screen - Details<br />
2.1 Information Region<br />
This area of the Screen includes meter counts and software versions.<br />
2.1.1 Meter A<br />
Displays the total number of units run on the printer. This counter should match<br />
the hard counter on the right mid- front section on the printer. This unit is in<br />
square feet in North America and in Square Meters in all other countries. (when<br />
printer set to metric mode)<br />
English mode: 1 count = one square foot<br />
Metric Mode: 1 count = one square meter<br />
NOTE<br />
If this counter differs from the hard counter on the printer, contact your local<br />
service company!<br />
The units of this counter are from the internal processor of the printer and can<br />
be “reset” if care is not taken upon replacement of the DC Controller if ever so<br />
needed. Please see <strong>KIP</strong> printer’s Service Manual for details on the setting<br />
procedures.<br />
Any discrepancies: the hard counter shall be taken as the correct value!<br />
7-4 Section 7 “?” Screen
2.1.2 Total Run<br />
This meter counts the total number of linear meters run on the printer in all<br />
countries.<br />
One count = one linear meter<br />
NOTE<br />
The units of this counter are from the internal processor of the printer and<br />
cannot be “reset” unless the DC Controller is replaced or FIRed.<br />
Please see <strong>KIP</strong> printer’s Service Manual for details on the setting procedures.<br />
Any discrepancies: the hard counter shall be taken as the correct value!<br />
2.1.3 Meter B<br />
This counter can be reset at any time to count the units in a particular job. The<br />
date of last “reset” is also displayed. This counter’s units are the same as Meter<br />
A. Press the reset button to start at “0”.<br />
2.1.4 Scan Count<br />
Displays the total scan count of the “imaged” area. If the original was larger than<br />
the saved imaged area only the saved imaged area is recorded. If the incorrect<br />
original size was selected, the selected will be recorded.<br />
Example:<br />
With a 24x36 original<br />
1) If the original was feed 36” wide with a 36” wide setting on the User<br />
Interface then 6 sq ft recorded.<br />
2) If the 36” wide original was scanned in at a 24” wide manual setting,<br />
the size will be recorded as 24x24 or 2 square feet.<br />
2.1.5 Scan Count- Temp<br />
This counter can be reset at any time to count the units in a particular job if so<br />
required. The date of last “reset” is also displayed. This counter’s units are the<br />
same as in Scan Count. Press the reset button to start at “0”.<br />
2.1.6 Software version<br />
Displays the software IPS version for technical support.<br />
2.1.7 Firmware Version<br />
Displays the printer firmware version for technical support.<br />
2.1.8 IPS Number<br />
Displays the current IPS number, this is required for any optional upgrades to the<br />
<strong>KIP</strong> printer.<br />
7-5 Section 7 “?” Screen
2.1.9 Machine Serial Number<br />
Displays the <strong>KIP</strong> printer hardware serial number, this is also located on the lower<br />
rear of the printer.<br />
NOTE<br />
If this serial number differs from the “hard coded” number on the lower rear of<br />
the printer, contact your local service company! The hard code serial number is<br />
to be taken as correct in case of any discrepancies.<br />
2.2 Supplier / Technical Support<br />
Displays the contact information for <strong>KIP</strong> printer supplies and service. This region<br />
should display your local Authorized <strong>KIP</strong> dealers’ information. If this information<br />
is incorrect, please contact your <strong>KIP</strong> dealer.<br />
7-6 Section 7 “?” Screen
3.0 User Guides<br />
Press the User Guides button to gain access to the <strong>KIP</strong> printer User Guides on<br />
the <strong>KIP</strong> printer.<br />
The User guides cover the most basic functions of the system operations<br />
including media / toner replacement on the <strong>KIP</strong> printer. For comprehensive<br />
details please consult this<br />
User Manual.<br />
a) Select this function<br />
when assistance is<br />
required with.<br />
b) Use the arrow<br />
buttons to move<br />
through the guide.<br />
c) Press OK at any time<br />
to exit the guides.<br />
7-7 Section 7 “?” Screen
4.0 Configuration<br />
There are six pages in the Configuration.<br />
Page 1 of 6<br />
7-8 Section 7 “?” Screen
4.1 Power Save Settings<br />
The <strong>KIP</strong> printer incorporates timers to save power and place the printer in “cold<br />
sleep mode” to suit individual company production requirements. These timers<br />
can be used to automatically turn off the printer when the “office is closed”, for<br />
example overnight.<br />
Energy Star Settings – Energy Star compliant settings require that the printer<br />
goes to Warm Sleep after 15 minutes and into Cold Sleep after 90 minutes of<br />
inactivity. These are the factory setting and can be achieved by selecting “Reset”.<br />
There are two sleep mode settings to choose from, only one can be active at a<br />
time and these are locked by default in the Services settings.<br />
1. Warm/Cold Sleep Timers – This timer can be set to put the printer into a<br />
warm/cold sleep mode after a predetermined period of inactivity.<br />
2. Sleep Time – This time is used in conjunction with the computers clock<br />
and is used to put the Printer to sleep at a pre-set time and wake the<br />
printer back up at a pre-set time.<br />
Locked or Unlocked in “Service”<br />
a) If the Timers are locked they must first be unlocked in Service Menu. (by a<br />
certified Service Technician)<br />
b) Set the timers by pressing on the hour, minutes and AM/PM as needed.<br />
c) If the printer is required during the “sleep” period, it will “awake”, produce<br />
the prints and then ”fall asleep” again, 15 minutes later.<br />
4.2 Default Mode<br />
Sets which screen will be the default, Scan, Copy or<br />
Job Info Mode dependent of the installation environment<br />
requirement.<br />
7-9 Section 7 “?” Screen
4.3 Monochrome Quality Settings<br />
Clicking this button will return the main COPY and SCAN settings to the default<br />
factory values.<br />
Page 2 of 6<br />
4.4 Master Lead / Trail Adjustment<br />
The leading and trailing edges on copies or scans can be<br />
adjusted to best suit user requirements. This adjustment adds<br />
or removes image / media from all scans and copies and<br />
should be considered a default setting of such.<br />
7-10 Section 7 “?” Screen
4.5 Test pattern<br />
A variety of test patterns may be printed from the <strong>KIP</strong> printer operator panel<br />
on an on-demand basis. The following four predefined test patterns are<br />
available to assist in pen table selection and overall quality verification.<br />
36” x 60” tif – Used to test long printing and calibrate scan/copy operations<br />
17” x 11” plt – Used to calibrate lead/trail edge settings<br />
36” x 24” plt – Used to calibrate lead/trail edge settings<br />
36” x 24” hprtl – Used to test output of mixed raster and vector data<br />
4.6 Options<br />
Enables options on the <strong>KIP</strong> printer. Please contact your local dealer for more<br />
details and for the Key Code for your system.<br />
NOTE<br />
Incorrect codes may prevent your system from functioning. Please do not enter or<br />
modify the current code without your supervisor’s permission. The codes may be<br />
locked and only accessed granted by a technician.<br />
4.7 Network<br />
Please see the <strong>KIP</strong> printer’s manual.<br />
NOTE<br />
Incorrect settings may prevent your system from functioning. Please do not enter<br />
or modify without your Network Administrators permission. Access to modify may<br />
be locked and only accessed granted by a technician.<br />
4.8 Reset Timer<br />
<strong>KIP</strong> printer’s system can be configured to revert to the Log-In<br />
screen after a predetermined period of inactivity. From this<br />
screen, users must enter a username and password before<br />
use (if required by system administrator). This Reset Timer<br />
will also revert all settings to the default values after the<br />
timer has expired.<br />
7-11 Section 7 “?” Screen
Page 3 of 6<br />
4.9 Language<br />
Set the UI into a desired language.<br />
4.10 English or Metric Units<br />
Set the system from “English Mode” to “Metric Mode” by pressing the English or<br />
Metric button. This will effect the entire <strong>KIP</strong> printer System, including Scan, Print<br />
and Copy. Please note that the printer must be set to the correct size mode for<br />
proper print function.<br />
7-12 Section 7 “?” Screen
Page 4 of 6<br />
4.11 Copy and Scan Menu Defaults<br />
Each <strong>KIP</strong> printer provides powerful options regarding the preferred condition of the<br />
system upon start up. <strong>KIP</strong> printer operators may designate features to be active when<br />
the system is powered on to ensure efficient use.<br />
1) Set up Copy or Scan Modes in their main menu to the desired features<br />
2) Access the configurations menu by pressing (?)<br />
3) Select the “Configuration” button<br />
4) Press the “Set Copy Defaults” or “Set Scan Defaults” button<br />
5) Presets for either the Copy or Scan screens have now been designated.<br />
7-13 Section 7 “?” Screen
4.12 Fold<br />
Sets the system to accept fold parameter loaded by <strong>KIP</strong> Request and enables<br />
the pull downs on the screens. Please contact your local certified service<br />
technician for configuration of this feature.<br />
4.13 Cut Sheet<br />
Enables / Disables the cut sheet function, which may not be required in certain<br />
installation.<br />
4.14 Interrupt<br />
Allows the Interrupt button to function in Copy Mode.<br />
a) Enabled = allows the user to pause all network print jobs to allow copies to<br />
be printed first.<br />
b) Disabled = all copy jobs will be placed in the queue as the order they are<br />
received within any network print jobs.<br />
7-14 Section 7 “?” Screen
Page 5 of 6<br />
4.15 Reset Job Info<br />
If the current job in the Job Info queue is printing<br />
unsuccessfully, the user can manually cancel the<br />
file within that job. This is done by going into the<br />
“Help/Info” screen and then to “Configuration”.<br />
Select the “Reset Job Info” button. An<br />
identification sheet will print out and the print<br />
queue can now continue printing.<br />
4.16 Reboot IPS<br />
This button will restart the IPS, when the system is not responding / printing<br />
correctly.<br />
4.17 Current Time<br />
Set the current time using the arrow buttons. Please note that the Time Zone<br />
may need to be set. Please contact your Local <strong>KIP</strong> Dealer to set the correct Time<br />
Zone.<br />
7-15 Section 7 “?” Screen
Page 6 of 6<br />
4.18 Copy Density<br />
Sets the printer toner density level. This affects all images that are sent via the<br />
<strong>KIP</strong> IPS COPY menu.<br />
4.19 Printer Density<br />
Sets the printer toner density level. This affects all images that are sent via <strong>KIP</strong><br />
Request, <strong>KIP</strong> Windows Driver, AutoCAD driver, <strong>KIP</strong> PrintNet, LPR, etc.<br />
7-16 Section 7 “?” Screen
Color Configuration<br />
Color function is an option with the <strong>KIP</strong> system. Please contact your local dealer<br />
to acquire these functions if not already enabled.<br />
This menu will allow<br />
a) A third party color printer to be connected to the <strong>KIP</strong> IPS.<br />
b) The <strong>KIP</strong> 600 to be calibrated to the printer and media type. This is a<br />
simple closed loop calibration.<br />
5.1 Manufacturer<br />
For color mode operation (copy / scan), select from the list your third party color<br />
printer’s manufacturer. If the manufacturer is not listed, it is not supported by the<br />
<strong>KIP</strong> system.<br />
5.2 Printer Model<br />
a) After the manufacturer is selected, the model of your printer must be chosen.<br />
b) Please scroll through the list using the arrow buttons until your printer model<br />
is displayed.<br />
c) Select the model.<br />
7-17 Section 7 “?” Screen
5.3 Media Type<br />
Only some models of some manufacturers will require the media<br />
to be set. If displayed, select the media type that is loaded and will<br />
be copied onto.<br />
5.4 Color Printer Destination IP<br />
The specified printer will have an IP address assigned to<br />
spool data to it. Please enter the IP address here. Please<br />
contact your local IT administrator for this information.<br />
7-18 Section 7 “?” Screen
5.5 Color Printer Calibration<br />
The six modes displayed in this screen<br />
reference the six modes in the “Copy” and<br />
“Scan” screens of the UI.<br />
a) On the right side of this screen<br />
shows if the mode has been<br />
calibrated.<br />
b) To calibrate a copy / scan mode<br />
select it.<br />
c) An “x” will appear beside the mode<br />
to be calibrated.<br />
d) Press “Print Calibration Target” button and an arrow with multicolored<br />
blocks will start to print from the device.<br />
e) After the target is printed and has time to<br />
dry completely, (from inkjet or bubble jet<br />
process) trim the target with a scissor to<br />
8.5 x 11 size (remove any excess media)<br />
and then press the Scan Calibration<br />
Target button.<br />
f) Insert the target face up in the center of the <strong>KIP</strong> 600 noting the arrow’s<br />
direction.<br />
g) After the scan is completed, the IPS will automatically calibrate the<br />
scanner - media – mode. It will place a “check” beside the calibrated mode,<br />
set the date it was calibrated and allow function of this mode in color Copy<br />
and Scan Modes of the <strong>KIP</strong> printer.<br />
7-19 Section 7 “?” Screen
How to calibrate the <strong>KIP</strong> 600 for Color Printer Configuration<br />
(For first copy / scan in color mode operation);<br />
1. Specify your color printer. (See 5.1 to 5.4)<br />
2. Select all of the following 4 modes.<br />
3. Perform the above d) to g).<br />
4. When finished all of the modes, turn the <strong>KIP</strong> 600 off and back on again.<br />
6.0 Other Buttons<br />
6.1 Service<br />
This button is used to access service technician functions of the IPS. It is<br />
password protected to prevent unwanted changes to the <strong>KIP</strong> printer.<br />
6.2 Print This Screen<br />
This button will print the main “?” screen. This include the meter counts, versions,<br />
etc. which are printed on the <strong>KIP</strong> printer. This can be useful for troubleshooting or<br />
for record keeping.<br />
7-20 Section 7 “?” Screen
Section 8<br />
Windows Driver<br />
8-1<br />
Page<br />
1. 0 Introduction 8- 2<br />
1.1 Introduction 8- 2<br />
1.2 Option Screen – Overview 8- 3<br />
2. 0 Function / Feature Details 8- 4<br />
2.1 Output Format 8- 4<br />
2.2 Orientation 8- 5<br />
2.3 Scaling 8- 5<br />
2.4 Copies 8- 5<br />
2.5 Media Type 8- 5<br />
2.6 Paper Size 8- 5<br />
2.7 Resolution 8- 6<br />
2.8 Halftone Color Adjustment 8- 6<br />
2.9 Management 8- 6<br />
2.10 Header 8- 7<br />
2.11 Folder 8- 7<br />
2.12 Mirrored Output 8- 7<br />
2.13 Reverse Collate 8- 7<br />
2.14 Stamps 8- 8<br />
3. 0 Installation 8- 9<br />
3.1 Prerequisites 8- 9<br />
3.2 Installation Process – Automatic 8- 10<br />
3.3 Installation Process – Manual 8- 13<br />
3.4 LPD / LPR Port 8- 15<br />
3.5 Upgrade 8- 15<br />
4. 0 Appendix 8- 22<br />
4.1 File Structure 8- 22<br />
4.2 Printing Hints 8- 24<br />
Section 8 Windows Driver
1. 0 Introduction<br />
1.1 Introduction<br />
The <strong>KIP</strong> Unified Windows Printer Driver (KUWPD) allows windows printing from Microsoft<br />
Windows NT4 / 2000 / XP / x64 Operating systems, as well as 2003 Server based<br />
applications.<br />
The <strong>KIP</strong> Unified Windows Printer Driver is available for download from your local <strong>KIP</strong><br />
website and is also supplied with your <strong>KIP</strong> <strong>3000</strong> Printer on the software CD.<br />
8-2<br />
Section 8 Windows Driver
1.2 Option Screen - Overview<br />
Beginning at the top of the layout above, these are the main features on the KUWPD<br />
Name Feature / Function<br />
Output Format Selects the type of “language” for driver output<br />
Orientation Rotation of the page<br />
Scaling Allows scaling of an image to the page size if not<br />
supported in the application.<br />
Copies Selects the total number of prints<br />
Media Type Selects the output media type<br />
Paper Size Selects the page size from standard sizes or<br />
create a custom page size.<br />
Resolution Select the resolution to match the printer DPI<br />
Halftone Color Adjustment Allows dither pattern change from various colors<br />
from the within an application to the printed<br />
document.<br />
Management Allows accounting to be used from windows<br />
applications.<br />
Header Places a text header on the print for quick<br />
document identification<br />
Folder Allows the document to be folded (with optional<br />
folder)<br />
Mirrored Output Mirrors the image on the print<br />
Reverse Collate In a multi page document, reverse the print order<br />
8-3<br />
Section 8 Windows Driver
2. 0 Function Details<br />
2.1 Output Format<br />
The KUWPD improves support for many Windows applications by providing dual output<br />
printer language capabilities. Selecting the Output Format in “Printing Preferences” or<br />
“Document Defaults” (NT4), before entering an application will select the proper output<br />
method.<br />
<strong>KIP</strong> GL Output Format<br />
The first output format the KUWPD is capable of is <strong>KIP</strong> GL (HPGL2/HP-<br />
RTL). CAD applications that may not have a compatible driver available can<br />
utilize <strong>KIP</strong> GL and achieve improved quality. The <strong>KIP</strong> GL output can be<br />
further enhanced by making changes to the Pen Table on the <strong>KIP</strong> Controller.<br />
Features already in the Default Pen Table on the <strong>KIP</strong> Controller such as Line<br />
Width Compensation and RTL Dither allow users to achieve improved quality<br />
when using the <strong>KIP</strong> GL output format.<br />
<strong>KIP</strong> Script Output Format<br />
The user can choose <strong>KIP</strong> Script (Postscript output) when printing from<br />
applications that function best when outputting Postscript data. For example;<br />
Adobe Acrobat functions best when using Postscript output, especially on<br />
images larger than E-size (Acrobat 6). Other graphics applications including<br />
MS-Word, Powerpoint, and Excel also work very well with <strong>KIP</strong> Script<br />
output. The <strong>KIP</strong> Script data can be smaller in file size and transmits quickly<br />
over networks.<br />
NOTE<br />
The <strong>KIP</strong> PDF Powerscript 3 option is required for printing <strong>KIP</strong> Script data. Please contact<br />
your local <strong>KIP</strong> dealer for details.<br />
NOTE<br />
When using the <strong>KIP</strong> GL output format, the Default.PEN - Pen Table at the <strong>KIP</strong> Controller<br />
will also control some of the printing features. Features such as Vector Line Dither<br />
Pattern, RTL Raster Dither, RTL Density, and Line Width Compensation are used<br />
during conversion for printing. These settings must be configured PRIOR to opening the<br />
<strong>KIP</strong> Unattend print queue.<br />
NOTE<br />
Certain applications work better depending on the Output Format.<br />
- Applications using heavy raster or photographic data work best with <strong>KIP</strong> Script type<br />
output. Examples: Adobe Acrobat products, Adobe Illustrator Products, Adobe<br />
Photoshop Products and Corel Draw based products.<br />
- Microsoft applications generally work well with either output format. Examples:<br />
Microsoft Word, Excel, Project.<br />
8-4<br />
Section 8 Windows Driver
2.2 Orientation<br />
There are two types or Orientation in the <strong>KIP</strong> driver: Landscape and Portrait.<br />
Examples:<br />
Landscape<br />
8-5<br />
Portrait<br />
Selection of the orientation should take into account the design or layout from within the<br />
application. If an incorrect orientation is selected the page size can be “rotated” incorrectly<br />
and image may be lost in the final printed output.<br />
2.3 Scaling<br />
Many Windows applications have their own scaling capabilities built into the "print<br />
menu". For example: Spicer and MS PowerPoint allow for some form of “Scale to Page”<br />
type feature. Some Windows applications such as MS Word and MS Excel do not allow for<br />
scaling to engineering and architectural wide format paper sizes. The “Scaling” feature in<br />
KUWPD allows the user to set a percentage to enlarge the document to fit the paper size<br />
desired when scaling is not included in the application.<br />
Example:<br />
2.4 Copies<br />
No scale used scale applied to enlarge image<br />
<strong>KIP</strong><br />
Select the total number of copies you wish to print. The range is from 1 to 999.<br />
2.5 Media Type<br />
The <strong>KIP</strong> printer may have more than one media type installed. These types may include<br />
bond, vellum and film. This feature allows printing onto a media type of your choice of an<br />
installed kind.<br />
2.6 Paper Size<br />
<strong>KIP</strong><br />
Select the output page size. Please note that the <strong>KIP</strong> printer may have a roll installed that<br />
may be larger than the selection.<br />
Section 8 Windows Driver
This feature is very important in wide format printing from CAD applications and MS Excel.<br />
This is a feature that is required in CAD applications where the image size may vary from<br />
one image to the next such as: 36” x 60” for the first document then 24” x 80” for the next.<br />
The Custom Size feature allows the users much simpler access for several capabilities:<br />
1. Choose any paper size “on-the-fly” without adding new paper sizes to the operating<br />
system (Printers and FaxesServer PropertiesForms).<br />
2. Choose different and non-standard paper sizes for each and every document.<br />
3. Choose very long paper sizes.<br />
4. It is not necessary to exactly match the document length to the output length; the<br />
users can intentionally choose a longer length for the media size. For example, if<br />
the image is meant to fit on 36” wide media, but the user isn’t sure about the length<br />
of the media required, the user can set a very long length (up to 200 feet) and the<br />
“white” space (extra paper) at the end of the document will automatically be removed.<br />
This prevents any waste of media without an image (<strong>KIP</strong> GL)<br />
2.7 Resolution<br />
Output resolution is automatically determined when installing the Windows driver.<br />
2.8 Halftone Color Adjustment<br />
The <strong>KIP</strong> driver can be adjusted to allow colors from within your application to have different<br />
variance of shading. This provides the ability to increase or decrease the level of overall<br />
contrast of the grey tones on final output. Adjust the level as required to satisfy your final<br />
product requirements.<br />
2.9 Management<br />
The <strong>KIP</strong> <strong>3000</strong> has the ability to account for each print produced. This allows for<br />
job/department costing. Three fields exist in the driver to allow the user to include this<br />
information.<br />
These fields are:<br />
a) Requester<br />
b) Job Number<br />
c) Description<br />
NOTE<br />
The <strong>KIP</strong> <strong>3000</strong> is a 600 x 600 DPI device.<br />
Unified Accounting – The Windows Driver points to a central location Ex. A <strong>KIP</strong> <strong>3000</strong> which<br />
has a centralized list and rules for accounting. For information on how to set up unified<br />
Accounting please see the Request or PrintNet sections.<br />
8-6<br />
Section 8 Windows Driver
The Requester, Job Number and Description fields under “Printing Preferences” or<br />
“Document Defaults (NT4)” can be set to use operating system environment variables.<br />
Examples: The Requester field can be set to %Username%<br />
The Description field can be set to %Computername%<br />
2.10 Header<br />
To easily recognize printed documents, text can be placed on the top and bottom of the<br />
print. The text header includes all the “Management” information as well as the file name.<br />
2.11 Folder<br />
Text here<br />
Text here<br />
If an optional folding device is installed onto the printer, select fold to allow the printer to<br />
determine which fold table to apply to the document. The patterns must be set by a certified<br />
service technician in the <strong>KIP</strong> <strong>3000</strong> IPS.<br />
2.12 Mirrored Output<br />
The image can be mirrored as required by the user. This may be needed on translucent<br />
media or for other specialty applications.<br />
2.13 Reverse Collate<br />
If the document to be printed contains more than one page, collation may be important. To<br />
allow the pages to be reversed printed (last page first), select this function. Please note that<br />
the application must also support multiple page printing.<br />
8-7<br />
Section 8 Windows Driver
2.14 Stamps<br />
The <strong>KIP</strong> Windows driver will read the list of available stamps that are configured on the <strong>KIP</strong><br />
IPS. It is not possible to modify these stamps using the driver. For information on<br />
configuring stamps, please see the <strong>KIP</strong> Request documentation.<br />
8-8<br />
Section 8 Windows Driver
3.0 Installation<br />
3.1 Prerequisites<br />
Requirements at the Network Server or User Workstations<br />
a) The <strong>KIP</strong> Unified Windows Printer Driver (KUWPD) allows windows printing from<br />
Microsoft Windows NT4 / 2000 / XP / x64 Operating systems as well as 2003 Server<br />
based applications. (Windows 9x is not supported)<br />
b) Please ensure that your applications are as up-to-date as possible, in terms of<br />
version, available service packs, and hot fixes (this also includes your OS).<br />
a. Windows NT Service Pack 6 is Required<br />
c) If you are updating your system from a previous installation, you will likely need the<br />
assistance of and/or permission from a Network Administrator to remove the<br />
previous <strong>KIP</strong> Driver. Any users connected to the previous shared version of the <strong>KIP</strong><br />
Printer Driver on the Server or Workstation will need to remove that printer object<br />
and connect to the newly shared driver that will be installed.<br />
<strong>KIP</strong> Unified Windows Printer Driver (KUWPD) offers HPGL2/HP-RTL and Postscript<br />
Language printing to <strong>KIP</strong> digital printers from Microsoft Windows NT4 / 2000 / XP / 2003<br />
based applications (Windows 9x platforms not supported). The driver can be downloaded<br />
from your local <strong>KIP</strong> website and is included on your <strong>KIP</strong> <strong>3000</strong> Software CD. This driver may<br />
also be obtained from <strong>KIP</strong> PrintNET. Please see the PrintNET documentation for more<br />
information.<br />
KUWPD contains:<br />
• Printer driver files<br />
• An installation utility (Printman.exe)<br />
• A dedicated printer port monitor (<strong>KIP</strong>0) for Microsoft operating systems as<br />
described in the following pages.<br />
• Once the KUWPD has been downloaded and uncompressed, the files can be<br />
placed directly on the workstation or server to which it will be installed or on a<br />
USB drive or CD. See Appendix A for details on the files and file structure.<br />
For new installations on a Workstation or<br />
Server see:<br />
“Installation Process”<br />
For updating from a previous installation<br />
of a <strong>KIP</strong> Printer see:<br />
“Upgrade Installation”<br />
8-9<br />
Section 8 Windows Driver
3.2 Installation Process - Automatic<br />
<strong>KIP</strong> Unified Windows Printer Driver (KUWPD) can be installed on Microsoft Windows NT4,<br />
2000, XP, x64, 2003 platforms (Windows 9x platforms not supported) by using the provided<br />
printman.exe utility or by manually adding a port monitor (monitor.inf) and printer driver<br />
(plotter.inf). In both cases, Local Administrative rights are necessary.<br />
Printman Utility Installation Method:<br />
Once the KUWPD has been downloaded and unzipped, the files can be placed directly<br />
onto the workstation or server where it will be installed or, onto a USB drive or CD. See<br />
Appendix A for more information on the files and structure.<br />
a) Execute printman.exe from a Microsoft Windows NT4, 2000, XP, x64 or 2003<br />
operating system. An installation window is displayed:<br />
b) Select the appropriate <strong>KIP</strong> Printer from the Model Name drop down selection (kip<br />
<strong>3000</strong>). Do not change the Name and Source Fields.<br />
c) Select Install. <strong>KIP</strong> printer port monitor is now installed.<br />
8-10<br />
Section 8 Windows Driver
The following screen will appear.<br />
e) Do not change Port Name.<br />
f) Choose Server/Workstation from Installation Location.<br />
g) Do not change Destination Directory.<br />
h) Provide the IP address OR hostname of your <strong>KIP</strong> printer for IPS Name or IP<br />
Address. It is important to add EITHER the hostname OR the IP address. Do not<br />
add both. This is the destination address.<br />
i) Do not change IP Port Number.<br />
j) Click OK. The selected <strong>KIP</strong> Printer Driver is added to the system and assigned to<br />
the Printer Port monitor (<strong>KIP</strong>0).<br />
k) The installed printer can now be accessed from the Microsoft Printer Control Panel.<br />
If printer is not seen, press F5 to refresh the printer list<br />
8-11<br />
Section 8 Windows Driver
Right-Click on “<strong>KIP</strong> Printer” and select Printing Preferences. User Interface is displayed.<br />
For Microsoft Windows NT4, select Document Defaults.<br />
l) The following settings will determine the initial defaults for the printer driver. These<br />
defaults are acquired from client workstations connecting to the shared printer driver.<br />
Please note that some workstations may not be able to alter the Printer Preferences<br />
unless allowed by the network login.<br />
m) Select desired Output Format* and make your selections for default paper size,<br />
orientation, Management functions*, and Header information.<br />
n) Click OK when finished.<br />
o) Share the printer to other network clients if required.<br />
8-12<br />
Section 8 Windows Driver
3.3 Installation Process - Manual<br />
The printman.exe utility is designed to automate the installation of the <strong>KIP</strong> Port Monitor<br />
(<strong>KIP</strong>0) and the <strong>KIP</strong> Unified Windows Printer Driver (KUWPD). It is possible to install both<br />
components manually. Manual installation techniques may be necessary to satisfy IT<br />
and/or corporate requirements.<br />
a) Depending on your operating system, locate the appropriate folder that contains the<br />
monitor.inf for your system platform.*<br />
KUWPD \ WINNT4 = Microsoft Windows NT 4 Workstation / Server<br />
KUWPD \ WIN2000 = Microsoft Windows 2000 Workstation / Server<br />
KUWPD \ WINXP = Microsoft Windows XP, Microsoft Windows 2003 Server<br />
KUWPD \ AMD64 = Microsoft Windows XP 64-bit Edition<br />
* Alternatively, you can use the Microsoft Standard TCP/IP port monitor (configured<br />
for LPR/LPD), however some functionality and transport speed will be lost. See<br />
Printing Hints section in Appendix.<br />
b) From the Printers control panel, select File, Server Properties.<br />
c) Print Server Properties is displayed. Select Ports from available tabbed headings.<br />
d) Select Add Port. Printer Ports dialog is displayed. Select New Port Type.<br />
8-13<br />
Section 8 Windows Driver
e) Browse to the appropriate operating system folder from the KUWPD distribution, and<br />
select monitor.inf. Select OK. <strong>KIP</strong> Port Monitor is added to Available Port Types.<br />
f) Select <strong>KIP</strong> Port Monitor and click New Port.<br />
g) Configure <strong>KIP</strong> Port:<br />
f) Do not change Port Name unless required*<br />
* For multiple <strong>KIP</strong> printers, create an additional <strong>KIP</strong> Port per printer named <strong>KIP</strong>1,<br />
<strong>KIP</strong>2, <strong>KIP</strong>3…<br />
g) Choose Server/Workstation from Installation Location<br />
h) Do not change Destination Directory<br />
i) Provide the IP address OR hostname of your <strong>KIP</strong> printer for IPS Name or IP<br />
Address. It is important to add EITHER the hostname OR the IP address. Do not<br />
add both. This is the destination address<br />
j) Do not change IP Port Number<br />
k) Click OK. Port Monitor is now configured. Exit Print Server Properties.<br />
l) Continue printer installation by using Add-Printer-Wizard.<br />
8-14<br />
Section 8 Windows Driver
3.4 LPR / LPD Port<br />
The Microsoft provided TCP/IP Port Monitor can be used as an LPR/LPD type of<br />
port instead of the <strong>KIP</strong>0 port. During configuration of TCP/IP Port Monitor, LPR must<br />
be used, with LPR Byte Counting enabled. LPR/LPD implementation requires a<br />
Queue Name to be defined. Use <strong>KIP</strong> as the queue name, in all uppercase lettering.<br />
This is the name of the printer object on the <strong>KIP</strong> IPS by default.<br />
3.5 Upgrade Process<br />
Obtaining the Windows Driver Information if the <strong>KIP</strong> IPS replaces another <strong>KIP</strong><br />
system<br />
For your current Windows Driver Setup, please obtain the following information prior to<br />
removing or uninstalling any component.<br />
Obtain your current Windows Driver Configuration. In your Windows Driver, go to<br />
Properties, Ports and locate your information for the <strong>KIP</strong>0 port. Complete information<br />
within the table provided.<br />
8-15<br />
Port Name<br />
Port Location<br />
Destination Directory<br />
Controller Name / IP<br />
Address<br />
IP Port Number<br />
<strong>KIP</strong> Unified Windows Printer Driver (KUWPD) can be upgraded from previous versions of<br />
<strong>KIP</strong> Windows Printer Drivers on Microsoft Windows NT4, 2000, XP, x64, and 2003<br />
platforms by manually adding the new printer driver (plotter.inf) to an existing <strong>KIP</strong>0 port.<br />
Local Administrative rights are necessary.<br />
a) Delete existing <strong>KIP</strong> printer driver object(s) from the Control Panel - Printers menu at<br />
the workstation(s) / server(s).<br />
b) Once the KUWPD has been downloaded and unzipped, the files can be placed<br />
directly onto the workstation or server where it will be installed or, on a USB drive or<br />
CD. See Appendix A for more information on the files and structure.<br />
Section 8 Windows Driver
c) From the Control Panel - Printers menu select “Add Printer”. When the Printer<br />
Wizard dialog is displayed* select Local printer attached to this computer. Click Next<br />
* Microsoft Windows NT4 screens will vary slightly from those shown<br />
8-16<br />
Section 8 Windows Driver
d) Select Using the Following Port, and assign <strong>KIP</strong>0, or use <strong>KIP</strong>1, <strong>KIP</strong>2 depending on<br />
the installation. Select Next.<br />
e) Install Printer Software dialog is displayed. Click Have Disk.<br />
8-17<br />
Section 8 Windows Driver
f) Depending on your operating system, locate the appropriate folder that contains the<br />
plotter.inf for your system platform.<br />
KUWPD / WINNT4 = Microsoft Windows NT 4 Workstation / Server<br />
KUWPD / WIN2000 = Microsoft Windows 2000 Workstation / Server<br />
KUWPD / WINXP = Microsoft Windows XP, x64, Microsoft Windows 2003 Server<br />
g) Select the appropriate <strong>KIP</strong> Printer from the list displayed and click Next.<br />
h) Provide a Printer Name when prompted. Select Next.<br />
8-18<br />
Section 8 Windows Driver
i) Assign a shared name (if applicable)*. Select Next<br />
* If replacing a previously shared driver, it is possible to use the same share name.<br />
j) Determine if you would like to print a Test Page when prompted. Select Next.<br />
8-19<br />
Section 8 Windows Driver
k) Completing the Add Printer Wizard dialog is displayed. Click Finish. Printer Driver is<br />
added to system.<br />
l) Installed printer can now be accessed from the Microsoft Printer Control Panel*<br />
* If printer is not seen, press F5 to refresh the printer list<br />
m) Right-Click <strong>KIP</strong> printer and select Printing Preferences*. User Interface is displayed.<br />
* For Microsoft Windows NT4, select Document Defaults<br />
p) The following settings will determine the initial defaults for the printer driver. These<br />
defaults are acquired from client workstations connecting to the shared printer driver.<br />
8-20<br />
Section 8 Windows Driver
Please note that some workstations may not be able to alter the Printer Preferences<br />
unless allowed by the network login.<br />
n) Select the desired Output Format* and make your selections for default paper size,<br />
orientation, Management functions*, and Header information.<br />
* See Printing Hints section later in this document<br />
o) Click OK when finished.<br />
NOTE<br />
If you wish to add additional <strong>KIP</strong> Printers, use the Add-Printer-Wizard, and select<br />
<strong>KIP</strong> (c) from the list of manufactures.<br />
8-21<br />
Section 8 Windows Driver
4.0 Appendix<br />
4.1 File Structure Overview<br />
When the printer driver is unzipped and copied to the Hard Disk of the system whereit will<br />
be installed, the directory and file structure are as follows:<br />
C:\KUWPD<br />
C:\KUWPD\AMD64<br />
C:\KUWPD\WINNT4<br />
C:\KUWPD\WIN2000<br />
C:\KUWPD\WINXP<br />
KUWPD<br />
• Printman.exe - Installation utility for Microsoft Windows NT4 / 2000 / XP / x64 / 2003.<br />
Provides a GUI for Printer Port Monitor and Printer Driver installation.<br />
• Mfc71.dl l- Microsoft DLL needed to run Printman<br />
• Msvcr71.dl l- Microsoft DLL needed to run Printman<br />
AMD64<br />
• Copy64.exe - utility to properly place x64 files in support path structure<br />
• Microsoft.VC80.CRT.manifest – Microsoft compiler manifest file<br />
• msvcr80.dll - Microsoft DLL needed.<br />
WINNT4<br />
• Kawntppm.dll- Printer Port Monitor for Microsoft Windows NT4 Workstation /<br />
Server<br />
• Kipgs24.ppd - Postscript Printer Definition File<br />
• Kipgs400.ppd- Postscript Printer Definition File<br />
• Kipgs600.ppd- Postscript Printer Definition File<br />
• Kipgs1020.ppd- Postscript Printer Definition File<br />
• Kuwntpd.dll- Printer Driver DLL for Microsoft Windows NT4 Workstation /<br />
Server<br />
• Kuwntpdui.dll- Printer Driver User Interface for Microsoft Windows NT4<br />
Workstation / Server<br />
• Monitor.inf- Printer Port Monitor installation file Microsoft Windows NT 4<br />
Workstation / Server<br />
• Plotter.inf- Printer Driver installation file Microsoft Windows NT4<br />
Workstation / Server<br />
8-22<br />
Section 8 Windows Driver
WIN2000<br />
• Kaw2kppm.dll- Printer Port Monitor for Microsoft Windows 2000<br />
• Kipgs24.ppd- Postscript Printer Definition File<br />
• Kipgs400.ppd- Postscript Printer Definition File<br />
• Kipgs600.ppd- Postscript Printer Definition File<br />
• Kipgs1020.ppd- Postscript Printer Definition File<br />
• Kuwxppd.dll- Printer Driver DLL for Microsoft Windows 2000 / XP / 2003<br />
• Kuwxppui.dll- Printer Driver User Interface for Microsoft Windows 2000 / XP /<br />
2003<br />
• Monitor.inf- Printer Port Monitor installation file for Microsoft Windows 2000<br />
• Plotter.inf- Printer Driver installation file Microsoft Windows 2000<br />
WINXP<br />
• Kuwxppm.dll- Printer Port Monitor for Microsoft Windows 2000 / XP / x64 / 2003<br />
• Kipgs24.ppd- Postscript Printer Definition File<br />
• Kipgs400.ppd- Postscript Printer Definition File<br />
• Kipgs600.ppd- Postscript Printer Definition File<br />
• Kipgs1020.ppd- Postscript Printer Definition File<br />
• Kuwxppd.dll- Printer Driver DLL for Microsoft Windows 2000 / XP / x64/ 2003<br />
• Kuwxppui.dll- Printer Driver User Interface for Microsoft Windows 2000 / XP / x64<br />
• Monitor.inf- Printer Port Monitor installation file for Microsoft Windows XP / x64<br />
2003<br />
• Plotter.inf- Printer Driver installation file Microsoft Windows XP / x64 / 2003<br />
8-23<br />
Section 8 Windows Driver
4.2 Printing Hints<br />
• Issue: Adobe Acrobat 6.X products, when printing with <strong>KIP</strong> GL output language and<br />
large size (E-Size or larger) documents has potential to miss or clip off data<br />
prematurely.<br />
Solution: Adobe Acrobat 7.X products correct this issue. Acrobat 6.X requires the<br />
use of <strong>KIP</strong> Script output to solve this issue (choose <strong>KIP</strong> Script in the drivers Printing<br />
Preferences prior to opening Acrobat 6)<br />
• Issue: Printing from Adobe products such as Acrobat Reader requires Postscript<br />
output.<br />
Solution: Default the “Printing Preferences” of the <strong>KIP</strong> driver to <strong>KIP</strong> Script prior to<br />
opening the Adobe application. Printing of <strong>KIP</strong>Script data also requires the<br />
Powerscript3 option on the <strong>KIP</strong> Controller.<br />
• Issue: The output format for driver MUST be chosen before entering an<br />
application to ensure proper output format.<br />
Solution: Ensure output format is set in Printing Preferences before launching an<br />
application.<br />
• Issue: Printing from AutoCAD products with large and/or complex amounts of<br />
embedded raster objects will cause a very large output file / spool file size.<br />
Solution: It is suggested to use dedicated <strong>KIP</strong> ADI/HDI for complex raster printing<br />
from AutoCAD products.<br />
8-24<br />
Section 8 Windows Driver
Section 9<br />
<strong>KIP</strong> AutoCAD Driver<br />
Page<br />
1.0 Overview and Features 9- 2<br />
2.0 Connection 9- 4<br />
2.1 Options 9- 4<br />
2.2 <strong>KIP</strong> Request Link – Advanced Features 9- 4<br />
3.0 Installation 9- 5<br />
4.0 Configuration 9- 8<br />
4.1 Media 9- 8<br />
4.2 Graphics 9- 9<br />
4.3 Custom Properties 9- 9<br />
5.0 Custom Settings 9- 12<br />
5.1 Printer Connection 9- 13<br />
5.1.1 Link to Request Software 9- 13<br />
5.1.2 Put Pen & Media into File 9- 13<br />
5.1.3 Machine 9- 13<br />
5.1.4 Status 9- 13<br />
5.2 Plot Identification 9- 14<br />
5.2.1 Requester/User Name 9- 14<br />
5.2.2 Job Number 9- 14<br />
5.2.3 Description 9- 14<br />
5.2.4 Stamp 9- 14<br />
5.3 Printer Connection 9- 15<br />
5.3.1 Type 9- 15<br />
5.3.2 Fold 9- 15<br />
5.3.3 Save Paper 9- 15<br />
5.3.4 Header 9- 15<br />
5.4 Raster Image Control 9- 16<br />
5.4.1 Gamma 9- 16<br />
5.4.2 Density 9- 16<br />
5.4.3 Raster photo Mode 9- 16<br />
5.5 Color Merge Control 9- 17<br />
5.6 Adjustments 9- 17<br />
6.0 Appendix 9- 18<br />
6.1 Accounting Features - Variables 9- 18<br />
9-1
1.0 Overview and Features<br />
The <strong>KIP</strong> AutoCAD HDI has been designed to quickly and effectively print to the <strong>KIP</strong> printer<br />
directly from the AutoCAD application when using the Microsoft Windows operating system.<br />
The <strong>KIP</strong> driver is supported with these versions of AutoCAD from AutoDesk:<br />
2004 / 2005 / 2006 / 2007<br />
The following two screens are general to AutoCAD and are not detailed within this User<br />
Guide. They select the print to device, media size, pen configurations, and shading to list a<br />
few of their functions. Please refer to the AutoCAD User Guides for more details on these<br />
screens features and functions.<br />
Plot Screen<br />
Advanced features and functionality of this driver<br />
can work in tandem with <strong>KIP</strong> Request software for<br />
added power and flexibility, or as a stand-alone<br />
entity. Features when linked to <strong>KIP</strong> Request<br />
include stamping, folding, headers, advanced<br />
raster image controls, media type selections, real<br />
time printer status and job accounting all from<br />
within the AutoCAD application.<br />
9-2<br />
Plotter Configuration<br />
Section 9 AutoCAD Driver
Within the “Plotter Configuration Screen” noted in the previous page is “Custom<br />
Properties”, please select Link to <strong>KIP</strong> Request Software…<br />
9-3<br />
Section 9 AutoCAD Driver
2.0 Connection<br />
2.1 Options<br />
There are two methods to print from the <strong>KIP</strong> HDI driver to the <strong>KIP</strong> <strong>3000</strong>:<br />
1) Windows Printer Port<br />
The Windows driver must be installed on the PC. This method spools images directly<br />
to the printer via the printer port. This is a very simple connection method with all<br />
available features and functions of the <strong>KIP</strong> HDI driver. This is the preferred method.<br />
2) Plot to File<br />
The output file must be manually submitted to the printer using <strong>KIP</strong> Request software.<br />
This method is not detailed in this guide.<br />
2.2 <strong>KIP</strong> Request Link – Advanced Features<br />
Users have the flexibility of linking to <strong>KIP</strong> Request to access advanced functions and<br />
features.<br />
Allowing the <strong>KIP</strong> HDI driver to interface with <strong>KIP</strong> Request provides the most versatile and<br />
powerful printing solutions. <strong>KIP</strong> Request is a document submission tool that allows for<br />
complete and comprehensive control over printing / plotting.<br />
This software can operate on several remote workstations simultaneously. With <strong>KIP</strong><br />
Request, users have the ability to obtain real-time printer/plotter status, password protect<br />
these submissions based on user and job information, apply custom made stamps, activate<br />
folding devices and modify job descriptions. The <strong>KIP</strong> HDI driver was designed to take<br />
advantage of, and dynamically link to, <strong>KIP</strong> Request, bringing many of these key features to<br />
the AutoCAD interface. It is recommended that the <strong>KIP</strong> HDI driver be configured in this<br />
manner. If you opt not to link with <strong>KIP</strong> Request, certain features of the <strong>KIP</strong> HDI driver will<br />
not be available to you (i.e. real-time printer status, password protected pull-down menus,<br />
on-the-fly stamping, and automated spooling). This document assumes that <strong>KIP</strong> Request is<br />
utilized and installed properly. Installation instructions and further documentation for <strong>KIP</strong><br />
Request are found in the <strong>KIP</strong> Request Section of this guide.<br />
9-4<br />
Section 9 AutoCAD Driver
3.0 Installation<br />
1) Within AutoCAD, click on File, and then select Plotter<br />
Manager.<br />
2) Under Plotter Manager<br />
double Click the Add-A-<br />
Plotter Wizard Icon.<br />
3) Choose My Computer to install<br />
the driver to your local computer.<br />
9-5<br />
Section 9 AutoCAD Driver
4) Identify your plotter / printer model.<br />
a) If <strong>KIP</strong> is in the list, simply select <strong>KIP</strong> from<br />
your list of manufacturers and click “Next.”<br />
b) If <strong>KIP</strong> is not in the list, click the “Have Disk”<br />
button and you will be able to browse for<br />
the plotter driver from your <strong>KIP</strong> Software<br />
CD. The file you are searching for is<br />
located in the Drivers\<strong>KIP</strong> HDI folder and<br />
should appear as <strong>KIP</strong>x.hif.<br />
Note<br />
<strong>KIP</strong>6.hif is the driver file for AutoCAD 2000 – No longer supported<br />
<strong>KIP</strong>7.hif is the driver file for AutoCAD 2000i and AutoCAD 2002 -No<br />
longer supported<br />
<strong>KIP</strong>8.hif is the driver file for AutoCAD 2004, 2005 and 2006.<br />
<strong>KIP</strong>9.hif is the driver file for AutoCAD 2007<br />
5) Once you have selected this file <strong>KIP</strong> will appear in the list. Select it from your list of<br />
manufacturers and click “Next.”<br />
6) The next screen is the PCP and PC2 importation<br />
screen. This screen allows users of previous AutoCAD<br />
versions to import their PCP and PC2 files to the<br />
AutoCAD 2000 family PC3 file format.<br />
If the user does not wish to migrate or does not have any<br />
PCP or PC2 files, click the “Next” button and proceed with<br />
the installation.<br />
7) Output Port Selection: select <strong>KIP</strong>0, which is the Port<br />
created at the time the <strong>KIP</strong> Windows driver is installed.<br />
Note<br />
The <strong>KIP</strong> windows driver should be installed prior to<br />
the AutoCAD driver to use this port. If you choose<br />
not to use this method, select Plot to File.<br />
8) Specifying the printer’s name. Since all the <strong>KIP</strong> printers<br />
use the same driver, the user could set up a name for<br />
each <strong>KIP</strong> device. We recommend you use the<br />
nomenclature of your <strong>KIP</strong> machine to identify the printer’s<br />
name.<br />
Example: <strong>KIP</strong> <strong>3000</strong><br />
9-6<br />
Section 9 AutoCAD Driver
9) To complete the installation, click the<br />
Finish button. Printer configuration will be<br />
done later and there is no need to<br />
“Calibrate Plotter” as the <strong>KIP</strong> printer was<br />
calibrated during installation by the<br />
technician.<br />
10) Once the installation is complete, please<br />
note the creation of the <strong>KIP</strong> <strong>3000</strong>.pc3 file in the<br />
ACAD/Plotters folder.<br />
9-7<br />
Section 9 AutoCAD Driver
4.0 Configuration<br />
Click on File, and then Plotter Manager<br />
1) Double-click on the .PC3 file of the <strong>KIP</strong> printer to<br />
open the Plotter Configuration Editor.<br />
Navigate to the “Device and Document Settings” tab<br />
4.1 Media<br />
1) Click the “+” sign next to “Media”. This will<br />
open up the Media Options and allows<br />
selection of the Media Source (which is<br />
“Roll’) and Media Size.<br />
2) Select your media size to suit your image.<br />
9-8<br />
Section 9 AutoCAD Driver
4.2 Graphics<br />
1) Click the “+” sign next to “Graphics”.<br />
This will open up the Graphics options<br />
and allows the selection of the Color<br />
Depth (in this case “256 shades of<br />
gray” ) and the resolution.<br />
The <strong>KIP</strong> <strong>3000</strong> has 600DPI resolution.<br />
4.3 Custom Properties<br />
1) Click on Custom Properties<br />
2) Then click on the button to see the <strong>KIP</strong><br />
Custom Settings dialog box.<br />
3) A number of the features of the <strong>KIP</strong><br />
Request software have been directly<br />
integrated into the <strong>KIP</strong> HDI driver;<br />
these features are enabled by “linking”<br />
the HDI driver to the <strong>KIP</strong> Request<br />
software.<br />
9-9<br />
Section 9 AutoCAD Driver
4) By clicking the “Link” to the <strong>KIP</strong> Request<br />
Software” checkbox, the user will be asked to<br />
locate the <strong>KIP</strong> Request configuration file<br />
(this is the file the HDI driver uses to employ<br />
the <strong>KIP</strong> Request features.)<br />
Note<br />
<strong>KIP</strong> Request must be installed and<br />
configured to link these features to<br />
this HDI driver. Please see the<br />
Request section of the User Guide.<br />
5) The following dialog box requires the<br />
user to locate the winreq.ini file. Click<br />
on the “location” button.<br />
6) It will point to the default location,<br />
which is C:\Program Files\<strong>KIP</strong>\Request.<br />
9-10<br />
Section 9 AutoCAD Driver
7) Click the Machine button, to list of<br />
all of the machine models connected<br />
in Request and select which<br />
machine to link. Please note that the<br />
models listed are dependent on<br />
those used in Request.<br />
8) Select “OK” to finish linking the KDI to <strong>KIP</strong><br />
Request.<br />
9) The <strong>KIP</strong> custom settings dialog box should display “Real Time Status” from the <strong>KIP</strong><br />
printer. Users have the ability to track printing from the AutoCAD application by<br />
Requester, Job Number, and Description. Users also have the ability to add a<br />
stamp to their document from the <strong>KIP</strong> HDI driver.<br />
9-11<br />
Section 9 AutoCAD Driver
10<br />
8<br />
5.0 Custom Settings<br />
9<br />
6<br />
7<br />
1 2<br />
No. Name Function<br />
1 Link to <strong>KIP</strong> Request Enables advanced features on Custom Properties<br />
2 Put Pen and Media info in Places all media and advanced pen information inside<br />
plot file<br />
the file to overwrite default settings.<br />
3 Raster Image Control Adjustment for raster embedded images. Gamma and<br />
density controls.<br />
4 Color Merge Control Line Merge and color overlay control.<br />
5 Dither Patterns Controls dither patterns for vector lines and raster<br />
embedded images<br />
6 Line Width Compensation Controls overall line thickness or thinness<br />
7 Media Options Selects the type of media, folded output (optional,<br />
media save and printed header.<br />
8 Plot Identification Used for accounting / job tracking and header<br />
information. Preset stamps from <strong>KIP</strong> Request can also<br />
be selected.<br />
9 Status “Real-Time” printer status. Includes installed media.<br />
10 Machine Displays currently select printer model<br />
9-12<br />
Section 9 AutoCAD Driver<br />
3<br />
4<br />
5
5.1 Printer Connection<br />
5.1.1 Link to Request Software<br />
This button should be selected to utilize the advanced features of the Custom<br />
Properties screen. It links the AutoCAD Driver to the Request Software.<br />
5.1.2 Put Pen and Media Info into File<br />
Includes all print file header information necessary for proper processing on<br />
the <strong>KIP</strong> IPS controller. This includes the media types and sizes, merge control<br />
and the Raster Image control to override the default settings in the printer.<br />
5.1.3 Machine<br />
Displays currently installed printing devices.<br />
Installations with multiple printers can select the<br />
specific printer as noted in the installation section.<br />
5.1.4 Status<br />
This region shows the current:<br />
- roll width and type<br />
- any misfeeds<br />
- toner requirements<br />
- standby mode of the printer<br />
This is an active communication with the printer. The status is shown at the<br />
desktop of the user rather than requiring the user to visit the printer.<br />
9-13<br />
Section 9 AutoCAD Driver
5.2 Plot Identification<br />
The following features can be used in environments where job costing or department<br />
allocations are required for prints on the <strong>KIP</strong> <strong>3000</strong>. They can also be useful for print<br />
identification and print distribution as this information can be placed in a header.<br />
Unified Accounting – The AutoCad Driver points to a central location Ex. A <strong>KIP</strong> <strong>3000</strong><br />
which has a centralized list and rules for accounting. For information on how to set<br />
up unified Accounting please see the Request or Print NET sections. NOTE: Unified<br />
Accounting is on by default. Unified accounting is only available for HDI 8 and HDI 9<br />
based products.<br />
Please see the Appendix for advanced naming variables.<br />
5.2.1 Requester / User Name<br />
This button allows the user to select a predetermined User Name from a drop<br />
down list or manually type a name. This field may be configured to be<br />
mandatory and password protected (see <strong>KIP</strong> Request Software Guide). The<br />
drop down variables and passwords themselves are also configured in the<br />
Request Software. %Username may be used as an environment variable.<br />
5.2.2 Job Number<br />
This button allows the user to select a predetermined Job Number from a<br />
drop down list or manually type the job number. This field may be configured<br />
to be mandatory and password protected (see <strong>KIP</strong> Request Software Guide).<br />
The drop down variables and passwords themselves are also configured in<br />
the Request Software.<br />
5.2.3 Description<br />
This button allows the user to select a predetermined Description from a drop<br />
down or manually type a description. This field may be configured to be<br />
mandatory and password protected (see <strong>KIP</strong> Request Software Guide). The<br />
drop down variables and passwords themselves are also configured in the<br />
Request Software.<br />
5.2.4 Stamp<br />
This button allows a stamp (predetermined in the Request Software) to be<br />
placed on the print(s). The creation and placement of the stamp is preformed<br />
in the request application. (see <strong>KIP</strong> Request Software Guide)<br />
9-14<br />
Section 9 AutoCAD Driver
5.3 Media Options<br />
5.3.1 Type<br />
This drop down list has the listed media types that may be installed in the <strong>KIP</strong><br />
printer. They include Bond, Vellum and Film. Please note the Status region<br />
to confirm the media currently installed. If media selected for a print is not<br />
currently installed, the printer will “hold the job” and wait for the media type to<br />
be satisfied prior printing the job.<br />
5.3.2 Fold<br />
Folds the print according to the fold patterns configured on the <strong>KIP</strong> IPS.<br />
Please note that the optional folder must be installed for this action to occur.<br />
5.3.3 Save Paper<br />
If the media size selected is larger than the image size, this button will<br />
prevent excess media (waste) from being consumed in the print process. This<br />
occurs in the length of the print. This does not affect image output.<br />
Note: If the Printer is set to “Closest,” the nearest roll width installed will be<br />
used to even further reduce media waste (more than one roll width must be<br />
installed of the same media type).<br />
5.3.4 Header<br />
A text header can be placed on the paper for print identification. The<br />
information placed in the Plot Identification will be printed on the print<br />
9-15<br />
Section 9 AutoCAD Driver
5.4 Raster Image Control<br />
5.4.1 Gamma<br />
This value sets the gamma level of embedded raster images on the print file.<br />
Gamma is the overall contrast of the image.<br />
5.4.2 Density<br />
This value sets the density of the image without affecting lines or shades in a<br />
print (the vector data). This can be used to enhance photos or other raster<br />
images placed within a drawing. A higher value will have a greater density.<br />
5.4.3 Raster Photo Mode<br />
This button is used to print the shading effects of a raster image. Some raster<br />
images are meant to be 100% solid (no tones such as a line). Others are<br />
pictures or drawings where shades are required. Select Photo Mode to print<br />
the raster image as shades rather than 100% solid. Embedded Excel or<br />
Word documents should have this un-selected for optimum output.<br />
9-16<br />
Section 9 AutoCAD Driver
5.5 Color Merge Control<br />
Color merge is the prevention or selection of a third color (or shade when<br />
printer on the <strong>KIP</strong> <strong>3000</strong>) where layers of a drawing overlap.<br />
5.6 Adjustments<br />
Color Overwrite Color Merge<br />
5.6.1 Line Width Compensation<br />
Controls line weights on a global basis. Values can be from -4.0 to +4.0. A<br />
higher value will result in all lines increasing in thickness. A lower value will<br />
result in all lines decreasing in thickness.<br />
5.6.2 Vector Line Dither<br />
Controls dithering patterns for grayscale line entities. Values are from Fine<br />
(Tight) to Coarse (Wide) dither patterns.<br />
Note<br />
This does not control vector fill areas. This should be set at the <strong>KIP</strong> IPS<br />
5.6.3 RTL Image Dither<br />
Works in conjunction with Raster Image Control: if Raster Photo Mode is<br />
enabled, then RTL Image dither can be controlled. Values are from Fine<br />
(tight) to coarse (wide) dither patterns. Photographic images work best with a<br />
more coarse setting while embedded text documents from Word or Excel<br />
work best with a Fine setting.<br />
9-17<br />
Section 9 AutoCAD Driver
6.0 Appendix<br />
6.1 Accounting Features- Variables<br />
Specialized names or masks can be used for the accounting data fields in the Custom<br />
Properties of the <strong>KIP</strong> AutoCAD Driver (Requester, Job Number, and Description)<br />
Both the Requester and Job Number fields by default are recorded into the <strong>KIP</strong> Controller<br />
Accounting log. The Job Number field can then be the key field used to query Production<br />
Reports directly from the <strong>KIP</strong> Unattend software. The <strong>KIP</strong> Controller log can also be<br />
imported into any program that can read ASCII data.<br />
Specialized Mask Names and Rules<br />
These customized names can be assigned to the mask elements using all normal methods.<br />
Dwgname and dwgpath are the only two variables that can be set.<br />
Example:<br />
AutoCAD reports original file path of drawing named "R300-20.DWG" and the path that the<br />
file is stored in as:<br />
C:\Program Files\AutoCAD 2006\drawings\R300-20.DWG<br />
If mask item is set to:<br />
Dwgname logged is “R300-20”<br />
Dwgpath logged is ‘C:\Program Files\AutoCAD 2006\drawings\R300-20.DWG”<br />
dwgpath=x\x\x\x\x where = sign and following is optional mask to select path elements.<br />
x replaced by # includes that element of path to be used in accounting data.<br />
dwgpath=x\#\x\x logged is ‘Program Files’<br />
dwgpath=x\#\# logged is ”Program Files\AutoCAD 2006”<br />
9-18<br />
Section 9 AutoCAD Driver
Section 10<br />
<strong>KIP</strong> Request<br />
1. 0 Introduction................................................................................................................... 10- 3<br />
1.1 Introduction ....................................................................................................... 10- 3<br />
1.2 Main Screen...................................................................................................... 10- 4<br />
1.3 Simple Printing.................................................................................................. 10- 5<br />
2. 0 Function / Feature Details............................................................................................ 10- 7<br />
2.1 Folder Select..................................................................................................... 10- 7<br />
2.1.1 Select a folder................................................................................... 10- 7<br />
2.1.2 Folder up .......................................................................................... 10- 7<br />
2.1.3 Display File types “Browse for”......................................................... 10- 7<br />
2.2 File Select ......................................................................................................... 10- 7<br />
2.2.1 Select a file ....................................................................................... 10- 7<br />
2.2.2 Recall Last File(s)............................................................................. 10- 8<br />
2.2.3 Select All........................................................................................... 10- 8<br />
2.2.4 Unselect All....................................................................................... 10- 8<br />
2.3 Job List ............................................................................................................. 10- 8<br />
2.3.1 Selected Files ................................................................................... 10- 8<br />
2.3.2 Enlarge / Reduce............................................................................. 10- 9<br />
2.3.3 Pen Table ......................................................................................... 10- 9<br />
2.3.4 Stamp ............................................................................................... 10- 9<br />
2.3.5 Fold................................................................................................... 10- 9<br />
2.3.6 File Order......................................................................................... 10- 10<br />
2.4 Key Job Settings.............................................................................................. 10- 11<br />
2.4.1 Requester........................................................................................ 10- 11<br />
2.4.2 Job Number..................................................................................... 10- 11<br />
2.4.3 Description....................................................................................... 10- 11<br />
2.4.5 Date................................................................................................. 10- 11<br />
2.4.6 Enlarge / Reduce............................................................................. 10- 11<br />
2.4.7 Media Type...................................................................................... 10- 11<br />
2.4.8 Pen Table ........................................................................................ 10- 12<br />
2.4.9 # of Copies ...................................................................................... 10- 12<br />
2.4.10 Collate ........................................................................................... 10- 12<br />
2.5 Advanced Job Settings .................................................................................... 10- 12<br />
2.5.1 Pen Configuration............................................................................ 10- 13<br />
2.5.2 Advanced Settings Button . ............................................................. 10- 15<br />
2.5.2.1 Line Width Compensation................................................ 10- 15<br />
2.5.2.2 Vector Line Dither pattern................................................ 10- 15<br />
2.5.2.3 Clip to Image Size............................................................. 10- 16<br />
2.5.2.4 Use Round End Capping ................................................. 10- 16<br />
2.5.2.5 Turn Merge On ................................................................. 10- 16<br />
2.5.2.6 Raster Photo Mode.......................................................... 10- 16<br />
2.5.2.7 Raster Density Level....................................................... 10- 17<br />
2.5.2.8 Photo Dither Pattern (Raster) ......................................... 10- 17<br />
2.5.3 Enlarge / Reduce............................................................................. 10- 18<br />
2.5.4 Stamp .............................................................................................. 10- 20<br />
2.5.4.1 Stamp Schemes- .............................................................. 10- 21<br />
2.5.4.2 Use Text ........................................................................... 10- 21<br />
2.5.4.3 Use Image ........................................................................ 10- 21<br />
2.5.4.4 Current Font Area ............................................................. 10- 21<br />
2.5.4.5 Set Font ............................................................................ 10- 21<br />
10-1<br />
Section 10 <strong>KIP</strong> Request
2.5.4.6 Stamp Placement And Margin Area ................................. 10- 21<br />
2.5.4.7 Text Rotation – Pull down................................................. 10- 21<br />
2.5.4.8 Text / Graphic Gap – Text Field........................................ 10- 22<br />
2.5.4.9 Graphic Rotation – Pull down ........................................... 10- 22<br />
2.5.4.10 Graphic Placement – Pull down...................................... 10- 22<br />
2.5.4.11 Merge Type – Pull down ................................................. 10- 22<br />
2.5.4.12 Screening – Pull down .................................................... 10- 22<br />
2.5.4.13 Text Settings Area .......................................................... 10- 22<br />
2.5.4.14 Macro – Pull down Menu ................................................ 10- 22<br />
2.5.4.15 Graphic Image Settings Area.......................................... 10- 23<br />
2.5.4.16 Preview Stamp................................................................ 10- 23<br />
2.5.5 Fold.................................................................................................. 10- 23<br />
2.5.5.1 Use Folder Settings…on Printer ....................................... 10- 24<br />
2.5.5.2 Orientation ........................................................................ 10- 24<br />
2.5.5.3 Scheme............................................................................. 10- 25<br />
2.5.5.4 Fold Patterns (available)................................................... 10- 25<br />
2.5.5.5 Roll Size............................................................................ 10- 25<br />
2.5.5.6 Matrix Folding ................................................................... 10- 25<br />
2.5.6 Header Label................................................................................... 10- 25<br />
2.5.7 Mirror ............................................................................................... 10- 25<br />
2.5.8 Invert................................................................................................ 10- 25<br />
2.5.9 Quick View....................................................................................... 10- 26<br />
2.5.10 Manage.......................................................................................... 10- 26<br />
2.6 Printer Selection .............................................................................................. 10- 27<br />
2.7 Printer Information ........................................................................................... 10- 27<br />
2.8 Menu................................................................................................................ 10- 27<br />
2.8.1 File................................................................................................... 10- 27<br />
2.8.2 View................................................................................................. 10- 27<br />
2.8.3 Sort.................................................................................................. 10- 28<br />
2.8.4 Option.............................................................................................. 10- 28<br />
2.8.5 Manage............................................................................................ 10- 31<br />
2.8.6 Transfer ........................................................................................... 10- 32<br />
2.9 DropBox........................................................................................................... 10- 32<br />
3. 0 Retrieve Scans ............................................................................................................. 10- 33<br />
3.1 Mailbox Retrieval ............................................................................................ 10- 33<br />
3.2 Mailbox File Deletion ...................................................................................... 10- 35<br />
4. 0 <strong>KIP</strong> <strong>3000</strong> Copier Configurations................................................................................. 10- 36<br />
5. 0 Request Installation..................................................................................................... 10- 37<br />
5.1 Installation........................................................................................................ 10- 37<br />
5.1.1 Windows Driver Access.................................................................. 10- 37<br />
5.1.2 CD Installation ................................................................................ 10- 37<br />
5.1.3 First Time Run ................................................................................ 10- 37<br />
5.2 Connection to <strong>KIP</strong> Printers ............................................................................. 10- 38<br />
5.2.1 Find <strong>KIP</strong> Printers ............................................................................ 10- 38<br />
5.3 Other Installation Considerations.................................................................... 10- 39<br />
5.3.1 Prompt Setup.................................................................................. 10- 39<br />
5.3.2 Pen Tables ..................................................................................... 10- 39<br />
5.3.3 Advanced Configuration and Settings ............................................ 10- 39<br />
6. 0 Appendix ...................................................................................................................... 10- 40<br />
6.1 Folding - Technical description ....................................................................... 10- 40<br />
6.2 INI Configuration............................................................................................. 10- 42<br />
6.3 Creating Productivity Reports ......................................................................... 10- 47<br />
6.4 Printing DWF files ........................................................................................... 10- 53<br />
10-2<br />
Section 10 <strong>KIP</strong> Request
1. 0 Introduction<br />
1.1 Introduction<br />
<strong>KIP</strong> Request software can be used to send documents, or sets of documents, to a<br />
<strong>KIP</strong> Printer. Request can be used from a workstation enabling users to print across<br />
a network. It has many advanced features and powerful functions to allow<br />
customization of prints.<br />
Using the Request software, allows the “requester” a number of adjustable options<br />
like selection of username, job number, media type, zoom, number of copies,<br />
description of job, pen table adjustments, time / date selection, invert, mirror,<br />
stamping, header and fold options to name a few features.<br />
The Request package also allows configuration of the <strong>KIP</strong> <strong>3000</strong>. This include scan<br />
to FTP location, accounting to include Passwords and Usernames, as well as<br />
retrieve scanned images from <strong>KIP</strong> <strong>3000</strong> IPS Mailboxes.<br />
It is also used to configure <strong>KIP</strong> PrintNet another submission utility that is web<br />
browser based.<br />
The <strong>KIP</strong> Request software is a comprehensive tool which allows access to the<br />
advanced functions and features for the <strong>KIP</strong> <strong>3000</strong>.<br />
10-3<br />
Section 10 <strong>KIP</strong> Request
1.2 Main Screen<br />
1<br />
2<br />
11<br />
10<br />
9<br />
3 4<br />
No. Name Function<br />
1 Printer Selection Click on the “name” to select the printer you wish to print<br />
to if more than one <strong>KIP</strong> device installed.<br />
2 Menu Menu for multiply functions in the GUI and configuration<br />
of the software / system.<br />
3 Folder Select Use this region to select the folder you wish to print files<br />
from.<br />
4 File Select Displays the files in a folder to allow selection.<br />
5 Submit After file selection and adjustments, sends job for<br />
printing.<br />
6 Key Job Settings This area allows the key details to be applied to a job, if<br />
so needed.<br />
7 Pre -View Files can be pre-viewed prior to printing. Click on this<br />
area to pre-view a file.<br />
8 Printer / Job Info Displays current printer roll information or status as well<br />
as basic job / file information<br />
9 Job List Displays files for printing and any function applied to the<br />
file<br />
10 Dropbox For drag and drop function of file selection<br />
11 Advanced Job Settings Allows advanced job and print configurations, such as<br />
Zoom, Stamp, Fold, and Pen Control.<br />
10-4<br />
8<br />
5<br />
Section 10 <strong>KIP</strong> Request<br />
6<br />
7
1.3 Simple Printing<br />
The following describes how to make a basic job submission to the <strong>KIP</strong> printer.<br />
1) Click on the “<strong>KIP</strong> Request” icon on your Desk Top<br />
2) Or from the “Start” button click on:<br />
a) All Programs<br />
b) <strong>KIP</strong> Programs<br />
c) <strong>KIP</strong> Request<br />
3) Browse to the folder where the<br />
files you wish to print are located<br />
on your local PC or on the<br />
network. (usual Windows mouse<br />
functions for folder selection)<br />
4) Click on the file(s) to print which<br />
will be shown with a “check<br />
mark” in the box beside the file.<br />
5) The files selected will now<br />
also be shown in the lower<br />
box noting any zoom, pen,<br />
stamp and fold to be applied.<br />
10-5<br />
Section 10 <strong>KIP</strong> Request
6) Complete any Key Job Settings that<br />
may be required such as user name,<br />
zoom, media type, collation and<br />
number of copies / sets.<br />
7) Press the Submit Print Job button.<br />
8) The files selected will be printed.<br />
NOTE:<br />
Later in this manual, descriptions of custom settings which you may wish to apply to prints,<br />
are detailed. Custom settings should be configured prior to selection of the files.<br />
10-6<br />
Section 10 <strong>KIP</strong> Request
2. 0 Function / Feature Details<br />
2.1 Folder Select<br />
2.1.1 Select a folder<br />
a) Using the mouse to select a drive letter,<br />
computer or other location on the PC or<br />
network where the files to be printed are<br />
located.<br />
b) Click once to view the files within displayed<br />
in the file region.<br />
2.1.2 Folder up<br />
The Folder Up icon takes you to the next<br />
higher folder in the folder structure.<br />
2.1.3 Display File types “Browse for”<br />
Request can be configured to only display files<br />
that are printable in the File Select area or to<br />
display all file types. The Configured Types are<br />
set by the administrator. Please see the INI.<br />
configuration for details on how to set this<br />
feature’s function.<br />
2.2 File Select<br />
2.2.1 Select a file<br />
a) After selection of the folder which<br />
contains the files for printing, files<br />
within the folder will be displayed in<br />
this area. The details of the file are<br />
also noted, such as size type etc.<br />
Note: This area can be resized within<br />
the region provided.<br />
b) Click on the file to be printed: a red<br />
Check will indicate that they are<br />
selected.<br />
10-7<br />
Section 10 <strong>KIP</strong> Request
c) If an invalid file is selected, which<br />
cannot be printed, a note box will<br />
appear. ( in this case a .hlp file can<br />
not be printed )<br />
File types which can be selected are:<br />
HPGL/2 formats (.plt, .hpg, .gl2, .000, .rtl, .906, .907, etc.)<br />
HPGL formats<br />
HP-RTL formats<br />
Autodesk DWF (.dwf)<br />
Adobe Portable Document Format (.pdf)*<br />
Postscript (.ps)*<br />
Encapsulated Postscript (.eps)*<br />
TIFF Group 4 (.tif)<br />
CALS Group 4 (.cal)<br />
PCX Monochrome (.pcx)<br />
Intergraph (.cit)<br />
JPEG (.jpg)<br />
Computer Graphics Metafile (.cgm)*<br />
Government Group 4 (.c4)<br />
ASCII File formats (.txt, et cetera)<br />
<strong>KIP</strong> Format (.tlc)<br />
All file formats are registered to there respective companies.<br />
10-8<br />
* Requires an Option<br />
These are some of the most common file extensions. If the file extension differs and the file<br />
still remains a valid type, it will print. That is a .plt file can be renamed .xyz and as long as<br />
the structure remains intact the file will print.<br />
2.2.2 Recall Last File(s)<br />
The last file(s) sent to be printed (after you<br />
press the Submit Button) can be recalled with<br />
this button. This allows quick resubmission if<br />
required for additional changes and sets.<br />
2.2.3 Select All<br />
This button selects all files in the current folder.<br />
2.2.4 Unselect All<br />
This button deselects all files in the current folder<br />
2.3 Job List<br />
2.3.1 Selected Files<br />
Once selected (in 2.2.1), all files to be printed are listed here. It includes the file<br />
name (with location structure), pen table, stamp and fold pattern to be applied to<br />
each file. This region allows further settings to be applied to the selected file(s).<br />
Note: This are can be resized within the region provided.<br />
Section 10 <strong>KIP</strong> Request
In the above example, the third file from the top (black line.TIF) will be enlarged<br />
150%, applied a pen pattern called “50 Grey” and it will not be folded.<br />
2.3.2 Enlarge / Reduce<br />
Other zoom settings can be applied from the Advanced Job Settings.<br />
2.3.3 Pen Table<br />
Pen type and styles can be applied to vector or hybrid files. They can include pen<br />
widths, raster density, junctions, etc. Please see Pens in 2.5.1 for greater details.<br />
The name of the applied pen table is displayed here and can be changed prior to<br />
printing.<br />
a) Click on the “pen Table” of the file you wish<br />
to change<br />
b) A drop down arrow will appear<br />
c) Select a predetermined pen table. (see<br />
2.5.1 to create tables)<br />
2.3.4 Stamp<br />
Stamps (or watermarks) can be applied to any printed document. Please see<br />
Pens in 2.5.3 for greater details.<br />
The name of the applied stamp is displayed here and can be changed prior to<br />
printing.<br />
a) Click on the Stamp of the file you wish to change<br />
b) A drop down arrow will appear<br />
c) Select a predetermined stamp. (see 2.5.3 to<br />
create stamps)<br />
2.3.5 Fold<br />
If an optional Folder is connected, fold patterns can be applied to the documents.<br />
This is called matrix Folding. To set up fold patterns please see 2.5.4 for greater<br />
details. The name of the Fold Pattern is displayed here and can be changed prior<br />
to printing.<br />
a) Click Fold on the file you wish to change<br />
b) A drop down arrow will appear<br />
10-9<br />
Section 10 <strong>KIP</strong> Request
c) Select a predetermined Fold. (see 2.5.4 to<br />
create Fold Patterns)<br />
d) Please note that the fold parameter can be set in the Printer and displayed as<br />
“Controller” in the Request. This uses the automatic settings of the printer to<br />
determine the fold pattern for standard documents. For documents that may<br />
require special folding please create the pattern in the Request software<br />
2.3.6 File Order<br />
File print order, and removal can be preformed in the JOB list Area. After files<br />
have been selected “right click” in the Job List area.<br />
A menu will appear.<br />
To perform some of the functions in the menu, a file(s) will need to be selected,<br />
a) Cut Selected Files<br />
This is a tool to remove the selected files.<br />
b) Paste Files<br />
This function is used to ‘Add’ new files between files in the selected files<br />
area.<br />
c) Move File Up One<br />
Select a file to move up one in the selected files area.<br />
d) Move File Down One<br />
Select a file to move down one in the selected files area.<br />
e) Move File to Top<br />
Select a file to move up to the top in the selected files area.<br />
f) Move File to Bottom<br />
Select a file to move down to the bottom in the selected files area.<br />
g) Reverse File Order<br />
This tool reverses the entire job list in the selected files area.<br />
h) Remove File from List<br />
This tool is used to ‘Delete’ files from the selected files area list.<br />
10-10<br />
Section 10 <strong>KIP</strong> Request
2.4 Key Job Settings<br />
2.4.1 Requester<br />
This field can be used for accounting.<br />
Information entered is applied to the<br />
<strong>KIP</strong> Job and Print Logs. This<br />
information will also be printed in the<br />
<strong>KIP</strong> Header if applied. The label of<br />
the field, “Requester” can also be<br />
customized. (i.e. “Operator” or<br />
“User”).This is detailed in the .INI<br />
Configuration.<br />
2.4.2 Job Number<br />
This field can be used for accounting.<br />
Information entered is applied to the<br />
<strong>KIP</strong> Job and Print Logs. This<br />
information will also be printed in the<br />
<strong>KIP</strong> Header if applied. The label of<br />
the field, “Job Number” can also be<br />
customized (i.e. “Department<br />
Number” or “Job Name”).<br />
2.4.3 Description<br />
This field can be used for accounting. Information entered is applied to the <strong>KIP</strong> Job<br />
and Print Logs. The label of the field, “Description” can also be customized (i.e.<br />
“Sales” or “New Construction”).<br />
NOTE: Unified Accounting<br />
Unified Accounting will centralize all your accounting information to the IPS. To<br />
enable this feature see the INI Configuration section.<br />
2.4.4 Requested Time<br />
Users can select a job be printed at a certain time.<br />
2.4.5 Date<br />
Users can select a job be printed at a certain date<br />
2.4.6 Enlarge / Reduce<br />
User can select a preconfigured zoom percentage, or key in a percentage from 5% to<br />
360%. If FORCE SIZE is selected, the FORCE SIZE MENU opens (See 2.5.2).<br />
2.4.7 Media Type<br />
This field allows the selection of the type of media the job is to be printed on. Types<br />
include bond, vellum, and film (Mylar). Applying the “On Hold” media type will place<br />
the job in the queue but will not print until a valid media type is applied by the queue<br />
Manager. Other media types can be configured as noted in the INI Configuration<br />
section.<br />
10-11<br />
Section 10 <strong>KIP</strong> Request
2.4.8 Pen Table<br />
This field displays the Pen Table that<br />
will be applied to vector files as they<br />
are selected. Pull down the menu to<br />
select a different Pen Table. Click the<br />
Pens button to make changes within<br />
the selected Pen Table (see 2.5.1).<br />
2.4.9 # of Copies<br />
This field chooses the total number<br />
copies from 1 to 999.<br />
2.4.10 Collate<br />
This field allows collated or uncollated prints.<br />
2.5 Advanced Job Settings<br />
111, 222, 333 … or 123, 123, 123 …<br />
On the left side of the main Request screen are buttons to allow advanced settings and<br />
configuration of the prints.<br />
These buttons are:<br />
Manage<br />
Pen Configuration<br />
Zoom<br />
Stamp<br />
Fold<br />
Header<br />
Mirror<br />
Invert<br />
View<br />
10-12<br />
Section 10 <strong>KIP</strong> Request
2.5.1 Pen Configuration<br />
This button allows the modification of the settings of vector<br />
plot files. Files’ pen table and screening information can be<br />
changed. Plot File Setup also allows borders, modification<br />
of halftone settings, dither patterns and more. The following<br />
is a list of the all the controls:<br />
2.5.1.1 Use Colors<br />
This applies a file’s native pen<br />
width information, and half<br />
toning information. Unless<br />
you are making changes to a<br />
customer’s file, USE<br />
COLORS is the setting most<br />
often used. When USE<br />
COLORS is applied, the Pen<br />
Table is shaded.<br />
2.5.1.2 Force Pens<br />
Request allows you to edit pen widths and screening by pen number (with a<br />
range of Pen 0 to Pen 255.) This forces the settings in the <strong>KIP</strong> Pen Table to<br />
override the pen information originally embedded in the file. Most users will only<br />
need to Force Pens if the customer needs to make changes to an existing file.<br />
2.5.1.3 Resolution<br />
Allows the selection the dotsper-inch,<br />
or resolution, for<br />
their documents to be<br />
converted. The <strong>KIP</strong> <strong>3000</strong> is a<br />
600 DPI device.<br />
10-13<br />
Section 10 <strong>KIP</strong> Request
2.5.1.4 Border<br />
This allows a border to be<br />
used in the file. A maximum<br />
border of five inches can be<br />
applied to each edge.<br />
2.5.1.5 Calcomp setup<br />
Only use this when submitting<br />
a Calcomp language file. This<br />
changes Calcomp file settings<br />
so that the printer will interpret<br />
Calcomp files correctly. These<br />
settings include Checksum,<br />
Sync Character, End of<br />
Message Character, and<br />
Steps Per Inch. Calcomp<br />
settings only apply to plot files<br />
with a Calcomp text header.<br />
Most plot files do not contain<br />
Calcomp text headers.<br />
2.5.1.6 Load / Save<br />
Saves changes in a custom<br />
Pen Table or load a table to<br />
see or make changes. Save<br />
the table once the changes<br />
have been made. The current<br />
Pen Table name is displayed<br />
at the top of the Pen Table<br />
Setup Menu.<br />
10-14<br />
Section 10 <strong>KIP</strong> Request
2.5.2 Advanced Settings Button<br />
Opens the Advanced Settings Menu.<br />
2.5.2.1 Line Width Compensation<br />
This allows addition and<br />
subtraction of pixels from the<br />
overall width of all vector lines.<br />
Users have the choice of<br />
selecting negative values (to<br />
compensate for thick lines) to<br />
positive values (to compensate<br />
for thin lines)<br />
Choosing -1.0 will remove 1 pixel<br />
from vector data lines.<br />
Choosing 3.0 will add 3 pixels to<br />
vector data lines.<br />
Choosing 0.0 makes no<br />
changes to the lines.<br />
2.5.2.2 Vector Line Dither pattern<br />
Users have 2 choices of<br />
vector line dither patterns.<br />
This will alter the appearance<br />
of vector grayscale in different<br />
ways. Fine is the default<br />
setting. There is no ‘correct’<br />
pattern to choose. Users can<br />
choose the setting they prefer.<br />
10-15<br />
Section 10 <strong>KIP</strong> Request
2.5.2.3 Clip to Image Size<br />
This crops the file data to the start of image data. Apply when the file designer<br />
has saved the entire drawing area as part of the file. If an error “File Too Large<br />
To Print,” occurs, clipping to Image Size is often the solution.<br />
2.5.2.4 Use Round End Capping<br />
This will set end capping on lines in<br />
vector files to round ends instead of<br />
what has been specified in the plot file’s<br />
Line Attribute command.<br />
2.5.2.5 Turn Merge On<br />
This enables the user to merge lines of<br />
different shades. When not applied, the<br />
layers within the plot file determine how<br />
lines merge on each other.<br />
2.5.2.6 Raster Photo Mode<br />
When a raster image has been<br />
embedded within a plot file, Raster Photo<br />
Mode should be used.<br />
Raster Photo Mode can be applied to all<br />
drawings, whether they contain raster<br />
images or not. Some raster images may<br />
need to be printed in 100% solid rather<br />
than the original shading of the image.<br />
10-16<br />
Section 10 <strong>KIP</strong> Request
2.5.2.7 Raster Density Level<br />
This slide bar will modify the density level of the embedded raster image. The<br />
scale range is from 0-100. The higher the number on the scale, the darker the<br />
image will be. A density level can also be keyed into the text field.<br />
2.5.2.8 Photo Dither Pattern (Raster)<br />
Users have 3 choices of raster dither output patterns. There is no ‘correct’ setting.<br />
Set according to user preference.<br />
10-17<br />
Section 10 <strong>KIP</strong> Request
2.5.3 Enlarge / Reduce<br />
This button allows the for scaling of the image and<br />
advanced page sizing for printing. All setting will be<br />
saved as a scheme for later use.<br />
2.5.3.1 Image Information<br />
The current selected file size and any scale<br />
applied to it will be displayed here. To note<br />
any other selected (tagged) files, use the<br />
drop down to select the required file.<br />
2.5.3.2 Scheme<br />
Allows a predetermine scheme (group of<br />
settings) to be applied to the files for<br />
printing. The creation or deletion of<br />
zoom/media schemes is also performed<br />
here.<br />
2.5.3.3 Enlarge / Reduce<br />
Select from predetermined zoom ratios with<br />
the drop down or enter a custom value in<br />
this field<br />
2.5.3.4 Roll Size<br />
Select the roll width to be printed on.<br />
Please note that this width must be installed<br />
into the printer for the job to commence<br />
printing. Please see the Printer Info at the<br />
bottom of the main screen to confirm the<br />
rolls installed.<br />
10-18<br />
Section 10 <strong>KIP</strong> Request
2.5.3.5 Length<br />
The length of the page can be entered<br />
rather than using the automatic length of<br />
the zoom file. Please also not that a value<br />
of “0” will automatically cut the media to the<br />
length of the image to avoid any waste.<br />
2.5.3.6 Rotation<br />
All prints are automatically rotated to best fit<br />
the installed media. This can be changed to<br />
allow custom rotation of the image on the<br />
page configured in this screen. Degrees<br />
include 90, 180 and 270.<br />
2.5.3.7 Ignore Force Size….<br />
If the image is smaller than the selected<br />
paper size, no zoom ratio will be applied to<br />
the image if this button is selected.<br />
2.5.3.8 Nest<br />
To avoid wasting media and at times to<br />
increase print production, two images can<br />
be set side by side on a single page of<br />
media (nest the images).<br />
2.5.3.9 Margins<br />
The image can be positioned anywhere on<br />
the page using these fields.<br />
10-19<br />
Section 10 <strong>KIP</strong> Request
2.5.3.10 Refresh Image<br />
After any settings are applied, press this button to refresh the view box.<br />
2.5.3.11 View Box<br />
The view box displays the image on the page. There are also five buttons which<br />
selects the position of the image on the page as well. These are Center, upper left,<br />
upper right, lower left and lower right.<br />
2.5.4 Stamp<br />
The stamp button allows configuration of watermarks, stamps or overlays of<br />
images. Either or both text and graphics can be utilized.<br />
10-20<br />
Section 10 <strong>KIP</strong> Request
2.5.4.1 Stamp Schemes-<br />
Custom Stamp settings are saved as<br />
schemes which can be used. All<br />
“stamps” are to be saved prior to their<br />
use.<br />
2.5.4.2 Use Text<br />
This allows the user to place text in their stamp.<br />
2.5.4.3 Use Image<br />
This allows the user to place an image in their<br />
stamp.<br />
2.5.4.4 Current Font Area<br />
This details the settings for the current<br />
text. Click SET FONT to change the<br />
settings.<br />
2.5.4.5 Set Font<br />
This allows the selection of the font size<br />
and type. This feature uses the<br />
standard Windows font set and sizes.<br />
2.5.4.6 Stamp Placement And Margin Area<br />
This allows placement of the stamp in 9 preset locations. Then margins can be<br />
applied to move the image up to 5” from the selected border.<br />
2.5.4.7 Text Rotation – Pull down<br />
Allows the user to rotate (counter clockwise)<br />
the text portion of their stamp in 45° increments.<br />
User may also click on the “<strong>KIP</strong>” in the Stamp<br />
Placement area to cycle through the Text<br />
Rotation options.<br />
10-21<br />
Section 10 <strong>KIP</strong> Request
2.5.4.8 Text / Graphic Gap – Text Field<br />
This applies a separation of up to 5” between<br />
the Text and Graphic stamps.<br />
2.5.4.9 Graphic Rotation – Pull down<br />
Allows the user to rotate (counter clockwise)<br />
the graphic portion of their stamp in 45°<br />
increments. User may also click on the “Logo”<br />
in the Stamp Placement area to cycle through<br />
the Graphic Rotation options.<br />
2.5.4.10 Graphic Placement – Pull down<br />
Determines the placement of the graphic in<br />
relation to the applied text. This is ignored if<br />
text is not applied.<br />
2.5.4.11 Merge Type – Pull down<br />
A. Opaque<br />
This option displays the stamp on top of<br />
the image. The background of the stamp<br />
is white and will obscure some image.<br />
B. Transparent<br />
This option overlays the stamp on top of<br />
the image. The background of the stamp<br />
is transparent.<br />
C. Invert<br />
This option displays the stamp on top of<br />
the image. Colors are inverted where the<br />
data intersects<br />
2.5.4.12 Screening – Pull down<br />
This allows the user to define the screen level<br />
(shading) of the stamp using pre-set screening<br />
percentages.<br />
2.5.4.13 Text Settings Area<br />
Enter the text of the stamp. Add a Macro within the text if desired.<br />
2.5.4.14 Macro – Pull down Menu<br />
Choose a macro from the list to apply information at print time, such as<br />
Requester name, time of day, etc.<br />
10-22<br />
Section 10 <strong>KIP</strong> Request
2.5.4.15 Graphic Image Settings Area<br />
This displays the path to your selected graphic image. The path is relative to the<br />
user’s workstation.<br />
NOTE:<br />
1) The image file must also reside on the <strong>KIP</strong> IPS, it may be pushed to the IPS from<br />
the workstation.<br />
2) Or you may apply the stamp to document with a file label called “Savestamp.tif”.<br />
It will then automatically be copied from the workstation to the <strong>KIP</strong> IPS.<br />
2.5.4.16 Preview Stamp<br />
Click to see the configured Stamp settings in<br />
the viewer. Use CRTL+TAB to cycle through<br />
text and image.<br />
2.5.5 Fold<br />
Request allows the users to create Fold and Rotate schemes. These folding<br />
features can be used with the <strong>KIP</strong>Fold folding systems. The Request program<br />
reads settings from the printer (presets.ini file in the LOGDIR folder) and<br />
displays the folding choices in a dropdown menu.<br />
Folding can be accomplished with two methods:<br />
- Allow the printer to determine the rotation and pattern<br />
- Override the printer settings to have rotation and patterns set in the Request.<br />
The choice between the two methods depends on the installation environment. That is if a<br />
small number of document sizes are to be folded with a standard set for width, length and<br />
orientation it is simplest to have the printer control the folding (requires setup by qualified<br />
technician) If the documents can vary with orientation, then folding must be configured in<br />
request and printed / folded in this manner. You can also override method A with B at any<br />
time for greater flexibility.<br />
10-23<br />
Section 10 <strong>KIP</strong> Request
(Method A)<br />
2.5.5.1 Use Folder Settings…on<br />
Printer<br />
Use this button to enable the<br />
printer to determine the<br />
orientation and fold pattern.<br />
(Method B)<br />
2.5.5.2 Orientation<br />
This allows the user to select the<br />
file orientation and output<br />
orientation of the fold. The output<br />
is important due to the fact that<br />
folders require the title block in a<br />
particular corner. This is<br />
dependent on the model of folder.<br />
Left Side is for the file<br />
Right Side for Output<br />
10-24<br />
Section 10 <strong>KIP</strong> Request
2.5.5.3 Scheme<br />
Once a satisfactory setting is achieved, it can be saved as a scheme for actual use.<br />
Schemes not required can be removed as well.<br />
2.5.5.4 Fold Patterns (available)<br />
The Request program reads settings on the printer (presets.ini file in the LOGDIR<br />
folder) and displays the folding patterns available in a dropdown menu. These<br />
pattern types are configurable by the technician.<br />
2.5.5.5 Roll Size<br />
Allows roll selection to be automatic (closet) or precise (exact). Please note that<br />
some images may need to be exact or the correct fold pattern will not be attained. If<br />
Exact is chosen then the media width of the file must also be installed in the printer.<br />
2.5.5.6 Matrix Folding<br />
<strong>KIP</strong> Request also incorporates Matrix Folding. Users can select different folding<br />
schemes for individual documents within a set. (see 2.3.5)<br />
2.5.6 Header Label<br />
A header can be placed on the top or bottom of each print.<br />
This can allow for easy document identification of the prints.<br />
Information from the Key Job Settings (Requester and Job<br />
Number) are included as well as the file name, date and<br />
time of printing<br />
2.5.7 Mirror<br />
Mirror the image on the print.<br />
2.5.8 Invert<br />
Inverts the image on the print(s).<br />
( makes black area white and a white area black)<br />
10-25<br />
Section 10 <strong>KIP</strong> Request
2.5.9 Quick View<br />
Click on this button to display a viewer in the bottom right of the main Screen<br />
Click again to remove the viewer. ( click on a file , then click inside viewer<br />
box to see the image. )<br />
2.5.10 Manage<br />
Press this button to manage the print queue. Password required.<br />
10-26<br />
Section 10 <strong>KIP</strong> Request
2.6 Printer Selection<br />
The label or name of the printer can be used to<br />
send jobs to multiple <strong>KIP</strong> printers on the<br />
network if so configured. Click on the name to<br />
select the printer to send the job to. Printer<br />
status will also be displayed in the lower area<br />
of the main screen (see Printer information 2.7).<br />
2.7 Printer Information<br />
Roll status, cover or door opened, toner<br />
requirement, misfeeds, and other selected<br />
printer status’ are displayed in the lower<br />
center of the main screen.<br />
2.8 Menu<br />
Like most other Windows based application a<br />
menu is located at the upper left of the main<br />
screen. This allows for “menu text” based<br />
configurations and settings. Most functions are<br />
discussed in other sections of the guide.<br />
2.8.1 File<br />
2.8.1.1 Submit Job<br />
Submits a job after files selected<br />
2.8.1.2 Exit<br />
Exits Request software<br />
2.8.2 View<br />
2.8.2.1 Refresh<br />
This updates the directory and file information in the main screen.<br />
2.8.2.2 Quick view<br />
Allows a view of the selected image with grayscales (see Quick View 2.5.8)<br />
There are no panning or enlarge view tools in this viewer.<br />
2.8.2.3 View thumbnail<br />
This allows a thumbnail view of a selected image in the lower right corner of the<br />
main screen.<br />
10-27<br />
Section 10 <strong>KIP</strong> Request
2.8.2.4 View selected image<br />
This allows the<br />
customer to view<br />
any accepted raster<br />
or vector file that is<br />
highlighted.<br />
(NOTE: .CGM files<br />
are not viewable<br />
from this feature.)<br />
This viewer allows<br />
panning and other<br />
viewing tools.<br />
Notes:<br />
- Zoom into areas of<br />
by holding down the<br />
right mouse button<br />
and drawing a zoom<br />
area to be seen in red.<br />
- Click on any area to<br />
zoom back out<br />
2.8.2.5 View all tagged images<br />
Opens all tagged files in the viewer noted. Use the “arrows” to view the next<br />
document or the dropdown to view the selected document.<br />
2.8.2.6 Convert all tagged to…<br />
This will convert the selected file(s) to any of the accepted raster formats. (TIFF<br />
Group 4, CALS Group 4, .PCX, .TLC, .CIT or .PDF) You will also be prompted as<br />
to the placement of the files once converted.<br />
2.8.3 Sort<br />
This menu is the same as File Order in 2.3.6. Please see this section for details.<br />
2.8.4 Option<br />
2.8.4.1 Save Current Job<br />
This allows the user to save the job file list and the<br />
applied settings. The complete name (including path<br />
information) can use up to 256 characters (Does not<br />
save the files, only the file settings).<br />
2.8.4.2 Recall Saved Job<br />
Allows the customer to recall and reprint a job that has<br />
been previously saved.<br />
2.8.4.3 Recall Recent Job<br />
Request saves the job information for the last 15<br />
Requested jobs. RECALL RECENT JOB allows the user<br />
to recall one of these jobs.<br />
10-28<br />
Section 10 <strong>KIP</strong> Request
2.8.4.4 Recall History Jobs<br />
Job History can be used to call up and print jobs that were previously printed. By<br />
selecting a job from the Job History list, the job can be changed and resubmitted for<br />
printing.<br />
1. With Request open go to Option and select “Recall<br />
History Jobs”<br />
2. The following window<br />
will open up<br />
3. From this list of jobs that are saved in the History list choose the desired job to reprint. The<br />
chosen job will be loaded into the selected job area and all prior settings will also be loaded.<br />
10-29<br />
Section 10 <strong>KIP</strong> Request
4. At this point the selected job can be sent to the printer to be reprinted or files can be added<br />
to it creating a new job. Additional settings may also be applied and or changed.<br />
5. The new job with all of its settings will be added to the Job History folder for latter use.<br />
2.8.4.5 Modify Pens (Plot file setup)<br />
Allows the user to apply and modify the settings of vector plot files. Users can<br />
override files’ pen table and screening information. Plot File Setup also lets the<br />
user apply borders, modify halftone settings, dither patterns, and more. Please<br />
see 2.5. and 2.5.2 for greater details<br />
2.8.4.6 Prompt Setup<br />
Prompt Setup lets the Administrator define mandatory settings before a job can be<br />
submitted.<br />
Making Fields Required<br />
When a field is required, the user must enter data before the job will be<br />
submitted.<br />
Making Pull-Down Menus<br />
When checked, the user must choose from an established list of field entries.<br />
Normally, users cannot add a pull down entry without knowing the Request<br />
Master Password. Each pull down entry can also be password protected, so<br />
only the specific users can select specific entries.<br />
Default ‘Fold’ ON<br />
Checking this box will apply Folding feature as soon as Request is opened.<br />
Default Stamp ON<br />
Checking this box will apply Stamping feature as soon as Request is opened.<br />
2.8.4.7 Advanced<br />
Advanced features can be turned ‘On’ or ‘Off’ by clicking on this function.<br />
Features are:<br />
1. Selecting the same file multiple times from within in the same folder.<br />
2. Enlarge/Reduce on a per file basis.<br />
3. Manual image placement.<br />
4. Load/Save compressed jobs.<br />
10-30<br />
Section 10 <strong>KIP</strong> Request
2.8.4.8 Find <strong>KIP</strong> Printers<br />
This menu allows users to attach to <strong>KIP</strong><br />
Printers or add a new <strong>KIP</strong> Printer. FIND <strong>KIP</strong><br />
PRINTERS will automatically search for<br />
shared <strong>KIP</strong> Printers installed, and will add<br />
them to the list of available printers. Simply<br />
check the box next to the printers to which<br />
you would like to submit prints. Click OK to<br />
finish.<br />
Add a Printer<br />
There are two methods to adding a printer to the list,<br />
by IP address or IPS name. We recommend IP<br />
address only for the <strong>KIP</strong> <strong>3000</strong>. Please contact the<br />
Network Administrator for the IP address of your <strong>KIP</strong><br />
<strong>3000</strong>.<br />
Details of the settings / configuration are noted in<br />
Section 5 - Request Installation.<br />
2.8.5 Manage<br />
View the Print Queue<br />
From the MANAGE Menu, users can VIEW THE SELECTED PRINTER’S QUEUE.<br />
This option will display the contents of the Printer Queue. Users will be able to see<br />
the main IPS screen, but will not be able to manipulate it in any way.<br />
Manage the Print Queue<br />
Users can also MANAGE THE <strong>KIP</strong> PRINT QUEUE if they know the Request Master<br />
Password.<br />
NOTE: A user who can MANAGE the queue is able to manipulate the system!<br />
Push File to IPS<br />
This has been incorporated for ease of use for making file updates to the <strong>KIP</strong><br />
internal controller. This feature works with IP based printers only. Upon clicking this<br />
feature, the user is prompted with an explorer window to choose and pick a file<br />
meant to be placed on the <strong>KIP</strong> controller. For example, if the user was making an<br />
update to the IPS software with a new executable, one would select the file at the<br />
‘Requester’ workstation. Upon selecting and clicking ok, the new executable would<br />
be copied into ‘C:\Monpath1\Installers on the <strong>KIP</strong> IPS. An administrator would then<br />
use the management capability of Request to open up the print queue. Upon<br />
opening Windows explorer on the <strong>KIP</strong> IPS, the administrator could browse to the<br />
C:\Monpath1\Installers folder and perform the required upgrade. This function has<br />
mainly been established for ease of use by any administrator to make software<br />
upgrades.<br />
10-31<br />
Section 10 <strong>KIP</strong> Request
2.8.6 Transfer<br />
See Section 3.0 for Scan Retrieval / Deletion .<br />
Upload Settings is a network administrator function.<br />
See Admin Service Function )<br />
2.9 DropBox<br />
The DropBox can be used to select files rather than use the Folder Select (2.1) and File<br />
Select (2.2). This region allows “Drag and drop” functionality.<br />
1) Use Windows Explorer to locate the printable files (or other file viewing utility).<br />
2) Select the files using Windows conventions and then drag them with the mouse and<br />
drop the files into the DropBox.<br />
3) The files selected will now appear in the Job List region.<br />
10-32<br />
Section 10 <strong>KIP</strong> Request
3. 0 Retrieve Scans<br />
3.1 Mailbox Retrieval<br />
Documents scanned on the <strong>KIP</strong> <strong>3000</strong> can be retrieved with the <strong>KIP</strong> Request software.<br />
These are documents scanned into mailboxes on the IPS.<br />
The mailboxes can be created and selected in the <strong>KIP</strong> <strong>3000</strong> Scan Mode. Please see the<br />
Scan Section for greater detail on the use.<br />
<strong>KIP</strong> <strong>3000</strong> Scan Mode<br />
To retrieve documents that are scanned into a mailbox use Request in the following<br />
manner:<br />
1) Use the Folder selection area to browse to <strong>KIP</strong> Mail Box located under<br />
“Desktop” (on the local drive)<br />
10-33<br />
Section 10 <strong>KIP</strong> Request
2) Click on <strong>KIP</strong> Mailbox and listed are all the <strong>KIP</strong> <strong>3000</strong> Mail boxes on the <strong>KIP</strong><br />
<strong>3000</strong> IPS.<br />
Note: FTP locations are not shown here, only IPS mailboxes!<br />
3) Click on the mailbox (folder) that contains the scanned images that are<br />
required.<br />
4) Right Click with the mouse to<br />
“Transfer Current Scan Directory”<br />
5) A screen will appear to allow the<br />
Mailbox directory to copy scanned files<br />
to local drives or networked storage<br />
locations.<br />
6) After you have copied the files it will ask if you wish to delete the folder on<br />
the IPS. This can be performed at this time if so desired.<br />
7) After the folder with the scanned images has been copied other tasks can<br />
be performed with <strong>KIP</strong> applications and other third party applications:<br />
a) Database the images<br />
b) Image editing<br />
c) <strong>KIP</strong> Request<br />
d) Any other image tools applications<br />
10-34<br />
Section 10 <strong>KIP</strong> Request
3.2 Mailbox File Deletion<br />
To remove a file from within a Mail box, use <strong>KIP</strong> Request in the following manner:<br />
1) Use the Folder selection area to browse to <strong>KIP</strong> Mailbox on the local drive<br />
2) Click on <strong>KIP</strong> Mailbox and the list of ALL the <strong>KIP</strong> <strong>3000</strong> Mail boxes on the <strong>KIP</strong><br />
<strong>3000</strong> IPS will become visible.<br />
3) Click on the mailbox (folder) that contains the scanned images that are no<br />
longer required.<br />
4) Right Click with the mouse to “Delete<br />
Current Scan Directory”<br />
5) A “Delete Folder” confirmation screen will appear to confirm the command.<br />
This will remove all of the files within the folder and leave the folder on the<br />
system.<br />
ONCE DELETED, FILES ARE PERMANENTLY<br />
REMOVED!<br />
10-35<br />
Section 10 <strong>KIP</strong> Request
4. 0 <strong>KIP</strong> <strong>3000</strong> Copier Configurations<br />
Please see the “Administrator/Service Functions of the <strong>KIP</strong> <strong>3000</strong>” document to add and<br />
control these features or functions!<br />
10-36<br />
Section 10 <strong>KIP</strong> Request
5. 0 Request Installation<br />
5.1 Installation<br />
Two methods are available to install the <strong>KIP</strong> Request software on a Windows workstation.<br />
1) Use an installed and configured <strong>KIP</strong> Windows Driver to gain access to the<br />
<strong>KIP</strong> Request Installer.<br />
2) Use the <strong>KIP</strong> Installation CD provided with the <strong>KIP</strong> <strong>3000</strong> (Installation software<br />
should also be located on your local <strong>KIP</strong> companies web site if this CD is not<br />
available, Please ensure Installer version is correct for your <strong>KIP</strong> <strong>3000</strong><br />
system!)<br />
5.1.1 Requirements<br />
Workstation operation systems can be:<br />
Windows 2000<br />
Windows XP<br />
Administrator access is also required to install the software.<br />
5.1.2 Windows Driver Access<br />
1) Click on “Start”, then “Printers and Fax”, and locate the <strong>KIP</strong> Windows print<br />
Driver in the list of installed printers. If you do not see a <strong>KIP</strong> printer you should<br />
now use the CD Installation.<br />
2) Right click on the driver and select “Properties”.<br />
3) On the “Device Settings” tab will be an “INSTALL <strong>KIP</strong> REQUEST” Button.<br />
4) Double click on the button and follow the prompts. Please accept the default<br />
settings for easy of configuration.<br />
5.1.3 CD Installation<br />
1) Locate the <strong>KIP</strong> Software CD and place in disk drive.<br />
2) Browse CD for INSTALLATION and <strong>KIP</strong> Request.<br />
3) Follow the prompts and select all defaults settings for easy of configuration.<br />
5.1.4 First Time Run<br />
After the software installation is complete, the<br />
application can be run from the Desktop (icon shown)<br />
or from the “Start,” then “All Programs,” then “<strong>KIP</strong><br />
Programs,” <strong>KIP</strong> Request . It may take several<br />
minutes for the first time launch as it attempts to find<br />
configured <strong>KIP</strong> devices. (see 5.2 Connection to <strong>KIP</strong><br />
Printers)<br />
5.1.4.1 Master Password<br />
Upon starting Request for the first time it will ask for a MASTER PASSWORD.<br />
This password allows access to the Prompt Settings (accounting)<br />
configurations. This password will be used by the department manager or<br />
network administrator. Please key in a password noting that it will be required<br />
in the future. Once set the password can not be changed.<br />
10-37<br />
Section 10 <strong>KIP</strong> Request
5.2 Connection to <strong>KIP</strong> Printers<br />
Once the application is installed and run for the first time, it is time to connect to a<br />
<strong>KIP</strong> device. Please ensure that the <strong>KIP</strong> printer is plugged in and turned on, and the<br />
address IP settings configured (see Section 11 Connectivity).<br />
5.2.3 Find <strong>KIP</strong> Printers<br />
Using the upper menu, select “Option” and then “Find <strong>KIP</strong> Printers”.<br />
1) From the FIND <strong>KIP</strong> PRINTERS window,<br />
click ADD A PRINTER TO THIS LIST.<br />
2) Select SET IP ADDRESS and enter the IP<br />
Address of the <strong>KIP</strong> IPS.<br />
3) In the “Description” field, key in a friendly<br />
Printer Name that the User can recognize<br />
(model number such as “<strong>3000</strong>”).<br />
4) TEST the connection.<br />
Note : If the IP address is invalid, the<br />
following message is seen.<br />
5) Click OK to return to the SELECT PRINTERS screen and ensure that the printer<br />
is selected with a check mark.<br />
6) Click OK again to return to Request Screen.<br />
7) The roll information should now be seen in the lower main screen as well to<br />
confirm connection.<br />
10-38<br />
Section 10 <strong>KIP</strong> Request
5.3 Other Installation Considerations<br />
5.3.1 Prompt Setup<br />
If Accounting is desired please see 2.8.4.5 in this section of the User guide. This also<br />
requires that the MASTER PASSWORD be configured.<br />
5.3.2 Pen Tables<br />
1) Pen widths and pages sizing are usually part of today’s plot files. If older languages<br />
are used please ensure that a pen table is created for the installation requirements.<br />
Please see 2.5.1 in this section of the User Guide.<br />
2) Raster and Hybrid files are quite common. Please see the “Advanced” button under<br />
“Pen Table” for any customization required. Please see 2.5.2 in this section of the<br />
User Guide. The final result on the print may be your best guide when establishing<br />
desired settings.<br />
5.3.3 Advanced Configuration and Settings<br />
The <strong>KIP</strong> Request Application is customizable. For advanced customizations please see<br />
the Appendix 6.0 - INI Configuration. Please note that any syntax errors in the INI will<br />
cause issue with <strong>KIP</strong> Request. Modification of the INI is to be performed with great<br />
caution.<br />
10-39<br />
Section 10 <strong>KIP</strong> Request
6. 0 Appendix<br />
6.1 Folding - Technical description<br />
Fold parameters are assigned similar to Stamp (.STP) files and Pen Table (.PEN) files as<br />
explained in the <strong>KIP</strong> Job Ticket Integration Information. In the job ticket folder, there is a job<br />
sub-folder containing text files that refer to the .STP, .PEN files for stamping and pen tables,<br />
there is now a new file referred to as a .FLD file that contains fold parameters.<br />
In Stamping a particular image, the job sub-folder must contain files such as 0000.SSP<br />
which contains the name of the .STP file associated with stamping the first image in the job.<br />
The content of the .SSP file is actually the name of the .STP file (also in the job sub-folder)<br />
to be used by the Unattend program in stamping a particular image. Subsequent images<br />
are stamped by using 0001.SSP, 0002.SSP to stamp image number 2 and 3 in the job.<br />
The numbering refers to the order of the documents in the .<strong>KIP</strong> ASCII Job Ticket. This<br />
method is duplicated for setting a fold parameter to work with image number 1, using<br />
0000.FLP, then image 2 using 0001.FLD etc.<br />
Action Actual File Reference File:<br />
Stamp .STP, default.stp, not<br />
for construction.stp,<br />
etc.<br />
0000.SSP, 0001.SSP, 0002. SSP<br />
containing a .STP filename to apply to<br />
document 1, 2, 3 as listed in .<strong>KIP</strong> ASCII<br />
Job Ticket.<br />
Pen Table .PEN, default.pen, etc. 0000.PPN, 0001.PPN, 0002.PPN referring<br />
to .PEN filename to apply to document 1,<br />
Fold .FLD, default.fld,<br />
36x24.fld, etc.<br />
.FLD File Contents (sample)<br />
[KipFolderSettings Ver. 1.0]<br />
FolderOriginalOrientation=0<br />
FolderOutputOrientation=1<br />
FolderRollSize=0<br />
FolderPreset=2<br />
2, 3 as listed in .<strong>KIP</strong> ASCII Job Ticket<br />
0000.FLP, 0001. FLP, 0002. FLP referring<br />
to .FLD filename to apply to document 1,<br />
2, 3 as listed in .<strong>KIP</strong> ASCII Job Ticket<br />
Definitions of the .FLD<br />
FolderOriginalOrientation<br />
Defined as landscape =0, portrait=1, reverse landscape=2, reverse portrait=3. The PPT<br />
Unattend uses this information combined with “FolderOutputOrientation” to calculate a final<br />
rotation parameter used in creation of the TIF Pack bit file before printing. Note: When<br />
using the <strong>KIP</strong> Folder all images must print in Portrait mode with title block exiting the printer<br />
last in order to fold properly and finish with the title block showing.<br />
10-40<br />
Section 10 <strong>KIP</strong> Request
FolderOutputOrientation<br />
Defined as landscape =0, portrait=1, reverse landscape=2, reverse portrait=3. The PPT<br />
Unattend uses this information combined with “FolderOriginalOrientation” to calculate a<br />
final rotation parameter used in creation of the TIF Pack bit file before printing. Note: When<br />
using the <strong>KIP</strong> Folder all images must print in Portrait mode with title block exiting the printer<br />
last in order to fold properly and finish with the title block showing.<br />
FolderRollSize<br />
This is used to lock printing to a specific roll size used in folding this document. Valid<br />
values are 0=36” roll, 1=34”, 2=30”, 3=24”, 4=22”, 5=18”, 6=17”, 7=12”, 8=11”, 9=8.5” or the<br />
word “Closest”. If using a value 0-9, the controller will prompt the user for this media size<br />
before continuing to print. This will stop the printer and other jobs from printing until the<br />
user inserts this size of media. If “Closest” is used, the Controller will use the media that fits<br />
the image the best after applying the rotation specified. Note: If using Force Size feature of<br />
the Job Ticket you must also use the same Roll Size for Force Size in FolderRollSize of<br />
the .FLD file.<br />
FolderPreset=2<br />
This refers to the preset in the Kipfoldpreset.ini. The settings defining packet size, margin,<br />
and fan and cross fold settings are set in the kipfoldpreset.ini by the technician at the<br />
controller. As a feature of Request 5 SR3, user can display the names of these settings in<br />
the new Rotate / Fold menus. The Request obtains a copy of the kipfoldpreset.ini from the<br />
current Log Directory (Log Directory as set in Unattend, Configuration, Miscellaneous<br />
Setup) named “presets.ini”.<br />
10-41<br />
Section 10 <strong>KIP</strong> Request
6.2 INI Configuration<br />
Custom Settings Fields in the<br />
Request Configuration Settings File: Winreq.ini<br />
[ Location: C:\PROGRAM FILES\WINDOWS REQUEST\WINREQ.INI ]<br />
[GENERAL]<br />
MultipleRequests=(True, False or Clear, Default=Clear)<br />
Using ‘Clear’, clears any previous entries from ‘Requester’, ‘Job number’ and<br />
‘description’ fields each time Request software is closed and re-started.<br />
Using False Closes the app. after each submission.<br />
LocalRequest=(0, 1, Default =0)<br />
‘0’ is ‘false’ and ‘1’ is true.<br />
‘LocalRequest=1’ is used when the Request app is run on the IPS.<br />
Set to 0 for failsafe operation<br />
SelectMultiple=(0, 1, Default =1)<br />
‘1’ – allows users to add the same name file up to 9 times in the same job.<br />
SaveRequest=(0, 1, Default =1)<br />
‘1’ - Job submitted using Request are saved in ‘Recall folder’<br />
‘0’ – no jobs are saved in recall folder.<br />
PrintView=(0, 1, Default =1)<br />
Printview is used to view the output on the screen as before submitting it to<br />
the printer. This is different than right clicking on the file and using ‘view<br />
selected image’ as Printview uses information from ‘stamp’, ‘rotate’, ‘invert’<br />
and ‘mirror’ selection before making an output for viewing.<br />
‘1’ – Allows use of printview capability<br />
‘0’ – Displays the file but does not use the fields as described above.<br />
DisplayPreviewWindow=(0, 1, Default =1)<br />
‘1’ – preview window is available for looking at images before submission<br />
‘0’ – removes the preview window from requester screen<br />
OnlineFeatures=(0, 1, Default =1)<br />
‘1’ – allows usage of advanced features.<br />
‘0’ – disables usage of advanced features.<br />
UnifiedAccounting=(0, 1, Default =0)<br />
‘1’ – allows usage of unified accounting.<br />
‘0’ – disables usage of unified accounting.<br />
PreviousSort=2<br />
Reads and displays information about how files were sorted inside Requester<br />
window. Files can be sorted by their names (ascending, descending), by size<br />
or by modified date. The value here is used for troubleshooting purposes.<br />
FileType=8<br />
This displays how many entries that are available under ‘Browse for’ section<br />
inside Request software. For diagnostic purposes only.<br />
10-42<br />
Section 10 <strong>KIP</strong> Request
StatusDelay=30<br />
Sets time in seconds that Request software will wait to read status<br />
information (roll information, error condition) from the printer.<br />
PenDir=C:\Program Files\Windows Request\Pens\<br />
Records and displays location of the ‘Pen table’ being used for printing.<br />
LastPen=default.Pen<br />
Records and displays the last pen used for file submission<br />
LastDir=C:\IMAGES<br />
Records and displays the last folder where the files were printed from.<br />
DefaultRequester=%UserName<br />
Shown here using an environment variable called UserName. You may also<br />
enter information after the “=” that will be displayed in the REQUESTER field<br />
each time the Software is started. Up to 30 characters may be used.<br />
DefaultDistribution=%Distribution<br />
Shown here using an environment variable called Distribution. You may also<br />
enter information after the “=” that will be displayed in the DISTRIBUTION<br />
field each time the Software is started. Up to 30 characters may be used.<br />
DefaultDescription=%Description<br />
Shown here using an environment variable called Description. You may also<br />
enter information after the “=” that will be displayed in the DESCRIPTION field<br />
each time the Software is started. Up to 30 characters may be used.<br />
Prompt=Distribution<br />
This line allows the user to customize the Distribution field name.<br />
RequesterPrompt=Requester<br />
This line allows the user to customize the Requester field name.<br />
TextSize=0.10"<br />
A <strong>KIP</strong> text header will be applied to raw files dropped into a monitor path.<br />
This value determines the size of the header, in inches.<br />
TextPos=0<br />
A <strong>KIP</strong> text header will be applied to raw files dropped into a monitor path.<br />
This value determines whether the header appears on the Leading Edge (0),<br />
or Trailing Edge (1).<br />
The next section contains the paths to the internal programs that Unattend uses to<br />
detect, convert, merge, and move files. If the required programs are not in these<br />
default locations, a Runtime Error 53 (File Not Found) will occur.<br />
ExportExe=C:\PROGRAMS\DS\MTP.EXE<br />
ViewExe=C:\Programs\ultrav.exe<br />
RemoteControlExe=C:\Programs\vncviewer.exe<br />
Raster2Tlc=C:\Programs\DS\MTF.Exe<br />
Vector2Tlc=C:\Programs\DS\MH2.Exe<br />
CropExe=C:\Programs\Cropexe.Exe<br />
TlcMergeExe=C:\Programs\DS\MI.exe<br />
TiffViewer=<br />
10-43<br />
Section 10 <strong>KIP</strong> Request
AutoRecognize=c:\programs\DS\MAD.exe<br />
PowerScriptExe=c:\programs\DS\pscript.exe<br />
KipPortExe=C:\Programs\KawPDFT.Exe<br />
RecallDir=C:\Programs\Recall<br />
TempDir=C:\Programs\TR<br />
MiniSize=1000,720<br />
Units=ENGLISH (English or Metric units)<br />
AddHpglCmd=<br />
Values are software switches, used to apply custom commands to HPGL/2<br />
files. This line may contain one switch, multiple switches, or none. Some<br />
switches are specific to certain versions; some are specific to certain printer<br />
models. Switches are case-sensitive. Some switches have a value after the<br />
switch, separated by a space. Multiple switches are separated by a space.<br />
You may see some of the following:<br />
-D 300 Forces raster images to 300 DPI, to compensate for raster images<br />
looking ‘squished’ or out of place on some files created with HP<br />
drivers.<br />
-G Affects grayscale level of embedded raster images. This feature is<br />
now built into the Request Pen Table. Value (1-100)<br />
-Y <strong>KIP</strong> 8000-specific.<br />
-Z <strong>KIP</strong> 8000-specific.<br />
An example of how multiple switches might appear in the line:<br />
AddHpglCmd=-D 300 –G 50<br />
DebugVal=999<br />
Used for diagnostic purposes only.<br />
MP=à‘Þ •àƒ„—…000000<br />
The encrypted master password as set by the installer<br />
ST=00<br />
10-44<br />
Section 10 <strong>KIP</strong> Request
This next section (MultiplePrinters) should not be configured outside of the GUI of Request<br />
[MultiplePrinters]<br />
RequestDir0=c:\monpath1\request<br />
StatusDir0=C:\monpath1\logdir<br />
MachineType0=<strong>3000</strong><br />
<strong>KIP</strong> IPS has at least one “Monitor Path”, usually on its own c:\ drive. The <strong>KIP</strong><br />
IPS can monitor up to 20 different paths.<br />
Prior to the port based printing (5), this was the method for setting up multiple<br />
printers for the requester. It allows the user to set the paths for the Request<br />
software’s communicate directly with the Unattend software. This can either<br />
be drive letter mapping, or UNC naming.<br />
The Requestdir should match the drive and directory set on the Controller in<br />
the Unattend, Configuration, Set Monitor Paths, Request Monitor Path. The<br />
Request software will create a subdirectory here for each request and place<br />
all the relevant files for the print job in that unique directory.<br />
The Statusdir should match the drive and directory set on the controller in the<br />
Unattend, Configuration, Miscellaneous, Log Directory. The Request software<br />
will look to this directory for the updated paper and error information created<br />
by the Unattend software at the Controller. The Log directory is read each<br />
time the <strong>KIP</strong> Icon / title bar on the Request menu is selected with the mouse.<br />
The Machinetype allows the user to set a name for their printer. It does not<br />
have to match the actual printer they own. For instance the user could give<br />
the printer a personal name like “BOB”. This would be displayed on the <strong>KIP</strong><br />
icon/title bar.<br />
Additional <strong>KIP</strong> Printers.<br />
Users may create additional groups of printers to select from directly<br />
underneath the current paths. For example:<br />
[MultiplePrinters]<br />
RequestDir0=C:\Monpath1\Request<br />
StatusDir0=C:\Monpath1\LogDir<br />
MachineType0=6000<br />
RequestDir1=F:\abc\Request<br />
StatusDir1=F:\abc\LogDir<br />
MachineType1=<strong>3000</strong> UL<br />
RequestDir2=\\40Server\8000\Request<br />
StatusDir2=\\40Sever\8000\LogDir<br />
MachineType2=8000<br />
In the Request software users can change from one printer to the next by<br />
selecting the <strong>KIP</strong> icon / title bar at the top of the Request interface. This will<br />
switch from one printer to the next and update the roll information at the<br />
bottom of the Request interface.<br />
10-45<br />
Section 10 <strong>KIP</strong> Request
[KipPortPrinters]<br />
PrinterName1=~<strong>KIP</strong> <strong>3000</strong><br />
[ConvertTypes]<br />
Type0=Group4 TIF R<br />
Type1=Group4 CAL R<br />
Type2=ZSoft PCX R<br />
Type3=HPGL PLT V<br />
Type4=<strong>KIP</strong> TLC R<br />
Type5=Group4 GP4 R<br />
Type6=Postscript PS V<br />
Type7=Postscript EPS V<br />
Type8=Adobe PDF V<br />
Type9=JPEG JPG R<br />
Type10=Unknown 0?? V<br />
Type11=Intergraph CIT R<br />
Type12=ASCII xxx A<br />
valid<br />
(NOTE: Type 10, where 0?? Is located, represents all files that begin in 0 that are<br />
Vector files. For example Microstation I-Plot files with .000 extensions.)<br />
(NOTE: Type12. In an actual .ini file, the actual file extension would be entered.<br />
For example: Type12=ASCII INI A ; Type13=ASCII DAT A ; Type14=ASCII LOG A,<br />
etc.)<br />
[PaperTypes] Additional media types can be added but they must also be<br />
Paper0=Bond added into the IPS INI<br />
Paper1=Vellum<br />
Paper2=Film<br />
Paper3=OnHold<br />
[PullDownDistribution]<br />
ð Ï •àƒ„—…˜þ†Š ˆ ‰ ÿûýÛÝ›šŽŒœà‘Þ •àƒ„—<br />
…˜þ†Š ˆ ‰ ÿûýÛÝ›šŽŒœ<br />
[PullDownRequester]<br />
[PullDownDescription]<br />
”Ô Õ•àƒ„—…˜þ†Š ˆ ‰ ÿûýÛÝ›šŽŒœà‘Þ •àƒ„—<br />
…˜þ†Š ˆ ‰ ÿûýÛÝ›šŽŒœ<br />
[OutputTypes]<br />
Type0=TLC Tiled Format -t<br />
Type1=CAL CALS Group 4 -C<br />
Type2=TIF TIFF Group 4 -T<br />
Type3=PCX Monochrome -c<br />
Type4=CIT Intergraph -G<br />
Type5=PDF Adobe -g<br />
10-46<br />
Section 10 <strong>KIP</strong> Request
6.3 Creating Productivity Reports<br />
The <strong>KIP</strong> Productivity Reporting Package (PRP) is designed to use information gathered from<br />
accounting fields in <strong>KIP</strong> Request along with various applications that have been linked to <strong>KIP</strong><br />
Request such as:<br />
<strong>KIP</strong> Request<br />
AutoCAD<br />
<strong>KIP</strong> <strong>3000</strong> Software<br />
<strong>KIP</strong> PrintNet<br />
<strong>KIP</strong> Copymaker (for <strong>KIP</strong> 2000 series scanners)<br />
By sharing accounting data generated from <strong>KIP</strong> Request, users have the ability to link multiple<br />
applications using the same accounting rules. This system allows managers to generate reports<br />
that have valuable accounting information and can be manipulated by the user to get the desired<br />
output including the following:<br />
• <strong>KIP</strong> productivity reporting package generates reports of meter readings and<br />
accounting data on a daily, weekly or monthly time cycle.<br />
• Reports include detailed authorization, accounting and meter information.<br />
• PRP reports can be opened with Notepad or exported as an ASCII file format.<br />
There are three main accounting fields in the Request software:<br />
Request<br />
1. Requester - This is a field which can be used for accounting. Information entered is applied<br />
to the <strong>KIP</strong> Job and Print Logs.<br />
2. Job Number - This is a field which can be used for accounting.<br />
Information entered is applied to the <strong>KIP</strong> Job and Print Logs.<br />
This field is tied to ALL Reports!<br />
3. Description - This is a field which can be used for accounting.<br />
Information entered is applied to the <strong>KIP</strong> Job and Print Logs.<br />
When these fields are set up correctly and have been configured as “required” in the Request<br />
software, the “rules” will carry over to the other applications.<br />
AutoCAD Copymaker<br />
<strong>KIP</strong> <strong>3000</strong> User Log on Screen<br />
10-47<br />
Section 10 <strong>KIP</strong> Request
PrintNet<br />
Accounting fields entered into the Request software installed on the Web server host pc being<br />
utilized by <strong>KIP</strong> PrintNet will also be transferred to users accessing PrintNet via the intranet or<br />
internet.<br />
Productivity reports can be generated from Request 6.0 and can be very helpful in keeping<br />
track of accounting data. These can be generated on a daily, weekly, monthly or custom<br />
time frame.<br />
The Productivity reports can be accessed by doing the following:<br />
1. On the Request main screen select “Manage” from the menu bar and then select “Print<br />
Reports”<br />
2. The Following window will appear. This is where the currently selected printer information will be<br />
displayed. There are three different types of reports that can be generated from this screen:<br />
1. Printing<br />
2. Scanning<br />
3. Meter Reading<br />
10-48<br />
Section 10 <strong>KIP</strong> Request
1. Printing<br />
This report will include both prints and copies that have been sent to the <strong>3000</strong> print engine. The<br />
report will include Date, Time, Requester, Media, # of originals, # of Copies and Sq. Feet. The<br />
information for Requester and Job Number shown below are gathered from all <strong>KIP</strong> printing<br />
applications. The user can select the Start Date and the End Date of the report along with where to<br />
print the report. The report can be sent directly to the default printer attached to the PC generating<br />
the report or to the Notepad to be saved to a file.<br />
10-49<br />
Section 10 <strong>KIP</strong> Request
10-50<br />
Section 10 <strong>KIP</strong> Request
2. Scanning<br />
This report will include all files that have been scanned to file using the Scan Mode of the <strong>3000</strong> UI.<br />
The report will include Date, Time, Requester, Location, Type, Format and Sq. Feet. The<br />
information for Requester shown below is gathered from all <strong>KIP</strong> printing applications. The user can<br />
select the Start Date and the End Date of the report along with what to do with this data. The report<br />
can be sent directly to the default printer attached to the PC generating the report or to the Notepad<br />
to be saved to a file.<br />
10-51<br />
Section 10 <strong>KIP</strong> Request
3. Meter Reading<br />
This report will include daily Meter readings from the desired dates set in the Start Date and End<br />
Date. The report will include Date, Meter A, Meter B and Total run. This meter reading should<br />
closely match the actual meter reading on the <strong>KIP</strong> <strong>3000</strong> printer. The user can select the Start Date<br />
and the End Date of the report along with what to do with this data. The report can be sent directly<br />
to the default printer attached to the PC generating the report or to the Notepad to be saved to a file.<br />
10-52<br />
Section 10 <strong>KIP</strong> Request
6.4 Printing DWF files<br />
DWF (Design Web Format) files offer a simple, secure way to share design data from<br />
AutoDesk. Developed specifically for engineering design data, the DWF format is the best<br />
way to share 2D and 3D design information, because the file size is smaller and faster to<br />
transmit than either native design file formats or other alternatives. DWF files are print<br />
ready and maintain absolute data fidelity.<br />
How are DWF’s created?<br />
• If you’re using AutoCAD, Autodesk Inventor, or other Autodesk applications, you can<br />
create DWF files directly from the built-in “Publish” command within the application.<br />
• DWF files can also be created from any application using the Autodesk DWF Writer<br />
that ships with Autodesk DWF Composer. Autodesk DWF Writer software enables<br />
you to publish to DWF format from CAD applications that do not offer built-in DWF<br />
publishing, such as Bentley Microstation or Dassault’s Solidworks software.<br />
Autodesk DWF Writer is a certified Microsoft Windows system printer driver that<br />
enables you to quickly and easily convert files to DWF format.<br />
• If you’re NOT using AutoCAD, Autodesk Inventor, or other Autodesk applications,<br />
the Autodesk DWG Viewer component that ships with DWF Composer allows for the<br />
full publishing capabilities that are in AutoCAD 2006. This includes the ability to<br />
batch convert DWG files to DWF. Users simply need to add DWG files in the Publish<br />
menu before Publishing the sheet set to a single DWF file<br />
NOTE: Some DWF files created prior to 2004 may not be compatible.<br />
<strong>KIP</strong> Request handles printing .DWF files directly to the printer. This is done by selecting<br />
a .dwf file from a desired location and clicking on “Submit Print Job”.<br />
10-53<br />
Section 10 <strong>KIP</strong> Request
After clicking on “Submit Print Job”, a DWF settings window will appear.<br />
This will allow the user to:<br />
a) Print all pages in a multi-page .dwf file or only the desired pages.<br />
b) Select to Print Colors in Black to change all of the lines / areas to print solid black<br />
and not gray.<br />
c) Choose “Reverse Print Order”<br />
d) Enter a password if the DWF files was created with password protection.<br />
10-54<br />
Section 10 <strong>KIP</strong> Request
Section 11<br />
<strong>KIP</strong> PrintNET<br />
Page<br />
1. 0 Preview / Main Screen 11- 2<br />
1.1 Main Screen 11- 3<br />
2. 0 Operation Details 11- 4<br />
2.1 Login Screen 11- 4<br />
2.2 Logout 11- 5<br />
2.3 Admin Setup 11- 5<br />
2.4 Requester Region 11- 5<br />
2.5 File Selection Area 11- 6<br />
2.6 File Selection 11- 6<br />
2.7 Remove 11- 7<br />
2.8 Remove All 11- 7<br />
2.9 Enlarge / Reduce 11- 7<br />
2.10 Header 11- 7<br />
2.11 Invert / Mirror / Collate 11- 7<br />
2.12 Email communication 11- 7<br />
2.13 Submit Print Job 11- 8<br />
2.14 Manage Queue 11- 9<br />
3.0 Installation<br />
3.1 Requirements - Host PC OS 11- 11<br />
3.2 Requirements - Host PC NTFS Permission 11- 11<br />
3.3 Requirements - Host PC Network Protocol 11- 11<br />
3.4 Installation - Host PC 11- 12<br />
4.0 Host PC Configuration 11- 13<br />
5.0 Configuration 11- 15<br />
5.1 Administration 11- 16<br />
5.2 Email 11- 17<br />
5.3 Advanced Configuration 11- 20<br />
5.4 Job History 11- 22<br />
5.5 Unified Accounting 11- 23<br />
6.0 Appendix 11- 24<br />
7.0 FAQ’s 11- 27<br />
11-1 Section 11 <strong>KIP</strong> Print Net
1.0 Preview / Main Screen<br />
<strong>KIP</strong> PrintNET is a basic web-enabled version of <strong>KIP</strong> Request for use in company intranets<br />
or the global internet. This allows job submissions to the <strong>KIP</strong> printer without installation of<br />
the <strong>KIP</strong> Request application on the PC. Users require a PC with high-speed Internet or<br />
intranet connection and a web browser. The <strong>KIP</strong> PrintNET submission tool can be used<br />
with a number of java script enabled web browsers:<br />
Windows Internet Explorer, Netscape Navigator, MAC Safari, Mozilla Firefox, Opera<br />
This section of the user guide provides information about using the submission tool<br />
including its features and functionality. It demonstrates the use of Windows Internet<br />
Explorer, although other web browsers may have similar functions.<br />
For installation, technical details and administrative procedures please refer to the chapters<br />
of Installation, Setup and Configurations near the end of this section. Please note that a<br />
host PC is required for the use of <strong>KIP</strong> PrintNET. The Appendix displays a few screen shots<br />
of web browsers and components required for correct and complete operation of <strong>KIP</strong><br />
PrintNET. Certain web browsers (primarily Internet Explorer) require the use of ActiveX<br />
controls.<br />
Please note that <strong>KIP</strong> PrintNET does not have all the advanced features as the <strong>KIP</strong> Request<br />
application and <strong>KIP</strong> request must be installed in the Host PC prior to installing <strong>KIP</strong><br />
PrintNET.<br />
11-2 Section 11 <strong>KIP</strong> Print Net
1<br />
9<br />
3<br />
1.1 Main Screen<br />
6<br />
7<br />
8<br />
16 15<br />
No. Name Function<br />
1 Host Address<br />
Type in the URL of the Server / PC that hosts <strong>KIP</strong> PrintNET<br />
(password protected )<br />
2 Logout Logout from the <strong>KIP</strong> PrintNET session<br />
3 Admin Setup Administrative feature setup if logged on as administrator<br />
4 Queue Management Manages the job queue on the printer.<br />
5 Accounting Region<br />
Selection for Name of Operator, Printer type, Project<br />
number, Time and Date of requested Job,<br />
6 New Job Clear all previous setting to start a new print submission.<br />
7 File Selected Area Displays file names and the file size of selected files<br />
8 Select Browse to select the file(s) for printing from the PC / LAN<br />
9 Remove / Remove All Deleting one or all files from the job list.<br />
10 Job Settings<br />
Pen table selection, Media type selection, Stamp selection,<br />
Rotate / Fold selection, number of copies selection and print<br />
/ image size.<br />
11 Header / Header Position Inserting a Header and position of the Header on the print<br />
12 Printing Options Provides Mirror, Invert and Collation capability<br />
13 Email Communication<br />
Add an email address to send auto response for job<br />
acceptance<br />
14 Job Submission Send a job / files<br />
15 History Queue View and Re-Submit Jobs<br />
16 Printer Configuration Change Printer Settings<br />
11-3 Section 11 <strong>KIP</strong> Print Net<br />
5<br />
2<br />
4<br />
10<br />
11<br />
13<br />
14<br />
12
2.0 Operation Details<br />
2.1 Login Screen<br />
To access the PrintNET host, in the address line of your web browser type in the URL of<br />
the Server / PC that hosts the <strong>KIP</strong> Job submittal tool application. It is important to use the<br />
syntax in the following format:<br />
http://Host_Name. or IP address<br />
Please contact your network administrator for your URL to the <strong>KIP</strong><br />
printer as installations will differ.<br />
This link will take the user to the login web page.<br />
Users are required to enter a login name and password as assigned by an<br />
Administrator. The ‘User Name’ can be a combination of numbers and letters up to 30<br />
characters long. Upon login, the user will be able to see the <strong>KIP</strong> PrintNET web page.<br />
If prompted to install Persits XUpload, click Install (first time use only. If you are unable<br />
to install this “plug in” please contact your network administrator for access)<br />
11-4 Section 11 <strong>KIP</strong> Print Net
2.2 Logout<br />
Once the user has completed a job submission, they may ‘Logout’ of the <strong>KIP</strong> PrintNET<br />
web page.<br />
2.3 Admin Setup<br />
Please see the section Installation and Setup near the end of this section for details<br />
regarding Administrative functions and features.<br />
2.4 Requester Region<br />
1) Operator<br />
This displays the login name of the<br />
person who logged in using their user<br />
name and password.<br />
2) Printer<br />
User can make their choice of printer that<br />
is available on the network to send print<br />
jobs to. The printer setup is explained in<br />
the Installation and Setup section. This is<br />
only available on server hosted<br />
installations of PrintNet.<br />
3) Project Code<br />
User has the choice of using administratively<br />
defined job numbers from this list as in <strong>KIP</strong> Request<br />
software.<br />
4) Notes<br />
This field allows user to enter a description for specific print jobs as in <strong>KIP</strong> Request<br />
software<br />
5) Time of Request<br />
This field displays the system time at the time of submission. This field can be used<br />
to schedule a job at a certain time, as in <strong>KIP</strong> Request software. This must be<br />
configured to allow this feature on the <strong>KIP</strong> IPS.<br />
6) Date of Request<br />
This field is displays the system date at the time of submission. This field can be<br />
used to schedule a job on a certain date, as in <strong>KIP</strong> Request software.<br />
7) Pen Table<br />
User has the choice of specifying a pen table associated with a selected vector files.<br />
8) Media Type<br />
User has the choice of Bond, Vellum<br />
and Film media. Additional media types<br />
can be added to this field. Additions are<br />
made in the ‘Winreq.ini’ file. For more<br />
11-5 Section 11 <strong>KIP</strong> Print Net
information, please see Installation and<br />
Setup section.<br />
9) Stamp<br />
Users can choose to apply an available<br />
stamp scheme to printed documents.<br />
Stamps that can be used here are<br />
created using the ‘<strong>KIP</strong> Request’<br />
software.<br />
10) Rotate / Fold<br />
Users can choose to use one of the available Rotate / Fold schemes. Schemes for<br />
‘Fold / Rotate’ that are available here are created using the ‘<strong>KIP</strong> Request’ software.<br />
11) Number of Copies<br />
Users select number of copies to print.<br />
2.5 File Selection Area<br />
In this section, users can add<br />
or review the files they have<br />
selected for printing.<br />
2.6 File Selection<br />
There are two methods to add<br />
new files for printing.<br />
1) Use “Select” to add a file<br />
to be printed. This will<br />
launch a new window for<br />
section of the required<br />
files. Select the files using<br />
Windows commands<br />
(Crtl+Click, or Shift+Click<br />
or a simple click) then<br />
select “Open” after<br />
highlighting the file(s)<br />
2) Drag and drop feature<br />
is available here. Use<br />
Windows Explorer (or<br />
other browser as a<br />
separate window) to<br />
highlight, then drag and<br />
drop files into the <strong>KIP</strong><br />
PrintNET File select<br />
region.<br />
11-6 Section 11 <strong>KIP</strong> Print Net
2.7 Remove<br />
Select the file and use “Remove” to<br />
deselect a file that is not required to be<br />
printed<br />
2.8 Remove All<br />
Removes all files from the file selection<br />
area.<br />
2.9 Enlargement / Reduction & Force Size<br />
The entire set of documents<br />
selected can be reduced or<br />
enlarged from 25% up to 400%.<br />
If the user would prefer to print<br />
files to a specific size media, the<br />
‘Force size’ feature is available.<br />
Entries in Force Size are<br />
determined by <strong>KIP</strong> Request<br />
software.<br />
2.10 Header size and Position<br />
Header (0.1 mm to 1.5mm) can be<br />
deployed on the leading edge or trailing<br />
edge of printed output.<br />
2.11 Mirror / Invert / Collate<br />
Users can choose to mirror or invert and<br />
set collation can be enabled.<br />
11-7 Section 11 <strong>KIP</strong> Print Net
2.12 Email Confirmation<br />
Users may enter an e-mail address<br />
where confirmation of a print job<br />
submission will be sent. The Installation<br />
and Setup section of this document<br />
describes this feature and the function in<br />
greater detail.<br />
2.13 Submit Print Job<br />
This sends the selected print files and job information to the<br />
host PC for printing.<br />
11-8 Section 11 <strong>KIP</strong> Print Net
2.14 Manage Queue<br />
To use this feature the IP or URL of the <strong>KIP</strong> <strong>3000</strong> must be known. That is a HOST PC<br />
configuration can not access the print queue, only direct connection to the<br />
<strong>KIP</strong> <strong>3000</strong>.<br />
Select this button to manage and view the job queue in the <strong>KIP</strong> <strong>3000</strong> Printer.<br />
Must be logged in as Administrator.<br />
Refresh List<br />
Delete Job<br />
Select the job(s) then use<br />
this button to remove<br />
Printer status or installed roll information<br />
11-9 Section 11 <strong>KIP</strong> Print Net
Edit Job<br />
To edit a job, right click on the JOB TICKET name and select Edit Job Ticket.<br />
A window will come on the screen allowing you to change the Number of Copies and Media<br />
Type. Select OK when done.<br />
Note:<br />
Queue Management will work only if connected directly to the IPS on the <strong>KIP</strong> <strong>3000</strong>.<br />
11-10 Section 11 <strong>KIP</strong> Print Net
3.0 Installation<br />
The <strong>KIP</strong> <strong>3000</strong> has the services required for direct connection so no additional hardware is<br />
required. However, if more than four concurrent uses will submit jobs to the <strong>KIP</strong> <strong>3000</strong> a<br />
HOST PC must be used!<br />
3.1 Requirements: Host PC Operating System<br />
1. Microsoft Windows 2000/2003 Server or Microsoft Small Business Server<br />
2. IIS 5.1 or later.<br />
3. <strong>KIP</strong> Request 6.0 or later must be installed on the host PC.<br />
4. <strong>KIP</strong> Request 6.0 must have a username “admin” and a password “kip” for initial <strong>KIP</strong><br />
PrintNET configuration.<br />
3.2 Requirements: Host PC NTFS Permission<br />
1. Internet Guest Account (IUSR_XXXX)* requires read/write/modify NTFS permissions<br />
to the following files for <strong>KIP</strong> Request and <strong>KIP</strong> PrintNET applications:<br />
\include\emailsettings.asp<br />
\Request\winreq.ini<br />
2. Internet Guest Account (IUSR_XXXX)* and “Network Service” System Object<br />
requires read/write/modify NTFS permissions to the following directories for <strong>KIP</strong><br />
Request and <strong>KIP</strong> PrintNET applications:<br />
\Request\<br />
\Request\Settings<br />
\Uploads**<br />
* IUSR_XXXX where XXXX represents the Computer Name hosting the <strong>KIP</strong> PrintNET<br />
application<br />
** Uploads location is defined by a System Environment variable ‘<strong>KIP</strong>N’ followed by<br />
Uploads subdirectory. By default, <strong>KIP</strong>N is set to the installation path of <strong>KIP</strong> PrintNET<br />
specified at installation.<br />
3.3 Requirements: Host PC Network Protocol<br />
1. TCP Port 80 inbound for web page content delivery and document upload<br />
functionality.<br />
2. Connection to TCP Port 8421 outbound for delivery of print jobs to <strong>KIP</strong> Printer<br />
3. Connection to TCP Port 25 (optional) outbound for e-mail delivery confirmation.<br />
11-11 Section 11 <strong>KIP</strong> Print Net
3.4 Host PC Installation<br />
1. Ensure installer has local<br />
Administrative privileges<br />
2. Install <strong>KIP</strong> Request on the Host PC.<br />
(please see the <strong>KIP</strong> Request section<br />
see install <strong>KIP</strong> Software CD)<br />
3. Execute the <strong>KIP</strong> PrintNET installation<br />
by double-clicking on the<br />
KPNSetup_v2.2.exe (see <strong>KIP</strong><br />
Software CD)<br />
4. Read and accept the <strong>KIP</strong> End<br />
User License Agreement.<br />
5. Enter User Information and<br />
Company Information:<br />
6. Select Installation directory.<br />
(Default is C:\Program<br />
Files\<strong>KIP</strong>\PrintNET)<br />
7. Click Next to complete installation:<br />
<strong>KIP</strong> PrintNET creates a virtual<br />
directory with the alias ‘PrintNET’<br />
on the instance of IIS provided by<br />
the Host PC.<br />
11-12 Section 11 <strong>KIP</strong> Print Net
4.0 Host PC Configuration<br />
This section of the document explains how to setup certain user settings for use inside of<br />
<strong>KIP</strong> PrintNET. This section requires advanced knowledge of <strong>KIP</strong> Request software and its<br />
configuration settings on the host system as defined by Winreq.ini. Changes made in<br />
Winreq.ini on the host PC are reflected in <strong>KIP</strong> PrintNET.<br />
From the main screen, our main focus will be on the following features:<br />
a) Requester, Job Number, and Description<br />
To edit, open Winreq.ini on the Host PC and scroll to the following lines:<br />
Prompt=Job Number:<br />
RequesterPrompt=Requester:<br />
DescriptionPrompt=Description:<br />
Requester Job Number and Description fields can be edited to match user<br />
requirements. An example is shown below:<br />
Prompt=Project Code:<br />
RequesterPrompt=Operator:<br />
DescriptionPrompt=Notes:<br />
Please refer to <strong>KIP</strong> User Guide for <strong>KIP</strong> Request software for more information<br />
b) Pen table<br />
Available pen table files are created and defined within <strong>KIP</strong> Request. <strong>KIP</strong> PrintNET<br />
software will use pen tables defined in <strong>KIP</strong> Request.*<br />
Please refer to <strong>KIP</strong> User Guide for <strong>KIP</strong> Request software for more information on<br />
pen table setup<br />
11-13 Section 11 <strong>KIP</strong> Print Net
c) Media type<br />
Available media types ‘Bond’, ‘Vellum’, ‘Film’ are defined within Winreq.ini<br />
<strong>KIP</strong> PrintNET software will use the media types tables defined in winreq.ini<br />
Winreq.ini can be edited to allow more media types. An example showing an<br />
additional defined media ‘TBond’ is shown below. Up to six (6) character long names<br />
can be chosen for Media types. To edit, open Winreq.ini on the Host PC and scroll to<br />
the following lines<br />
[PaperTypes]<br />
Paper0=Bond<br />
Paper1=Vellum<br />
Paper2=Film<br />
Paper3=TBond<br />
d) Stamp<br />
Available stamps are created and defined within <strong>KIP</strong> Request. <strong>KIP</strong> PrintNET<br />
software will use stamps defined in <strong>KIP</strong> Request.*<br />
Please refer <strong>KIP</strong> Technical User Guide for <strong>KIP</strong> Request software for more<br />
information on pen table setup<br />
e) Rotate / Fold<br />
Available Rotate / Fold parameters are defined within <strong>KIP</strong> Request. <strong>KIP</strong> PrintNET<br />
software will use Rotate / Fold parameters defined in <strong>KIP</strong> Request.*<br />
Please refer <strong>KIP</strong> Technical User Guide for <strong>KIP</strong> Request software for more<br />
information on Rotation and Fold parameters<br />
f) Enlarge / Reduce and Force -Size settings<br />
Standard enlargement and reduction ratios 25%, 50%, 66.7%, 75%, 150%, 200%<br />
and 400% are non-modifiable. Additional Force-Size settings are created and<br />
defined within <strong>KIP</strong> Request. <strong>KIP</strong> PrintNET software will use Force-Size settings<br />
defined in <strong>KIP</strong> Request.*<br />
Please refer <strong>KIP</strong> Technical User Guide for <strong>KIP</strong> Request software for more<br />
information on Force-Size settings<br />
11-14 Section 11 <strong>KIP</strong> Print Net
5.0 Configuration<br />
Verify local host access to <strong>KIP</strong> PrintNET by opening your web browser and entering<br />
http://localhost/PrintNET<br />
The main login screen to the <strong>KIP</strong> PrintNET software should appear.<br />
Both the user name and password for Administrative access to <strong>KIP</strong> PrintNET must<br />
be defined within <strong>KIP</strong> Request software using Prompt Setup operations for the<br />
Requester field. Requester prompt must be configured as “Required” from the<br />
pulldown list.<br />
The default user name for accessing the Administrative account is: admin<br />
The default password for accessing the Administrative account is: kip<br />
After administrative authentication, select Admin Setup.<br />
11-15 Section 11 <strong>KIP</strong> Print Net
5.1 Administrative Screen<br />
1 Home Screen<br />
2 Printer Configuration Screen<br />
3 Job List Screen<br />
4 Job History Screen<br />
5 User Guides<br />
6 Add, Edit, and Delete Users<br />
7 Email Settings<br />
11-16 Section 11 <strong>KIP</strong> Print Net
5.2 Email Settings<br />
SMTP<br />
Setup SMTP Server and Email settings. Click Submit when finished.<br />
SMTP Server: Name or IP Address of your Email Server.<br />
SMTP Username: Login name for Email Server.<br />
SMTP Password: Password for login.<br />
From Address: Email Address that will show in the from field.<br />
Click the Test Server button to test login credentials.<br />
Job Ticket Email<br />
This section sets the E-Mail message that is sent when a job is submitted through PrintNET<br />
and a receipt is requested.<br />
From Address: Email Address that will show in the from field. You can put multiple<br />
address in separated by a semicolon “;”.<br />
Subject: Subject of the Email.<br />
Body: Body of Email.<br />
NOTE: You can right click in the Subject or Body sections and select a macro to be<br />
automatically filled in when message is sent. You can choose from Job Ticket, Requester,<br />
Job Number, and Description.<br />
11-17 Section 11 <strong>KIP</strong> Print Net
Printer Error Message<br />
E-Mail is sent every time one of the selected events is triggered. You can choose from Out<br />
of Toner, Out of Paper, and Paper Jams.<br />
Recipients: Email address that will be set to. You can put multiple address in separated by<br />
a semicolon “;”.<br />
Subject: Subject of the Email.<br />
Body: Body of Email.<br />
NOTE: You can right click in the Subject or Body sections and select a macro to be<br />
automatically filled in when message is sent. You can choose from Date/Time, Event<br />
Message, Printer Name, Printer Serial Number, IP Address, Dealer Name, Dealer Phone<br />
Number, Meter A, Meter A Unit, Meter B, Meter B Unit, and Total Run.<br />
11-18 Section 11 <strong>KIP</strong> Print Net
Monthly Meter Report<br />
E-Mail sent for meter reports. This can be scheduled Weekly or Monthly.<br />
Recipients: Email address that will be set to. You can put multiple address in separated by<br />
a semicolon “;”.<br />
Subject: Subject of the Email.<br />
Body: Body of Email.<br />
NOTE: You can right click in the Subject or Body sections and select a macro to be<br />
automatically filled in when message is sent. You can choose from Printer Name, Printer<br />
Serial Number, IP Address, Meter Reading Date, Meter Reading Time, Meter A, Meter A<br />
Unit, Meter B, Meter B Unit, Copy, Network Print, Scan, and Total Run.<br />
11-19 Section 11 <strong>KIP</strong> Print Net
5.3 Printer Configuration<br />
NOTE: Undesired output might occur if settings are changed.<br />
This section is for configuring the printer. After making necessary changes click on submit.<br />
Changes will be sent to the printer and after 20 seconds the new settings will be displayed.<br />
Basic Configuration<br />
• Printer Name<br />
The name of this printer.<br />
• Historical Queue<br />
Sets size limit of the historical queue. A “0” (Zero) setting will turn off.<br />
Measured in Gigabytes. The range can be set from “0” (Disabled) to “25”.<br />
• Print Setting<br />
Sets selection for paper size.<br />
• Copy Density Value<br />
Sets density values for prints.<br />
• Output rotation<br />
Rotates landscape/portrait based on selection.<br />
11-20 Section 11 <strong>KIP</strong> Print Net
• Reprint<br />
Sets the number of copies to reprint after a jam condition. This value is used<br />
as default.<br />
Sets the number of inches to reprint after a jam condition. If a value is set<br />
here it will override the default copies to reprint.<br />
Advanced Configuration<br />
• Print Separator Sheets<br />
Sets where separator sheets are printed.<br />
• Deck Info<br />
Sets Media selection. Custom Media Types can be added here.<br />
• Other<br />
Min Cut Length – Sets the minimum length a sheet can be cut to, measured<br />
in Inches. Default 8.25”.<br />
Max Image Length – Sets maximum image length that can be printed,<br />
measured in Inches. Default 600”.<br />
HPGL Min Line weight – Sets the minimum line weight for HPGL pens,<br />
measured in Inches. Default .003”.<br />
HPGL Min Grayscale – Sets the minimum setting for grayscale. Default 1.<br />
DWF Min Line weight – Sets the minimum line weight for DWF images.<br />
Default 1.<br />
Image Width Removal – Sets how much with of the image is removed,<br />
measured in pixels. Default 75.<br />
Lead Edge Void – Sets the amount of the leading edge is ignored, measured<br />
in pixels. Default 50.<br />
Delay Between Collated Sets – Sets the print delay in between collated sets,<br />
measured in seconds. Default 1.<br />
• Custom Media Types<br />
Lists and sets Media Types.<br />
11-21 Section 11 <strong>KIP</strong> Print Net
5.4 Job History<br />
The Job History screen displays a list of jobs that have been printed.<br />
To edit a job, right click on the Job Ticket name. The following screen shows up and you<br />
can then change the number of copies and media type.<br />
Click on the Print icon to re-submit the jobs selected.<br />
11-22 Section 11 <strong>KIP</strong> Print Net
5.5 Unified Accounting<br />
This feature becomes available when multiple printers are used in a server environment. If<br />
Unified Accounting is wanted a host printer needs to be selected from the list of printers on<br />
the IIS Host. All accounting information will be pulled from this printer.<br />
When using Unified Accounting the Workstation and IPS DO NOT Communicate directly<br />
with one another.<br />
In this diagram shows how the Workstation communicates with the IIS Host and the IIS<br />
Host then communicates with the IPS inside the selected printer.<br />
IPS<br />
Job Transfer<br />
IIS<br />
HOST PC<br />
Submit Job<br />
WKSTN<br />
11-23 Section 11 <strong>KIP</strong> Print Net
6.0 Appendix<br />
Other Web Browsers<br />
This document is created using the most popular web browser at the time of publishing.<br />
Other browsers are available which may change operation of <strong>KIP</strong> PrintNET. This is based<br />
upon the ActiveX abilities of the browser and the OS. Here are a few other examples of<br />
browsers that are available to submit prints using <strong>KIP</strong> PrintNET.<br />
<strong>KIP</strong> PrintNET on Mozilla Firefox<br />
<strong>KIP</strong> PrintNET on MAC Safari<br />
11-24 Section 11 <strong>KIP</strong> Print Net
<strong>KIP</strong> PrintNET on Opera<br />
11-25 Section 11 <strong>KIP</strong> Print Net
<strong>KIP</strong> PrintNET installs the following files and folders to a user specified installation<br />
directory:<br />
\admin.asp Administration Page<br />
\aspupload.dll Provides upload functionality<br />
\checkp.asp Provides form functionality<br />
\default.asp Default Login Page<br />
\dragdrop.asp File Selection Window<br />
\logout.asp Provides Logout functionality<br />
\main.asp Main User Interface Page<br />
\mainsubmit.asp Provides Job Submit functionality<br />
\newjob.asp Provides New Job action functionality<br />
\simpleupload.asp Provides Non ActiveX upload functionality<br />
\xupload.asp Provides ActiveX upload functionality<br />
\xupload.ocx ActiveX Control<br />
\css\sft.css Contains font formatting<br />
\images\adminbutton.jpg User Interface Graphic<br />
\images\back.jpg User Interface Graphic<br />
\images\button2.png User Interface Graphic<br />
\images\kiplogo.jpg User Interface Graphic<br />
\images\kiplogo.gif User Interface Graphic<br />
\images\minus.gif User Interface Graphic<br />
\images\plus.gif User Interface Graphic<br />
\images\return.jpg User Interface Graphic<br />
\images\submit.jpg User Interface Graphic<br />
\include\email.asp Provides e-mail functionality<br />
\include\emailsettings.asp Contains e-mail settings<br />
\include\formcheck.js Contains rules for form fields<br />
\include\settings.asp Contains main application settings<br />
\include\utils.asp Contains detection of user web browser capability<br />
\include\x.js Contains additional rules for form fields<br />
\inclide\xmlhttprequest.js Contains Opera webbrowser upload capability<br />
\libs\kiputils.dll Provides job submission to <strong>KIP</strong> printers<br />
\Uploads Directory for accepting submitted print jobs<br />
11-26 Section 11 <strong>KIP</strong> Print Net
7.0 Frequently Asked Questions (FAQ)<br />
Q: When I connect to <strong>KIP</strong> PrintNET, I am prompted to install an ActiveX control.<br />
What is this? I do not see the “browse” area that allows me to select my files<br />
for printing. Why?<br />
A: <strong>KIP</strong> PrintNET uses an ActiveX control for those using Internet Explorer web<br />
browsers. You must allow the ActiveX control permission to load. If the ActiveX<br />
control does not load it may be because some facilities prevent ordinary users from<br />
loading ActiveX controls / content without proper computer and / or network<br />
permissions. Please see your administrator.<br />
Q: When I submit a large print job, my web browser hangs even though the<br />
progress bar says 0:00 seconds left.<br />
A: <strong>KIP</strong> PrintNET verifies that each file was received by the Hosting PC. Once this<br />
verification is completed, control is given back to the web interface<br />
Q: I am getting an error when submitting my print job. I see some error codes.<br />
A: Errors while submitting print jobs are most likely caused by a permissions issue at<br />
the PC hosting <strong>KIP</strong> PrintNET. The Internet Guest User on the hosting PC<br />
(IUSR_XXXX) requires read / write / modify permissions applied to the Uploads<br />
directory defined in settings.asp. Please see your administrator regarding this type<br />
of issue.<br />
Q: Do I have to use Windows 2000 Server or Windows 2003 Server?<br />
A: Not necessarily. Windows 2000 Professional and Windows XP Professional contain<br />
a stripped down version of IIS, but is limited by concurrent connection limits, and full<br />
IIS features and capabilities.<br />
Q: What is IIS 5.1? How do I get it?<br />
A: IIS stands for Internet Information Services and is provided by Microsoft in Windows<br />
2000 Professional, Windows 2000 Server, various versions of Small Business<br />
Server, Windows XP Professional, and Windows 2003 Server. Within Add / Remove<br />
Programs, select Add / Remove Windows Components. IIS is an option in this area.<br />
Q: Can <strong>KIP</strong> PrintNET run on previous version of IIS? What about Windows NT 4<br />
Server?<br />
A: No. The necessary controls for providing / hosting <strong>KIP</strong> PrintNET require IIS 5.1 or<br />
better implementations. Windows NT 4 Server does not contain a version suitable<br />
for <strong>KIP</strong> Print Net<br />
Q: How do I change the location where Uploads are stored on the Hosting PC?<br />
A: <strong>KIP</strong> PrintNET defines a system environment variable at installation time called <strong>KIP</strong>N.<br />
The “Uploads” folder is a directory inside of the path specified by the <strong>KIP</strong>N system<br />
environment variable. Change the value of <strong>KIP</strong>N environment variable and create an<br />
uploads folder within the new path.<br />
Q: How long are Uploads stored in the Uploads location on the PC hosting <strong>KIP</strong><br />
PrintNET?<br />
A: <strong>KIP</strong> PrintNET purges the Uploads directory of any compressed files older than two<br />
(2) days from the time received.<br />
11-27 Section 11 <strong>KIP</strong> Print Net
Section 12<br />
Productivity Reports<br />
1.0 Productivity Reports 12- 3<br />
2.0 Creating Productivity Reports 12- 4<br />
2. 1 Printing 12- 5<br />
2. 2 Scanning 12- 6<br />
2. 3 Meter Reading 12- 7<br />
3.0 Automatic Metering 12- 8<br />
3. 1 Configuration of Monthly Meter Reports 12- 8<br />
3. 2 Process for Configuration of Monthly Meter Reports 12- 9<br />
3. 3 Different Types of Meters 12- 9<br />
3. 4 Report Schedule 12- 9<br />
3. 5 Email Address Report 12- 9<br />
3. 6 IPS Log Data 12- 9<br />
3. 7 Macros in Monthly Reports 12- 9<br />
3. 8 Sample Reports 12- 11<br />
4.0 Automatic Email Report 12- 12<br />
4. 1 Process for Configuration of Email report for Printer Messages<br />
12- 12<br />
4. 2 Email Address Support 12- 13<br />
4. 3 Macros to Include in the Monthly Meter Report 12- 13<br />
12-1<br />
Section 12 Productivity Reports
1.0 Productivity Reports - <strong>KIP</strong> 6.2 Software<br />
The <strong>KIP</strong> Productivity Reporting is designed to use information gathered from accounting<br />
fields in <strong>KIP</strong> Request along with various applications that have been linked to <strong>KIP</strong> Request<br />
such as:<br />
<strong>KIP</strong> AutoCAD Driver<br />
<strong>KIP</strong> PrintNet<br />
<strong>KIP</strong> Windows Driver<br />
<strong>KIP</strong> <strong>3000</strong> Copy and Scan<br />
By sharing accounting data generated in <strong>KIP</strong> Request users have the ability to link multiple<br />
application using the same accounting rules. This allows managers to generate reports that<br />
have valuable accounting information and can be manipulated to get the desired output<br />
including the following:<br />
• <strong>KIP</strong> productivity reporting package generates reports of meter readings and<br />
accounting data on a daily, weekly or monthly time cycle.<br />
• Reports include detailed authorization, accounting and meter information.<br />
• Reports can be opened into Notepad or exported as an ASCII file format.<br />
• Reports can be sent via SMTP to any email capable device (i.e. PC, PDA, Cell<br />
Phone)<br />
There are three main accounting fields:<br />
<strong>KIP</strong> Request<br />
1. Requester – This is a field which can be used for<br />
accounting. Information entered is applied to the <strong>KIP</strong><br />
Job and Print Logs.<br />
2. Job Number - This is a field which can be used for<br />
accounting. Information entered is applied to<br />
the <strong>KIP</strong> Job and Print Logs.<br />
3. Description - This is a field which can be<br />
used for accounting. Information entered is<br />
applied to the <strong>KIP</strong> Job and Print Logs.<br />
When these fields are set up correctly and have been configured as “required” in the<br />
Request software the “rules” will carry over to the other application<br />
AutoCAD Driver<br />
From with the <strong>KIP</strong> AutoCAD driver<br />
12-2<br />
Section 12 Productivity Reports
<strong>KIP</strong> <strong>3000</strong> User Log on Screen<br />
On the Copy / Scan screen if accounting enabled<br />
PrintNet<br />
Accounting fields entered into the Request software installed on the Web server host<br />
pc being utilized by <strong>KIP</strong> PrintNet will also be transferred to the to users accessing the<br />
PrintNet via the intranet or internet.<br />
<strong>KIP</strong> Windows Printer Driver<br />
The <strong>KIP</strong> Windows driver will retrieve the accounting list and rules from the <strong>KIP</strong> IPS.<br />
12-3<br />
Section 12 Productivity Reports
2.0 Creating Productivity Reports<br />
Productivity reports can be generated from <strong>KIP</strong> Request 6.x and can be very helpful in<br />
keeping track of accounting data. These can be generated on a daily, weekly, monthly or<br />
custom time frame.<br />
The Productivity reports can be accessed by doing the following:<br />
a) On the Request main screen select “Manage” from the menu bar and then select “Print<br />
Reports”<br />
b) The Following window will appear. This is where the currently selected printer<br />
information will be displayed. There are three different types of reports that can be<br />
generated from this screen:<br />
- Printing<br />
- Scanning<br />
- Meter Reading<br />
12-4<br />
Section 12 Productivity Reports
2.1 Printing<br />
This report will include both prints and copies that have been sent to the <strong>3000</strong> print<br />
engine. The report will include Date, Time, Requester, Media, # of originals, # of<br />
Copies and Sq. Feet. The information for Requester and Job Number shown below<br />
are gathered from all <strong>KIP</strong> printing applications. The user can select the Start Date<br />
and the End Date of the report along with where to print the report. The report can<br />
be sent directly to the default printer attached to the PC generating the report to<br />
Microsoft Notepad (or other ACSII reader) or to any file location accessible to the<br />
generating workstation.<br />
12-5<br />
Section 12 Productivity Reports
2.2 Scanning<br />
This report will include all files that have been scanned to file using the Scan Mode<br />
of the <strong>3000</strong> UI. The report will include Date, Time, Requester, Location, Type,<br />
Format and Sq. Feet. The information for Requester shown below is gathered from<br />
all <strong>KIP</strong> printing applications. The user can select the Start Date and the End Date<br />
of the report along with what to do with this data. The report can be sent directly to<br />
the default printer attached to the PC generating the report to Microsoft Notepad<br />
(or other ACSII reader) or to any file location accessible to the generating<br />
workstation.<br />
12-6<br />
Section 12 Productivity Reports
2.3 Meter Reading<br />
This report will include daily Meter readings from the desired dates set in the Start<br />
Date and End Date. The report will include Date, Meter A, Meter B (<strong>KIP</strong> 8000<br />
Only) and Total run. This meter reading should closely match the actual meter<br />
reading on the <strong>KIP</strong> <strong>3000</strong> printer. The user can select the Start Date and the End<br />
Date of the report along with what to do with this data. This report is calculated<br />
once per hour or when the <strong>KIP</strong> <strong>3000</strong> is started. The report can be sent directly to<br />
the default printer attached to the PC generating the report to Microsoft Notepad<br />
(or other ACSII reader) or to any file location accessible to the generating<br />
workstation.<br />
12-7<br />
Section 12 Productivity Reports
3.0 Automated Metering<br />
Overview<br />
The PrintNet software built into every <strong>KIP</strong> IPS includes the ability to automatically<br />
generate reports that covers a complete month of copying, scanning, and network<br />
printing. The automatic generation of Monthly Meter reports is designed to provide<br />
simple cost recovery information and general meter readings from the Log data that is<br />
stored on the IPS. The timing of the report can be triggered on a specific day of the<br />
week or day of the month (beginning, middle or end) at a specific time. The report<br />
form is customizable and allows the manager to decide the content of the report. For<br />
example, the report can be as simple as a single meter reading or it can be<br />
comprehensive and include two different meters as well as information on copy, scan,<br />
and network printing volumes. A PDF version of the monthly report is included to<br />
ensure easy portability.<br />
3.1 Configuration of the Monthly Meter Report<br />
The configuration of the Monthly Meter Report is completed via web browser to<br />
the IP address of the <strong>KIP</strong> Printer. Only the “admin” login can be used to<br />
change or generate the Monthly Meter Reports. The default login when the<br />
system arrives from <strong>KIP</strong> is “admin” and the password is “kip”. This can be<br />
changed after logging in as “admin” in the <strong>KIP</strong> Users area of PrintNET.<br />
Important Note: If the “admin” account and password are not part of the<br />
accounting data that is configured in <strong>KIP</strong> Request and pushed to the IPS, then<br />
the login will not be possible. Please be sure that if you are pushing accounting<br />
data to the IPS from <strong>KIP</strong> Request that the “admin” account is included as one of<br />
the entries.<br />
3.2 Process for configuring Monthly Meter Report<br />
a) Connect to IP address of <strong>KIP</strong> printer using a web browser.<br />
b) Login as “admin”, select the icon to enter the Email Settings area.<br />
c) Configure the SMTP email settings in the Email Setting area.<br />
Important Note: The email settings must work properly first for the Monthly Meter<br />
Report to function. The email settings for SMTP Server, Username and Password<br />
are available from the IT administrator.<br />
d) Configure the Monthly Meter Report Settings. Use a “right-click” to view the<br />
macros that can be used within the report. After choosing a macro, the text for that<br />
macro will show in the report. Eg: {CURRENT_COPYING} is the macro for<br />
obtaining the copy volume within the report.<br />
e) Save the settings – choose the “Submit” to save the settings.<br />
f) Test the Report Generation – choose “Send Now” to test the settings or to<br />
generate an instantaneous report.<br />
3.3 Different Types of Meters<br />
Various printing, copying, and scan-to-file meters are available within the automated<br />
report:<br />
a) Meter A that totals the overall number of Square Feet or Linear Feet of printing<br />
and copying that has occurred.<br />
b) Meter B is a secondary meter for the <strong>KIP</strong> 8000.<br />
12-8<br />
Section 12 Productivity Reports
c) The Total Run is a meter that covers the overall total linear amount of media has<br />
been fed through the machine over the life of the printer.<br />
d) The Copy and Network Printing meters individually capture the number of square<br />
feet for copying and network printing volumes.<br />
e) The Scan-to-file meter captures the number of square feet for documents that are<br />
scanned to any of the available file formats.<br />
3.4 Report Schedule<br />
The Generate Schedule area of the Monthly Meter Report that allows the<br />
manager to set the time period for how often the report is automatically created.<br />
The report can be scheduled to print every week or once a month. Please note<br />
that the printer and IPS have to be powered ON and connected to the network<br />
in order for the scheduled report to be automatically generated on the<br />
scheduled date.<br />
Choices for the “Generate Schedule” feature:<br />
• Weekly:<br />
The IPS will email the report automatically on the Day of the week at the<br />
specified Time of Day. Choose the day of the week (Monday – Sunday) and<br />
time. At this setting, 4-5 reports are automatically generated per month<br />
OR<br />
• Monthly:<br />
The IPS will email the report automatically on the Day of the Month at the<br />
specified Time of Day. Setup of the feature allows for choosing which day<br />
from the 1 st , 15 th , or last calendar day of the month and time. At this setting, 1<br />
report will be automatically generated per month on the scheduled date.<br />
3.5 Email Address Support<br />
The Monthly Meter Report can be emailed to several types of email addresses<br />
simultaneously. For example, the report could be sent to a local email address<br />
while at the same time sent to a cell phone. Each email address needs to be<br />
separated by a semi-colon. The “send now” feature is the best test to confirm<br />
that the IT administrator provided the correct SMTP connections and is allowing<br />
the IPS to send emails to the specific email addresses.<br />
3.6 IPS Log Data<br />
In addition to a PDF of the Monthly Meter Report, the raw log data used in<br />
creating the report can be delivered as an attachment to the email address.<br />
There are three types of comma delimited ASCII data used in creating the<br />
report:<br />
a) Copy and Network Printing Log – named MMMYY.log such as Aug06.log.<br />
b) Scan-to-file log – named STFMMMYY.log such as STFAug06.log<br />
c) Meter Reading log – named MeterMMMYY.log such as MeterAug06.log.<br />
3.7 Macros available via “right-click” to include in the Monthly<br />
Meter Report:<br />
• Printer Name – Computer name of <strong>KIP</strong> IPS<br />
• Printer Serial Number – entered at IPS Service UI<br />
• IP Address – IP address of <strong>KIP</strong> IPS<br />
• Meter Reading Date – date that report was generated based<br />
on the date setting on the <strong>KIP</strong> IPS.<br />
• Meter Reading Time – time that report was generated base<br />
on the time setting on the <strong>KIP</strong> IPS.<br />
• Meter A – Meter A measures the square footage of all<br />
12-9<br />
Section 12 Productivity Reports
printing and copying and generally matches the mechanical meter on the front of<br />
the machine. Meter A can be reset or adjusted by a Service Technician in the<br />
Service Mode settings as shown in the Service Manual (Chapter 8) “Software<br />
Counter”. The Meter A information is read directly from the printer and stored in<br />
the MeterMMMYY.log in the specified value set in the Service Settings.<br />
• Meter A Unit – the value of Meter A can be either Linear Feet or Square Feet.<br />
The factory default is Square Feet which can also be changed by a service<br />
technician in the Service Settings – Counter Setting. The Meter A unit of<br />
measure is read directly from the printer and stored in the MeterMMMYY.log in<br />
the specified value set in the Service Settings.<br />
• Meter B and Meter B Unit – same function as Meter A, but is a second meter<br />
only available on the <strong>KIP</strong> 8000.<br />
• Copy – places into the report the Copy volume for the past 1 month. For<br />
example, if today is 8/23 at 4 pm, the Copy volume will cover from 7/23 at 4 pm<br />
up to 8/23 a 4 pm. This measurement includes all copying functions performed<br />
via the touch screen of the <strong>KIP</strong> IPS. Data reported will always be in Square Feet.<br />
The raw log data contains the word “copy” embedded in the MMMYY.log on the<br />
<strong>KIP</strong> IPS.<br />
• Network Print – places into the report the Network Printing volume for the past<br />
one month. All items that’s are considered network printing have the word<br />
“request” embedded in the MMMYY.log on the <strong>KIP</strong> IPS. This includes all items<br />
sent from the <strong>KIP</strong> Request, <strong>KIP</strong> PrintNET, Windows Driver, AutoCAD Driver, and<br />
data sent via LPR from Windows/Unix/Apple networks. Data reported will always<br />
be in Square Feet.<br />
• Scan – places into the report the Scan-to-file volume for the past one month. All<br />
items that are considered scan-to-file are extracted from the STFMMMYY.log on<br />
the <strong>KIP</strong> IPS.<br />
• Total Run – the value of the Total Run is always in Linear Feet. The Total Run<br />
meter is read directly from the printer and stored in the MeterMMMYY.log in<br />
linear meters, but converted to linear feet for the reports.<br />
Shown below is a sample of the configuration menu:<br />
12-10<br />
Section 12 Productivity Reports
3.8 Sample Report:<br />
This is an example of a Monthly Report that contains meter readings and<br />
details of copy, scan-to-file, and network printing volume. The email was sent<br />
to a local email account as well as to a cell phone/PDA. A PDF of the report is<br />
automatically included. The raw log data that was used to compile the report is<br />
also included as attachments to the email. The raw log data can be used<br />
12-11<br />
Section 12 Productivity Reports
4.0 Automatic Email Reports<br />
Overview<br />
An e-mail notification system can be activated which will provide printer status<br />
information to any accessible email address. The <strong>KIP</strong> IPS utilizes the same SMTP<br />
email settings to send the email notifications. In the event that the paper or toner<br />
supply is depleted, designated users may have email alerts sent to their choice of PC,<br />
laptop, PDS, or cell phone based emails. The IPS is capable of sending an email<br />
whenever the following events occur:<br />
• Printer: out of toner.<br />
• Printer paper jam.<br />
• Printer of out media.<br />
4.1 Process for Configuration of Email Report for Printer Error Messages<br />
a) Connect to the IP address of the <strong>KIP</strong> printer using a web browser.<br />
b) Login as “admin”, select the icon to enter the Email Settings area.<br />
c) Configure the SMTP email settings in the Email Setting area.<br />
Important Note: The email settings must work properly first for the Printer Error<br />
Message to function. The email settings for SMTP Server, Username and<br />
Password are available from the IT administrator.<br />
d) Configure the Printer Error Message email settings. Use a “right-click” to view the<br />
macros that can be used within the report. After choosing a macro, the text for that<br />
macro will show in the report. For example, {EVENT_MESSAGE} is the macro for<br />
placing the printer error message that has occurred (Printer Jam or Printer out of<br />
toner).<br />
e) Save the settings – choose the “Submit” to save the settings.<br />
f) Test the Report Generation – choose “Send Now” to test the settings or to<br />
generate an instantaneous report.<br />
12-12<br />
Section 12 Productivity Reports
4.2 Email Address Support.<br />
The Printer Error Message can be emailed to several types of email addresses<br />
simultaneously. For example, the report could be sent to a local email address while<br />
at the same time sent to a cell phone. Each email address needs to be separated by<br />
a semi-colon. The “send now” feature is the best test to confirm that the IT<br />
administrator provided the correct SMTP connections and is allowing the IPS to send<br />
emails to the specific email addresses.<br />
4.3 Macros available via “right-click” to include in the Monthly Meter Report:<br />
• Date/Time – Date and Time the message was<br />
generated by the IPS.<br />
• Event Message – generic term for any of the<br />
three issues that could occur:<br />
1. Printer: out of toner.<br />
2. Printer paper jam.<br />
3. Printer of out media.<br />
• Printer Name – Computer name of <strong>KIP</strong> IPS.<br />
• Printer Serial Number – entered at IPS Service<br />
UI and stored in the Winuntd.ini of the Print Queue software.<br />
• IP Address – IP address of <strong>KIP</strong> IPS.<br />
• Dealer Name – entered at the IPS Service UI and stored in the Winuntd.ini of<br />
the Print Queue software.<br />
• Dealer Phone Number – entered at the IPS Service UI and stored in the<br />
Winuntd.ini of the Print Queue software.<br />
Sample Email<br />
The following is a sample email that was received from a <strong>KIP</strong> printer after the<br />
condition of Out of Toner occurred. The email was sent to a local email address as<br />
well as to an cell phone/PDA.<br />
12-13<br />
Section 12 Productivity Reports
Section 13<br />
Connectivity<br />
13-1<br />
Page<br />
1. 0 Set IP Address 13- 2<br />
1.1 Enter Configuration Mode 13- 2<br />
1.2 TCP/IP Properties 13- 3<br />
1.2.1 DHCP / Manual IP assignment 13- 4<br />
1.2.2 DHCP / Manual DNS assignment 13- 5<br />
1.2.3 DHCP / Manual WINS assignment 13- 6<br />
1.2.4 Apply Settings 13- 7<br />
1.3 Exit Configuration Mode 13- 7<br />
2. 0 Appendix<br />
Applications - Diagram A<br />
Applications - Diagram B<br />
Connectivity - Diagram C<br />
A – Printing from Microstation<br />
B – Printing from MAC OS 9<br />
C – Printing from Mac OS X<br />
Terminology and Base <strong>KIP</strong> Function<br />
Section 13 Connectivity
1.0 IP Addressing<br />
1.1 Configuration Mode<br />
To access and set the IP address:<br />
a) Press the “?” button on the Operator<br />
Panel<br />
b) Then press the “Configuration” button<br />
c) Enter “Setup Menu 2” and locate<br />
“Network”<br />
d) Click “Network” to enter TCP/IP<br />
Properties Page. Please note that if<br />
the settings are locked a Certified<br />
Service Technician must grant access<br />
this feature<br />
13-2<br />
Section 13 Connectivity
1.2 TCP/IP Properties<br />
1<br />
2<br />
3<br />
4<br />
5<br />
6<br />
No. Name Function<br />
1 IP Setting Selects DHCP assigned IP address or manually<br />
assigned address<br />
2 IP Address Displays IP address<br />
3 Subnet Mask Displays Subnet Mask<br />
4 Default Gateway Displays Gateway<br />
5 DNS Setting Selects DHCP assigned DNS address or manually<br />
assigned DNS address<br />
6 WINS Setting Selects DHCP assigned WINS address or manually<br />
assigned WINS address<br />
7 DNS Address Displays DNS address<br />
8 WINS Address Displays WINS address<br />
13-3<br />
Section 13 Connectivity<br />
7<br />
8
1.2.1 DHCP / Manual IP Assigment<br />
a) Press “Use DHCP” button for DHCP to assign IP address<br />
b) Press “Use Following IP Address” button to<br />
enter IP address manually<br />
c) Enter desired IP Address, Subnet Mask, and Gateway<br />
13-4<br />
Section 13 Connectivity
1.2.2 DHCP / Manual DNS Assigment<br />
a) Press “Obtain DNS” button for DHCP to assign<br />
DNS address<br />
b) Press “Use the following DNS” button to enter<br />
DNS address manually<br />
c) Enter desired DNS Address<br />
13-5<br />
Section 13 Connectivity
1.2.3 DHCP / Manual WINS Assignment<br />
a) Press “Obtain WINS” button for DHCP to assign<br />
WINS address<br />
b) Press “Use the following WINS” button to enter<br />
WINS address manually<br />
c) Enter desired WINS address<br />
13-6<br />
Section 13 Connectivity
1.2.4 Apply Settings<br />
a) Select “Apply” button to accept IP addressing information.<br />
1.3 Exit Configuration<br />
a) Select “OK” button to exit Configuration Menu<br />
13-7<br />
Section 13 Connectivity
Connectivity - Appendix A<br />
Printing from MICROSTATION to the <strong>KIP</strong> Printer<br />
There are 2 methods to print from MICROSTATION to the <strong>KIP</strong> Printer.<br />
Method 1 - Recommended<br />
Printing from MICROSTATION using the <strong>KIP</strong> Windows Printer driver<br />
Convert the drawing file data into raster data using the <strong>KIP</strong> Windows driver.<br />
Inside MICROSTATION, choose “Printer.PLT” as the driver to use the <strong>KIP</strong><br />
windows driver. The <strong>KIP</strong> windows driver, however, should be the “Default” printer<br />
on the system at this time. The driver inside MICROSTATION will use the device<br />
properties as set for the <strong>KIP</strong> Windows printer, including dither patterns, paper<br />
settings, etc.<br />
Simply choose “Printer.plt’ as the<br />
driver to use the <strong>KIP</strong> Printer by default<br />
from MICROSTATION. Click on ‘Page’<br />
and select properties of the <strong>KIP</strong><br />
Windows driver<br />
Click on ‘Plot’ to complete printing<br />
using the <strong>KIP</strong> Windows driver<br />
See “Windows Driver – Section 6” for<br />
details on driver installation.<br />
Method 2 – Not Recommended<br />
Use an HPGL-2 driver from within MICROSTATION<br />
Use an HPGL-2 compatible driver (IMRTL.PLT) from within MICROSTATION to<br />
generate plot file data (.PLT). Using this method, users have 2 choices of<br />
sending data to the Printer.<br />
a) Point the output path of the ‘IMRTL.plt’ driver directly to the <strong>KIP</strong> ‘Port’ (for<br />
more information regarding the <strong>KIP</strong> ‘Port’, please refer to the windows driver<br />
section) on the <strong>KIP</strong> Controller.<br />
- 1 -
) The .PLT files created by the driver can be viewed within the Request<br />
software and printed in collated sets with enhanced features like using stamps,<br />
header information and Pen settings.<br />
Setting up the HPGL-2 parameters to create <strong>KIP</strong> Printer ready data file<br />
Using windows explorer, identify folder where MICROSTATION software<br />
is installed.<br />
Under the sub-folder ‘PLOTDRV’ select ‘IMRTL.PLT’. Open this file with<br />
Windows ‘Notepad’.<br />
Editing the “IMRTL.PLT” file:<br />
The line that requires a change is marked below in bold.<br />
For an example, we will assume that the MICROSTATION User requires<br />
to print to a <strong>KIP</strong> <strong>3000</strong> Printer. We will also assume the Computer name to<br />
be “<strong>KIP</strong>-PPC”.<br />
Method 2 : Direct Print<br />
Since the Port would be set up automatically with the change as on the next<br />
page, users would be able to use this driver (<strong>KIP</strong>GL.PLT) to create plot file<br />
data directly to the <strong>KIP</strong> controller<br />
Method 2 : Request Print<br />
Generate the plot file data (.PLT) at any specified location on the system<br />
using the method above. Use <strong>KIP</strong> Request to select the “.plt” files and submit<br />
them for printing. File collation, stamping, header information addition, etc are<br />
features the users could use while using the <strong>KIP</strong> Request software.<br />
- 2 -
; MICROSTATION starts counting pens at 1, so even though the HP 650c has<br />
; pens 0 through 255, pen 0 is not used by MICROSTATION.<br />
num_pens = 255 ; Defines pens used - max value is 255<br />
change_pen = both : options are color, weight, level or both<br />
model = mdl ; plotter model<br />
driver = hmrhpgl2 ; MDL driver to use<br />
autocenter ; Automatically center plot on page<br />
end_plot = eject ; Performs page eject<br />
rotate = none ; enable/disable automatic rotation to maximize<br />
; plots: cw = rotate clockwise, ccw = rotate<br />
; counter-clockwise, none = disable<br />
;default_extension/auto_incExt = '000'<br />
; default extension for plotfiles<br />
;<br />
; To configure a default output file name comment out the default_extension<br />
; line above and uncomment this line. "lpt1" may be substituted with any<br />
; desired filename - e.g. "$(MS_PLTFILES)plotfile.000"<br />
default_outFile/auto_overwrite = "lpt1"<br />
; Substitute the name of a pentable file to be loaded when this driver is<br />
selected<br />
;pentable=\dir\file.tbl<br />
border/pen=1/filename/time ; leave this out for no border<br />
; communication=(handshake=0,baud=9600,par=none,data=8,stop=1)<br />
This line above, should be:<br />
default_outFile/auto_overwrite = \\Computername\Shared_printer_driver<br />
name\<br />
or as in example using ‘<strong>KIP</strong>-PPC” as the Computer name and ‘<strong>KIP</strong><strong>3000</strong>” as<br />
the shared printer driver name:<br />
default_outFile/auto_overwrite = \\<strong>KIP</strong>-PPC\<strong>KIP</strong><strong>3000</strong><br />
Once the changes are made, the user could overwrite the file with the same<br />
filename, or could save the new file as ‘<strong>KIP</strong>GL.PLT’.<br />
- 3 -
- 4 -
Connectivity - Appendix B<br />
Configuring a TCP/IP Desktop Printer for Mac OS 9<br />
The Apple Desktop Printer Utility is required for TCP/IP printing. This utility allows<br />
the user to configure a desktop printer by specifying the type of printer being<br />
used and its IP address.<br />
To configure the desktop printer, do the following steps:<br />
1. Open the Desktop Printer Utility. The following dialog box should appear:<br />
a. Select the printer driver you wish to use (LaserWriter 8.5.1 or later)<br />
in the popup menu;<br />
b. Select the “Printer (LPR)“ to specify TCP/IP printing;<br />
c. Click OK.<br />
1
2. A new dialog should appear:<br />
3. Under “PostScript Printer Description (PPD) File,“ click Change. A list of<br />
Printer Description files should appear. Select the PPD with the same<br />
name as your printer.<br />
Click the “Select“ button and you will see the desktop printer configuration<br />
dialog appear again:<br />
2
4. Under “Internet Printer“ click “Change.“ The following dialog should<br />
appear:<br />
. Under “Printer Address,“ enter either the name (e.g.,<br />
laserwriter.acme.com) or the IP address (111.222.3.444) for the<br />
printer. (The domain name or IP address should be the same as<br />
the one you previously set up, as described in Palomar’s Setting<br />
Printer IP Addresses page). A Queue name is not needed for direct<br />
printing to a TCP/IP printer; it is only used when using a UNIX print<br />
spooler.<br />
a. Click Verify to verify the printer’s location. If a printer is found to<br />
exist at the specified IP address, a message stating that a printer<br />
exists at the specified location appears at the bottom left-hand<br />
corner of the screen; if this message does not appear, then correct<br />
the printer address.<br />
b. Click OK.<br />
3
5. The status dialog should look something like this:<br />
6. Select Save under the File menu to create a desktop printer. Select a<br />
name for the desktop printer. A new printer icon should appear on the<br />
desktop. Verify that the configuration works by dragging a printable<br />
document onto the new desktop printer.<br />
4
Connectivity - Appendix C<br />
Configuring a TCP/IP Printer in Macintosh OS X<br />
The <strong>KIP</strong> IPS can be connected to Macintosh systems through TCP/IP. Macintosh allows<br />
for this by configuring a desktop printer to point to the <strong>KIP</strong> IPS. The Following steps<br />
note the procedure for setting up a Macintosh system for TCP/IP printing. These steps<br />
apply to Macintosh OS X:<br />
1. On the desktop open the Mac hard drive<br />
1
2. Select the “Applications” folder<br />
3. Select the “Utilities” folder<br />
2
4. Find the “Printer Setup Utility”<br />
5. On the top menu bar select “Printers” and then “Add a Printer”<br />
3
6. On the next screen you will need to configure the following items:<br />
a. In the first pull down select “IP Printing”<br />
b. In the second “Printer Type” pull down select LPD/LPR<br />
c. In the third area “Printer Address” set this to your <strong>KIP</strong> printer IP Address<br />
d. In the fourth area “Queue Name” set the queue name to <strong>KIP</strong> (this is the<br />
default Queue name)<br />
e. In the fifth area “Printer Model” select “Other”<br />
7. Locate the desired .PPD file (ex. <strong>KIP</strong>GS600.PPD) select “choose”<br />
4
8. Select “Add”<br />
9. The printer set up will be in the Printer List<br />
5
10. In the menu bar on top, select Printers then select “Create Desktop Printer” from<br />
the pull down choices<br />
6
Connectivity - Appendix D<br />
Introduction<br />
<strong>KIP</strong> IPS - Technical Detail<br />
Version 1.1<br />
The following document contains technical detail and description related to the<br />
networkability of <strong>KIP</strong> printers, functionality of <strong>KIP</strong> printers in various network<br />
typologies, and concepts relating to client-server printing architecture. This<br />
document is intended for an audience familiar with core networking fundamentals<br />
and concepts, and an understanding of general network typologies and practices.<br />
<strong>KIP</strong> Printers are considered to be hardware network-connected devices in the<br />
sense that participation within a given network typology requires a physical RJ-45<br />
type connection in order to communicate with other network devices such as<br />
computer workstations, dedicated-servers, switching equipment, hubs, bridges,<br />
office printers, routers, and a variety of other network capable hardware.<br />
<strong>KIP</strong> Printers are TCP/IP devices. TCP/IP is short for Transmission Control<br />
Protocol / Internet Protocol. TCP/IP is a widely adopted networking protocol<br />
standard that is common place in many environments requiring network capable<br />
equipment, and network connectivity to company intranets, the larger internet, email,<br />
wireless communications, shared printing devices, IP-telephony, and many<br />
other applications<br />
Many other networking protocols exist at the same OSI level as TCP/IP (.e.<br />
IPX/SPX AppleTalk, NetBEUI) and at lower levels of the OSI model (BGP, RIP,<br />
OSPF, IGRP / EIGRP). TCP/IP can be traced to it’s origin in 1969 to a research<br />
project funded by the United States Defense Advanced Research Projects<br />
Agency (DARPA). In 1983 TCP/IP was adopted as a standard by the DARPA as<br />
the primary vehicle for network connected devices, or hosts, and was considered<br />
a requirement for connected device implementation. Many companies have now<br />
built corporate TCP/IP networks that have grown to a point at which it could<br />
almost be considered a mainstream consumer technology.<br />
TCP/IP has several different fundamental concepts and inner working that are<br />
well beyond the scope of this document. An excellent resource of TCP/IP study<br />
can be found at http://www.faqs.org/rfcs/rfc1180.html.<br />
1
Industry Standard Terminology<br />
Network Interface Card (NIC):<br />
All <strong>KIP</strong> digital printers come equipped with an onboard Network Interface Card<br />
(NIC). The NIC houses a RJ-45 type connection that allows it to interface with<br />
other networking hardware via a patch cable. The onboard NIC is responsible for<br />
receiving, transmitting, encoding, and interpreting TCP/IP segments or packets<br />
present on a network.<br />
Operating System (OS):<br />
All <strong>KIP</strong> digital printers are equipped with software driven Operating System that<br />
further handles encoded and decoded TCP/IP packets.<br />
Line Printer Remote / Line Printer Daemon (LPR/LPD):<br />
All <strong>KIP</strong> digital printers are capable of communicating via a dedicated TCP port<br />
designed for printing called Line Printer Remote / Line Printer Daemon. LPR/LPD<br />
protocols are defined by RFC1179. The <strong>KIP</strong> LPD accepts data on TCP port 515.<br />
Whereas LPR/LPD is commonly found in UNIX based networks, it is also found<br />
and accepted on Windows based networks, and Novell based networks.<br />
Transmission Control Protocol / Internet Protocol:<br />
<strong>KIP</strong> Printers are TCP/IP devices. TCP/IP is short for Transmission Control<br />
Protocol / Internet Protocol. TCP/IP is a widely adopted networking protocol<br />
standard that is common place in many environments requiring network capable<br />
equipment, and network connectivity to company intranets, the larger internet, email,<br />
wireless communications, shared printing devices, IP-telephony, and many<br />
other applications.<br />
TCP Port:<br />
A common name given to a numbered connection based communication channel<br />
across TCP/IP. Some facts regarding TCP connectivity include:<br />
• TCP can establish a Connection<br />
• TCP provides a stream of unlimited length<br />
• TCP guarantees that as long as you have a connection data sent will<br />
arrive at the destination<br />
UDP Port:<br />
A common name given to a connectionless based communication channel.<br />
Some facts regarding UDP connectivity include:<br />
• UDP cannot establish connectivity<br />
• UDP provides no guaranteed delivery or error checking<br />
• UDP is faster for sending small amounts of data<br />
2
<strong>KIP</strong> Printer Network Components<br />
<strong>KIP</strong> printers have several network components (both hardware and software<br />
based) that allow for TCP/IP printing functionality.<br />
<strong>KIP</strong>0 Port (<strong>KIP</strong>0):<br />
All <strong>KIP</strong> digital printers are capable of communicating via a dedicated TCP port for<br />
printing, and client communications. The <strong>KIP</strong>0 port accepts data on TCP port<br />
8421 and responds on the source port initiated by a client and/or server. The<br />
<strong>KIP</strong>0 port is designed and maintained by <strong>KIP</strong> and is dedicated to function within a<br />
Microsoft Windows based computing environment. <strong>KIP</strong> Unified Windows Printer<br />
Drivers and <strong>KIP</strong> Request Software are fundamentally linked to the <strong>KIP</strong>0 port and<br />
provide seamless network connectivity to and from the <strong>KIP</strong> printer. The <strong>KIP</strong>0 port<br />
was designed for specific Wide-Format printing objectives not addressed in<br />
traditional port monitors.<br />
KAWPDFT.EXE:<br />
KAWPDFT.EXE is a <strong>KIP</strong> designed executable used exclusively by <strong>KIP</strong> Request<br />
software to transfer printable data in the form of Job Tickets to the <strong>KIP</strong> Printer,<br />
and retrieve status indications from the <strong>KIP</strong> printer. KAWPDFT.EXE selects any<br />
unused upper level client TCP port ( > 1023 ) and attempts to connect to the <strong>KIP</strong><br />
Printer’s listening TCP port (8421).<br />
<strong>KIP</strong>SERVE.EXE:<br />
<strong>KIP</strong>SERVE.EXE is a <strong>KIP</strong> designed executable that can best be described as a<br />
listening service or listening daemon. <strong>KIP</strong>SERVE resides within the OS of all <strong>KIP</strong><br />
digital printers. <strong>KIP</strong>SERVE accepts data on TCP port 8421 from <strong>KIP</strong> Request<br />
software (via KAWPDFT.EXE) and/or from the port monitor component of the<br />
<strong>KIP</strong> Unified Windows Printer Driver (described below). As data arrives from either<br />
source, a <strong>KIP</strong> Job Ticket is generated for further print processing. <strong>KIP</strong>SERVE<br />
also delivers simple printer status across the source port in which it was initially<br />
connected from.<br />
<strong>KIP</strong> Unified Windows Printer Driver (KUWPD):<br />
All <strong>KIP</strong> digital printers are provided with a Windows Printer Driver that can be<br />
used for various Windows application printing. The KUWPD is comprised of<br />
many components, some of which pertain to network functionality.<br />
• <strong>KIP</strong> Port Monitor: The <strong>KIP</strong> port monitor establishes a default <strong>KIP</strong>0 printer<br />
port on NT/2000/XP/2003 based workstations and servers. Multiple <strong>KIP</strong><br />
ports can be created, but must have a unique name such as <strong>KIP</strong>1, <strong>KIP</strong>2,<br />
<strong>KIP</strong>3 and so on. The port monitor is responsible for transferring data from<br />
the Windows Client (be it a dedicated print server or workstation) to the<br />
<strong>KIP</strong> printer. This concept is fundamentally different from a print spooler<br />
because a print spooler is the component on Windows operating systems<br />
3
that delivers print jobs from applications on a client computer to a print<br />
servers and/or hands off data to a port monitor for local or remote delivery.<br />
The <strong>KIP</strong> port monitor can operate in one of two modes depending on its<br />
network location: Server Mode and Controller Mode.<br />
o Server Mode:<br />
The <strong>KIP</strong> port monitor can operate in server mode. Server mode<br />
describes functionality where the <strong>KIP</strong>0 port is expected to deliver<br />
data to some host (<strong>KIP</strong> printer) other than the current port location.<br />
This destination can be specified by either an assigned IP address<br />
of a <strong>KIP</strong> printer or resolved host name of a <strong>KIP</strong> printer (i.e. DNS or<br />
WINS name resolved). This transport is accomplished via TCP port<br />
8421 to a listening <strong>KIP</strong>SERVE.EXE on the remote host.<br />
o Controller Mode:<br />
The <strong>KIP</strong> port monitor can operate in controller mode. Controller<br />
mode describes functionality where the <strong>KIP</strong>0 port is expected to<br />
write out <strong>KIP</strong> Job Tickets on the host in which the port is installed.<br />
Network delivery methods are suspended in this mode. All <strong>KIP</strong><br />
digital printers are factory delivered and equipped with a <strong>KIP</strong> port<br />
monitor in Controller Mode. This is essential for LPR based print<br />
delivery methods as it coordinates closely with LPD services also<br />
present within the operating system of <strong>KIP</strong> digital printers.<br />
• Port Operations: Regardless of the port mode (Server vs. Controller), the<br />
<strong>KIP</strong>0 port is capable of functioning in native mode or pass-through mode.<br />
The native vs. pass-through concept can best be described as an autosensing<br />
of the method in which printable data has been presented to the<br />
<strong>KIP</strong>0 port monitor.<br />
Native Mode vs. Pass-through Mode<br />
The <strong>KIP</strong> port monitor is capable of auto-sensing what type of printable data<br />
arrives and how to further handle the data for network transport. <strong>KIP</strong> port monitor<br />
is able to detect the origin of printable data based on an examination of certain<br />
bytes within file header information present in the print data stream. Based on<br />
this data type, the <strong>KIP</strong> port monitor dynamically operates in two possible<br />
transport modes: Native and Pass-through.<br />
* It is important to note that native mode and pass-through mode functions<br />
regardless of port locations Server Mode vs. Controller Mode described above.<br />
4
• Native mode:<br />
Native mode refers to printable data generated by the KUWPD rendering<br />
engine. Data arriving in this format has been rendered by the KUWPD<br />
exclusively by coordination between the Microsoft GDI engine and the driver<br />
components of KUWPD. Most applications will use the Window Print Manager<br />
functions in coordination with a printer driver to generate printable data for the<br />
desired network printer. A <strong>KIP</strong> Job ticket is thus generated and is said to be in<br />
native mode format. Data that has been determined to have not been<br />
generated by KUWPD causes the <strong>KIP</strong> port monitor to operate in Passthrough<br />
mode.<br />
• Pass-through mode:<br />
Pass-through mode refers to printable data not generated by the KUWPD<br />
rendering engine. Data arriving in this format is assumed to be print ready<br />
and has not been directly rendered by the KUWPD engine. Many CAD<br />
specific applications have the ability to render printable data languages<br />
directly within the design application, bypassing the GDI and driver<br />
functionality of a standard Windows based application and/or printing<br />
methodology. These types of applications generally make use of helper<br />
drivers and/or internal drivers to prepare printable data before any GDI or<br />
Windows based driver mechanism comes into direct contact with the print<br />
data. Examples of such Windows applications that have internal rendering<br />
capability are, but are not limited to, AutoDesk AutoCAD products (via<br />
dedicated HDI print drivers), Bentley MicroStation Products, Dassault Catia<br />
based products, Unigraphics based products, SDRC Ideas based products.<br />
These types of CAD applications behave in a way similar to UNIX based<br />
printing architecture in that data is forwarded to a port monitor, such as <strong>KIP</strong><br />
port monitor, for the sole purpose of transporting printable data to a network<br />
printer, thus passing-through or bypassing the Microsoft GDI and printer<br />
driver rendering functions. A <strong>KIP</strong> Job ticket is thus generated and is said to be<br />
in pass-through format.<br />
* It is important to note that Pass-through mode is always employed when<br />
<strong>KIP</strong> port monitor accepts data from a UNIX based clients. UNIX applications<br />
generate printable data without the use of Microsoft GDI functionality, and<br />
primarily use LP/LPR/LPD type transport.<br />
5
MICROSOFT NETWORK CONNECTIVITY<br />
Windows Workstation Windows Server <strong>KIP</strong> Digital Printer<br />
NT/2000/XP NT/2000/2003<br />
Windows Printer Driver<br />
AutoCAD Driver<br />
“Helper” Drivers<br />
SPOOLER<br />
<strong>KIP</strong>0 Port Monitor<br />
Or<br />
LPR Port Monitor<br />
TCP 8421<br />
Or<br />
TCP 515
NOVELL NETWORK CONNECTIVITY<br />
Windows Workstation Netware Server <strong>KIP</strong> Digital Printer<br />
NT/2000/XP 5.X / 6.X<br />
Windows Printer Driver<br />
AutoCAD Driver<br />
“Helper” Drivers<br />
SPOOLER<br />
NDPS Gateway<br />
LPR over IP<br />
TCP 515
UNIX NETWORK CONNECTIVITY<br />
Unix CAD Workstation Unix Server <strong>KIP</strong> Digital Printer<br />
Sun/HP/SGI/IRIX 5.X / 6.X<br />
Catia V4 GL/2 output<br />
Ideas GL/2 output<br />
Unigraphics GL/2 output<br />
TIFF output<br />
CALS output<br />
Others , , ,<br />
LP/LPR<br />
LP/LPR/LPD<br />
TCP 515
<strong>KIP</strong> <strong>3000</strong> Network Connectivity<br />
Unix CAD Workstation<br />
Sun/HP/SGI/IRIX<br />
TIFF output CALS output<br />
Catia V4 GL/2 Ideas GL/2<br />
LP/LPR/LPD<br />
Unix Server<br />
Unigraphics GL/2<br />
Windows Server<br />
NT/2000/2003<br />
Windows Workstation<br />
NT/2000/XP<br />
Windows Printer<br />
Driver<br />
AutoCAD Driver "Helper" Drivers<br />
Spooler<br />
Novell<br />
Netware Server<br />
5.X/6.X<br />
TCP 515 TCP 8421 TCP 515 TCP 515
Spreadsheets<br />
Organization charts<br />
Presentations<br />
Office Design<br />
Project Management<br />
AutoCAD 2000i<br />
2002/2004<br />
2005/2006<br />
Catia<br />
Ideas<br />
<strong>KIP</strong> Network Connectivity<br />
Windows Drivers<br />
AutoCAD Drivers<br />
UNIX<br />
UNIX<br />
Server<br />
Firewall<br />
Web Server<br />
FTP Site<br />
Internet<br />
<strong>KIP</strong> PrintNet Intranet<br />
<strong>KIP</strong> Request Users<br />
<strong>KIP</strong> K PrintNet Internet<br />
Internet Explorer<br />
Netscape<br />
Raster Files<br />
Vector Files<br />
PDF/DWF Files<br />
Internet Explorer<br />
Netscape
![User's Guide [Copy Operations] - NovaCopy](https://img.yumpu.com/18759240/1/184x260/users-guide-copy-operations-novacopy.jpg?quality=85)