Car Multimedia System
Car Multimedia System
Car Multimedia System

Create successful ePaper yourself
Turn your PDF publications into a flip-book with our unique Google optimized e-Paper software.
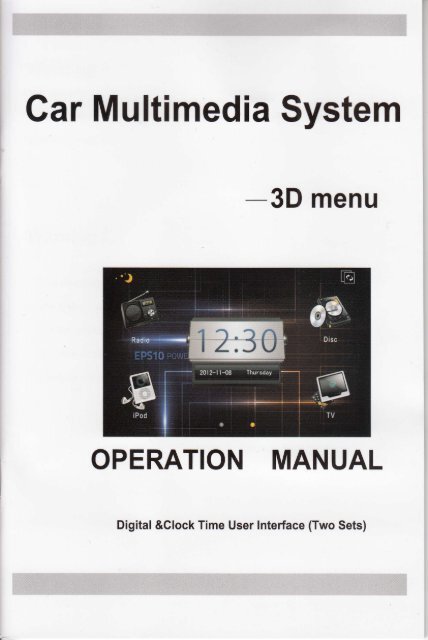
<strong>Car</strong> <strong>Multimedia</strong> <strong>System</strong><br />
-3D menu<br />
OPERATION MANUAL<br />
Digital &Glock Time User lnterface (Two Sets)
Dear customer,<br />
Thanks for your purchase! Please read this manual carefully, and keep it for<br />
future reference.<br />
wti nihg'A<br />
The disk must be clean.Please clean it if having dust.<br />
The disk must be cleaned by soft cloth,then put the disk<br />
into the device.Otherwise, the dust will be taken into the<br />
machine and it effects the machine to insert and eject<br />
slowly or not insert and eject.
CONTENTS<br />
Notes on installation... """"""3<br />
Connection guide......... """"' 4<br />
Main menu.. """" 6<br />
SpecialFeatures.....<br />
vMcD&MPs<br />
""""""" I<br />
.'.."'10<br />
General setting........ """"""'11<br />
Radio mode """'14<br />
DVD/SD/USB operation mode......... """""17<br />
TV mode..... """ 19<br />
Bluetooth mode......... """"" 21<br />
IPOD mode. """"" 23<br />
AUX mode......... """""""'24<br />
GPS mode """"25<br />
<strong>System</strong> setuP ......... """"""32<br />
Remote operation.... """"""'38<br />
Specification<br />
"""'39<br />
Simple trouble shooting guide...'.'..' """"'40<br />
T<br />
NOTE$III.ON INSTALLATION<br />
Notes on installation<br />
The unit is designed tor 12-l4vdc,negative ground operation system only.Before installing<br />
the unit,make sure your vehicles is connected lo 12v-14v dc negative grounded elect1cal<br />
system.<br />
The negative battery terminal must be disconnected before making connections,which can<br />
reduce damaging to the unit due to short circuit.<br />
Be sure to connect the color coded leads correctly according to the diagram.lncorrect<br />
connection may cause the unit malfunction or damage the vehicle's electrical system.<br />
Be sure to connect the speake(-)leads to the speake(-)terminal.never connect the left<br />
and right channel speaker cables each other or to the vehicle body.Do not block vents or<br />
radiator panels.blocking them will cause heat to build up inside any may result in fire.<br />
After the completion of the installation and begin to operate the unit(including replacing the<br />
battery),please press the reset button(1) on the front panel with pointed objects(such as<br />
ball pen) to set the unit to initial status,
CONNECTION GUIDE<br />
Gonnection Guide<br />
1.57G Main Board Gonnection Guide<br />
WIRING DIAGRAM<br />
Gre€n<br />
Red<br />
White<br />
R6tl<br />
White<br />
lied<br />
grake wire<br />
Rear view control wire<br />
lgnition switch<br />
Delection headlamPS<br />
Power.'l2v<br />
Aill0 anten*a c0nlr0l<br />
KEYl<br />
KEY2<br />
JU0[0il[<br />
il 00000[0 0l<br />
[0[il"il[il[000 [il"<br />
DTV<br />
- bvR<br />
r Po0<br />
Rear and lett speakel<br />
Front and lo{1 speaker<br />
Rear and right speaker<br />
Front and ri9hl speaker<br />
il<br />
.j<br />
2.31G Main Board Connection Guide<br />
3.lndash-I DIN Connection<br />
@ n"a<br />
@ wrm<br />
oR.d<br />
@ wnr<br />
@ n.a<br />
@**<br />
Puaplo<br />
Ewn @ ononat<br />
^,'-n-.*,'6 -I!l<br />
Rear and l€ltspeak€r @<br />
Frontand leftspeaker @<br />
Roerandilghlspoak6r @<br />
Frontandnlghlsp€aksr @
BASIC OPERATION<br />
Main menu<br />
( You can choose your favorite one in the two sets of Ul,we will help you to do the set of Ul.)<br />
We can change 4kinds of backgrounds as freely in Main Menu.<br />
l.Digital Time Ueser lnterface.<br />
2.Clock Time Ueser lnterface.<br />
Welcome to select any sets of Ul in the two sets of user interface!
BASIC OPERATION<br />
Basic function introduction :<br />
l.Luminous 2. Transfer background<br />
4.Read Disc 5. IPOD Function<br />
7.V-Disc(Optionalfunction) B.DVR External(Optionalfunction)<br />
1O.SD card<br />
13.Set up<br />
16.Time show<br />
Enter into the mode<br />
Touch 3'12 number icons button,can separately enter into the mode.<br />
Swith Screen<br />
Press icons 1,The screen is off,press again,the screen will be reopened.<br />
Time Display<br />
Such as 16.will show the time and date,press the icon,it will be off the area,<br />
press again,the screen will be reopened.<br />
Conversion background image<br />
Press icons 2, it will replace 4 kinds of background pictures automatically.<br />
GeneralSetup<br />
Press icons 13[SETUP] in any interface except GPS,it will appear general setup menu<br />
as below.<br />
General Setting<br />
Press icons 13[SETUP] in any interface except GPS,it will appear general setup menu<br />
as below.<br />
1 l.Navigation<br />
l4.Bluetooth function<br />
3. Radio function<br />
6.TV Function<br />
9.USB <strong>Car</strong>d<br />
12,AUX IN<br />
15.Rear Camera<br />
Special Features:<br />
3 Dimensional carton Menu<br />
Left-right Reversal Up-down Reversal<br />
Up-down Reversal Left-right Reversal<br />
Moveable lcons in Main Meun<br />
We can move any icons as freely in the main menu. Design your desired style.
S,pocial features(Optional Function)<br />
V,MCD Function(OPtional)<br />
lnsert in U discs and SD card and enter in the interface of VMCD. Then we willput in CD<br />
discs. These musics which is inside CD discs will be copying in U discs and SD card.<br />
External U discs and SD card.(Max:8G memory)<br />
1.This CD is loading finished,lt will be<br />
indicating"CD"<br />
2.Clik on the touch-key "13" Select the<br />
Compression ratio and burn any discs.<br />
3.Choosing all of the music which is burning 4.lf you want to stop to burn,you will click on<br />
inside CD disc, then Pressing "OK". the "Exl". These discs will be burned finished<br />
MPS Function<br />
It's disc icon will be showing red. You will<br />
select desired music inside any disc.<br />
l.Support MP3, WMA, FLAC, APE, AAC mainstream music formats for broadcast.<br />
2.Support RM, RMVB, ASF, AVl, MP4, 3 GP, MOV, FLV, MPE, MPG, MPEG, DAT all<br />
formats of videos to play,namely that the look, without conversion.<br />
10<br />
f;<br />
Support JPG, BMP, GlF, PNG, TIFF, PCX, ICO ect , different format images. At the<br />
same time,it is also support ing to rotating, preview and amplification the pictures<br />
Genefal Setting<br />
6<br />
7<br />
I<br />
I<br />
10<br />
11<br />
1. General<br />
2. Display<br />
3.sound<br />
7.Disp-M<br />
9.Music navigation setting<br />
11. Handbrake Test setting<br />
1 3. Steering Wheel setting<br />
15.OFF<br />
4.time<br />
5.information<br />
6.language<br />
8. Key Sound<br />
10. Rear View lmage setting<br />
12.change logo<br />
14. Touch screen adjustment<br />
16.Main menu button<br />
Touch l,Language button,can set the menu display language Chinese or English.<br />
Touch 2,Key sound button,can set the key sound on or off.<br />
Touch 3,music navigation,can set up the music or video is on or off when navigation<br />
Touch 4,backlight mode,can choose Day or night mode.<br />
Touch S,rear view image,can set up the rear view image on or off<br />
Touch6,steering wheel setting,can set up the steering wheel,details please check the<br />
steering wheel setting guide.<br />
TouchT,touch screen adjustment<br />
TouchS,handbrake test setting can set up the handbrake on or off.<br />
Steering wheel setting<br />
Setup and use of steering wheel:<br />
lf your car with steering wheel control, please operate as follows:<br />
11<br />
1<br />
1<br />
3<br />
4<br />
5
1. Under the circumstance of power cut off,<br />
find the grounding wire of your car's<br />
steering wheelwires, (Note: some cars<br />
have three pieces of wires, others have two<br />
pieces), then, connect it to the grounding<br />
wire of three pieces of steering wheel wires<br />
drew forth from the main unit. lf your car's<br />
steering wheel has three pieces of wires,<br />
connect the other two pieces of key wires<br />
to the rest two pieces of key wires drew<br />
forth from the main unit, you can connect<br />
them at will; if your car's steering wheel has<br />
two pieces of wire totally, you can connect<br />
the rest one to any piece of the rest two<br />
pieces of key wire drew forth from the main<br />
unit;<br />
2. Supply the power to turn on the unit after you confirm the steering wheel connection<br />
wires all correct, press the setup button of upper right corner in the screen to enter setup<br />
menu;<br />
3. Press the center of direction setup button in the top of setup menu, the steering wheel<br />
setup menu will bound out;<br />
4. After steering wheel setup menu bound out, press text button firstly, you will see<br />
sample figure of A and B displayed in information box, this is the initial figure that the<br />
main unit get sample to car's steering wheel.<br />
5. Then, press the following key "cancel" firstly to clear all keys. Note: you must press<br />
this key to clear all previous setting before every to change setting.<br />
6. And then, you can make the keys learn. after you press the top function key, the<br />
information box will prompt'PLS PRESS KEY" to prompt user to press key of car's<br />
steering wheel that need to define. when you have pressed the key of car's steering<br />
12<br />
Steering wheelSetting<br />
wheel, the information box will display the key figure that you pressed, that means the<br />
key has been got sample by main unit, then, you can learn the next key till finish all keys<br />
learning.<br />
7. When complete the learning, you need to press "complete" to save the key you have<br />
learned and start steering wheel function, if you didn't press "apply" key after finished<br />
learning, before you will study will make invalid processing.<br />
B. lf you don't want it after finish learning, press "cancel" to cancel it, at the same time,<br />
close the steering wheel function.<br />
9. lf you think that some keys' sample figures are very close during learning and it's easy<br />
to mistake code, press exchange two wires, means exchange previous two pieces of<br />
wires from car steering wheel to unit drew forth. lf the car's steering wheel just has one<br />
piece of wire, please connect the key wire of steering wheel to the other wire of unit, then<br />
return to the first step to learn.<br />
10. Maybe there are several keys in car's steering wheel, you can define by yourself,<br />
make the key function of steering wheel and key function in menu correspondence, and<br />
finish learning. You can ignore it if a key in menu but not in steering wheel, it won't<br />
influence normal use. You just need to learn the keys which are in steering wheel's OK.<br />
11. You can also enter setup menu and press "cancel" to close steering wheel function<br />
after finish learning steerlng wheel. After closed the steering wheel will have no function.<br />
lf you need to turn on steering wheel function, please return to the first step and re-learn<br />
to setup.<br />
13
Display Setup<br />
Press the display mode right picture<br />
shows which has four kinds of mode to<br />
select:<br />
Custom ize--Standard-- Brig ht--Soft<br />
Press the right picture shows "color"<br />
"contrast" "brightness" to adjust<br />
the color, contrastand brightness of<br />
display screen at will separately.<br />
Voice Setup<br />
Press "EQ mode" button of right picture<br />
shows which has five kinds of mode to<br />
adjust:<br />
Sta ndard--+Rock--Popu la r -) Jazz---+<br />
Classical<br />
Press "loudness" button of right picture<br />
shows to choose "turn on" or " turn offl'the<br />
loudness.Press the left or right button of<br />
"treble" and "bass" you can adjust treble or<br />
bass by yourself.<br />
Press car's up, down, left, right button as<br />
right picture which can come to the<br />
adjustment to car's front, back, left, right<br />
loudspeakers.<br />
Time Setuo<br />
lss time adjustment E outton ,no<br />
button to setup time and date.<br />
Press time adjustment button to setup the<br />
time display is "12H" or "24H".<br />
ffi :,[i""i$u,"Jt"Jif ll j'J:iffi ".<br />
year, month,day.After finish the<br />
adjustment, Please ISubmissionl button<br />
and then exit the time setup menu.<br />
14<br />
li<br />
Edition lnformation<br />
Press edition button, lt will display the software's edition information.<br />
Radio mode<br />
1. FM/AM<br />
2. Automatically scan radio<br />
3.Manualscan radio<br />
3. Manual scan radio+<br />
4. Manual scan radio-<br />
5. AF<br />
6. TA(RDsxoptional)<br />
Automatically scan radio<br />
7. PTY(RDS)(optional)<br />
B. BAND<br />
9. video<br />
10.time<br />
12. radio<br />
13.come back<br />
14. BAND<br />
Press 1 (auto-scan radiol button, the unit will auto-scan radio, and save them into 1-6<br />
button of each wave band.<br />
Scan<br />
Press 2 (browsel button, it auto-scan radio which is per-set in 1-6 button of each wave<br />
band, Every radio is displayed for 10 minutes.<br />
Loc
Press 3 ( LocI button to setup remote or short-range scan radio mode of unit, if be setup<br />
in the short-range scan radio mode, the unit just receive local strong signal radio. lf be<br />
setup in remote mode, it will receive local and remote radios.<br />
Sterdo and sihgle track switch:<br />
Press 4 (STI button to setup stereo and single track receive radio mode.<br />
RDS(optional function)<br />
lf no RDS, or RDS is closed, 5-7 are lnvalid.<br />
A. ( PTYI press 7 to choose your favorite programs style, 2 seconds later it will<br />
auto-scan program of the program style you setup.<br />
B. (TAI after you pressS, it will to auto-search RDS display radio.<br />
C. (AFI AF function is setup to be open while being again, Press 5 to close or re-open<br />
it,<br />
lf the current signal is weak, within 50 seconds the unit will auto-search and display<br />
strong signal radio of same style.<br />
Radio mode<br />
Manual Scan<br />
press 10 f El uoO f EI to choose different radio channels upward and downward.<br />
Long press 10 tEI anO f EI the unit will search the channels upward or downward<br />
automatically, lt stops when a channel is searched.<br />
Band switch:<br />
Press 12 [BandI to switch the radio band. The switching order is as follows:<br />
FM 1 ---+FM2-+FM 3-,AM 1 --AM2<br />
Favorite radio channels:<br />
When the unit receive a favorite channel, You can press one of the buttons in '1-6 keys<br />
for 2 seconds to save it in this button. Press 1-6key to play the preset channel. Show as<br />
picture 16.<br />
Return to main menu:<br />
Press 13 to return to the main menu<br />
Generalsetup:<br />
Press 14 and the general setup menu shows up.<br />
16<br />
il<br />
DVD/SD/M MC/USB OP E RATION S<br />
DVD/SD/MMC/USB<br />
operations<br />
The unit will enter the DVD mode automatically when you put in a disc, if there is<br />
a disc inside the device, you can also enter the DVD mode by pressing DVD icon<br />
in the menu status, Enter/eject disc button.<br />
1. Next<br />
2. Previous<br />
3. Stop<br />
4. Play/ pause<br />
5. Fast backward<br />
6. Fast forward<br />
7. MUTE<br />
8. Menu display<br />
9. OK<br />
10. Direction key<br />
11. Return to main menu<br />
12. Status/time<br />
13. Generalsetup menu<br />
DVD/SDIM MC/USB OPE RATIONS<br />
Press buutonS [menu] to enter the menu mode. [Note: the disc should be the<br />
VCD2.0, which supports the menu play or DVDI.<br />
ACatalog function:<br />
Press 6 [catalog] to choose various catalog of DVD.<br />
lTrack function operation<br />
Press 7 [track] to switch the set of left track, right track, mixed track, stereo,<br />
language (which should be supported by disc) freely.<br />
I Reduce and enlarge:<br />
Press 8 [reduce and enlarge] to reduce or enlarge the display picture by times,<br />
you may refer to remote control introduction.<br />
OVolume control:<br />
The volumes increase/decrease if you press 9 volume button.<br />
iRepeat play:<br />
Press button 11 to set the repeat mode and the repeat sequence is as follow:<br />
All repeat--single repeat-*repeat off<br />
DVDISD/M MC/USB OPERATIONS<br />
Note:the default mode is "all repeat".<br />
I Fast foruvard / fast backward:<br />
Press 12 and 13 button to play fast forward and fast backward. Press 12<br />
continuously to play fast fonivard lx)x{x$x)Ql. Press button directly in fast<br />
forward or fast backward to return to the normal play.<br />
lSelect program setup:<br />
Press button 14 or 15 to choose next or previous.<br />
lReturn to main menu:<br />
Press button 16 to return to main menu.<br />
JGeneral setup menu:<br />
Press button 17 and the general setup menu shows up. For details, please<br />
refer to the general setup from page 9.<br />
l<strong>System</strong> button:<br />
Press 19 [system]to choose NTSC or PAL system.<br />
ORandom button:<br />
Press 20 [random]to<br />
iDVD setup:<br />
Press 21 [setup]to setup DVD mode.<br />
lTitle button:<br />
play programs in DVD randomly.<br />
Press 22 [title] to display the title catalog in DVD.<br />
iDisplay button:<br />
Press 23 [display] to display play time and programs of DVD.<br />
lScan:<br />
Press 24 [scan]to scan Program in DVD.<br />
lConfirm:<br />
Press 26-29, up, down, left, right to choose the status you want. press 25 [OK]<br />
to confirm.<br />
DTV: M,ODE{Optidhal Function)<br />
Click TV icon in the main menu to enter<br />
the T1/ model(can choose analog TV)<br />
TV:Iri.li&<br />
l.Previous Channel<br />
2.Next Channel<br />
3.Volume<br />
4.Automatic scan<br />
5.Main Menu<br />
6.Delete<br />
1B 19
T,Y,rM'ode<br />
T.Favourite Chanel<br />
8.OK<br />
9.Drop out<br />
10..come back<br />
11.Set up<br />
12.Status and time<br />
13.Mute<br />
ITV system setup<br />
Press 1 [TV setup] repeatedly to select the correct TV audio/video system. The<br />
selection sequence is as follows:<br />
PAL-L-PAL-DK-PAL-BG--SECAML-+SECAM-BG-SECAM-DK---+NTSC<br />
lPreset the TV<br />
Press 2 [automatic scan] to scan and save the TV automatically. lt can save up to 99<br />
radio channels.<br />
lVolume control<br />
Press S[+]and 6[-] button to control the volume to increase and decrease. The<br />
volume is Split into 30 grades. lf you turn off the unit [or close the ACC lock] when the<br />
volume is set below 10, the unit will come to the previous volume when you restart<br />
the device; if the volume is set above 10, the unit will restore to default 10 after you<br />
restart the unit.<br />
OChannel selection:<br />
Press 4 and 3 buttons to select the previous channel and next channel<br />
respectivelOCatalog<br />
Press 10 [catalog] to control digital TV catalog.<br />
lExit<br />
Press 11 [exit] to exit digital TV interface.<br />
lScan radio<br />
Press 12 [scan] to scan digital TV channels.<br />
20<br />
M<br />
.w 's<br />
I<br />
I<br />
BLU ETOOTH MODE(Optiona!)<br />
Bfq&aili<br />
Please note the several following points before reading the Bluetooth operating<br />
instructions:<br />
lTo connect the mobile phone Bluetooth, enter "Bluetooth" panel and press button<br />
to match.<br />
t)After the successful match, the Bluetooth picture will turn to "Bluetooth icon"<br />
t)Default matching password is 0000.<br />
Phone dial number<br />
1. Phone dial number<br />
2. Phone book<br />
3. Music display<br />
4. Bluetooth set<br />
5.Dial/receive calls<br />
Phone Book<br />
1. Phone book<br />
2. Dialed calls<br />
3. Received calls<br />
4. Missed calls<br />
5. Bluetooth / mobile phone switching<br />
6.Refuse /hang off calls<br />
T.Number display<br />
8.MUTE<br />
9.Status and time display<br />
21<br />
6.Next<br />
T.Previous
BLU ETOOTH MODE(Optional)<br />
Bluetooth Music<br />
lThe Bluetooth of this DVD supports A2DP, stereo Bluetooth music play protocol<br />
and automatic control. lf the matched mobile phone supports the functions, you just<br />
need to press 1 in the standby mode under the A2DP communication protocol, then,<br />
the device will control the mobile phone automatically to play its music. You can<br />
press 1 to pause when play the music. The device returns to normal when you press<br />
it again. Press 2 to stop playing and 1 to start to play again. Press 3 to<br />
select the next program and 4 to select the previous program.<br />
Bluetooth setup<br />
lPress 1 [reset] to see the save data of Bluetooth.Press2 [cut] to cut the<br />
connecting Bluetooth. Press3 [connection] to connect Bluetooth.<br />
lPress 4 to increase/decrease the volume of Bluetooth,<br />
22<br />
IPOD OPERATING MODE<br />
IPOD operating mode(optional)<br />
'1. Next<br />
2. Previous<br />
3. Confirm<br />
4. Volume + /-<br />
5. Confirm<br />
6. Random Button<br />
7. Repeat<br />
8. Turn off<br />
9. Next video<br />
10. Play/pause<br />
11. Previous video<br />
12. General setup menu<br />
13. Status and time<br />
14. Return to main menu<br />
lVolume control<br />
Press 1 button to control the volume to increase and decrease. The volume is Split<br />
into 30 grades. lf you turn off the unit [or close the ACC lock] when the volume is set<br />
below 10, the unit will come to the previous volume when you restart the device; if the<br />
volume is set above 10, the unit will restore to default '10 after you restart the unit.<br />
ORandom<br />
Press 2[random]to play audio and video in IPOD randomly.<br />
lTurn off<br />
Press 3 [turn off]to close IPOD connecting status, IPOD will charge power<br />
immediately.<br />
lRepeat<br />
Press 4 [repeat] to replay current program or cyclical replay all programs.<br />
rlMenu play<br />
Press 12 [menu]to enter menu play mode.<br />
lProgram selection setup:<br />
Press 9 or 1'l to select next or previous respectively. lln play status:<br />
Press '10 to pause / play, press it again to recover normal play.<br />
t)ln play status:<br />
Press 6 [video] to enter video play; press 7 to select previous video, press 8 to<br />
select next video.<br />
2g
AUX MODE<br />
1. Volume -<br />
2. Volume +<br />
3. Mute / vocal<br />
lPress 2 [+] and 1 [-,] button to controlthe volume to increase and decrease. The<br />
volume is Split into 30 grades. lf you turn off the unit [or close the ACC lock] when the<br />
volume is set below 10, the unit will come to the previous volume when you restart<br />
the device; if the volume is set above 10, the unit will restore to default 10 after you<br />
restart the unit.<br />
I Speaker status display:<br />
Press 3 means mute, press it again to return to the vocal status.<br />
GPS OPERATION MODE (Optional Function)<br />
GPS Navigation (Operation)<br />
Remark: Before Navigate,GPS Map card must be insert to this unit's GPS card<br />
Slot normally and set navigation path at the same time.<br />
path settings:<br />
1 )Navigation<br />
Click the GPS lcon on the Main lnterface inter into Navigation Console lnterface,<br />
Click" Console" longly, pop up below interface.<br />
1. Back Main lnterface lcon, lt need waiting 3 seconds on another mode,then the<br />
lcon willwork.<br />
2. Click"PlP OFF" go to Picture in Picture<br />
3. Close the PIP display<br />
4. Setting time lcon(We can see the time in GPS system)<br />
5. E-book lcon( Read some words)<br />
6. Games lcon(Playing Games)<br />
7. Navigation lcon,Click it go to Navigation lnterface.<br />
8. Setup lcon,Click it go to set up lnterface.<br />
9. Music lcon,Click it go to listen music.<br />
10. PIP Display size<br />
11. Close the PIP display.<br />
Click the "setup" lcon on the Console lnterface, go to the below interface.<br />
24 25
click"Navigation set up" lcon on the setup interface,go to below interface.<br />
click"folder" lcon on the Navigation setup lnterface go to below interface,to choose<br />
navigation map software on this interface. Then click "oK" button, set up success.<br />
After click"oK" Button,then the navigation software path set up successful,click<br />
"Back" button back to console main menu.<br />
click"GPS Monitor" on the set up interface,go to below interface,this interface display<br />
GPS signal and GPS signalstrength.<br />
click"Usual setup"on the setup lnterface,go to below interface"Key-Stroke Volurnc"<br />
Set "language" and"<strong>System</strong> Volume" .<br />
Click"Screen"on the Setup lnterface,go to below interface,to adjust the screen's<br />
26 27
Click "Time" on the Setup interface,go to below lnterface,to set time and time zone'<br />
Click"Skin" on the Setup lnterface,go to below lnterface, We will<br />
to change the background of GPS interface.<br />
28<br />
pull down the picture<br />
Click"Music" on the GPS lnterface,go to below the interface<br />
Back<br />
play sw{ch<br />
Click"Movie" on the GPS lnterface,go to below the interface.<br />
Click"E-Book" on the GPS lnterface,qo to below the interface.<br />
I lack button:click it to lhE .Console"interface<br />
Close<br />
29
Click"screen"the GPS interface, go to below interface.<br />
Slides<br />
Pic!ure<br />
ZM<br />
Zmm in<br />
click"Game" theGPS interface, go to below interface. lncluding 4kinds of games 3.WZQ Game<br />
1.Try to connet game<br />
30<br />
l.BoxMan Game
Syste,m llSetup Menu<br />
You can press Setup key on the remote controlto bring up the <strong>System</strong> Setup<br />
Menu when the unit is under the stop/playback mode.<br />
SETUP MENU Main Page<br />
Press up/down direction button to select a item,<br />
then press ENTER.<br />
$fstom,s*up<br />
lYSY€TE:M:<br />
According to the Color <strong>System</strong> of the TV, you can choose the TV <strong>System</strong>.<br />
. AUTO: Choose this settings if your DVD player is connected to a multi-system TV.<br />
. NTSC: Choose this settings if your DVD player is connected to a NTSC TV.<br />
. PAL: Choose this settings if your DVD player is connected to a PAL TV.<br />
. PAL60: Choose this settings if your DVD player is connected to a PAL60 TV.<br />
The default setting is NTSC.<br />
SCREEN SAVER,<br />
lf the screen saver is on, when your DVD player is in Stop, Open, or No Disc<br />
state, or there is a frame frozen for more than 3 minutes, the screen saver will<br />
32<br />
Syste,rn Setu,p,Menu<br />
be displayed. This feature can protect the screen from damage.<br />
ON: Choose this setting to activate the screen saver.<br />
OFF: Choose this setting to cancel the screen saver<br />
The default setting is ON.<br />
TV TYPE<br />
16: 9 (Wide Screen): Choose this setting if your DVD player is connected to a<br />
wide screen TV. lf you choose this setting and you don't have a wide screen TV,<br />
the images on the screen may appear distorted due to vertical compression.<br />
4: 3 LB (Letter Box): Choosing this setting if your DVD player is connected to a<br />
normal ratio TV. connector You'll see the movies in their original aspect ratio<br />
(height-to-width ratio). You'll see the entire frame of the movie, but it will take up<br />
a smaller portion of the screen vertically. The movie might appear with black<br />
bars at the top and bottom of the screen.<br />
4 : 3 PS (Pan & Scan): Choosing this setting if your DVD player is connected to<br />
a normal ratio TV. You can fill the movie to the entire screen of your TV. This<br />
might mean that parts of the picture (the left and right edges) won't be seen.<br />
PASSWORD<br />
The password option is initialized locked, and you cannot set the ratings limit or<br />
change the password. ln order for the Ratings feature work, the password mode<br />
must be turned on. lf you want to set the ratings limit, you will need to enter the<br />
default password, which is 0000, then press Enter to confirm. To change the<br />
33
<strong>System</strong> Setup Menu<br />
password, you will be prompted for the old password, then be prompted for a<br />
new. Enter a 4-digit number (this is your password).<br />
Notes: Some time, the password is 6-digit number, the default is 000000.<br />
RATING<br />
The Rating feature is a rating limit system, like movie ratings. lt works with DVD<br />
discs that have been assigned a rating. This helps you control the types of<br />
DVDs that your family watches.<br />
There are two rating options: NO ADULT and KID SAFE.<br />
Select the VIEW ALL option to cancel the rating limit.<br />
The default setting is VIEW ALL.<br />
DEFAULT<br />
Choose this option to resume all the setup options to default settings.<br />
LANGUAGE SETUP<br />
34<br />
<strong>System</strong>.:.,r$,etU,P r, Mie n u<br />
OSD LANGUAGE<br />
press the Arrow buttons to choose the OSD language you prefer, Press Enter to<br />
confirm, and it will display OSD in that language; There are I optional OSD<br />
languages: Chinese, English, Japan, French, Spanish, Portuguese, German<br />
and Latin.<br />
AUDIO LANGUAGE<br />
press the Arrow buttons to choose the audio language you prefer. Press Enter<br />
to confirm. lf the disc you are playing has that language available, it will output<br />
audio in that language; There are I optional audio languages: Chinese, English,<br />
Japan, French, Spanish, Portuguese, German and Latin.<br />
SUBTITLE LANGUAGE<br />
press the Arrow buttons to choose the subtitle language you prefer, Prees Enter<br />
to confirm. lf the disc you are playing has that language available, it wlll dlsplays<br />
subtitles in that language; There are 8 optional audio languages: Chinese,<br />
English, Japan, French, Spanish, Portuguese, German, and Off.<br />
MENU LANGUAGE<br />
press the Arrow buttons to choose the menu language you prefer. Press Enter to<br />
confirm. lf the disc you are playing has that language available, it will displays<br />
35
Syste,m Setup Menu<br />
menu in that language; There are 8 optional menu languages: Chinese, English,<br />
Japan, French, Spanish, Portuguese, German, and Off.<br />
AUDIO Setup<br />
Use the Up and Down arrow button to move the scroll and adjust the key.<br />
VIDEO SETUP<br />
BRIGHTNESS<br />
Use the Up and Down arrow button to move the scroll and adjust the<br />
brightness. -"<br />
CONTRAST<br />
Use the Up and Down arrow button to move the scroll and adjust the<br />
contrast.<br />
36<br />
<strong>System</strong> Setup Menu<br />
HUE<br />
Use the Up and Down arrow button to move the scroll and adJust the hue.<br />
SATURATION<br />
Use the Up and Down arrow button to move the scroll and adjust saturatlon.<br />
DIGITAL SETUP<br />
DYNAMIC RANGE:<br />
When "LINE OUT" is selected, choose this setting to adjust the line out ratio and<br />
get different effect. lf adjusting to FULL, the audio signal peak value will be the<br />
minimum;while adjusting to OFF, maximum. DUAL MONO<br />
Choose this option to setup the L and R mono output mode; There are four<br />
modes in this option: STEREO, MONO L, MONO R, and MIX MONO; lt is<br />
mainly used in karaoke mode.<br />
37
RE,M:OTE.OPERATION<br />
1. Power supply<br />
2. Play/Pause<br />
3. Enter/Eject<br />
4. Direction keys<br />
5. Band/<strong>System</strong> switching button<br />
6. Enter<br />
7. Volume +/-<br />
8. Select the channel/program/Fast<br />
backward/forward<br />
9. Programming/Stereo<br />
10. Playing time display<br />
11. GPS screen switching<br />
12. RepeaUAutomatically save the channel<br />
13. Random play/Local & remote control<br />
14. Number keys<br />
15. Audio settings<br />
16. PBC settings<br />
17. Mute<br />
18. Desired program<br />
19. Mode switching<br />
20. StopiReturn<br />
2'1. Angle selection<br />
22. TitleiLanguage settings<br />
23. Main menu setup<br />
24. f itle I Calalog setti n gs<br />
25.Zoom in/Zoom out<br />
26. GPS shortcuVmode<br />
27. TFf screen up-sliding key<br />
28. TFT screen down-sliding key<br />
29. Compensation of equal-loudness<br />
38<br />
24<br />
7<br />
23<br />
2l<br />
I<br />
I<br />
t5<br />
S,PECIF!CATION<br />
General<br />
Power supply<br />
Load<br />
Max. Power output<br />
Tone control<br />
Dimensions<br />
I nstallation dimension<br />
Weight<br />
Applicable disc<br />
Video system<br />
lnstallation angle<br />
Video<br />
Video system<br />
Video output<br />
Resolution<br />
Max. Output<br />
Frequency scope<br />
39<br />
4.4VDC<br />
40<br />
50w.4<br />
+t8db(Bass: 1 00Hz,Treble: 1 0KHz)<br />
Aboutl 92.1 78.1 00mm(D*W*H)<br />
Aboutl 69.1 82*1 03mm(D*W*H)<br />
About 2.65k9<br />
MPEG4.DVD,SUPER,VCD.MP3,CD,CD-R,<br />
CD-RW, PICTURE-CD<br />
AUTO, NTSC, PAL<br />
0-+/-30<br />
16:9 MaiI MODE/16:9FULL SCREEN<br />
1.0Vp-p.75ohms<br />
500<br />
600 O (2.0Vrms)<br />
20Hz-20KHz<br />
I
SIMPLE TROBLE SHOOTING GUIDE<br />
Problems Reasons and setUement<br />
No power Check whether lfie fuse of power supply is broken.<br />
LCD display mess-up and<br />
the key does not work<br />
Cannot receive the radio<br />
channel<br />
Bad effect on receiving the<br />
radio<br />
Cannot put the disc into<br />
the DVD<br />
Charge br amther one with a proper capacity if necessary<br />
Press Reset Key<br />
Check urttetter the antenna is connected or whether it is connected<br />
well. Connect the antenna well.<br />
The lengrth of the antenna may not enough. Check whether the<br />
antenna is spread out or broken. Change for a new one if it is broken.<br />
The broadcasting signal is too weak, change for another one with a<br />
strong signal.<br />
The antenna is not connected tothe ground properly. Make sure<br />
whether the antenna is connected well to the ground.<br />
Stereo indicator fl ashes Perfect the tuning frequency<br />
There is a disc inside the DVD. Withdraw the disc to solve it.<br />
The broadcasting signal is too weak. Please set it in the MONO<br />
mode<br />
Noise The disc is broken or dirty. Change for a good disc.<br />
No picture The video cable between the DVD and TV is not connected well"<br />
The picture shake The system color setting is not correct. Set the color system to "PAT"<br />
or'NTSC" according to your TV.<br />
Bluetooth cannot work Check whether the Bluetooth mobile phone matches the DVD and<br />
Echo is too loud in<br />
Bluetooth talk<br />
whether it is conectly connected to the DVD. Match and connect it<br />
again according to the instruction of the mobile phone.<br />
The volume is too loud. Tum the DVD down to a proper volume.<br />
40