D-<strong>Link</strong> <strong>DU</strong>-<strong>562M</strong> <strong>External</strong> Modem User’s Guide Chapter 2 Specifications 2.1 Specifications Computer Interface USB V1.1 Line Interface RJ-11 for POTS line Data Protocols V.90 / V.92, K56flex, V.34, V.32bis, V.32, V.22bis, V.22, V.23, V.21, Bell 212A and 103 Data Speed 56k, 54k, 52k, 50k, 48k, 46k, 44k, 42k, 40k, 38k, 36k, 34k, 33.6k, 31.2k, 28.8k, 26.4k, 24k, 21.6k, 19.2k, 16.8k, 14.4k, 12k, 9600, 7200, 4800, 2400, 1200, 300 Data Compression V.42bis, MNP 5 Error Correction V.42 LAPM, MNP 2,3,4 Fax Protocols Group 3 Compatible, Class 1 fax: V.17, V.29, V.27ter, V.21 ch 2 Fax Speed 14.4k, 12k, 9600, 7200, 4800, 2400, 300 General Sandard AT commands, V.8 and Automode, Caller ID, Virtual DTE, V.80 Virtual UART (115.2kbps), DTMF detection and generation, ADPCM, Answering machine (voice), OnNow Power Management, Wake-up on ring , Distinctive ring for data/fax/voice, World wide country support Power Consumption below 700mW 2.2 System Requirements CPU : Pentium 200MHz MMX comptible or greater RAM : 16Mbyte RAM or more Interface : USB port HDD : 2MB free space or above Telecom Requirement : 1 POTS line Operation system : Windows 98SE , Windows ME, Windows 2K, Windows XP 6
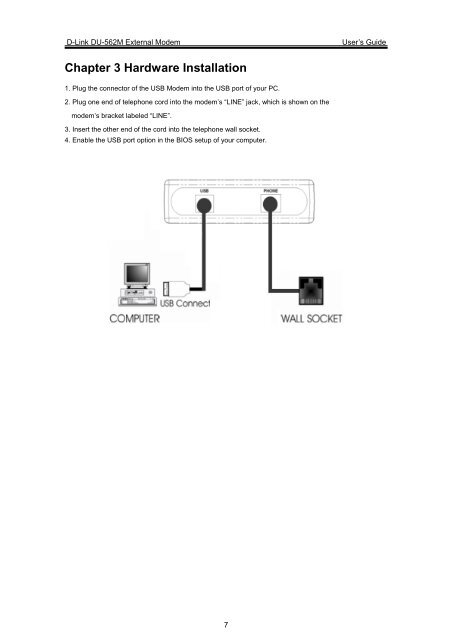
D-<strong>Link</strong> <strong>DU</strong>-<strong>562M</strong> <strong>External</strong> Modem User’s Guide Chapter 3 Hardware Installation 1. Plug the connector of the USB Modem into the USB port of your PC. 2. Plug one end of telephone cord into the modem’s “LINE” jack, which is shown on the modem’s bracket labeled “LINE”. 3. Insert the other end of the cord into the telephone wall socket. 4. Enable the USB port option in the BIOS setup of your computer. 7