?????????? ? ?????????? BOSCH TES50129
?????????? ? ?????????? BOSCH TES50129
?????????? ? ?????????? BOSCH TES50129

You also want an ePaper? Increase the reach of your titles
YUMPU automatically turns print PDFs into web optimized ePapers that Google loves.
en<br />
“Coffee strength” rotary knob<br />
h<br />
to<br />
g G<br />
This rotary knob (13) is used<br />
to adjust the coffee strength<br />
or select the setting for preground<br />
coffee.<br />
Very mild<br />
Mild<br />
Medium<br />
Strong<br />
Ground coffee<br />
“Drink selection” rotary knob<br />
a<br />
to<br />
c<br />
b<br />
to<br />
d<br />
This rotary knob (14) is<br />
used to select the required<br />
beverage and quantity. It is<br />
also used to change user<br />
settings.<br />
Small espresso<br />
Espresso<br />
Small café crème<br />
Café crème<br />
Large café crème<br />
2 small espressos<br />
2 espressos<br />
2 small café crèmes<br />
2 café crèmes<br />
2 large café crèmes<br />
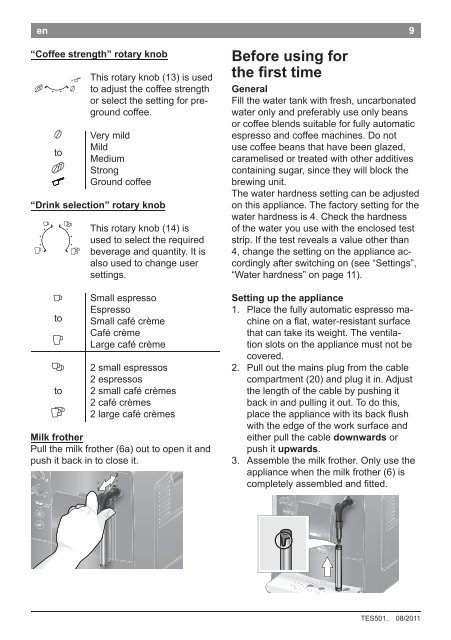
Milk frother<br />
Pull the milk frother (6a) out to open it and<br />
push it back in to close it.<br />
9<br />
Before using for<br />
the fi rst time<br />
General<br />
Fill the water tank with fresh, uncarbonated<br />
water only and preferably use only beans<br />
or coffee blends suitable for fully automatic<br />
espresso and coffee machines. Do not<br />
use coffee beans that have been glazed,<br />
caramelised or treated with other additives<br />
containing sugar, since they will block the<br />
brewing unit.<br />
The water hardness setting can be adjusted<br />
on this appliance. The factory setting for the<br />
water hardness is 4. Check the hardness<br />
of the water you use with the enclosed test<br />
strip. If the test reveals a value other than<br />
4, change the setting on the appliance accordingly<br />
after switching on (see “Settings”,<br />
“Water hardness” on page 11).<br />
Setting up the appliance<br />
1. Place the fully automatic espresso machine<br />
on a fl at, water-resistant surface<br />
that can take its weight. The ventilation<br />
slots on the appliance must not be<br />
covered.<br />
2. Pull out the mains plug from the cable<br />
compartment (20) and plug it in. Adjust<br />
the length of the cable by pushing it<br />
back in and pulling it out. To do this,<br />
place the appliance with its back fl ush<br />
with the edge of the work surface and<br />
either pull the cable downwards or<br />
push it upwards.<br />
3. Assemble the milk frother. Only use the<br />
appliance when the milk frother (6) is<br />
completely assembled and fi tted.<br />
TES501.. 08/2011<br />
TES501_Heft1_RW.indb 9 14.09.2011 16:10:24