
You also want an ePaper? Increase the reach of your titles
YUMPU automatically turns print PDFs into web optimized ePapers that Google loves.
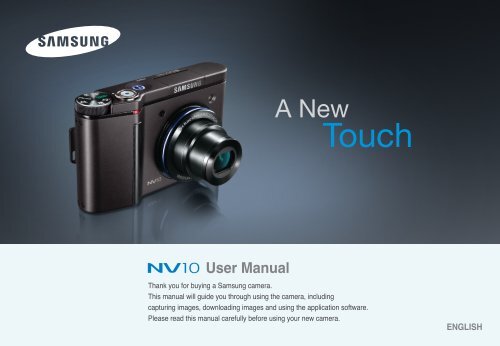
<strong>User</strong> <strong>Manual</strong><br />
Thank you for buying a Samsung camera.<br />
This manual will guide you through using the camera, including<br />
capturing images, downloading images and using the application software.<br />
Please read this manual carefully before using your new camera.<br />
ENGLISH
Instructions<br />
Use this camera in the following order.<br />
Set up the camera driver<br />
Take a picture<br />
Insert the USB cable<br />
Check the camera’s power<br />
Check [Removable Disk]<br />
Before connecting the camera to a PC, via<br />
the USB cable, you will need to set up the<br />
camera driver. Install the camera driver<br />
that is contained in Application software<br />
CD-ROM. (p.61)<br />
Take a picture. (p.18)<br />
Insert the supplied USB cable into the<br />
PC’s USB port and the camera’s USB<br />
connection terminal. (p.63)<br />
Check the camera’s power. If the power is<br />
turned off, press the camera button to turn<br />
it on.<br />
Open Window’s EXPLORER and search<br />
for [Removable Disk]. (p.65)<br />
If you use a card reader to copy the images on the memory card to your PC, the<br />
images could be damaged. When transferring the images taken with the camera<br />
to your PC, be sure to use the supplied USB cable to connect the camera to<br />
your PC. Please note that the manufacturer holds no responsibility for loss or<br />
damage of images on the memory card due to the use of a card reader.<br />
Getting to know your camera<br />
Thank you for buying a Samsung Digital Camera.<br />
Prior to using this camera, please read the user manual thoroughly.<br />
When you require After Sales service, please bring the camera and the cause of<br />
the camera malfunction (such as battery, Memory card etc.) to the A/S centre.<br />
Please check that the camera is operating properly prior to when you intend to<br />
use it (e.g. for a trip or an important event) to avoid disappointment. Samsung<br />
camera takes no responsibility for any loss or damages that may result from<br />
camera malfunction.<br />
Keep this manual in a safe place.<br />
Specifications are subject to change without prior notice.<br />
Microsoft, Windows and Windows logo are registered trademarks of Microsoft<br />
Corporation incorporated in the United States and/or other countries.<br />
All brand and product names appearing in this manual are registered trademarks<br />
of their respective companies.<br />
1
2<br />
Danger Warning<br />
DANGER indicates an imminently hazardous situation which, if not avoided, will<br />
result in death or serious injury.<br />
Do not attempt to modify this camera in any way. To do so may result in fire,<br />
injury, electric shock or severe damage to you or your camera. Internal<br />
inspection, maintenance and repairs should only be carried out by your dealer or<br />
Samsung Camera Service centre.<br />
Please do not use this product in close proximity to flammable or explosive<br />
gases, as this could increase the risk of explosion.<br />
Should any form of liquid or a foreign object enter the camera, do not use it.<br />
Switch off the camera, and then disconnect the power source. You must contact<br />
your dealer or Samsung Camera Service centre. Do not continue to use the<br />
camera as this may cause a fire or electric shock.<br />
Do not insert or drop metallic or inflammable foreign objects into the camera<br />
through access points e.g. the memory card slot and battery chamber. This may<br />
cause a fire or electric shock.<br />
Do not operate this camera with wet hands. This could pose a risk of electric<br />
shock.<br />
WARNING indicates a potentially hazardous situation which, if not avoided, could<br />
result in death or serious injury.<br />
Do not use the flash in close proximity to people or animals. Positioning the flash<br />
too close to your subject’s eyes may cause eyesight damage.<br />
For safety reasons keep this product and accessories out of reach of children or<br />
animals to prevent accidents e.g.:<br />
Swallowing battery or small camera accessories. If an accident should occur,<br />
please consult a doctor immediately.<br />
There is the possibility of injury from the camera’s moving parts.<br />
Battery and camera may become hot during prolonged use and it may result in<br />
camera malfunction. Should this be the case, allow the camera to sit idle for a<br />
few minutes to allow it time to cool.<br />
Do not leave this camera in places subject to extremely high temperatures, such<br />
as a sealed vehicle, direct sunlight or other places of extreme variances in<br />
temperature. Exposure to extreme temperatures may adversely affect the<br />
camera’s internal components and could cause a fire.<br />
When in use, do not cover the camera or Charger. This may cause heat to build<br />
up and distort the camera body or cause a fire. Always use the camera and its<br />
accessories in a well-ventilated area.
Caution<br />
CAUTION indicates a potentially hazardous situation which, if not avoided, may<br />
result in a minor or moderate injury.<br />
Leaking, overheating, or damaged battery could result in fire or injury.<br />
Use battery with the correct specification for the camera.<br />
Do not short circuit, heat or dispose of battery in fire.<br />
Do not insert the battery with the polarities reversed.<br />
Remove the battery when not planning to use the camera for a long period of<br />
time. Otherwise the battery may leak corrosive electrolyte and permanently<br />
damage the camera’s components.<br />
Do not fire the flash while it is in contact with hands or objects. Do not touch the<br />
flash after using it continuously. It may cause burns.<br />
Do not move the camera while it is switched on, if you are using the AC Charger.<br />
After use, always switch off the camera before unplugging the cable from the<br />
wall socket. Then make sure that any connector cords or cables to other devices<br />
are disconnected before moving the camera. Failure to do so may damage the<br />
cords or cables and cause a fire or electric shock.<br />
Take care not to touch the lens or lens cover to avoid taking an unclear image<br />
and possibly causing camera malfunction.<br />
Avoid obstructing the lens or the flash when you capture an image.<br />
Before inserting any cables or AC adapter, check the directions and do not insert<br />
by force. It may cause breakage of cable or camera.<br />
Credit cards may be demagnetized if left near case. Avoid leaving magnetic strip<br />
cards near the case.<br />
Contents<br />
READY<br />
How to use the PROGRAM mode 18<br />
How to use the <strong>Manual</strong> mode 18<br />
System chart 5 How to use the ASR (Advanced<br />
Identification of features 6 Shake Reduction) mode 19<br />
Front & Top6 How to use the Special Effect mode 19<br />
Back & Bottom 7 How to use the SCENE mode 19<br />
Bottom8 How to use the MOVIE CLIP mode 19<br />
Cradle (Optional) 8 Recording the movie clip without voice 20<br />
Self-timer lamp 9 Pausing while recording a movie<br />
Camera Status Lamp 9 clip (Successive Recording) 20<br />
Mode dial 9 Using Successive Recording 20<br />
Mode icon10 Things to Watch Out for When<br />
Connecting to a Power Source 10 Taking Pictures 20<br />
How to charge the rechargeable Using the camera buttons to set<br />
battery (SLB-0837B) 12<br />
Inserting the memory card 13<br />
Instructions on how to use the<br />
the camera 21<br />
POWER button 21<br />
Shutter button 21<br />
memory card 13 ZOOM W / T button21<br />
Using the LCD monitor to set the<br />
RECORDING<br />
camera settings23<br />
Color tone24<br />
When Using the Camera for the First Brightness24<br />
Time : Smart button 15 Selecting focus type 25<br />
When Using the Camera for the First Time : Flash 25<br />
Setting up the Date / Time and Language16 Size 26<br />
LCD monitor indicator 17 Continuous shot 26<br />
Starting the recording mode 18 Metering 27<br />
How to use the AUTO mode 18 Sharpness 27<br />
3
4<br />
Contents<br />
Effect28<br />
Quality / Frame rate28<br />
Self-timer / Remote control 29<br />
Voice recording / Voice memo 30<br />
White balance 31<br />
ISO 32<br />
Exposure compensation 32<br />
Scene menu33<br />
Special Effect : Photo Frame 33<br />
Special Effect : Motion GIF 34<br />
Special Effect : Composite shooting34<br />
Shutter Speed 35<br />
Aperture Value35<br />
Photo Gallery mode36<br />
PLAY<br />
Starting play mode 38<br />
Playing back a still image 38<br />
Playing back a movie clip 39<br />
Movie clip capture function 39<br />
On camera movie trimming 39<br />
Playing back a recorded voice memo<br />
or voice file39<br />
LCD monitor indicator 40<br />
Using the camera buttons to adjust<br />
the camera 40<br />
Play mode button40<br />
BACK button 40<br />
Thumbnail / Enlargement button 41<br />
Starting the slide show 41<br />
Protecting images 42<br />
Deleting images 42<br />
DPOF 42<br />
DPOF : STANDARD 42<br />
DPOF : Print size43<br />
DPOF : Index 43<br />
Rotating an image 43<br />
Resize 44<br />
Trimming 44<br />
Effect44<br />
Motion GIF 45<br />
PictBridge 45<br />
Printer button 47<br />
SETUP<br />
Setup menu 48<br />
OSD set 49<br />
File name 49<br />
Language 49<br />
Setting up the Date / Time / Date type 50<br />
Imprinting the recording date 50<br />
LCD brightness 50<br />
Auto Focus lamp 50<br />
Auto power off 50<br />
Quick view 51<br />
Start up image 51<br />
Sound Volume 51<br />
Operation Sound 51<br />
Start up sound 51<br />
Shutter sound 52<br />
Formatting a memory 52<br />
Copy To Card 52<br />
Selecting Video out type 53<br />
Connecting an External Device<br />
(USB) 54<br />
Initialisation 54<br />
Important notes54<br />
Warning indicator 56<br />
Before contacting a service centre56<br />
Specifications 58<br />
SOFTWARE<br />
Software Notes 60<br />
System Requirements 60<br />
About the software 60<br />
Setting up the application software 61<br />
Starting PC mode 63<br />
Removing the removable disk65<br />
Setting up the USB Driver for MAC 66<br />
Using the USB Driver for MAC 66<br />
Removing the USB Driver for<br />
Windows 98SE 66<br />
Digimax Master67<br />
FAQ 69
System chart<br />
Please check that you have the correct contents before using this product. The contents can vary depending on the sales region.<br />
To buy the optional equipment, contact your nearest Samsung dealer or Samsung service centre.<br />
Camera case<br />
DPOF compatible<br />
printer (see p.42)<br />
Remote control<br />
<strong>User</strong> manual,<br />
Product warranty<br />
SD memory card / MMC<br />
(see p.13)<br />
Cradle (SCC-NV2)<br />
< Included items ><br />
Camera strap<br />
AV cable<br />
Software CD<br />
(see p.61)<br />
Computer<br />
(see p.63)<br />
Rechargeable battery<br />
(SLB-0837B)<br />
External monitor (see p.53)<br />
PictBridge compatible<br />
printer (see p.45)<br />
AC adapter (SAC-45) /<br />
USB cable (SUC-C2)<br />
5
6<br />
Identification of features<br />
Front & Top<br />
Mode dial<br />
Self-timer lamp<br />
Remote control sensor<br />
Instructions for the Built-in flash<br />
- The flash opens automatically when you press<br />
the shutter button down half way.<br />
- Do not open the flash by force.<br />
It may cause breakage of camera.<br />
- When you dont use the flash, close the flash to<br />
prevent breakage.<br />
Shutter button<br />
Speaker<br />
Power button<br />
Built-in flash<br />
Auto focus lamp<br />
Lens / Lens cover<br />
Microphone
Identification of features<br />
Back & Bottom<br />
LCD monitor<br />
USB / AV connection terminal<br />
Cradle connector<br />
Camera status lamp<br />
Smart buttons<br />
Smart buttons<br />
Tripod socket<br />
Zoom W button (Thumbnail)<br />
Zoom T button (Digital zoom)<br />
Camera strap eyelet<br />
BACK button<br />
Play mode button<br />
7
8<br />
Identification of features<br />
Bottom Cradle (Optional)<br />
Battery chamber cover<br />
Battery chamber<br />
Memory card slot<br />
Battery holder<br />
Battery cover lever<br />
To open the battery chamber cover, slide the battery cover lever in the direction<br />
shown above.<br />
You can recharge your rechargeable battery, transfer a captured image to print,<br />
and download images with the cradle. (Refer to page. 12, p.45, p.64)<br />
Top<br />
Back<br />
USB port<br />
DC connection terminal<br />
Camera connection terminal<br />
AV connection<br />
terminal
Identification of features<br />
Self-timer lamp<br />
Icon Status Description<br />
- For the first 7 seconds, the lamp blinks at 1 second intervals.<br />
Blinking - For the final 3 seconds, the lamp blinks quickly at 0.25second<br />
intervals.<br />
Blinking<br />
For the 2 seconds, the lamp blinks quickly at 0.25-second<br />
intervals before taking a picture<br />
Blinking<br />
A picture will be taken after about 10 seconds and 2 seconds<br />
later a second picture will be taken.<br />
Blinking<br />
Pressing the shutter button of remote control will allow an<br />
interval of 2 seconds before the image is taken.<br />
Camera Status Lamp<br />
Status Description<br />
After taking a picture<br />
While voice memo recording<br />
When the USB cable is<br />
inserted to a PC<br />
Transmitting Data with a PC<br />
When the USB cable is<br />
inserted to a printer<br />
When the printer is printing<br />
When the AF activates<br />
The lamp blinks while saving the image and then<br />
turns off when ready to take another picture<br />
The lamp blinks<br />
The lamp lights up<br />
(LCD monitor turns off after initializing the device)<br />
The lamp turns on (LCD monitor turns off)<br />
The lamp is off<br />
The lamp blinks<br />
The lamp lights (The subject is in focus)<br />
The lamp blinks (The subject is not in focus)<br />
Mode dial<br />
You can select the desired working mode by using the mode dial located on the<br />
top of the camera.<br />
AUTO mode<br />
PROGRAM mode<br />
MANUAL mode<br />
ASR mode<br />
Select this mode for quick and easy picture taking with<br />
minimal user interaction.<br />
Selecting the program mode will configure the camera<br />
with optimal settings. You can still manually configure all<br />
functions except the aperture value and shutter speed.<br />
You can manually configure all functions including the<br />
aperture value and shutter speed.<br />
Advanced Shake Reduction (ASR) mode. This mode will<br />
reduce the camera shaking and help you get a good<br />
image.<br />
9
10<br />
Identification of features<br />
SPECIAL EFFECT mode<br />
SCENE mode<br />
MOVIE CLIP mode<br />
PHOTO GALLERY mode<br />
It is possible to add special effects to your images by<br />
using this mode.<br />
Use the menu to easily configure optimal settings for a<br />
variety of shooting situations.<br />
A movie clip can be recorded for as long as the available<br />
recording time of the memory capacity allows.<br />
The saved images can be reviewed with music or various<br />
effects in this mode.<br />
Mode icon<br />
SPECIAL<br />
PHOTO<br />
MODE AUTO PROGRAM MANUAL ASR MOVIE PLAY<br />
EFFECT<br />
GALLERY<br />
Icon<br />
MODE<br />
Icon<br />
NIGHT PORTRAIT CHILDREN LANDSCAPE CLOSE UP<br />
MODE TEXT SUNSET DAWN BACKLIGHT FIREWORKS BEACH & SNOW<br />
Icon<br />
SCENE<br />
Connecting to a Power Source<br />
You should use the rechargeable battery (SLB-0837B) supplied with the camera.<br />
Be sure to charge the battery before using the camera.<br />
SLB-0837B rechargeable battery Specification<br />
Model SLB-0837B<br />
Type Lithium Ion<br />
Capacity 800mAh<br />
Voltage 3.7V<br />
Charging time<br />
(When the camera is turned off)<br />
About 130 ~ 150 Min.
Connecting to a Power Source<br />
Number of images and battery life : Using the SLB-0837B<br />
Still image Movie<br />
Battery life Number of images Recording time<br />
Approx. 90 MIN Approx. 180 Approx. 90 MIN<br />
Based<br />
on the<br />
following<br />
shooting<br />
conditions<br />
Using the fully charged battery, Auto<br />
mode, 10M image size,<br />
Fine image quality, Shot to shot interval<br />
: 30Sec.<br />
Changing the zoom position between<br />
the Wide and the Tele after every shot.<br />
Using the flash on every second shot.<br />
Using the camera for 5 minutes and<br />
then Powering it off for 1 minute.<br />
Based<br />
on the<br />
following<br />
shooting<br />
conditions<br />
Using the fully charged<br />
battery<br />
640X480 image size<br />
30fps frame rate<br />
These figures are measured under Samsung’s standard conditions and shooting<br />
conditions and may vary depending on the user's methods.<br />
INFORMATION<br />
Important information about battery usage.<br />
When the camera is not used, turn off the camera power.<br />
Please remove the battery if the camera will not be used for long periods.<br />
Battery can lose power over time and are prone to leaking if kept inside the<br />
camera.<br />
Low temperatures (below 0°C) can affect the performance of the battery<br />
and you may experience reduced battery life.<br />
Battery will usually recover at normal temperatures.<br />
During extended use of the camera, the camera body may become warm.<br />
This is perfectly normal.<br />
You can charge the rechargeable battery (SLB-0837B) by using an SAC-45 KIT.<br />
The SAC-45 consists of the AC adapter (SAC-45) and the USB cable (SUC-C2).<br />
When the AC adapter and the USB cable are assembled, it can be used as an<br />
AC cable.<br />
Using the SAC-45 as an AC charger<br />
: Insert the AC adapter into the USB connector.<br />
When the AC adapter is inserted, it can be used<br />
as an AC charger.<br />
Using the SAC-45 as an USB cable<br />
: Remove the AC adapter from the USB connector.<br />
You can transmit data with a PC (p.45) or charge<br />
the battery.<br />
CAUTION<br />
In the following cases, the battery may not be charged.<br />
When using the USB cable that was not supplied with this camera : Use the<br />
supplied USB cable.<br />
When using the USB hub : Connect the camera to the PC directly.<br />
When other USB devices are connected to the PC : Disconnect the other<br />
USB devices.<br />
When the USB is connected to the USB port located on the front of the<br />
computer : Use the USB located on the back of the computer.<br />
If the USB port of the PC doesn't meet the Power output standard (5V, 500mA),<br />
the camera may not be charged.<br />
11
12<br />
Connecting to a Power Source<br />
You can charge the rechargeable battery (SLB-0837B) by using the cradle.<br />
When you charge the battery with the cradle, you only can use Lithium Ion<br />
battery pack (SLB-0837B).<br />
How to charge the rechargeable battery (SLB-0837B)<br />
Charging with the cradle<br />
Charging with the camera<br />
Charging LED<br />
Charging LED of the AC Adapter<br />
Charging LED<br />
Being Charged Red LED is on<br />
Charging is complete Green LED is on<br />
Charging error Red LED is off or blinking<br />
Being discharged<br />
(Using the AC adapter)<br />
CAUTION<br />
Orange coloured LED is on<br />
Before inserting any cables or AC adapter, check the directions and do not<br />
insert by force. It may cause breakage of cable or camera.<br />
If the charging LED of the AC Charger does not turn on or blink after<br />
inserting the rechargeable battery, please check whether the battery is<br />
inserted correctly.<br />
If you charge the battery with the camera power on, the battery can't charge<br />
fully. Turn the camera off while charging the battery.<br />
If you insert the fully discharged battery to charge it, do not turn on the<br />
camera at the same time. The camera may not be turned on because of the<br />
low battery capacity. Charge the battery for more than 10 minutes before<br />
using the camera.<br />
Do not use the flash frequently or take a movie clip with a fully discharged<br />
battery that has only been charged for a short time.
Insert the battery as shown<br />
- If the camera does not turn on after you<br />
have inserted battery, please check<br />
whether the battery is inserted with the<br />
correct polarity (+ / -).<br />
- When the battery chamber cover is<br />
opened, do not press the battery<br />
chamber cover by force. This may<br />
cause damage to the battery chamber cover.<br />
Battery<br />
indicator<br />
Battery<br />
status<br />
Connecting to a Power Source<br />
There are 4 indicators for battery condition that are displayed on the LCD monitor.<br />
The battery is<br />
fully charged<br />
Low battery capacity<br />
(Prepare to recharge<br />
or use spare battery)<br />
Low battery capacity<br />
(Prepare to recharge<br />
or use spare battery)<br />
Inserting the memory card<br />
Turn off the camera's power before inserting the memory card.<br />
- Insert the memory card as shown.<br />
- Have the front of the memory card<br />
facing toward the back of the camera<br />
(LCD monitor) and the card pins<br />
toward the front of the camera (Lens).<br />
- Do not insert the memory card the<br />
wrong way round. Doing so may<br />
damage the memory card slot.<br />
Low battery capacity<br />
(Prepare to recharge<br />
or use spare battery)<br />
Instructions on how to use the memory card<br />
Be sure to format the memory card (see p.52) if you are using a newly<br />
purchased memory for the first time, if it contains data that the camera cannot<br />
recognise, or if it contains images captured with a different camera.<br />
Turn off the camera power whenever the memory card is being inserted or<br />
removed.<br />
Repeated use of the memory card will eventually reduce its performance.<br />
Should this be the case, you will need to purchase a new memory card.<br />
Wear and tear on the memory card is not covered by the Samsung warranty.<br />
The memory card is an electronic precision device.<br />
Do not bend, drop or subject it to any heavy impact.<br />
Do not store the memory card in an environment with strong electronic or<br />
magnetic fields, e.g. near loud speakers or TV receivers.<br />
Please do not use or store in an environment where there are extremes in<br />
temperature.<br />
Do not allow the memory card to become dirty or to come into contact with any<br />
liquid. Should this happen, clean the memory card with a soft cloth.<br />
Please keep the memory card in its case when not in use.<br />
During and after periods of extended use, you may notice that the memory card<br />
is warm. This is perfectly normal.<br />
Do not use a memory card that is used in another digital camera.<br />
To use the memory card in this camera, format the memory card using this<br />
camera.<br />
Do not use a memory card formatted by another digital camera or memory card<br />
reader.<br />
13
If the memory card is subjected to any of the following, the recorded data may<br />
become corrupted :<br />
- When the memory card is used incorrectly.<br />
- If the power is switched off or the memory card is removed while recording,<br />
deleting (formatting) or reading.<br />
Samsung cannot be held responsible for lost data.<br />
It is advisable to copy important data onto other media as back-up e.g. floppy<br />
disks, hard disks, CD etc.<br />
If there is insufficient memory available<br />
: A [Memory Full!] message will appear and the camera will not operate.<br />
To optimise the amount of memory in the camera, replace the memory card or<br />
delete unnecessary images stored on the memory card.<br />
14<br />
Instructions on how to use the memory card<br />
INFORMATION<br />
Don't remove the memory card when the camera status lamp is blinking as<br />
this may cause damage to data in the memory card.<br />
The camera can use SD Memory Cards and MMC (Multi Media Cards).<br />
When using MMC cards, please consult the instructions supplied with the cards.<br />
Card pins<br />
Write protect<br />
switch<br />
Label<br />
[SD (Secure Digital) memory card]<br />
The SD memory card has a write protect<br />
switch that prevents image files from being<br />
deleted or formatted. By sliding the switch<br />
towards the bottom of the SD memory<br />
card, the data will be protected. By sliding<br />
the switch towards the top of the SD<br />
memory card, the data protection will be<br />
cancelled. Slide the switch to the top of the<br />
SD memory card before taking a picture.<br />
When using a 256MB MMC memory, the specified shooting capacity will be as<br />
follows. These figures are approximate as image capacities can be affected by<br />
variables such as subject matter and memory card type.<br />
Recorded image size Super Fine Fine Normal 30FPS 15FPS<br />
10M 49 95 139 - -<br />
Still<br />
image<br />
7M<br />
5M<br />
3M<br />
66<br />
88<br />
124<br />
126<br />
167<br />
229<br />
182<br />
237<br />
319<br />
-<br />
-<br />
-<br />
-<br />
-<br />
-<br />
1M 451 691 840 - -<br />
Movie<br />
* 640<br />
320<br />
-<br />
-<br />
-<br />
-<br />
-<br />
-<br />
00:12:39<br />
00:30:27<br />
00:20:46<br />
00:57:36<br />
* The recording times can be changed by the zoom operation.<br />
The zoom button doesn't operate while recording movies.
When Using the Camera for the First Time : Smart button<br />
This button is used for shifting the menu cursor to select or for confirming the<br />
selected menu.<br />
SIZE<br />
[Selecting the main menu :<br />
Touching the button]<br />
[Confirming the sub menu :<br />
Pressing the button]<br />
3648x2736<br />
3136x2352<br />
2688x2016<br />
2240x1680<br />
1024x768<br />
[Confirming the main menu :<br />
Pressing the button]<br />
3648x2736<br />
3136x2352<br />
2688x2016<br />
2240x1680<br />
1024x768<br />
[Selecting the sub menu :<br />
Touching the button]<br />
To select sub menu, in some menus, touch the button and slide your finger to<br />
the left / right.<br />
Slow Fast<br />
[e.g. : Selecting the shutter speed]<br />
Extending the menus : Press the extension menu button and the more available<br />
menus will display.<br />
Pressing the<br />
extension menu<br />
button<br />
15
16<br />
When Using the Camera for the First Time : Setting up the Date / Time and Language<br />
When the camera is turned on for the first time, a menu will be displayed in the<br />
LCD monitor to set date, time and language. This menu will not be displayed<br />
again after setting up the date, time and language. Set up the date, time and<br />
language before using this camera.<br />
Setting up the language<br />
1. Press the [Language] menu button.<br />
2. Select a desired language by pressing the vertical<br />
smart button.<br />
ENGLISH <br />
FRANÇAIS<br />
DEUTSCH<br />
<br />
Language<br />
Date & Time<br />
Exit:BACK<br />
INFORMATION<br />
You can select any one of 22 languages. These are listed below :<br />
- English, Korean, French, German, Spanish, Italian, S.Chinese, T.Chinese,<br />
Japanese, Russian, Portuguese, Dutch, Danish, Swedish, Finnish, Thai,<br />
BAHASA (MALAY / INDONESIAN), Arabic, Polish, Hungarian, Czech and<br />
Turkish.<br />
Even if the camera is restarted, the language setting will be maintained.<br />
Setting up the date, time and date type<br />
1. Press the [Date&Time] menu button.<br />
2. Select a desired date type by pressing the vertical<br />
smart button.<br />
3. To change the date, select the [2006/06/01] menu<br />
and press the vertical smart button.<br />
4. To select Year / Month / Day and Hour : Minute,<br />
press the horizontal smart button. To change the<br />
numbers, press the vertical smart button.<br />
2006/06/01<br />
yy/mm/dd <br />
mm/dd/yy<br />
dd/mm/yy<br />
Off<br />
<br />
<br />
<br />
Language<br />
Date & Time<br />
Exit:BACK<br />
<br />
OK
LCD monitor indicator<br />
The LCD monitor displays information about the shooting functions and selections.<br />
<br />
<br />
<br />
<br />
[Image & Full Status]<br />
No. Description Icons Page<br />
1<br />
2 Date / Time 01:00 AM 2006/06/01 p.50<br />
3<br />
Recording mode<br />
<br />
Number of available shots remaining 3<br />
Remaining time (Movie clip/ Voice recording) 00:01:00/01:00:00<br />
<br />
<br />
<br />
<br />
<br />
<br />
p.9-10<br />
p.14<br />
No. Description Icons Page<br />
4 Card inserted indicator -<br />
5 Battery p.13<br />
Optical / Digital Zoom bar /<br />
6 p.21-22<br />
Digital Zoom rate<br />
7 Focus mode p.25<br />
8 Flash p.25<br />
9 Image size p.26<br />
10 Shooting mode p.26<br />
11 Metering p.27<br />
12 Sharpness p.27<br />
13 Special Effect p.28<br />
14 Image quality / Frame rate p.28<br />
15 Self-timer p.29<br />
16 Voice Recording / Voice memo p.30<br />
17 Setup menu p.48<br />
18 Extension menu p.15<br />
19 Exposure compensation p.32<br />
20 ISO p.32<br />
21 White Balance p.31<br />
22 Auto focus frame p.18<br />
17
18<br />
Starting the recording mode<br />
How to use the AUTO mode ( )<br />
Please select this mode for quick and easy picture taking with minimal user<br />
interaction.<br />
1. Insert the battery (p.13) taking note of the correct<br />
polarity (+ / -).<br />
2. Insert the memory card (p.13). As this camera has<br />
a 20MB internal memory, it is not essential to<br />
insert the memory card. If the memory card is not<br />
inserted, an image will be stored in the internal<br />
memory. If the memory card is inserted, an image<br />
will be stored on the memory card.<br />
3. Close the battery chamber cover.<br />
4. Press the power button to turn on the camera.<br />
(If the date / time that is displayed on the LCD<br />
[AUTO mode]<br />
monitor is incorrect, reset the date / time before<br />
taking a picture.)<br />
5. Select the Auto mode by rotating the mode dial.<br />
6. Point the camera towards the subject and compose the image by using the<br />
LCD monitor.<br />
7. Press the shutter button to capture an image.<br />
INFORMATION<br />
If the auto focus frame turns to red when you press the shutter button down<br />
half way, it means that the camera cannot focus on the subject. Should this<br />
be the case, the camera is unable to capture an image clearly.<br />
How to use the PROGRAM mode ( )<br />
Selecting the program mode will configure the<br />
camera with optimal settings. You can still manually<br />
configure all functions except the aperture value and<br />
shutter speed.<br />
1. Select the Program mode by rotating the mode<br />
dial.<br />
2. Press the menu button to configure advanced<br />
functions such as image size (p.26), quality<br />
(p.28), metering (p.27), continuous shooting<br />
(p.26) and special effects (p.28).<br />
Refer to page 24-35 for more information about<br />
the menus.<br />
How to use the <strong>Manual</strong> mode ( )<br />
You can manually configure all functions with the<br />
aperture value and shutter speed.<br />
1. Select the <strong>Manual</strong> mode by rotating the mode<br />
dial.<br />
2. Set the aperture value and shutter speed by using<br />
the smart button.<br />
Refer to page 35 for more information about the<br />
menus.<br />
[PROGRAM mode]<br />
[MANUAL mode]
Starting the recording mode<br />
How to use the ASR (Advanced Shake Reduction)<br />
mode ( )<br />
Advanced Shake Reduction (ASR) mode.<br />
This mode will reduce the effect of camera shake<br />
and help you get a well-exposed image in dim<br />
conditions.<br />
Things to watch out for using the ASR mode<br />
1. The digital zoom will not operate in the ASR mode.<br />
2. If the lighting conditions are brighter than fluorescent<br />
lighting condition, the ASR doesn’t activate.<br />
3. If the lighting condition is darker than in<br />
[ASR mode]<br />
fluorescent lighting condition, camera shake<br />
warning indicator ( ) will display. For best results only take pictures in<br />
situations where the camera shake warning indicator ( ) is not displayed.<br />
4. If the subject is moving the final image captured may be blurred.<br />
5. Avoid moving the camera while the [Capturing!] message is displayed to<br />
achieve a better result.<br />
6. As the ASR uses the camera’s digital processor, images taken using the ASR<br />
may take a little longer for the camera to process.<br />
How to use the Special Effect mode ( )<br />
It is possible to add special effects to your images<br />
by using this mode. Select the Special Effect mode<br />
by rotating the mode dial.<br />
Refer to page 33-35 for more information about<br />
the special effect menus.<br />
[SPECIAL EFFECT mode]<br />
How to use the SCENE mode ( )<br />
Use the menu to easily configure optimal settings<br />
for a variety of shooting situations.<br />
Select the Scene mode by rotating the mode dial.<br />
Refer to page 33 for more information about the<br />
menus.<br />
[SCENE mode]<br />
How to use the MOVIE CLIP mode ( )<br />
A movie clip can be recorded for as long as the<br />
available recording time of the memory capacity<br />
allows.<br />
1. Select the MOVIE CLIP mode by rotating the<br />
mode dial. (Available recording time will display on<br />
the LCD monitor)<br />
2. Point the camera towards the subject and<br />
compose the image by using the LCD monitor.<br />
Press the shutter button and movie clips are<br />
recorded for as long as the available recording<br />
[MOVIE CLIP mode]<br />
time allows. Movie clips will still be recorded if the<br />
shutter button is released.<br />
If you wish to stop recording, press the shutter button again.<br />
* Image size and type are listed below.<br />
- Image size : 640X480, 320X240 (Selectable)<br />
- File type : *.avi (MPEG-4)<br />
19
20<br />
Starting the recording mode<br />
To record a movie clip without voice<br />
1. Press the extension menu button.<br />
2. Select the [VOICE] [OFF] menu.<br />
3. Press the shutter button and movie clip is<br />
recorded for as long as the available recording<br />
time without voice allows.<br />
Pausing while recording a movie clip (Successive Recording)<br />
This camera allows you to temporarily stop during unwanted scenes, while<br />
recording a movie clip. Using this function, you can record your favourite scenes<br />
into a movie clip without having to create multiple movie clips.<br />
Using Successive Recording<br />
1. Press the shutter button and movie clips are<br />
recorded for as long as the available recording<br />
time allows. Movie clips will still be recorded if the<br />
shutter button is released.<br />
2. Press the II button to pause recording. Press the<br />
II button again to resume the recording.<br />
3. If you wish to stop recording, press the shutter<br />
button again.<br />
OFF<br />
ON<br />
[MOVIE CLIP mode]<br />
[Successive recording of a<br />
movie clip]<br />
Things to Watch Out for When Taking Pictures<br />
Pressing the shutter button down half way.<br />
Lightly press the shutter button to confirm focus and flash battery charge.<br />
Press the shutter button all way down to take the picture.<br />
[Lightly press the shutter button] [Press the shutter button]<br />
The available recording time may vary depending on shooting conditions and<br />
camera settings.<br />
When either the Flash Off or Slow synchro mode is selected in a low lighting<br />
condition, the camera shake warning indicator ( ) may appear on the LCD<br />
monitor. In this case, use a tripod, support the camera on a solid surface or<br />
change to flash shot mode.<br />
Shooting against the light :<br />
Please do not take pictures into the sun. Taking a picture against the sun may<br />
make the picture dark. To take a picture against the sun, please use the<br />
[Backlight] in the scene shooting mode (see page 33), fill-in flash (see page 25),<br />
spot metering (see page 27), or exposure compensation (see page 32).<br />
Avoid obstructing the lens or the flash when you capture an image.<br />
Compose the image by using the LCD monitor.<br />
In some of the following conditions the auto focus system may not perform as expected.<br />
- When photographing a subject that has little contrast.<br />
- If the subject is highly reflective or shiny.<br />
- If the subject is moving at high speed.<br />
- When there is strong reflected light, or when the background is very bright.<br />
- When the subject matter has only horizontal lines or the subject is very narrow<br />
(such as a stick or flagpole).<br />
- When the surroundings are dark.
Using the camera buttons to set the camera<br />
The recording mode function can be set up by using the camera buttons.<br />
POWER button<br />
Used for turning the camera’s power on / off.<br />
If there is no operation during the specified<br />
time, the camera's power will be turned off<br />
automatically to save battery life.<br />
Refer to page 50 for more information about<br />
the auto power off function.<br />
Shutter button<br />
Used for taking an image or recording voice in<br />
the RECORDING mode.<br />
In MOVIE CLIP mode :<br />
Pressing the shutter button down fully starts<br />
the process for recording a movie clip.<br />
Press the shutter button once and the movie<br />
clip is recorded for as long as the available<br />
recording time in the memory allows. If you wish to stop recording, press the<br />
shutter button again.<br />
In STILL IMAGE mode :<br />
Pressing the shutter button down halfway activates the autofocus and checks<br />
the condition of the flash. Pressing the shutter button down fully takes and stores<br />
the image. If you select voice memo recording, the recording will start after the<br />
camera has finished storing the image data.<br />
ZOOM W / T button<br />
If the menu is not displayed, this button works<br />
as the OPTICAL ZOOM or DIGITAL ZOOM<br />
button.<br />
This camera has a 3X optical zoom and a 5X digital zoom function.<br />
Using both will offer a total zoom ratio of 15X.<br />
TELE Zoom<br />
Optical zoom TELE : Pressing the ZOOM T button. This will zoom into the<br />
subject i.e. the subject will appear nearer.<br />
Digital zoom TELE : When the maximum (3X) optical zoom is selected,<br />
pressing the ZOOM T button activates the digital zoom<br />
software. Releasing ZOOM T button stops the digital<br />
zooming at the required setting. Once the maximum<br />
digital zoom (5X) is achieved, pressing the ZOOM T<br />
button will have no effect.<br />
Pressing<br />
the ZOOM<br />
T button<br />
Pressing<br />
the ZOOM<br />
T button<br />
[WIDE zoom] [TELE zoom] [Digital zoom 5X]<br />
21
WIDE Zoom<br />
Optical zoom WIDE : Pressing the ZOOM W button. This will zoom out from<br />
the subject i.e. the subject will appear farther away.<br />
Pressing the ZOOM W button continuously will set the<br />
camera to its minimum zoom setting i.e. the subject<br />
appears at its farthest from the camera.<br />
22<br />
Pressing<br />
the ZOOM<br />
W button<br />
Pressing<br />
the ZOOM<br />
W button<br />
[TELE zoom] [Optical zoom 2X] [WIDE zoom]<br />
Digital zoom WIDE : When the digital zoom is in operation, pressing the<br />
Digital<br />
zoom<br />
ZOOM W / T button<br />
Optical<br />
zoom<br />
ZOOM W button will reduce the digital zooming in steps.<br />
Releasing ZOOM W button stops digital zooming.<br />
Pressing the ZOOM W button will reduce the digital<br />
zoom and then it will continue to reduce the optical<br />
zoom until the minimum setting is reached.<br />
Pressing<br />
the ZOOM<br />
W button<br />
Pressing<br />
the ZOOM<br />
W button<br />
[Digital zoom 5X] [TELE zoom] [WIDE zoom]<br />
INFORMATION<br />
Images taken using the digital zoom may take a little longer for the camera<br />
to process. Allow time for this to take place.<br />
You may notice a decrease in image quality when using the digital zoom.<br />
To view a clearer digital zoom image, press the shutter button halfway at the<br />
maximum optical zoom position and press the zoom T button again.<br />
The digital zoom can’t be activated in the ASR, High Speed, Motion Capture<br />
mode, [Night], [Children], [Text], [Close up] and [Fireworks] scene modes.<br />
Take care not to touch the lens to avoid taking an unclear image and<br />
possibly causing camera malfunction. If the image is dim, turn the camera<br />
power off and on again to modify the lens position.<br />
Take care not to press the lens as this may cause a camera malfunction.<br />
When the camera is turned on, take care not to touch the camera's moving<br />
lens parts as this may cause the resulting image to be dim and unclear.<br />
You can operate the Wide and Tele zoom by using the remote control.
Using the LCD monitor to set the camera settings<br />
You can use the menu on the LCD monitor to set up recording functions.<br />
(O : Selectable, X : Not selectable, - : Partly selectable)<br />
MENU page<br />
COLOR O X X X X X X p.24<br />
BRIGHT O X X X X X X p.24<br />
NORMAL O O O O X O O<br />
FOCUS AUTO MACRO O X O X X X X p.25<br />
MACRO X O X O X O O<br />
SIZE O O O O O O O p.26<br />
SINGLE X O O O O O X<br />
CONTINUOUS X O X X X O X<br />
SHOOTING HIGH SPEED X O X X X O X p.26<br />
MOTION CAPTURE X O X X X O X<br />
AEB X O X X X X X<br />
QUALITY O O O O O O O p.28<br />
REMOTE O O O O O O O<br />
Double O O O O O O X<br />
TIMER 2SEC O O O O O O X p.29<br />
10SEC O O O O O O O<br />
OFF O O O O O O O<br />
VOICE O O O O O O O p.30<br />
W/B X O X X X O O p.31<br />
ISO X O X X X O X p.32<br />
EV X O X X X X O p.32<br />
FLASH<br />
METERING<br />
MENU page<br />
OFF O O O O - O X<br />
SHARPNESS<br />
PHOTO FRAME<br />
M.GIF<br />
COMPOSITE<br />
EFFECT<br />
SLOW SYNC X O X O - X X<br />
FILL IN X O X O - O X<br />
RED EYE O O X O - X X<br />
AUTO X O X O - X X<br />
MULTI X O X O X O O<br />
SPOT X O X O X O O<br />
CENTER X O X O X O O<br />
X O X O X O X p.27<br />
X X X O X X X p.33<br />
X X X O X X X p.34<br />
X X X O X X X p.34<br />
NORMAL X O X O X O O<br />
B&W X O X O X O O<br />
SEPIA X O X O X O O<br />
B X O X O X O O<br />
R X O X O X O O<br />
G X O X O X O O<br />
NEGATIVE X O X O X O O<br />
CUSTOM X X X O X X X<br />
Menus are subject to change without prior notice.<br />
The selectable menus may vary in each scene modes.<br />
p.25<br />
p.27<br />
p.28<br />
23
24<br />
Color tone<br />
You can add color tone on the captured image.<br />
Warm menu will increase red color of the image.<br />
Cool menu will increase blue color of the image.<br />
Selecting the color tone<br />
To select the color tone, touch the button and slide your finger to the left or right.<br />
[Emphasizing the Cool-color] [Emphasizing the Warm-color]<br />
COLOR<br />
Brightness<br />
You can change the brightness of the image.<br />
BRIGHT<br />
Changing the brightness<br />
To select the brightness, touch the button and slide your finger to the left or right.<br />
[Dark] [Bright]
Focus Type<br />
Focus range<br />
Selecting focus type<br />
You can select the focus type in accordance with<br />
the subject distance.<br />
The distance ranges are show below.<br />
[Auto] [Macro] [Auto Macro]<br />
Types of focus modes and focus ranges (W : Wide, T : Tele) (Unit : cm)<br />
INFORMATION<br />
NORMAL(AF)<br />
MACRO<br />
Normal<br />
Macro Auto macro<br />
W:80-Infinity W:4-80 W:4-Infinity<br />
T:80-Infinity T:50-80 T:50-Infinity<br />
When the macro mode is selected, it is possible that camera shake will<br />
occur. Take care not to shake the camera while taking a picture.<br />
When you take a picture within 40cm in the Macro mode, select the FLASH<br />
OFF mode.<br />
Flash<br />
You can select the flash type in accordance with<br />
the subject distance.<br />
The distance ranges are show below.<br />
During the ASR, Continuous shot, High Speed<br />
Continuous shot, Motion Capture, AEB, Movie clip<br />
mode and Scene modes except for the Night,<br />
Portrait, Children scene modes, the flash will not<br />
operate.<br />
Flash range (W : Wide, T : Tele) (Unit : m)<br />
ISO<br />
AUTO<br />
AUTO<br />
RED EYE<br />
FILL IN<br />
SLOW SYNC<br />
OFF<br />
Normal<br />
Macro Auto macro<br />
W:0.8-4.5 W:0.4-0.8 W:0.4-4.5<br />
T:0.8-2.5 T:0.5-0.8 T:0.5-2.5<br />
INFORMATION<br />
If you press the shutter button after selecting the Auto, Fill-in, Slow sychro<br />
flash, the first flash fires to check the shooting condition (Flash range and<br />
Power ratio of flash).<br />
Do not move the camera until the second flash fires.<br />
Using the flash frequently will reduce the life of the battery.<br />
Under normal operating conditions the charging time for the flash is usually<br />
within 4 seconds. If the battery is weak, the charging time will be longer.<br />
Take photographs within the flash range.<br />
The image quality is not guaranteed if the subject is too close or highly reflective.<br />
When taking an image in poorly lit conditions with the flash, there may be a<br />
white speck in the captured image. The speck is caused by the reflecting of<br />
the flash light from the atmospheric dust. It is not camera malfuction.<br />
Do not open the Built-in flash by force. It may cause breakage of the flash.<br />
25
26<br />
Size<br />
You can select the image size appropriate for your application.<br />
Mode<br />
Icon<br />
Size<br />
Still image mode<br />
Movie clip mode<br />
3648X 3136X 2688X 2240X 1024X 640X 320X<br />
2736 2352 2016 1680 768 480 240<br />
INFORMATION<br />
3648x2736<br />
3136x2352<br />
2688x2016<br />
2240x1680<br />
1024x768<br />
[STILL IMAGE mode]<br />
640x480<br />
320x240<br />
[MOVIE CLIP mode]<br />
640 320<br />
The higher the resolution, the lower the number of shots available because<br />
high resolution images require more memory.<br />
Continuous shot<br />
You can select type of shooting and number of continuous shot.<br />
- SINGLE : Take one picture only<br />
AEB<br />
- CONTINUOUS : Images will be taken continuously<br />
M. CAPTURE<br />
until the shutter button is released.<br />
HIGH SPEED<br />
CONTINUOUS<br />
The shooting capacity depends on<br />
SINGLE<br />
the memory.<br />
- HIGH SPEED : This takes 3 shots continuously<br />
(2.5 shots per second) when the [Still image mode]<br />
shutter is pressed down and held.<br />
- M. CAPTURE : This takes 7 shots per second, when the shutter is pressed<br />
down and held. After completing the continuous shooting,<br />
images are saved and the images play back on the Rear<br />
LCD. The maximum number of shots is 20 and the image<br />
size is fixed as 1024X768.<br />
- AEB : Take three pictures in a series in different exposures: standard exposure<br />
(0.0EV), short exposure (-0.5EV) and over exposure (+0.5EV).<br />
Use the mode if it is hard to decide exposure of the object.<br />
High resolution and picture quality increases file saving time, which increases<br />
stand-by time.<br />
If the [CONTINUOUS], [HIGH SPEED], [M. CAPTURE] or [AEB] sub menu is<br />
selected, the flash will be off automatically.<br />
It is best to use a tripod for the AEB shooting as the time to save each image<br />
file is longer and blurring caused by camera shake may occur.<br />
When the [M.CAPTURE] menu is selected, you only can select ISO 400,<br />
800, 1000.
Metering<br />
If you cannot obtain suitable exposure conditions, you can change the metering<br />
method to take brighter pictures.<br />
- MULTI : Exposure will be calculated based on<br />
an average of the available light in the<br />
image area. However, the calculation<br />
MULTI<br />
will be biased towards the centre of the<br />
image area. This is suitable for general<br />
use.<br />
SPOT<br />
- SPOT : Only the rectangular area in the centre<br />
of the LCD monitor will be metered for<br />
[PROGRAM mode]<br />
light. This is suitable when the subject in the centre is exposed<br />
correctly, regardless of the back lighting.<br />
- CENTER : Exposure will be calculated based on an average of the available<br />
light in the image area. However, the calculation will be biased<br />
towards the centre of the image area. This is suitable for taking a<br />
picture of small object like a flower or insects.<br />
If the subject is not the centre of the focus area, do not use the spot metering<br />
as this may result in an exposure error. In this circumstance, it is better to use<br />
exposure compensation.<br />
Sharpness<br />
You can adjust the sharpness of the picture you<br />
want to take. You cannot check the sharpness effect<br />
on the LCD monitor before you take a picture,<br />
because this function is applied only when the<br />
captured image is stored on the memory.<br />
SOFT<br />
NORMAL<br />
VIVID<br />
CENTER [PROGRAM mode]<br />
Sub menu Icon Description<br />
SOFT<br />
The edges of the image are softened.<br />
This effect is suitable for editing images on your PC.<br />
NORMAL<br />
The edges of the image are sharp.<br />
This is suitable for printing.<br />
The edges of the image are emphasized.<br />
VIVID<br />
The edges will appear sharp, but noise may occur in<br />
the recorded image.<br />
27
28<br />
Effect<br />
By using the camera’s digital processor, it is possible to add special effects to<br />
your images<br />
: No effect is added to the image<br />
BLUE<br />
: Captured images will be stored in black and<br />
SEPIA<br />
white.<br />
B&W<br />
: Captured images will be stored in a sepia tone<br />
NORMAL<br />
(a range of yellowish brown colours).<br />
: Captured images will be stored in a blue tone.<br />
: Captured images will be stored in a red tone.<br />
[Program mode]<br />
: Captured images will be stored in a green tone.<br />
: Save the image in negative mode.<br />
: <strong>User</strong> can set the tone of the R (Red), G (Green) and B (Blue) value.<br />
These menus can be selected in the Special Effect mode only.<br />
How to use the Custom Effect ( )<br />
1. Select the [CUSTOM] effect menu<br />
by using the Smart button.<br />
CUSTOM<br />
NEGATIVE<br />
GREEN<br />
RED<br />
3. Select a desired value by using the Smart button.<br />
2. Select the R, G or B menu by using<br />
the Smart button.<br />
Select: Exit:BACK<br />
Exit:BACK<br />
Icon<br />
Quality / Frame rate<br />
You can select the compression ratio appropriate for your application of the<br />
captured images. The higher the compression ratio, the lower the picture quality.<br />
Mode Still image mode<br />
Movie clip mode<br />
Sub menu Super Fine Fine Normal 30FPS 15FPS<br />
File Type jpeg jpeg jpeg avi avi<br />
INFORMATION<br />
SUPER FINE<br />
FINE<br />
NORMAL<br />
[STILL IMAGE mode]<br />
30 FPS<br />
15 FPS<br />
[MOVIE CLIP mode]<br />
This file format complies with the DCF (Design rule for Camera File system).<br />
JPEG (Joint Photographic Experts Group) : JPEG is the image<br />
compression standard developed by the Joint Photographic Experts Group.<br />
This type of compression is most commonly used for compressing photos<br />
and graphics because it can compress the files efficiently.
Self-timer / Remote control<br />
This function is used when the photographer would also like to be in the picture.<br />
- Selecting a self-timer :<br />
OFF<br />
When you press the Shutter button, the picture will<br />
10 sec<br />
be taken after the specified time has elapsed and<br />
2 sec<br />
DOUBLE<br />
the self-timer function will be cancelled.<br />
REMOTE<br />
- Selecting a remote mode :<br />
Pressing the shutter button of remote control will<br />
allow an interval of 2 seconds before the image is<br />
taken. After taking a picture, the remote mode will<br />
be maintained. But, pressing the Power button will cancel the remote mode.<br />
Description of Self-timer / Remote mode<br />
Icon Mode Description<br />
10s<br />
Pressing the shutter button will allow an interval of<br />
10 seconds before the image is taken.<br />
2s<br />
Pressing the shutter button will allow an interval of<br />
2 seconds before the image is taken.<br />
Double<br />
A picture will be taken after about 10 seconds and<br />
2 seconds later a second picture will be taken.<br />
Remote<br />
You can take a picture by remote control instead of using<br />
the shutter button of the camera.<br />
Remote control range<br />
When you take a picture by using the remote control,<br />
refer to the illustrations shown alongside about the<br />
remote control range.<br />
[Shutter button on<br />
the remote control]<br />
Replacing battery for the remote control<br />
Make sure the + (positive) polarity is toward the top and the - (negative) polarity is<br />
toward the bottom while installing battery for the remote control. Replace battery for<br />
the remote control in the local service centre. Use the CR 2025 3V battery.<br />
INFORMATION<br />
When taking a picture using the self-timer, the self-timer lamp works as follows :<br />
2 second self-timer setting : The self-timer lamp blinks at 0.25 second<br />
interval for 2 seconds.<br />
10 second self-timer setting : The self-timer lamp blinks at 1 second interval<br />
for the first 7 seconds. It blinks at 0.25 second<br />
interval for the remaining 3 seconds.<br />
If you operate the Play mode button during the self-timer operation, the selftimer<br />
function is canceled.<br />
Use a tripod to prevent camera shake.<br />
29
Voice recording / Voice memo<br />
A voice can be recorded for as long as the available<br />
recording time of the memory capacity allows. And<br />
you can add your voice-over to a stored still image.<br />
OFF<br />
MEMO<br />
RECORD<br />
Voice recording<br />
1. Select a recording mode with the exception of the<br />
Movie clip mode by rotating the mode dial.<br />
OFF<br />
2. Select the Voice recording menu by using the<br />
MEMO<br />
smart button.<br />
RECORD<br />
3. Press the shutter button to record a voice.<br />
- Press the shutter button once and voice is<br />
recorded for as long as the available recording<br />
time allows. The recording time will be displayed on the LCD monitor. Voice<br />
will still be recorded if the shutter button is released.<br />
- If you wish to stop recording, press the shutter button again.<br />
- File type : *.wav<br />
30<br />
Voice memo<br />
1. Select a recording mode with the exception of the<br />
Movie clip mode by rotating the mode dial.<br />
OFF<br />
2. Select the Voice memo menu by using the smart<br />
MEMO<br />
button. If the voice memo indicator is displayed on<br />
RECORD<br />
the LCD monitor, the setting is completed.<br />
3. Press the shutter button and take a picture.<br />
The picture is stored on the memory card.<br />
4. Voice memo will be recorded for ten seconds from the moment the picture is<br />
stored. In the middle of the sound recording, pressing the shutter button will<br />
stop the voice memo.<br />
INFORMATION<br />
A distance of 40cm between you and the camera (microphone) is the best<br />
distance to record sound.
White balance<br />
The white balance control allows you to adjust the colours to appear more<br />
natural. When a menu except the AWB (Auto White Balance) is selected, you<br />
can only select the negative color effect.<br />
AUTO : The camera automatically<br />
selects the appropriate<br />
white balance settings,<br />
depending on the<br />
prevailing lighting<br />
conditions.<br />
DAYLIGHT : For taking images outside.<br />
CLOUDY : For taking images under a<br />
cloudy and overcast sky.<br />
Fluorescent H : For shooting under daylight fluorescent types of three<br />
way fluorescent lighting.<br />
Fluorescent L : Shooting under white fluorescent lighting.<br />
TUNGSTEN : For shooting under tungsten (standard light bulb)<br />
lighting.<br />
CUSTOM : Allows the user to set the white balance according to the<br />
shooting condition.<br />
Different lighting conditions may cause a colour cast on your images.<br />
Using the Custom White Balance<br />
White balance settings may vary slightly depending on the shooting<br />
environment. You can select the most appropriate white balance setting for a<br />
given shooting environment by setting up the custom white balance.<br />
1. Select the CUSTOM ( ) menu of the<br />
White Balance and place a sheet of white<br />
paper in front of the camera so that the LCD<br />
monitor shows only white.<br />
2. OK menu button : selects pre-saved custom<br />
<br />
white balance.<br />
[White paper]<br />
BACK button : cancels the custom white<br />
balance.<br />
Shutter button : stored the new custom white balance.<br />
- The custom white balance value will be applied, starting with the next picture<br />
you take.<br />
- The user configured white balance will be remain effective until it is<br />
overwritten.<br />
31
32<br />
ISO<br />
You can select the ISO sensitivity when taking pictures.<br />
The speed or specific light-sensitivity of a camera is rated in ISO numbers.<br />
- AUTO :<br />
The camera's sensitivity is automatically changed<br />
by variables such as lighting value or subject<br />
brightness.<br />
- 100, 200, 400, 800, 1000 :<br />
You can increase the shutter speed while the<br />
same amount of light is present, by increasing the<br />
ISO sensitivity. However, the image may be saturated in high luminance.<br />
The higher the ISO value, the greater is the camera’s sensitivity to light;<br />
therefore it has a greater capacity for taking pictures in darker conditions.<br />
However, the noise level in the image will increase as the ISO value increases,<br />
making the image appear coarse.<br />
When the [M.CAPTURE] menu is selected, you only can select ISO 400,<br />
800, 1000.<br />
Exposure compensation<br />
This camera automatically adjusts the exposure according to the ambient<br />
lighting conditions. You can also select the exposure value by using the + / -<br />
button.<br />
Compensating Exposure<br />
1. Press the exposure compensation menu button<br />
and the exposure compensation menu bar will<br />
appear as shown.<br />
2. Touch the button and slide your finger to select<br />
the exposure value.<br />
3. Press the exposure compensation menu button<br />
again. The value you set will be saved and the<br />
Exposure Compensation setup mode will close.<br />
A negative exposure compensation value reduces the exposure.<br />
Note that a positive exposure compensation value increases the exposure<br />
and the LCD monitor will appear white or you may not get good pictures.
Scene menu<br />
Use the menu to easily configure optimal settings for a variety of shooting<br />
situations.<br />
The scene modes are listed below.<br />
[NIGHT] ( ) : Use this for shooting still<br />
images at night or in<br />
other dark conditions.<br />
[PORTRAIT] ( ) : To take a picture of a<br />
person.<br />
[CHILDREN] ( ) : To take a picture of fast<br />
moving objects, for example, children.<br />
[LANDSCAPE] ( ) : To take pictures of distant scenery.<br />
[CLOSE UP] ( ) : Close-up shooting for small objects such as plants<br />
and insects.<br />
[TEXT] ( ) : Use this mode to shoot a document.<br />
[SUNSET] ( ) : For taking pictures of sunsets.<br />
[DAWN] ( ) : Daybreak scenes.<br />
[BACKLIGHT] ( ) : For portraits without shadows caused by backlighting.<br />
[FIREWORK] ( ) : Firework scenes.<br />
[BEACH&SNOW] ( ) : For ocean, lake, beach and snow scape scenes.<br />
Special Effect : Photo Frame<br />
You can add 9 types of frame-like borders to a still<br />
image you want to capture.<br />
Date & Time information will not be printed on the<br />
stored image taken with Photo Frame menu.<br />
: The photo frame is not inserted.<br />
33
34<br />
Special Effect : Motion GIF<br />
You can make Motion GIF with captured images.<br />
Motion GIF : Taking images continuously and save them in a file. This file<br />
supports animation.<br />
How to make the Motion GIF<br />
1. Select the Special Effect mode by rotating the<br />
mode dial.<br />
2. Press the Motion GIF menu button.<br />
3. Select the image size and FPS (Frame Per Second).<br />
4. Press the Shutter button to take pictures.<br />
(Max. 50 images)<br />
5. Press the OK menu button to save the image.<br />
The images saved as a motion GIF file.<br />
400X300<br />
320X240<br />
[Selecting FPS]<br />
Save:OK Cancle:BACK<br />
[Pressing the OK menu button]<br />
5 FPS<br />
2 FPS<br />
[Selecting image size]<br />
[Taking pictures]<br />
INFORMATION<br />
As the GIF file format has limitation of shades, image quality can be decreased.<br />
Special Effect : Composite shooting<br />
You can combine 2, 3, or 4 different shots in a still image<br />
- : Cancels the composite shooting<br />
- : 2 different shots are combined in a still<br />
image.<br />
- : 3 different shots are combined in a still<br />
image.<br />
- : 4 different shots are combined in a still<br />
image.<br />
- : 2 different panorama shots are combined in a still image.<br />
Selecting 2 composite shooting<br />
Pressing<br />
the shutter<br />
button<br />
Pressing<br />
the shutter<br />
button<br />
Capture:SH Del:Back Save:OK Del:Back<br />
Pressing<br />
the OK<br />
menu button<br />
[Ready for taking] [First shot] [Second shot] [The final picture]<br />
INFORMATION<br />
You can use the flash, self-timer, macro focus, voice memo functions and<br />
the Zoom W / T button during the composite shooting.<br />
If you press the Play mode button or rotating the mode dial during the<br />
composite shots, each camera working mode is executed. The images<br />
captured before will be deleted.<br />
After taking the last composite shooting, press the OK button. And then the<br />
voice memo will start.
Special Effect : Composite shooting Shutter Speed<br />
Changing a part of composite shot before taking the last shot<br />
Before taking the last composite shot, you can change a part of composite shot.<br />
1. During the composite shots, press the BACK button.<br />
2. A previous image will be deleted and new frame will display. If there is an<br />
image taken before, press the BACK button again and a previous image will<br />
be deleted again.<br />
Pressing the BACK button<br />
Capture:SH Del:Back Capture:SH Del:Back<br />
[Before taking the 3rd shot] [Moving backward to the 2nd shot]<br />
3. Press the shutter button to capture a new image.<br />
Changing a part of composite shot after taking the last shot<br />
1. After taking the last shot, a menu will display as<br />
shown.<br />
2. Select an image to delete by using the Smart<br />
button.<br />
3. Press the BACK button and the selected image is<br />
deleted.<br />
4. Press the Shutter button to take an image again.<br />
5. Press the OK button and the image is saved.<br />
Save:OK Del:BACK<br />
This mode will set the shutter speed for automatic<br />
exposure. High Shutter speeds can capture a<br />
moving object in a still image as if the object is not<br />
moving. Low Shutter speeds can capture a moving<br />
object with an ‘active’ effect.<br />
Setting up the shutter speed<br />
To select the shutter speed, touch the button and slide your finger to the left or<br />
right.<br />
Aperture Value<br />
Slow Fast<br />
This mode will set the aperture value for automatic<br />
exposure. Smaller Aperture values make the object<br />
sharp but blur the background. Larger Aperture<br />
values make both the object and background sharp.<br />
35
36<br />
Photo Gallery mode<br />
When the images play back, you can add play back effect and listen a B.G.M.<br />
Only still images can be played back. Movie, Voice files are not played back.<br />
Selecting a play back mode<br />
1. Select the Photo Gallery mode by rotating<br />
the mode dial.<br />
2. Press the Play mode button and menus as<br />
shown will display.<br />
: Play back by album<br />
: Play back by date<br />
3. Press the Smart button to select a desired play back mode.<br />
Edit:<br />
Album mode : Images play back by album.<br />
If a memory card is not inserted, Personal / Family / Friend / Event albums can't<br />
be selected. All of images saved in the internal memory play back.<br />
Selecting an album<br />
You can select an album by using the smart button.<br />
Before selecting an album, insert images into<br />
albums (p.37).<br />
: All images save in the memory play back.<br />
: Images saved in the Personal album play back.<br />
: Images saved in the Family album play back.<br />
: Images saved in the Friends album play back.<br />
: Images saved in the Events album play back.<br />
Edit:
Photo Gallery mode<br />
Adding images in an album<br />
Press the Album menu button and the menus<br />
shown below will display.<br />
- Moving cursor / Selecting an image<br />
: Smart button (Horizontal)<br />
- Selecting images : Pressing the smart button<br />
Images you want can be selected at a time.<br />
- Selecting / Cancelling an album : Each album button<br />
: Adding images in the Personal album.<br />
: Adding images in the Family album.<br />
: Adding images in the Friends album.<br />
: Adding images in the Events album.<br />
- Moving to previous menu : BACK button<br />
Select: View:BACK<br />
Playing back an album<br />
Press the slide show menu button.<br />
Edit: Edit:<br />
: Starting the slide show<br />
100-0001<br />
: Selecting an effect of the slide show<br />
: Setting play interval<br />
: Selecting a B.G.M<br />
A B.G.M can be played back with images.<br />
Only a saved music can be selected.<br />
You can’t add any music on the B.G.M list.<br />
: Selecting play back time<br />
[Play] : The slide show is closed after one cycle.<br />
[Repeat Play] : The slide show is repeated until cancelled.<br />
37
38<br />
Photo Gallery mode<br />
Rotating an image<br />
You can rotate an image to a direction you want.<br />
Press the horizontal smart button.<br />
Touch the smart button and the selected image is<br />
rotated. Press the smart button and the rotated<br />
image information will be saved.<br />
: rotates the image clockwise.<br />
: rotates the image anticlockwise.<br />
Date mode : When an image is taken, date information is also recorded.<br />
In date mode, images play back by the date.<br />
Selecting a date<br />
You can select a date by using the smart button.<br />
Usage of the menu of the date mode is same as<br />
album mode. Refer to p.37 for more information.<br />
Edit:<br />
Edit:<br />
Starting play mode<br />
Turn the camera on and select Play mode by pressing the play mode button<br />
( ). The camera can now play back the images stored in the memory.<br />
You can set up the PLAY mode function by using the camera buttons and LCD<br />
monitor.<br />
If the memory card is inserted in the camera, all the camera functions apply only<br />
to the memory card.<br />
If the memory card is not inserted in the camera, all the camera functions apply<br />
only to the internal memory.<br />
Playing back a still image<br />
1. Select the PLAY mode by pressing the<br />
play mode button ( ).<br />
2. The last image stored on the memory is<br />
displayed on the LCD monitor.<br />
3. Touch the button and slide your finger to<br />
the left or right to select an image.<br />
After selecting an image, press the button<br />
marked with an arrow. The images will be<br />
played back continuously.<br />
INFORMATION<br />
Manner mode : Pressing the play mode button for more than 3 seconds<br />
changes the buzzer and start-up sound setting to OFF,<br />
even though you may have set these to ON.<br />
Edit:<br />
Edit:
Starting play mode<br />
Playing back a movie clip<br />
1. Select the recorded movie clip that you want to<br />
play back by using the smart button.<br />
2. Press the horizontal smart button and menus for<br />
movie will display.<br />
3. Press the button to play back a movie clip file.<br />
- To pause a movie file while playing it back,<br />
press the II button again.<br />
- Pressing the button again will cause the<br />
movie clip file will restart.<br />
- To rewind the movie clip while it is playing,<br />
press the button. To fast forward the<br />
movie clip, press the button. Whenever the<br />
button is pressed, the search speed<br />
will be increased to 2X, 4X, 8X or 16X.<br />
- To stop playback of the movie clip, press the button.<br />
4. Press the BACK button and the menu will disappear.<br />
Movie clip capture function : capture still images from the movie clip.<br />
1. Press the II menu button while playing back a<br />
movie file.<br />
2. Press the Capture menu button. The captured<br />
image is saved under a new file name.<br />
Play:<br />
On camera movie trimming : You can extract desired frames of movie clip during<br />
the movie clip play back.<br />
1. Press the extract menu button at the point of the<br />
movie clip that you want to start extracting.<br />
Trimming?<br />
Yes<br />
2. Press the extract menu button at the point of the<br />
No<br />
movie clip that you want to stop extracting.<br />
3. A confirmation window will display.<br />
4. Press the smart button to select a desired sub<br />
menu.<br />
[Yes] : The extracted frames are saved as a new file name.<br />
[No] : The movie trimming will cancel.<br />
Playing back a recorded voice memo or voice file<br />
1. Select the recorded voice that you want to play<br />
back by using the smart button.<br />
2. Press the horizontal smart button; menus for voice<br />
will display.<br />
3. Press the button to play back a voice clip file.<br />
- To pause a voice file while playing it back, press<br />
the II button again.<br />
- Pressing the button again will cause the voice file to restart.<br />
- To rewind the voice while it is playing, press the button. To fast forward<br />
the voice, press the button.<br />
- To stop playback of the voice, press the button.<br />
- When an image that has voice memo displays, icon will display on the<br />
LCD monitor. Press the Smart button and you will find for playing back<br />
the Voice memo. Press the menu button and then the voice plays back.<br />
39
40<br />
LCD monitor indicator<br />
The LCD monitor displays shooting information about the displayed image.<br />
<br />
<br />
<br />
ISO:200<br />
AV:F2.8<br />
TV:1/30<br />
FLASH:OFF<br />
3648X2736<br />
2006.06.01<br />
Edit:<br />
<br />
No. Description Icon Page<br />
1 Battery p.13<br />
2 Recording Information -<br />
3 Slide Bar -<br />
4 Fn menu : Press the smart button -<br />
5 Setup menu p.48<br />
6 DPOF menu p.42<br />
7 Delete menu p.42<br />
8 Protect menu p.42<br />
9 Slide show menu p.41<br />
10 Play back mode icon -<br />
11<br />
Folder name and Stored<br />
image number<br />
100-0001<br />
p.49<br />
<br />
<br />
<br />
<br />
<br />
Using the camera buttons to adjust the camera<br />
In Play mode, you can use the buttons on the camera to conveniently set up the<br />
Play mode functions.<br />
Play mode button<br />
If you have turned on the camera by pressing the POWER button, you can press<br />
the PLAY MODE button once to switch to Play mode and press it again to switch<br />
to Recording mode.<br />
You can turn the power on with the play mode button. The camera is turned on<br />
in play mode. Press the play mode button again to turn off the camera.<br />
ISO sensitivity<br />
Aperture value<br />
Shutter speed<br />
Whether or not the flash is used<br />
Size<br />
Recording date<br />
BACK button<br />
ISO:200<br />
AV:F2.8<br />
TV:1/30<br />
FLASH:OFF<br />
3648X2736<br />
2006.06.01<br />
When the menus are displayed the BACK<br />
button allows you to return to the previous<br />
screen, and will eventually bring you out of the<br />
menu system.<br />
Edit:<br />
The maximum enlargement rate in proportion to the image size.<br />
Image size 10M 7M 5M 3M 1M<br />
Maximum enlargement rate X11.4 X9.8 X7.0 X7.0 X2.66
Thumbnail ( ) / Enlargement ( ) button<br />
You can view multiple pictures, enlarge a selected picture, and crop and save a<br />
selected area of an image.<br />
Thumbnail display<br />
1. While an image is displayed on full screen, press the<br />
thumbnail button.<br />
2. The thumbnail display will highlight the image that<br />
had been showing at the time the thumbnail mode<br />
was selected.<br />
3. Use the smart button to move to a desired image.<br />
4. To view an image separately, press the enlargement button.<br />
ISO:200<br />
AV:F2.8<br />
TV:1/30<br />
FLASH:OFF<br />
3648X2736<br />
2006.06.01<br />
Edit:<br />
Pressing the thumbnail<br />
button ( )<br />
Pressing the enlargement<br />
button ( )<br />
[Normal display mode] [Thumbnail display mode]<br />
Image enlargement<br />
1. Select an image that you want to enlarge and press<br />
the enlargement button.<br />
2. Different parts of the image can be viewed by using<br />
the smart button.<br />
3. Pressing the thumbnail button will zoom back to the<br />
original full sized image.<br />
- You can tell whether the image displayed is an<br />
enlarged view by checking the image enlargement<br />
indicator shown at the bottom left of the LCD<br />
monitor. (If the image is not an enlarged view, the<br />
indicator will not be displayed.) You can also<br />
check the area of enlargement.<br />
- Movie clips and WAV files can’t be enlarged.<br />
- If an image is enlarged, a loss of quality may occur.<br />
Select: Full:T<br />
Starting the slide show<br />
Images can be displayed continuously at pre-set intervals.<br />
You can view the slide show by connecting the camera to an external monitor.<br />
To start the slide show, press the Start menu button.<br />
Movie file, Voice file and GIF file won't be displayed.<br />
ISO:200<br />
AV:F2.8<br />
TV:1/30<br />
FLASH:OFF<br />
3648X2736<br />
2006.06.01<br />
Edit:<br />
Configure slide show effects : Unique screen effects can be used in the slide<br />
show.<br />
: The image slides regularly (from Effect1 to Effect 3).<br />
Mix<br />
: Image moves from the top left.<br />
Effect 3<br />
: Image is displayed slowly from the center<br />
Effect 2<br />
outwards.<br />
Effect 1<br />
: The next image overspreads the previous image.<br />
Off<br />
Setting play interval : Set the slide show play interval.<br />
Repeat Option : Selecting the repeat option for the slide<br />
show.<br />
[ONE PLAY] : The slide show is closed after one<br />
cycle.<br />
[REPEAT PLAY] : The slide show is repeated until<br />
cancelled.<br />
10 sec<br />
5 sec<br />
3 sec<br />
1 sec<br />
REPEAT PLAY<br />
ONE PLAY<br />
41
42<br />
Protecting images<br />
This is used to protect specific shots from being accidentally erased (Lock).<br />
It also unprotects images that have been previously protected (Unlock).<br />
ONE : Protect / release displayed image.<br />
ALL : Protect / release all saved images<br />
- If you protect an image, the protect icon will be<br />
displayed on the LCD monitor. (An unprotected image<br />
has no indicator)<br />
- An image in LOCK mode will be protected from the<br />
delete function, but will NOT be protected from the<br />
format function.<br />
Deleting images<br />
ISO:200<br />
AV:F2.8<br />
TV:1/30<br />
FLASH:OFF<br />
3648X2736<br />
2006.06.01<br />
ONE ALL<br />
Of all the files stored in the memory card, the unprotected files in the DCIM<br />
subfolder will be deleted. Remember that this will permanently delete<br />
unprotected images. Important shots should be stored on a computer before<br />
deletion takes place. The startup image and SKIN image are stored in the<br />
camera's internal memory (i.e., not on the memory card) and it will not be<br />
deleted even if you delete all files on the memory card.<br />
ONE : deletes displayed image.<br />
ALL : deletes all saved images<br />
- The protected images can’t be deleted<br />
- If there aren’t any protected images, all images are<br />
deleted and a [No Image!] message will display.<br />
Edit:<br />
ONE ALL<br />
DPOF<br />
DPOF (Digital Print Order Format) allows you to embed printing information on<br />
your memory card’s MISC folder. Select the pictures to be printed and how<br />
many prints to make.<br />
The DPOF indicator will display on the LCD monitor when an image that has<br />
DPOF information plays back. Images can then be printed on DPOF printers, or<br />
at an increasing number of photo labs.<br />
This function is not available for Movie clips and Voice recording files.<br />
If a memory card is not inserted, the menus are still displayed in the LCD, but are<br />
not selectable.<br />
DPOF : STANDARD<br />
This function allows you to embed print quantity information on a stored image.<br />
1. Select the [IMAGES] menu by pressing the smart<br />
button.<br />
2. Select a desired sub menu by pressing the smart<br />
button.<br />
[ONE PICS] : Select a number of prints of<br />
displayed image.<br />
[ALL PICS] : Configure number of prints for all<br />
pictures except movie and voice<br />
files.<br />
[CANCEL] : Cancel the print setup.<br />
3. Press the OK button to confirm the setting. If an<br />
image carries DPOF instructions, the DPOF<br />
indicator ( ) will show.<br />
ISO:200<br />
AV:F2.8<br />
TV:1/30<br />
FLASH:OFF<br />
3648X2736<br />
2006.06.01<br />
Edit:<br />
30 Images
DPOF : Print size<br />
You can specify the print size when printing images stored on the memory card.<br />
The [SIZE] menu is available only for DPOF 1.1 compatible printers.<br />
Setting the Print Size<br />
1. Select the [SIZE] menu by pressing the smart<br />
button.<br />
2. Select a desired sub menu by pressing the smart button.<br />
[ONE PICS] : Select a print size of displayed image.<br />
[ALL PICS] : Change print size of all saved images.<br />
[CANCEL] : Cancel all of the print size settings.<br />
3. Press the OK button to confirm the setting.<br />
If an image carries DPOF instructions, the DPOF<br />
indicator will show.<br />
DPOF [SIZE] secondary menu : Cancel, 3X5, 4X6,<br />
5X7, 8X10<br />
Depending on the manufacturer and printer model,<br />
cancelling the printing may take a little longer for the printer to process.<br />
DPOF : Index<br />
Images (except for movie clips and voice file) are printed as index type.<br />
1. Select the [INDEX] menu by pressing the smart<br />
button.<br />
2. Select a desired sub menu by pressing the smart<br />
NO<br />
button.<br />
YES<br />
If [NO] is selected : Cancel the index print setting.<br />
If [YES] is selected : The image will be printed in<br />
index format.<br />
Cancel<br />
Rotating an image<br />
You can rotate the stored images by various degrees.<br />
Once the playback of the rotated picture is finished, it<br />
will switch back to the original state.<br />
1. Press the smart button (horizontal).<br />
2. Press the [ROTATE] menu button.<br />
3. Select a desired sub menu by pressing the smart<br />
button.<br />
[Before rotating the image]<br />
RIGHT 90<br />
LEFT 90<br />
180<br />
[Right 90°] [Left 90°] [180°]<br />
4. If you display the rotated image on the LCD monitor, empty spaces may<br />
appear to the left and right of the image.<br />
43
Change the resolution (size) of pictures taken. Select [<strong>User</strong> image] to save an<br />
image to be the start-up image. The resized image will have a new file name.<br />
1. Press the smart button (horizontal).<br />
2. Press the [RESIZE] menu button.<br />
3. Select a desired sub menu by pressing the smart<br />
button.<br />
Image Resize Types<br />
44<br />
Resize<br />
3136x2352<br />
2688x2016<br />
2240x1680<br />
1024x768<br />
START IMAGE<br />
Size 3136X2352 2688X2016 2240X1680 1024X768 START IMAGE<br />
10M O O O O O<br />
7M X O O O O<br />
5M X X O O O<br />
3M X X X O O<br />
1M X X X X O<br />
INFORMATION<br />
You can change the resolution of only those files compressed in the JPEG 4:2:2 format.<br />
The resized image will have a new file name. The [START IMAGE] image is<br />
stored not on the memory card but on the internal memory.<br />
Only one [START IMAGE] image can be saved. If you save a new [START<br />
IMAGE], the existing startup image will be deleted.<br />
If the memory capacity is insufficient to store the resized image, a [Memory<br />
Full!] message will display on the LCD monitor and the resized image will<br />
not be stored.<br />
Trimming<br />
You can extract part of the image that you want and save it separately.<br />
1. Select an image that you want to enlarge and<br />
press the enlargement button.<br />
2. Press the smart button (horizontal).<br />
3. Press the [TRIM] menu button.<br />
4. Press the smart button. The trimmed image will<br />
save as a new file name, and display on the LCD<br />
monitor.<br />
To cancel the trimming, press the BACK button.<br />
If there is not enough memory space to save the<br />
trimmed image, the image can't be trimmed.<br />
To delete the enlarged image during the trimming<br />
function, press the delete button.<br />
Effect<br />
By using the camera’s digital processor, it is possible to add special effects to<br />
your images.<br />
1. Press the smart button.<br />
2. Press the [EFFECT] menu button.<br />
3. Select a desired sub menu by using the smart button.<br />
: No effect is added to the image<br />
: Captured images will be stored in black and white.<br />
: Captured images will be stored in a sepia tone<br />
(a range of yellowish brown colours).<br />
: Captured images will be stored in a blue tone.<br />
: Captured images will be stored in a red tone.<br />
: Captured images will be stored in a green tone.<br />
: Save the image in negative mode.<br />
Trim: Cancel:BACK<br />
RED<br />
BLUE<br />
SEPIA<br />
B & W
Motion GIF<br />
You can make Motion GIF with captured images. Motion GIF : Taking images<br />
continuously and save them in a file. This file supports animation.<br />
How to make the Motion GIF<br />
1. Press the vertical smart button.<br />
ISO:200<br />
AV:F2.8<br />
TV:1/30<br />
FLASH:OFF<br />
3648X2736<br />
2006.06.01<br />
Edit:<br />
3. Select the image size and FPS (Frame Per Second).<br />
4. Select desired images by using the smart button.<br />
5. Press the OK button and a Motion GIF file is saved.<br />
How to play back the Motion GIF file<br />
1. Select a Motion GIF file by using the smart button.<br />
2. Press the vertical smart button and menus<br />
display.<br />
3. Press the start menu button.<br />
2. Press the Motion GIF menu button.<br />
Select:<br />
PictBridge<br />
You can use the USB cable to connect this camera to a printer that supports<br />
PictBridge (sold separately) and print the stored images directly. Movie clips and<br />
voice files cannot be printed.<br />
Setting up the camera for connection to a printer<br />
1. Press the Setup menu button and press the F4<br />
menu button.<br />
2. Select the [USB]-[Printer] menu by using the<br />
smart button.<br />
Connecting the Camera to a Printer<br />
Using the USB cable with Cradle (Optional) :<br />
Connect the camera and the cradle. Connect the cradle to a printer’s USB<br />
port with the supplied USB cable.<br />
Using the USB cable with Camera :<br />
Connect the camera to a printer’s USB port with the supplied USB cable.<br />
[Using the USB cable with Cradle]<br />
[Using the USB cable with Camera]<br />
Computer<br />
Printer<br />
<br />
Format<br />
Copy to Card<br />
Video Out<br />
USB<br />
Reset<br />
Exit:BACK<br />
45
If you selected [Computer], when you connected the camera to your printer, the<br />
[Connecting Computer] message will display and the connection will not be<br />
established. In this case, disconnect the USB cable, and then change the menu.<br />
Or press the Printer button and the camera is connected to the printer displaying<br />
the [Connecting Printer] message. But, the camera may not connect to the<br />
printer, depending on the manufacturer and model of the printer<br />
Easy printing : When you connect the camera to printer in the Play back mode,<br />
you can print a picture easily with the default print settings.<br />
1. In the play back mode, connect the camera and<br />
the printer. The menu icons will display as<br />
shown.<br />
46<br />
PictBridge<br />
2. Press the button.<br />
3. Select the [Yes] menu and the image will print.<br />
Print mode : You can select the Easy printing mode or Custom printing mode.<br />
: Custom Printing mode<br />
: Easy Printing mode<br />
Print?<br />
Yes<br />
No<br />
Custom Set : You can select the Paper Size, Print Format, Paper Type, Print<br />
Quality, Date Print, and File Name Print menus for printed pictures.<br />
<br />
No. Icon Description Menu<br />
1 Selecting images for printing One Pic, All Pics<br />
2<br />
Setting the size of the printing<br />
paper<br />
Auto, PostCard, Card, 4x6, L,<br />
2L, Letter, A4, A3<br />
3<br />
Setting the number of pictures to<br />
be printed on a sheet of paper<br />
Auto, Full, 1, 2, 4, 8, 9, 16,<br />
Index<br />
4<br />
Setting the quality of the<br />
printing paper<br />
Auto, Plain, Photo, FastPhoto<br />
5<br />
Setting the quality of the<br />
picture to be printed<br />
Auto, Draft, Normal, Fine<br />
6 Setting whether to print the date Auto, Off, On<br />
7<br />
Setting whether to print the file<br />
name<br />
Auto, Off, On<br />
Some menu options are not supported in all manufacturer and printer models.<br />
If not supported, the menus are still displayed in the LCD, but are not selectable.<br />
If the setting values are not changed in the automatic / manual setting, the<br />
setting values are automatically kept.
PictBridge<br />
Printing images (Custom mode) : Images will be printed with changed printer<br />
setting.<br />
1. In custom printing mode, press the Print menu<br />
button.<br />
2. Select the [Yes] menu.<br />
3. The screen shown on the right will appear and<br />
the picture will be printed. If no picture is<br />
selected, the [No Image!] message will be<br />
displayed. Press the BACK button while printing<br />
to cancel the printing.<br />
Print?<br />
Yes<br />
No<br />
Print?<br />
Yes<br />
No<br />
Now Printing<br />
001 / 001<br />
Cancel:BACK<br />
Reset : Initialises user-changed configurations.<br />
1. In custom printing mode, press the Reset menu<br />
button.<br />
2. All settings will be reset.<br />
Printer button<br />
If you select [Computer] sub menu in the [USB]<br />
setup menu, [Connecting Computer] message<br />
will display when you connect the camera to<br />
your printer and the connection will not be<br />
established. In this case, press the Printer<br />
button. [Connecting Printer] message will<br />
display and the Easy printing mode will be<br />
selected.<br />
* In some instances the camera may not connect<br />
to the printer, this will depend on the<br />
manufacturer of the printer.<br />
Connecting Computer<br />
Printer:<br />
47
48<br />
Setup menu<br />
In this mode, you can set up basic settings. You can use the setup menu in all<br />
camera modes, except Voice Recording mode.<br />
The items indicated by are default settings.<br />
Menu tab Main menu Sub menu Secondary menu Page<br />
OSD set<br />
(Recording mode)<br />
Full<br />
Hide<br />
Basic<br />
LCD Save<br />
p.49<br />
OSD set<br />
(Playback mode)<br />
Full<br />
Hide<br />
Basic<br />
-<br />
p.49<br />
File Series Reset p.49<br />
ENGLISH FRANÇAIS<br />
DEUTSCH ESPAÑOL ITALIANO<br />
Language<br />
DANSK<br />
PORTUGUÊS<br />
SVENSKA<br />
BAHASA<br />
DUTCH<br />
SUOMI<br />
p.49<br />
POLSKI Magyar<br />
- -<br />
Date&Time<br />
yy/mm/dd<br />
dd/mm/yy<br />
mm/dd/yy<br />
Off<br />
p.50<br />
Imprint<br />
Off<br />
Date &Time<br />
Date<br />
-<br />
p.50<br />
LCD<br />
Dark<br />
Bright<br />
Normal<br />
-<br />
p.50<br />
AF Lamp Off On p.50<br />
Power Off 1, 3, 5, 10 min - p.50<br />
Quick View Off 0.5, 1, 3 sec p.51<br />
Menu tab Main menu Sub menu Secondary menu Page<br />
Start Image<br />
Off<br />
<strong>User</strong> image<br />
LOGO<br />
-<br />
p.51<br />
Sound Volume<br />
Off<br />
Medium<br />
Low<br />
High<br />
p.51<br />
Beep Sound<br />
Off<br />
Sound2<br />
Sound1<br />
Sound3<br />
p.51<br />
Start Sound<br />
Off<br />
Sound2<br />
Sound1<br />
Sound3<br />
p.51<br />
Shutter Sound<br />
Off<br />
Sound2<br />
Sound1<br />
Sound3<br />
p.52<br />
Format No Yes p.52<br />
Copy to Card No Yes p.52<br />
Video Out NTSC PAL p.53<br />
USB Computer Printer p.54<br />
Reset No Yes p.54<br />
Menus are subject to change without prior notice.
Setup menu<br />
How to select the setup menu<br />
1. In any mode with the exception of Photo Gallery<br />
mode, press the extension menu button ( )<br />
and press the setup menu button ( ).<br />
2. Each buttons have different setup menus.<br />
Press the F1-4 ( ) menu button.<br />
Full <br />
Basic<br />
Hide<br />
LCD Save<br />
[OSD set]<br />
You can check shooting (Recording mode) and displayed image (Play back<br />
mode) information.<br />
Full <br />
Basic<br />
Hide<br />
LCD Save<br />
OSD Set<br />
OSD Set<br />
File<br />
Language<br />
Date&Time<br />
[Recording mode menu]<br />
Full<br />
Basic <br />
Hide<br />
OSD Set<br />
OSD Set<br />
File<br />
Language<br />
Date&Time<br />
Exit:BACK Exit:BACK<br />
[Play back mode menu]<br />
OSD Set<br />
OSD Set<br />
File<br />
Language<br />
Date&Time<br />
Exit:BACK<br />
[Full] : When the smart button is touched, the icons will be enlarged and OSD<br />
will be displayed.<br />
[Basic] : When the smart button is touched, the icons will be enlarged and OSD<br />
will not be enlarged.<br />
[Hide] : If the camera doesn't operate for about 3 seconds, all OSD will<br />
disappear. When the shutter is pressed down or half way down, the<br />
shutter speed and auto focus frame will display. OSD may display by<br />
using the camera buttons except for the shutter button.<br />
[LCD save] : If the camera is not used for about 30 seconds, the power and<br />
camera status lamps blink and the LCD monitor turns off.<br />
[ File name ]<br />
This function allows the user to select the file naming format.<br />
[Series] : New files are named using numbers that<br />
Series<br />
OSD Set<br />
follow the previous sequence, even when a<br />
Reset<br />
OSD Set<br />
new memory card is used, or after<br />
<br />
File<br />
[Reset]<br />
formatting, or after deleting all pictures.<br />
: After using the reset function, the next file<br />
name will be set from 0001 even after<br />
formatting, deleting all or inserting a new<br />
memory card.<br />
Language<br />
Date&Time<br />
Exit:BACK<br />
- The first stored folder name is 100SSCAM, and the first file name is SNC10001.<br />
- File names are assigned sequentially from SNC10001 SNC10002 ~ <br />
SNC19999.<br />
- The folder number is assigned sequentially from 100 to 999 as follows:<br />
100SSCAM 101SSCAM ~ 999SSCAM.<br />
- The files used with the memory card conform to the DCF (Design rule for<br />
Camera File systems) format.<br />
[ Language ]<br />
There is a choice of languages that can be displayed on the LCD monitor. Even<br />
if the battery and AC charger are removed and inserted again, the language<br />
setting will be preserved.<br />
LANGUAGE sub menu :<br />
English, Korean, French, German, Spanish, Italian,<br />
ENGLISH<br />
OSD Set<br />
OSD Set<br />
S.Chinese, T.Chinese, Japanese, Russian,<br />
FRANÇAIS<br />
File<br />
Portuguese, Dutch, Danish, Swedish, Finnish, Thai,<br />
DEUTSCH Language<br />
BAHASA (MALAY / INDONESIAN), Arabic, Polish,<br />
<br />
Date&Time<br />
Hungarian, Czech and Turkish.<br />
Exit:BACK<br />
49
[ Setting up the Date / Time / Date type ]<br />
You can change the date and time that will be displayed on the captured images<br />
and set up the date type.<br />
50<br />
Setup menu<br />
- Date type : [yy/mm/dd], [mm/dd/yy], [dd/mm/yy],<br />
[Off]<br />
[ Imprinting the recording date ]<br />
There is an option to include DATE / TIME on still images.<br />
Sub menus<br />
[Off] : The DATE & TIME will not be<br />
imprinted on the image file.<br />
[Date] : Only the DATE will be imprinted on<br />
the image file.<br />
[Date&Time] : The DATE & TIME will be imprinted<br />
on the image file.<br />
[ LCD brightness ]<br />
You can adjust the LCD brightness.<br />
[LCD] sub menu : Dark, Normal, Bright<br />
2006/06/01<br />
yy/mm/dd<br />
mm/dd/yy<br />
dd/mm/yy<br />
Off <br />
Off <br />
Date<br />
Date&Time<br />
Dark<br />
Normal <br />
Bright<br />
OSD Set<br />
OSD Set<br />
File<br />
Language<br />
Date&Time<br />
Exit:BACK<br />
Imprint<br />
LCD<br />
AF Lamp<br />
Power Off<br />
Quick View<br />
Exit:BACK<br />
Imprint<br />
LCD<br />
AF Lamp<br />
Power Off<br />
Quick View<br />
Exit:BACK<br />
[ Auto Focus lamp ]<br />
You can turn the Auto Focus lamp on and off.<br />
Sub menus<br />
[Off] : The AF lamp will not light up in a low light<br />
condition.<br />
[On] : The AF lamp will light up in a low light<br />
condition.<br />
[ Auto power off ]<br />
This function switches the camera off after a set amount of time in order to<br />
prevent unnecessary battery drainage.<br />
Sub menus<br />
[1, 3, 5, 10 min] : The power will turn off automatically<br />
1 min<br />
if not used for the period of time<br />
3 min<br />
5 min<br />
specified.<br />
10 min <br />
- After replacing the battery, the power off setting will<br />
be preserved.<br />
- Note that the automatic power off function will not<br />
operate if the camera is in PC mode, slide show, playing back a voice<br />
recording, playing back a movie file or taking a composite shot.<br />
Off<br />
On<br />
<br />
Imprint<br />
LCD<br />
AF Lamp<br />
Power Off<br />
Quick View<br />
Exit:BACK<br />
Imprint<br />
LCD<br />
AF Lamp<br />
Power Off<br />
Quick View<br />
Exit:BACK
Setup menu<br />
[ Quick view ]<br />
If you enable Quick View before capturing an image, you can view the image<br />
you just captured on the LCD monitor for the duration set in the [Quick View]<br />
setup. Quick view is possible only with still images.<br />
Sub menus<br />
[Off] : The quick view function can’t be<br />
activated.<br />
[0.5, 1, 3 sec] : The captured image is briefly<br />
displayed during the selected time.<br />
Off<br />
0.5 sec<br />
1 sec<br />
3 sec<br />
Imprint<br />
LCD<br />
AF Lamp<br />
Power Off<br />
Quick View<br />
[ Start up image ]<br />
You can select the image that is first displayed on the LCD monitor whenever<br />
the camera is turned on.<br />
Start up image : [Off], [LOGO], [<strong>User</strong> Image]<br />
- Use a saved image for the start-up image with the<br />
[START IMAGE] in the [RESIZE] menu in the play<br />
mode.<br />
- The start-up image will not be deleted by [DELETE]<br />
or [Format] menu.<br />
- The <strong>User</strong> images will be deleted by [Reset] menu.<br />
<br />
Exit:BACK<br />
Off Start Image<br />
LOGO Sound Volume<br />
<strong>User</strong> image BEEP Sound<br />
Start Sound<br />
Shutter Sound<br />
Exit:BACK<br />
[ Sound Volume ]<br />
You can select the sound volume of start sound, operation sound and shutter<br />
sound.<br />
[Sound Volume] sub menus : [Off], [Low], [Medium],<br />
Off<br />
Low<br />
[High]<br />
<br />
Medium<br />
High<br />
Start Image<br />
Sound Volume<br />
BEEP Sound<br />
Start Sound<br />
Shutter Sound<br />
[ Operation Sound ]<br />
If you set sound to ON, various sounds will be activated for camera startup,<br />
when buttons are pressed, so that you can be aware of the camera operation<br />
status.<br />
[Sound] sub menus : [Off], [Sound 1], [Sound 2],<br />
[Sound 3]<br />
[ Start up sound ]<br />
You can select the sound that is activated whenever the camera is turned on.<br />
Start up sound : [Off], [Sound 1], [Sound 2],<br />
[Sound 3]<br />
- If the start up image is set to [Off], the start up<br />
sound will not activate, even though you may<br />
have set these to on.<br />
Exit:BACK<br />
Off Start Image<br />
Sound 1 Sound Volume<br />
Sound 2 BEEP Sound<br />
Sound 3 Start Sound<br />
Shutter Sound<br />
Exit:BACK<br />
Off Start Image<br />
Sound 1 Sound Volume<br />
Sound 2 BEEP Sound<br />
Sound 3 Start Sound<br />
Shutter Sound<br />
Exit:BACK<br />
51
[ Shutter sound ]<br />
You can select the shutter sound.<br />
Shutter sound : [Off], [Sound 1], [Sound 2],<br />
[Sound 3]<br />
52<br />
Setup menu<br />
Off Start Image<br />
Sound 1 Sound Volume<br />
Sound 2 BEEP Sound<br />
Sound 3 Start Sound<br />
Shutter Sound<br />
[ Formatting a memory ]<br />
This is used for formatting the memory. If you run [Format] on the memory, all<br />
images, including the protected images, will be deleted. Be sure to download<br />
important images to your PC before formatting the memory.<br />
Sub menus<br />
[No] : The memory will not be formatted.<br />
[Yes] : A [Processing!] message appears and the<br />
memory will be formatted. If you run FORMAT<br />
in Play mode, a [No Image!] message will<br />
appear.<br />
No <br />
Yes<br />
Exit:BACK<br />
Format<br />
Copy to Card<br />
Video Out<br />
USB<br />
Reset<br />
Exit:BACK<br />
Be sure to run [Format] on the following types of memory card.<br />
- A new memory card, or an unformatted memory card<br />
- A memory card that has a file this camera can't recognise or one that has been<br />
taken from another camera.<br />
- Always format the memory card using this camera. If you insert a memory card<br />
that has been formatted using other cameras, memory card readers, or PCs,<br />
you will get a [Card Error!] message.<br />
[ Copy To Card ]<br />
This enables you to copy image files, movie clips and voice recording files to the<br />
memory card.<br />
[No] : Cancels "Copy to Card".<br />
[Yes] : All images, movie clips and voice recording<br />
No<br />
Yes <br />
Format<br />
Copy to Card<br />
files saved in the internal memory are<br />
Video Out<br />
copied to the memory card after the<br />
USB<br />
[Processing!] message is displayed.<br />
Reset<br />
Exit:BACK<br />
INFORMATION<br />
When this menu is selected without inserting a memory card, you can select<br />
the [Copy To Card] menu but the menu can’t be run.<br />
If there is not enough space available in the memory card to copy saved<br />
images in the internal memory (20MB), the [Copy To Card] command will<br />
copy only some of the images and display [Memory Full!] message. Then<br />
the system will return to the playback mode. Please be sure to delete any<br />
unnecessary files to free up space before inserting the memory card into the<br />
camera.<br />
When you move the images that are stored in the internal memory to the<br />
memory card, the next number of file names will be created in the card to<br />
avoid duplication of the file name.<br />
- When the [Reset] of the [File] setup menu is set : The copied file names<br />
start from after the last stored file name.<br />
- When the [Series] of the [File] setup menu is set : The copied file names<br />
start from after the last captured file name. After completing [Copy To<br />
Card], the last stored image of the last copied folder is displayed on the<br />
LCD monitor.
Setup menu<br />
[ Selecting Video out type ]<br />
The Movie output signal from the camera can be NTSC or PAL.<br />
Your choice of output will be governed by the type of device (monitor or TV, etc.)<br />
to which the camera is connected. PAL mode can support only BDGHI.<br />
Connecting to an external monitor<br />
Using the USB cable with Cradle (Optional) :<br />
Connect the camera and the cradle. Connect the<br />
cradle to an external monitor with the supplied AV<br />
cable.<br />
Using the AV cable with Camera :<br />
Connect the camera to an external monitor with<br />
the supplied AV cable.<br />
[Using the AV cable with Cradle]<br />
[Using the AV cable with Camera]<br />
NTSC<br />
PAL<br />
Yellow - Video<br />
White - sound<br />
<br />
Format<br />
Copy to Card<br />
Video Out<br />
USB<br />
Reset<br />
Exit:BACK<br />
- NTSC : U.S.A, Canada, Japan, South Korea, Taiwan, Mexico.<br />
- PAL : Australia, Austria, Belgium, China, Denmark, Finland, Germany, U.K.,<br />
Holland, Italy, Kuwait, Malaysia, New Zealand, Singapore, Spain,<br />
Sweden, Switzerland, Thailand, Norway.<br />
- When using a TV as an external monitor, you will need to select the external or<br />
AV channel of the TV.<br />
- There will be a digital noise on the external monitor, but it is not a malfunction.<br />
- If the image is not in the centre of the screen, use the TV controls to centre it.<br />
- When the camera is connected to an external monitor, some parts of the<br />
image may not display.<br />
- When the camera is connected to an external monitor, the menu will be visible<br />
on the external monitor and the menu functions are the same as those<br />
indicated on the LCD monitor.<br />
- When the camera is connected to an external monitor, the button sound may<br />
not sound.<br />
53
[ Connecting an External Device (USB) ]<br />
You can select an external device to which you want to connect the camera<br />
using the USB cable.<br />
Sub menus<br />
[Computer] : Select this if you want to connect the<br />
Computer<br />
camera to your PC. Refer to page 63<br />
Printer<br />
for instructions on how to connect the<br />
<br />
camera to your PC.<br />
[Printer] : Select this if you want to connect the<br />
camera to your printer.<br />
Refer to page 45 for instructions on how<br />
to connect the camera to your printer.<br />
54<br />
Setup menu<br />
No<br />
Yes<br />
<br />
Format<br />
Copy to Card<br />
Video Out<br />
USB<br />
Reset<br />
[ Initialisation ]<br />
All camera menu and function settings will be restored to their default values.<br />
However, values for DATE / TIME, LANGUAGE, and VIDEO OUT will not be<br />
changed.<br />
Sub menus<br />
[No] : Settings will not be restored to their defaults.<br />
[Yes] : All settings will be restored to their defaults.<br />
Exit:BACK<br />
Format<br />
Copy to Card<br />
Video Out<br />
USB<br />
Reset<br />
Exit:BACK<br />
Important notes<br />
Be sure to observe the following precautions!<br />
This unit contains precision electronic components. Do not use or store this unit<br />
in the following locations.<br />
- Areas exposed to severe changes in temperature and humidity.<br />
- Areas exposed to dust and dirt.<br />
- Areas exposed to direct sunlight or the inside of a vehicle in hot weather.<br />
- Environments where there is high magnetism or excessive vibration.<br />
- Areas with high explosives or highly flammable materials.<br />
Do not leave this camera in places subject to dust, chemicals (like naphthalene<br />
and mothball), high temperatures or high humidity.<br />
Keep this camera with silica gel in a hermetically sealed box when not planning<br />
to use the camera for a long period of time.<br />
Sand can be particularly troublesome to cameras.<br />
- Do not let sand get inside the camera when using it on beaches, coastal<br />
dunes, or other areas where there is lots of sand.<br />
- Doing so may result in failure or may permanently render the camera unusable.<br />
Handling the camera<br />
- Never drop the camera or subject it to severe shocks or vibrations.<br />
- Protect the large size LCD monitor from an impact. When this camera is not<br />
used, keep it in the camera case.<br />
- Avoid obstructing the lens or the flash when you capture an image.<br />
- This camera is not waterproof.<br />
To avoid dangerous electrical shocks, never hold or operate the camera with<br />
wet hands.<br />
- If you use this camera in wet places, such as beach or pool, do not let water or<br />
sand get inside the camera. Doing so may result in failure or may permanently<br />
damage the unit.
Important notes<br />
Extremes in temperature may cause problems.<br />
- If the camera is transferred from a cold to a warm and humid environment,<br />
condensation can form on the delicate electronic circuitry. If this occurs, turn<br />
the camera off and wait for at least 1 hour until all moisture is dispersed.<br />
Moisture built up can also occur on the memory card. If this happens, turn off<br />
the camera and remove the memory card. Wait until the moisture has<br />
dispersed.<br />
Caution on Using the Lens<br />
- If the lens is subjected to direct sunlight, it could result in the discoloration and<br />
deterioration of the image sensor.<br />
- Pay attention not to get fingerprints or foreign substances on the surface of the<br />
lens.<br />
If the digital camera is not used for a long period, an electric discharge can<br />
occur.<br />
It is a good idea to remove the battery and the memory card if you do not intend<br />
using the camera for an extended period of time.<br />
If the camera is exposed to an electronic interference, it will turn itself off to<br />
protect the memory card.<br />
Camera Maintenance<br />
- Use a soft brush (available from photo stores) to gently clean the lens and LCD<br />
assemblies. If this does not work, lens-cleaning paper with lens cleaning fluid<br />
can be used.<br />
Clean the camera body with a soft cloth. Do not allow this camera to come into<br />
contact with solvent materials such as benzol, insecticide, thinners etc. This<br />
may damage the body shell of the camera and also affect its performance.<br />
Rough handling can damage the LCD monitor. Take care to avoid damage<br />
and keep the camera in a protective carrying case when not in use.<br />
Do not attempt to disassemble or modify the camera.<br />
Under certain conditions, static electricity can cause the flash unit to fire. This is<br />
not harmful to the camera and is not a malfunction.<br />
When images are uploaded or downloaded (when the charger and USB cable<br />
are inserted into the cradle (optional) at the same time), the data transfer may be<br />
affected by static electricity.<br />
In this case, disconnect and re-connect the USB cable before trying the transfer<br />
again.<br />
Before an important event or going on a trip, you should check the camera<br />
condition.<br />
- Take a picture to check that the camera is working correctly and ensure you<br />
have a fully charged spare battery.<br />
- Samsung cannot be held responsible for camera malfunctions.<br />
55
56<br />
Warning indicator<br />
There are several warnings that may appear on the LCD display<br />
Memory Error!<br />
Memory card error<br />
Turn off the camera power and turn it on again<br />
Insert the memory card again<br />
Insert and format the memory card (p.52)<br />
Card Locked!<br />
The memory card is locked<br />
SD memory card : Slide the write protect switch towards the top of the<br />
memory card<br />
No Card!<br />
A memory card is not inserted<br />
Turn off the camera power and insert the memory card again<br />
Turn off the camera power and turn it on again<br />
No Image!<br />
There are no images stored on the memory<br />
Take images<br />
Insert a memory card that is holding some images<br />
File Error!<br />
File error<br />
Delete the erroneous files.<br />
Memory card error<br />
Contact a camera service centre<br />
Low Battery!<br />
There is low battery capacity<br />
Insert a fully charged battery<br />
Low Light!<br />
When taking pictures in dark places<br />
Take pictures in Flash Photography mode.<br />
DCF Full Error<br />
Violation of DCF format<br />
Copy the images to a PC and format the memory.<br />
Before contacting a service centre<br />
Please check the following<br />
The camera doesn’t switch on<br />
There is low battery capacity<br />
Insert a fully charged battery (p.13)<br />
Battery is inserted incorrectly with the polarities reversed.<br />
Insert the battery according to the polarity marks (+, -)<br />
The rechargeable battery is not inserted<br />
Insert the battery and turn on the camera<br />
The camera power ceases while in use<br />
The battery is exhausted<br />
Insert a fully charged battery<br />
The Camera is turned off automatically<br />
Turn on the camera power again.
Before contacting a service centre<br />
Battery power quickly drains<br />
The Camera is being used in low temperatures<br />
Keep the camera in warm conditions (i.e. inside a coat or jacket) and only<br />
remove it in order to take images<br />
Camera does not take images when pressing the Shutter button<br />
There is insufficient memory capacity<br />
Delete unnecessary image files<br />
The memory card has not been formatted<br />
Format the memory card (p.52)<br />
The memory card is exhausted<br />
Insert a new memory card<br />
The memory card is locked<br />
Refer to [Card Locked!] error message (p.56)<br />
The cameras power is off<br />
Turn the camera power on<br />
The battery is exhausted<br />
Insert charged battery (p.13)<br />
Battery is inserted incorrectly with the polarities reversed.<br />
Insert the battery according to the polarity marks (+, -)<br />
The camera suddenly stops working while in use<br />
The camera stopped due to a malfunction<br />
Remove /re-insert battery and switch the camera on<br />
The images are unclear<br />
A picture was taken the subject without setting an appropriate macro mode<br />
Select an appropriate macro mode to take a clear image.<br />
Taking a picture beyond the flash range<br />
Take a picture within the flash range<br />
The lens is smudged or dirty<br />
Clean the lens<br />
The flash does not fire<br />
Flash off mode has been selected<br />
Dis-engage flash off mode<br />
The camera mode can't use flash<br />
Refer to the FLASH instruction (p.25)<br />
Incorrect date and time is displayed<br />
The date and time have been set incorrectly or the camera has adopted the<br />
default settings<br />
Reset the date and time correctly<br />
The camera buttons do not operate<br />
Camera malfunction<br />
Remove/re-insert battery and switch the camera on<br />
A card error has occurred while the memory card is in the camera.<br />
Incorrect memory card format<br />
Re-format the memory card<br />
The images don't play back<br />
Incorrect file name (Violation of DCF format)<br />
Do not change the image file name<br />
57
58<br />
Before contacting a service centre<br />
Colour of image is different to the original scene<br />
White balance or effect setting is incorrect<br />
Select appropriate White balance and effect<br />
Images are too bright<br />
Exposure is excessive<br />
Reset exposure compensation<br />
No image on external monitor<br />
The external monitor has not been connected properly with the camera<br />
Check the connection cables<br />
There are incorrect files in the memory card<br />
Insert a memory card that has correct files<br />
When using the PC’s explorer, the [Removable Disk] file does not show<br />
Cable connection is incorrect<br />
Check the connection<br />
The camera is off<br />
Turn the camera on<br />
The operating system is not Windows 98, 98SE, 2000, ME, XP/ Mac OS Mac OS<br />
9.0 ~ 10.4. Alternatively the PC does not support USB<br />
Install Windows 98, 98SE, 2000, ME, XP/ Mac OS 9.0 ~ 10.4 to PC that<br />
supports USB<br />
The camera driver is not installed<br />
Install a [USB Storage Driver]<br />
Specifications<br />
Image Sensor<br />
- Type : 1/1.8CCD<br />
- Effective Pixel : Approx. 10.1 Mega-pixel<br />
- Total Pixel : Approx. 10.3 Mega-pixel<br />
Lens<br />
- Focal Length : Schneider Lens f = 7.4 ~ 22.2mm<br />
(35mm film equivalent : 35 ~ 105mm)<br />
- F No. : F2.8 ~ F5.1<br />
- Digital Zoom :Still Image mode : 1.0X ~ 5.0X<br />
Play mode : 1.0X ~ 11.4X (depends on image size)<br />
LCD Monitor : 2.5" color TFT LCD (230,000 pixel)<br />
Focusing<br />
- Type : TTL auto focus<br />
- Range<br />
Wide Tele<br />
Normal 80cm ~ Infinity<br />
Macro 4cm ~ 80cm 50cm ~ 80cm<br />
Auto Macro 4cm ~ Infinity 50cm ~ Infinity<br />
Shutter<br />
- Speed : - Auto : 1 ~ 1/1,500 sec. - <strong>Manual</strong> Mode : 15 ~ 1/1,500 sec.<br />
- Night : 4 ~ 1/1,500 sec. - Fireworks : 4 sec.<br />
Exposure<br />
- Control : Program AE, <strong>Manual</strong> Exposure<br />
Metering : Multi, Spot, Center<br />
- Compensation : 2EV (1/3EV steps)<br />
- ISO Equivalent : Auto, 100, 200, 400, 800, 1000<br />
Flash<br />
- Modes : Auto, Auto & Red-eye reduction, Fill-in, Slow sync, Flash off<br />
- Range : Wide : 0.4m ~ 4.5m, Tele : 0.5m ~ 2.5m (ISO AUTO)<br />
- Recharging Time : Approx. 4 sec.
Specifications<br />
Sharpness : Soft, Normal, Vivid<br />
Effect : Normal, B&W, Sepia, Red, Green, Blue, Negative, Composite, Frame,<br />
GIF animation<br />
White Balance : Auto, Daylight, Cloudy, Fluorescent_H, Fluorescent_L,<br />
Tungsten, Custom<br />
Voice Recording : Voice Recording (Max 1 hours)<br />
Voice Memo in Still Image (Max. 10 sec.)<br />
Date Imprinting : Date&Time, Date, Off (user selectable)<br />
Shooting<br />
- Still Image :Modes : Auto, Program, <strong>Manual</strong>, ASR, Effect, Scene<br />
Scene : Night, Portrait, Children, Landscape, Text, Close-up,<br />
Sunset, Dawn, Backlight, Fireworks, Beach & Snow<br />
Continuous : Single, Continuous, H. Continuous, AEB, Motion<br />
Capture<br />
Self-timer : 2 sec., 10 sec., Double self timer (10sec. & 2sec.),<br />
Remote Controller<br />
- Movie Clip :With Audio (recording time : memory capacity dependent)<br />
Size : 640x480, 320x240 (3X Optical Zoom and Mute in Zooming)<br />
Frame rate : 30 fps, 15 fps<br />
Color Effect & WB selectable<br />
Movie Editing (Embedded): Pause during recording, Still Image<br />
Capture, Time Trimming<br />
Storage<br />
- Media :Internal Memory : About 20MB<br />
External Memory (Optional) : MMC/SD card (up to 1GB guaranteed)<br />
- File Format :Still Image : JPEG (DCF), EXIF 2.2, DPOF 1.1, PictBridge 1.0<br />
Movie : AVI (MPEG-4) Audio : WAV<br />
- Image Size<br />
10M 7M 5M 3M 1M<br />
3648X2736 3136X2352 2688X2016 2240X1680 1024X768<br />
- Capacity (256MB MMC)<br />
10M 7M 5M 3M 1M<br />
Super Fine 49 66 88 124 451<br />
Fine 95 126 167 229 691<br />
Normal 139 182 237 319 840<br />
Image Play<br />
- Type : Single image, Thumbnails, Slide show with Effect & BGM, Movie Clip,<br />
Photo Gallery<br />
- Editing : Color Effect , Trimming, Rotating, Resizing<br />
Interface<br />
- Digital output connector : USB 2.0<br />
- Audio : Mono<br />
- Video output : NTSC, PAL (user selectable)<br />
- DC power input connector : 24pin Connector<br />
Power Source<br />
- Rechargeable battery : SLB-0837(B) (800mAh)<br />
- Adaptor : DC 4.2V (SAC-45, SUC-C2)<br />
- Cradle : SCC-NV2 (Optional)<br />
* Included battery may depending on sales region.<br />
Dimensions (WxHxD) : 96.5 x 60 x 18.5mm (projecting part 8mm)<br />
Weight : 148.7g (without battery and card)<br />
Operating Temperature : 0 ~ 40C<br />
Operating Humidity : 5 ~ 85%<br />
Software<br />
- Camera Driver : Storage Driver<br />
(Windows 98/98SE/2000/ME/XP, Mac OS 9.0 ~ 10.4)<br />
- Application : Digimax Master, Adobe Reader<br />
Specifications are subject to change without prior notice.<br />
All trademarks are the property of their respective owners.<br />
59
60<br />
Software Notes<br />
Please ensure that you read this instruction manual carefully before use.<br />
The attached software is a camera driver and image editing software tool for<br />
Windows.<br />
Under no circumstances should all or part of either the software or the user<br />
manual be reproduced.<br />
Copyrights for software are licensed only for use with a camera.<br />
In the unlikely event of a manufacturing fault, we will repair or exchange your<br />
camera.<br />
We cannot, however, be held responsible in any way for damage caused by<br />
inappropriate use.<br />
Using a Hand-made (self assembled) PC or a PC and OS that has not been<br />
guaranteed by the manufacturer is not covered by the Samsung warranty.<br />
Before using this manual, you should have a basic knowledge of computers and<br />
O/S (Operating Systems).<br />
System Requirements<br />
For Windows For Macintosh<br />
PC with processor better than Pentium II 450MHz<br />
(Pentium 700MHz recommended)<br />
Power Mac G3 or later<br />
Windows 98/ 98SE/ 2000/ ME/ XP Mac OS 9.0 ~ 10.4<br />
Minimum 64MB RAM (XP : 128MB) Minimum 64MB RAM<br />
200MB of available hard disk space<br />
(1GB recommended)<br />
110MB of available hard-disk space<br />
USB port USB port<br />
CD-ROM drive CD-ROM drive<br />
1024x768 pixels, 16bit color display<br />
compatible monitor<br />
(24bit color display recommended)<br />
For playing back a movie clip<br />
Mac OS 10.1 or later<br />
MPlayer, VLC Media Player<br />
About the software<br />
After inserting the CD-ROM provided with this camera into the CD-ROM drive, the<br />
following window should automatically run.<br />
Before connecting the camera to the PC, you<br />
should first install the camera driver.<br />
Screen Captures illustrated on this manual<br />
is based on English Edition of Windows.<br />
Camera driver : This enables images to transfer between the camera and<br />
PC.<br />
This camera uses the USB Storage Driver as the camera driver. You can use<br />
the camera as a USB card reader. After installing the driver and connecting this<br />
camera to the PC, you can find [Removable Disk] in [Windows Explorer] or [My<br />
Computer]. A USB Storage Driver is provided only for Windows. A USB Driver<br />
for MAC is not included with the Application CD. You can use the camera with<br />
Mac OS 9.0 ~ 10.4.<br />
XviD codec : This makes movie clips (MPEG-4) recorded with this camera<br />
play back on a PC.<br />
To play back a movie clip recorded with this camera, you must install the XviD<br />
codec. If a movie clip recorded with this camera does not play well, install this<br />
codec. This software is only compatible with Windows.<br />
Digimax Master : This is the all-in-one multi media software solution.<br />
You can download, view, edit and save your digital images and movie files with<br />
this software. This software is only compatible with Windows.
About the software<br />
INFORMATION<br />
Be sure to check the system requirements before installing the driver.<br />
To play back the movie taken with this camera on the computer, DirectX 9.0<br />
must be installed.<br />
You should allow 5 - 10 seconds for running the automatic setup program<br />
according to the capability of your computer. If the frame does not show, run<br />
the [Windows Explorer] and select [Samsung.exe] in the CD-ROM Drive.<br />
PDF documents of user manual are included in the Software CD-ROM<br />
supplied with this camera. Search the PDF files with Window's explorer.<br />
Before opening the PDF files, you must install the Adobe Reader included in<br />
the Software CD-ROM.<br />
To install the Adobe Reader 6.0.1 correctly, Internet Explorer 5.01 or later<br />
had to be installed. Visit "www.microsoft.com" and upgrade the Internet<br />
Explorer.<br />
Setting up the application software<br />
To use this camera with a PC, install the application software first.<br />
After this has been done, the stored images in the camera can be moved to the<br />
PC and can be edited by an image editing program.<br />
You can visit the Samsung web-site through the internet.<br />
http://www.samsungcamera.com : English<br />
http://www.samsungcamera.co.kr : Korean<br />
1. The auto run frame will display.<br />
Click the [Install] menu in the Auto<br />
run frame.<br />
2. Install the camera driver and DirectX by selecting a button shown on the<br />
monitor. If an latest version of DirectX was installed on your computer, DirectX<br />
may not be installed.<br />
61
62<br />
Setting up the application software<br />
3. To play back the movie clip recorded with this camera on the computer, install<br />
the XviD codec.<br />
The XviD codec is distributed according to and under the terms and conditions of<br />
the GNU General Public License and anyone can copy, modifiy and distribute<br />
this codec freely, but WITHOUT ANY WARRANTY, IMPLIED OR<br />
EXPRESSED, OF MERCHANTABILITY OR FITNESS FOR A PARTICULAR<br />
PURPOSE; provided, however, that you have to follow the GNU General Public<br />
License whenever you are distributing this codec or modification thereof.<br />
For more information see the GNU General Publice License documents<br />
(http://www.gnu.org/copyleft/gpl.html).<br />
4. Install the Digimax Master in order.
Setting up the application software<br />
5. After restarting the computer, connect the PC to the camera with the USB<br />
cable.<br />
6. Turn on the camera power.<br />
The [Found New Hardware Wizard] will<br />
open and the computer will recognise the<br />
camera.<br />
If your OS is Windows XP, an image<br />
viewer program will open.<br />
If the download window of Digmax Master<br />
opens after starting Digimax Master, the<br />
camera driver was set up successfully.<br />
INFORMATION<br />
If you have installed the camera driver, The [Found New Hardware Wizard]<br />
may not open.<br />
On a Windows 98 or 98 SE system, the Found New Hardware Wizard<br />
dialog box opens and a window asking you to select a driver file may<br />
appear. In this case, specify "USB Driver" in the CD supplied.<br />
Starting PC mode<br />
If you connect the USB cable to a USB port on your PC and then turn on the<br />
power, the camera will automatically switch to "computer connection mode".<br />
In this mode, you can download stored images to your PC through the USB<br />
cable.<br />
The LCD monitor is always turned off in PC mode.<br />
Connecting the camera to a PC<br />
1. Press the Setup menu button and press the F4<br />
menu button.<br />
2. Select the [USB]-[Computer] menu by using the<br />
smart button.<br />
3. Connect the PC to the camera with the USB cable.<br />
Computer<br />
Printer<br />
<br />
Format<br />
Copy to Card<br />
Video Out<br />
USB<br />
Reset<br />
Exit:BACK<br />
63
64<br />
Starting PC mode<br />
Connecting the camera to a PC<br />
[Using the USB cable with Cradle (optional)]<br />
[Using the USB cable with Camera]<br />
If you selected [Printer] in Step 4, when you connect the camera to your<br />
printer, the [Connecting Printer] message will display and the connection will<br />
not be established.<br />
In this case, disconnect the USB cable, and then follow the procedure from<br />
Step 2 and onward.<br />
Disconnecting the camera and PC : Refer to page 65<br />
(Removing the removable disk).<br />
INFORMATION<br />
Before inserting any cables or AC adapter, check the directions and do not<br />
insert by force. It may cause breakage of cable or camera.<br />
Downloading stored images<br />
You can download the still images stored on the camera to your PC's hard disk<br />
and print them or use a photo editing software to edit them.<br />
1. Connect the camera to your PC with the USB cable.<br />
2. On your computer's desktop display, select<br />
[My computer] and double click [Removable<br />
Disk DCIM 100SSCAM].<br />
The image files will then be displayed.<br />
3. Select an image and press the right mouse<br />
button.<br />
4. A pop-up menu will open.<br />
Click the [Cut] or [Copy] menu.<br />
- [Cut] : cuts a selected file.<br />
- [Copy] : copies files.<br />
5. Click a folder where you want to paste the file.
Starting PC mode<br />
6. Press the right mouse button and a pop-up<br />
menu will open. Click [Paste].<br />
7. An image file is transferred from the camera<br />
to your PC.<br />
- By using [Digimax Master], you can see the stored images in the memory<br />
directly on the PC monitor and you can copy or move the image files.<br />
CAUTION<br />
We recommend that you should copy the images to the PC to view them.<br />
Opening images directly from the removable disk may be subject to<br />
unexpected disconnection.<br />
When you upload a file that is not taken by this camera to the Removable<br />
Disk, the [File Error!] message will be displayed on the LCD monitor in the<br />
PLAY mode, and nothing is displayed in THUMBNAIL mode.<br />
Removing the removable disk<br />
Windows 98/98SE<br />
1. Check whether the camera and PC are transferring a file.<br />
If the camera status lamp blinks, please wait until the lamp has finished<br />
blinking and is constantly on.<br />
2. Unplug the USB cable.<br />
Windows 2000/ME/XP<br />
(The illustrations may differ from those shown depending on the Windows O/S.)<br />
1. Check whether the camera and PC are transferring a file.<br />
If the camera status lamp blinks, please wait until the lamp has finished<br />
blinking and is constantly on.<br />
2. Double-click the [Unplug or Eject Hardware]<br />
icon on the task bar.<br />
3. The [Unplug or Eject Hardware] window will<br />
open. Select the [USB Mass Storage<br />
Device] and click the [Stop] button.<br />
4. The [Stop a Hardware device] window will<br />
open. Select the [USB Mass Storage<br />
Device] and click the [OK] button.<br />
5. A [Safe to Remove Hardware] window will<br />
open. Click the [OK] button.<br />
[Double-click!]<br />
65
66<br />
CAUTION<br />
Removing the removable disk<br />
6. A [Unplug or Eject Hardware] window will open.<br />
Click the [Close] button and the removable disk<br />
will be removed safely.<br />
7. Unplug the USB cable.<br />
Setting up the USB Driver for MAC<br />
1. A USB Driver for MAC is not included with the software CD as MAC OS<br />
supports the camera driver.<br />
2. Check the MAC OS version during start-up.<br />
This camera is compatible with MAC OS 9.0 ~ 10.4.<br />
3. Connect the camera to the Macintosh and turn the camera power on.<br />
4. A new icon will be displayed on the desktop after connecting the camera to the MAC.<br />
Using the USB Driver for MAC<br />
1. Double click a new icon on the desktop and the folder in the memory will be<br />
displayed.<br />
2. Select an image file and copy or move it to MAC.<br />
For Mac OS 10.0 or later : First complete uploading from computer to<br />
camera and then remove the removable disk<br />
with the Extract command.<br />
If a movie clip can’t play back on the Mac OS, please visit the following<br />
site (http://www.divx.com/divx/mac/) and download the codec. Or, use a<br />
media player that supports the Xvid codec (Mplayer, VLC (VideoLAN<br />
Client) media player).<br />
Removing the USB Driver for Windows 98SE<br />
To remove the USB driver, refer to the process shown below.<br />
1. Connect the camera to your PC and turn them on.<br />
2. Check whether the Removable Disk is on the [My Computer].<br />
3. Remove the [Samsung Digital Camera] on the Device manager.<br />
4. Disconnect the USB cable.<br />
5. Remove the [Samsung USB Driver] on the Add / Remove Programs Properties.<br />
6. Uninstallation is complete.
Digimax Master<br />
You can download, view, edit and save your images and movies with this<br />
software. This software is only compatible with Windows except for<br />
the Windows 98.<br />
To start the program, click [Start Programs Samsung Digimax Master<br />
Digimax Master].<br />
Downloading images<br />
1. Connect the camera to your PC.<br />
2. A window for downloading images will<br />
display after connecting the camera to<br />
your PC.<br />
- To download the captured images,<br />
select the [Select All] button.<br />
- Select desired folder in the window and<br />
click the [Select All] button. You can<br />
save captured images and selected folders.<br />
- If you click the [Cancel] button, downloading<br />
will be cancelled.<br />
3. Click [Next >] button.<br />
4. Select a destination and make a folder to<br />
save downloaded images and folders.<br />
- Folder names can be made in order of date<br />
and images will be downloaded.<br />
- Folder name will be made as you want and<br />
images will be downloaded.<br />
- After selecting a folder that was made<br />
before, images will be downloaded.<br />
5. Click [Next >] button.<br />
6. A window will open as shown alongside.<br />
The destination of the selected folder will be<br />
displayed on the upper side of the window.<br />
Click the [Start] button to download the<br />
images.<br />
7. Downloaded images will be displayed.<br />
67
68<br />
Digimax Master<br />
Image viewer : You can view the stored images.<br />
<br />
<br />
<br />
<br />
<br />
<br />
- Image viewer functions are listed below.<br />
Menu bar : You can select menus.<br />
File, Edit, View, Tools, Change functions, Auto download, help, etc.<br />
Image selection window : You can select the desired images in this window.<br />
Media type selection menu : You can select image viewer, image edit and<br />
movie edit functions in this menu.<br />
Preview window : You can preview an image or a movie clip and check the<br />
multi media information.<br />
Zoom bar : You can change preview size.<br />
Folder display window : You can see the folder location of the selected<br />
image.<br />
Image display window : Images in the selected folder are displayed.<br />
Refer to the [Help] menu in Digimax Master for further information.<br />
Image edit : You can edit the still image.<br />
<br />
<br />
- Image edit functions are listed below.<br />
Edit menu : You can select the following menus.<br />
[Tools] : You can resize or crop the selected image. See the [Help] menu.<br />
[Adjust] : You can modify image quality. See the [Help] menu.<br />
[Retouch] : You can change image or insert effects on the image. See the<br />
[Help] menu.<br />
Drawing tools : Tools for editing an image.<br />
Image display window : A selected image displays in this window.<br />
Preview window : You can preview the changed image.<br />
A still image edited with Digimax Master can’t be played back on the camera.<br />
Refer to the [Help] menu in Digimax Master for further information.
Digimax Master<br />
Movie edit : You can get the still image, movie clip, narration, music files together<br />
in a movie clip.<br />
<br />
- Movie clip edit functions are listed below.<br />
Edit menu : You can select the following menus.<br />
[Add Media] : You can add other media elements to a movie.<br />
[Edit Clip] : You can change the brightness, contrast, colour and saturation.<br />
[Effects] : You can insert an effect.<br />
[Set Text] : You can insert texts.<br />
[Narrate] : You can insert a narration.<br />
[Produce] : You can save the edited multi media as a new file name.<br />
You can select AVI, Windows media (wmv), Windows media<br />
(asf) and movie clip for this camera (avi, MPEG-4) file types.<br />
Frame display window : You can insert multi media in this window.<br />
Some movie clips that were compressed with a codec that is not compatible with<br />
the Digimax Master can’t play back in the Digimax Master.<br />
Refer to the [Help] menu in Digimax Master for further information.<br />
<br />
FAQ<br />
Please check the following if the USB connection malfunctions.<br />
Case 1 USB cable is not connected or it is not the supplied USB cable.<br />
Connect the supplied USB cable.<br />
Case 2 The camera is not recognised by your PC.<br />
Sometimes, the camera may appear under [Unknown Devices] in<br />
Device Manager.<br />
Install the camera driver correctly.<br />
Turn off the camera, remove the USB cable, plug in the USB cable<br />
again, and then turn on the camera.<br />
Case 3 There is an unexpected error during file transfer.<br />
Turn the camera power off and on again. Transfer the file again.<br />
Case 4 When using the USB hub.<br />
There may be a problem in connecting the camera to the PC through<br />
the USB hub if the PC and the hub are not compatible. Wherever<br />
possible, connect the camera to the PC directly.<br />
Case 5 Are other USB cables connected to the PC?<br />
The camera may malfunction when it is connected to the PC at the<br />
same time as another USB cable. In this case, disconnect the other<br />
USB cable, and connect only one USB cable to the camera.<br />
69
70<br />
FAQ<br />
Case 6 When I open the Device Manager (by clicking Start (Settings) <br />
Control Panel (Performance and Maintenance) System <br />
(Hardware) Device Manager), there are Unknown Devices or Other<br />
Devices entries with a yellow question mark (?) beside them or<br />
devices with an exclamation mark (!) beside them.<br />
Right-click on the entry with the question (?) or exclamation (!) mark<br />
and select "Remove". Restart the PC and connect the camera again.<br />
For Windows 98 PC, remove the camera driver also, restart the PC,<br />
and then reinstall the camera driver.<br />
Case 7 In some security programs (Norton Anti Virus, V3, etc.), the computer<br />
may not recognise the camera as a removable disk.<br />
Stop the security programs and connect the camera to the computer.<br />
Refer to the security program instructions about how to temporarily<br />
disable the program.<br />
Case 8 The camera is connected to the USB port located on the front of the<br />
computer.<br />
When the camera is connected to the USB port located on the front of<br />
the computer, the computer may not recognise the camera. Connect<br />
the camera to the USB port located on the back of the computer.<br />
When the movie clip doesn’t play back on the PC<br />
When the movie clip recorded by the camera doesn’t play back on the PC,<br />
the causes are mostly due to the codec installed on the PC.<br />
When codec for play back the movie clip isn’t installed<br />
Install the codec as listed below.<br />
[ Installing codec for Windows ]<br />
1) Insert the CD provided with the camera.<br />
2) Run the Windows Explorer and select [CD-ROM drive:\XviD] folder and click<br />
the XviD-1.1.0-30122005.exe file.<br />
The XviD codec is distributed according to the GNU General Public License<br />
and everyone can copy, distribute and change this codec. This License<br />
applies to any program or other work which contains a notice placed by the<br />
copyright holder saying it may be distributed under the terms of this General<br />
Public License.<br />
For more information, see the License documents<br />
(http://www.gnu.org/copyleft/gpl.html).<br />
When the DirectX 9.0 or later is not installed<br />
Install the DirectX 9.0 or later<br />
1) Insert the CD provided with the camera<br />
2) Run the windows explorer and select the [CD-ROM drive:\ USB Driver\<br />
DirectX 9.0] folder and click the DXSETUP.exe file.<br />
The DirectX will be installed. Visit the following site for downloading the<br />
DirectX. http://www.microsoft.com/directx
FAQ<br />
If a PC (Windows 98) stops responding while the camera and PC are connected<br />
repeatedly<br />
If a PC (Windows 98) is turned on for a long time and the camera is<br />
connected repeatedly, the PC may not recognise the camera. In this case, restart<br />
the PC.<br />
If a PC connected with the camera stops responding while Windows is starting.<br />
In this case, disconnect the PC and the camera and Windows will start.<br />
If the problem happens continuously, set the Legacy USB Support to disable<br />
and re-start the PC. The Legacy USB Support is in the BIOS setup menu.<br />
(The BIOS setup menu differs from the PC manufacturers and some BIOS<br />
menus don’t have Legacy USB Support) If you can’t change the menu by<br />
yourself, contact to the PC manufacturer or BIOS manufacturer.<br />
If the movie clip can't be deleted, or if a removable disk can’t be extracted or if an<br />
error message displays during the file transfer.<br />
If you install only the Digimax Master, the problems mentioned above<br />
occasionally happen.<br />
- Close the Digimax Master program by clicking the Digimax Master icon on<br />
the Taskbar.<br />
- Install all the application programs included in the software CD.<br />
Correct Disposal of This Product<br />
Correct Disposal of This Product (Waste Electrical & Electronic<br />
Equipment)<br />
(Applicable in the European Union and other European countries with<br />
separate collection systems) This marking shown on the product or its<br />
literature, indicates that it should not be disposed with other household<br />
wastes at the end of its working life.<br />
To prevent possible harm to the environment or human health from uncontrolled<br />
waste disposal, please separate this from other types of wastes and recycle it<br />
responsibly to promote the sustainable reuse of material resources. Household<br />
users should contact either the retailer where they purchased this product, or their<br />
local government office, for details of where and how they can take this item for<br />
environmentally safe recycling. Business users should contact their supplier and<br />
check the terms and conditions of the purchase contract.<br />
This product should not be mixed with other commercial wastes for disposal.<br />
Samsung Techwin cares for the environment at all product<br />
manufacturing stages to preserve the environment, and is<br />
taking a number of steps to provide customers with more<br />
environment-friendly products. The Eco mark represents<br />
Samsung Techwin's will to create environment-friendly<br />
products, and indicates that the product satisfies the EU<br />
RoHS Directive.<br />
71
72<br />
FCC notice<br />
NOTE :<br />
This equipment has been tested and found to comply with the limits for a<br />
Class B digital device, pursuant to part 15 of the FCC Rules. These limits are<br />
designed to provide reasonable protection against harmful interference in a<br />
residential installation.<br />
This equipment generates, uses and can radiate radio frequency energy and,<br />
if not installed and used in accordance with the instructions, may cause<br />
harmful interference to radio communications. However, there is no guarantee<br />
that interference will not occur in a particular installation. If this equipment does<br />
cause harmful interference to radio or television reception, which can be<br />
determined by turning the equipment off and on, the user is encouraged to try<br />
to correct the interference by one or more of the following measures:<br />
- Reorientate, or relocate, the receiving antenna.<br />
- Increase the separation between the equipment and receiver.<br />
- Connect the equipment into an outlet on a circuit different from that to which<br />
the receiver is connected.<br />
- Consult the dealer or an experienced radio / TV technician for help.<br />
CAUTION :<br />
Changes or modifications not expressly approved by the manufacturer<br />
responsible for compliance could void the user’s authority to operate the<br />
equipment.<br />
Declaration of Conformity<br />
Trade Name : SAMSUNG TECHWIN<br />
Model No. : Samsung NV10<br />
Responsible Party : Samsung Opto-Electronics America, INC.<br />
Address : 40 Seaview Dr. Secaucus,NJ 07094<br />
Telephone No. : 201-902-0347<br />
This device complies with Part 15 of the FCC Rules. Operation is subject to<br />
the following two conditions: (1) This device may not cause harmful<br />
interference, and (2) this device must accept any interference received,<br />
including interference that may cause undesired operation.<br />
MEMO
SAMSUNG TECHWIN CO., LTD.<br />
OPTICS & DIGITAL IMAGING DIVISION<br />
145-3, SANGDAEWON 1-DONG, JUNGWONGU,<br />
SUNGNAM-CITY, KYUNGKI-DO, KOREA<br />
462-121<br />
TEL : (82) 31-740-8086, 8088, 8090, 8092, 8099<br />
FAX : (82) 31-740-8398<br />
www.samsungcamera.com<br />
SAMSUNG OPTO-ELECTRONICS AMERICA, INC.<br />
HEADQUARTERS<br />
40 SEAVIEW DRIVE, SECAUCUS,<br />
NJ07094, U.S.A.<br />
TEL : (1) 201-902-0347<br />
FAX : (1) 201-902-9342<br />
WESTERN REGIONAL OFFICE<br />
18600 BROADWICK ST.,<br />
RANCHO DOMINGUEZ, CA 90220, U.S.A.<br />
TEL : (1) 310-900-5263/5264<br />
FAX : (1) 310-537-1566<br />
www.samsungcamerausa.com<br />
SAMSUNG OPTO-ELECTRONICS FRANCE S.A.S.<br />
TOUR MAINE MONTPARNASSE<br />
33, AVENUE DE MARINE<br />
75755, PARIS CEDEX 15, FRANCE<br />
TEL : +33 (0)1 4279 2200<br />
FAX : +33 (0)1 4320 4510<br />
www.samsungphoto.fr<br />
SAMSUNG OPTO-ELECTRONICS GmbH<br />
ZENTRALE, KEINE REPARATUR<br />
AM KRONBERGER HANG 6<br />
D-65824 SCHWALBACH/TS, GERMANY<br />
TEL: 49 (0) 6196 66 5303<br />
FAX: 49 (0) 6196 66 5366<br />
TECHNISCHE SERVICE HOTLINE:<br />
00800 4526 3727<br />
(nur kostenfrei für Anrufe aus Deutschland)<br />
Die Adressen Ihrer Kundendienste sowie die<br />
Garantiebestimmungen entnehmen Sie bitte aus dem<br />
beiliegenden Faltblatt (SAMSUNG INTERNATIONAL<br />
WARRANTY CERTIFICATE)<br />
INTERNET: www.samsungcameras.de<br />
TIANJIN SAMSUNG OPTO-ELECTRONICS CO.,LTD.<br />
7 PINGCHANG ROAD NANKAI DIST., TIANJIN<br />
P.R CHINA POST CODE : 300190<br />
TEL : (86) 22-2761-4599<br />
FAX : (86) 22-2769-7558<br />
www.samsungcamera.com.cn<br />
SAMSUNG OPTO-ELECTRONICS UK LIMITED<br />
SAMSUNG HOUSE 1000 HILLSWOOD DRIVE<br />
HILLSWOOD BUSINESS PARK<br />
CHERTSEY KT16 OPS U.K.<br />
TEL : 00800 12263727<br />
(free for calls from UK only)<br />
UK Service Hotline : 01932455320<br />
www.samsungcamera.co.uk<br />
RUSSIA INFORMATION CENTER<br />
SAMSUNG ELECTRONICS<br />
117545 ST. DOROZHNAYA BUILDING 3,<br />
KORPUS 6, ENTRANCE 2, MOSCOW, RUSSIA<br />
TEL : (7) 095-363-1700<br />
CALL FREE : (8) 800 200 0 400 (from Russia only)<br />
www.samsungcamera.ru<br />
Internet address - http : //www.samsungcamera.com<br />
The CE Mark is a Directive conformity<br />
mark of the European Community (EC)<br />
6806-0045