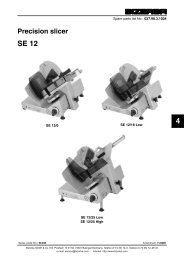
IMPORTANT NOTICE - Berkel Sales & Service
IMPORTANT NOTICE - Berkel Sales & Service
IMPORTANT NOTICE - Berkel Sales & Service

You also want an ePaper? Increase the reach of your titles
YUMPU automatically turns print PDFs into web optimized ePapers that Google loves.
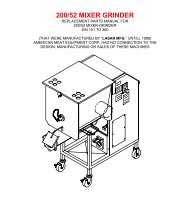
10. Two sets of green and red pushbuttons are located on the front of the machine that activate the magnetic<br />
contactors that control the mix and grind motors. The magnetic interlock switch is mounted in the pushbutton<br />
box. It lines up with the magnet attached to the product mixer safety cover. When the safety cover is raised the<br />
machine will stop operation.<br />
11. Push the green start button for grind. CHECK THE ROTATION OF THE AUGER DRIVE SHAFT; ROTATION<br />
MUST BE COUNTER-CLOCKWISE as indicated by the rotation decal affixed to the grinding bowl. ROTATION<br />
MUST ONLY BE CHECKED WITH THE GRINDING AUGER REMOVED, otherwise serious irreparable damage<br />
may occur to grinding components.<br />
12. Push the green start button for mix. CHECK ROTATION OF THE MIXING PADDLE; ROTATION MUST BE<br />
COUNTER-CLOCKWISE as indicated by the rotation decal located on the paddle front mounting hub.<br />
Backwards operation will not allow mixing paddle to feed product to the grinding auger.<br />
13. If machine runs clockwise (backwards), it must be rewired to correct rotation, otherwise serious irreparable<br />
damage may occur to grinding components. Both the auger and the mixing paddle must operate in the same<br />
direction.<br />
14. Check operation of optional footswitch if equipped. Plug footswitch cord into fitting at the bottom of the<br />
pushbutton control box. Move toggle selector to foot. The machine will operate with pressure on the footswitch<br />
treadle. Releasing the treadle stops the machine. The footswitch operates the mix and grind together.<br />
15. Insert auger assembly into grinding bowl, place knife (sharp edges out) onto the square end of the auger<br />
assembly. The breaker plate slides over the worm knife drive pin, and is held from rotating by pins in the grinding<br />
bowl. Install the retaining ring.<br />
ONLY HAND TIGHTEN RETAINING RING<br />
For best results, use knife and plate as a set. Do not operate machine for any period of time without product<br />
in the grinding bowl. This will cause heating and dulling of the knife and plate.<br />
16. Check placement of all warning labels and Manual. Machine is now ready for trained operators to process<br />
product.<br />
17. Use meat deflector attached to grinding bowl to eliminate meat splatter.<br />
18. Contact your local Distributor or BIRO directly if you have any questions or problems with the installation or<br />
operation of this machine.<br />
5