Owner's Manual Owner's Manual
Owner's Manual Owner's Manual
Owner's Manual Owner's Manual

You also want an ePaper? Increase the reach of your titles
YUMPU automatically turns print PDFs into web optimized ePapers that Google loves.
E<br />
8<br />
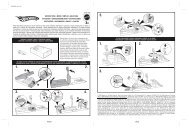
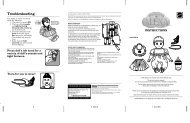
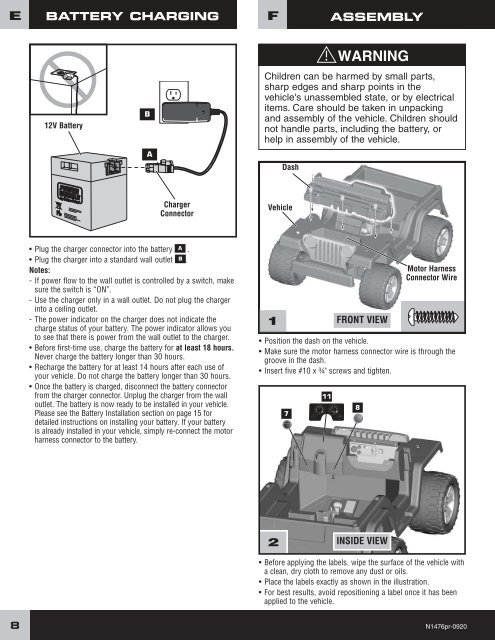
BATTERY CHARGING<br />
12V Battery<br />
B<br />
A<br />
Charger<br />
Connector<br />
• Plug the charger connector into the battery A .<br />
• Plug the charger into a standard wall outlet B .<br />
Notes:<br />
- If power flow to the wall outlet is controlled by a switch, make<br />
sure the switch is “ON”.<br />
- Use the charger only in a wall outlet. Do not plug the charger<br />
into a ceiling outlet.<br />
- The power indicator on the charger does not indicate the<br />
charge status of your battery. The power indicator allows you<br />
to see that there is power from the wall outlet to the charger.<br />
• Before first-time use, charge the battery for at least 18 hours.<br />
Never charge the battery longer than 30 hours.<br />
• Recharge the battery for at least 14 hours after each use of<br />
your vehicle. Do not charge the battery longer than 30 hours.<br />
• Once the battery is charged, disconnect the battery connector<br />
from the charger connector. Unplug the charger from the wall<br />
outlet. The battery is now ready to be installed in your vehicle.<br />
Please see the Battery Installation section on page 15 for<br />
detailed instructions on installing your battery. If your battery<br />
is already installed in your vehicle, simply re-connect the motor<br />
harness connector to the battery.<br />
F<br />
Children can be harmed by small parts,<br />
sharp edges and sharp points in the<br />
vehicle's unassembled state, or by electrical<br />
items. Care should be taken in unpacking<br />
and assembly of the vehicle. Children should<br />
not handle parts, including the battery, or<br />
help in assembly of the vehicle.<br />
1<br />
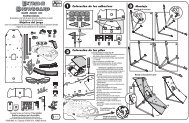
ASSEMBLY<br />
WARNING<br />
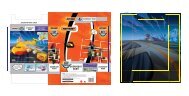
• Position the dash on the vehicle.<br />
• Make sure the motor harness connector wire is through the<br />
groove in the dash.<br />
• Insert five #10 x ¾" screws and tighten.<br />
2<br />
Dash<br />
Vehicle<br />
7<br />
11<br />
FRONT VIEW<br />
8<br />
INSIDE VIEW<br />
Motor Harness<br />
Connector Wire<br />
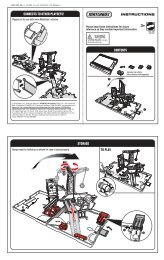
• Before applying the labels, wipe the surface of the vehicle with<br />
a clean, dry cloth to remove any dust or oils.<br />
• Place the labels exactly as shown in the illustration.<br />
• For best results, avoid repositioning a label once it has been<br />
applied to the vehicle.<br />
N1476pr-0920