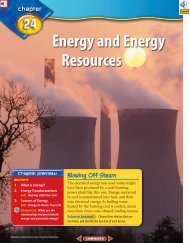
Chapter 24 Resource: Energy and Energy Resources
Chapter 24 Resource: Energy and Energy Resources
Chapter 24 Resource: Energy and Energy Resources

Create successful ePaper yourself
Turn your PDF publications into a flip-book with our unique Google optimized e-Paper software.
Copyright © Glencoe/McGraw-Hill, a division of the McGraw-Hill Companies, Inc.<br />
Name Date Class<br />
2<br />
Laboratory<br />
Activity<br />
Hydroelectric Generator<br />
Moving water has energy that you can use. For centuries, waterwheels have been used to turn<br />
millstones to grind grain or to run machines in factories. Today, moving water is used to make<br />
electricity. Dams along rivers create reservoirs where water is stored <strong>and</strong> then released when<br />
electricity is needed. In this laboratory activity, you can examine the series of energy transformations<br />
that occur when moving water is used to generate electrical energy.<br />
Strategy<br />
You will build a model hydroelectric generator.<br />
You will build a device to detect the electricity generated.<br />
You will demonstrate how the energy of moving water is converted to electrical energy.<br />
Materials<br />
small spool insulated magnetic wire (#28 or finer)<br />
metric ruler<br />
7.5-cm nails (2)<br />
scissors<br />
hammer<br />
7.5-cm ✕ 12.5-cm ✕ 5-cm wooden block<br />
2.5-cm nails (2)<br />
germanium diode (type 1N34A)<br />
white glue<br />
small bar magnet, 2–3 cm<br />
round piece from toy wooden construction set<br />
7.5-cm spokes from toy wooden construction set (8)<br />
small paper cups (8)<br />
ice pick<br />
cardboard strips, approximately 2.5 cm ✕ 15 cm (2)<br />
small nails (4)<br />
electrical tape<br />
cardboard rectangles, approximately 12.5 cm ✕ 17.5 cm (2)<br />
compass<br />
alligator clips (2)<br />
rubber tubing<br />
sink with running water<br />
Procedure<br />
1. Measure about 10 cm of magnetic wire.<br />
Starting beyond the 10-cm mark, begin<br />
wrapping the wire around the lower part of<br />
one of the 7.5-cm nails. Wrapping up <strong>and</strong><br />
down the nail, wrap 1,000 turns of wire<br />
around the nail. See Figure 1. When you<br />
are finished, the coil should be 2 to 3 cm<br />
long. Allow another 10 cm of wire to<br />
extend at the bottom end of the coil. Cut<br />
off any leftover wire.<br />
Figure 1<br />
<strong>Energy</strong> <strong>and</strong> <strong>Energy</strong> <strong>Resource</strong>s 11<br />
H<strong>and</strong>s-On Activities