23105S Carrier to Housing Leak Repair Procedure - Spicer
23105S Carrier to Housing Leak Repair Procedure - Spicer
23105S Carrier to Housing Leak Repair Procedure - Spicer

You also want an ePaper? Increase the reach of your titles
YUMPU automatically turns print PDFs into web optimized ePapers that Google loves.
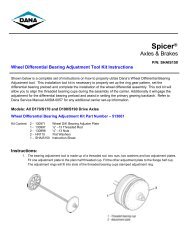
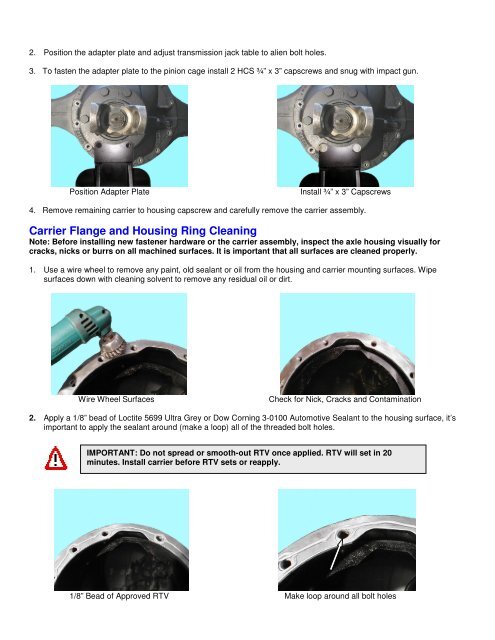
2. Position the adapter plate and adjust transmission jack table <strong>to</strong> alien bolt holes.<br />
3. To fasten the adapter plate <strong>to</strong> the pinion cage install 2 HCS ¾” x 3” capscrews and snug with impact gun.<br />
Position Adapter Plate Install ¾” x 3” Capscrews<br />
4. Remove remaining carrier <strong>to</strong> housing capscrew and carefully remove the carrier assembly.<br />
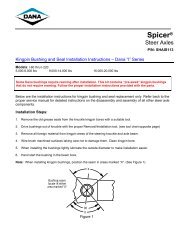
<strong>Carrier</strong> Flange and <strong>Housing</strong> Ring Cleaning<br />
Note: Before installing new fastener hardware or the carrier assembly, inspect the axle housing visually for<br />
cracks, nicks or burrs on all machined surfaces. It is important that all surfaces are cleaned properly.<br />
1. Use a wire wheel <strong>to</strong> remove any paint, old sealant or oil from the housing and carrier mounting surfaces. Wipe<br />
surfaces down with cleaning solvent <strong>to</strong> remove any residual oil or dirt.<br />
Wire Wheel Surfaces Check for Nick, Cracks and Contamination<br />
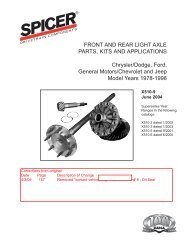
2. Apply a 1/8” bead of Loctite 5699 Ultra Grey or Dow Corning 3-0100 Au<strong>to</strong>motive Sealant <strong>to</strong> the housing surface, it’s<br />
important <strong>to</strong> apply the sealant around (make a loop) all of the threaded bolt holes.<br />
IMPORTANT: Do not spread or smooth-out RTV once applied. RTV will set in 20<br />
minutes. Install carrier before RTV sets or reapply.<br />
1/8” Bead of Approved RTV Make loop around all bolt holes