23105S Carrier to Housing Leak Repair Procedure - Spicer
23105S Carrier to Housing Leak Repair Procedure - Spicer
23105S Carrier to Housing Leak Repair Procedure - Spicer

Create successful ePaper yourself
Turn your PDF publications into a flip-book with our unique Google optimized e-Paper software.
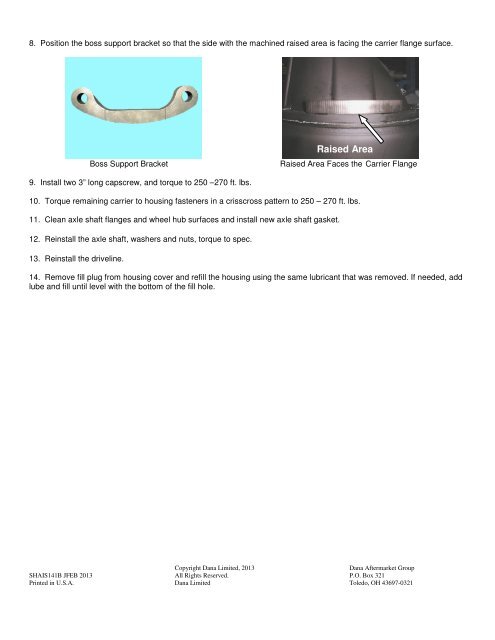
8. Position the boss support bracket so that the side with the machined raised area is facing the carrier flange surface.<br />
Boss Support Bracket Raised Area Faces the <strong>Carrier</strong> Flange<br />
9. Install two 3” long capscrew, and <strong>to</strong>rque <strong>to</strong> 250 –270 ft. lbs.<br />
10. Torque remaining carrier <strong>to</strong> housing fasteners in a crisscross pattern <strong>to</strong> 250 – 270 ft. lbs.<br />
11. Clean axle shaft flanges and wheel hub surfaces and install new axle shaft gasket.<br />
12. Reinstall the axle shaft, washers and nuts, <strong>to</strong>rque <strong>to</strong> spec.<br />
13. Reinstall the driveline.<br />
Raised Area<br />
14. Remove fill plug from housing cover and refill the housing using the same lubricant that was removed. If needed, add<br />
lube and fill until level with the bot<strong>to</strong>m of the fill hole.<br />
Copyright Dana Limited, 2013 Dana Aftermarket Group<br />
SHAIS141B JFEB 2013 All Rights Reserved. P.O. Box 321<br />
Printed in U.S.A. Dana Limited Toledo, OH 43697-0321