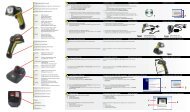
RS-232 Bluetooth Adapter Instructions - Intermec
RS-232 Bluetooth Adapter Instructions - Intermec
RS-232 Bluetooth Adapter Instructions - Intermec

You also want an ePaper? Increase the reach of your titles
YUMPU automatically turns print PDFs into web optimized ePapers that Google loves.
To use the <strong>Bluetooth</strong> adapter<br />
1 Install the <strong>Bluetooth</strong> adapter on your host PC.<br />
2 Create a <strong>Bluetooth</strong> connection between your scanner and host<br />
PC.<br />
3 Collect data with your scanner.<br />
4 (Optional) Configure your <strong>Bluetooth</strong> communications<br />
parameters.<br />
These instructions describe how to perform each step.<br />
Installing the <strong>RS</strong>-<strong>232</strong> <strong>Adapter</strong><br />
1 Insert the <strong>RS</strong>-<strong>232</strong> adapter into an unused serial COM port on<br />
your host PC. Make sure to note the COM port number.<br />
Note: If you are running Keyport Lite, the serial<br />
COM port on your host PC must match the COM<br />
port selected in Keyport Lite.<br />
If the green light inside the adapter starts blinking, your host<br />
PC is providing power to the adapter through Pin 9. You have<br />
successfully installed the adapter.<br />
If the green light inside the adapter is not blinking, you need<br />
to supply power to the adapter. Continue with Step 2.<br />
2 Attach the appropriate country-specific power plug to the<br />
power supply.<br />
3 Connect the power supply to the <strong>RS</strong>-<strong>232</strong> adapter and AC<br />
power. The green light inside the adapter starts blinking.<br />
Creating a <strong>Bluetooth</strong> Connection<br />
This section describes how to create a <strong>Bluetooth</strong> connection<br />
with:<br />
• HyperTerminal.<br />
• Keyport Lite.<br />
Creating a <strong>Bluetooth</strong> Connection With HyperTerminal<br />
1 Start HyperTerminal.<br />
4 <strong>RS</strong>-<strong>232</strong> <strong>Bluetooth</strong> <strong>Adapter</strong> <strong>Instructions</strong>