Data Interfaces
Data Interfaces
Data Interfaces

Create successful ePaper yourself
Turn your PDF publications into a flip-book with our unique Google optimized e-Paper software.
© SAP AG<br />
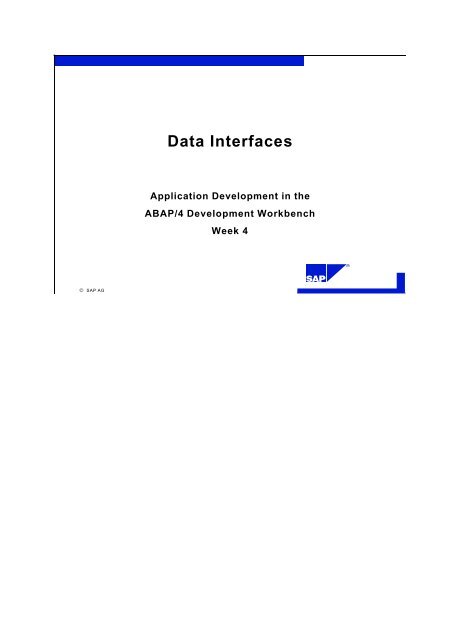
<strong>Data</strong> <strong>Interfaces</strong><br />
Application Development in the<br />
ABAP/4 Development Workbench<br />
Week 4<br />
R
Contents I / Week 4<br />
Chapter 1 Principles<br />
Chapter 2 Linking Options<br />
Chapter 3 Remote Function Call<br />
© SAP AG<br />
Exercises<br />
Solutions<br />
Chapter 4 ABAP/4 Desktop Integration<br />
Components<br />
Chapter 5 CPI-C Interface
Chapter 1 Basic Techniques<br />
© SAP AG<br />
l Overview of linking options<br />
l Overview of Basis interfaces<br />
l Overview of basic components
Chapter 1 Objectives<br />
© SAP AG<br />
l Main terms and components for communications<br />
interfaces.<br />
l Basic techniques of direct, cross-system<br />
communication:<br />
CPI-C, RFC and OLE (programming interfaces) and<br />
the relevant system components (SAP gateway, side<br />
information tables, transport logs)
Linking Options Overview<br />
© SAP AG<br />
R/3<br />
R/3 R/2<br />
External<br />
system<br />
Communication is possible between different R/3 systems, between R/3 and R/2, between R/3 and<br />
external systems, and also between R/2 and external systems.
Basis <strong>Interfaces</strong> of the R/3 System<br />
<strong>Data</strong>base<br />
server<br />
Application<br />
server 1<br />
Frontend<br />
(SAPGUI)<br />
© SAP AG<br />
R/3 System<br />
...<br />
Application<br />
server 2<br />
...<br />
Frontend<br />
(SAPGUI)<br />
<strong>Data</strong>base operations (SQL)<br />
ABAP/4 Open SQL, ABAP/4 Native SQL<br />
Batch input<br />
CALL TRANSACTION ... USING<br />
CPI-C<br />
RFC<br />
Seq. files (application server files)<br />
Seq. files (frontend files)<br />
OLE<br />
RFC<br />
At different levels in the R/3 System, there are various data communication options. These include the<br />
following:<br />
1) Communication with the database via ABAP/4 Open SQL or DB SQL.<br />
2) Indirect data communication using file transfer.<br />
3) Techniques of direct, cross-system communication in the network.<br />
This course covers the Basis techniques for direct communication (time-critical data).<br />
Although ABAP/4 supports the use of Native SQL, any direct database accesses to SAP tables should<br />
be read-only. Table updates usually cause problems for data consistency because of the complexity of<br />
table dependencies. For this reason, changes should be made using the relevant SAP transaction<br />
programs with batch input or the ABAP/4 statement CALL TRANSACTION ... USING.<br />
At application level, the following Basis techniques are available:<br />
- Access to sequential files of the application server and the frontend<br />
- CPI-C ---> program-to-program communication<br />
- RFC ---> Remote Function Call<br />
At frontend level, the following Basis techniques are available:<br />
- Access to sequential files<br />
- RFC<br />
- OLE (Object Linking and Embedding
Indirect Communication I<br />
© SAP AG<br />
<strong>Data</strong> transfer using files<br />
w READ DATASET INTO <br />
w TRANSFER TO <br />
w Function module: WS_UPLOAD<br />
w Function module: WS_DOWNLOAD<br />
seq. file<br />
SAP R/3 naturally supports the file transfer technique on the application server and on frontends.<br />
In ABAP/4, you implement the interface to the file system on the application server with the key words<br />
READ DATASET and TRANSFER TO.<br />
On frontends, you implement the interface to the file system with the following function modules:<br />
WS_UPLOAD: Reads a file in the file system where the SAPGUI is running into an internal table<br />
in the<br />
R/3 System.<br />
WS_DOWNLOAD: Stores the contents of an internal table as a file on the SAPGUI machine.
Indirect Communication II<br />
seq. file<br />
© SAP AG<br />
Batch input<br />
Read<br />
sequential file<br />
Batch input<br />
preparation<br />
Import data<br />
Batch input is based on file transfer with additional update.<br />
R/3 System<br />
SD<br />
FI<br />
MM<br />
PP<br />
R/3<br />
CO<br />
AM AM<br />
Client / Server<br />
QM<br />
ABAP/4<br />
PS<br />
PM<br />
WF<br />
HR<br />
IS<br />
With this process, you should note that only one system must be active at any one time. You can transfer<br />
the files to the other system and read in the data at a later stage. Time-critical data should not be<br />
involved here.
Transferring Time-critical <strong>Data</strong><br />
© SAP AG<br />
Example: Local warehouse<br />
Warehouse A<br />
4 434518 759691<br />
Warehouse B<br />
4 434518 759691<br />
SD<br />
FI<br />
MM<br />
PP<br />
R/3<br />
CO<br />
AM<br />
Client / / Server<br />
QM<br />
ABAP/4 PS<br />
PM<br />
WF<br />
HR<br />
IS<br />
Time-critical applications such as entering warehouse movements , goods receipt, or goods issue,<br />
require direct communication between the local warehouse computer and the central system.
Direct Communication I<br />
Program-to-program communication (CPI-C)<br />
Phase Local warehouse Central<br />
computer system<br />
II<br />
II<br />
III<br />
© SAP AG<br />
Set up<br />
connection<br />
<strong>Data</strong><br />
transfer<br />
Close<br />
connection<br />
"Goods xyz received"<br />
ok<br />
Connection setup<br />
accepted<br />
<strong>Data</strong> received<br />
and updated<br />
Connection closure<br />
accepted<br />
As the name (COMMON PROGRAMMING INTERFACE FOR COMMUNICATIONS) implies, CPI-<br />
C is a general programming interface for communication purposes.<br />
CPI-C allows two applications or two programs to communicate with each other in much the same way<br />
as two people communicate in an ordinary telephone conversation. One program sets up the connection,<br />
while the partner program accepts the connection. Then, application data can be exchanged until the<br />
communication link is closed by one of the partners. You can use this method to make time-critical data<br />
immediately available in the partner system.<br />
The concept behind the CPI-C interface was originally developed by IBM within the framework of SAA<br />
(System Application Architecture). Other SAA interfaces include CUA (Common User Access) and<br />
CCS (Common Communication Support). CPI-C was later taken over by the X/OPEN group.<br />
SAP has implemented the CPI-C interface. The CPI-C starter set is also supported.
Direct Communication II<br />
Remote call to a routine (RFC)<br />
© SAP AG<br />
Local warehouse Central<br />
computer system<br />
Call function<br />
ABC in<br />
system XYZ<br />
with the<br />
parameters<br />
1,2,3.<br />
Call<br />
Result<br />
System XYZ<br />
Function ABC<br />
Process<br />
parameter values<br />
1, 2, 3 and<br />
return result<br />
The remote call to a function module (routine) in a partner system represents a further level of<br />
complexity in the data exchange process.<br />
RFC is related to RPC (Remote-Procedure-Call) in a UNIX-TCP/IP environment.<br />
RFC is based on CPI-C.<br />
SAP has implemented the RFC interface.<br />
For application programmers, this remote call process is much easier to handle than program-toprogram<br />
communication because data is exchanged only via defined parameters.
Direct Communication Techniques - OLE<br />
© SAP AG<br />
OLE OLE<br />
Remote Function<br />
Calls Calls<br />
CPI-C<br />
In a desktop environment, SAP components include a layered architecture for integration with R/3.<br />
Apart from the RFC SDK (Software Development Kit) for desktops, SAP also supplies special OLE<br />
products for use with Windows platforms.<br />
OLE (Object Linking and Embedding) is a Microsoft Corporation standard. OLE 2.0 has also been<br />
adopted by other manufacturers in their desktop applications.<br />
OLE is an object layer which is located above the RFC interface in desktop environments. OLE 2.0compatible<br />
applications can communicate with R/3 3.0 via this interface. SAP’s implementation of the<br />
OLE layer is based on RFC API commands.
Network: TCP/IP and SNA LU6.2<br />
TCP/IP<br />
- R/2<br />
- External systems<br />
SNI (BS2000)<br />
Windows NT<br />
UNIX UNIX<br />
© SAP AG<br />
R/3<br />
TCP/IP<br />
TCP/IP<br />
R/3<br />
Communication is possible between SAP applications and with external systems.<br />
SNA LU6.2<br />
- R/2<br />
- External systems<br />
IBM IBM<br />
Host systems<br />
<strong>Data</strong> exchange is based on different transport protocols which are specific to a particular platform or<br />
manufacturer.<br />
Communication with an R/3 System is always via the TCP/IP protocol.<br />
IBM platforms communicate via the SNA protocol LU6.2.<br />
All other platforms support TCP/IP.
ISO-OSI 7-Layer Model<br />
© SAP AG<br />
SDLC<br />
LU6.2<br />
(APPC)<br />
Ethernet<br />
Token Ring<br />
RFC<br />
CPI-C<br />
X.25<br />
X.25<br />
Ethernet<br />
TCP/IP<br />
(sockets)<br />
In very simple terms, the ISO-OSI 7-layer model can be split into three sections:<br />
A: At the lowest level (layer 1) are the different networks such as Ethernet, Token-Ring, X.25 etc. There<br />
is a backup layer (2) between the network layer and the routing layer (3).<br />
B: In the middle level (layers 3 and 4) are the transport protocols, including the well-known protocol<br />
TCP/IP. Strictly speaking, TCP should be assigned layer 4 and IP to layer 3.<br />
Since the SNA-LU6.2 protocol is normally based on IBM’s own SNA architecture model, it is shown in<br />
the ISO-OSI 7-layer model on layers 3 to 6. Nevertheless, it should still be considered as a transport<br />
protocol.<br />
C: The session, presentation and application layers (5, 6, 7) form the upper third of the model. End-users<br />
can only access the application layer. The programming interface CPI-C is also included at this last<br />
level.<br />
RFC is to be found at a higher level still. It is thus based on CPI-C.<br />
Token Ring<br />
...<br />
7<br />
6<br />
5<br />
4<br />
3<br />
2<br />
1
SAP Gateway (CPI-C Handler)<br />
SD<br />
MM<br />
PP<br />
QM<br />
PM<br />
R/3<br />
R/3<br />
Client / / Server<br />
ABAP/4<br />
HR<br />
FI<br />
CO<br />
AM<br />
PS<br />
WF<br />
IS<br />
© SAP AG<br />
External<br />
program<br />
SAP<br />
gateway<br />
The SAP gateway is used for every CPI-C or RFC communication.<br />
MM<br />
PP PP<br />
QM<br />
PM<br />
R/3<br />
SD<br />
R/3<br />
Client / / Server<br />
ABAP/4<br />
HR<br />
FI<br />
CO<br />
AM<br />
PS<br />
WF<br />
IS<br />
IBM/SNI host<br />
The SAP gateway consists of several programs. At runtime, these can be identified as the "gw*"<br />
processes.<br />
If you wish, the CPI-C handler can perform a protocol conversion. You need this if, for example, you<br />
want to set up a connection to an IBM host system.<br />
Every application server has a gateway.<br />
It is also possible to install an SAP gateway as a standalone instance.<br />
The SAP gateway is ported for SNI BS2000.<br />
R/2
Side Information Tables<br />
Contents:<br />
R/3<br />
R/2<br />
© SAP AG<br />
Symbolic destination ---> addressed in the program<br />
Partner LU ---> target machine or Logical Unit (SNA)<br />
Partner program ---> name of partner program<br />
...<br />
Side information tables<br />
UNIX<br />
WINDOWS NT<br />
WINDOWS 3.1<br />
WINDOWS 95<br />
OS/2<br />
TXCOM --> CPI-C connection setup<br />
RFCDES --> RFC connection setup<br />
XCOM --> CPI-C, RFC connection setup<br />
RFCD --> RFC connection setup<br />
side info<br />
side info<br />
side info For SAP gateways and libraries<br />
side info on external platforms<br />
side info<br />
Each system from which you set up a CPI-C communication requires a side information table. Side<br />
information tables can be compared to telephone directories.<br />
The terms LU (logical unit) and TP (transaction program) come from the SNA environment. In a<br />
TCP/IP environment, different terms are used.<br />
Side information tables contain parameters which are needed for communication purposes. The three<br />
most important of these are:<br />
Symbolic destination:<br />
The program setting up a connection uses a symbolic destination which must exist in the side<br />
information table. A symbolic destination can be compared with a name in a telephone directory.<br />
Partner LU:<br />
The partner LU (logical unit) specifies where the communication partner is to be found. It can be<br />
compared with an address in a telephone directory.<br />
Partner program:<br />
The partner program is the program which is started in the partner system or the program to which the<br />
connection is made. It can be compared with the telephone number of the partner.
Chapter 1 Summary<br />
© SAP AG<br />
l The R/3 System supports various techniques for direct<br />
online communication between programs in different<br />
systems and on different machines in a network.<br />
l Connections can be set up both from and to R/3.
Chapter 2 Linking Options<br />
© SAP AG<br />
l Communication between R/3 Systems<br />
l Communication between R/3 and R/2 Systems<br />
l Communication between R/3 and external systems
Chapter 2 Objectives<br />
© SAP AG<br />
l The different linking options between R/3, R/2 and<br />
external systems.<br />
l Terms such as SAP gateway, side info tables, and<br />
RFC tables, as well as the underlying concepts.
Communication Between SAP Systems<br />
R/3<br />
R/2<br />
© SAP AG<br />
IBM<br />
The subsequent sections cover the following scenarios for communication between SAP systems:<br />
R/3 - R/3 (the R/3 Systems can be different releases)<br />
R/3 - R/2 (R/2 can be running on an IBM or an SNI platform)<br />
R/2<br />
R/3<br />
The question of which system sets up the connection will also be discussed in more detail.<br />
SNI
Communication: R/3 External Programs<br />
© SAP AG<br />
R/3<br />
There are several options for communication between R/3 and external systems, but you have to know<br />
whether an external platform is supported by SAP or not. To find out which platforms can be linked to<br />
R/3, refer to SAP Supported Network Products.<br />
If a platform cannot be linked to R/3 through CPI-C / RFC, this does not mean that no online<br />
communication is possible. The options for these platforms are described in the subsequent sections.<br />
The question of which system sets up the connection will also be discussed in more detail.
Technical Representation of the SAP Gateway<br />
Functionality of the SAP gateway<br />
R/3<br />
dispatcher<br />
R/2 (SNI)<br />
© SAP AG<br />
X1SA<br />
TCP/IP<br />
gwrd<br />
gwrd<br />
gwhost<br />
gwwp<br />
LU6.2<br />
X1SA<br />
gwrd<br />
R/2 (IBM)<br />
R/3<br />
dispatcher<br />
The SAP gateway or the CPI-C Handler is involved in every communication with an R/3 System.<br />
The SAP gateway is supplied with every R/3 System.<br />
The SAP gateway is a program pool in the R/3 System’s executable directory. All gateway programs<br />
begin with "gw".<br />
The SAP gateway consists of the following programs:<br />
gwhost<br />
gwims<br />
gwmon<br />
gwrd<br />
gwwp<br />
At runtime, you can identify gateway processes with the UNIX command "ps -ef | grep gw".<br />
The SAP gateway is responsible both for TCP/IP and LU6.2 connections.
SAP Side Information Tables (CPI-C)<br />
R/2: XCOM<br />
R/3: TXCOM<br />
UNIX<br />
NT<br />
Windows<br />
OS/2<br />
© SAP AG<br />
XCOM<br />
DEST DEST LU LU TP TP ...<br />
...<br />
TGB TGB LU1 LU1 CP1C2<br />
CP1C2<br />
TXCOM<br />
DEST LU TP Prot ...<br />
ABC LU2 CPIC2 E<br />
sideinfo<br />
DEST DEST = = GWHOST GWHOST<br />
GWHOST GWHOST = = is0001<br />
is0001<br />
GWSERV GWSERV = = sapgw00 sapgw00<br />
LU LU = = hw5001<br />
hw5001<br />
TP TP = = sapgw00 sapgw00<br />
PROTOCOL PROTOCOL = = I<br />
I<br />
The side information table is a configuration table where you define the parameters that are necessary for<br />
a communication.<br />
The table has a different name in different systems.<br />
In R/2, it is known as XCOM and can be maintained with Transaction TM31.<br />
In R/3, it is known as TXCOM and can be maintained with Transaction SM54 or SM31.<br />
In external systems, the side information table is always called sideinfo. In UNIX, for example, you can<br />
edit side information with the editor program "vi". The side information table is used for CPI-C and RFC<br />
connections in external systems.
The RFC Tables RFCDES (R/3) and RFCD (R/2)<br />
Table RFCDES (R/3)<br />
RFC destination: BC415<br />
Connection type: 3<br />
Target machine: hs5001 System number: 00<br />
Description: Demo RFC connection<br />
Language: D User: Miller<br />
Client: 000 Password: Demo<br />
Table RFCD (R/2)<br />
DEST DEST MAN MAN User User name name Password Password S S Argument of table XCOM<br />
BC415 000 Miller Demo D TGB<br />
© SAP AG<br />
To implement a communication with a Remote Function Call (RFC), you must make control entries in<br />
the relevant tables.<br />
For an RFC connection initiated from R/3, you need to make an entry in the table RFCDES.<br />
For an RFC connection initiated from R/2, you need to make an entry in the table RFCD. This entry<br />
points to the table XCOM.
Communication Between Two R/3 Systems<br />
© SAP AG<br />
hs5001, sapgw00 hs5101, sapgw01<br />
System T01<br />
Table TXCOM (T01)<br />
TCP/IP<br />
Dest LU TP Prot Gateway host Gateway service<br />
BC415A hs5101 sapgw01 I<br />
BC415B hs5101 sapgw01 I hs5101 sapgw01<br />
System T02<br />
Communication between two R/3 Systems is always based on the transport protocol TCP/IP.<br />
For R/3 - R/3 communication, you need to maintain the R/3 tables TXCOM (for CPI-C) and RFCDES<br />
(for RFC).<br />
The destination Dest can be any name you choose.<br />
LU (logical unit - related to IBM's SNA) is the "host name" of the R/3 partner system.<br />
TP (transaction program name) is the sapgwXX of the partner system. Since a gateway service is assigned<br />
to every application server, this name is unique.<br />
For Prot (protocol), you enter an “I” for R/3 - R/3 communication.<br />
The Gateway host entry is optional and specifies the host name of an alternative gateway. By default, the<br />
system uses the gateway of the application server from which the communication is set up.<br />
The Gateway service entry only makes sense if there is also an entry for Gateway host. It specifies the<br />
service sapgwXX of the alternative gateway.<br />
For an R/3 - R/3 RFC connection, you must make an entry in the table RFCDES. To maintain this table,<br />
you use Transaction SM59. The connection type that you specify in the transaction is 3.
Communication Between R/3 and R/2<br />
R/2<br />
IBM<br />
© SAP AG<br />
IMS<br />
CICS<br />
R/3<br />
R/2<br />
SNI<br />
DCAM<br />
UTM<br />
Since R/3 - R/2 communication involves a number of different scenarios, you have to decide the<br />
following:<br />
- Is R/2 running on IBM or SNI?<br />
- Which transaction monitor is running on the host?<br />
For IBM: CICS or IMS?<br />
For SNI: DCAM or UTM?<br />
- Which program is setting up the connection? The R/2 program or the R/3 program?<br />
These different scenarios are covered on subsequent pages.
R/3 R/2 Communication (IBM)<br />
© SAP AG<br />
Connection setup from R/3<br />
hs5001 hs5002<br />
UNIX, UNIX, NT NT (T01) (T01)<br />
SAP SAP gateway<br />
gateway<br />
Host Host (K50)<br />
(K50)<br />
R/3 R/3<br />
ABAP/4<br />
ABAP/4<br />
SNA SNA subsystem<br />
subsystem<br />
R/2 R/2<br />
ABAP/4<br />
ABAP/4<br />
TCP/IP (remote)<br />
shared memory (local)<br />
Table RFCDES (T01) Gateway options<br />
RFC destination K50 Gateway host: hs5002<br />
Connection type 2 Gateway service: sapgw00<br />
Dest LU TP Prot Gateway host Gateway service<br />
K50 C hs5002 sapgw00<br />
LU6.2<br />
Table TXCOM (T01) Side info SAPgateway<br />
DEST = K50<br />
LU = K50T00<br />
TP = X1SA<br />
For communication from R/3 to R/2, an SNA gateway must be active (i.e. an SAP gateway plus the<br />
relevant SNA subsystem). Ideally, this should be installed as a standalone gateway.<br />
For the SNA-LU6.2 connection, the specific SNA product (SNA subsystem) of the hardware<br />
manufacturer must be installed and configured on the gateway machine.<br />
You can find out which products are supported on which platforms, and in which version, in the overview<br />
SAP Supported Network Products.<br />
In the case of a CPI-C communication between R/3 and R/2 where the R/3 System is the initiator of the<br />
communication, you need to make an entry in der R/3 table TXCOM and an entry in the gateway table<br />
sideinfo.<br />
Table TXCOM:<br />
- The destination Dest can be any name you choose<br />
- LU and TP are dummy entries and can be left blank<br />
- Prot (protocol) must be C<br />
In the case of an RFC communication between R/3 and R/2 where the R/3 System is the initiator of the<br />
communication, you need to make an entry in the R/3 table RFCDES and an entry in the gateway table<br />
sideinfo.
R/2 R/3 Communication (IBM)<br />
Connection setup from R/2<br />
Host Host (K50)<br />
(K50)<br />
R/2<br />
R/2<br />
ABAP/4 ABAP/4<br />
Dest LU TP<br />
T01 MP30 T01<br />
(hs5000)<br />
© SAP AG<br />
LU6.2<br />
hs5000<br />
SNA SNA subsystem<br />
subsystem<br />
Progr: Progr: gwhost<br />
gwhost<br />
SAP SAP gateway<br />
gateway<br />
TCP/IP (remote)<br />
shared memory (local)<br />
Table XCOM (K50) Side info from gwhost<br />
DEST = T01<br />
LU = hs5001<br />
TP = sapgw00<br />
GWHOST = hs5001<br />
GWSERV = sapgw00<br />
Protocol = I<br />
hs5001, sapgw00<br />
UNIX, UNIX, NT NT (T01)<br />
(T01)<br />
SAP SAP gateway<br />
gateway<br />
R/3<br />
R/3<br />
ABAP/4<br />
ABAP/4<br />
The switching program gwhost is started on the machine where the SNA software is installed. gwhost<br />
then looks for an entry in the side information table where the destination matches the TP specification in<br />
the R/2 table XCOM (the program started by the SNA subsystem does not have to be called gwhost - it<br />
can be copied beforehand or a symbolic link can be set up, e.g. ln -s gwhost T01). If you want to set up a<br />
connection from R/2 to several R/3 Systems, each R/3 System must be defined at the SNA services level<br />
on the one hand, and have its own intermediate program (e.g. T01, T02, ... ) on the other. There must of<br />
course also be an entry in the side information table for each R/3 System. The symbolic destination is<br />
identical with the name of the intermediate program (DEST=T02). To reach different destinations, e.g.<br />
different R/3 Systems, this means that the intermediate program must be declared to the SNA subsystem<br />
under different names.<br />
You should ensure that the side information file can be found and read by the switching program. To do<br />
this, you need to know the identity of the user who started the program. Of course, the authorizations of<br />
the side information file must be set so that the user can read them.<br />
The switching program is required for CPI-C and RFC connections.<br />
For an RFC connection, you need to make the appropriate entry in the table RFCD.
R/3 R/2 Communication (SNI)<br />
© SAP AG<br />
Connection setup from R/3<br />
UNIX, UNIX, NT NT (T01) (T01)<br />
BS2000 BS2000 (K50)<br />
(K50)<br />
R/3<br />
R/3<br />
ABAP/4 ABAP/4<br />
TCP/IP<br />
Table RFCDES Gateway options<br />
SAP SAP gateway<br />
gateway<br />
R/2 R/2<br />
ABAP/4<br />
ABAP/4<br />
RFC destination K50 Gateway host: BS2GW<br />
Connection type 2 Gateway service: sapgw00<br />
Table TXCOM (T01)<br />
Dest LU TP PROT Gateway host Gateway service<br />
BS2000 C BS2GW sapgw00<br />
On the external machine (BS2000), there must be an SAP gateway active (the connection must be set up<br />
from the gateway of the BS2000 host).<br />
On BS2000 machines, the SAP gateway can be accessed via TCP/IP. However, the following<br />
requirements must be satisfied:<br />
BS2000 version 11, DCAM version 11 (BCAM V.11 with TCP/IP)<br />
On BS2000 machines, the SAP gateway can communicate with an UTM application or a DCAM<br />
application.<br />
Table TXCOM of the R/3 System:<br />
Dest LU TP Prot Gateway host Gateway service<br />
S50 C host name sapgwXX<br />
The entries for LU and TP are dummy entries. For the gateway the following applies:<br />
LU=DEST and TP=X1SA<br />
host name is the name derived from the BCAM generation of the BS2000 host where the gateway is<br />
running. The gateway can function with or without side information.<br />
(Parameter: bs2/use_sideinfo [0,1]).
R/2 R/3 Communication (SNI)<br />
© SAP AG<br />
Connection setup from R/2<br />
BS2000 BS2000 (K50)<br />
(K50)<br />
R/2<br />
R/2<br />
ABAP/4 ABAP/4<br />
Progr: Progr: gwhost<br />
gwhost<br />
Dest LU TP Comm. type<br />
BS2R3 T01 H<br />
TCP/IP<br />
UNIX, UNIX, NT NT (T01)<br />
(T01)<br />
R/3<br />
R/3<br />
ABAP/4<br />
ABAP/4<br />
Table XCOM (K50) Side info from gwhost<br />
The connection is set up via the SAP gateway of the R/3 System.<br />
hs5001, sapgw00<br />
SAP SAP gateway<br />
gateway<br />
Dest = T01<br />
LU = hs5001<br />
TP = sapgw00<br />
GWHOST = hs5001<br />
GWSERV = sapgw00<br />
Protocol = I<br />
The communication is made by an intermediate step in the program gwhost which is running on the<br />
BS2000 host.<br />
Entries in the side information tables:<br />
Table XCOM of the R/2 System:<br />
Symbolic dest. LU (logical unit) TP (transaction prog.) Comm. type<br />
R2R301 (gwhost) H<br />
Table sideinfo for gwhost:<br />
Dest=(gwhost)<br />
LU= (host name_1)<br />
TP= (sapdpXX)<br />
GWHOST= (host name_2)<br />
GWSERV= (sapgwYY)<br />
Protocol= (I)<br />
For an RFC connection, you need the appropriate entry in the table RFCD.
R/3 External Program (UNIX)<br />
© SAP AG<br />
External program on SAP-supported UNIX platforms<br />
hs5001, sapgw00 hs5002, sapgw01<br />
UNIX UNIX (T01) (T01) (T01)<br />
UNIX<br />
UNIX<br />
R/3<br />
R/3<br />
ABAP/4 ABAP/4<br />
Table TXCOM (T01)<br />
TCP/IP (remote)<br />
shared Memory (local)<br />
SAP SAP gateway<br />
gateway<br />
Table RFCDES (T01) Gateway options<br />
TCP/IP<br />
RFC destination R3EXT Gateway host: hs5002<br />
Connection type T<br />
Program Path name Gateway service: sapgw01<br />
Dest LU TP Prot Gateway host Gateway service<br />
R3EXT hs5002 path name E hs5002 sapgw01<br />
UNIX<br />
UNIX<br />
External External program program<br />
For an RFC connection, you need to make the appropriate entry in the table RFCDES with Transaction<br />
SM59.<br />
Since the SAP gateway uses the values in TXCOM or RFCDES, you do not need an entry in the side<br />
information table. The external program is started via the SAP gateway.<br />
A distinction is made as to whether the SAP gateway runs on the same machine as the external program<br />
or not.<br />
SAP gateway and target machine identical:<br />
The SAP gateway has a particular ID which corresponds to the user name (c11adm) used to start it.<br />
==> The external program must be in the user’s search path and able to be started with this ID<br />
SAP gateway and target machine different:<br />
The SAP gateway starts the external program with Remote Shell or Remote Execute. Also, the above user<br />
must be known in the target system and have an entry in the .rhost.
R/3 External Program (TCP/IP)<br />
l Systems not supported by SAP, but accessible via<br />
© SAP AG<br />
TCP/IP<br />
UNIX, UNIX, NT<br />
NT<br />
R/3 R/3<br />
SAP gateway<br />
CPI-C CPI-C / / RFC<br />
RFC<br />
socket socket program program<br />
TCP/IP<br />
External External<br />
socket socket program program<br />
DEC DEC OpenVMS<br />
OpenVMS<br />
HP HP MPE<br />
MPE<br />
IBM IBM host host system<br />
system<br />
IBM IBM AS400<br />
AS400<br />
SNI SNI host host system<br />
system<br />
. . . . .<br />
.<br />
You can also connect external systems online to R/3 Systems for which there is no CPI-C / RFC support.<br />
This section covers systems which are accessible via TCP/IP.<br />
Systems accessible via TCP/IP always provide programming-API sockets. The socket interface is the<br />
API of TCP.<br />
An SAP CPI-C / RFC program can thus communicate with a socket program.<br />
This means, for example, that you can connect DEC OpenVMS machines, HP MPE machines, IBM<br />
hosts, the IBM AS400 series, as well as SNI hosts via the TCP/IP protocol.<br />
A CPI-C / RFC gateway program, which communicates a) with R/3 via CPI-C or RFC and b) with the<br />
external socket program via sockets, thus assumes the gateway function. You must develop this gateway<br />
program to suit your own requirements.<br />
From the point of view of the R/3 System, only one CPI-C or RFC program is started (see also previous<br />
page).
R/3 External Program (Windows NT)<br />
© SAP AG<br />
NT<br />
NT<br />
SAPgui<br />
exec exec<br />
UNIX, UNIX, NT<br />
NT<br />
SAP SAP gateway<br />
gateway<br />
SAPgui<br />
data stream (TCP/IP)<br />
External<br />
External<br />
program program<br />
R/3 R/3<br />
Windows NT supports the CPI-C and RFC interfaces.<br />
TCP/IP<br />
NT<br />
NT<br />
SAP SAP gateway gateway<br />
External<br />
External<br />
program program<br />
Under Windows NT, you can start an external program in either of the following ways:<br />
1) Directly from the SAPgui.<br />
Entry in TXCOM:<br />
Dest LU TP Prot<br />
R3FE Dummy Ext. prog. F<br />
Entry in RFCDES with Transaction SM59:<br />
Connection type: T<br />
Program location: User<br />
Program: /tmp/extpgm<br />
2) From the SAP gateway.<br />
Entry in TXCOM:<br />
Dest LU TP Prot Gateway host Gateway<br />
service<br />
R3EX host name Ext. prog. E host name sapgwXX<br />
Entry in RFCDES with Transaction SM59:<br />
Connection type: T
Program location: Explicit<br />
Target machine: Host name<br />
Gateway options: Gateway host: Host name<br />
Gateway service: sapgwXX<br />
Program: /tmp/extpgm
R/3 External Program (WfW , Windows 3.1)<br />
© SAP AG<br />
UNIX, UNIX, NT<br />
NT<br />
R/3<br />
R/3<br />
SAP SAP gateway<br />
gateway<br />
SAPgui<br />
data stream (TCP/IP)<br />
SAPgui<br />
Windows Windows<br />
exec exec<br />
External External<br />
program program<br />
An external program, usually an RFC program, is started on a Windows machine by the SAPgui. Here,<br />
you cannot call the program through the SAP gateway.<br />
Entry in RFCDES with Transaction SM59:<br />
Connection type: T<br />
Program location: User<br />
Program: c:\tmp\extpgm<br />
A frontend program is connected to an R/3 System via the SAP gateway which is running on an NT or<br />
UNIX machine.<br />
For WfW and Windows 3.1, the CPI-C interface is not supported.
R/3 External Program (OS/2)<br />
© SAP AG<br />
SAPgui<br />
exec exec<br />
UNIX, UNIX, NT<br />
NT<br />
UNIX, NT<br />
R/3 R/3<br />
SAP SAP gateway<br />
gateway<br />
SAPgui<br />
data stream (TCP/IP)<br />
External<br />
External<br />
program program<br />
OS/2<br />
OS/2<br />
OS/2<br />
OS/2<br />
TCP/IP<br />
External<br />
External<br />
program program<br />
Under OS/2, the situation is the same as with Windows NT. You can start a program from the SAPgui or<br />
through the SAP gateway. Since OS/2 has a multi-user capability, the SAP gateway does not have to be<br />
on the OS/2 system.<br />
An external program in OS/2 is connected to R/3 via the SAP gateway.<br />
Under OS/2, you can start an external program from the SAPgui, via remsh or from a remote SAP<br />
gateway.<br />
The external program is started via remsh:<br />
Entry in TXCOM:<br />
Dest LU TP Prot Gateway host Gateway<br />
service<br />
R3FE host name Ext. prog. E<br />
The external program is started from a remote SAP gateway:<br />
Entry in TXCOM:<br />
Dest LU TP Prot Gateway host Gateway<br />
service<br />
R3FE host name_1 Ext. prog. E host name_1 sapgwXX<br />
For an RFC connection, you must make the appropriate entry in the table RFCDES with Transaction<br />
SM59.
R/3 IBM Host / AS400<br />
© SAP AG<br />
External program based on IBM CPI-C or APPC<br />
IBM IBM host<br />
host<br />
UNIX<br />
UNIX UNIX<br />
R/3 R/3<br />
OS/2<br />
UNIX<br />
SAP SAP gateway<br />
gateway<br />
NT SNA subsystem<br />
APPC<br />
APPC<br />
CPI-C<br />
CPI-C<br />
LU6.2<br />
LU6.2<br />
APPC<br />
APPC<br />
CPI-C CPI-C<br />
AS400<br />
AS400<br />
If a machine can be accessed via the SNA protocol LU6.2, it always has at least the programming API<br />
APPC (Advanced Program to Program Communication). Communication between external APPC and<br />
SAP CPI-C programs is possible.<br />
Normally, systems accessible via LU6.2 have CPI-C, which is easier to use and itself based on APPC.<br />
This means that communication between external CPI-C programs and SAP CPI-C programs is<br />
guaranteed.<br />
Machines in the IBM AS400 series have both APPC und CPI-C. External programs are started via<br />
SNA-LU6.2:<br />
Entry in TXCOM:<br />
Dest LU TP Prot Gateway host Gateway<br />
service<br />
R3EX host name Ext. prog. C<br />
The name of the TXCOM destination corresponds to an entry in the side information of the SAP gateway<br />
(see also R/3 - R/2 Communication with connection setup from R/3).<br />
Calling an external RFC program is not possible because, at present, no SAP RFC SDK (Software<br />
Development Kit) is supplied for the above platforms.
External Program (TCP/IP) R/3<br />
© SAP AG<br />
External External program program<br />
TCP/IP<br />
Side info of the external program<br />
Dest = T01<br />
LU = hs5001<br />
TP = sapgw00<br />
GWHOST = hs5001<br />
GWSERV = sapgw00<br />
Protocol = I<br />
hs5001, sapgw00<br />
T01<br />
T01<br />
SAP SAP gateway<br />
gateway<br />
R/3<br />
R/3<br />
ABAP/4<br />
ABAP/4<br />
The side information table "sideinfo" on the source machine must be in the current directory.<br />
Alternatively, before calling the program, you must place the SHELL variable SIDE_INFO in the path<br />
where the side information table is located.<br />
The side information table "sideinfo" for the SAP gateway is stored in the data directory (e.g.<br />
/usr/sap//DVEBMGS00/data) and defined for the SAP gateway ID (adm) by the SHELL<br />
variable SIDE_INFO.<br />
The information in the side information tables can be wholly or partly taken from the external program<br />
(see SAP_CMINIT, RFC connections).<br />
If the external program and the SAP gateway are running on the same machine, the entry in the side<br />
information table can contain all information:<br />
Table "sideinfo" for external program and SAP gateway:<br />
DEST=<br />
GWHOST=<br />
GWSERV=<br />
PROTOCOL=<br />
LU=<br />
TP=
External Program (LU6.2) R/3<br />
External External system<br />
system<br />
External External program program<br />
© SAP AG<br />
LU6.2<br />
SNA SNA subsystem<br />
subsystem<br />
Program: Program: gwhost<br />
gwhost<br />
SAP SAP gateway<br />
gateway<br />
TCP/IP (remote)<br />
shared memory (local)<br />
Side info from gwhost<br />
Dest = T01<br />
LU = hs5001<br />
TP = sapgw00<br />
GWHOST = hs5001<br />
GWSERV = sapgw00<br />
Protocol = I<br />
hs5001, sapgw00<br />
UNIX, UNIX, NT NT (T01)<br />
(T01)<br />
SAP SAP gateway<br />
gateway<br />
R/3<br />
R/3<br />
ABAP/4<br />
ABAP/4<br />
If the source machine is not an IBM host, this type of communication is only possible if both LU6.2<br />
products support peer-to-peer communication (PU type 2.1).<br />
Calling an external RFC program is not possible because, at present, no SAP RFC SDK (Software<br />
Development Kit) is supplied for platforms accessible via LU6.2.<br />
All other requirements are the same as those already listed for R/2 -> R/3 communication.
Gateway Monitor<br />
Gateway connection table (SAP system)<br />
LU name TP name User Status Symb.dest Conv ID ...<br />
hs1234 sapgw01 BC415-01 CONNECTED X50 12345678<br />
hs2345 sapgw01 LOTZ CONNECTED X50 12345679<br />
hs2345 sapgw01 TILLINGER CONNECTED X50 12345680<br />
. . .<br />
Gateway connection table (operating system)<br />
No. CLIENT (LU/TP) USER STATE SDEST CONNID ...<br />
000 hs1234 sapgw01 BC415-01 CONNECTED X50 12345678<br />
001 hs2345 sapgw01 LOTZ CONNECTED X50 12345679<br />
002 hs2345 sapgw01 TILLINGER CONNECTED X50 12345680<br />
. . .<br />
© SAP AG<br />
The purpose of the gateway monitor is to monitor connections. It allows you to display all the<br />
connections currently managed by an SAP gateway. The gateway monitor includes the following<br />
functions:<br />
Displays a list of active CPIC connections<br />
Displays a list of gateway work processes<br />
Displays the parameters of a CPIC connection<br />
Deletes CPIC connections<br />
Displays memory occupancy<br />
Displays memory contents<br />
Manages gateway statistics<br />
Resets the error counter<br />
Displays gateway parameters and attributes<br />
Provides a gateway trace facility<br />
Security display and refresh<br />
In R/3, you can call the gateway monitor with the Transaction SMGW, or start it at operating system<br />
level with the executable program gwmon. When you make the call, the system provides the name of the<br />
profile file. With UNIX, for example, the procedure is as follows:<br />
ps -ef | grep gw --> gwrd pf=/usr/sap//SYS/profile/<br />
gwmon pf= /usr/sap//SYS/profile/ .
Chapter 2 Summary<br />
© SAP AG<br />
l The SAP gateway (CPI-C handler) is used for all<br />
communications with SAP R/3 Systems.<br />
l SAP side information tables are configuration tables<br />
where you define the necessary connection parameters<br />
for a communication.<br />
l To implement a communication via Remote Function Call<br />
(RFC), you make control entries in the appropriate tables<br />
(RFCDES, RFCD).<br />
l Communications are possible between R/3 Systems,<br />
between R/3 and R/2 Systems, as well as between R/3<br />
Systems and external programs.
Chapter 3 Remote Function Call<br />
© SAP AG<br />
l Synchronous RFC<br />
l Asynchronous RFC<br />
l Transactional RFC
Chapter 3 Objectives<br />
© SAP AG<br />
l How to communicate with other SAP or external<br />
systems using RFC (Remote Function Call).<br />
l Different RFC call variants.<br />
l How to maintain table RFCDES for the various<br />
linking options.<br />
l Development tools for RFC programs.
Supporting RFC on Heterogenous Platforms<br />
© SAP AG<br />
R/2<br />
RFC<br />
RFC<br />
RFC for R/2 systems is available from Release 5.0E.<br />
RFC for R/3 systems is available from Release 2.0.<br />
R/3<br />
RFC<br />
R/3<br />
RFC<br />
External<br />
system<br />
RFC is also supported for systems on which no SAP system is installed. For information on which<br />
platforms SAP supports, please refer to the document SAP Supported Network Products. SAP provides<br />
an RFC SDK (Software Development Kit) for these platforms (executable only in R/3 from Release<br />
2.1).
RFC Features<br />
© SAP AG<br />
Automatic Automatic data data conversion<br />
conversion<br />
Automatic Automatic logon logon to to the the SAP SAP partner partner system<br />
system<br />
Automatic Automatic conversion conversion of of all all RFC RFC data data types<br />
types<br />
Automatic Automatic communication communication flow flow control control<br />
Development Development environment:<br />
environment:<br />
Remote Remote debugging<br />
debugging<br />
RFC RFC generator<br />
generator<br />
The conversion of data for transfer between linked systems is performed automatically.<br />
LOGON to the SAP partner system is also performed automatically (the user’s name and password are<br />
stored in the table RFCDES).<br />
For single parameters, the conversion of all data types (CHAR, NUMC, DATE, TIME, HEX, FLTP,<br />
INT) is supported. Please note that you should not use mixed data types (i.e. character and numeric<br />
types) in the same transfer structure (structures and internal tables).<br />
The communication flow between programs is controlled internally.<br />
For R/3-to-R/3 connections, the RFC development environment provides remote debugging.<br />
The RFC generator allows you to create external RFC programs (server and client) in C or Visual<br />
Basic.
ABAP/4 Function Modules<br />
© SAP AG<br />
FM maintenance<br />
FM_02<br />
Interface<br />
Import<br />
Export<br />
Tables<br />
Exceptions<br />
Program<br />
Documentation<br />
Administration<br />
Function Library<br />
FM group: FIBU<br />
FM_01 ...<br />
FM_02 ...<br />
FM group: ZIBU<br />
FM_03 ...<br />
FM_04 ...<br />
FM use<br />
PROGRAM ...<br />
TABLES ...<br />
CALL FUNCTION<br />
'FM_02'<br />
EXPORTING ...<br />
IMPORTING ...<br />
ABAP/4 function modules are divided into function groups in the Function Library. A function group<br />
contains functions which perform similar tasks (e.g. calendar functions) or work with the same data (1st<br />
function fills an internal table, 2nd function edits an internal table, ...).<br />
You can assign a group to a particular application (FI, HR) or flag it for general use (*).
Local Call of Function Modules<br />
ABAP/4 function module ...<br />
Import parameter Reference field Ref. type Proposal Optional Reference<br />
f1 ...<br />
Export parameter Reference field Ref. type Reference<br />
f2 ...<br />
Changing parameter Reference field Ref. type Proposal Optional Reference<br />
f3 ...<br />
Tables parameter Reference field Optional<br />
t1 ...<br />
...<br />
CALL FUNCTION 'TEST'<br />
EXPORTING<br />
f1 = a1<br />
© SAP AG<br />
ABAP/4 program ABAP/4 function module<br />
IMPORTING<br />
f2 = a2<br />
CHANGING<br />
f3 = a3<br />
TABLES<br />
t1 = tab<br />
The function<br />
module is<br />
executed locally<br />
in the same<br />
R/3 System.<br />
FUNCTION TEST.<br />
...<br />
ENDFUNCTION.<br />
In R/3, function modules are ABAP/4 programs which are stored centrally in the Function Library.<br />
They can be called locally by any ABAP/4 program. Function modules are similar to functions in C, and<br />
procedures in PASCAL or COBOL. Both C functions and PASCAL or COBOL procedures are also<br />
stored in a central library.<br />
Function modules have a defined interface. Input parameters are passed to them via the IMPORTING<br />
or CHANGING interface. Single result parameters can be returned via the EXPORTING and<br />
CHANGING interface, but internal tables are passed to the TABLES interface. When creating a<br />
function module, you can define IMPORTING parameters as optional. Since they have a predefined<br />
value, you do not have to assign a value when calling a function module.<br />
Interface parameters should reference Dictionary reference structures.<br />
CHANGING parameters contain fields or field strings which can be passed from the program to the<br />
function module when the function module is called, and returned to the calling program when the<br />
processing of the function module has finished.<br />
For each function module, you can raise exceptions which the function module can trigger if an error<br />
occurs.<br />
You maintain function modules with Transaction SE37.
External Functions<br />
External program<br />
...<br />
Call RFC function A<br />
...<br />
Function 1<br />
(Prg. routine)<br />
Function 2<br />
(Prg. routine)<br />
...<br />
© SAP AG<br />
LINK<br />
...<br />
RFC library<br />
RFC SDK<br />
( SAP )<br />
RFC function set:<br />
RFC function A<br />
RFC function B<br />
...<br />
Standard functions:<br />
Function A<br />
Function B<br />
...<br />
The SAP RFC SDK (Software Development Kit) is delivered with all R/3 Systems.<br />
As in the CPI-C SDK, the RFC SDK contains executable programs for the relevant hardware platform,<br />
libraries, include programs, and also ABAP/4 and C programs. Accompanying text files describe the<br />
structure of the SDK and provide information about how the programs are to be compiled on the<br />
different platforms.<br />
The RFC libraries provide the functionality for creating external client or server programs<br />
(programming languages include C and Visual Basic - in general, all languages which allow you to link<br />
C libraries). Essentially, the libraries contain the calls required for RFC such as OPEN, ACCEPT and<br />
SEND. They also provide a number of standard function routines for testing purposes.
REMOTE FUNCTION CALL (RFC)<br />
SAP system A<br />
ABAP/4 program<br />
...<br />
CALL FUNCTION 'FUNC'<br />
DESTINATION 'DEST'<br />
EXPORTING<br />
IMPORTING<br />
CHANGING<br />
TABLES<br />
EXCEPTIONS<br />
COMMUNICATION_FAILURE = 1<br />
SYSTEM_FAILURE = 2<br />
...<br />
© SAP AG<br />
f1 = a1<br />
f2 = a2<br />
f3 = a3<br />
t1 = tab<br />
SAP system B<br />
ABAP/4 function module<br />
FUNCTION FUNC.<br />
...<br />
ENDFUNCTION.<br />
External program<br />
C routine<br />
Function modules can also be called by remote systems if the function module is designed for RFC.<br />
If SAP R/2 or R/3 is the RFC server system, the function module name is FUNC. If a C program is the<br />
RFC server program, FUNC is the name of a function installed previously with RFC API.<br />
DEST is the symbolic destination of the partner system. The destination must be defined in the table<br />
RFCDES.<br />
You can use the EXPORTING and IMPORTING parameters to pass and receive field or field string<br />
values.<br />
With CHANGING, you can pass values of fields or field strings to or from the function module.<br />
With TABLES, you can pass references to internal tables. Table parameters should have homogenous<br />
data types.<br />
All interface parameters must refer to Dictionary reference structures (unlike local calls to function<br />
modules).<br />
You use the EXCEPTIONS parameter to specify the exceptions the calling program is to handle itself.<br />
...
Function Modules: RFC Capability<br />
© SAP AG<br />
l Transaction: SE37, Administration<br />
l RFC-enabled function modules<br />
Process type<br />
Normal<br />
Remote Function Call supported<br />
Update with immediate start<br />
...<br />
Generation<br />
Generation<br />
Import stub<br />
FUNCTION TEST.<br />
SELECT *...<br />
ENDFUNCTION.<br />
To start a function module by remote start, it must be flagged as RFC-enabled in the function module<br />
administration facility. If RFC support is set, the system generates an import stub when you create the<br />
module. This import stub is part of an ABAP/4 program and is executed when the function module is<br />
called by a remote system.
Table RFCDES<br />
© SAP AG<br />
Maintaining RFCDES with Transaction SM59<br />
RFC destinations<br />
R/2 connections<br />
R/3 connections<br />
Internal connections<br />
Logical connections<br />
CMC connections<br />
SNA/CPI-C connections<br />
TCP/IP connections<br />
You edit the table RFCDES with transaction SM59.<br />
+<br />
+<br />
+<br />
+<br />
+<br />
+<br />
+<br />
+<br />
Connections via ABAP/4 driver<br />
The following connection types (partner system/program) are possible:<br />
I Internal: Same SAP system; communication from application server to application server.<br />
( => same database). You cannot maintain this type. When the system is started, the entries are set<br />
automatically.<br />
2 Partner system is an R/2 System.<br />
3 Partner system is another R/3 System => other database.<br />
S Partner is a program which can be accessed via the LU6.2 protocol. No RFC SDKs are yet<br />
available<br />
for these platforms. Such a partner program would have to use hard APPC calls.<br />
L Logical partner:<br />
Reference is to an existing destination. Existing values (e.g. user name and password) can be<br />
overwritte and new values can be added.<br />
M CMC (Common Messaging Call) connection. This destination is designed for an R/3-to-R/3<br />
connection<br />
which uses the standard programming interface CMC for mail systems.<br />
T Partner is an external RFC program based on TCP/IP.<br />
X The RFC data flow can be passed to a self-defined ABAP/4 program<br />
(ABAP/4 CPI-C program).<br />
Similarly, R/2 contains the table RFCD (which references the table XCOM).
Destinations BACK, SPACE and NONE<br />
System A System B<br />
...<br />
CALL FUNCTION 'B'<br />
DESTINATION 'B'<br />
...<br />
© SAP AG<br />
FUNCTION A.<br />
...<br />
ENDFUNCTION.<br />
Result A<br />
Result B<br />
FUNCTION B.<br />
...<br />
...<br />
CALL FUNCTION 'A'<br />
DESTINATION<br />
ENDFUNCTION.<br />
'BACK'<br />
When executing a RFC function, you can call an RFC-enabled function in the calling system with<br />
CALL FUNCTION ... DESTINATION 'BACK'. You can use the BACK destination with RFC<br />
between two R/3 systems and between R/3 and external C programs (RFC SDK), as well as with the<br />
RFCDES connection types 3 and T.<br />
Two functions can call each other recursively.<br />
If you want to execute a function module locally, you specify the destination SPACE.<br />
You specify the destination NONE if you want to execute a function module locally, but the call to be<br />
performed is technically a REMOTE call (i.e. via a gateway). (See RFC test without partner system.)
Remote Debugging<br />
R/3 A<br />
REPORT CUGE.<br />
PARAMETERS ...<br />
DATA ...<br />
CALL FUNCTION<br />
'RFC_CUSTOMER_GET'<br />
DESTINATION 'B'<br />
...<br />
...<br />
© SAP AG<br />
Remote debugging is possible between two R/3 systems.<br />
R/3 B<br />
FUNCTION RFC_CUSTOMER_GET.<br />
DATA ...<br />
SELECT * FROM KNA1 ...<br />
...<br />
ENDFUNCTION.<br />
If you run the calling program in debugging mode, the code of the remote function module is transported<br />
to and displayed in the calling system. All the usual debugging options such as Single step and Execute<br />
are also supported in the ABAP/4 code of the function module.
Asynchronous RFC: STARTING NEW TASK ...<br />
R/3 server A R/3 server B (same or other R/3)<br />
PROGRAM RS01.<br />
.<br />
CALL FUNCTION 'FUNC1'.<br />
DESTINATION 'B'<br />
STARTING NEW TASK 'ABC'<br />
EXPORTING ...<br />
TABLES ...<br />
.<br />
© SAP AG<br />
FUNCTION FUNC1.<br />
...<br />
ENDFUNCTION.<br />
You use STARTING NEW TASK to generate a new task which calls the function module. The<br />
original program continues to run after the remote function call has been started.<br />
The client program in the above example can receive no confirmation messages from the called<br />
function module since IMPORTING, CHANGING or EXCEPTIONS are not possible with CALL and<br />
because the connection is closed right after the CALL. You also cannot use the destination BACK in the<br />
called function module.<br />
If the called function module performs dialogs, the relevant screens are displayed in the client system in<br />
the new session.<br />
Using this technique, you can not only make connections to another remote R/3 System, but you can also<br />
execute remote function modules on any computer in your own R/3 System (with distributed systems).
Asynchronous RFC with Return of <strong>Data</strong><br />
R/3 server A R/3 server B (same or other R/3)<br />
PROGRAM RS01.<br />
...<br />
CALL FUNCTION 'FUNC1'.<br />
DESTINATION 'B'<br />
STARTING NEW TASK 'ABC'<br />
PERFORMING FUNC1_RETURN ON END OF TASK.<br />
EXPORTING ...<br />
TABLES ...<br />
...<br />
FORM FUNC1_RETURN USING TASK.<br />
...<br />
RECEIVE RESULTS FROM FUNCTION FUNC1<br />
IMPORTING ...<br />
TABLES ...<br />
EXCEPTIONS ...<br />
...<br />
SET USER-COMMAND '...'.<br />
ENDFORM.<br />
...<br />
AT USER-COMMAND.<br />
...<br />
© SAP AG<br />
FUNCTION FUNC1.<br />
...<br />
ENDFUNCTION.<br />
In the above example, the called function module can return data or exceptions to the client program,<br />
although the function module has been started asynchronously. By using the PERFORMING addition,<br />
you ensure that the connection to the partner remains open.<br />
When the called function module is processed, the FORM routine specified after the CALL-FUNCTION<br />
parameter PERFORMING is called.<br />
The FORM routine must have a formal parameter (any name is allowed). This parameter is supplied<br />
automatically with the relevant task ID when the routine is called.<br />
By using RECEIVE RESULTS FROM FUNCTION ... in the FORM routine, you can get the<br />
asynchronously processed function module to return data and exceptions. By using the SET USER-<br />
COMMAND statement, you can start the program event directly.
Asynchronous RFC: Parallel Processes<br />
© SAP AG<br />
PROGRAM PARAL01.<br />
...<br />
CALL FUNCTION 'A'<br />
DESTINATION '1'<br />
STARTING NEW TASK 'A'<br />
PERFORMING 'BACK' ON END OF TASK.<br />
CALL FUNCTION 'B'<br />
DESTINATION '2'<br />
STARTING NEW TASK 'B'<br />
PERFORMING 'BACK' ON END OF TASK.<br />
...<br />
FORM BACK USING TASK.<br />
CASE TASK.<br />
WHEN 'A'. ... AFLAG = 'X'.<br />
WHEN 'B'. ... BFLAG = 'X'.<br />
ENDCASE.<br />
SET USER-COMMAND 'CHECK'.<br />
ENDFORM.<br />
AT USER-COMMAND.<br />
CASE SY-UCOMM.<br />
WHEN 'CHECK'.<br />
IF AFLAG = 'X' AND BFLAG = 'X'.<br />
...<br />
By starting several RFCs with STARTING NEW TASK, you can roll out calculations to other servers<br />
(with distributed systems) or systems, or run them in parallel.<br />
If you have to wait for the result of some or all called function modules, you can control this in the list<br />
environment via the event AT USER-COMMAND by setting flags.<br />
Note:<br />
You can perform the same action in a dialog chain (screen sequence) without using SET USER-<br />
COMMAND to trigger the AT USER-COMMAND list event. Please note that the function modules<br />
first run separate from the client program. You do not know when the individual function modules have<br />
finished or, consequently, when the relevant FORM routine is internally triggered. The processing of the<br />
FORM routine is inserted into the current PAI event of the client program. PAI is then processed again<br />
from the beginning.
RFC Dialog<br />
R/3 System 1 R/3 System 2<br />
Variant 1: Synchronous<br />
PROGRAM RS01.<br />
...<br />
CALL FUNCTION 'DIALOG'.<br />
DESTINATION ...<br />
...<br />
Screen 100<br />
Variant 2: Separated<br />
PROGRAM RS01.<br />
...<br />
CALL FUNCTION 'DIALOG'.<br />
DESTINATION ...<br />
STARTING NEW TASK 'A'...<br />
Caller<br />
session<br />
© SAP AG<br />
Screen 100<br />
1st session 2nd session<br />
FUNCTION DIALOG.<br />
...<br />
CALL SCREEN '100'.<br />
...<br />
ENDFUNCTION.<br />
Screen 100<br />
RFC dialog (or RFC with screens) allows you to display screens (dialog and list screens) in the client<br />
system and process them in a remote system within a RFC.<br />
In the called function module, you can call a screen using (for example) CALL SCREEN. The screen is<br />
then transported and displayed in the client system. The same applies to CALL TRANSACTION,<br />
SUBMIT AND RETURN, and CALL DIALOG.<br />
There are two call techniques:<br />
1) Synchronous RFC:<br />
Here, the client program executes the call and waits until the called function module has finished. All<br />
dialog steps executed by the called function module are displayed in the original session of the client<br />
program. Only when the function module is finished does the client program continue processing after<br />
CALL FUNCTION.<br />
2) Asynchronous RFC (STARTING NEW TASK ):<br />
Here, the client program continues processing directly after CALL FUNCTION. The function module is<br />
run asynchronously on a remote system. All dialog steps executed by the called function module are<br />
displayed in a new session in the client system. RFC dialog thus behaves like a remote login.<br />
Transaction SC38 allows you to start a R/2 program. The list output of the this program is displayed in<br />
the R/3 SAPGUI.
Transactional RFC (tRFC)<br />
© SAP AG<br />
R/3<br />
Automatic job<br />
scheduling<br />
Program<br />
with tRFC<br />
DB<br />
SD FI<br />
MM<br />
CO PP<br />
R/3<br />
AM<br />
Client / / Server<br />
QM<br />
ABAP/4<br />
PS<br />
PM<br />
WF<br />
HR<br />
IS<br />
Administration tables<br />
Table RFCDES:<br />
TRFC options<br />
Job<br />
tRFC<br />
Administration transaction<br />
SM58<br />
R/3<br />
Function<br />
module(s)<br />
SD<br />
FI<br />
MM MM CO PP<br />
R/3 AM<br />
Client / Server<br />
QM<br />
ABAP/4<br />
PS<br />
ABAP/4<br />
PS<br />
PM<br />
WF WF<br />
HR IS<br />
Transactional RFC (tRFC): You can also submit Remote Function Calls when the target system is not<br />
available. For example, the connection to a partner system may have been interrupted or the partner<br />
system itself is not currently active.<br />
The function module is flagged to be run asynchronously. It is not executed immediately, but the data<br />
passed with EXPORTING or TABLES is stored in a database table.<br />
Automatic job scheduling is performed. The job starts the relevant function module(s) in the partner<br />
system.<br />
You set parameters for the relevant connection via the table RFCDES:<br />
--> suppress background job if communication error occurs<br />
--> attempt to set up until system instructs otherwise<br />
--> break between two attempts
tRFC Syntax<br />
© SAP AG<br />
PROGRAM ASYN01.<br />
.<br />
.<br />
.<br />
CALL FUNCTION 'A'<br />
DESTINATION '1'<br />
IN BACKGROUND TASK<br />
EXPORTING ...<br />
TABLES ...<br />
...<br />
CALL FUNCTION 'B'<br />
DESTINATION '1'<br />
IN BACKGROUND TASK<br />
EXPORTING ...<br />
TABLES ...<br />
COMMIT WORK.<br />
In contrast to synchronous RFC, there is an additional parameter sequence called IN BACKGROUND<br />
TASK<br />
All RFC calls which contain this sequence and the same DESTINATION are stored in the database<br />
using COMMIT WORK. These RFC calls form a Logical Unit of Work (LUW). The function<br />
modules are executed in the target system in the same sequence in which they are submitted in the source<br />
system.<br />
This means that, for each target system, the RFCs submitted in a LUW form a Logical Unit of Work.<br />
The called RFC-enabled function is executed once and only once.<br />
Exactly Once!<br />
This guarantees transaction integrity.<br />
You cannot specify IMPORTING parameters with CALL.<br />
External systems can benefit from the tRFC guarantee that a function module is executed once by using<br />
the RFC API call RfcIndirectCall.
tRFC: Tables and Scheduling<br />
ABAP/4 progam<br />
CALL FUNCTION ...<br />
IN BACKGROUND TASK<br />
EXPORTING ...<br />
TABLES ...<br />
CALL FUNCTION ...<br />
IN BACKGROUND TASK<br />
EXPORTING ...<br />
TABLES ...<br />
COMMIT WORK.<br />
Transaction<br />
SM58<br />
© SAP AG<br />
ARFCSSTATE<br />
Transactional RFC Log file<br />
ARFCSDATA<br />
DB<br />
Caller FM Target system Date Time Status<br />
PAUL xyz R3B 06.07.95 14.00 --<br />
By using CALL FUNCTION ... IN BACKGROUND TASK, you store the called data in internal<br />
tables.<br />
COMMIT WORK stores the context data of the function calls in the database (general data such as the<br />
name of the function module in table ARFCSSTATE; concrete data passed with CALL in table<br />
ARFCSDATA). Then, the send job is scheduled.<br />
The send job reads the database tables ARFCSSTATE and ARFCSDATA and tries to set up a<br />
connection to the partner system. If an error occurs, the send job is re-scheduled.<br />
You can analyze the log file with Transaction SM58. This allows you to display and edit function calls<br />
that have not yet been executed.<br />
If you want to send an LUW later, you can specify this event by calling the function module<br />
START_OF_BACKGROUNDTASK before COMMIT WORK.
RFC Between R/3 and External Programs<br />
© SAP AG<br />
R/3 System<br />
ABAP/4<br />
...<br />
CALL FUNCTION...<br />
DESTINATION...<br />
...<br />
Function module<br />
FUNCTION...<br />
ENDFUNCTION.<br />
RFC<br />
External system<br />
External<br />
RFC server<br />
program<br />
External<br />
RFC client<br />
program<br />
ABAP/4 programs can exchange data with an external program via the RFC interface.<br />
External programs can call a function module in the R/3 System via the RFC interface.
External RFC Program: Client<br />
© SAP AG<br />
RfcOpen(...);<br />
...<br />
RfcCall(...);<br />
...<br />
RfcReceive(...);<br />
...<br />
RfcCall(...);<br />
...<br />
RfcReceive(...);<br />
...<br />
RfcClose(...);<br />
}RfcCallReceive (...);<br />
The above program is an RFC client program, i.e. it initiates a communication and connects to the RFC<br />
server program.<br />
RfcOpen sets up a connection to the partner system (INIT, ALLOCATE, LOGON). You are then<br />
logged on to the SAP system.<br />
RfcCall calls a function module (SAP system) or a function (external system) and transfers parameters<br />
and tables.<br />
RfcReceive allows you to receive replies after RfcCall has been called. RfcReceive waits until a reply<br />
has been received.<br />
Instead of RfcCall and RfcReceive, you can use a function called RfcCallReceive.<br />
RfcClose closes the conversation with the partner system.<br />
Between a CALL and a RECEIVE you can always use a RfcLists. This tells you whether a function has<br />
been processed or whether the connection is still open.<br />
You pass connection parameters via RfcOpen (at least the client, user name and password) or a side<br />
information file. From Release 3.0, you should use saprfc.ini as the side information file. You can also<br />
use the following features:<br />
--> Addressing R/3 via load balancing (specify the message server)<br />
--> An external server program can be registered at an SAP gateway<br />
(--> Demon). This saves the start time usually required (performance option).
External RFC Program: Server<br />
© SAP AG<br />
main(...)<br />
{ ...<br />
RfcAccept(...)<br />
...<br />
RfcInstallFunction(...)<br />
...<br />
RfcDispatch(...)<br />
...<br />
RfcClose(...)<br />
}<br />
...<br />
static RFC_RC rfcfunc(...)<br />
...<br />
<strong>Data</strong> processing<br />
{ RfcGet<strong>Data</strong>(...)<br />
RfcSend<strong>Data</strong>(...)<br />
}<br />
The above example demonstrates how an external RFC server program should be structured.<br />
RfcInstallFunction installs all RFC-enabled functions in this program. You must explicitly declare all<br />
program functions. This allows RfcDispatch to find them.<br />
In addition, RfcInstallFunction automatically declares the following standard library functions:<br />
RFC_SYSTEM_INFO: Returns system information to the calling system.<br />
RFC_DOCU: Documents which RFC functions can be called in the program.<br />
RFC_PING: Checks that the communication path to the program is correct.<br />
RFC_START_GUI: Starts SAPGUI on the frontend.<br />
ARFC_DEST_SHIP,<br />
ARFC_DEST_CONFIRM: Used internally with transactional RFC.<br />
You can call these in R/3 from the menu bar of Transaction SM59 when you display a RFC destination<br />
(system information: target system, function list, test connection)<br />
RfcDispatch waits for a function call for an internal program function and subsequently calls this<br />
function.
The SAP RFC SDK<br />
© SAP AG<br />
rfcsdk/bin/rfcexec<br />
sapinfo<br />
startrfc<br />
srfctest<br />
srfcserv<br />
trfctest<br />
trfcserv<br />
lib/librfc.a<br />
include/sapitab.h<br />
saprfc.h<br />
text/*.doc<br />
*.txt<br />
*.c<br />
The SAP RFC SDK (Software Development Kit) is delivered with every R/3 System.<br />
The RFC SDK contains executables, libraries, include files as well as ABAP/4 and C programs for the<br />
hardware platform. Text files describe the structure of the SDK and explain how the programs on the<br />
various platforms are compiled and connected.<br />
The bin directory contains a number of executables which provide test and special functionality.<br />
The lib directory contains the function library.<br />
<strong>Data</strong> types and prototypes of the RFC calls are defined in the saprfc.h file.<br />
Functions for the handling of internal tables are stored in the sapitab.h file.
Desktop SDK (for Windows)<br />
© SAP AG<br />
Desktop SDK<br />
RFC SDK<br />
lib\librfc.dll ( --> 16 oder 32 Bit )<br />
...<br />
help<br />
RFC Logon Manager ( VRFC )<br />
Documentation (RFC generator etc.)<br />
In Windows environments, RFC SDK is delivered with special utilities for constructing application<br />
solutions in the area of desktop integration.<br />
The desktop SDK contains additional and Windows-specific documentation concerning desktop<br />
integration questions (see the directory help). It also provides Windows-specific software layers which<br />
hide the actual RFC calls and thus facilitate the access to RFC solutions. Some of these additional layers<br />
are offered as C++ classes.<br />
The RFC Logon Manager provides a standardized logon dialog which all RFC applications under<br />
Windows can use. It also allows you to monitor active RFC sessions.<br />
Visual RFC (VRFC) provides optimized session management (optimized usage of sockets on the PC)<br />
and also a number of standard dialogs (e.g. logon dialog).
SAP RFC Programs<br />
© SAP AG<br />
l sapinfo<br />
l startrfc<br />
l rfcexec<br />
l srfctest<br />
l srfcserv<br />
l trfctest<br />
l trfcserv<br />
R/3<br />
SD<br />
MM<br />
PP<br />
R/3<br />
FI<br />
CO<br />
AM<br />
Client / / Server<br />
QM<br />
ABAP/4<br />
PS<br />
PM<br />
WF<br />
HR IS<br />
The RFC SDK (Software Development Kit) contains three executable programs which are also available<br />
in C source code. These programs are as follows:<br />
sapinfo: Client program which sets up the connection to the partner system and retrieves various<br />
system<br />
information. It can be used as a connection test program.<br />
startrfc: Client program which can start any function module in the SAP system, pass parameters<br />
or<br />
tables to it, and receive results in the form of parameters and tables. RFC program for<br />
connecting external systems to an SAP System.<br />
rfcexec: Server program which is started by an SAP system and allows you to start several<br />
predefined<br />
functions. It can also be used for testing the connection between an SAP system and an<br />
external<br />
system.<br />
srfctest: Client program for synchronous RFC (connection and performance tests possible).<br />
srfcserv: Server program for synchronous RFC (connection and performance tests possible).<br />
trfctest: Client program for transactional RFC<br />
trfcserv: Server program for transactional RFC
RFC Server: rfcexec<br />
R/3<br />
© SAP AG<br />
n Three functions of rfcexec:<br />
SD<br />
FI<br />
MM<br />
CO<br />
PP R/3<br />
AM<br />
Client / Server<br />
QM<br />
ABAP/4<br />
PS<br />
PM WF<br />
HR<br />
IS<br />
u RFC_REMOTE_PIPE<br />
u RFC_REMOTE_FILE<br />
u RFC_REMOTE_EXEC<br />
Start<br />
Output<br />
start<br />
remote pipe<br />
rfcexec<br />
rfcexec<br />
remote-pipe<br />
remote-pipe<br />
{<br />
{<br />
}<br />
}<br />
remote-file<br />
remote-file<br />
{<br />
{<br />
}<br />
}<br />
remote-exec<br />
remote-exec<br />
{<br />
{<br />
}<br />
}<br />
The SAP RFC server program rfcexec provides the three following functions as standard:<br />
RFC_REMOTE_PIPE<br />
Can call an operating system command or start a program. The programs’s standard output is redirected<br />
to the SAP system and output in the SAPGUI.<br />
RFC_REMOTE_FILE<br />
Allows the system on which the rfcexec is started to read a file into an internal table. The contents of the<br />
internal file can also be stored as a file on the external system.<br />
RFC_REMOTE_EXEC<br />
Can start a program without having to redirect the output of the program to the SAPGUI.<br />
... ... ...
RFC: Connection and Performance Test<br />
R/3 ABAP/4:<br />
Server: Function modules<br />
Client program: SRFCTEST<br />
External RFC programs:<br />
Client program: srfctest<br />
Server program: srfcserv<br />
Client program: trfctest<br />
Server program: trfcserv<br />
© SAP AG<br />
ABAP/4 program SRFCTEST<br />
Start<br />
Possible RFC tests:<br />
1. CONNECTION<br />
2. PERFORMANCE<br />
3. TRANSACTIONAL RFC<br />
Destination<br />
...<br />
Selection<br />
Result list<br />
dest_srfcserv<br />
Both the R/3 System and the libraries contain a number of test programs. The functionality covers<br />
everything from connection tests to performance measurement.<br />
ABAP/4:<br />
SRFCTEST After starting the program, you must select the desired execution option (with the<br />
cursor). You then specify the Logical destination and the No. of desired function<br />
calls<br />
(only relevant with the execution option PERFORMANCE). The execution<br />
options<br />
PERFORMANCE and TRANSACTION RFC allow you to specify a number of<br />
additional parameters (e.g. the number of table lines).<br />
C:<br />
srfctest Client program for synchronous RFC (calls an ABAP/4 function module or a C<br />
function)<br />
srfcserv Server program for synchronous RFC (can be used as partner program for<br />
srfctest or<br />
SRFCTEST<br />
trfctest Client program for transactional RFC<br />
trfcserv Server program for transactional RFC<br />
The programs use the destination NONE as the default. If you want to test other destinations, you must<br />
maintain the table RFCDES first.
RFC Generator<br />
l RFC generator generates C programs<br />
© SAP AG<br />
w Client C program<br />
w Server C program<br />
l RFC generator generates Visual Basic programs<br />
w Client Visual Basic program<br />
w Server Visual Basic program<br />
The RFC generator is available from Release 2.1G or 2.2A. From Release 3.0, full functionality is<br />
available as far as the generation of server programs is concerned.<br />
For an existing function module with a fully defined interface, the RFC generator generates the relevant<br />
C or Visual Basic programs (in the client or server version).<br />
If you want to generate an external server program, you first have to create a dummy function module<br />
(interface!) in R/3 (analogous to the desired function in the external server program).
RFC Generator for C Programs<br />
FUNCTION FUNCTION ABC. ABC.<br />
DATA_PROCESSING<br />
DATA_PROCESSING<br />
ENDFUNCTION.<br />
© SAP AG<br />
SD FI<br />
MM<br />
CO PP<br />
R/3<br />
AM<br />
Client / / Server<br />
QM<br />
ABAP/4 PS<br />
PM<br />
WF<br />
HR<br />
IS<br />
R/3<br />
R/3 generates<br />
programs<br />
RFC request<br />
result<br />
C RFC program<br />
... ...<br />
main( main( ) )<br />
{ {<br />
RfcOpen(...);<br />
RfcOpen(...);<br />
... ...<br />
RfcCallReceive(...,"ABC",...);<br />
... ...<br />
RfcClose(...);<br />
RfcClose(...);<br />
} }<br />
In Transaction SE37, you can start the RFC generator by choosing Utilities->Interface->Generate.<br />
You have to be in the interface display or change mode of this function module. There, you can generate<br />
C programs.<br />
In the subsequent dialog box, you can specify which programs are to be generated. You can also enter<br />
the directories where the individual files are to be stored after the generation on the frontend machine.<br />
After the generation process has been completed, the individual files are transferred to the frontend.<br />
The accompanying text files include a description of the files to be generated or loaded on the frontend.<br />
They also describe the compilation and/or the linking of the programs.
RFC Generator for Visual Basic Programs<br />
FUNCTION FUNCTION ABC. ABC.<br />
DATA_PROCESSING<br />
DATA_PROCESSING<br />
ENDFUNCTION.<br />
© SAP AG<br />
SD FI<br />
MM<br />
CO PP<br />
R/3<br />
AM<br />
Client / / Server<br />
QM<br />
ABAP/4 PS<br />
PM<br />
WF<br />
HR<br />
IS<br />
R/3<br />
R/3 generates<br />
programs<br />
RFC request<br />
result<br />
Visual Basic RFC program<br />
REM REM function function module module<br />
DIM DIM ... ...<br />
DIM DIM ... ...<br />
RfcReceiveTxt ( ( ) )<br />
You can use the RFC generator to generate Visual Basic programs. Downloading generated Visual<br />
Basic programs only makes sense on Windows platforms which support Visual Basic.<br />
The generated program starts the corresponding SAP function module without you having to include any<br />
Visual Basic code.<br />
... ...
RFC Example in Visual Basic<br />
© SAP AG<br />
Declare Function RfcOpenExt Lib "librfc.dll" ...<br />
Declare Sub RfcClose Lib "librfc.dll" ......<br />
hRfc = RfcOpenExt(destination, mode, host, sysnr, ...)<br />
...<br />
hSpace = RfcAllocParamSpace(3, 0, 1)<br />
rc% = RfcAddExportString(hSpace, 0, "COMPANY", 7, 0, 4, MyCompany)<br />
rc% = RfcAddExportString(hSpace, 1, "CUSTOMER", 8, 0, 10, MyCustomer)<br />
rc% = RfcAddExportString(hSpace, 2, "YEAR", 4, 6, 4, MyYear)<br />
thSales = ItCreate("SALES", 20 , 0, 0)<br />
rc% = RfcAddTable(hSpace, 0, "SALES", 5, 0, 20, thSales)<br />
RfcRc = RfcCallExt(hRfc, hSpace, "GET_SALES_BY_MONTH")<br />
...<br />
If RfcRc = 0 Then<br />
RfcRc = RfcReceiveExt(hRfc, hSpace, xException)<br />
End If<br />
If RfcRc = 0 Then<br />
MsgBox "Function Call Failed !"<br />
RfcClose(hRfc)<br />
End If<br />
The above example shows RFC calls in a Visual Basic program fragment. Many details have been<br />
omitted, including the access to the results of the function calls, but you the fragment does contain the<br />
code for the following tasks:<br />
Declaring RFC calls<br />
Logging on to the R/3 System<br />
Defining the parameters and calls<br />
Error handling
Chapter 3 Summary<br />
© SAP AG<br />
l RFC allows you to implement program-to-program<br />
communication between R/3 systems, R/2 systems, and<br />
external systems. In SAP systems, you set up the connection<br />
with ABAP/4. For external programs, you use the relevant<br />
RFC libraries.<br />
l There are several RFC variants (synchronous, asynchronous,<br />
and transactional).<br />
l In R/3, you maintain connection parameters in the table<br />
RFCDES.<br />
l From R/3, you can generate external RFC programs.
Exercise for Chapter 3<br />
Report name: ZBCE##C1<br />
Function group: ZE##<br />
Function module: Z_BC415_##_...<br />
Logical destination: BC415_##<br />
##: Group number<br />
Implement an RFC communication between two R/3 systems<br />
to read data (airline carrier information) from a server system<br />
and output it in the client system.<br />
Proceed as follows:<br />
1. Create a function group (see above) in a server system to be<br />
specified by the instructor.<br />
2. Program a function module assigned to this function group<br />
(see above) and including the following functionality:<br />
• Import parameter for the airline carrier<br />
• Table parameter for selected records of table SCARR<br />
• Exception for an invalid key evaluation<br />
Use the following program fragment to allow generic<br />
selection in table SCARR:<br />
IF NE SPACE.<br />
TRANSLATE USING '+_*%'.<br />
ELSE.<br />
= '%'.<br />
ENDIF.<br />
• Read the table SCARR and transfer the valid records to the<br />
internal table.
3. Maintain a logical destination (see above) for an R/3-to-R/3<br />
connection in the client system using Transaction SM59. The<br />
target machine will be named by the instructor.<br />
4. Write a report (see above) in the client system with the<br />
following functionality:<br />
• Parameter for airline carrier (generic entry possible)<br />
Logical destination<br />
Function module<br />
• Call function module and pass relevant parameters<br />
• Exception handling<br />
• Output result data
Exercise 2 for Chapter 3<br />
Report name: ZBCE##C2<br />
Function module: TRAIN415_RFC_CALLTRANSACTION<br />
Logical destination: BC415_##<br />
##: group number<br />
Realize a report to call function module<br />
'TRAIN415_RFC_CALLTRANSACTION' using the transaction<br />
created in the first exercise. The function module calls<br />
transaction 'TFBA' to change customer data with modified<br />
telephone numbers.<br />
Proceed as follows:<br />
1. Create the report (s.a.) in a R/3 system to be specified by the<br />
instructor.<br />
2. Use the customer number ( = group number), the telephone<br />
number and the destination as report parameters.<br />
3. Use the ‘A’ mode for the transaction to be called during the<br />
function module call.<br />
4. In the remote system, check which telephone data is<br />
maintained for the customer with your group number. To do<br />
so, use transaction TFBA in the remote R/3 System. Test your<br />
report using another telephone number for the customer.
Exercise 3 for Chapter 3<br />
Report name: ZBCE##C3<br />
Function module: TRAIN415_RFC_CALLTRANSACTION<br />
Logical destination: BC415_##<br />
##: group number<br />
Realize a report to call the above mentioned function module<br />
which is to change customer data in your own system and in a<br />
remote system using transactional RFCs.<br />
Proceed as follows:<br />
1. Copy the report ZBCE##C2 you have created in Exercise 2 to<br />
report ZBCE##C3.<br />
2. Modify the report in accordance with the description above,<br />
that is, the function module is to be called in the own system<br />
and in the remote system specifed by your own destination<br />
using CALL FUNCTION ... IN BACKGROUND TASK. Use at<br />
least the ‘N’ mode for the transactional RFC to execute<br />
transaction TFBA in the background.<br />
3. Use transaction SM58 to check scheduling and execution of<br />
your function module call. If you can’t display any data, use<br />
the explicit scheduling function module<br />
START_OF_BACKGROUNDTASK in your program with a<br />
later time.
Solution for Chapter 3<br />
*&----------------------------------------------------------------<br />
*<br />
*& Report RS415031<br />
*<br />
*&<br />
*<br />
*&----------------------------------------------------------------<br />
*<br />
REPORT RS415031 .<br />
PARAMETERS: CARRID LIKE SPFLI-CARRID,<br />
DEST LIKE RFCDES-RFCDEST DEFAULT 'NONE',<br />
RFC(30) DEFAULT 'TRAIN415_RFC_GET_CARRIER'.<br />
DATA: CARRITAB LIKE SCARR OCCURS 0 WITH HEADER LINE,<br />
MESS(80).<br />
CALL FUNCTION RFC<br />
CASE SY-SUBRC.<br />
WHEN 1.<br />
DESTINATION DEST<br />
EXPORTING<br />
TABLES<br />
EXCEPTIONS<br />
CARRID = CARRID<br />
CARRIER = CARRITAB<br />
NO_CARRIER_FOUND = 1<br />
COMMUNICATION_FAILURE = 2 MESSAGE MESS<br />
SYSTEM_FAILURE = 3 MESSAGE MESS.<br />
WRITE: / 'You have selected an invalid carrier ID.'.<br />
EXIT.<br />
WHEN 2.<br />
WRITE: / MESS.<br />
EXIT.<br />
WHEN 3.<br />
WRITE: / MESS.<br />
EXIT.
ENDCASE.<br />
LOOP AT CARRITAB.<br />
WRITE: / CARRITAB-CARRID,<br />
ENDLOOP.<br />
15 CARRITAB-CARRNAME,<br />
40 CARRITAB-CURRCODE.<br />
FUNCTION TRAIN415_RFC_GET_CARRIER.<br />
*"----------------------------------------------------------------<br />
-<br />
*"*"Local interface:<br />
*" IMPORTING<br />
*" VALUE(CARRID) LIKE SCARR-CARRID DEFAULT SPACE<br />
*" TABLES<br />
*" CARRIER STRUCTURE SCARR<br />
*" EXCEPTIONS<br />
*" NO_CARRIER_FOUND<br />
*"----------------------------------------------------------------<br />
-<br />
IF CARRID NE SPACE.<br />
ELSE.<br />
ENDIF.<br />
TRANSLATE CARRID USING '+_*%'.<br />
CARRID = '%'.<br />
SELECT * FROM SCARR INTO TABLE CARRIER<br />
IF SY-SUBRC NE 0.<br />
WHERE CARRID LIKE CARRID.<br />
MESSAGE E038 RAISING NO_CARRIER_FOUND.<br />
* No data for this selection (New input please)<br />
ENDIF.<br />
ENDFUNCTION.
Solution 2 for Chapter 3<br />
*&----------------------------------------------------------------<br />
*<br />
*& Report RS415032<br />
*<br />
*&<br />
*<br />
*&----------------------------------------------------------------<br />
*<br />
REPORT RS415032.<br />
PARAMETERS: CUSTID LIKE SCUSTOM-ID,<br />
PHONE LIKE SCUSTOM-TELEPHONE,<br />
DEST LIKE RFCDES-RFCDEST DEFAULT 'NONE'.<br />
DATA: CUSTITAB LIKE CUST415 OCCURS 0 WITH HEADER LINE,<br />
TAMESS LIKE T100 OCCURS 0 WITH HEADER LINE,<br />
SYS LIKE SY-SYSID,<br />
MESS(80).<br />
CUSTITAB-TELEPHONE = PHONE.<br />
CUSTITAB-ID = CUSTID.<br />
APPEND CUSTITAB.<br />
CALL FUNCTION 'TRAIN415_RFC_CALLTRANSACTION'<br />
DESTINATION DEST<br />
EXPORTING<br />
IMPORTING<br />
TABLES<br />
EXCEPTIONS<br />
TAMODE = 'A'<br />
SYSID = SYS<br />
CUSTTAB = CUSTITAB<br />
MESSTABLE = TAMESS<br />
COMMUNICATION_FAILURE = 1 MESSAGE MESS<br />
SYSTEM_FAILURE = 2 MESSAGE MESS.
CASE SY-SUBRC.<br />
WHEN 1.<br />
WRITE: / MESS.<br />
EXIT.<br />
WHEN 2.<br />
WRITE: / MESS.<br />
EXIT.<br />
WHEN OTHERS.<br />
LOOP AT TAMESS.<br />
WRITE: / TAMESS.<br />
ENDLOOP.<br />
ENDCASE.
Solution 3 for Chapter 3<br />
*&----------------------------------------------------------------<br />
*<br />
*& Report RS415033<br />
*<br />
*&<br />
*<br />
*&----------------------------------------------------------------<br />
*<br />
REPORT RS415033 .<br />
PARAMETERS: CUSTID LIKE SCUSTOM-ID,<br />
PHONE LIKE SCUSTOM-TELEPHONE,<br />
DEST LIKE RFCDES-RFCDEST DEFAULT 'NONE',<br />
TIME LIKE SY-UZEIT DEFAULT SY-UZEIT.<br />
DATA: CUSTITAB LIKE CUST415 OCCURS 0 WITH HEADER LINE,<br />
TAMESS LIKE T100 OCCURS 0 WITH HEADER LINE,<br />
SYS LIKE SY-SYSID,<br />
MESS(80).<br />
CUSTITAB-TELEPHONE = PHONE.<br />
CUSTITAB-ID = CUSTID.<br />
APPEND CUSTITAB.<br />
CALL FUNCTION 'TRAIN415_RFC_CALLTRANSACTION'<br />
IN BACKGROUND TASK<br />
DESTINATION DEST<br />
EXPORTING<br />
TABLES<br />
TAMODE = 'N'<br />
CUSTTAB = CUSTITAB.<br />
CALL FUNCTION 'START_OF_BACKGROUNDTASK'<br />
EXPORTING<br />
EXCEPTIONS<br />
STARTDATE = SY-DATUM<br />
STARTTIME = TIME<br />
OTHERS = 1.
IF SY-SUBRC 0.<br />
ENDIF.<br />
WRITE: / 'Error.'.<br />
CALL FUNCTION 'TRAIN415_RFC_CALLTRANSACTION'<br />
EXPORTING<br />
TABLES<br />
TAMODE = 'A'<br />
IF SY-SUBRC 0.<br />
EXIT.<br />
ELSE.<br />
COMMIT WORK.<br />
ENDIF.<br />
CUSTTAB = CUSTITAB.
Chapter 4 ABAP/4 Desktop Integration<br />
Components<br />
© SAP AG<br />
l Introduction to desktop integration<br />
l Basic principles of OLE 2.0<br />
l Architecture of ABAP/4 desktop integration<br />
components
Chapter 4 Objectives<br />
© SAP AG<br />
l Central terms and components in SAP desktop<br />
integration.<br />
l Basic techniques for handling SAP RFC objects in<br />
the context of Object Linking and Embedding (OLE)<br />
Automation.
Why Desktop Integration?<br />
l Development of user-specific frontend applications.<br />
l Development of solutions for communication with other<br />
machines and integration with R/3 using Visual Basic or C.<br />
l Analysis and processing of data with Excel within an R/3<br />
transaction.<br />
l Use of MS Word or Word Perfect as R/3 word processing<br />
program.<br />
© SAP AG<br />
The integration of existing desktop programs is a decisive factor in the context of open interfaces to the<br />
R/3 System.<br />
Since the intention is to employ current programming languages to enable users to access data in R/3,<br />
SAP supplies the RFC SDK (Software Development Kit) for frontend platforms.<br />
If you want to access desktop documents or objects in desktop applications from R/3, Windows<br />
frontends now allow you to make use of special desktop functionality such as OLE (Object Linking and<br />
Embedding) for MS Windows environments which is within the scope of ABAP/4 in R/3.
SAP Desktop Integration: Tools<br />
l Based on standards (TCP/IP, CPI-C, OLE 2.0).<br />
l Similar handling in different operating systems (RFCs in<br />
Windows 3.1, Windows NT, Windows95, Unix, OS/2).<br />
l Allow developers to use their "own" programming language<br />
(Visual Basic, C, C++).<br />
l OLE objects and the RFC development environment conceal<br />
the underlying complexity.<br />
© SAP AG<br />
For desktop integration purposes, you can use the complete RFC SDK (Software Development Kit) as<br />
supplied for all other R/3 platforms (e.g. UNIX, Windows NT). The RFC SDK is imported explicitly to<br />
frontends by the SAP installation program SAPSETUP.EXE which allows you to opt for "individual"<br />
installation by selecting components of the SAP frontend programs to suit your own requirements. The<br />
RFC SDK is included in the component "Desktop Development Kit".<br />
In addition to the normal functionality of the RFC SDK, Windows frontends include the sub-directory<br />
SAPSRV with OLE 2.0 Automation-specific implementations. These programs are covered in more<br />
detail later.
Objects, Methods and Properties<br />
© SAP AG<br />
Core Core object object<br />
Components<br />
Sub-types<br />
Behavior Behavior<br />
Restrictions<br />
Restrictions<br />
Rules Rules<br />
Properties<br />
Methods Methods<br />
Events<br />
<strong>Interfaces</strong><br />
Objects, methods and properties are terms from the field of object-oriented programming. Before<br />
concentrating in more detail on OLE-specific programming, these terms should be explained.<br />
Objects have properties which characterize the objects. You can select and set these properties.<br />
To perform special functions on the objects, you define methods (functions).<br />
The objects themselves can be defined in object hierarchies where you can work with inherited properties<br />
and methods.<br />
In R/3, function modules are now presented as objects which R/3 makes available externally via the<br />
object-oriented interface (OLE Automation). There is thus an RFC object hierarchy.
Component Architecture<br />
© SAP AG<br />
OLE OLE<br />
Remote Function<br />
Calls Calls<br />
CPI-C<br />
In a desktop environment, SAP components for integration with R/3 have a layered architecture.<br />
The CPI-C foundation layer offers low-level program-to-program communication from the desktop with<br />
an R/3 application server via TCP/IP. CPI-C itself is not available as an API for development on all<br />
desktop platforms.<br />
The RFC layer allows access to function modules from a wide range of platforms. Here, the underlying<br />
CPI-C commands are concealed and transparent to the user.<br />
OLE (Object Linking and Embedding) is an object layer which is located above the RFC interface in a<br />
desktop environment. OLE 2.0-compatible applications can communicate with R/3 Release 3.0 via this<br />
interface. SAP’s implementation of the OLE layer is based on RFC API commends.
Object Linking and Embedding (OLE)<br />
What is OLE?<br />
© SAP AG<br />
n Object Linking and Embedding enables Windows applications<br />
to make use of functions in an highly integrated manner.<br />
n The Excel table below has been integrated into PowerPoint.<br />
Expenses - Sales conference<br />
Description Amount<br />
Flight $1.200<br />
Hotel $350<br />
Entertainment $150<br />
Meals $200<br />
Overall total $1.900<br />
Originally, OLE was supposed to stand for Object Linking or Embedding, since the term OLE embodies<br />
two quite different processes.<br />
Object Linking is very similar to DDE (Dynamic <strong>Data</strong> Exchange) which is a further development of a<br />
intermediate file used by different programs to exchange data. For example, the OLE server program<br />
selects data and copies it to the intermediate file, while the OLE client program can retrieve the data. The<br />
retrieval can be performed in a number of different ways. The advantage of OLE over DDE is that the<br />
OLE server program is also responsible for displaying the data, as shown above. Here, PowerPoint is the<br />
OLE client program which has imported the table from the OLE server program Excel.<br />
Object Embedding is more widespread than Object Linking. Here, an object is completely embedded in<br />
an OLE client program. The data must then be managed by the OLE client program. The OLE server<br />
program is called only if new objects are retrieved or exisiting objects are changed.<br />
Object Automation represents a considerable enhancement of OLE 2.0. It allows OLE server programs<br />
to access objects individually and OLE client programs to manipulate them using properties and<br />
methods.
OLE 2.0 Components<br />
Automation<br />
Structured<br />
Structured<br />
storage<br />
<strong>Data</strong> transfer<br />
Notification<br />
© SAP AG<br />
Drag<br />
and and drop drop<br />
Component<br />
object<br />
model<br />
Naming Naming and and<br />
link tracking<br />
Visual<br />
editing<br />
Compound<br />
documents<br />
OLE OLE 1.0 interoperability<br />
interoperability<br />
The OLE Automation functionality of OLE 2.0 has been implemented in R/3 Release 3.0. Other OLE<br />
2.0 components have are not currently integrated into R/3.
OLE 2.0 Automation<br />
l Allows an application to control the behavior of another<br />
application in an object-oriented manner.<br />
l OLE client<br />
© SAP AG<br />
n An application that can generate and control objects made<br />
available by an OLE 2.0-compatible application (server).<br />
l OLE server<br />
n A server represents the objects, methods and properties of an<br />
application to be used by another desktop application (client).<br />
In a desktop environment, an OLE 2.0 application "registers" its own application objects that can be<br />
generated and used by other applications. The registered objects each have specific methods and<br />
properties. A method is a function used only for this object (e.g. in Excel, cells have the method Clear,<br />
which deletes the contents of the cell). A property is an attribute of the object (e.g. if application has the<br />
property Visible and its value is True, the application can be seen on the desktop).<br />
OLE 2.0 Automation allows you to access objects and methods of another OLE 2.0-capable application<br />
from an application program. The access is object-oriented.
R/3 and OLE 2.0 Automation<br />
ABAP/4<br />
SAP<br />
objects<br />
© SAP AG<br />
Excel<br />
objects<br />
OLE Automation<br />
Visual Visual Basic Basic / / Visual Visual C++ C++<br />
OLE 2.0 Automation interface<br />
Third-party<br />
objects<br />
Word<br />
objects<br />
Office components<br />
Project<br />
objects<br />
This graphic illustrates the combinations between R/3 Release 3.0 and other OLE Automation-capable<br />
applications. You can access the OLE objects of desktop applications and manipulate them from an<br />
ABAP/4 program.<br />
At the same time, you can also use desktop application programs to access R/3 OLE objects which are<br />
made available on the desktop by a special SAP-specific program.<br />
In subsequent sections, the bi-directional aspect of OLE Automation accesses is described in more detail.
OLE Client Architecture in R/3<br />
© SAP AG<br />
Application server Workstation<br />
ABAP/4 program<br />
Control<br />
statements for<br />
program-specific<br />
objects<br />
RFC RFC<br />
SAPGUI<br />
actual OLE<br />
OLE2-capable<br />
application<br />
In the above example, the access is from ABAP/4 programs to OLE objects made available on the<br />
desktop by application programs.<br />
Special ABAP/4 OLE statements use the SAPGUI to make RFCs on the desktop side. The SAPGUI<br />
software then executes OLE-specific calls from the desktop.<br />
In this way, you can use an ABAP/4 program to control all desktop application objects made available<br />
via an OLE 2.0 Automation server program (e.g. EXCEL, MS Word, ...).
OLE 2.0 Client Properties<br />
l Facilitates the communication between application server<br />
and frontend via the RFC interface.<br />
l SpeciaI functions for OLE are implemented in the SAPGUI.<br />
l Collected calls<br />
© SAP AG<br />
n When the ABAP/4 processor encounters the first non-OLE<br />
statement, OLE 2.0 commands are sent to SAPGUI.<br />
l Language independence<br />
n The ABAP/4 processor uses the OLE object ID instead of the<br />
text names for properties and methods.<br />
Normally, all consecutive OLE statements are buffered by the ABAP/4 processor and sent to the<br />
frontend together. Here, a statement may also refer to the results of preceding statements.<br />
Even if the next command is not an OLE statement, developers can direct the collection to continue by<br />
setting a series of properties in a loop. For this functionality, you must use the NO FLUSH option with<br />
OLE calls.
OLE 2.0 Programming Tools<br />
l Maintenance Transaction SOLE for all desktop applications<br />
that can be controlled from ABAP/4.<br />
l Automatic identification of desktop objects:<br />
© SAP AG<br />
R/3 report RSOLEINT (Transaction SOLI)<br />
w reads the OLE object register on the desktop<br />
w loads objects, methods and properties into R/3<br />
l Object Browser:<br />
R/3 report RSOLETI1 (Transaction SOLO)<br />
w Browser for OLE objects, properties and methods<br />
l Special OLE include for ABAP/4 programs<br />
OLE2INCL<br />
All applications controlled by ABAP/4 must be entered in the table TOLE which you maintain with the<br />
Transaction SOLE. This table also indicates whether type information exists for a particular<br />
application. Type information describes all the objects of an application, all its properties and methods,<br />
as well as its parameters.<br />
You can load type information into the R/3 System (table OLELOAD) with the Transaction SOLI. The<br />
ABAP/4 processor can then perform the necessary type conversions and be language-independent of the<br />
OLE application. For all OLE applications delivered as standard by SAP, the English version is supplied<br />
in the OLELOAD.<br />
In addition to runtime information in the table OLELOAD, you can also use the Transaction SOLI to<br />
load other information such as documentation and WinHelp references. You can then access this<br />
information in the SAP environment with the Object Browser (Transaction SOLO).<br />
For programming in the OLE environment, you must use the OLE-specific include OLE2INCL.
ABAP/4 Statements for OLE 2.0<br />
Five new ABAP/4 statements:<br />
© SAP AG<br />
DATA: object TYPE OLE2_OBJECT.<br />
w CREATE OBJECT object class<br />
w GET PROPERTY OF object property = field<br />
w SET PROPERTY OF object property = field<br />
w CALL METHOD OF object method<br />
§ EXPORTING prop1 = field1 ... propN = fieldN<br />
w FREE OBJECT object<br />
You must first define the object with the above DATA statement.<br />
CREATE OBJECT checks the existence of the object and generates an OBJECT_HANDLE. To be able<br />
to address an OLE Automation server from ABAP/4, the server must be registered as a class in the R/3<br />
System.<br />
GET PROPERTY allows you to copy the property property to the field field.<br />
SET PROPERTY sets the property property with the contents of the field field.<br />
You use CALL METHOD to call the method method (either a literal or a variable) of the object object.<br />
With EXPORTING, you pass the field values to the parameters of the method.<br />
FREE OBJECT releases the resources at the frontend.<br />
For more detailed documentation about the above key words, refer to the ABAP/4 online help.
Programming Example in ABAP/4<br />
l Example transaction in R/3: OLE<br />
l<br />
© SAP AG<br />
INCLUDE OLE2INCL.<br />
DATA: EXCEL TYPE OLE2_OBJECT.<br />
DATA: BOOKS TYPE OLE2_OBJECT.<br />
DATA: CELL TYPE OLE2_OBJECT.<br />
DATA: FILENAME(50) = 'C:\TEMP\OLE1.XLS'.<br />
DATA: VALUE(10).<br />
CREATE OBJECT EXCEL 'EXCEL.APPLICATION'.<br />
SET PROPERTY OF EXCEL 'VISIBLE' = 1.<br />
CALL METHOD OF EXCEL 'WORKBOOKS' = BOOKS.<br />
CALL METHOD OF BOOKS 'OPEN' EXPORTING #1 = FILENAME #2 = 1.<br />
GET PROPERTY OF EXCEL 'ACTIVECELL' = CELL.<br />
GET PROPERTY OF CELL 'VALUE' = VALUE.<br />
WRITE: / 'Value:', VALUE.<br />
CALL METHOD OF EXCEL 'QUIT'.<br />
FREE OBJECT CELL.<br />
FREE OBJECT BOOKS.<br />
FREE OBJECT EXCEL.<br />
The Transaction OLE is an example of OLE client functionality of ABAP/4 in the R/3 System. It allows<br />
you direct access to the desktop applications MS Word, Excel and Visio.<br />
Usage example for Excel:<br />
The "Start" button generates the Excel application object and activates the application window.<br />
There should be an Excel file on your PC. Please enter the complete path of this file in the document<br />
area.<br />
The "Edit File" button opens the specified file for processing in the Excel application object. At the<br />
same time, it generates a spreadsheet object and activates the menu bars and the tools of the desktop<br />
application.<br />
The "Get Cell" button copies the contents of the active call in Excel to the field in the SAP data area.<br />
You can then change this value and write it back to the active cell in Excel with "Transfer".<br />
The "Release" button releases the OLE object<br />
If you change the Excel sheet with "Transfer", Excel notes this and displays another dialog box for you<br />
to confirm whether you want to save the modified file.<br />
The example report RS41504A implements the above ABAP/4 code.
OLE Server Architecture in R/3<br />
Desktop workstation<br />
© SAP AG<br />
MS Excel<br />
MS Access<br />
OLE<br />
Automation<br />
client<br />
O<br />
L<br />
E<br />
2.0<br />
Permanent<br />
RFC objects<br />
RFC<br />
Automation<br />
server<br />
RFC RFC API API<br />
R/3<br />
System<br />
To enable you to access them, OLE objects in the R/3 System are made available to other OLE 2.0 client<br />
applications by the RFC Automation server program (AMRFCSRV.EXE).<br />
The Automation server objects have been implemented as a layer via the RFC API function library. The<br />
RFC Automation server converts the OLE calls to RFC API calls.<br />
The R/3 SAPGUI software does not have to be installed on the frontend for a desktop user to be able to<br />
use the Automation server objects. The only requirements are installation of the RFC SDK (Software<br />
Development Kit) on the desktop and a Winsocket-compatible network interface for this functionality.
Automation Server<br />
The Automation server has two service levels:<br />
© SAP AG<br />
n A local server for client applications that access SAP functions<br />
n The Automation Assistant (a graphical tool that allows the user<br />
to execute functions and transactions online).<br />
SAP Automation Assistant<br />
Function Import Export Table<br />
Output log<br />
The Automation Assistant is frontend application for Automation server objects that runs under (16 bit)<br />
Windows.<br />
This tool allows developers to retrieve information about the function module interface of the R/3<br />
application server and execute the function. It is also possible to display transactions in the R/3 System<br />
with their screens and fields.<br />
You can use an OLE application to make the windows of the Automation Assistant visible by setting the<br />
property "RFC.Application.Visible" to "True". In this case, the property "<br />
RFC.Application.Server.Visible" must also be set to "True".
RFC Object Hierarchy<br />
Exports<br />
collection<br />
© SAP AG<br />
Imports<br />
collection<br />
Parameter<br />
Application<br />
Server<br />
Function<br />
Rows<br />
collection<br />
Server objects<br />
collection<br />
Function<br />
collection<br />
Structure Table<br />
Row<br />
Connection<br />
Tables<br />
collection<br />
The above RFC object hierarchy represents the objects for OLE client programs available through the<br />
Automation server.<br />
When accessing these objects, programmers must observe the following sequence of steps:<br />
Create the server object and set up the connection (connection object).<br />
Create at least one function object for the server object.<br />
Assign a value to the export parameter object.<br />
Call the method function of the server object.<br />
Use the import parameter objects to call the result of executing the function module.<br />
Close the connection and release all objects.<br />
The properties and methods for the individual objects are described in the online help. There now follow<br />
some examples of programming with these objects, properties and methods.
Creating an RFC Server Object<br />
Application<br />
Server collection<br />
© SAP AG<br />
Server<br />
Application<br />
Server collection<br />
Server<br />
With "server object"<br />
Set RFCServer = CreateObject ("RFC.ServerObject")<br />
OR<br />
With "application object" and the method Add<br />
Set RFCApp = CreateObject("RFC.Application")<br />
Set RFCObjs = RFCApp.ServerObjects<br />
Set RFCServer = RFCObjs.Add("Server1")<br />
To work with other objects in the RFC object hierarchy apart from the application object, you must<br />
generate a server object.<br />
To generate a server object, there are two options.<br />
1. When using CreateObject("RFC.ServerObject"), the following steps are executed automatically:<br />
a. An application object is created.<br />
b. An entry for a new server object is added to the server collection object.<br />
c. A server object is created.<br />
2. When using CreateObject("RFC.Application"), the following steps are executed:<br />
a. An application object is created.<br />
When using RFCObjs.Add to create a server object, the following steps are executed:<br />
a. An entry for a new server object is added to the server collection object.<br />
b. A server object is created.
Setting Up a Connection to R/3<br />
Logon using the method "Logon"<br />
Set RFCConnection = RFCServer.Connection<br />
If RFCConnection.Logon True Then<br />
RFCServer.Application.Quit<br />
Exit<br />
End If<br />
Logon using the method "Open"<br />
RFCConnection.User= User1”<br />
RFCConnection.System= D22”<br />
...<br />
RFCConnection.Open<br />
© SAP AG<br />
ODER<br />
Application<br />
Server collection<br />
Server<br />
Connection<br />
To call a function module in R/3, you must set up a connection to an R/3 application server. Only one<br />
connection is possible for each server object. There are two ways of setting up a connection:<br />
“Logon” method:<br />
You should use this method if the user has to enter most of the connection information. Since it<br />
automatically displays a dialog field for entry of the logon information, you then do not need to code<br />
this.<br />
“Open” method:<br />
You should use this method if you can set all the connection information in the program, since no<br />
dialog field is automatically displayed in this case. The “Open” method works only if all the logon<br />
information is predefined.
Calling an R/3 Function (1)<br />
With an R/3 function module as<br />
"dynamic" method of the server object<br />
RESULT = RFCServer.R3FunctionName(<br />
EXCEPTIONSTR,<br />
PARAM1:= LocParam1,<br />
PARAM2:= LocParam2,<br />
PARAM3:= LocParam3)<br />
l Import and export parameters assigned<br />
as "specified arguments"<br />
l OLE client application MUST support<br />
conventions for specified arguments<br />
l Syntax for VB for application code<br />
© SAP AG<br />
Function collection<br />
Imports coll.<br />
Application<br />
Server collection<br />
Server<br />
Function<br />
Parameter<br />
Exports coll.<br />
When observing the conventions governing specified arguments for calling a function module (dynamic<br />
function object of the server), the exception string must be the first parameter in the command line.<br />
The Automation server automatically creates a function object as well as import and export objects.<br />
The import parameters for the function call are assigned automatically from the local parameters defined<br />
in the command line.
Calling an R/3 Function (2.1)<br />
Create function object that represents the<br />
R/3 function module<br />
Set RFCFunction =<br />
RFCServer.Functions.Add(“R3FunctionName )<br />
l Adds the function object to the<br />
function collection<br />
l OLE client application does not need<br />
to support specified arguments<br />
l Syntax for Visual Basic code<br />
© SAP AG<br />
Function collection<br />
Imports coll.<br />
Application<br />
Server collection<br />
Server<br />
Function<br />
Parameter<br />
Exports coll.<br />
For Visual Basic, programming via 'Names Arguments' is not possible. For this reason, each function<br />
module called must be added as a function object to the function collection object with the method<br />
“Add”.
Calling an R/3 Function (2.2)<br />
Define values for export objects and use<br />
"Call" method for function object<br />
Set FunctionExports = RFCFunction.Exports<br />
FunctionExports.Item( PARAM1 ) = LocParam1<br />
FunctionExports.Item( PARAM2 ) = LocParam2<br />
Result = RFCFunction.Call<br />
Set local variable to import object to get result<br />
of function call<br />
Set LocParam3 = FunctionImports.Item("PARAM3")<br />
© SAP AG<br />
Function collection<br />
Imports coll.<br />
Application<br />
Server collection<br />
Server<br />
Function<br />
Parameter<br />
Exports coll.<br />
Before calling the function module with the method “Call”, you must also set the export parameters<br />
using the exports collection object.<br />
To get the import parameters after the function call, you must assign the local variable to the object item<br />
of the import collection. This is different from dynamic retrieval where the import parameters of the local<br />
variables are assigned automatically.
Working with Tables: Results (1)<br />
Working with the table resulting from a function call<br />
Access table object with Tables Collection<br />
Set TablesColl = RFCFunction.Tables<br />
Set TableObj = TablesColl.Item(“R3TableName )<br />
Access table data with Rows Collection<br />
For Each TableRow In TableObj.Rows<br />
Cells(RowIndex, 1) = TableRow(“R3ColName1 )<br />
Cells(RowIndex, 2) = TableRow(“R3ColName2 )<br />
....<br />
RowIndex=RowIndex+1<br />
Next<br />
© SAP AG<br />
Function<br />
Tables coll.<br />
Table<br />
Rows coll.<br />
Row<br />
When using a function call with specified arguments (where the function object is a dynamic method of<br />
the server object), it is not necessary to retrieve the table object with the table collection because the<br />
variable TableObj is automatically assigned to the table object.<br />
The syntax used for navigation in the rows collection is specific to VBA (Visual Basic for Applications).<br />
The construction "For Each" is not supported by Visual Basic 3.0. Programmers using Visual Basic<br />
must access the table entries with the code specified in the next graphic.
Working with Tables: Results (2)<br />
Working with the table resulting from a function call:<br />
Access table data with table object "Cell"<br />
For x = 1 to TableObj.RowCount<br />
Cells(RowIndex, 1) = TableObj.Cell(x, R3ColName1 )<br />
Cells(RowIndex, 2) = TableObj.Cell(x, R3ColName2 )<br />
....<br />
Next x<br />
With multiple calls to a function, reset the contents with<br />
the method "FreeTable"<br />
TableObj.Freetable<br />
© SAP AG<br />
The above syntax applies for accessing table object cells with Visual Basic 3.0.<br />
There are two other methods for working with data of a table object: UnloadTable and SetTable.<br />
UnloadTable unloads the contents of a server table objects into a local variable, since the data changes<br />
each time the function is called.<br />
SetTable allows you transfer the data from a local table to a server table object.
Working with Tables: Entry (1)<br />
Creating a table object for entry in a function call<br />
Using a function as a dynamic method of the server object<br />
© SAP AG<br />
Set TableObj = RFCServer.CreateTable(“R3Tabellenname )<br />
For x = 1 to NumRows<br />
TableRow= TableObj.AppendRow<br />
TableRow( R3TableField1 )= ....”<br />
TableRow( R3TableField2 )= ...”<br />
Next x<br />
RESULT = RFCServer.R3FunctionName(<br />
EXCEPTIONSTR,<br />
PARAM1:= LocParam1,<br />
R3TABLENAME:=TableObj,<br />
PARAM3:= LocParam3)
Working with Tables: Entry (2)<br />
Creating a table object for entry in a function call<br />
Using a function that was explicitly added to the collection<br />
Set RFCFunction = RFCServer.Functions.Add(“R3FunctionName )<br />
Set TablesColl = RFCFunction.Tables<br />
Set TableObj = TablesColl.Item(“R3TableName )<br />
For x = 1 to NumRows<br />
TableRow= TableObj.AppendRow<br />
TableObj.Cell(x, R3TableField1 )= ...”<br />
TableObj.Cell(x, R3TableField2 )= ..”<br />
Next x<br />
...<br />
RFCFunction.Call<br />
© SAP AG
Exercise for Chapter 4<br />
Report name: ZBCE##D1<br />
Main report: RS415047<br />
##: Group number<br />
Implement an OLE link between R/3 (OLE client) and your PC<br />
application Excel (OLE server). The report should download<br />
flight customer data to Excel and present it in an Excel sheet.<br />
Proceed as follows:<br />
1. Use the Transaction 'SOLI' to view the OLE-related objects in<br />
your R/3 System.<br />
2. Copy the main report RS415047 to your report ZBCE28#D1.<br />
In your program, comment mark the locations where you have<br />
to insert the OLE-specific ABAP/4 key words.<br />
3. Execute the modified report. At the end, it will be necessary to<br />
make an active switch from R/3 to the Excel application.<br />
4. Then, you can return to the first R/3 System and test the<br />
connection to both your programs with the CPI-C destination<br />
you have specified.
Solution for Chapter 4<br />
*&---------------------------------------------------------------------*<br />
*& Report RS415041 *<br />
*& *<br />
*&---------------------------------------------------------------------*<br />
REPORT RS4155041.<br />
PARAMETERS: DISCOUNT(3) TYPE N.<br />
*<br />
* OLE-specific include file<br />
*<br />
INCLUDE OLE2INCL.<br />
*<br />
* <strong>Data</strong> definitions of OLE objects with type ole2_object<br />
*<br />
DATA: EXCEL TYPE OLE2_OBJECT.<br />
DATA: BOOKS TYPE OLE2_OBJECT.<br />
DATA: BOOK TYPE OLE2_OBJECT.<br />
DATA: CELL TYPE OLE2_OBJECT.<br />
*<br />
* Definition of loop counter<br />
*<br />
DATA: I TYPE I VALUE '5'.<br />
*<br />
* Internal table CUSTOMER with structure of SCUSTOM table<br />
*<br />
DATA: BEGIN OF CUSTOMER OCCURS 0.<br />
INCLUDE STRUCTURE SCUSTOM.<br />
DATA: END OF CUSTOMER.<br />
*<br />
* Call function with program parameter DISCOUNT<br />
* All customers with discount rates greater than or equal to discount<br />
* are returned to the internal table CUSTOMER<br />
*<br />
CALL FUNCTION 'TRAIN415_RFC_NORMAL_WITHITAB'<br />
EXPORTING<br />
IDISC = DISCOUNT<br />
TABLES<br />
CUSTOM = CUSTOMER<br />
EXCEPTIONS<br />
INVALID_DISCOUNT = 1.<br />
IF SY-SUBRC 0.<br />
WRITE: / TEXT-005 .<br />
EXIT.<br />
ENDIF.<br />
*<br />
* Create object EXCEL of OLE class 'EXCEL.APPLICATION'<br />
*<br />
CREATE OBJECT EXCEL 'EXCEL.APPLICATION'.<br />
CALL METHOD OF EXCEL 'WORKBOOKS' = BOOKS.<br />
CALL METHOD OF BOOKS 'ADD' = BOOK.<br />
*
* Fill line in EXCEL sheet with header lines of table columns<br />
*<br />
PERFORM FILL_CELL USING 2 1 'ID'.<br />
PERFORM FILL_CELL USING 2 2 'Name'.<br />
PERFORM FILL_CELL USING 2 3 'Telephone'.<br />
PERFORM FILL_CELL USING 2 4 'Discount'.<br />
*<br />
* Loop at customr table and print values in EXCEL sheet<br />
*<br />
LOOP AT CUSTOMER.<br />
PERFORM FILL_CELL USING I 1 CUSTOMER-ID.<br />
PERFORM FILL_CELL USING I 2 CUSTOMER-NAME.<br />
PERFORM FILL_CELL USING I 3 CUSTOMER-TELEPHONE.<br />
PERFORM FILL_CELL USING I 4 CUSTOMER-DISCOUNT.<br />
I = I + 1.<br />
ENDLOOP.<br />
*<br />
* Make the EXCEL sheet visible on the desktop<br />
*<br />
SET PROPERTY OF EXCEL 'VISIBLE' = 1.<br />
WRITE: / TEXT-006 .<br />
*<br />
* Now leave the EXCEL application<br />
* Note: You must go to the EXCEL application and respond to<br />
* the dialog box<br />
*<br />
AT LINE-SELECTION.<br />
CALL METHOD OF EXCEL 'QUIT'.<br />
*<br />
* Release all OLE objects<br />
*<br />
FREE OBJECT CELL.<br />
FREE OBJECT EXCEL.<br />
FREE OBJECT BOOKS.<br />
*<br />
* FORM routine which fills the specified cell in the EXCEL sheet<br />
* with the given value<br />
*<br />
FORM FILL_CELL USING I J VAL.<br />
CALL METHOD OF EXCEL 'CELLS' = CELL EXPORTING #1 = I #2 = J.<br />
SET PROPERTY OF CELL 'VALUE' = VAL.<br />
ENDFORM.
Chapter 5 CPI-C Interface<br />
© SAP AG<br />
l Overview<br />
l Basic functionality in the starter set<br />
l Additional functionality<br />
l Development environment
Chapter 5 Objectives<br />
© SAP AG<br />
l The CPI-C interface and the individual CPI-C calls.<br />
l Basic for programming CPI-C in ABAP/4 and in C.
CPI-C Implementation<br />
R/2<br />
ABAP/4<br />
© SAP AG<br />
CPI-C implementation by SAP:<br />
R/3<br />
ABAP/4<br />
External<br />
CPI-C libraries<br />
(SAP)<br />
- R/3 ABAP/4 interface<br />
- R/2 ABAP/4 interface<br />
- External systems CPI-C libraries<br />
cpictlib TCP/IP protocol<br />
cpicslib LU6.2 protocol, APPC<br />
For the currently supported platforms, see the document<br />
"SAP Supported Network Products".<br />
CPI-C implementation according to X/OPEN Standard<br />
External<br />
CPI-C libraries<br />
(external)<br />
e.g. CPI-C implementation by IBM according to SAA (System Application Architecture), UPIC by SNI<br />
(Universal Programming Interface for Communication), etc.
General Flow<br />
System 1 System 2<br />
© SAP AG<br />
Initialize Initialize connection<br />
connection<br />
Set Set up up connection<br />
connection<br />
Send Send data data<br />
Receive Receive data data<br />
Send Send data<br />
data<br />
Close Close connection<br />
connection<br />
Side Side info<br />
info<br />
table table<br />
(Client)<br />
Program 1 (Server)<br />
Program 2<br />
Accept Accept connection<br />
connection<br />
Receive Receive data data<br />
Send Send data<br />
data<br />
Receive Receive data data<br />
Close Close connection<br />
connection<br />
With program-to-program communication, the general flow is the same regardless of the programming<br />
language used. The following rules apply:<br />
- With half duplex communication, only one program is authorized to send data at any one time. When one<br />
program is in send mode, the other is in receive mode.<br />
- The program setting up the communication always has the right to send data first.<br />
- The other (started) program is in receive mode first.<br />
- Switching the direction of the communication is achieved by setting off CMRCV in send mode. Then, the<br />
partner program can send data.<br />
- Mutiple communication switching is possible.<br />
One program sets up the connection ( = client); a partner program accepts the connection ( = Server).<br />
In the communication initiator system, a side information table must exist. This table is needed for the<br />
connection initialization.
SAP Side Information Tables<br />
R/2: XCOM<br />
R/3: TXCOM<br />
UNIX<br />
NT<br />
Windows<br />
OS/2<br />
© SAP AG<br />
XCOM<br />
Dest Dest LU LU TP TP ...<br />
...<br />
ABC ABC LU1 LU1 CP1C2<br />
CP1C2<br />
XCOM<br />
Dest LU TP Prot ...<br />
ABC LU2 CPIC2 E<br />
sideinfo<br />
Dest Dest = = C11 C11<br />
GWHOST GWHOST = = is0001<br />
is0001<br />
GWSERV GWSERV = = sapgw00 sapgw00<br />
LU LU = = hw5001<br />
hw5001<br />
TP TP = = sapgw00 sapgw00<br />
Protocol Protocol = = I<br />
I<br />
Each system from which you set up a CPI-C communication requires a side information table. Side<br />
information tables can be compared to telephone directories.<br />
This table contains entries with parameters required for communication purposes. The three most<br />
important of these are:<br />
Symbolic destination:<br />
The program setting up a connection uses a symbolic destination which must exist in the side<br />
information table. A symbolic destination can be compared with a name in a telephone directory.<br />
Partner LU:<br />
The partner LU (logical unit) specifies where the communication partner is to be found. It can be<br />
compared with an address in a telephone directory.<br />
Partner program:<br />
The partner program is the program which is started in the partner system or the program to which the<br />
connection is made. It can be compared with the telephone number of the partner.<br />
Side information tables have different names in different systems:<br />
- In R/2, the table is XCOM (maintained with Transaction TM31).<br />
- In R/3, the table is TXCOM (maintained with Transaction SM54 or SM31)<br />
- In external systems, the table is always called sideinfo. Under UNIX, you can maintain sideinfo with
the<br />
editor program “vi”
Available CPI-C Functionality<br />
ABAP/4 ABAP/4<br />
Function libraries ( SAP )<br />
CPI-C starter set calls CPI-C starter set calls<br />
© SAP AG<br />
CPI-C advanced function calls (subset)<br />
CPI-C SAP-specific functions<br />
The CPI-C starter set is implemented in ABAP/4 (key word COMMUNICATION).<br />
SAP provides a number of functions for developing external CPI-C programs (also known as remote<br />
CPI-C) on SAP-supported platforms.<br />
These functions can be divided into three groups:<br />
CPI-C starter set calls:<br />
This group contains CPI-C starter set calls.<br />
CPI-C advanced function calls:<br />
This group contains a subset of the X/Open advanced function calls.<br />
CPI-C SAP-specific calls:<br />
This group contains SAP-specific functions which are either needed for communication with R/2 or R/3,<br />
or which are optional.
CPI-C Calls in ABAP/4<br />
© SAP AG<br />
COMMUNICATION INIT ...<br />
COMMUNICATION ALLOCATE ...<br />
COMMUNICATION ACCEPT ...<br />
COMMUNICATION SEND ...<br />
COMMUNICATION RECEIVE ...<br />
COMMUNICATION DEALLOCATE ...<br />
The CPI-C starter set has been implemented in ABAP/4 with the key word COMMUNICATION and<br />
its six variants.<br />
For all variants, you can find the return code value of the operation either in the system field SY-<br />
SUBRC or in the optional parameter RETURNCODE (R/2, from Rel. 5.0).
CPI-C Functions for C Programs<br />
CPI-C starter set calls CMINIT Initialize connection<br />
CMALLC Set up connection<br />
CMACCP Accept connection<br />
CMRCV Receive data<br />
CMSEND Send data<br />
CMDEAL Close connection<br />
CPI-C advanced function calls CMSPLN<br />
(subset) CMSTPN<br />
...<br />
CPI-C SAP-specific functions SAP_CMINIT<br />
SAP_CMLOGON<br />
...<br />
© SAP AG<br />
The CPI-C starter set and other CPI-C function calls (advanced function calls (subset) and SAP-specific<br />
functions) are available to the programming language C for external platforms (see the document "SAP<br />
Supported Network Products").<br />
The CPI-C starter set consists of the following calls:<br />
CMINIT Initialize_Conversation Define communication parameters<br />
CMALLC Allocate_Conversation Set up conversation<br />
CMACCP Accept_Conversation Accept conversation<br />
CMSEND Send Send data<br />
CMRCV Receive Receive data<br />
CMDEAL Deallocate_Conversation Close conversation
Standard Includes (<strong>Data</strong> Definitions)<br />
ABAP/4 C<br />
REPORT XYZ. XYZ.<br />
... ...<br />
INCLUDE RSCPICDF.<br />
INCLUDE RSEBCASC.<br />
... ...<br />
© SAP AG<br />
...<br />
#include <br />
oder<br />
#include "{pathname}/cpic.h"<br />
For CPI-C programs, both ABAP/4 and C contain includes (reports or files) with data definitions on the<br />
one hand and conversion tables on the other.<br />
ABAP/4:<br />
RSCPICDF: This report performs all CPI-C definitions as specified by IBM or X/Open. It defines, for<br />
example, the different return codes.<br />
RSEBCASC: This include program contains both the conversion tables for converting EBCDIC to<br />
ASCII<br />
and vice-versa.<br />
C program:<br />
Here, you have to include the header file cpic.h. You can specify the file name explicitly or the file must<br />
exist in the central include directory. In this file, all constants, structures and function prototypes are<br />
declared.<br />
For the data conversion, you can use the file convert.txt. The explicit path to this file is declared via the<br />
environment variable CONVERT.<br />
...
Initializing Connections (INIT)<br />
ABAP/4 C<br />
... ...<br />
COMMUNICATION INIT INIT<br />
DESTINATION dest dest<br />
ID ID convid convid<br />
[ [ RETURNCODE rc rc ] ]<br />
... ...<br />
© SAP AG<br />
...<br />
CMINIT (<br />
convid,<br />
dest,<br />
&rc );<br />
...<br />
The program setting up the CPI-C connection must first execute an INIT call. This uses a symbolic<br />
address to access the side information file (which contains the connection and communication<br />
parameters).<br />
symbolic_dest: Symbolic name (entry in the side information table)<br />
conversation_id: This value is returned by the routine and must be specified in all subsequent CPI-<br />
C calls<br />
for this connection.<br />
return_code: Error code: (0 (CM_OK) --> routine executed without error).<br />
The variables are defined in the include RSCPICDF for ABAP/4, and in the file "cpic.h" for C.<br />
ABAP/4: DEST C 8 C: dest PCPIC_CHAR<br />
CONVID C 8 convid PCONVERSATION_ID<br />
RC X 2 rc CM_RETCODE<br />
(Examples: ABAP/4: --> DATA: DEST(8) TYPE C.<br />
C: --> PCPIC_CHAR dest = (PCPIC_CHAR)0;)<br />
For C data types, you should note the following:<br />
& --> is an address operator and returns a pointer to an object<br />
* --> is a reference operator and returns the address of an object<br />
Legend: Italics --> denote a variable<br />
Underlined characters --> input variable which must be specified during the call<br />
[ ... ] --> optional specification
Setting Up Connections Actively (ALLOCATE)<br />
ABAP/4 C<br />
... ...<br />
COMMUNICATION<br />
ALLOCATE<br />
ID ID convid convid<br />
[ [ RETURNCODE rc rc ] ]<br />
... ...<br />
© SAP AG<br />
The connection is set up physically to a partner program.<br />
...<br />
CMALLC (<br />
convid,<br />
&rc );<br />
convid: The value returned by INIT must be specified here.<br />
You must assign appropriate types and lengths to variables:<br />
ABAP/4: CONVID C 8<br />
RC X 2<br />
C: convid PCONVERSATION_ID<br />
rc CM_RETCODE<br />
If CMALLC is executed without error, the program for this connection will be in SEND mode.<br />
...
Accepting Connections Passively (ACCEPT)<br />
ABAP/4 C<br />
...<br />
COMMUNICATION ACCEPT<br />
ID convid<br />
[ RETURNCODE rc ]<br />
...<br />
© SAP AG<br />
...<br />
CMACCP (<br />
convid,<br />
&rc );<br />
A passive program must accept the connection before data can be exchanged.<br />
You should assign appropriate types and lengths to variables:<br />
ABAP/4: CONVID C 8<br />
RC X 2<br />
C: convid PCONVERSATION_ID<br />
rc CM_RETCODE<br />
If the ACCEPT is executed without error, the program for this connection will be in RECEIVE mode.<br />
conversation_id: This value is returned by the routine and must be specified in all subsequent CPI-<br />
C calls<br />
for this connection.<br />
return_code: = 0 (CM_OK): Routine executed without error<br />
= error code: An error has occurred<br />
...
Sending <strong>Data</strong> (SEND)<br />
ABAP/4 C<br />
...<br />
COMMUNICATION SEND<br />
ID convid<br />
BUFFER output<br />
[ LENGTH send_length ]<br />
[ RETURNCODE rc ]<br />
...<br />
© SAP AG<br />
...<br />
CMSEND (<br />
convid,<br />
output,<br />
&send_length,<br />
&request_to_send_received,<br />
&rc );<br />
With the SEND command, you can send data packets of up to 30,000 bytes.<br />
All the data in the buffer output is sent to the receiving program. However, it is not actually transferred<br />
until the buffer is full or after the next RECEIVE or DEALLOCATE.<br />
If a particular length send_length is specified, the appropriate number of bytes is transferred from the<br />
buffer output to the receiving program.<br />
A SEND is allowed only within the send status.<br />
You must assign appropriate types and lengths to variables:<br />
ABAP/4: CONVID C 8<br />
OUTPUT C<br />
SEND_LENGTH P max. 30,000<br />
RC X 2<br />
C: convid PCONVERSATION_ID<br />
output PCPIC_CHAR max. 30,000<br />
send_length CPIC_INT<br />
request_to_send_received REQUEST_TO_SEND_RECEIVED<br />
(not evaluated)<br />
rc CM_RETCODE<br />
...
Receiving <strong>Data</strong> (RECEIVE)<br />
ABAP/4 C<br />
l ...<br />
COMMUNICATION RECEIVE<br />
ID convid<br />
BUFFER input<br />
[ LENGTH req_length ]<br />
[ RECEIVED rec_length ]<br />
DATAINFO datainfo<br />
STATUSINFO statusinfo<br />
[ HOLD ]<br />
[ RETURNCODE rc ]<br />
...<br />
© SAP AG<br />
...<br />
CMRCV (<br />
convid,<br />
input,<br />
&requested_length,<br />
&received_length,<br />
&data_info,<br />
&status_info,<br />
&request_to_send_received,<br />
&rc );<br />
<strong>Data</strong> is received in the buffer input in accordance with the buffer length. After the call, rec_length<br />
contains the number of bytes placed in the buffer. The DATAINFO and STATUSINFO fields contain<br />
information about the call.<br />
If a RECEIVE occurs in send mode, the right to send is transferred to the receiving program, together<br />
with any existing user data in the network buffer. The sending program then assumes RECEIVE mode.<br />
You must assign appropriate types and lengths to variables:<br />
ABAP/4: C:<br />
CONVID C 8 convid<br />
PCONVERSATION_ID<br />
INPUT C max. 30,000 input PCPIC_CHAR<br />
DATAINFO X 4 data_info PDATA_RECEIVED<br />
STATUSINFO X 4 status_info PSTATUS_RECEIVED<br />
REQ_LENGTH P requested_length CPIC_INT (max.<br />
30,000)<br />
REC_LENGTH X 4 received_length CPIC_INT<br />
RC X 2 rc CM_RETCODE<br />
request_to_send_received<br />
PREQUEST_TO_SEND_RECEIVED<br />
If the HOLD parameter is set, the current work process is kept (no roll-out, roll-in).<br />
...
Status and <strong>Data</strong> Information in RECEIVE<br />
* Status information<br />
ABAP/4: Include report RSCPICDF<br />
DATA: INT4(4) TYPE X.<br />
...<br />
DATA:<br />
CM_NO_STATUS_RECEIVED LIKE INT4 VALUE '00000000',<br />
CM_SEND_RECEIVED LIKE INT4 VALUE '00000001',<br />
* <strong>Data</strong> information<br />
CM_NO_DATA_RECEIVED LIKE INT4 VALUE '00000000',<br />
CM_COMPLETE_DATA_RECEIVED ... VALUE '00000002',<br />
...<br />
typedef typedef int int STATUS_RECEIVED;<br />
STATUS_RECEIVED;<br />
... ...<br />
# status_info<br />
#define #define CM_NO_STATUS_RECEIVED CM_NO_STATUS_RECEIVED 00<br />
#define #define CM_SEND_RECEIVED 11<br />
# data_info<br />
typedef typedef int int STATUS_RECEIVED;<br />
STATUS_RECEIVED;<br />
... ...<br />
#define #define CM_NO_DATA_RECEIVED 00<br />
#define #define CM_COMPLETE_DATA_RECEIVED 22<br />
© SAP AG<br />
C: Header file cpic.h<br />
The status information is used to switch the send direction. The values have the following meanings:<br />
- CM_NO_STATUS_RECEIVED --> Send direction not switched<br />
- CM_SEND_RECEIVED --> Connection partner surrenders send rights<br />
If the status information is set to CM_SEND_RECEIVED, the current program has the status SEND.<br />
The data information returns details about the flow control. The different statuses are as follows:<br />
- CM_NO_DATA_RECEIVED --> No data received<br />
- CM_COMPLETE_DATA_RECEIVED --> All data received<br />
- CM_INCOMPLETE_DATA_RECEIVED --> Not all available data received
Closing Connections (DEALLOCATE)<br />
ABAP/4 C<br />
...<br />
COMMUNICATION DEALLOCATE<br />
ID convid<br />
[ RETURNCODE rc ]<br />
...<br />
© SAP AG<br />
...<br />
CMDEAL (<br />
convid,<br />
&rc );<br />
This call closes the CPI-C connection. If there is still data in the buffer, it is transferred before the<br />
connection is closed. The local system resources are then released.<br />
Only the sending program should close the connection.<br />
You should assign appropriate types and lengths to variables:<br />
ABAP/4: C:<br />
CONVID C 8 convid PCONVERSATION_ID<br />
RC X 2 rc CM_RETCODE<br />
...
CPI-C Return Codes<br />
ABAP/4: Include report RSCPICDF<br />
DATA: INT2(2) TYPE X.<br />
...<br />
* return code<br />
DATA: CM_OK LIKE INT2 VALUE '0000'.<br />
...<br />
DATA: CM_DEALLOCATED_NORMAL LIKE INT2 VALUE '0012',<br />
DATA: CM_PARAMETER_ERROR LIKE INT2 VALUE '0013',<br />
...<br />
typedef typedef int int CM_RETCODE;<br />
CM_RETCODE;<br />
... ...<br />
# returncode<br />
#define #define CM_OK CM_OK 00<br />
... ...<br />
#define #define CM_DEALLOCATED_NORMAL CM_DEALLOCATED_NORMAL 18 18<br />
#define #define CM_PARAMETER_ERROR 19 19<br />
... ...<br />
© SAP AG<br />
C: Header file cpic.h<br />
Return codes provide information about the outcome of calls. You use the returned values to aid general<br />
progran flow control and error handling in the event of communication terminations.<br />
In ABAP/4, the return code value is copied to the system field SY-SUBRC.<br />
The return codes are defined in the include report RSCPICDF.<br />
The return code is 2 bytes long and has the type X.
CPI-C Advanced Function Calls<br />
© SAP AG<br />
CMSPLN() Sets the partner LU<br />
CMSTPN() Sets the partner transaction program<br />
CMCNVO() <strong>Data</strong> conversion from ASCII to EBCDIC<br />
CMCNVI() <strong>Data</strong> conversion from EBCDIC to ASCII<br />
CMFLUS() Immediate transfer of network buffer data<br />
to the partner program<br />
...<br />
CPI-C advanced function calls:<br />
This group contains a subset of the X/Open advanced function calls. SAP provides a subset of the<br />
X/Open CPI-C advanced function calls for external programs.<br />
You use CMSPLN (Set_Partner_LU_Name) and CMSTPN (Set_Transaction_Program_Name) to set<br />
the partner LU and partner transaction programs. CMSPLN and CMSTPN only make sense after a<br />
CMINIT and before a CMALLC, i.e. only in programs which set up a connection. Then, you can<br />
overlay the contents of the side information file.<br />
CMCNVO (Convert_Outgoing) and CMCNVI (Convert_Incoming) are the function calls for<br />
converting data from EBCDIC to ASCII and vice-versa.<br />
CMFLUS (Flush) immediately transfers network buffer data to the partner program.
CPI-C SAP-specific Functions<br />
SAP_CMINIT() Specifies SAP gateway (active program)<br />
SAP_CMACCP() Specifies SAP gateway (passive program)<br />
SAP_CMLOGON() Connect string for logon to R/2 or R/3<br />
SAP_CMCERR() Error handling<br />
SAP_CMPERR()<br />
SAP_CMLOADCONVTAB() <strong>Data</strong> conversion<br />
SAP_CMMODCONVTAB()<br />
...<br />
© SAP AG<br />
SAP-specific CPI-C functions are partly required for communication with SAP R/2 or R/3. Optional<br />
SAP-specific CPI-C functions simplify the development of remote CPI-C programs.<br />
SAP_CMINIT (optional) and SAP_CMACCP(required in a passive program) inform the program<br />
which gateway handler is being used (gateway host, gateway service, protocol type), but these details are<br />
generally available in the relevant side information. SAP_CMINIT only makes sense before a CMINIT.<br />
Accordingly, the partner program must then contain a SAP_CMACCP before the CMACCP in order to<br />
receive the communication parameters.<br />
SAP_CMLOGON (optional) creates the connect string necessary for logging on to an R/2 or R/3<br />
System.<br />
SAP_CMCERR (optional) checks whether the data received by the R/2 or R/3 System is an error<br />
message.<br />
In the case of an error, SAP_CMPERR (optional) returns a short explanation of the error.<br />
You can use SAP_CMLOADCONVTAB (optional) to load a special conversion table.<br />
SAP_CMMODCONVTAB (optional) modifies an area of the current conversion table.
Communication with an ABAP/4 Program<br />
R/3<br />
© SAP AG<br />
R/2<br />
Communication program<br />
External<br />
system<br />
R/2<br />
SAP Basis System<br />
Communication program<br />
ABAP/4 (FORM routine)<br />
An ABAP/4 program is interpreted by a language processor embedded in the SAP Basis System.<br />
This architecture first requires a connection to be set up with the SAP Basis System:<br />
R/2: X1SA R/3: sapgwxx<br />
You must make an appropriate entry in the side information table of the system setting up the<br />
communication.<br />
R/3
ABAP/4 Program as Server<br />
© SAP AG<br />
REPORT RSCPICSV.<br />
...<br />
FORM FORM1.<br />
...<br />
COMMUNICATION ACCEPT<br />
...<br />
COMMUNICATION RECEIVE<br />
...<br />
ENDFORM.<br />
In an ABAP/4 server program, the communication is made in a subroutine (FORM).<br />
The FORM routine executes an ACCEPT call and then has the status allowing it to receive data.<br />
The FORM routine can set up further communications as required.<br />
An ABAP/4 program can contain several subroutines for communication purposes and then call them in<br />
various sequences.
<strong>Data</strong> Conversion<br />
© SAP AG<br />
R/3<br />
UNIX<br />
ASCII<br />
R/2<br />
EBCDIC<br />
MVS<br />
VSE<br />
BS2000<br />
<strong>Data</strong> conversion is required between systems using the ASCII character set and those using EBCDIC,<br />
unless the partner system is being used purely for data archiving purposes.
Conversion Commands<br />
© SAP AG<br />
ABAP/4:<br />
C:<br />
TRANSLATE field USING ASC_TO_EBC.<br />
TRANSLATE field USING EBC_TO_ASC.<br />
TRANSLATE field FROM CODE PAGE abc<br />
TO CODE PAGE xyz.<br />
CMCNVO ( output, &send_length, &rc );<br />
CMCNVI ( input, &received_length, &rc);<br />
SAP_CMLOADCONVTAB()<br />
SAP_CMMODCONVTAB()<br />
If an EBCDIC host system is attempting to communicate with an R/3 ASCII machine, the data must be<br />
converted, but it is not important whether the sending program or the receiving program performs the<br />
conversion.<br />
You can use include programs (RSEBCASC in ABAP/4, cpic.h in C) to convert data. It is even possible<br />
to convert between code pages. You must maintain the relevant code page in the SAP system. In R/3,<br />
you do this with the Transaction SPAD.<br />
CMCNVO() converts from ASCII to EBCDIC.<br />
CMCNVI() converts from EBCDIC to ASCII.<br />
For the C functions SAP_CMLOADCONVTAB() and SAP_CMMODCONVTAB(), you use a special<br />
conversion table in the file convert.txt (for the precise syntax, see the online manual BC<br />
Communication: Programming).
Logon String for the SAP System<br />
l ABAP/4:<br />
© SAP AG<br />
w <strong>Data</strong>base structure<br />
CPICCONN<br />
Field Length<br />
REQID 4<br />
REQTYPE 4<br />
AMODE 1<br />
IMODE 1<br />
FILL1 2<br />
MAND 3<br />
NAME 12<br />
CODE 8<br />
LANG 1<br />
KORR 1<br />
PROG 8<br />
MODN 30<br />
l C:<br />
w SAP_CMLOGON (<br />
output,<br />
&send_length,<br />
reqid,<br />
reqtype,<br />
amode,<br />
client,<br />
usr,<br />
pwd,<br />
language,<br />
prog,<br />
form,<br />
&rc<br />
);<br />
In an ABAP/4 (client) program, you can use the ABAP/4 Dictionary structure CPICCONN. Set the data<br />
and then send the logon string with COMMUNICATION SEND.<br />
In a C program, you first set up the logon string with SAP_CMLOGON and then send it with<br />
CMSEND. The logon string is appropriately formatted and converted from ASCII to EBCDIC because<br />
a logon string is expected in EBCDIC both for R/2 and for R/3.
Logon to the SAP System<br />
Logon<br />
CONN CPIC 1<br />
1 4 5 8 9 10 11 12 75<br />
Client (3)<br />
User name (12)<br />
FORM routine (30)<br />
Password (8)<br />
ABAP/4 program<br />
Language ID (1)<br />
Unused (1)<br />
------------------------------------------------------------------------------------------------------------------------<br />
Acknowledgement<br />
Acknowledgement<br />
© SAP AG<br />
CPIC 1<br />
Type<br />
1. Negative acknowledgement<br />
APPC CPIC 1<br />
2. Negative acknowledgement<br />
Request ID: APPC, FREE<br />
FREE 1 00027 E027 User not allowed<br />
The general header is sent only when you logon to the SAP System.<br />
The header is twelve bytes long; the last three characters are blank.<br />
Messages from the SAP System<br />
The program name specifies the ABAP/4 program that contains a FORM routine. The FORM routine is<br />
activatred internally by the SAP task handler.<br />
If an error occurs, the connection is terminated with the request ID FREE and an error text.<br />
As confirmation of the logon, the SAP System sends back the general header with the request ID APPC.<br />
The data is then transferred in free format.
Logon to the Basis System<br />
ABAP/4<br />
REPORT RSCPIC01.<br />
... ...<br />
TABLES: CPICCONN.<br />
CMINIT CMINIT ... ...<br />
INCLUDE RSCPICDF.<br />
CMALLC CMALLC ... ...<br />
INCLUDE RSEBCASC.<br />
... .<br />
COMMUNICATION INIT ...<br />
SAP_CMLOGON ( (<br />
COMMUNICATION ALLOCATE ...<br />
output, output,<br />
CPICCONN-REQID = 'CONN'.<br />
&sendlength,<br />
&sendlength,<br />
CPICCONN-REQTYPE = 'CPIC'.<br />
"CONN", "CONN",<br />
CPICCONN-AMODE = '1'.<br />
"CPIC", "CPIC",<br />
...<br />
'1', '1',<br />
CPICCONN-PROG = 'ABAPPROG'.<br />
... ...<br />
CPICCONN-MODN = 'FORM1'.<br />
"ABAPPROG",<br />
"FORM1"<br />
TRANSLATE CPICCONN USING ASC_TO_EBC.<br />
"FORM1" ); );<br />
COMMUNICATION SEND ...<br />
CMSEND<br />
BUFFER CPICCONN ... CMSEND ( ( convid, convid, output, output, ... ... ); );<br />
CMRCV<br />
COMMUNICATION RECEIVE ...<br />
CMRCV ( ( convid, convid, input, input, ... ... ); );<br />
BUFFER CPICCONN ... ... ...<br />
TRANSLATE CPICCONN USING EBC_TO_ASC.<br />
...<br />
© SAP AG<br />
..<br />
.<br />
..<br />
.<br />
The logon data record must always be sent to an SAP System in EBCDIC format.<br />
In ABAP/4, you can use the TRANSLATE statement for data conversion. The include program<br />
RSEBCASC contains conversion tables for a conversion to IBM’s EBCDIC character set, but you can<br />
also specify certain code pages explicitly.<br />
In C, you can make use of the relevant functionality via the SAP libraries.<br />
C
CPI-C Development Environment<br />
l ABAP/4 Development Workbench<br />
l The SAP CPI-C Software Development Kit (SDK)<br />
© SAP AG<br />
The SAP CPI-C SDK (Software Development Kit) is delivered with every R/3 System.<br />
The CPI-C SDK contains excutable programs for the relevant hardware platform, libraries and include<br />
files, as well as ABAP/4 and C programs. Accompanying text files describe the structure of the SDK<br />
and provide important information about how programs are compiled and imported to the individual<br />
platforms.<br />
The directory structure in the file system is as follows:<br />
cpicsdk - bin Executable programs<br />
- lib Libraries<br />
- include Header files<br />
- text Source files, help text
SAP CPI-C Programs<br />
© SAP AG<br />
ABAP/4 programs<br />
ACPICT1<br />
ACPICT2<br />
C programs<br />
ccpict1t<br />
ccpict2t<br />
Every R/3 System delivered contains the ABAP/4 programs ACPICT1 and ACPICT2. ACPICT1 is a<br />
client program, i.e. a program which initiates a communication. ACPICT2 is a server program started<br />
by a partner program. Both ABAP/4 programs are supplied for the R/2 System from Release 5.0G.<br />
The C programs ccpict1t and ccpict2t (directory cpicsdk/bin) are also delivered with the CPI-C SDK.<br />
ccpict1t is a client program, ccpict2t is a server program.<br />
You can use these programs at least to test the connection to the partner system or the partner program.<br />
So, ccpict1t can call the R/3 program ACPICT2, while ACPICT1 can call ccpict2t.
Executing CPI-C Test Programs<br />
© SAP AG<br />
ACPICT1<br />
CPI-C test program<br />
Program parameters<br />
DEST<br />
ABAP<br />
CONVERT<br />
USER<br />
PWD<br />
ccpict1t<br />
[1]: ccpict1t -dest R3 -abap -usr ABC -pwd XYZ<br />
For the connection test, you need to start the program ACPICT1 in R/3. In the program parameters, you<br />
specify the partner program. If this is a C program, you do not need to specify values for USER and<br />
PWD (password). If you want to set up a connection to an R/2 ABAP/4 program, you must set the<br />
ABAP and CONVERT flags, as well as USER and PWD.<br />
You can pass the required program parameters to the client program ccpict1t via the command line. To<br />
find out which parameters these are, execute ccpict1t without specifying any parameters.
Developing, Testing and Error Detection<br />
l ABAP/4:<br />
l C:<br />
© SAP AG<br />
Debugging<br />
System log<br />
Trace files<br />
Gateway monitor<br />
Developer traces<br />
Debugging: Program code, tables, breakpoints, ...<br />
You can evaluate the system log with Transaction SM21.<br />
Trace files are generated by external CPI-C programs. You can set the trace level with the environment<br />
variable CPIC_TRACE.<br />
You start the gateway monitor under UNIX as follows:<br />
gwmon pf = /sapmnt/
Chapter 5 Summary<br />
© SAP AG<br />
l SAP provides CPI-C functionality both in ABAP/4<br />
(starter set) and also in libraries for external programs<br />
(starter set, advanced function calls, SAP-specific<br />
functions).<br />
l When communicating with an ABAP/4 server program,<br />
the client program must first logon to the SAP Basis<br />
System.<br />
l In the ABAP/4 server program, a FORM routine is<br />
responsible for communication.<br />
l <strong>Data</strong> conversions may have to be performed.<br />
l There are programs for performing connection tests with<br />
partner systems.
Exercise 1 for Chapter 5<br />
Report name: ZBCE##E1 (active)<br />
ZBCE##E2 (passive)<br />
Main report: RS415057 (active)<br />
RS415058 (passive)<br />
Logical destination: BC415_##<br />
##: Group number<br />
Implement a CPI-C communication between two R/3 Systems<br />
where the data (information about a special airline carrier) is<br />
read from a server system and output in a client system.<br />
Proceed as follows:<br />
1. Create your CPIC destination with Transaction SM54 in R/3<br />
for a server system to be specified by the instructor.<br />
2. Copy the main report RS415057 to your report ZBCE##E1. In<br />
your program, you must fill the places flagged with the<br />
comment *Ad ... . From this active program, you should call<br />
the FORM routine SEND in your passive program ZBCE##E2<br />
which you must also create.<br />
3. Now switch to the specified R/3 server system. There, copy<br />
the main report RD415058 to your report ZBCE##E2. In your<br />
program, you must fill the places flagged with the comment<br />
*Add ... .<br />
4. Then, you can return to the first R/3 System and use your<br />
CPI-C destination to test the connection of both your<br />
programs.
Solution for Chapter 5<br />
&----------------------------------------------------------------*<br />
*& Report RS415051 *<br />
*& *<br />
*&---------------------------------------------------------------*<br />
REPORT RS415051.<br />
TABLES SPFLI.<br />
TABLES CPICCONN. "Logon record<br />
INCLUDE RSEBCASC.<br />
INCLUDE RSCPICDF.<br />
PARAMETERS: DEST(8) DEFAULT 'BC415TIL'.<br />
PARAMETERS: CARRID LIKE SPFLI-CARRID DEFAULT 'LH'.<br />
DATA: SBUFFER(5) VALUE 'OK'.<br />
DATA BEGIN OF ISPFLI OCCURS 1.<br />
INCLUDE STRUCTURE SPFLI.<br />
DATA END OF ISPFLI.<br />
DATA: RBUFFER(255).<br />
DATA: DUMMY.<br />
DATA: CONVID(8), "Coversation ID<br />
DI(4) TYPE X, "<strong>Data</strong> information<br />
SI(4) TYPE X, "Status information<br />
RL(4) TYPE X, "Receive length<br />
CPIC_RC LIKE SY-SUBRC. "Return code
*----------------------------------------------------------------*<br />
* <strong>Data</strong> for SAP logon *<br />
*----------------------------------------------------------------*<br />
CPICCONN-REQID = 'CONN'. "Request ID<br />
CPICCONN-REQTYPE = 'CPIC'. "Type<br />
CPICCONN-AMODE = '1'. "Mode number<br />
CPICCONN-IMODE = ' '.<br />
CPICCONN-FILL1 = ' '.<br />
CPICCONN-MAND = '000'. "Client<br />
CPICCONN-NAME = 'SAPCPIC'. "User<br />
CPICCONN-CODE = 'ADMIN'. "Password<br />
CPICCONN-LANG = SY-LANGU. "Language<br />
CPICCONN-KORR = ' '. "not used<br />
CPICCONN-PROG = 'RS415052'. "Partner program<br />
CPICCONN-MODN = 'SEND'. "FORM routine<br />
*----------------------------------------------------------------*<br />
* CPI-C: CM_INIT *<br />
*----------------------------------------------------------------*<br />
FORMAT COLOR 1.<br />
WRITE: / 'CM_INIT #', DEST.<br />
COMMUNICATION INIT DESTINATION DEST ID CONVID RETURNCODE CPIC_RC.<br />
FORMAT COLOR 2.<br />
WRITE: / 'RC:', CPIC_RC.<br />
IF CPIC_RC NE CM_OK.<br />
EXIT.<br />
ENDIF.
*----------------------------------------------------------------*<br />
* CPI-C: CM_ALLOCATE *<br />
*----------------------------------------------------------------*<br />
SKIP 1.<br />
FORMAT COLOR 1.<br />
WRITE: / 'CM_ALLOC'.<br />
COMMUNICATION ALLOCATE ID CONVID RETURNCODE CPIC_RC.<br />
FORMAT COLOR 2.<br />
WRITE: / 'RC:', CPIC_RC.<br />
IF CPIC_RC NE CM_OK.<br />
EXIT.<br />
ENDIF.<br />
*----------------------------------------------------------------*<br />
* CPI-C: CM_SEND: Logon to SAP *<br />
*----------------------------------------------------------------*<br />
TRANSLATE CPICCONN USING ASC_TO_EBC.<br />
SKIP 1.<br />
FORMAT COLOR 1.<br />
WRITE: / 'CM_SEND SAP logon'.<br />
COMMUNICATION SEND ID CONVID BUFFER CPICCONN RETURNCODE CPIC_RC.<br />
FORMAT COLOR 2.<br />
WRITE: / 'RC:', CPIC_RC.<br />
TRANSLATE CPICCONN USING EBC_TO_ASC.<br />
WRITE: / 'LOGON-DATA'(001), 20 CPICCONN.<br />
IF CPIC_RC NE CM_OK.<br />
EXIT.<br />
ENDIF.
*----------------------------------------------------------------*<br />
* CPI-C: CM_RECEIVE Response to SAP logon *<br />
*----------------------------------------------------------------*<br />
SKIP 1.<br />
FORMAT COLOR 1.<br />
WRITE: / 'CM_RCV Response to logon'.<br />
COMMUNICATION RECEIVE ID CONVID BUFFER RBUFFER RETURNCODE CPIC_RC<br />
FORMAT COLOR 2.<br />
WRITE: / 'RC:', CPIC_RC.<br />
DATAINFO DI<br />
STATUSINFO SI<br />
RECEIVED RL.<br />
TRANSLATE RBUFFER USING EBC_TO_ASC.<br />
WRITE: / 'RESPONSE TO LOGON:'(002), RBUFFER(40).<br />
IF CPIC_RC NE CM_OK.<br />
EXIT.<br />
ENDIF.<br />
*----------------------------------------------------------------*<br />
* Send parameter for selection *<br />
*----------------------------------------------------------------*<br />
FORMAT COLOR 1.<br />
WRITE: / 'CM_SEND'.<br />
*----------------------------------------------------------------*<br />
* CPI-C: CM_SEND Send CARRID to partner program *<br />
*----------------------------------------------------------------*<br />
COMMUNICATION SEND ID CONVID BUFFER CARRID RETURNCODE CPIC_RC.<br />
FORMAT COLOR 2.<br />
WRITE: / 'RC:', CPIC_RC.<br />
*<br />
WHILE CPIC_RC = CM_OK.<br />
FORMAT COLOR 1.<br />
WRITE: / 'CM_RCV'.
*----------------------------------------------------------------*<br />
* CPI-C: CM_RCV Receive data from sending partner program *<br />
*----------------------------------------------------------------*<br />
COMMUNICATION RECEIVE ID CONVID BUFFER ISPFLI RETURNCODE CPIC_RC<br />
FORMAT COLOR 2.<br />
WRITE: / 'RC:', CPIC_RC.<br />
WRITE: / 'DI:', DI.<br />
WRITE: / 'SI:', SI.<br />
APPEND ISPFLI.<br />
ENDWHILE.<br />
SKIP 1.<br />
FORMAT COLOR 1.<br />
DATAINFO DI<br />
STATUSINFO SI<br />
RECEIVED RL.<br />
WRITE: / 'Received data:'(004).<br />
FORMAT COLOR 6.<br />
LOOP AT ISPFLI.<br />
NEW-LINE.<br />
WRITE: ISPFLI-CARRID,<br />
ENDLOOP.<br />
ISPFLI-CONNID,<br />
ISPFLI-CITYFROM,<br />
ISPFLI-CITYTO.<br />
*----------------------------------------------------------------*<br />
* CPI-C: Deallocate *<br />
*----------------------------------------------------------------*<br />
SKIP 1.<br />
FORMAT COLOR 1.<br />
WRITE: / 'CM_DEALL'.<br />
COMMUNICATION DEALLOCATE ID CONVID RETURNCODE CPIC_RC.<br />
FORMAT COLOR 2.<br />
WRITE: / 'RC:', CPIC_RC.<br />
*&---------------------------------------------------------------*<br />
*& Report RS415052 *<br />
*& *
*&---------------------------------------------------------------*<br />
REPORT RS41505D.<br />
INCLUDE RSEBCASC.<br />
INCLUDE RSCPICDF.<br />
TABLES SPFLI.<br />
DATA BEGIN OF ISPFLI OCCURS 1.<br />
INCLUDE STRUCTURE SPFLI.<br />
DATA END OF ISPFLI.<br />
DATA: RBUFFER(255).<br />
DATA: DUMMY.<br />
DATA: CONVID(8), "Coversation ID<br />
FORM SEND.<br />
DI(4) TYPE X, "<strong>Data</strong> information<br />
SI(4) TYPE X, "Status information<br />
RL(4) TYPE X, "Receive length<br />
CPIC_RC LIKE SY-SUBRC. "Return code<br />
*----------------------------------------------------------------*<br />
* CPI-C: CM_ACCEPT *<br />
*----------------------------------------------------------------*<br />
COMMUNICATION ACCEPT ID CONVID RETURNCODE CPIC_RC.<br />
IF CPIC_RC NE CM_OK.<br />
EXIT.<br />
ENDIF.
*----------------------------------------------------------------*<br />
* CPI-C: CM_RCV Receive carrier ID *<br />
*----------------------------------------------------------------*<br />
COMMUNICATION RECEIVE ID CONVID<br />
IF CPIC_RC NE CM_OK.<br />
EXIT.<br />
ENDIF.<br />
*<br />
* Read data<br />
*<br />
SELECT * FROM SPFLI<br />
BUFFER SPFLI-CARRID<br />
RETURNCODE CPIC_RC<br />
DATAINFO DI<br />
STATUSINFO SI<br />
RECEIVED RL.<br />
WHERE CARRID = SPFLI-CARRID.<br />
*----------------------------------------------------------------*<br />
* CPI-C: CM_SEND Send selected data to partner program *<br />
*----------------------------------------------------------------*<br />
COMMUNICATION SEND ID CONVID<br />
IF CPIC_RC NE CM_OK.<br />
EXIT.<br />
ENDIF.<br />
ENDSELECT.<br />
BUFFER SPFLI<br />
RETURNCODE CPIC_RC.<br />
*----------------------------------------------------------------*<br />
* CPI-C: Deallocate *<br />
*----------------------------------------------------------------*<br />
COMMUNICATION DEALLOCATE ID CONVID<br />
ENDFORM.<br />
RETURNCODE CPIC_RC.
Outlook: Using OCX Components<br />
R/3 application server Frontend platform<br />
BAPI function<br />
modules<br />
or<br />
customer-specific<br />
function modules<br />
© SAP AG<br />
What is OCX?<br />
RFC<br />
gateway<br />
R/3<br />
application<br />
TCP/IP<br />
TCP/IP port<br />
RFC<br />
libraries<br />
RFC API<br />
( WInSock )<br />
Logon<br />
Desktop<br />
application<br />
Table<br />
Table view<br />
Includes<br />
visualization<br />
OCX (Ole custom Control eXtension) is an OLE object which combines the different OLE features in<br />
one. Like DLLs, OCXs are compiled on Windows-based systems and exist in the process environment<br />
of the application. All OCX properties and methods are primarily represented via the OLE Automation<br />
interface.<br />
The SAP environment contains the following OCXs:<br />
Table OCX<br />
Table view OCX<br />
Logon OCX
Outlook: SAP Business Objects<br />
l Object-oriented<br />
approach with<br />
R/3<br />
l Management of<br />
objects in the<br />
Business<br />
Object<br />
Repository<br />
l Currently, there<br />
are about 160<br />
core business<br />
objects<br />
© SAP AG<br />
Behavior<br />
Restrictions<br />
Rules Methods<br />
Events<br />
In Release 3.0 of the R/3 System, an object-oriented approach has been directly implemented in the SAP<br />
business workflow development. This includes encapsulation of functions and modules, and also<br />
inheritance, i.e. hierarchical relationships between object types.<br />
An object type is the definition/description of all objects generated at runtime. It is thus available at the<br />
time of definition, whereas objects are always edited at runtime.<br />
Objects are defined by a key structure which consists primarily of key fields of the relevant tables which<br />
make up the business document. Besides the key structure, you can define other proerties which<br />
correspond to the database fields of tables.<br />
Methods in R/3 are the implementation of actions (e.g. performed by ABAP/4 reports, function modules<br />
or transactions) and can be executed with the relevant object.
Outlook: SAP Business Object Active X<br />
Architecture<br />
© SAP AG<br />
Win32 Win32<br />
OLE Automation<br />
OCX<br />
MS Excel<br />
Visual Basic<br />
...<br />
OLE Automation<br />
clients<br />
RFC RFC<br />
Application Application server server<br />
R/3 Object Broker<br />
Business<br />
objects<br />
For external applications, you will be able to access business objects in R/3 by using SAP Business<br />
Object Active X (implemented as an OCX, OLE Control eXtension).<br />
The external application accesses R/3 objects via OLE Automation calls directed to SAP Business<br />
Object Control. The calls are then passed on as pure RFC calls to the R/3 Object Broker.<br />
This allows you to access all object types managed via the SAP Business Object Repository. In R/3,<br />
you access the Object Repository with Transaction SWO1.
Outlook: Object Hierarchy<br />
© SAP AG<br />
Factory<br />
Business object<br />
The above object hierarchy shows the available OLE objects.<br />
Business objects<br />
collection<br />
The factory object controls the connection to the R/3-System. It is also required to generate business<br />
objects and collections of business objects.<br />
The business collection object contains the individual business objects.<br />
Business objects are local instances of R/3 business objects. As soon as an object is generated on the<br />
desktop, the methods and properties of the relevant R/3 business object are made available for further<br />
processing. For this reason, the business objects learn about the interfaces only at runtime.<br />
For more information on available object methods and object properties, please refer to the online<br />
documentation.
Outlook: Working with Business Objects<br />
Example of processing SAP business objects<br />
Set oBOF = CreateObject("SAP.BusinessObjectFactory")<br />
blnLogged = oBOF.Logon<br />
Set boWhoAmI = oBOF.GetSAPObject("USR01", "MUELLER")<br />
...<br />
oBOF.Logoff<br />
blnLogged = False<br />
© SAP AG<br />
In the above example, a factory object is generated first. Logon to the R/3 System is performed with the<br />
“Logon” method.<br />
Then, the R/3 business object "USR01" is accessed with the key field value "MUELLER".<br />
Before logoff from the R/3 System, the business object can be processed.
© SAP AG<br />
<strong>Data</strong> Transfer<br />
Application Development in the<br />
ABAP/4 Development Workbench<br />
Week 4<br />
R
Contents II / Week 4<br />
Chapter 1 Sequential Files<br />
Chapter 2 Introduction to Batch Input<br />
Processing<br />
Chapter 3 Special Features of Batch<br />
Input Processing<br />
© SAP AG<br />
Exercises<br />
Solutions<br />
Chapter 4 General Information about<br />
Application-specific Batch<br />
Input Programs<br />
Chapter 5 CALL TRANSACTION<br />
Chapter 6 Local Files
Chapter 1 Sequential Files<br />
© SAP AG<br />
l The Purpose of Sequential Files.<br />
l Opening, Processing and Closing Files.<br />
l Processing Files with Different Formats.
Chapter 1 Objectives<br />
© SAP AG<br />
l The possible uses of sequential files.<br />
l How to process sequential files and the steps<br />
involved.<br />
l How to process a sequential file containing different<br />
record types.
Overview<br />
© SAP AG<br />
ABAP/4 program<br />
R/3<br />
TRANSFER READ DATASET<br />
Sequential file<br />
You can process sequential files with the statements READ DATASET (for read operations) and<br />
TRANSFER (for write operations).<br />
The sequential file must be visible to the application server. Files on the current presentation server<br />
cannot be processed with TRANSFER or READ DATASET. For further information about files of this<br />
type, see the chapter Local Files.
<strong>Data</strong> Imports and Exports<br />
© SAP AG<br />
Fabe Farbe<br />
Customer<br />
program<br />
Customer system<br />
Sequential<br />
file<br />
R/3 System<br />
SAP<br />
program<br />
Sequential files are located at the interface between a customer system and the R/3 System.<br />
Sequential files are suitable for importing data from a customer system to the R/3 System and for<br />
exporting data from the R/3 System to a customer system.
File Processing<br />
© SAP AG<br />
Open file<br />
Process file<br />
Close file<br />
Before data records can be written to a sequential file or read from a file, the file must be opened.<br />
After processing, the file is closed.<br />
In the program, you call the file by its absolute file name. The absolute file name consists of the exact<br />
path and the actual (relative) file name, e.g. '/tmp/bc180/d01' (note that file names are case-sensitive).<br />
The format of file names is largely dependent on the operating system. You can access portable<br />
programs with the function module FILE_GET_NAME which returns the physical name for a given<br />
logical file name. See also the online documentation for the module in Transaction SE37 or refer to the<br />
online ABAP/4 User’s Guide.
Opening a File<br />
© SAP AG<br />
OPEN DATASET <br />
OUTPUT<br />
FOR INPUT<br />
APPENDING<br />
IF SY-SUBRC NE 0.<br />
.<br />
.<br />
.<br />
To open a file, you use the statement OPEN DATASET . Depending on whether this is<br />
successful, SY-SUBRC is set to 0 or 8. Errors are ignored.<br />
If you do not specify any further options, the file is opened for reading.<br />
Possible options:<br />
FOR OUTPUT<br />
Opens the file for writing. If the file already exists, its contents are deleted, but this applies only after<br />
the end of the program. If the statement occurs in a program, the cursor is simply positioned at the<br />
beginning of the file. You must then specify CLOSE DATASET in order to delete the file. If the file<br />
does not exist, it is generated.<br />
FOR INPUT<br />
Opens an existing file for reading. If the file is already open, the cursor is positioned at the beginning of<br />
the file. You do not have to specify FOR INPUT explicitly.<br />
FOR APPENDING<br />
Opens the file for writing at the end of the file. If the file does not exist, it is generated. If the file is<br />
already open, the cursor is positioned at the end.
Opening a File (Binary and Text Mode)<br />
© SAP AG<br />
OPEN DATASET <br />
OUTPUT<br />
FOR INPUT<br />
APPENDING<br />
IN BINARY MODE<br />
TEXT MODE<br />
IF SY-SUBRC NE 0.<br />
.<br />
.<br />
.<br />
You can choose to open a file in binary mode or in text mode.<br />
Possible options:<br />
IN BINARY MODE<br />
The data is not interpreted by the read and write operations READ DATASET and TRANSFER. The<br />
data areas specified for these key words are input or output directly. You do not have to specify IN<br />
BINARY MODE explicitly.<br />
IN TEXT MODE<br />
If you open a file with this option, the system assumes that the file has a line structure. Each time<br />
READ DATASET or TRANSFER is executed, one line is always input/output and the data is always<br />
processed up to the end-of-line selection. If the data area is too large for the line that is read, the<br />
remaining area is padded with blanks. If it is too small, the end of the line is lost.<br />
If you make no additional specification, the file is opened in binary mode.
Binary Mode and Text Mode<br />
Binary mode Text mode<br />
ABAP/4<br />
program A B C<br />
A B<br />
A B C D<br />
TRANSFER<br />
© SAP AG<br />
A B C A B A B C D<br />
READ DATASET<br />
ABAP/4<br />
program A B C<br />
A B A<br />
B C D<br />
READ DATASET<br />
ABAP/4<br />
program A B C<br />
A B<br />
A B C D<br />
ABAP/4<br />
program A B C<br />
A B<br />
A B C<br />
TRANSFER<br />
A B C A B A B C D<br />
The example above illustrates the difference between binary mode and text mode:<br />
Three fields of different lengths are transferred at any one time. The data is then read into three fields of<br />
the same length.<br />
In text mode, the operating system-specific line-end character is set after every data record.<br />
Blanks at the end of a data record are not suppressed in text mode.
Opening a File - AT POSITION<br />
© SAP AG<br />
OPEN DATASET <br />
AT POSITION <br />
MESSAGE <br />
The following additions exist for the OPEN statement:<br />
AT POSITION <br />
With this addition, you can specify a file position (in bytes) from the beginning of the file. The next read<br />
or write operation then takes place at this point. You cannot position the cursor before the beginning of<br />
the file.<br />
Although this addition can be used together with IN TEXT MODE, this has little sense as the physical<br />
format of a text file is largely dependent on the operating system.<br />
MESSAGE <br />
If an error occurs when opening the file, the associated operating system message is stored in the field<br />
.<br />
For information on other additions, refer to the online documenation.
Transferring <strong>Data</strong> Records<br />
© SAP AG<br />
TRANSFER TO .<br />
Sequential<br />
file<br />
data<br />
record<br />
Each TRANSFER statement transfers one data record to a sequential file.<br />
Before TRANSFER, you place the data record in a field or a structure.<br />
Possible structures are field strings or table work areas.<br />
The execution of the TRANSFER statement depends on the mode:<br />
- Binary mode: Writes the length of the field or structure.<br />
- Text mode: Writes a line.<br />
If the specified file is not open, the TRANSFER statement tries to open the file FOR<br />
OUTPUT (IN BINARY MODE) or using the additions of the last OPEN DATASET statement for this<br />
file.<br />
Errors which occur during the TRANSFER statement result in program termination.<br />
The additional parameter LENGTH of the TRANSFER statement allows you to specify a<br />
length in bytes (in the format TRANSFER TO LENGTH ). In this<br />
case, the exact number of characters specified in is transferred. If the structure is shorter, the<br />
record is padded (with blanks in text mode and hexadecimal zeros in binary mode). If the structure is<br />
longer, the record is truncated.
Reading <strong>Data</strong> Records<br />
© SAP AG<br />
READ DATASET INTO .<br />
Sequential<br />
file<br />
data<br />
record<br />
Each READ DATASET statement reads one record from a sequential file into a field or structure.<br />
Possible structures are field strings or table work areas.<br />
The execution of the READ DATASET statement depends on the mode:<br />
- Binary mode: Reads the length of the structure.<br />
- Text mode: Reads a line.<br />
If the specified file is not open, READ DATASET tries to open the file (IN BINARY MODE FOR<br />
INPUT or with the options of the last OPEN DATASET statement for this file).<br />
If the end of the file is reached, SY-SUBRC is set to 4. Otherwise it is set to 0. If the file cannot be<br />
opened, SY-SUBRC contains the value 8. Errors result in program termination.<br />
READ DATASET, like TRANSFER, does not perform conversions implicitly. The data is read in as it<br />
was written.<br />
The additional parameter LENGTH of the READ DATASET statement allows you to specify<br />
a length in bytes (in the format READ DATASET INTO LENGTH ).<br />
In this case, the exact number of characters specified in is read from the data record into the<br />
structure. If the structure is shorter, the record is padded (with blanks in text mode and with<br />
hexadecimal zeros in binary mode). If the structure is longer, the record is truncated.
Closing/Deleting a Sequential File<br />
© SAP AG<br />
CLOSE DATASET .<br />
DELETE DATASET .<br />
You use the CLOSE DATASET statement to close a sequential file explicitly.<br />
As with OPEN DATASET, errors are ignored.<br />
In a program, all opened files are implicitly closed each time the screen changes, and then reopened<br />
exactly as they were before when processing resumes.<br />
At the end of a program, all files are closed.<br />
Opening and closing files explicitly aids readability. Also, the advantage of using OPEN DATASET is<br />
that you can use the addition MESSAGE to avoid a programmed termination if an error occurs when<br />
opening the file (SY-SUBRC = 8). In addition, you should be aware that, in cases where a file is read,<br />
or generated and read, several times in the same report, only explicit opening or closing guarantees that<br />
the cursor will be repositioned at the beginning of the file.<br />
A file is not closed implicitly when READ DATASET reaches the endo of a file.<br />
You can use the DELETE DATASET to delete a sequential file explicitly. If this is<br />
successful, SY-SUBRC is set to 0.<br />
You can display the current state of the file in debugging by choosing Goto -> System -> System areas<br />
and then entering (or selecting) DATASETS.
Example: Creating a File<br />
© SAP AG<br />
REPORT RSFFF01A.<br />
TABLES SFLIGHT.<br />
* INCLUDE RSFFF01B.<br />
DATA: BEGIN OF REC,<br />
CARRID LIKE SFLIGHT-CARRID,<br />
CONNID LIKE SFLIGHT-CONNID,<br />
FLDATE LIKE SFLIGHT-FLDATE,<br />
PLANETYPE LIKE SFLIGHT-PLANETYPE,<br />
END OF REC.<br />
PARAMETERS<br />
FILE(20) DEFAULT '/tmp/RSFFF01A'<br />
LOWER CASE.<br />
START-OF-SELECTION.<br />
OPEN DATASET FILE FOR OUTPUT.<br />
GET SFLIGHT.<br />
MOVE-CORRESPONDING SFLIGHT TO REC.<br />
TRANSFER REC TO FILE.<br />
WRITE: / REC-CARRID, REC-CONNID,<br />
/ REC-FLDATE, REC-PLANETYPE.<br />
ULINE.<br />
END-OF-SELECTION.<br />
CLOSE DATASET FILE.<br />
First you define the structure to be transferred. In this example, it is a field string, but it could also be a<br />
help field, the header liner of an internal table or an ABAP/4 Dictionary work area.<br />
The field string can also be transferred from an include report.<br />
Next, you fill the structure. In principle, all statements that perform a value assignment can be used<br />
here. Examples include MOVE, COMPUTE, MOVE-CORRESPONDING, MOVE TO and WRITE<br />
TO. Refer also to the relevant online documentation.<br />
Finally, you transfer the structure with the TRANSFER statement.
Example: ABAP/4 Dictionary Structures<br />
© SAP AG<br />
REPORT RSFFF01C.<br />
TABLES: SFLIGHT, SBC420A.<br />
PARAMETERS<br />
FILE(20) DEFAULT '/tmp/RSFFF01A'<br />
LOWER CASE.<br />
GET SFLIGHT.<br />
MOVE-CORRESPONDING SFLIGHT TO SBC420A.<br />
TRANSFER SBC420A TO FILE.<br />
WRITE: / SBC420A-CARRID, SBC420A-CONNID,<br />
/ SBC420A-FLDATE, SBC420A-PLANETYPE.<br />
ULINE.<br />
Table structure SBC420A<br />
--------------------------------------------------------------------<br />
Name Type Length Meaning<br />
--------------------------------------------------------------------<br />
SBC420A-CARRID CHAR 03 Short description of airline company<br />
SBC420A-CONNID NUMC 04 Code for flight connection<br />
SBC420A-FLDATE DATS 08 Flight date<br />
SBC420A-PLANETYPE CHAR 10 Aircraft type<br />
REPORT RSFFF01D.<br />
TABLES: SFLIGHT, SBC420A.<br />
DATA: BEGIN OF REC.<br />
INCLUDE STRUCTURE SBC420A.<br />
DATA: END OF REC.<br />
PARAMETERS<br />
FILE(20) DEFAULT '/tmp/RSFFF01A'<br />
LOWER CASE.<br />
GET SFLIGHT.<br />
MOVE-CORRESPONDING SFLIGHT TO REC.<br />
TRANSFER REC TO FILE.<br />
WRITE: / REC-CARRID, REC-CONNID,<br />
/ REC-FLDATE, REC-PLANETYPE.<br />
ULINE.<br />
Dict.<br />
You can also use structures from the ABAP/4 Dictionary for data transfer. To do this, declare the<br />
structure with TABLES.<br />
Then, in your program, do either of the following:<br />
- use the work area declared with TABLES<br />
- copy the structure for your field string with INCLUDE STRUCTURE.<br />
You can display the ABAP/4 Dictionary structure in the ABAP/4 Editor with the SHOW command.
Example: Reading a File<br />
© SAP AG<br />
REPORT RSFFF01E.<br />
TABLES SFLIGHT.<br />
* INCLUDE RSFFF01B.<br />
DATA: BEGIN OF REC,<br />
CARRID LIKE SFLIGHT-CARRID,<br />
CONNID LIKE SFLIGHT-CONNID,<br />
FLDATE LIKE SFLIGHT-FLDATE,<br />
PLANETYPE LIKE SFLIGHT-PLANETYPE,<br />
END OF REC.<br />
PARAMETERS<br />
FILE(20) DEFAULT '/tmp/RSFFF01A'<br />
LOWER CASE.<br />
START-OF-SELECTION.<br />
OPEN DATASET FILE FOR INPUT.<br />
DO.<br />
READ DATASET FILE INTO REC.<br />
IF SY-SUBRC NE 0. EXIT. ENDIF.<br />
WRITE: / REC-CARRID,REC-CONNID,<br />
/ REC-FLDATE,REC-PLANETYPE.<br />
ULINE.<br />
ENDDO.<br />
CLOSE DATASET FILE.<br />
First you define the structure to be read. In this example, it is a field string. It can also be transferred<br />
from an include report.<br />
The structure used for reading with READ DATASET must match the structure used for writing with<br />
TRANSFER.<br />
You read the data records into your structure within a loop and process them.<br />
READ DATASET does not require a logical database. You can therefore analyze your extract data<br />
along with data from any logical database (which you then specify in the report attributes).
Example: Extending a File<br />
© SAP AG<br />
REPORT RSFFF01F.<br />
TABLES: SFLIGHT, SBC420A.<br />
PARAMETERS FILE(20) DEFAULT<br />
'/tmp/RSFFF01A' LOWER CASE.<br />
START-OF-SELECTION.<br />
OPEN DATASET FILE FOR APPENDING<br />
IN BINARY MODE.<br />
GET SFLIGHT.<br />
MOVE-CORRESPONDING SFLIGHT TO SBC420A.<br />
TRANSFER SBC420A TO FILE.<br />
WRITE: / SBC420A-CARRID, SBC420A-CONNID.<br />
END-OF-SELECTION.<br />
CLOSE DATASET FILE.<br />
To append data records to the end of the file, you use the FOR APPENDING addition of the OPEN<br />
DATASET statement.
Example: Variable Format (Generate)<br />
© SAP AG<br />
REPORT RSFFF01G.<br />
TABLES: SFLIGHT, SBOOK.<br />
INCLUDE RSFFF01I.<br />
PARAMETERS:<br />
FILE(20) DEFAULT '/tmp/RSFFF01G'<br />
LOWER CASE.<br />
START-OF-SELECTION.<br />
OPEN DATASET FILE FOR OUTPUT<br />
IN BINARY MODE.<br />
GET SFLIGHT.<br />
MOVE-CORRESPONDING SFLIGHT TO REC1.<br />
MOVE 'A' TO REC1-FLAG.<br />
TRANSFER REC1 TO FILE.<br />
WRITE REC1-CARRID, REC1-CONNID,.......<br />
GET SBOOK.<br />
MOVE-CORRESPONDING SBOOK TO REC2.<br />
MOVE 'B' TO REC2-FLAG.<br />
TRANSFER REC2 TO FILE.<br />
WRITE REC2-BOOKID, REC2-CUSTID,.......<br />
END-OF-SELECTION.<br />
CLOSE DATASET FILE.<br />
The above example generates a sequential file with data records of different structures.<br />
The include program is defined as follows:<br />
DATA: BEGIN OF REC1, FLAG.<br />
INCLUDE STRUCTURE SBC420A.<br />
DATA: END OF REC1.<br />
DATA: BEGIN OF REC2, FLAG.<br />
INCLUDE STRUCTURE SBC420B.<br />
DATA: END OF REC2.<br />
The structure SBC420A is used for flight data, while the structure SBC420B holds reservation data.<br />
A flag should indicate whether the next data record contains flight data or reservation data.
Example: Variable Format (Read)<br />
© SAP AG<br />
REPORT RSFFF01H.<br />
TABLES: SBC420A, SBC420B.<br />
DATA: FLAG.<br />
PARAMETERS<br />
FILE(20) DEFAULT '/tmp/RSFFF01G'<br />
LOWER CASE.<br />
START-OF-SELECTION.<br />
OPEN DATASET FILE FOR INPUT<br />
IN BINARY MODE.<br />
DO.<br />
READ DATASET FILE INTO FLAG.<br />
IF SY-SUBRC NE 0. EXIT. ENDIF.<br />
CASE FLAG.<br />
WHEN 'A'.<br />
READ DATASET FILE INTO SBC420A.<br />
WRITE: / SBC420A-CARRID SBC420A-CONNID,<br />
SBC420A-FLDATE, SBC420A-PLANETYPE.<br />
WHEN 'B'.<br />
READ DATASET FILE INTO SBC420B.<br />
WRITE: / SBC420B-BOOKID, SBC420B-CUSTID,<br />
SBC420B-CUSTYP, SBC420B-CLASS.<br />
ENDCASE.<br />
ENDDO.<br />
END-OF-SELECTION.<br />
CLOSE DATASET FILE.<br />
The above program reads the data records of the file created with the previous program.<br />
The program assumes that an ID (‘A’ or ‘B’) precedes each data record.<br />
The file is opened in binary mode and the records are read in the length of the structure specified.
Defining Structures - Summary<br />
Yes<br />
© SAP AG<br />
Write<br />
Fill structure<br />
Transfer structure<br />
More data<br />
records?<br />
Define structures<br />
Open file<br />
Read<br />
No Yes<br />
Close file<br />
Read data record<br />
Process data record<br />
End of<br />
file?<br />
In a file processing program, you first define the structures required for the data records with the<br />
TABLES or DATA statement. The program uses these structures as internal buffers for the data<br />
records.<br />
You then open the sequential file for reading or writing with the OPEN statement.<br />
When writing to the file, you transfer the filled structures to the file with TRANSFER statements.<br />
When reading the file, you fill the structures set up for the data records with READ DATASET for<br />
further processing in the program.<br />
To close the sequential file, you exit file processing with the CLOSE DATASET statement.<br />
No
Chapter 1 Summary<br />
l The simplest method of organizing data is through sequential files. In<br />
particular, they provide a convenient way of exchanging data between<br />
systems. The TRANSFER command writes data (record by record) to a<br />
directory on the application server; you specify the path using the notation<br />
appropriate for the operating system. The READ DATASET command allows<br />
the target system to read in the data and you can then continue processing it<br />
if required. You open and close sequential files in the appropriate mode for<br />
whatever processing is required.<br />
© SAP AG
Exercises on Chapter 1: Sequential Files<br />
1. Your program name: ZBCF##A1<br />
Your group number: ##<br />
Your directory name: /tmp<br />
Your file name: BOOK##<br />
Name of the include report: RSFFF01L.<br />
Task:<br />
Create a file with flight/reservation data. The data records are<br />
to be entered by the user individually.<br />
Programming hints:<br />
a) Use the include report specified above for the data<br />
structure.<br />
The structure contains the airline carrier ID, flight ID, flight<br />
date, booking ID and customer ID (CARRID,CONNID,<br />
FLDATE, BOOKID, CUSTOMID).<br />
b) Using the PARAMETERS statement, define a selection<br />
screen on which the flight/reservation data can be entered.<br />
c) Transfer the data record in text mode.<br />
d) A new data record is to be added to the file whenever the<br />
report is started.<br />
2. Your program name: ZBCF##A2<br />
Your group number: ##<br />
Your directory name: /tmp<br />
Your file name: BOOK##<br />
Name of the include report: RSFFF01L<br />
Task:
Create a program that reads in the data of your<br />
flight/reservation file BAN## and outputs it to the screen.
Model Solution 1 for Chapter 1: Sequential Files<br />
REPORT RSFFF011 .<br />
* Record for sequential file defined as Dictionary structure or<br />
* include report provided<br />
DATA: BEGIN OF REC.<br />
INCLUDE STRUCTURE SBC420C.<br />
DATA: END OF REC.<br />
* STRUCTURE SBC420C:<br />
* CARRID, CONNID, FLDATE, BOOKID, CUSTOMID.<br />
* Alternative:<br />
* INCLUDE RSFFF01L.<br />
* Create selection screen (manual data input)<br />
PARAMETERS:<br />
FILE(20) DEFAULT '/tmp/BOOKXX' LOWER CASE,<br />
CARRID LIKE SFLIGHT-CARRID DEFAULT 'BA',<br />
CONNID LIKE SFLIGHT-CONNID DEFAULT '0001',<br />
FLDATE LIKE SFLIGHT-FLDATE DEFAULT '19960401',<br />
BOOKID LIKE SBOOK-BOOKID DEFAULT '00000001',<br />
CUSTOMID LIKE SBOOK-CUSTOMID DEFAULT '00000001'.<br />
* Open file for appending in text mode<br />
START-OF-SELECTION.<br />
OPEN DATASET FILE FOR APPENDING IN TEXT MODE.<br />
* Transfer data from selection screen to field string
MOVE: CARRID TO REC-CARRID,<br />
CONNID TO REC-CONNID,<br />
FLDATE TO REC-FLDATE,<br />
BOOKID TO REC-BOOKID,<br />
CUSTOMID TO REC-CUSTOMID.<br />
* Write field string to sequential file<br />
TRANSFER REC TO FILE.<br />
* List output<br />
WRITE: / REC-CARRID,<br />
/ REC-CONNID,<br />
/ REC-FLDATE,<br />
/ REC-BOOKID,<br />
/ REC-CUSTOMID.<br />
ULINE. SKIP.<br />
*D TEXT-001: 'Transfer data record to file:'<br />
WRITE: / TEXT-001, FILE.<br />
* Close the sequential file<br />
CLOSE DATASET FILE.
Model Solution 2 for Chapter 1: Sequential Files<br />
REPORT RSFFF012.<br />
* Record for sequential dataset defined as Dictionary structure or<br />
* include report provided<br />
DATA: BEGIN OF REC.<br />
INCLUDE STRUCTURE SBC420C.<br />
DATA: END OF REC.<br />
* STRUCTURE SBC420C:<br />
* CARRID, CONNID, FLDATE, BOOKID, CUSTOMID.<br />
* Alternative:<br />
* INCLUDE RSFFF01L.<br />
DATA: COUNT LIKE SY-INDEX.<br />
* Create selection screen<br />
PARAMETERS:<br />
FILE(20) DEFAULT '/tmp/BOOKXX' LOWER CASE.<br />
* Open file for reading in text mode<br />
START-OF-SELECTION.<br />
OPEN DATASET FILE FOR INPUT IN TEXT MODE.<br />
DO.<br />
READ DATASET FILE INTO REC.<br />
* Termination condition for reading<br />
IF SY-SUBRC NE 0.
COUNT = SY-INDEX - 1.<br />
EXIT.<br />
ENDIF.<br />
* List output<br />
WRITE: / 'Satz:', SY-INDEX,<br />
ENDDO.<br />
SKIP.<br />
ULINE.<br />
/ REC-CARRID,<br />
/ REC-CONNID,<br />
/ REC-FLDATE,<br />
/ REC-BOOKID,<br />
/ REC-CUSTOMID USING NO EDIT MASK.<br />
*D TEXT-001: '<strong>Data</strong> records read from file:'<br />
WRITE: / COUNT, TEXT-001, FILE.<br />
* Close the sequential file<br />
CLOSE DATASET FILE.
Chapter 2 Introduction to Batch Input Processing<br />
© SAP AG<br />
l Overview of Batch Input<br />
l Programming techniques for creating batch input<br />
sessions<br />
l Transaction SM35: Batch input administration<br />
transaction
Chapter 2 Objectives<br />
l The uses of batch input processing.<br />
l Programming technique for creating batch input sessions.<br />
l Processing batch input sessions and administration options.<br />
© SAP AG
Task Overview<br />
© SAP AG<br />
External External system system<br />
SAP R/2<br />
SAP R/3<br />
The reasons for transferring data without a basic interactive dialog with the user are:<br />
The datasets are large and already exist on an electronic data medium<br />
The data is transferred to another system and only then imported into the SAP system.
Problem Overview<br />
© SAP AG<br />
External<br />
data<br />
External<br />
data<br />
SAP<br />
interfaces<br />
Checks<br />
You must not transfer external data directly to the SAP database.<br />
External data must be checked before it is transferred to the SAP database.<br />
SAP system (host)<br />
SAP<br />
database<br />
SAP<br />
database
Technique Overview<br />
External system<br />
SAP R/2<br />
SAP SAP R/3 R/3<br />
© SAP AG<br />
Queue<br />
Batch<br />
input<br />
sessions<br />
Application<br />
program<br />
Large data sets are transferred to the SAP system using batch input.<br />
SAP<br />
database<br />
Batch input is an automatic procedure. It is often referred to as BDC (Batch <strong>Data</strong> Communication).<br />
To guarantee data consistency, the transfer data is subject to the same checks and updates as dialog<br />
data which is entered interactively by the user. Examples include:<br />
- Format checks<br />
- Automatic value range check (against check table or fixed value range)<br />
- Conversion of user data to program data and vice-versa<br />
- Field default values<br />
The transfer data is stored temporarily in the form of a batch input session in a queue file.<br />
A batch input session is a collection of business processes (transactions).<br />
A user dialog is simulated in a batch input procedure.
Screen Technique Overview<br />
© SAP AG<br />
Input<br />
modules<br />
PAI<br />
Output<br />
modules<br />
Dialog step<br />
Input<br />
modules<br />
Output<br />
modules<br />
PBO PAI PBO<br />
Input Processing Input Processing<br />
In an SAP system, dialog and background processing are controlled by screen programs.<br />
A screen program controls one dialog step.<br />
The components of a dialog step are:<br />
A PBO (Process Before Output) event which prepares the screen for output<br />
User input<br />
A PAI (Process After Input) event which processes user input<br />
t
Batch Input Processing<br />
© SAP AG<br />
SAP R/3<br />
Customer<br />
data<br />
Source file<br />
Sequential<br />
file<br />
Batch input program<br />
Batch input function<br />
Flight<br />
connections<br />
Reservation<br />
data<br />
Batch input or BDC (Batch <strong>Data</strong> Communication) is an automatic procedure for transferring data to the<br />
SAP system without a user dialog.<br />
A user dialog is simulated for this procedure so that the same checks and updates can be performed.<br />
A central component of this procedure is a queue file.<br />
This file receives the data via batch input programs and groups associated data together into ‘sessions’.<br />
To load the data into SAP databases, you process the sessions with the batch input function (menu<br />
options Systems -> Services-> Batch input, Transaction SM35).
Batch Input Program<br />
© SAP AG<br />
Batch input program<br />
BDC<br />
table<br />
READ DATASET<br />
CALL FUNCTION<br />
Sequential file<br />
Queue<br />
file<br />
<strong>Data</strong> is transferred to the queue file by batch input programs.<br />
These programs perform the following functions:<br />
Structure<br />
BDCDATA<br />
INCLUDE<br />
STRUCTURE<br />
ABAP/4<br />
Dictionary<br />
They provide structured work areas in the form of an internal table (BDC table) for the data to be<br />
transferred.<br />
They read in the data.<br />
They place the data in the BDC table.<br />
They transfer the filled BDC table to the queue file.<br />
The BDC table receives the input for the data transfer transactions.
Batch Input Queue File<br />
© SAP AG<br />
Screens<br />
SAP R/3<br />
Queue<br />
file<br />
Batch input<br />
Transaction 1 Transaction 2<br />
Screen 1 Screen 2 Log<br />
file<br />
Screen 1 Screen 2<br />
Customer<br />
data<br />
Flight<br />
connections<br />
Booking<br />
data<br />
The queue file collects the individual screens and combines them into sessions.<br />
SAP<br />
database<br />
You process these sessions with the batch input function (choose Systems -> Services-> Batch input or<br />
call Transaction SM35). As when you execute application functions (with add or change transactions)<br />
in the dialog interface, this sends data to the log file. When you subsequently perform an update, the<br />
data reaches the relevant SAP databases.<br />
The batch input function starts the application functions specified in the relevant session (indicated by<br />
their transaction codes).<br />
The data from the session is now copied to the screens belonging to the online transaction specified.
Format of a Batch Input Session<br />
© SAP AG<br />
l User who has created the session<br />
Session header<br />
l Client in wh ch session is to be processed<br />
l Session name<br />
l Batch input user<br />
l Date from when the session may be processed (lock date)?<br />
l Delete session after processing (Keep function)?<br />
Transaction<br />
Close session<br />
A batch input session consists of a header part (session header, described by the ABAP/4 Dictionary<br />
structure APQI) and a data part (transactions, described by the ABAP/4 Dictionary structure APQD).<br />
...
Creating a Batch Input Session<br />
© SAP AG<br />
Open batch<br />
input session<br />
Insert data<br />
for transactions<br />
Close batch<br />
input session<br />
Every batch input session must be opened and closed.<br />
The data for the application functions (transactions) is inserted in the batch input session.<br />
A batch input program can generate several consecutive batch input sessions. Parallel generation is not<br />
possible.
Function Modules for Batch Input Program<br />
© SAP AG<br />
BDC_OPEN_GROUP<br />
Client<br />
Session name<br />
Lock date<br />
Delete session after<br />
processing<br />
BDC user name<br />
BDC_INSERT<br />
Transaction code<br />
BDC table<br />
BDC_CLOSE_GROUP<br />
CLIENT<br />
GROUP<br />
HOLD<br />
KEEP<br />
USER<br />
TCODE<br />
DYNPROTAB<br />
Function modules (function group SBDC) are available for creating batch input sessions.<br />
You will learn about these function modules in the following slides. Refer also to the online<br />
documentation.
Function Module BDC_OPEN_GROUP<br />
© SAP AG<br />
CALL FUNCTION BDC_OPEN_GROUP’<br />
BDC_OPEN_GROUP’<br />
EXPORTING<br />
CLIENT = <br />
GROUP = <br />
HOLDDATE = <br />
KEEP = <br />
USER = <br />
EXCEPTIONS<br />
QUEUE_ERROR = 1<br />
CLIENT_INVALID = 2<br />
GROUP_INVALID = 3<br />
.<br />
.<br />
.<br />
You open a batch input session with the function module BDC_OPEN_GROUP.<br />
The parameters you must specify are as follows:<br />
CLIENT (Client)<br />
GROUP (Session name)<br />
USER (User name)<br />
Specification of the following parameters is optional:<br />
HOLDDATE (Earliest session start date)<br />
KEEP (ID whether session should be deleted after successful processing;<br />
KEEP = ' ': Delete session (default value)<br />
KEEP = 'X': Do not delete session)<br />
You receive various return values via EXCEPTIONS. You can read these with SY-SUBRC.<br />
USER must always be specified; The user type should be BDC.<br />
In online processing, the online user (and not the user name specified) is used for the authorization<br />
checks.
Function Module BDC_INSERT<br />
© SAP AG<br />
CALL FUNCTION BDC_INSERT’ BDC_INSERT’<br />
EXPORTING TCODE = <br />
TABLES DYNPROTAB = <br />
EXCEPTIONS<br />
INTERNAL_ERROR = 1<br />
NOT_OPEN = 2<br />
QUEUE_ERROR = 3<br />
TCODE_INVALID = 4<br />
You use function module BDC_INSERT to insert the data for ONE transaction into a session.<br />
To transfer the data, you require an internal table (BDC table).<br />
You must specify the following parameters:<br />
TCODE (transaction code),<br />
DYNPROTAB (BDC table).
BDC Table<br />
Program Screen Start Field name Field contents<br />
x<br />
x<br />
© SAP AG<br />
The BDC table holds the data for one transaction.<br />
The contents of the BDC table are then passed to the queue file.<br />
One table line includes the following information:<br />
Program name, screen number, start ID, field name, field value.<br />
<br />
<br />
... ...<br />
<br />
<br />
... ...<br />
... ...<br />
The start ID 'X' is always at the beginning of a new screen. The input values are now entered for each<br />
field in the table for this screen.<br />
For reasons of clarity, a table line should only include either program name, screen number and start ID<br />
or field name and field value (as above). In principle, however, all information can be included in a line.<br />
Only the field names of fields to be changed explicitly are included.
Defining the BDC Table<br />
© SAP AG<br />
DATA: BEGIN OF <br />
OCCURS .<br />
INCLUDE STRUCTURE BDCDATA.<br />
DATA: END OF .<br />
SHOW BDCDATA<br />
Field name Type Length Short text<br />
PROGRAM CHAR 8 BDC module pool<br />
DYNPRO NUMC 4 BDC screen number<br />
DYNBEGIN CHAR 1 BDC start of a screen<br />
FNAM CHAR 35 BDC field name<br />
FVAL CHAR 132 BDC field contents<br />
You declare the BDC table as an internal table with the ABAP/4 Dictionary structure 'BDCDATA'.<br />
The field -FVAL differentiates between upper and lower case, but the fields -<br />
PROGRAM and -FNAM are not case-sensitive.
Filling the BDC Table<br />
© SAP AG<br />
FORM .<br />
REFRESH .<br />
CLEAR .<br />
MOVE: TO -PROGRAM,<br />
TO -DYNPRO,<br />
'X' TO -DYNBEGIN.<br />
APPEND .<br />
CLEAR .<br />
MOVE: TO -FNAM,<br />
TO -FVAL.<br />
APPEND .<br />
CLEAR .<br />
MOVE: TO -FNAM,<br />
TO -FVAL.<br />
APPEND .<br />
...<br />
CLEAR .<br />
MOVE: TO -PROGRAM,<br />
TO -DYNPRO,<br />
'X' TO -DYNBEGIN.<br />
APPEND .<br />
...<br />
ENDFORM.<br />
The BDC table is set up line by line. As for every internal table, you do this with MOVE and APPEND<br />
statements.<br />
The fields of the table header line should be reset to their initial value with CLEAR.
Function Module BDC_CLOSE_GROUP<br />
© SAP AG<br />
CALL FUNCTION BDC_CLOSE_GROUP’<br />
BDC_CLOSE_GROUP’<br />
EXCEPTIONS<br />
NOT_OPEN = 1<br />
QUEUE_ERROR = 2<br />
You close a batch input session with the function module BDC_CLOSE_GROUP.<br />
You receive various return values via EXCEPTIONS. You can read these with SY-SUBRC.
Example: Change Customer <strong>Data</strong><br />
© SAP AG<br />
BC_TRAVEL data model for training<br />
Change customer data<br />
(Transaction TFBA)<br />
Change cust. data<br />
Customer number 1<br />
Cust. name Meier<br />
Postal code 6900<br />
City Heidelberg<br />
G/P cust. B<br />
Discount [%] 10<br />
Tel. no. 06221/66666<br />
Save<br />
In this example, the application function Change customer data (Transaction TFBA) demonstrates the<br />
creation of a BDC program.<br />
Here, a customer’s address data is to be changed.<br />
Before writing a BDC program for the application function, you must know the application function (so<br />
that the BDC program can simulate your input on the screen).
Preparations for BDC Program<br />
© SAP AG<br />
Help<br />
F1<br />
Technical info<br />
Table SCUSTOM<br />
Field ID<br />
Code /5 or Aend<br />
Field BDC_OKCODE<br />
Change cust. data<br />
Customer number_______<br />
First perform (step by step) the application function to be simulated.<br />
Make a note of:<br />
- the program name and screen number for each screen<br />
- the field and table name for every entry or cursor positioning<br />
- the number for each function key pressed<br />
- the screen program sequence<br />
Program SAPMTFBA<br />
Screen number 100<br />
System<br />
Status<br />
To do this, you use the system function Status and the Technical info help function.
Preparations for BDC Program - Screen Painter<br />
Kundendaten Change cust. ndern data<br />
Customer number________<br />
© SAP AG<br />
Program SAPMTFBA<br />
Screen number 100<br />
System<br />
Status<br />
Field list<br />
Field name Ln Cl Lg Fmt. I O<br />
SCUSTOM ID 8 36 08 NUMC x x<br />
...<br />
OK 0 0 04 OK<br />
...<br />
...<br />
Screen Painter<br />
In the Screen Painter (choose Tools -> ABAP/4 Workbench -> Screen Painter, or call Transaction<br />
SE51), you can get a complete list of fields for a particular screen. This is an alternative to the online<br />
help function).
Structure of the BDC Table<br />
PROGRAM SCREEN SCRNSTART FNAM FVAL<br />
SAPMTFBA 0100 X<br />
SAPMTFBA 0200 X<br />
© SAP AG<br />
SCUSTOM-ID ID<br />
BDC_OKCODE /5<br />
SCUSTOM-NAME CUSTNAME<br />
SCUSTOM-POSTCODE POSTCODE<br />
SCUSTOM-CITY CITY<br />
SCUSTOM-CUSTTYPE CUSTTYPE<br />
SCUSTOM-DISCOUNT DISCOUNT<br />
SCUSTOM-TELEPHONE TELEPHONE<br />
BDC_OKCODE /11<br />
Before you write the batch input program, you have to run the transaction and note down the screen<br />
numbers, screen sequence and the screen field names to be addressed later in the program. You enter<br />
this data in the BDC table.<br />
The field name for the OK code is the same for all screens: BDC_OKCODE. The value for the OK<br />
code consists of a slash '/' and the function key number (example: '/11').
Declaration Part 1<br />
© SAP AG<br />
REPORT RSFFF02A.<br />
PARAMETERS:<br />
NAME LIKE APQI-GROUPID DEFAULT SY-UNAME,<br />
ID LIKE SCUSTOM-ID DEFAULT '00000001',<br />
CUSTNAME LIKE SCUSTOM-NAME DEFAULT 'SCHMIDT',<br />
POSTCODE LIKE SCUSTOM-POSTCODE DEFAULT '69000',<br />
CITY LIKE SCUSTOM-CITY DEFAULT 'HEIDELBERG',<br />
CUSTTYPE LIKE SCUSTOM-CUSTTYPE DEFAULT 'B',<br />
DISCOUNT LIKE SCUSTOM-DISCOUNT DEFAULT '10',<br />
TELEFON LIKE SCUSTOM-TELEPHONE DEFAULT '06221/<br />
123456'.<br />
DATA:BEGIN OF BDC_TAB OCCURS 5.<br />
INCLUDE STRUCTURE BDCDATA.<br />
DATA: END OF BDC_TAB.<br />
In the declaration part of the BDC program, you define the BDC table.<br />
In this example, the data is entered directly on the selection screen (via PARAMETERS).
Creating Sessions<br />
© SAP AG<br />
START-OF-SELECTION.<br />
WRITE: / 'Start BDC session creation',<br />
SY-MANDT, NAME, SY-UZEIT.<br />
CALL FUNCTION 'BDC_OPEN_GROUP'<br />
EXPORTING CLIENT = SY-MANDT<br />
GROUP = NAME<br />
USER = 'BC420BDC'<br />
KEEP = 'X'<br />
PERFORM GENERATE_BDC_DATA.<br />
CALL FUNCTION 'BDC_INSERT'<br />
EXPORTING TCODE = 'TFBA'<br />
TABLES DYNPROTAB = BDC_TAB.<br />
CALL FUNCTION 'BDC_CLOSE_GROUP'.<br />
WRITE: / 'End BDC session creation',<br />
SY-MANDT, NAME, SY-UZEIT.<br />
You require the function modules for opening and closing sessions.<br />
To insert the data in the session, you set up the BDC table in a subroutine and call the function module<br />
BDC_INSERT.
Filling the BDC Table 2<br />
© SAP AG<br />
FORM GENERATE_BDC_DATA.<br />
REFRESH BDC_TAB.<br />
CLEAR BDC_TAB.<br />
BDC_TAB-PROGRAM = 'SAPMTFBA'.<br />
BDC_TAB-DYNPRO = '0100'.<br />
BDC_TAB-DYNBEGIN = 'X'.<br />
APPEND BDC_TAB.<br />
CLEAR BDC_TAB.<br />
BDC_TAB-FNAM = 'SCUSTOM-ID'.<br />
BDC_TAB-FVAL = ID.<br />
APPEND BDC_TAB.<br />
CLEAR BDC_TAB.<br />
BDC_TAB-FNAM = 'BDC_OKCODE'.<br />
BDC_TAB-FVAL = '/5'.<br />
APPEND BDC_TAB.<br />
Two fields are transferred for the first screen of Transaction TFBA.
Filling the BDC Table 3<br />
© SAP AG<br />
CLEAR BDC_TAB.<br />
BDC_TAB-PROGRAM = 'SAPMTFBA'.<br />
BDC_TAB-DYNPRO = '0200'.<br />
BDC_TAB-DYNBEGIN = 'X'.<br />
APPEND BDC_TAB.<br />
CLEAR BDC_TAB.<br />
BDC_TAB-FNAM = 'SCUSTOM-NAME'.<br />
BDC_TAB-FVAL = CUSTNAME.<br />
APPEND BDC_TAB.<br />
CLEAR BDC_TAB.<br />
BDC_TAB-FNAM = 'SCUSTOM-POSTCODE'.<br />
BDC_TAB-FVAL = POSTCODE.<br />
APPEND BDC_TAB.<br />
CLEAR BDC_TAB.<br />
BDC_TAB-FNAM = 'SCUSTOM-CITY'.<br />
BDC_TAB-FVAL = CITY.<br />
APPEND BDC_TAB.<br />
ENDFORM.<br />
For the second screen of Transaction TFBA, the fields 'SCUSTOM-NAME', 'SCUSTOM-<br />
POSTCODE' and 'SCUSTOM-CITY' are transferred.
Filling the BDC Table 4<br />
© SAP AG<br />
CLEAR BDC_TAB.<br />
BDC_TAB-FNAM = 'SCUSTOM-CUSTTYPE'.<br />
BDC_TAB-FVAL = CUSTTYPE.<br />
APPEND BDC_TAB.<br />
CLEAR BDC_TAB.<br />
BDC_TAB-FNAM = 'SCUSTOM-DISCOUNT'.<br />
BDC_TAB-FVAL = DISCOUNT.<br />
APPEND BDC_TAB.<br />
CLEAR BDC_TAB.<br />
BDC_TAB-FNAM = 'SCUSTOM-TELEPHONE'.<br />
BDC_TAB-FVAL = TELEFON.<br />
APPEND BDC_TAB.<br />
CLEAR BDC_TAB.<br />
BDC_TAB-FNAM = 'BDC_OKCODE'.<br />
BDC_TAB-FVAL = '/11'.<br />
APPEND BDC_TAB.<br />
ENDFORM.<br />
On the second screen of Transaction TFBA, the fields 'SCUSTOM-CUSTTYPE', 'SCUSTOM-<br />
DISCOUNT' and 'SCUSTOM-TELEPHONE' are also transferred.<br />
Finally, the OK code must be passed (choose Customer data -> Save). The field name for the OK code<br />
is the same for all screens: BDC_OKCODE.<br />
The value for the OK code consists of a slash '/' and the function key number (example: '/11') .<br />
Alternatively, you can use the function code assigned to this function code.<br />
When you choose Save, the data is updated. This completes batch input processing for this transaction.
Generating a Sequential File for BDC Program 1<br />
© SAP AG<br />
REPORT RSFFF02B.<br />
TABLES SCUSTOM.<br />
DATA: BEGIN OF REC,<br />
ID LIKE SCUSTOM-ID,<br />
POSTCODE LIKE SCUSTOM-POSTCODE,<br />
CUSTTYPE LIKE SCUSTOM-CUSTTYPE,<br />
END OF REC.<br />
PARAMETERS:<br />
FILE(30) DEFAULT '/tmp/RSFFF02B'<br />
LOWER CASE,<br />
CODE1 LIKE SCUSTOM-POSTCODE DEFAULT<br />
'9999999999',<br />
CODE2 LIKE SCUSTOM-POSTCODE DEFAULT<br />
'1111111111',<br />
CUST1 LIKE SCUSTOM-CUSTTYPE DEFAULT 'B',<br />
CUST2 LIKE SCUSTOM-CUSTTYPE DEFAULT 'P'.<br />
START-OF-SELECTION.<br />
OPEN DATASET FILE FOR OUTPUT<br />
In the following example, the postal code is changed according to a particular algorithm. In addition,<br />
business customers (type B) are changed to private customers (type P), and vice-versa. For this, the<br />
customer masters are changed with a batch input program for Transaction TFBA. A sequential file with<br />
the required data is generated with this program.
Generating a Sequential File for BDC Program 2<br />
© SAP AG<br />
SELECT * FROM SCUSTOM<br />
WHERE ID BETWEEN '00000001'AND '00000050'.<br />
MOVE SCUSTOM-ID TO REC-ID.<br />
IF SCUSTOM-POSTCODE(1) BETWEEN '1' AND '5'<br />
OR SCUSTOM-POSTCODE(1) BETWEEN 'A' AND 'M'.<br />
MOVE CODE1 TO REC-POSTCODE.<br />
ELSE.<br />
MOVE CODE2 TO REC-POSTCODE.<br />
ENDIF.<br />
IF SCUSTOM-CUSTTYPE EQ 'P'.<br />
MOVE CUST1 TO REC-CUSTTYPE.<br />
ELSE.<br />
MOVE CUST2 TO REC-CUSTTYPE.<br />
ENDIF.<br />
TRANSFER REC TO FILE.<br />
WRITE: / REC-ID, REC-POSTCODE, REC-CUSTTYPE.<br />
ENDSELECT.<br />
END-OF-SELECTION.<br />
CLOSE DATASET FILE.<br />
ULINE. SKIP.<br />
WRITE: / TEXT-001, FILE.<br />
In the example, we use the file created by the above program.<br />
Comment:<br />
This is only a general example. As the data for this example comes from the same SAP system, the<br />
following batch input program could also read in the data directly with ABAP/4 Open SQL or via a<br />
logical database (if available).
Declaration Part 2<br />
© SAP AG<br />
REPORT RFFF02C.<br />
PARAMETERS:<br />
FILE(30) DEFAULT '/tmp/RSFFF02B'<br />
LOWER CASE,<br />
NAME LIKE APQI-GROUPID DEFAULT SY-UNAME.<br />
DATA:BEGIN OF BDC_TAB OCCURS 5.<br />
INCLUDE STRUCTURE BDCDATA.<br />
DATA: END OF BDC_TAB.<br />
DATA:BEGIN OF REC,<br />
ID LIKE SCUSTOM-ID,<br />
POSTCODE LIKE SCUSTOM-POSTCODE,<br />
CUSTTYPE LIKE SCUSTOM-CUSTTYPE;<br />
END OF REC.<br />
START-OF-SELECTION:<br />
OPEN DATASET FILE FOR INPUT.<br />
WRITE: TEXT-001, SY-MANDT, NAME, SY-UZEIT.<br />
In the declaration part of the BDC program, you define the BDC table and a structure for reading in the<br />
data.
Reading in the <strong>Data</strong> and Creating Sessions<br />
© SAP AG<br />
CALL FUNCTION 'BDC_OPEN_GROUP'<br />
EXPORTING CLIENT = SY-MANDT<br />
GROUP = NAME<br />
USER = 'BC420BDC'<br />
KEEP = 'X'.<br />
DO.<br />
READ DATASET FILE INTO REC.<br />
IF SY-SUBRC NE 0. EXIT. ENDIF.<br />
WRITE: / REC-ID USING NO EDIT MASK,<br />
REC-POSTCODE, REC-CUSTTYPE.<br />
PERFORM GENERATE_BDC_DATA.<br />
CALL FUNCTION 'BDC_INSERT'<br />
EXPORTING TCODE = 'TFBA'<br />
TABLES DYNPROTAB = BDC_TAB.<br />
ENDDO.<br />
CALL FUNCTION 'BDC_CLOSE_GROUP'.<br />
WRITE: / TEXT-002,<br />
SY-MANDT, NAME, SY-UZEIT.<br />
END-OF-SELECTION.<br />
CLOSE DATASET FILE.<br />
You require the function modules for opening and closing sessions.<br />
To insert the data in the session, you set up the BDC table in a subroutine and call the function module<br />
BDC_INSERT.<br />
You set up the BDC table and call the subroutine in a loop for reading in the data with READ<br />
DATASET.<br />
The called subroutine is similar to the subroutine in the first program example.
Functionality of Transaction SM35<br />
© SAP AG<br />
Overview<br />
Analysis<br />
Administration<br />
Process<br />
Batch input sessions<br />
Batch input process logs<br />
Locked sessions<br />
Display session contents<br />
Display batch input data<br />
Logs (extended log)<br />
Statistics<br />
Select sessions for deletion<br />
Lock sessions<br />
Release sessions<br />
Process in foreground<br />
Display errors only<br />
Process in background<br />
You can process sessions with the Batch input function (choose System -> Services -> Batch input, or<br />
call Transaction SM35). Information is provided on status, screen sequence, screen contents, the user<br />
doing the processing, processing mode, server, as well as the user used for the authorization check.<br />
In Release 3.0, the user can activate Expert mode if required. This function deactivates error message<br />
344 'Batch input data does nto exist for this screen’ for interactive session processing. This option is of<br />
particular interest if you want to branch to other transaction processing, which does not correspond to<br />
the screen sequence in the batch input program.<br />
The Extended log function allows you to record W, I and S messages in addition to E messages. This<br />
option is also available if you are processing sessions in the background.
Copying <strong>Data</strong> to Screens<br />
© SAP AG<br />
Sessions<br />
TCODE<br />
=<br />
TFBA’<br />
Customer no. 1<br />
Location Berlin<br />
PostCode11111<br />
Tel. 123<br />
TCODE<br />
=<br />
TFBA’<br />
Customer no. 21 21<br />
Location Hof<br />
Post.code 93333<br />
Tel. _<br />
Screens<br />
Customer no. 1<br />
Name Hess<br />
PostCode 11111<br />
Location Berlin<br />
Tel. 123<br />
Customer no. 21 21<br />
Name M ller<br />
Post.code 93333<br />
Location Hof<br />
Tel. _<br />
. . . . . .<br />
Customer<br />
master recs.<br />
Name Hess<br />
Post.code 87342<br />
Location Ulm<br />
Tel. _<br />
Name M ller<br />
Post.code 60000<br />
Location Frankf.<br />
Tel. _<br />
When you process a session with Transaction SM35, the system uses the transaction code (TFBA in<br />
this case) to search for the start screen. Only the relevant session data is copied to this start screen.<br />
The subsequent screen is then processed. First the data is read from the SAP database and then the<br />
session data is copied to the screen.<br />
When the transaction has been processed, the system searches for the next transaction code in the<br />
session and starts the transaction.<br />
. . .
Processing Modes<br />
© SAP AG<br />
Foreground Display all dialog steps<br />
Display errors only Display dialog steps only for error or<br />
termination messages<br />
Background Dialog steps not displayed, processing<br />
takes place in the background<br />
In the ‘Process in foreground’ mode, all screens of a transaction are displayed. The authorizations of the<br />
user doing the processing apply. If a session terminates abnormally in test mode, you can use the<br />
Restart function to branch directly to the session overview (where you can restart the processing).<br />
In the ‘Display errors only’ mode, screens are displayed only when an error occurs. A transaction<br />
contains an error if a type E (error) or type A (termination) dialog message is output. The authorizations<br />
of the user doing the processing apply.<br />
In the ‘Process in background’ mode, the session is processed in the background. Your screen is<br />
available for input as soon as the session has been passed to the background control system. The<br />
authorizations of the BDC user specified in the header part of the session apply.<br />
When processing a session, the update mode is always synchronous (i.e. the next transaction is called<br />
only when the update for the preceding transaction has been completed).
Batch Input Processing<br />
© SAP AG<br />
Function<br />
Exit active batch input transaction and<br />
flag as incorrect<br />
Delete active batch input transaction in<br />
session<br />
Exit batch input processing and flag as<br />
incorrect<br />
Switch display mode from "Display errors<br />
only" to "Process in foreground"<br />
Switch display mode from "Display in<br />
foreground" to "Display errors only"<br />
OK code<br />
/n<br />
/bdel<br />
/bend<br />
/bda<br />
/bde<br />
In correction mode (‘Process in foreground’ or ‘Display errors only’), you can control the processing of<br />
your session by choosing System -> Services-> Batch input or by entering a command in the command<br />
field.
Session Status<br />
© SAP AG<br />
Processed<br />
Incorrect<br />
To be processed<br />
Creating<br />
Processing<br />
Background<br />
Session successfully processed<br />
Session was processed, but still<br />
contains incorrect transactions<br />
Session created, but not yet<br />
processed<br />
Session currently being recorded<br />
Session currently being processed<br />
Session is processed in the<br />
background<br />
A session is assigned a status during and after processing.<br />
Basically, the system identifies transactions that cannot be processed due to errors. These transactions<br />
remain in the session (which becomes an error session). You can then process these sessions again and<br />
correct the errors.
Creating and Processing Sessions<br />
© SAP AG<br />
Sequential files<br />
t1<br />
Create session<br />
t2<br />
SAP database<br />
Process session<br />
When you create batch input programs, bear in mind that session creation and session processing take<br />
place at different times (t1 and t2). What is processed at time t2 is already planned at time t1.<br />
Example: At time t2, the batch input system can no longer respond to dialog messages (except through<br />
user input in correction mode).<br />
The batch input system does not take over any SPA/GPA parameters at time t2.<br />
t
Summary of User Preparations<br />
© SAP AG<br />
Run application function<br />
Note program names<br />
and screen numbers<br />
Note field names<br />
Note screen sequence<br />
and function codes<br />
Create BDC table layout<br />
When you create a batch input program, you must know the transaction it is based on.<br />
You therefore run the transaction and make a note of the screen numbers, screen sequence and screen<br />
field names to be addressed later in the program.<br />
You enter this data in the BDC table.
Summary of Batch Input Programs<br />
© SAP AG<br />
Define structure and BDC table<br />
Open file and session<br />
Read in data record<br />
Fill BDC table<br />
Insert BDC table into session<br />
Close file and session<br />
A batch input program must perform the above functions.
Chapter 2 Summary<br />
© SAP AG<br />
l Batch input is an automatic procedure suitable for<br />
processing mass data. It is used primarily when installing<br />
the SAP system and when transferring data from a legacy<br />
system (external system). When programming, the data to<br />
be transferred must already exist in the appropriate format<br />
for the screen. Also, you must use the appropriate<br />
function modules to generate an executable session in an<br />
intermediate file (known as a queue file). You run sessions<br />
by calling Transaction SM35 and the data is transferred to<br />
the SAP system. There are several processing and<br />
administration options available to support you.
Exercises for Chapter 2: Introduction to Batch Input<br />
Processing<br />
1. Your program name: ZBCF##B1<br />
Your group number: ##<br />
Model file name: TELXX<br />
Your directory name: /tmp<br />
Your session name: RSD##021SES<br />
Name of the BDC user: BC420BDC<br />
Task:<br />
For your file TEL## (you may have to recreate it with program<br />
RSFFF02D) or for the model file TELXX, write a batch input<br />
program which enters the telephone numbers in the relevant<br />
SCUSTOM records using transaction TFBA.<br />
Programming hint:<br />
For transaction TFBA, use the following screens in the order<br />
specified:<br />
Program name: SAPMTFBA<br />
Screens Fields<br />
0100 SCUSTOM-ID<br />
BDC_OKCODE<br />
0200 SCUSTOM-TELEPHONE<br />
BDC_OKCODE<br />
2. Your program name: ZBCF###B2<br />
Your group number: ###
Your directory name: /tmp<br />
Name of model file: KUNXX<br />
Session name: RSD###022SES<br />
Name of the BDC user: BC420DC<br />
Task:<br />
File KUNXX contains SCUSTOM data for adding new<br />
SCUSTOM records with transaction TFBB and for changing<br />
existing SCUSTOM records with transaction TFBA. Write a<br />
batch input program which reads in this data and enters it in<br />
the SCUSTOM records.<br />
Programming hint:<br />
The data record structure is as follows:<br />
filled for transaction<br />
Description Name Length TFBA TFBB<br />
ID REC-FLAG 1 U N<br />
Customer ID REC-ID 8 x<br />
Name REC-NAME 25 x x<br />
Postal code REC-POSTCODE 10 x x<br />
City REC-CITY 25 x x<br />
Customer type REC-CUSTTYPE 1 x x<br />
Cust. discount REC-DISCOUNT 3 x x<br />
Telephone REC-TELEPHONE 30 x x<br />
This structure is defined in the include program RSFFF02F.<br />
The ID has one of the following values:<br />
• 'U' (Update): Change SCUSTOM record<br />
• 'N' (New): Add this SCUSTOM record
The 'U' and 'N' records are filled almost identically, only the 'U'<br />
records also contain a customer ID.<br />
Use the following screens in the order specified:<br />
Screens for task 2<br />
Trans- Program Screens Fields<br />
action name<br />
TFBA SAPMTFBA 0100 SCUSTOM-ID<br />
BDC_OKCODE<br />
0200 SCUSTOM-NAME<br />
SCUSTOM-POSTCODE<br />
SCUSTOM-CITY<br />
SCUSTOM-CUSTTYPE<br />
SCUSTOM-DISCOUNT<br />
SCUSTOM-TELEPHONE<br />
BDC_OKCODE
Trans- Program Screens Fields<br />
action name<br />
TFBB SAPMTFBB 0100 SCUSTOM-NAME<br />
Include program for task 2<br />
SCUSTOM-POSTCODE<br />
SCUSTOM-CITY<br />
SCUSTOM-CUSTTYPE<br />
SCUSTOM-DISCOUNT<br />
SCUSTOM-TELEPHONE<br />
BDC_OKCODE<br />
0200 BDC_OKCODE<br />
DATA: BEGIN OF REC,<br />
FLAG,<br />
ID LIKE SCUSTOM-ID,<br />
NAME LIKE SCUSTOM-NAME,<br />
POSTCODE LIKE SCUSTOM-POSTCODE,<br />
CITY LIKE SCUSTOM-CITY,<br />
CUSTTYPE LIKE SCUSTOM-CUSTTYPE,<br />
DISCOUNT LIKE SCUSTOM-DISCOUNT,<br />
TELEPHONE LIKE SCUSTOM-TELEPHONE,<br />
END OF REC.
Model solution 1 (Chapter 2): Introduction to Batch Input<br />
Processing<br />
REPORT RSFFF021.<br />
* Internal table for storing the data in screen format<br />
DATA: BEGIN OF BDC_TAB OCCURS 5.<br />
INCLUDE STRUCTURE BDCDATA.<br />
DATA: END OF BDC_TAB.<br />
* Record for the data to be transferred to the SAP System<br />
DATA: BEGIN OF REC,<br />
PARAMETERS:<br />
TELEPHONE LIKE SCUSTOM-TELEPHONE,<br />
ID LIKE SCUSTOM-ID,<br />
NAME LIKE SCUSTOM-NAME,<br />
END OF REC.<br />
* Name of the batch input session<br />
NAME LIKE APQI-GROUPID DEFAULT SY-UNAME,<br />
* Name of the sequential file to be accessed<br />
FILE(30) DEFAULT '/tmp/TELXX' LOWER CASE.<br />
* Open dataset for accessing and in binary mode<br />
START-OF-SELECTION.<br />
OPEN DATASET FILE FOR INPUT IN BINARY MODE.<br />
* Text-001 D: Start creating BDC session
WRITE: / TEXT-001,<br />
SY-MANDT, NAME, SY-UZEIT.<br />
* Create the session header<br />
CALL FUNCTION 'BDC_OPEN_GROUP'<br />
EXPORTING<br />
* Access the data<br />
DO.<br />
CLIENT = SY-MANDT<br />
GROUP = NAME<br />
USER = 'BC420BDC'<br />
KEEP = 'X'.<br />
READ DATASET FILE INTO REC.<br />
IF SY-SUBRC NE 0.<br />
EXIT.<br />
ENDIF.<br />
WRITE: / REC-ID USING NO EDIT MASK, REC-NAME, REC-TELEPHONE.<br />
* Subroutine for transferring the data of one transaction to the<br />
* BDC_TAB (screen format)<br />
PERFORM GENERATE_BDC_DATA.<br />
* Function module for transferring the data of the BDC_TAB to the<br />
queue file<br />
CALL FUNCTION 'BDC_INSERT'<br />
EXPORTING<br />
TABLES<br />
TCODE = 'TFBA'<br />
DYNPROTAB = BDC_TAB.
ENDDO.<br />
* Close the completed session<br />
CALL FUNCTION 'BDC_CLOSE_GROUP'.<br />
* Text-002 D: End of BDC session creation<br />
WRITE: / TEXT-002,<br />
SY-MANDT, NAME, SY-UZEIT.<br />
* Close the fully accessed sequential dataset<br />
END-OF-SELECTION.<br />
CLOSE DATASET FILE.<br />
*-----------------------------------------------------------------<br />
*<br />
* FORM GENERATE_BDC_DATA<br />
*<br />
*-----------------------------------------------------------------<br />
*<br />
* ........<br />
*<br />
*-----------------------------------------------------------------<br />
*<br />
FORM GENERATE_BDC_DATA.<br />
REFRESH BDC_TAB.<br />
PERFORM DYNPRO USING:
ENDFORM.<br />
'X' 'SAPMTFBA' '0100',<br />
' ' 'SCUSTOM-ID' REC-ID,<br />
' ' 'BDC_OKCODE' '/5',<br />
'X' 'SAPMTFBA' '0200',<br />
' ' 'SCUSTOM-TELEPHONE' REC-TELEPHONE,<br />
' ' 'BDC_OKCODE' '/11'.<br />
*-----------------------------------------------------------------<br />
*<br />
* FORM DYNPRO<br />
*<br />
*-----------------------------------------------------------------<br />
*<br />
* ........<br />
*<br />
*-----------------------------------------------------------------<br />
*<br />
* --> DYNBEGIN<br />
*<br />
* --> NAME<br />
*<br />
* --> VALUE<br />
*<br />
*-----------------------------------------------------------------<br />
*<br />
FORM DYNPRO USING DYNBEGIN NAME VALUE.<br />
IF DYNBEGIN = 'X'.<br />
CLEAR BDC_TAB.<br />
MOVE: NAME TO BDC_TAB-PROGRAM,
VALUE TO BDC_TAB-DYNPRO,<br />
'X' TO BDC_TAB-DYNBEGIN.<br />
APPEND BDC_TAB.<br />
ELSE.<br />
CLEAR BDC_TAB.<br />
MOVE: NAME TO BDC_TAB-FNAM,<br />
VALUE TO BDC_TAB-FVAL.<br />
APPEND BDC_TAB.<br />
ENDIF.<br />
ENDFORM.<br />
Model solution 2 (Chapter 2): Introduction to Batch Input<br />
Processing<br />
REPORT RSFFF022.<br />
* Internal table for storing the data in screen format<br />
DATA: BEGIN OF BDC_TAB OCCURS 5.<br />
INCLUDE STRUCTURE BDCDATA.<br />
DATA: END OF BDC_TAB.<br />
* Include Report contains record for the data to be transferred to<br />
* the SAP system<br />
INCLUDE RSFFF02F.<br />
DATA: TCODE LIKE SY-TCODE.<br />
PARAMETERS:<br />
* Name of the batch input session<br />
NAME LIKE APQI-GROUPID DEFAULT SY-UNAME,<br />
* Name of the sequential file to be accessed
FILE(30) DEFAULT '/tmp/KUNXX' LOWER CASE.<br />
START-OF-SELECTION.<br />
* Open dataset for accessing and in binary mode<br />
OPEN DATASET FILE FOR INPUT IN BINARY MODE.<br />
* Text-001 D: Start creating BDC session<br />
WRITE: / TEXT-001,<br />
SY-MANDT, NAME, SY-UZEIT.<br />
* Create the session header<br />
CALL FUNCTION 'BDC_OPEN_GROUP'<br />
EXPORTING<br />
* Access the data<br />
DO.<br />
CLIENT = SY-MANDT<br />
GROUP = NAME<br />
USER = 'BC420BDC'<br />
KEEP = 'X'.<br />
READ DATASET FILE INTO REC.<br />
IF SY-SUBRC NE 0.<br />
EXIT.<br />
ENDIF.<br />
* Subroutines for transferring the data of one transaction to
* the BDC_TAB (screen format), irrespective of whether an SCUSTOM<br />
* record is updated or created<br />
CASE REC-FLAG.<br />
WHEN 'U'.<br />
TCODE = 'TFBA'.<br />
PERFORM GENERATE_BDC_DATA_TFBA.<br />
WHEN 'N'.<br />
TCODE = 'TFBB'.<br />
PERFORM GENERATE_BDC_DATA_TFBB.<br />
WHEN OTHERS.<br />
* Text-003 D: Processing terminated due to incorrect data<br />
WRITE: TEXT-001, REC-FLAG.<br />
EXIT.<br />
ENDCASE.<br />
* Function module for transferring the data of the BDC_TAB to the<br />
queue file<br />
CALL FUNCTION 'BDC_INSERT'<br />
EXPORTING<br />
TABLES<br />
TCODE = TCODE<br />
DYNPROTAB = BDC_TAB.<br />
WRITE: / REC-FLAG, REC-ID USING NO EDIT MASK,<br />
TELEPHONE,<br />
ULINE.<br />
/ REC-NAME UNDER REC-FLAG,<br />
/ REC-POSTCODE UNDER REC-NAME, REC-CITY, REC-<br />
REC-CUSTTYPE, REC-DISCOUNT.
ENDDO.<br />
* Close the completed session<br />
CALL FUNCTION 'BDC_CLOSE_GROUP'.<br />
* Text-002 D: End of BDC session creation<br />
WRITE: / TEXT-002,<br />
SY-MANDT, NAME, SY-UZEIT.<br />
* Close the fully accessed sequential dataset<br />
CLOSE DATASET FILE.
*-----------------------------------------------------------------<br />
*<br />
* FORM GENERATE_BDC_DATA_TFBA<br />
*<br />
*-----------------------------------------------------------------<br />
*<br />
* ........<br />
*<br />
*-----------------------------------------------------------------<br />
*<br />
FORM GENERATE_BDC_DATA_TFBA.<br />
REFRESH BDC_TAB.<br />
PERFORM DYNPRO USING:<br />
ENDFORM.<br />
'X' 'SAPMTFBA' '0100',<br />
' ' 'SCUSTOM-ID' REC-ID,<br />
' ' 'BDC_OKCODE' '/5',<br />
'X' 'SAPMTFBA' '0200',<br />
' ' 'SCUSTOM-NAME' REC-NAME,<br />
' ' 'SCUSTOM-POSTCODE' REC-POSTCODE,<br />
' ' 'SCUSTOM-CITY' REC-CITY,<br />
' ' 'SCUSTOM-CUSTTYPE' REC-CUSTTYPE,<br />
' ' 'SCUSTOM-DISCOUNT' REC-DISCOUNT,<br />
' ' 'SCUSTOM-TELEPHONE' REC-TELEPHONE,<br />
' ' 'BDC_OKCODE' '/11'.
*-----------------------------------------------------------------<br />
*<br />
* FORM GENERATE_BDC_DATA_TFBB<br />
*<br />
*-----------------------------------------------------------------<br />
*<br />
* ........<br />
*<br />
*-----------------------------------------------------------------<br />
*<br />
FORM GENERATE_BDC_DATA_TFBB.<br />
REFRESH BDC_TAB.<br />
PERFORM DYNPRO USING:<br />
'X' 'SAPMTFBB' '0100',<br />
' ' 'SCUSTOM-NAME' REC-NAME,<br />
' ' 'SCUSTOM-POSTCODE' REC-POSTCODE,<br />
' ' 'SCUSTOM-CITY' REC-CITY,<br />
' ' 'SCUSTOM-CUSTTYPE' REC-CUSTTYPE,<br />
' ' 'SCUSTOM-DISCOUNT' REC-DISCOUNT,<br />
' ' 'SCUSTOM-TELEPHONE' REC-TELEPHONE,<br />
' ' 'BDC_OKCODE' '/11',<br />
* Display screen. Specification not obligatory here<br />
ENDFORM.<br />
'X' 'SAPMTFBB' '0200',<br />
' ' 'BDC_OKCODE' '/3'.
*-----------------------------------------------------------------<br />
*<br />
* FORM DYNPRO<br />
*<br />
*-----------------------------------------------------------------<br />
*<br />
* ........<br />
*<br />
*-----------------------------------------------------------------<br />
*<br />
* --> DYNBEGIN<br />
*<br />
* --> NAME<br />
*<br />
* --> VALUE<br />
*<br />
*-----------------------------------------------------------------<br />
*<br />
FORM DYNPRO USING DYNBEGIN NAME VALUE.<br />
IF DYNBEGIN = 'X'.<br />
CLEAR BDC_TAB.<br />
MOVE: NAME TO BDC_TAB-PROGRAM,<br />
VALUE TO BDC_TAB-DYNPRO,<br />
'X' TO BDC_TAB-DYNBEGIN.<br />
APPEND BDC_TAB.<br />
ELSE.<br />
CLEAR BDC_TAB.<br />
MOVE: NAME TO BDC_TAB-FNAM,<br />
VALUE TO BDC_TAB-FVAL.<br />
APPEND BDC_TAB.<br />
ENDIF.<br />
ENDFORM.
Chapter 3 Special Features of Batch Input<br />
Processing<br />
© SAP AG<br />
l Programming step loop / table control screens in<br />
batch input.<br />
l Programming particular fields in batch input.<br />
l Requirements for batch input capability.<br />
l RSBDCSUB: Utility program for automatic session<br />
processing.<br />
l Batch input authorization.<br />
l Overview of utility programs for batch input.
Chapter 3 Objectives<br />
© SAP AG<br />
l Accessing specific lines of a step loop / table control<br />
screen or particular fields in batch input reports.<br />
l Conditions which must exist for a transaction to<br />
support batch input, and how to satisfy them.<br />
l The various standard utility programs available for<br />
managing sessions. In particular, how to automate<br />
session processing using RSBDCSUB.
Example: Display and Change Flights<br />
© SAP AG<br />
Flight model / BC_TRAVEL<br />
Display and Change Flights<br />
(Transaction TCF2 )<br />
Display<br />
Airline carrier AA<br />
Connection number 0064<br />
Airline carrier AA<br />
Connection number 0064<br />
Date Price Curr. Plane Cap. Occup.<br />
09.01.1996 2640.66 USD A310-300 280<br />
10.01.1996 2220.13 USD A310-300 280<br />
11.01.1996 1896.90 USD 727-300 280<br />
12.01.1996 2573.94 USD 727-400 280<br />
...<br />
...<br />
...<br />
Save<br />
In this example, Transaction TCF2 is used to change the database table SFLIGHT by adding new new<br />
flight data (new plane type, field SFLIGHT-PLANETYPE).<br />
...<br />
...<br />
1<br />
43<br />
96<br />
130<br />
...
Preparations for BDC Program - SFLIGHT<br />
Table SFLIGHT<br />
Field PLANETYPE<br />
Help<br />
F1<br />
Technical info<br />
Function SAVE/11<br />
© SAP AG BC420 / 3 - 1<br />
Table SFLIGHT<br />
Field PLANETYPE<br />
Technical info Help<br />
F1<br />
Date Price Curr. Plane Cap. Occup.<br />
09.01.1996<br />
10.01.1996<br />
11.01.1996<br />
12.01.1996<br />
...<br />
2640.66<br />
2220.13<br />
1896.90<br />
2573.94<br />
...<br />
USD<br />
USD<br />
USD<br />
USD<br />
...<br />
A310-300<br />
A310-300<br />
727-300<br />
727-400<br />
First perform (step by step) the application function to be simulated.<br />
Make a note of:<br />
- the program name and screen number for every screen<br />
- the field and table name for every entry or cursor positioning<br />
- the number for every function key activated<br />
- the screen sequence<br />
...<br />
280<br />
280<br />
280<br />
280<br />
...<br />
1<br />
43<br />
96<br />
130<br />
...<br />
Program SAPMTCF2<br />
Screen number 0200<br />
System<br />
Status<br />
To do this, you use the Status system function and the Technical info help function.<br />
The screen for the flight data is a table control screen. That is why the help function displays the same<br />
field name for every field in a column.
Example: Structure of the BDC Table<br />
PROGRAM SCREEN SCRBEGIN FNAM FVAL<br />
SAPMTCF2 0100 X<br />
SAPMTFC2 0200 X<br />
© SAP AG<br />
SFLIGHT-CARRID CARRID<br />
SFLIGHT-CONNID CONNID<br />
BDC_OKCODE /5 or UPDA<br />
SFLIGHT-PLANETYPE(3) PLANE<br />
BDC_CURSOR SFLIGHT-SEATSMAX(4)<br />
BDC_OKCODE /11 or SAVE<br />
You enter the information found with the help function in the BDC table.<br />
For fields of a table control screen, you must also specify the number of the table control line in<br />
parentheses, as a suffix to the field name, e.g. SFLIGHT-PLANETYPE(3) for the aircraft type in line<br />
3. Lines of a step loop screens are addressed in exactly the same way.<br />
You can also set the cursor. To do this, you use the field name 'BDC_CURSOR'. For the field value,<br />
specify the name of the field on which the cursor is to be positioned.<br />
For command field input, you can use the function code instead of the number of the function key. To<br />
find out the function code of a function key, use the online help (F1). Place the cursor on the function<br />
key field, hold down the mouse button and press F1. If you choose Extras, you get technical information<br />
which gives the function code.
Creating Sessions - Declaration Part<br />
© SAP AG<br />
REPORT RSFFF03A.<br />
DATA:BEGIN OF BDC_TAB OCCURS 5.<br />
INCLUDE STRUCTURE BDCDATA.<br />
DATA: END OF BDC_TAB.<br />
PARAMETERS:<br />
NAME LIKE APQI-GROUPID DEFAULT SY-UNAME,<br />
CARRID LIKE SFLIGHT-CARRID DEFAULT 'AA',<br />
CONNID LIKE SFLIGHT-CONNID DEFAULT '0064',<br />
PLANE LIKE SFLIGHT-PLANETYPE DEFAULT 'A310-200'.<br />
In the declaration part of the BDC program, you define the BDC table.<br />
Enter the session name in the NAME parameter.<br />
Enter the flight ID, flight number and aircraft type in the other parameters.
Creating Sessions<br />
© SAP AG BC420 / 3 - 1<br />
START-OF-SELECTION.<br />
WRITE: / 'Start creation of BDC session',<br />
SY-MANDT, NAME, SY-UZEIT.<br />
CALL FUNCTION 'BDC_OPEN_GROUP'<br />
EXPORTING CLIENT = SY-MANDT<br />
GROUP = NAME<br />
USER = SY-UNAME<br />
KEEP = 'X'.<br />
PERFORM GENERATE_BDC_DATA.<br />
CALL FUNCTION 'BDC_INSERT'<br />
EXPORTING TCODE = 'TCF2'<br />
TABLES DYNPROTAB = BDC_TAB.<br />
CALL FUNCTION 'BDC_CLOSE_GROUP'.<br />
WRITE: / 'End creation of BDC session',<br />
SY-MANDT, NAME, SY-UZEIT.<br />
You require the function modules for opening and closing sessions.<br />
To insert the data in the session, you set up the BDC table in a subroutine and call the function module<br />
BDC_INSERT.
BDC Program: Filling the BDC Table<br />
© SAP AG<br />
FORM GENERATE_BDC_DATA.<br />
REFRESH BDC_TAB.<br />
CLEAR BDC_TAB.<br />
BDC_TAB-PROGRAM = 'SAPMTCF2'.<br />
BDC_TAB-DYNPRO = '0100'.<br />
BDC_TAB-DYNBEGIN = 'X'.<br />
APPEND BDC_TAB.<br />
CLEAR BDC_TAB.<br />
BDC_TAB-FNAM = 'SFLIGHT-CARRID'.<br />
BDC_TAB-FVAL = CARRID.<br />
APPEND BDC_TAB.<br />
CLEAR BDC_TAB.<br />
BDC_TAB-FNAM = 'SFLIGHT-CONNID'.<br />
BDC_TAB-FVAL = CONNID.<br />
APPEND BDC_TAB.<br />
CLEAR BDC_TAB.<br />
BDC_TAB-FNAM = 'BDC_OKCODE'.<br />
BDC_TAB-FVAL = '/5'.<br />
APPEND BDC_TAB.<br />
For the first screen of Transaction TCF2, three fields are transferred.
Filling the BDC Table 5<br />
© SAP AG<br />
CLEAR BDC_TAB.<br />
BDC_TAB-PROGRAM = 'SAPMTCF2'.<br />
BDC_TAB-DYNPRO = '0200'.<br />
BDC_TAB-DYNBEGIN = 'X'.<br />
APPEND BDC_TAB.<br />
CLEAR BDC_TAB.<br />
BDC_TAB-FNAM = 'SFLIGHT-PLANETYPE(3)'.<br />
BDC_TAB-FVAL = PLANE.<br />
APPEND BDC_TAB.<br />
CLEAR BDC_TAB.<br />
BDC_TAB-FNAM = 'BDC_CURSOR'.<br />
BDC_TAB-FVAL = 'SFLIGHT-SEATSMAX(4)'.<br />
APPEND BDC_TAB.<br />
CLEAR BDC_TAB.<br />
BDC_TAB-FNAM = 'BDC_OKCODE'.<br />
BDC_TAB-FVAL = '/11'.<br />
APPEND BDC_TAB.<br />
ENDFORM.<br />
The table control fields are transferred for the second screen of Transaction TCF2.<br />
The data is updated when you choose Save. This completes the batch input processing for this<br />
transaction.
Special Fields<br />
© SAP AG<br />
OK code:<br />
- FNAM = BDC_OKCODE’<br />
- FVAL = /nn’<br />
Table control field:<br />
- FNAM = (line number)<br />
- <br />
Set cursor:<br />
- FNAM = BDC_CURSOR’<br />
- FVAL = (line number)<br />
In a batch input program, you can address the OK code, table control / step loop fields and cursor.<br />
The following rules apply when filling the BDC table:<br />
The field name for the OK code is always 'BDC_OKCODE'<br />
A table control / step loop field must have a valid line number<br />
The field name for the cursor is 'BDC_CURSOR'.
Transaction End in Batch Input<br />
© SAP AG<br />
Batch input capability<br />
Update<br />
Return to SAP main menu<br />
LEAVE TO TRANSACTION ' '<br />
No batch batch input input capability<br />
capability<br />
Start a new transaction<br />
- CALL TRANSACTION 'xxxx'<br />
- LEAVE TO TRANSACTION 'xxxx'<br />
- '/nxxxx'<br />
- '/i' (exit mode)<br />
In batch input processing, you can exit a transaction in one of two ways - either through an update or by<br />
returning to the SAP main menu.<br />
A transaction does not support batch input if it is started by LEAVE TO TRANSACTION , CALL TRANSACTION or by the command field entry '/n'.<br />
The Delete mode function is not supported in batch input.
Report RSBDCSUB<br />
© SAP AG<br />
ABAP/4 development/reporting<br />
Report RSBDCSUB<br />
Session name<br />
Created on<br />
From____ to<br />
Session status<br />
To be processed<br />
Incorrect<br />
Variant<br />
x Edit<br />
Execute<br />
Save<br />
Background job<br />
You use the report RSBDCSUB to schedule session processing.<br />
Proceed as follows:<br />
1. Create a variant. The selection criteria are:<br />
- Session name (generic entries are also possible)<br />
- Creation date<br />
- Session status<br />
- Target host (for the background system)<br />
- Extended log<br />
2. Create a background job for the report RSBDCSUB with the variant you have defined.
Processing Batch Input Sessions<br />
© SAP AG<br />
SAP<br />
Dialog<br />
process<br />
Queue<br />
Background<br />
process<br />
You can choose to process sessions in online or in the background.<br />
Starting the session online:<br />
- The authorizations of the user doing the processing are checked.<br />
Starting the session in the background:<br />
- The authorizations of the batch input user are used.
Authorizations for Batch Input Processing<br />
© SAP AG<br />
Object Fields Values Meaning<br />
S_BDC_MONI Session name Specifies session names<br />
for which a user is<br />
authorized<br />
Activities ABTC Process (submit) in<br />
background<br />
AONL Process online<br />
DELE Delete<br />
LOCK Sessions/logs<br />
Lock date, Change<br />
FREE Release terminated<br />
sessions<br />
ANAL Analyze sessions<br />
The authorization object S_BDC_MONI is used for authorization checks in batch input processing.<br />
You can use this authorization object to restrict processing to particular sessions (specifying the session<br />
name, or make a generic entry). You can also protect specific activities in batch input processing (by<br />
making an entry in the ‘Activities’ field).
Standard Utility Reports for Batch Input<br />
l RSBDCREO<br />
© SAP AG<br />
n deletes all sessions which are flagged as successful and still in the<br />
system, together with their logs<br />
n physically deletes all logs for which there are no sessions<br />
n reorganizes the log file (file is reduced if logs have been deleted)<br />
n function integrated in SM35<br />
l RSBDCLOG<br />
n generates a list of batch input logs, selected by session name<br />
n can display or delete logs and, if sessions exist, activate the analysis<br />
n function integrated in SM35<br />
l RSBDCDRU<br />
n allows you to print out the contents of selected sessions<br />
n function integrated in SM35
Chapter 3 Summary<br />
© SAP AG<br />
l In batch input programming, you can address step loop /<br />
table control screens as well as particular fields, and<br />
change them if required. Batch input capability can only<br />
be guaranteed if the transaction sets an end flag which is<br />
recognized by the batch input system. There are several<br />
standard utility programs available. They support the<br />
processing (RSBDCSUB) and management of batch input<br />
sessions.
Exercise for Chapter 3: Special Features of Batch Input<br />
Processing<br />
1. Your job name: ZBCF##C1JOB<br />
Your group number: ##<br />
Your session name: ZBCF##C1SES<br />
Your variant names: ZBCF##C1VAR<br />
Task:<br />
Create a job for your batch input program (Exercise 1, Chapter<br />
2). The job should start the batch input program and then<br />
process the generated session.<br />
Programming hints:<br />
a) Define a variant for the SAP program 'RSBDCSUB'.<br />
b) Create a job for your batch input program 'ZBCF17#B1'.<br />
c) Extend this job to include a request to process the variant<br />
you have defined for the SAP program 'RSBDCSUB'.<br />
d) Release the job and start it immediately.<br />
e) Analyze the job log and the job results.<br />
f) Use transaction SM35 to check that the sessions were<br />
processed correctly. Your session directory should be<br />
empty (successfully processed sessions are normally<br />
deleted immediately).
Chapter 4 General Information on Applicationspecific<br />
Batch Input Programs<br />
© SAP AG<br />
l Transferring data from external Systems to the SAP<br />
system.<br />
l Principles and examples of application-specific<br />
standard transfer programs for batch input.<br />
l Principles and examples of direct input.
Chapter 4 Objectives<br />
© SAP AG<br />
l Transferring data from external systems.<br />
l Standard application-specific transfer programs to<br />
support data transfer.<br />
l The requirements for using these programs and how<br />
to get information on them.
Overview<br />
© SAP AG<br />
Customer system<br />
Customer<br />
transfer<br />
program<br />
Customer DB/<br />
sequential file<br />
Sequential<br />
file<br />
Queue<br />
file<br />
SAP SAP system system<br />
Batch input<br />
program<br />
When the batch input procedure is used to import data from a customer system, the batch input program<br />
generally transfers the data from a sequential file.<br />
You create the sequential file with a customer transfer program. You then use a batch input program<br />
(the SAP transfer program) to transfer the data from the sequential file to the SAP queue file.<br />
The SAP System offers standard batch input programs for many standard data transfer cases. This<br />
means you do not have to write you own batch input program. However, the data you provide must be<br />
in a predefined SAP format.
Sequential <strong>Data</strong>set in SAP Format<br />
© SAP AG<br />
0<br />
1<br />
2<br />
2<br />
1<br />
0<br />
1<br />
2<br />
1<br />
.<br />
.<br />
.<br />
The data records of a sequential file must have a format that can be read by a standard SAP batch input<br />
program.<br />
The applications provide structure descriptions for the standard SAP batch input programs in the<br />
ABAP/4 Dictionary.<br />
The structure descriptions and the structure of the sequential file depend on the application. They are<br />
described in the documentation for the standard SAP batch input programs.<br />
Example: In Financial Accounting, there are three different types of data records:<br />
Type 0: Session header data (e.g. session name).<br />
Type 1: Transaction header data (e.g. transaction code).<br />
Type 2: SAP table data (e.g. table name, field name, field contents etc.)
<strong>Data</strong> Analysis<br />
© SAP AG<br />
Fields and structures<br />
in the legacy system<br />
?<br />
There is a data analysis at the start of every data transfer.<br />
Fields and structures<br />
in the SAP system<br />
In the data analysis, you decide which data can be transferred and how. Proceed as follows:<br />
Compare your old data with the data fields in the SAP System.<br />
Define which fields from the old data can be transferred directly to the SAP System.<br />
Draw up rules for filling data fields in the SAP System where old data cannot be directly used.
Transfer Program<br />
Sequential file 1<br />
© SAP AG<br />
Read data records<br />
Customer<br />
transfer program<br />
Structure in old format<br />
Structure in SAP format<br />
Write data records<br />
Sequential file 2<br />
The task of a customer transfer program is to create data records in SAP format and transfer them to a<br />
sequential file. The data can then be read by a standard SAP batch input program.
Importing SAP Structures<br />
© SAP AG<br />
Dict. Dict.<br />
Transfer program<br />
<br />
TABLES<br />
ABAP/4 program SAP<br />
Transfer program<br />
Dict.<br />
structure<br />
definitions<br />
<br />
<br />
ABAP/4<br />
CC<br />
COBOL<br />
PL/1<br />
You require the SAP structure descriptions for the transfer program. If you write the transfer program<br />
in ABAP/4, you use the TABLES statement to transfer the structure descriptions directly from the<br />
ABAP/4 Dictionary.<br />
The SAP system also supports the creation of transfer programs in other programming languages<br />
(COBOL, C, PL/1): You generate the structure descriptions in the respective programming language<br />
using the ABAP/4 program RDDSRCG0. These structure descriptions are then available in a sequential<br />
file and you can include them in your transfer program.
Initializing and Converting<br />
© SAP AG<br />
Type C<br />
Initializing SAP structures<br />
Converting fields<br />
.....<br />
Type Type C<br />
Type P Type Type C<br />
For every field passed in the batch input structure, a decision must be made as to whether the value of<br />
the field is initial (e.g. field should be reset to initial value) or whether batch input is not necessary for<br />
this field.<br />
If batch input data is not to be assigned to particular fields in the SAP System, the standard batch input<br />
programs expect a special character (NODATA flag). The default special character is '/', but you can<br />
define your own character with the field BGR00-NODATA. You must then initialize the SAP batch<br />
input structures with this special character.<br />
If the fields with the old structures are of a different length or type to the fields with the SAP structures,<br />
the transfer program must perform the conversions. The fields with the SAP batch input structures are<br />
always type C.
Other Tasks of a Transfer Program<br />
© SAP AG<br />
Customer<br />
check tables<br />
Customer<br />
conversion tables<br />
Transfer program<br />
<br />
<br />
Customer<br />
error tables<br />
There are other tasks that customer transfer programs can perform. Examples: Individual customer data<br />
checks can be made (to see if data should in fact be transferred, for example). <strong>Data</strong> can be converted<br />
according to defined rules (new numbers in the SAP System are to be assigned to particular numbers in<br />
the legacy system, for example). Incorrect data can be written in a customer error table after the data<br />
checks.
Menu Paths<br />
Financial accounting<br />
global settings<br />
Document<br />
Document data transfer<br />
Create variant for<br />
document data transfer<br />
© SAP AG<br />
Financial accounting Treasury<br />
Accounts receivable and<br />
accounts payable<br />
Consolidation<br />
Vendor accounts Business transactions<br />
Vendor master records Vendor single items<br />
Create vendor master<br />
records<br />
SAP R/3 main menu<br />
Tools<br />
Business Engineering<br />
Customizing<br />
Implement. projects<br />
Display SAP Ref. IMG<br />
Generate record layout Copy vendor master data<br />
The menu paths for finding the data transfer programs are shown for selected applications in the above<br />
diagram. In Release 3.0, you access the Customizing functions via the installation guide.<br />
For detailed documentation on the individual functions, press F1 and/or the extended help function.<br />
...<br />
...<br />
...<br />
...
Example: Transfer Program 1<br />
© SAP AG<br />
REPORT YSFFF04A.<br />
*E SAP structures for BDC:<br />
TABLES: BGR00, BLF00, BLFA1.<br />
*E Old structures:<br />
DATA: BEGIN OF OLDREC,<br />
TELF1(10) TYPE C,<br />
LIFNR(8) TYPE C,<br />
ANRED(2) TYPE C,<br />
NAME1(30) TYPE C,<br />
END OF OLDREC.<br />
*E Help structure for record layout initialization:<br />
DATA: BEGIN OF AUXREC.<br />
INCLUDE STRUCTURE BLFA1.<br />
DATA: END OF AUXREC.<br />
*E Target fields for conversions:<br />
DATA: LIFNR LIKE BLF00-LIFNR,<br />
NAME1 LIKE BLFA1-NAME1,<br />
TELF1 LIKE BLFA1-TELF1.<br />
*E Only for record layout initialization:<br />
DATA: N TYPE I.<br />
FIELD-SYMBOLS .<br />
*E File and session names, nodata flag:<br />
PARAMETERS:<br />
OLDFILE(20) DEFAULT '/tmp/OLD' LOWER CASE,<br />
SAPFILE(20) DEFAULT '/tmp/SAP' LOWER CASE,<br />
ERRFILE(20) DEFAULT '/tmp/ERROR' LOWER CASE,<br />
SESSION(20) DEFAULT 'B420SES041' LOWER CASE,<br />
NODATA DEFAULT '/' LOWER CASE.<br />
The program in the above example transfers telephone numbers from a sequential file. The data records<br />
have the following format: Telephone number (10), vendor number (8), form of address (2), name (30).<br />
The data is checked, converted and formatted so that it can be processed by the standard SAP batch<br />
input program RFBIKR00.<br />
This is a general example. All processing takes places in the same system and in ABAP/4. It would of<br />
course be possible to simplify the data transfer in this particular case.
Example: Transfer Program 2<br />
© SAP AG<br />
START-OF-SELECTION.<br />
OPEN DATASET: OLDFILE FOR INPUT IN TEXT MODE,<br />
SAPFILE FOR OUTPUT IN TEXT MODE,<br />
ERRFILE FOR OUTPUT IN TEXT MODE.<br />
*E Open session:<br />
MOVE: '0' TO BGR00-STYPE,<br />
SESSION TO BGR00-GROUP,<br />
SY-MANDT TO BGR00-MANDT,<br />
SY-UNAME TO BGR00-USNAM,<br />
NODATA TO BGR00-NODATA.<br />
TRANSFER BGR00 TO SAPFILE.<br />
*E Initialize record layout:<br />
DO.<br />
ADD 1 TO N.<br />
ASSIGN COMPONENT N OF STRUCTURE AUXREC TO .<br />
IF SY-SUBRC NE 0. EXIT. ENDIF.<br />
MOVE BGR00-NODATA TO .<br />
ENDDO.<br />
MOVE AUXREC TO BLFA1.<br />
Session data (such as session name, client, user name and the special character for ‘no batch input for<br />
this field’) is passed in table structure BGR00.<br />
The structure BLFA1 is initialized using the ASSIGN statement. Some applications (e.g.MM) also<br />
provide special initialization routines (e.g. INIT_STRUKTUREN_ERZEUGEN in program<br />
RMMMBIMI). For more details, refer to the online documentation for the particular batch input<br />
program.
Example: Transfer Program 3<br />
© SAP AG<br />
DO.<br />
*E Read in data record<br />
READ DATASET OLDFILE INTO OLDREC.<br />
IF SY-SUBRC NE 0. EXIT. ENDIF.<br />
*E Check: Transfer only certain data records<br />
IF OLDREC-LIFNR(5) NE 'BC420'<br />
OR OLDREC-LIFNR(6) EQ 'BC420B'<br />
OR OLDREC-TELF1 EQ SPACE.<br />
TRANSFER OLDREC TO ERRFILE.<br />
*E TEXT-001:'<strong>Data</strong> not transferred for vendor:'<br />
WRITE: / TEXT-001, OLDREC-LIFNR.<br />
ELSE.<br />
*E Convert: Other vendor numbers in SAP system<br />
IF OLDREC-LIFNR+5(1) = 'A'.<br />
OLDREC-LIFNR+5(1) = 'B'.<br />
ENDIF.<br />
*E Convert: Write out abbreviations in full<br />
CASE OLDREC-ANRED.<br />
WHEN 'Co'. BLFA1-ANRED = 'Company'.<br />
WHEN OTHERS. BLFA1-ANRED = NODATA.<br />
ENDCASE.<br />
When a data record has been read, a check is made to see if the data record should in fact be<br />
transferred. In general, extensive checks are run using a customer check table.<br />
If the check proves negative, the data record is placed in a customer error file.<br />
Some data is then converted. In general, a customer table is also used here.
Example: Transfer Program 4<br />
© SAP AG<br />
*E Convert old format to SAP format<br />
MOVE: OLDREC-LIFNR TO LIFNR,<br />
OLDREC-NAME1 TO NAME1,<br />
OLDREC-TELF1 TO TELF1.<br />
*E Fill SAP structures<br />
MOVE: '1' TO BLF00-STYPE,<br />
'XK02' TO BLF00-TCODE,<br />
LIFNR TO BLF00-LIFNR.<br />
MOVE: '2' TO BLFA1-STYPE,<br />
'BLFA1' TO BLFA1-TBNAM,<br />
TELF1 TO BLFA1-TELF1,<br />
NODATA TO BLFA1-SENDE.<br />
*E Transfer data<br />
TRANSFER: BLF00 TO SAPFILE,<br />
BLFA1 TO SAPFILE.<br />
*E TEXT-002: '<strong>Data</strong> transferred for vendor<br />
WRITE: / TEXT-002, OLDREC-LIFNR.<br />
ENDIF.<br />
ENDDO.<br />
CLOSE DATASET: OLDFILE, SAPFILE, ERRFILE.<br />
As the length of the old data is different, it must be converted.<br />
The converted data can then be placed in the SAP structures.<br />
Finally, the SAP structures can be transferred to a sequential file. They can then be analyzed by the<br />
standard batch input program RFBIKR00.<br />
Note: In ABAP/4, a single MOVE is sufficient to convert and fill the SAP structure (every MOVE<br />
statement automatically performs a conversion).
Batch Input, CALL TRANSACTION and Direct<br />
Input<br />
© SAP AG<br />
Batch input queue<br />
Batch input<br />
sessions<br />
External data<br />
ABAP/4<br />
program<br />
CALL TRANSACTION/<br />
USING BDCDATA<br />
Table<br />
R/3 database<br />
Direct input:<br />
Function modules<br />
instead of screens<br />
As an alternative to batch input, there are application-specific programs that use the direct input<br />
technique. When transferring large volumes of data (more than 10000 transactions), you can achieve<br />
considerable improvements in performance with direct input. Like CALL TRANSACTION USING,<br />
direct input is a means of updating data immediately (no sessions are generated). However, unlike<br />
CALL TRANSACTION USING or batch input, no screens are involved. Instead, the data is imported<br />
by calling function modules which check the data and then transfer it directly to the database tables.<br />
Since direct input offers a restart mechanism in the case of an error, the programs can only run as<br />
background jobs. You manage and start these jobs with the report RBMVSHOW or Transaction<br />
BMV0.<br />
Examples:<br />
RFBIBL00 FI Can be switched between direct input, batch input and CALL<br />
TRANSACTION. Posts documents.<br />
RMDATIND MM Direct input. Imports material master records.<br />
RVAFSS00 SD Direct input. Generates SD billing documents and FI follow-on<br />
documents from an external file.<br />
RKEVEXT0CO-PA Direct input. Transfers external data to Profitability Analysis.<br />
RAALTD11 AM Direct input. Creates asset master records.
Tasks of a Transfer Program<br />
© SAP AG<br />
Define old structures<br />
Import SAP structures<br />
Initialize SAP structures<br />
Read data record<br />
Check data<br />
Convert data<br />
Place data in SAP structure<br />
Transfer data record to sequential file<br />
The above diagram gives an overview of the tasks of a transfer program (required and optional).
<strong>Data</strong> Transfer with Batch Input<br />
© SAP AG<br />
Analyze data<br />
Generate SAP structures<br />
Design transfer program<br />
Create sequential file<br />
Create batch input program<br />
Create batch input session<br />
Analyze results<br />
Evaluate errors<br />
The above diagram gives an overview of the activities required for a data transfer.
Chapter 4 Summary<br />
© SAP AG<br />
l Interface programs are often required to peform fast,<br />
correct mass data processing, in particular the transfer of<br />
data from external systems to the SAP System. This<br />
chapter discussed the problems of this type of data<br />
transfer. Standard application-related transfer programs<br />
have been created for this purpose. The principles and<br />
scope of these programs were explained.
Chapter 5 CALL TRANSACTION<br />
© SAP AG<br />
l CALL TRANSACTION USING ... vs. batch input.<br />
l The statement CALL TRANSACTION USING ... .<br />
l Technical implementation.
Chapter 5 Objectives<br />
© SAP AG<br />
l The difference between CALL TRANSACTION<br />
USING ... and batch input, and the advantages and<br />
disadvantages of the two processes.<br />
l The scope of the CALL TRANSACTION USING ...<br />
statement and the different processing and update<br />
modes.<br />
l The technical features of the CALL TRANSACTION<br />
USING ... statement.
Overview<br />
© SAP AG<br />
Batch input:<br />
Sequential<br />
file<br />
Queue file<br />
Batch input function<br />
Application function<br />
SAP<br />
database<br />
BDC table<br />
CALL TRANSACTION:<br />
Sequential<br />
file<br />
Application function<br />
SAP<br />
database<br />
BDC table<br />
CALL<br />
TRANSACTION<br />
In contrast to batch input, the CALL TRANSACTION statement allows you to pass data directly to the<br />
dialog interface (without using the queue file). To store screen data temporarily, you use an internal<br />
table (a BDC table which has the same structure as with batch input). Then, you call the desired<br />
transaction in your program and the system copies the data temporarily stored the BDC table to the<br />
screens of the transaction.
The CALL TRANSACTION Statement<br />
© SAP AG<br />
CALL TRANSACTION <br />
USING <br />
MODE <br />
UPDATE <br />
MESSAGES INTO <br />
:<br />
A Display all<br />
E Display only if if there are errors<br />
N Display nothing<br />
:<br />
S Do not continue processing until<br />
update has finished (synchronous)<br />
A Continue processing immediately<br />
As with batch input, you can choose a particular display mode for processing the transaction.<br />
Unlike batch input, you can also specify an update mode. In asynchronous update processes, the called<br />
transaction does not wait until the database updates have been performed, but passes the update to the<br />
update task. In synchronous update processes, it waits until the update has been completed. Although<br />
synchronous update is slower than asynchronous update, it is also more secure because the called<br />
transaction can then report any errors to the calling program. In batch imput, the update mode is always<br />
'S' (synchronous).<br />
The MODE and UPDATE parameters are optional. The default for both is ‘A’ (asynchronous).<br />
The MESSAGES INTO option allows you to store any messages output by the called<br />
transaction in an internal table. The internal table must have the structure BDCMSGCOLL.
Technical Implementation<br />
Roll area 1 Roll area 2<br />
REPORT ... .<br />
DATA: BEGIN OF OCCURS ... .<br />
INCLUDE STRUCTURE BDC_DATA.<br />
DATA: END OF .<br />
:<br />
:<br />
PERFORM GENERATE_BDC_DATA.<br />
CALL TRANSACTION <br />
USING <br />
MODE <br />
UPDATE <br />
:<br />
:<br />
CASE SY-SUBRC.<br />
:<br />
:<br />
© SAP AG<br />
The system opens a second roll area for the called transaction. There, it processes the individual screens<br />
and copies the data from the table. When the transaction has finished, the second roll area is released<br />
and the processing continues in the first roll area.<br />
Notes:<br />
In contrast to batch input, there is no error logging. Whether the called transaction is processed depends<br />
on the authorizations of the calling user. The BDC table can only accept data for a single transaction.<br />
This means that before the next transaction call, you must perform a REFRESH on the BDC table and<br />
refill it with data.
Example Program - Define BDC Table<br />
© SAP AG<br />
REPORT RSFFF05A.<br />
DATA:BEGIN OF BDC_TAB OCCURS 5.<br />
INCLUDE STRUCTURE BDCDATA.<br />
DATA: END OF BDC_TAB.<br />
DATA: BEGIN OF MESSTAB OCCURS 5.<br />
INCLUDE STRUCTURE BDCMSGCOLL.<br />
DATA: END OF MESSTAB<br />
PARAMETERS:<br />
DISMODE DEFAULT 'A',<br />
UPDMODE DEFAULT 'S',<br />
ID LIKE SCUSTOM-ID DEFAULT '00000001',<br />
CUSTNAME LIKE SCUSTOM-NAME DEFAULT 'SCHMIDT',<br />
POSTCODE LIKE SCUSTOM-POSTCODE DEFAULT '6900',<br />
CITY LIKE SCUSTOM-CITY DEFAULT 'HEIDELBERG',<br />
CUSTTYPE LIKE SCUSTOM-CUSTTYPE DEFAULT 'B',<br />
DISCOUNT LIKE SCUSTOM-DISCOUNT DEFAULT '10',<br />
TELEFON LIKE SCUSTOM-TELEPHONE DEFAULT '24567'.<br />
You define the BDC table in the declaration part of the program.<br />
This CALL TRANSACTION program corresponds to the BDC program example RSFFF02A.
Example Program - Fill BDC Table<br />
© SAP AG<br />
START-OF-SELECTION.<br />
WRITE: / 'Start CALL TRANSACTION', SY-UZEIT.<br />
PERFORM GENERATE_BDC_DATA.<br />
CALL TRANSACTION 'TFBA'<br />
USING BDC_TAB<br />
MODE DISMODE<br />
UPDATE UPDMODE<br />
MESSAGES INTO MESSTAB.<br />
IF SY-SUBRC = 0.<br />
WRITE: / 'Transaction successfully<br />
processed'.<br />
ELSE.<br />
WRITE: / 'Error when processing'.<br />
ENDIF.<br />
WRITE: / 'Ende CALL TRANSACTION ', SY-UZEIT.<br />
You fill the BDC table as in batch input (in this case with a subroutine - see BDC program<br />
RSFFF02A).<br />
Then, you call the desired transaction.
Return Codes and System Fields<br />
© SAP AG<br />
Return codes:<br />
Value Meaning<br />
0 Successful<br />
< 1000 Error in dialog program<br />
> 1000 Error in batch input processing<br />
(see system fields)<br />
System fields:<br />
Field name Meaning<br />
SY-MSGID Message ID<br />
SY-MSGTY Message type (E,I,W,S,A)<br />
SY-MSGNO Message number<br />
SY-MSGV1 Message variable 1<br />
SY-MSGV2 Message variable 2<br />
SY-MSGV3 Message variable 3<br />
SY-MSGV4 Message variable 4<br />
To find out whether the processing of the called transaction was successful or not, you can read the<br />
return code value. There are also other system fields which contain the number, ID, type and variable of<br />
the dialog message output by the called transaction. You can use this information to display the message<br />
text (see following page).<br />
If you want to see all the messages output by the transaction, you should use the MESSAGES INTO<br />
option and then evaluate the contents of .
Message Output<br />
© SAP AG<br />
REPORT RSFFF05B.<br />
...<br />
CALL TRANSACTION 'TFBA'<br />
USING BDC_TAB<br />
MODE DISMODE<br />
UPDATE UPMODE<br />
MESSAGES INTO MESSTAB.<br />
...<br />
MESSAGE ID SY-MSGID<br />
TYPE SY-MSGTY<br />
NUMBER SY-MSGNO<br />
WITH SY-MSGV1 SY-MSGV2<br />
SY-MSGV3 SY-MSGV4.<br />
...<br />
The MESSAGE statement allows you to output dialog messages of the called transaction through the<br />
calling program.<br />
However, the message which reports the success or failure of the processing is output automatically.<br />
You are recommended to use the MESSAGE statement as above if you are running the program in the<br />
background. In this case, the message is held in the log.
Batch Input / CALL TRANSACTION - Summary<br />
© SAP AG<br />
Batch input CALL TRANSACTION<br />
Return code No Yes<br />
Error logging Yes No<br />
Processing Time-delayed Immediately<br />
Batch input and the CALL TRANSACTION statement are two different options for copying data to<br />
screens in an application transaction.<br />
The above table sets out the various features of these options.
Chapter 5 Summary<br />
© SAP AG<br />
l CALL TRANSACTION USING ... is an alternative to the<br />
conventional batch input process. Direct transfer of data<br />
is particularly fast since the queue file is avoided (i.e. no<br />
sessions are generated).<br />
As with batch input, there is a high degree of data<br />
integrity since the data is imported using transactions.<br />
CALL TRANSACTION has certain advantages over batch<br />
input (e.g. when you chooseupdate mode), but it does not<br />
offer the same correction and administration options as<br />
batch input.
Exercise for Chapter 5: CALL TRANSACTION<br />
1. Name of your job: ZBCF##E1<br />
Name of your directory: /tmp<br />
Your group number: ##<br />
Name of a model file: TELXX<br />
Task:<br />
Write a CALL TRANSACTION program for your file TEL## or<br />
for the model file TELXX. The program should enter the<br />
telephone numbers in the relevant SCUSTOM records using<br />
the Transaction TFBA.<br />
Programming hints:<br />
Convert your batch input program ZBCF##B1 to a CALL<br />
TRANSACTION program. For the Transaction TFBA, use the<br />
following screens in the specified order:<br />
Program name: SAPMTFBA<br />
Screens Fields<br />
0100 SCUSTOM-ID<br />
BDC_OKCODE<br />
0200 SCUSTOM-TELEPHONE<br />
BDC_OKCODE
Model solution for Chapter 5: CALL TRANSACTION<br />
REPORT RSFFF051.<br />
* Internal table to store the data in screen format<br />
DATA: BEGIN OF BDC_TAB OCCURS 5.<br />
INCLUDE STRUCTURE BDCDATA.<br />
DATA: END OF BDC_TAB.<br />
* Internal Table of format BDCMSGCOLL to store the transaction<br />
* messages<br />
DATA: BEGIN OF MESSTAB OCCURS 5.<br />
INCLUDE STRUCTURE BDCMSGCOLL.<br />
DATA: END OF MESSTAB.<br />
* Record for the data to be transferred to the SAP System<br />
DATA: BEGIN OF REC,<br />
PARAMETERS:<br />
TELEPHONE LIKE SCUSTOM-TELEPHONE,<br />
ID LIKE SCUSTOM-ID,<br />
NAME LIKE SCUSTOM-NAME,<br />
END OF REC.<br />
* Name of the sequential file to be accessed<br />
FILE(30) DEFAULT '/tmp/TELXX' LOWER CASE,<br />
* Processing and update mode<br />
DISMODE DEFAULT 'A',
UPDMODE DEFAULT 'S'.<br />
START-OF-SELECTION.<br />
* File opened for reading and in binary mode<br />
START-OF-SELECTION.<br />
OPEN DATASET FILE FOR INPUT IN BINARY MODE.<br />
* Text-001 E: Start CALL TRANSACTION<br />
WRITE: / TEXT-001, SY-UZEIT.<br />
* Accessing data<br />
DO.<br />
READ DATASET FILE INTO REC.<br />
IF SY-SUBRC NE 0.<br />
EXIT.<br />
ENDIF.<br />
WRITE: / REC-ID USING NO EDIT MASK, REC-NAME, REC-TELEPHONE.<br />
* Subroutine in order to tranfer the data of one transaction to<br />
* the BDC_TAB (screen format)<br />
PERFORM GENERATE_BDC_DATA.<br />
* Transaction called together with data in screen format<br />
CALL TRANSACTION 'TFBA'<br />
USING BDC_TAB<br />
MODE DISMODE<br />
UPDATE UPDMODE.<br />
* MESSAGES INTO MESSTAB.
IF SY-SUBRC = 0.<br />
* Text-002 E: Transaction successfully processed<br />
WRITE: TEXT-002.<br />
ELSE.<br />
* Text-003 E: Error in processing<br />
WRITE: TEXT-003.<br />
ENDIF.<br />
MESSAGE ID SY-MSGID<br />
ENDDO.<br />
TYPE SY-MSGTY<br />
NUMBER SY-MSGNO<br />
WITH SY-MSGV1 SY-MSGV2 SY-MSGV3 SY-MSGV4.<br />
* Text-004 D: End of CALL TRANSACTION<br />
WRITE: / TEXT-004, SY-UZEIT.<br />
* Close the fully accessed sequential dataset<br />
END-OF-SELECTION.<br />
CLOSE DATASET FILE.<br />
*-----------------------------------------------------------------<br />
*
* FORM GENERATE_BDC_DATA<br />
*<br />
*-----------------------------------------------------------------<br />
*<br />
* ........<br />
*<br />
*-----------------------------------------------------------------<br />
*<br />
FORM GENERATE_BDC_DATA.<br />
REFRESH BDC_TAB.<br />
PERFORM DYNPRO USING:<br />
ENDFORM.<br />
'X' 'SAPMTFBA' '0100',<br />
' ' 'SCUSTOM-ID' REC-ID,<br />
' ' 'BDC_OKCODE' '/5',<br />
'X' 'SAPMTFBA' '0200',<br />
' ' 'SCUSTOM-TELEPHONE' REC-TELEPHONE,<br />
' ' 'BDC_OKCODE' '/11'.<br />
*-----------------------------------------------------------------<br />
*<br />
* FORM DYNPRO<br />
*<br />
*-----------------------------------------------------------------<br />
*
* ........<br />
*<br />
*-----------------------------------------------------------------<br />
*<br />
* --> DYNBEGIN<br />
*<br />
* --> NAME<br />
*<br />
* --> VALUE<br />
*<br />
*-----------------------------------------------------------------<br />
*<br />
FORM DYNPRO USING DYNBEGIN NAME VALUE.<br />
IF DYNBEGIN = 'X'.<br />
CLEAR BDC_TAB.<br />
MOVE: NAME TO BDC_TAB-PROGRAM,<br />
VALUE TO BDC_TAB-DYNPRO,<br />
'X' TO BDC_TAB-DYNBEGIN.<br />
APPEND BDC_TAB.<br />
ELSE.<br />
CLEAR BDC_TAB.<br />
MOVE: NAME TO BDC_TAB-FNAM,<br />
VALUE TO BDC_TAB-FVAL.<br />
APPEND BDC_TAB.<br />
ENDIF.<br />
ENDFORM.
Chapter 6 Local Files<br />
© SAP AG<br />
l Local files vs. files on the application server.<br />
l Standard function modules for generating and<br />
reading local files.<br />
l Linking options between local files and files stored<br />
on the application server.<br />
l Overview: Function modules for working with local<br />
files.
Chapter 6 Objectives<br />
© SAP AG<br />
l The differences between local files and files stored<br />
on the application server and their various uses.<br />
l The different function modules available for<br />
processing local files.
Overview<br />
© SAP AG<br />
Application<br />
server<br />
88MHz<br />
Presentation<br />
server<br />
88MHz<br />
Application server files<br />
Presentation server files<br />
ABAP/4 programs run on the application server and have access to its sequential files.<br />
You can also use an ABAP/4 program to process local files (which belong to the presentation server).
Overview<br />
Application server<br />
files<br />
Presentation server<br />
files<br />
© SAP AG<br />
READ DATASET<br />
TRANSFER<br />
UPLOAD<br />
DOWNLOAD<br />
ABAP/4 program<br />
You process sequential files on the application server in ABAP/4 programs with the READ DATASET<br />
and TRANSFER statements which allow you to copy data from/to a field string.<br />
You process local sequential files on the presentation server with (UPLOAD and DOWNLOAD)<br />
function modules. These copy data from/to an internal table.
DOWNLOAD and UPLOAD<br />
CALL CALL FUNCTION<br />
FUNCTION<br />
DOWNLOAD’ DOWNLOAD’ DOWNLOAD’ DOWNLOAD’<br />
File name:<br />
File type:<br />
© SAP AG<br />
Convert<br />
according to<br />
file type<br />
CALL CALL CALL FUNCTION<br />
FUNCTION<br />
UPLOAD’ UPLOAD’ UPLOAD’ UPLOAD’<br />
File name:<br />
File type:<br />
Convert<br />
according to<br />
file type<br />
The function module DOWNLOAD downloads the contents of an internal table to a local sequential<br />
file.<br />
The function module UPLOAD uploads the contents of a local sequential file to an internal table.<br />
For the local file, you specify the absolute file name (meaning the complete path, e.g.<br />
'/tmp/bc180/myfile' for the UNIX file myfile in the directory /tmp/bc180 or 'C: BC180 MYFILE.ABA'<br />
for the OS/2 file MYFILE.ABA in the directory BC180 on disk drive C).<br />
The directory must be known to the presentation server.<br />
The choice of suitable file names is the reponsibility of the customer.<br />
The system requests the file name and the file type interaktively.<br />
The data is converted according to the file type.
Function Module DOWNLOAD<br />
© SAP AG<br />
CALL FUNCTION DOWNLOAD’ DOWNLOAD’<br />
EXPORTING<br />
BIN_FILESIZE = <br />
CODEPAGE = <br />
FILENAME = <br />
FILETYPE = <br />
ITEM = <br />
MODE = <br />
WK1_N_FORMAT = <br />
WK1_N_SIZE = <br />
WK1_T_FORMAT = <br />
WK1_T_SIZE = <br />
IMPORTING<br />
ACT_FILENAME = <br />
ACT_FILETYPE = <br />
FILESIZE = <br />
TABLES<br />
DATA_TAB = <br />
For the function module DOWNLOAD, you need an internal table for the data transfer. You define this<br />
table according to your data structure at the beginning of the program and then fill it with data.<br />
You use the MODE parameter to define the write mode ('A' to extend a file, ' ' to create a new file).<br />
The specification of default values for the file name, file type and a header for the file dialog is optional.<br />
The IMPORT parameters specify the values actually entered by the user for the file name, file type and<br />
the number of downloaded bytes.<br />
You only specify a value for the export parameter CODEPAGE when performing a DOWNLOAD to<br />
DOS (the only possible value is 'IBM'). Otherwise, this parameter is not used.<br />
All EXPORTING parameters are optional.<br />
If you want to generate a binary file, you must specify the file length. In this case, the transfer table<br />
must consist of a column of type X.
Formats<br />
© SAP AG<br />
Internal table (ABAP/4)<br />
F1 F2 F3<br />
A B C<br />
D E F<br />
. . .<br />
. . .<br />
Spreadsheet<br />
Format DAT<br />
A B C<br />
D E F<br />
. . . . . .<br />
. . . . . .<br />
Internal table (ABAP/4)<br />
F1 F2 F3 . . .<br />
A B C . . .<br />
D E F . . .<br />
G H I . . .<br />
. . .<br />
Spreadsheet<br />
Format WK1<br />
With UPLOAD and DOWNLOAD, another format available for conversions apart from ASC (ASCII)<br />
and BIN (binary) is DAT for Excel. With DOWNLOAD, WK1 is also available for Excel and Lotus.<br />
For the format DAT, table columns are divided by a tabulator character and the table lines by carriage<br />
return and line feed.<br />
For the format WK1, the data of a table is entered in a WK1-specific spreadsheet.
Function Module UPLOAD<br />
© SAP AG<br />
CALL FUNCTION UPLOAD’ UPLOAD’<br />
EXPORTING<br />
CODEPAGE = <br />
FILENAME = <br />
FILETYP = <br />
ITEM = <br />
IMPORTING<br />
FILESIZE = = <br />
TABLES<br />
DATA_TAB = <br />
For the function module UPLOAD, you need an internal table for the data transfer. You define this<br />
table according to your data structure at the beginning of the program.<br />
The specification of default values for the file name, file type and a header for the file dialog is optional.<br />
You only specify a value for the export parameter CODEPAGE when performing a DOWNLOAD to<br />
DOS (the only possible value is 'IBM'). Otherwise, this parameter is not used.
Example Program: DOWNLOAD<br />
REPORT RSFFF06A.<br />
TABLES SFLIGHT.<br />
DATA: BEGIN OF TAB OCCURS 20.<br />
INCLUDE STRUCTURE SBC420A.<br />
DATA: END OF TAB.<br />
* DATA: FILE LIKE RLGRAP-FILENAME<br />
* VALUE '....',<br />
* TYPE LIKE RLGRAP-FILETYPE<br />
* VALUE 'ASC',<br />
* LENGTH(5).<br />
* PARAMETERS:<br />
* MODE DEFAULT 'A'.<br />
GET SFLIGHT.<br />
MOVE-CORRESPONDING SFLIGHT TO TAB.<br />
APPEND TAB.<br />
WRITE: / TAB-CARRID, TAB-CONNID,<br />
/ TAB-FLDATE UNDER TAB-CARRID,<br />
/ TAB-PLANETYPE UNDER TAB-FLDATE.<br />
END-OF-SELECTION.<br />
© SAP AG<br />
This example program generates a local file with SFLIGHT data.<br />
CALL FUNCTION 'DOWNLOAD'<br />
* EXPORTING<br />
* FILENAME = FILE<br />
* FILETYPE = TYPE<br />
* ITEM = 'SFLIGHT data'<br />
* MODE = MODE<br />
* IMPORTING<br />
* ACT_FILENAME = FILE<br />
* ACT_FILETYPE = TYPE<br />
* FILESIZE = LENGTH<br />
TABLES<br />
DATA_TAB = TAB.<br />
* WRITE: / LENGTH, 'bytes downloaded to to file '<br />
* FILE, 'format', TYPE.<br />
When calling DOWNLOAD, it is enough to download the table with the data for the file. However, you<br />
can also specify default values for the file dialog name, type and header. If you make no specification<br />
about the mode, the file is always recreated (parameter MODE = ' ').
Example Program: UPLOAD<br />
© SAP AG<br />
REPORT RSFFF06B.<br />
TABLES SFLIGHT.<br />
DATA: BEGIN OF TAB OCCURS 20.<br />
INCLUDE STRUCTURE SBC420A.<br />
DATA: END OF TAB,<br />
START-OF-SELECTION.<br />
CALL FUNCTION 'UPLOAD'<br />
TABLES<br />
DATA_TAB = TAB.<br />
LOOP AT TAB.<br />
WRITE: / TAB-CARRID, TAB-CONNID,<br />
/ TAB-FLDATE UNDER TAB-CARRID,<br />
/ TAB-PLANETYPE UNDER TAB-FLDATE.<br />
ENDLOOP.<br />
This example program reads a local file with SFLIGHT data.
UPLOAD and DOWNLOAD as Standard<br />
Functions<br />
© SAP AG<br />
List<br />
Function DOWNLOAD<br />
ABAP/4 Editor<br />
00001<br />
00002<br />
00003<br />
. .<br />
. .<br />
. .<br />
Function UPLOAD<br />
DOWNLOAD<br />
You can call the function DOWNLOAD from a list (choose System -> List -> Save -> Local file) or<br />
from the ABAP/4 Editor to download a list or an ABAP/4 program to a local file<br />
This process supports certain formats.<br />
You can call the function UPLOAD from the ABAP/4 Editor to upload an ABAP/4 program from a<br />
local file to the ABAP/4 Editor.
Sequential File and Local File<br />
Sequential<br />
file<br />
© SAP AG<br />
TRANSFER<br />
READ DATASET<br />
CALLFUNCTION<br />
DOWNLOAD’ DOWNLOAD’<br />
CALLFUNCTION<br />
UPLOAD’ UPLOAD’<br />
Local sequential<br />
file<br />
You can use READ DATASET and DOWNLOAD to copy the contents of a sequential file to a local<br />
sequential file via an internal table.<br />
Conversely, you can use UPLOAD and TRANSFER to transfer data from a local sequential file to a<br />
sequential file.
UPLOAD / DOWNLOAD - Summary<br />
DOWNLOAD<br />
WS_FILENAME_GET<br />
© SAP AG<br />
WS_DOWNLOAD<br />
Download data<br />
Download data<br />
Logical file name<br />
Read data<br />
Read data<br />
Get file name Get file name<br />
Physical<br />
file name<br />
Execute<br />
program<br />
WS_EXECUTE<br />
Get<br />
file size<br />
WS_UPLOAD<br />
UPLOAD<br />
WS_QUERY<br />
Environment variables<br />
The function modules UPLOAD and DOWNLOAD are a convenient way of processing local files<br />
because they perform all the necessary activities automatically. The user is requested to specify the file<br />
name and type interactively.<br />
There are also other function modules you can use for file processing. These include the following:<br />
WS_DOWNLOAD and WS_UPLOAD:<br />
Like DOWNLOAD, except that the file name and type are not specified interactively and exceptions<br />
must be handled by the calling program.<br />
WS_QUERY:<br />
checks the existence and size of a file, as well as other environment variables.<br />
WS_EXECUTE:<br />
starts a program on the presentation server.
Chapter 6 Summary<br />
© SAP AG<br />
l The R/3 System allows you to generate local files on the<br />
frontend or the presentation server and process them<br />
further. It provides several standard function modules<br />
which are especially suited to this purpose. You can also<br />
exchange data between frontend files and application<br />
server files.
Exercises for Chapter 6: Local Files<br />
1. Name of your job: ZBCF##F1<br />
Your group number: ##<br />
Name of your host directory: /tmp<br />
Name of a host model file: BOOKXX<br />
Name of your local directory: /tmp<br />
Name of your local file: LOC##<br />
Task:<br />
Write a program which downloads your file BOOK## to the<br />
local file LOC##.<br />
2. Name of your program: ZBCF##F2<br />
Your group number: ##<br />
Name of your local directory: /tmp<br />
Name of your local file: LOC##<br />
Task:<br />
Write a program which reads your local file LOC## and<br />
displays it on the screen.
Model solutions for Chapter 6: Local Files<br />
1.<br />
REPORT RSFFF061.<br />
* Internal table for local dataset defined as Dictionary structure<br />
* or include report<br />
DATA: BEGIN OF TAB OCCURS 20.<br />
INCLUDE STRUCTURE SBC420C.<br />
DATA: END OF TAB.<br />
* STRUCTURE SBC420C:<br />
* CARRID, CONNID, FLDATE, BOOKID, CUSTOMID.<br />
* Alternative:<br />
* INCLUDE RSFFF01L.<br />
DATA: TYPE LIKE RLGRAP-FILETYPE VALUE 'ASC',<br />
LENGTH(5).<br />
* Create the selection screen<br />
PARAMETERS:<br />
HOSTFILE LIKE RLGRAP-FILENAME DEFAULT '/tmp/BOOKXX',<br />
* LOCLFILE LIKE RLGRAP-FILENAME DEFAULT '/tmp/BC420LOCXX', "UNIX<br />
LOCLFILE LIKE RLGRAP-FILENAME DEFAULT 'C:BC420LOCXX.ABA',<br />
"NT/OS2<br />
MODE DEFAULT 'A'.<br />
START-OF-SELECTION.<br />
* Text mode because /tmp/BOOKXX was created in text mode<br />
OPEN DATASET: HOSTFILE FOR INPUT IN TEXT MODE,
LOCLFILE FOR OUTPUT IN TEXT MODE.<br />
* Access data in application server file and store in an<br />
* internal table<br />
DO.<br />
CLEAR TAB.<br />
READ DATASET HOSTFILE INTO TAB.<br />
IF SY-SUBRC NE 0. EXIT. ENDIF.<br />
APPEND TAB.<br />
WRITE: / TAB-CARRID, TAB-CONNID,<br />
ULINE.<br />
ENDDO.<br />
/ TAB-FLDATE, TAB-BOOKID, TAB-CUSTOMID.<br />
* Call function module DOWNLOAD. <strong>Data</strong> is downloaded using an<br />
* internal table TAB together with the file name and file type<br />
* The length of the file generated in this way is returned.<br />
CALL FUNCTION 'DOWNLOAD'<br />
EXPORTING<br />
FILENAME = LOCLFILE<br />
FILETYPE = TYPE<br />
* ITEM = 'SFLIGHT data'<br />
MODE = MODE<br />
IMPORTING<br />
* ACT_FILENAME = FILE<br />
* ACT_FILETYPE = TYPE<br />
TABLES<br />
FILESIZE = LENGTH<br />
DATA_TAB = TAB.
2.<br />
*E Text-001: 'In file:'<br />
*E Text-002: 'Format'<br />
*E Text-003: 'bytes were downloaded'<br />
WRITE: / TEXT-001, LOCLFILE, TEXT-002, TYPE,<br />
REPORT RSFFF062.<br />
LENGTH, TEXT-003.<br />
* Internal table for local dataset defined as Dictionary structure<br />
* or include report<br />
DATA: BEGIN OF TAB OCCURS 20.<br />
INCLUDE STRUCTURE SBC420C.<br />
DATA: END OF TAB.<br />
* STRUCTURE SBC420C:<br />
* CARRID, CONNID, FLDATE, BOOKID, CUSTOMID.<br />
* Alternative:<br />
* INCLUDE RSFFF01L.<br />
DATA: TYPE LIKE RLGRAP-FILETYPE VALUE 'ASC',<br />
LENGTH(5).<br />
* Create the selection screen<br />
PARAMETERS:<br />
* LOCLFILE LIKE RLGRAP-FILENAME DEFAULT '/tmp/BC420LOCXX', "UNIX<br />
LOCLFILE LIKE RLGRAP-FILENAME DEFAULT 'C:BC420LOCXX.ABA'.<br />
"NT/OS2<br />
START-OF-SELECTION.
* Call the function module UPLOAD. Pass the name of the file to be<br />
* accessed and its type. Returns the data in form of an internal<br />
* table with the length of the file accessed.<br />
CALL FUNCTION 'UPLOAD'<br />
EXPORTING<br />
FILENAME = LOCLFILE<br />
FILETYPE = TYPE<br />
* ITEM = 'SFLIGHT data'<br />
IMPORTING<br />
TABLES<br />
FILESIZE = LENGTH<br />
DATA_TAB = TAB.<br />
* Output the internal table<br />
LOOP AT TAB.<br />
WRITE: / TAB-CARRID, TAB-CONNID,<br />
ULINE.<br />
ENDLOOP.<br />
/ TAB-FLDATE, TAB-BOOKID, TAB-CUSTOMID.<br />
*D Text-001: 'From file:'<br />
*D Text-002: 'Format'<br />
*D Text-003: 'bytes were read'<br />
WRITE: / TEXT-001, LOCLFILE, TEXT-002, TYPE,<br />
LENGTH, TEXT-003.
© SAP AG<br />
Appendix IV
© SAP AG<br />
Batch Input<br />
Buchen Post<br />
document Beleg<br />
Input file<br />
RFBIDE00<br />
RFBIKR00<br />
RFBISA00<br />
RFBIBL00<br />
session XX<br />
DIALOG interface<br />
Batch<br />
input<br />
The reports RFBIDE00, RFBIKR00, RFBISA00 and RFBIBL00 support automatic import of data<br />
from external or legacy systems.<br />
RFBIDE00 transfers customer master data and creates bank master data and credit limits.<br />
RFBIKR00 transfers vendor master data and creates bank master data.<br />
RFBISA00 transfers G/L account master data creates bank master data.<br />
RFBIBL00 transfers documents (posting and settlement).<br />
For further online documentation, choose Help -> R/3 library -> Financial Accounting -> Automatic<br />
Procedures -> Batch Input
Batch Input Flow<br />
© SAP AG<br />
SAP unknown data SAP known data<br />
Interface program<br />
BI Format<br />
SAP transfer programs<br />
BI interface<br />
e.g. - recurring entries<br />
- cashed checks<br />
SAP transfer programs<br />
You must create an interface program to convert non-SAP data to a format recognized by SAP.<br />
The required record structures are defined in the ABAP/4 Dictionaryt (e.g. BBKPF, BBSEG). By using<br />
a Customizing function, you can format the record layout in the Cobol, PL1, and C programming<br />
languages.
© SAP AG<br />
Batch Input Structures<br />
Typ 0 Session data<br />
Typ 1 Transaction code and header data<br />
Typ 2 Batch input data per table<br />
Naming convention:<br />
B T T T T<br />
Batch input Table name<br />
Examples<br />
BGR00<br />
BLF00<br />
BBKPF<br />
BLFA1<br />
BBSEG<br />
For each supported database table, there is an associated batch input structure.<br />
Batch input structures are stored in the ABAP/4 Dictionary.<br />
A batch input structure begins with the letter 'B' followed by the name of the table for which batch input<br />
data is determined.<br />
For each input field on a screen, there is a batch input field in the batch input structure.<br />
The special character "/" means:<br />
'No batch input for this field'.
© SAP AG<br />
Master <strong>Data</strong><br />
Transaction f r<br />
Create XK01 / XD01<br />
Change XK02 / XD02<br />
Lock XK05 / XD05<br />
Flag for deletion XK06 / XD06<br />
Structures ( using vendor as an example )<br />
BGR00 Type 0 Session data<br />
BLF00 Type 1 Transaction code,<br />
key fields<br />
BLFA1 Type 2 General data<br />
BLFBK Type 2 Bank connections<br />
BLFB1 Type 2 Company code data<br />
BLFB5 Type 2 Dunning data<br />
BLFM1 Type 2 Purchasing data<br />
The central transactions listed above are supported for customers and vendors.<br />
Depending on what is specified in the key fields of the type 1 record, the type 2 records are expected.<br />
The structures of type 2 records do not contain the key fields of the underlying database table.<br />
The key fields are obtained from the structures of the type 0 and type 1 records.
Example of Batch Input 1<br />
:<br />
© SAP AG<br />
BGR00<br />
BLF00<br />
BLFA1<br />
BLF00<br />
BLFA1<br />
BLFB1<br />
BLF00<br />
0 session - XX 001<br />
1 XK02 0000004711 / / /<br />
2 BLFA1 / New name /<br />
1 XK02 0000004712 0001 / /<br />
2 BLFA1 /<br />
2 BLFB1 /<br />
. . .<br />
. . . New city /<br />
. . .<br />
. . .<br />
ZB00 /<br />
Since there are several type 2 structures, the table name must also be passed.<br />
The bank connections are stored in a multiple case table. For this reason, there may be several records<br />
with the structure BLFBK (BKNBK) for each transaction.<br />
To delete a bank connection, you must set the delete flag in the structure BLFBK (BKNBK).<br />
. . .<br />
. . .
Documents<br />
© SAP AG<br />
Transaction<br />
FB01 Post document<br />
FB05 Post with clearing<br />
Structures<br />
BGR00 Type 0 Session data<br />
BBKPF Type 1 Transaction code<br />
and header data<br />
BBSEG Type 2 Document segment data<br />
BSELK Type 2 Selection header data<br />
BSELP Type 2 Selection item data<br />
The general posting and clearing transactions are supported.
:<br />
© SAP AG<br />
BGR00<br />
BBKPF<br />
BBSEG<br />
BBSEG<br />
BBKPF<br />
BBSEG<br />
BBKPF<br />
Example of Batch Input 2<br />
0 Session - XX 001<br />
. . .<br />
1 FB01 TTMMJJJJ DR 0001<br />
2 BBSEG 01 0000004711 / / 1000<br />
2 BBSEG 50 Revenues / / 1000<br />
1 FB01 TTMMJJJJ KR 0001<br />
2 BBSEG 31 0000004712 / / 2000 . . .<br />
BBSEG 2 BBSEG 40 Expenses / / 2000 . . .<br />
The structure BBSEG contains all the fields of the structure BSEG and also includes the CPD data or<br />
the data of the differing payment recipient and the data for additional screens.<br />
You can pass amount fields with a decimal comma.<br />
. . .<br />
. . .<br />
. . .<br />
. . .
Transfer Options per Company Code<br />
© SAP AG<br />
Transfer date<br />
Status<br />
Residual value<br />
Determine<br />
for each<br />
company code<br />
Calculate cum. insurable value<br />
Sequence of depreciation areas<br />
for transfer of legacy data<br />
For each company code, you define the following:<br />
- Transfer date<br />
- Status<br />
- Residual value<br />
- "Calculate cum. insurable value" option<br />
- Sequence of depreciation areas for transfer of legacy data<br />
You can transfer assets from the old system starting at any point in the past. When transferring legacy<br />
data less than a year old, it is possible to list the transactions from the last fiscal year closing up to the<br />
time of the transfer at the time of the transfer.<br />
If you did not maintain insurable values in your legacy system, you can calculate them when<br />
transferring the data. When determining the sequence, the depreciation areas should first appear on the<br />
screen with values which have for the most part been entered manually. Explicit values must be entered<br />
both in the area of book depreciation and in investment areas. In the remaining areas, you can transfer<br />
values from external areas and excude the option to change values.<br />
For further online documentation, choose Help -> R/3 library -> Financial Accounting -> Asset<br />
Accounting - System Administration -> Organizational Elements.
Transfer Options per Depreciation Area<br />
© SAP AG<br />
Determine<br />
for each<br />
depreciation<br />
area<br />
Replacement value<br />
Cum. depreciation<br />
Transfer of legacy data less than a<br />
year old - last depreciation posting<br />
period of legacy system<br />
For each depreciation area, you define the following options:<br />
“Calculate cum. replacement value"<br />
“Recalculate cum. depreciation"<br />
With legacy data less than one year old, the date of the last depreciation posting run in the legacy<br />
system<br />
If you did not maintain replacement values in your legacy system, you can calculate them when<br />
transferring the legacy data, provided the depreciation area allows this.<br />
You can use the option "Recalculate cum. depreciation" for test purposes.<br />
When listing cum. values, you can enter the residual value instead of the cum. depreciation. The system<br />
then determines the cum. depreciation at the time of transfer from the difference between the acquisition<br />
value and the net book value.<br />
If the depreciation has already been posted in the legacy system for legacy data less than one year old,<br />
you can store the last posting period in the depreciation area.
© SAP AG<br />
Automatic Transfer of Legacy <strong>Data</strong><br />
Legacy system<br />
Interface program<br />
Transfer program RAALTD01<br />
Legacy data in transfer format<br />
BALTD and BALTB<br />
error-free records records with errors<br />
D I A L O G I N T E R F A C E<br />
ANLH<br />
ANLA<br />
ANLB<br />
ANLC<br />
.<br />
An interface program is used to convert data from a legacy system to the format of the Dictionary tables<br />
BALTD (master data) and BALTB (transaction data) and copy it to a sequential file.<br />
The legacy data transfer program RAALTD01 starts a legacy data transfer transaction in the<br />
background for error-free records. Records containgin errors are stored in the form of a batch input<br />
session and must be processed again later.<br />
Batch<br />
input<br />
The documentation of the program RAALTD01 contains precise instructions<br />
for setting up the sequential transfer file with the interface program,<br />
test options,<br />
avoiding errors and interpreting those which occur,<br />
procedure in the case of a program termination.
Transferring Assets<br />
© SAP AG<br />
Account control in production FI<br />
Before AM import<br />
Vendor Asset bal. (can be directly posted)<br />
After AM import<br />
1000 1000<br />
Vendor Asset<br />
1000 1000<br />
Asset bal. (recon. account only)<br />
After import, the G/L accounts must be changed from “directly postable” to “reconciliation account<br />
only”.<br />
1000<br />
(RACKONT2)<br />
T ools Business Engineering Customizing <br />
Implement. projects SAP Reference IMG ... ”
Sequential file SAP data structure<br />
R/3 System Batch input<br />
session<br />
© SAP AG<br />
<strong>Data</strong> Transfer<br />
External system Prices/<br />
conditions<br />
Transaction 1<br />
Screen 1 Screen 2<br />
SAP format<br />
SAP<br />
condition records<br />
Customer-specific<br />
Customer-specific<br />
conversion conversion program<br />
program<br />
SAP SAP data data transfer transfer<br />
program<br />
program<br />
Process Process session session<br />
Transaction 2<br />
. . . . . .<br />
Screen 1 Screen 2<br />
SAP provides transfer programs (batch input) for transferring data from legacy systems.<br />
<strong>Data</strong> to be transferred to the R/3 System must be placed in a sequential file and the records must have<br />
SAP structure and format. The data is transferred from the legacy system to the sequential file by a<br />
subroutine created by the customer. Using an SAP program, you can generate data declarations in<br />
different programming languages for SAP tables and make use of these for your conversion program.<br />
The SAP transfer program (batch input) reads the data from the sequential file, retrieves it for transfer<br />
to the R/3 System and uses it to create a batch input session.<br />
When the session is processed, the data is transferred to the R/3 System. Here, a user dialog is<br />
simulated so that the same checks are performed as in a dialog.<br />
There are data transfer programs for<br />
- Customer master records<br />
- Vendor master records<br />
- Material master records<br />
- Condition records<br />
- Open orders
Overview of Background Processing<br />
© SAP AG<br />
Features<br />
Execution of ABAP/4 programs without dialog or<br />
operating sytem-specific Job Control Language<br />
Complete integration into the R/3 System<br />
Parallel running of background and online processing<br />
Easy to use<br />
Distributed processing<br />
If an ABAP/4 report has to process large volumes of data and long, complex lists, you should execute it<br />
as a background job.
Phases of Background Job Processing<br />
© SAP AG<br />
Job<br />
scheduling<br />
Job<br />
running<br />
Job<br />
overview<br />
To execute a program in the background, you must first include it in a job.<br />
When scheduling jobs, you define which reports you want to run. You can specify when the job is to be<br />
executed and the print parameters.<br />
The job can only be executed when it has been released by the administrator.<br />
You can display jobs and manage them in the overview facility. You can display and maintain logs<br />
generated by background processing.<br />
Jobs are executed in special work processes.
Scheduling Background Jobs<br />
Job name ......................<br />
.<br />
.<br />
.<br />
© SAP AG<br />
Job Job definition definition<br />
Save<br />
Save<br />
You create a job with the Job definition function.<br />
Steps Steps<br />
Print Print specifications<br />
specifications<br />
Start Start time time<br />
Period<br />
Period<br />
To proceed, choose System -> Services -> Jobs or System -> Services -> Reporting -> Program -><br />
Background, or call Transaction SM36.<br />
To make the request, you need to specify a job name (any name you like), the name of the program to be<br />
started and a variant, as well as the name of a user for authorization checking purposes.<br />
The scheduling part ends when you Save. Before doing this, you can specify the start time, how often<br />
the job is to be repeated and the print parameters.<br />
You can extend an existing job to include more steps. When doing this, you get a step list which you can<br />
edit to suit your requirements.<br />
In distributed environments, you can specify a target machine where the processing is to take place<br />
(choose this by pressing F4).<br />
By specifying a job class, you can determine the priority and type of a job.