L1 Compact Owners Guide - Bose
L1 Compact Owners Guide - Bose
L1 Compact Owners Guide - Bose

Create successful ePaper yourself
Turn your PDF publications into a flip-book with our unique Google optimized e-Paper software.
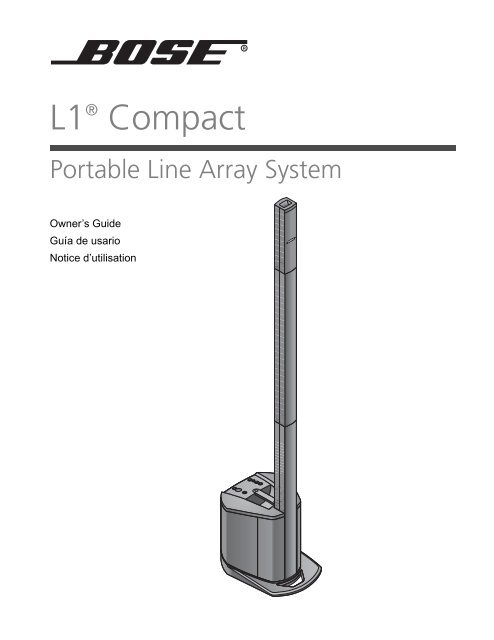
<strong>L1</strong> ® <strong>Compact</strong><br />
Portable Line Array System<br />
Owner’s <strong>Guide</strong><br />
Guía de usario<br />
Notice d’utilisation
Quick setup guide<br />
Guía rápida de instalación<br />
Notice de montage
SAFETY INFORMATION<br />
English<br />
Please read this owner’s guide<br />
Please take the time to follow the instructions in this owner’s guide carefully. It will help you set up<br />
and operate your system properly and enjoy its advanced features. Please save this owner’s guide<br />
for future reference.<br />
WARNING: To reduce the risk of fire or electrical shock, do not expose the system to rain or moisture.<br />
WARNING: To reduce the risk of electric shock, do not disassemble this system unless you are<br />
qualified. Refer servicing to qualified service personnel.<br />
The lightning flash with arrowhead symbol within an equilateral triangle alerts the user to the<br />
presence of uninsulated, dangerous voltage within the system enclosure that may be of<br />
sufficient magnitude to constitute a risk of electrical shock.<br />
The exclamation point within an equilateral triangle, as marked on the system, is intended to<br />
alert the user to the presence of important operating and maintenance instructions in this<br />
owner’s guide.<br />
CAUTION: This product shall be connected to a mains socket outlet with a protective earthing<br />
connection.<br />
CAUTION: Make no modifications to the system or accessories. Unauthorized alterations may<br />
compromise safety, regulatory compliance, and system performance.<br />
CAUTION: Do not place any naked flame sources, such as lighted candles, on or near the apparatus.<br />
CAUTION: Where the mains plug is used as the disconnect device, such disconnect device shall<br />
remain readily operable.<br />
Note: The product must be used indoors. It is neither designed nor tested for use outdoors, in<br />
recreation vehicles, or on boats.<br />
This product conforms to the EMC Directive 2004/108/EC and to the Low Voltage Directive<br />
2006/95/EC. The complete Declaration of Conformity can be found at<br />
www.<strong>Bose</strong>.com/static/compliance/index.html.<br />
WARNING: Do not expose this apparatus to dripping or splashing and do not place objects filled with<br />
liquids, such as vases, on or near the apparatus As with any electronic products, use care not to spill<br />
liquids into any part of the system. Liquids can cause a failure and/or a fire hazard.<br />
Japan only:<br />
Note: Provide an earth connection before the main plug is connected to the mains.<br />
©2009 <strong>Bose</strong> Corporation. No part of this work may be reproduced, modified, distributed, or otherwise used without<br />
prior written permission.
English TAB TAB TAB 4, 11 TAB 5, 12 TAB 2, 9, 16 TAB 1, 8, 15<br />
1. Read these instructions.<br />
2. Keep these instructions.<br />
3. Heed all warnings.<br />
4. Follow all instructions.<br />
5. Do not use this apparatus near water.<br />
6. Clean only with a dry cloth.<br />
7. Do not block any ventilation openings.<br />
Install in accordance with the manufacturer’s<br />
instructions.<br />
8. Do not install near any heat sources,<br />
such as radiators, heat registers, stoves,<br />
or other apparatus (including amplifiers)<br />
that produce heat.<br />
9. Do not defeat the safety purpose of the<br />
polarized or grounding-type plug. A<br />
polarized plug has two blades with one<br />
wider than the other. A grounding-type<br />
plug has two blades and a third grounding<br />
prong. The wider blade or third prong<br />
is provided for your safety. If the provided<br />
plug does not fit into your outlet,<br />
consult an electrician for replacement of<br />
the obsolete outlet.<br />
10. Protect the power cord from being<br />
walked on or pinched, particularly at<br />
plugs, convenience receptacles, and<br />
the point where they exit from the<br />
apparatus.<br />
11. Only use attachments/accessories<br />
specified by the manufacturer.<br />
12. Use only with the cart, stand,<br />
tripod, bracket, or table specified<br />
by the manufacturer or sold<br />
with the apparatus. When a cart<br />
is used, use caution when moving the<br />
cart/apparatus combination to avoid<br />
injury from tip-over.<br />
13. Unplug this apparatus during lightning<br />
storms or when unused for long periods<br />
of time.<br />
14. Refer all servicing to qualified service<br />
personnel. Servicing is required when<br />
the apparatus has been damaged in any<br />
way, such as power-supply cord or plug<br />
is damaged, liquid has been spilled or<br />
objects have fallen into the apparatus,<br />
the apparatus has been exposed to rain<br />
or moisture, does not operate normally,<br />
or has been dropped.<br />
IMPORTANT SAFETY INSTRUCTIONS<br />
15. To prevent risk of fire or electric shock,<br />
avoid overloading wall outlets, extension<br />
cords, or integral convenience<br />
receptacles.<br />
16. Do not let objects or liquids enter the<br />
product – as they may touch dangerous<br />
voltage points or short-circuit parts that could<br />
result in a fire or electric shock.<br />
17. See product enclosure for safety-related<br />
markings.<br />
18. Use proper power sources – Plug the product<br />
into a proper power source, as described<br />
in the operating instructions or as marked on<br />
the product.<br />
19. Apparatus shall not be exposed to dripping<br />
or splashing, and no objects filled<br />
with liquids, such as vases, shall be<br />
placed on the apparatus.<br />
20. No naked flame source, such as lighted<br />
candles, should be placed on or near the<br />
apparatus.<br />
21. Power LED – Indicates power status.<br />
Blue: Power on.<br />
Information about products that<br />
generate electrical noise<br />
This equipment has been tested and found to<br />
comply with the limits for a Class A digital<br />
device, pursuant to Part 15 of the FCC rules.<br />
These limits are designed to provide<br />
reasonable protection against harmful<br />
interference in a commercial environment. This<br />
equipment generates, uses, and can radiate<br />
radio frequency energy and, if not installed and<br />
used in accordance with the instructions, may<br />
cause harmful interference to radio<br />
communications. Operation of this equipment<br />
in a residential area is likely to cause harmful<br />
interference, in which case the user will be<br />
required to correct the interference at his own<br />
expense.<br />
This product complies with the Canadian<br />
ICES-003 Class A specifications.
TAB TAB TAB TAB 4, 11 TAB 3, 10 TAB 2, 9, 16 English<br />
CONTENTS<br />
INTRODUCTION 1<br />
Welcome . . . . . . . . . . . . . . . . . . . . . . . . . . . . . . . . . . . . . . . . . . . . . . . . . . . . . . . . . . . . . 1<br />
Features and benefits . . . . . . . . . . . . . . . . . . . . . . . . . . . . . . . . . . . . . . . . . . . . . . . . . . . . 1<br />
Product overview . . . . . . . . . . . . . . . . . . . . . . . . . . . . . . . . . . . . . . . . . . . . . . . . . . . . . . . 2<br />
SYSTEM SETUP 3<br />
System configurations . . . . . . . . . . . . . . . . . . . . . . . . . . . . . . . . . . . . . . . . . . . . . . . . . . . 3<br />
Setting up the system . . . . . . . . . . . . . . . . . . . . . . . . . . . . . . . . . . . . . . . . . . . . . . . . . . . 4<br />
Setting up in the collapsed position . . . . . . . . . . . . . . . . . . . . . . . . . . . . . . . . . . . . . . . 4<br />
Setting up in the extended position . . . . . . . . . . . . . . . . . . . . . . . . . . . . . . . . . . . . . . . 4<br />
Extending the Loudspeaker Array . . . . . . . . . . . . . . . . . . . . . . . . . . . . . . . . . . . . . . . . 5<br />
Connecting power to the system . . . . . . . . . . . . . . . . . . . . . . . . . . . . . . . . . . . . . . . . . 5<br />
OPERATING INFORMATION 6<br />
Connections and controls . . . . . . . . . . . . . . . . . . . . . . . . . . . . . . . . . . . . . . . . . . . . . . . . 6<br />
Rear panel outputs . . . . . . . . . . . . . . . . . . . . . . . . . . . . . . . . . . . . . . . . . . . . . . . . . . . . 7<br />
Plugging in your sources . . . . . . . . . . . . . . . . . . . . . . . . . . . . . . . . . . . . . . . . . . . . . . . . . 7<br />
Setting the Channel 1 (microphone) controls . . . . . . . . . . . . . . . . . . . . . . . . . . . . . . . . . . 8<br />
Setting the Channel 2 controls . . . . . . . . . . . . . . . . . . . . . . . . . . . . . . . . . . . . . . . . . . . . . 8<br />
Applying the acoustic guitar ToneMatch ® preset . . . . . . . . . . . . . . . . . . . . . . . . . . . . . 9<br />
Connection scenarios . . . . . . . . . . . . . . . . . . . . . . . . . . . . . . . . . . . . . . . . . . . . . . . . . . . . 9<br />
Classroom . . . . . . . . . . . . . . . . . . . . . . . . . . . . . . . . . . . . . . . . . . . . . . . . . . . . . . . . . . . 9<br />
Presentations . . . . . . . . . . . . . . . . . . . . . . . . . . . . . . . . . . . . . . . . . . . . . . . . . . . . . . . . 10<br />
Solo musical performances . . . . . . . . . . . . . . . . . . . . . . . . . . . . . . . . . . . . . . . . . . . . . 11<br />
DJ events . . . . . . . . . . . . . . . . . . . . . . . . . . . . . . . . . . . . . . . . . . . . . . . . . . . . . . . . . . . 11<br />
Advanced setup using the T1 ToneMatch ® audio engine . . . . . . . . . . . . . . . . . . . . . . . 12<br />
Single musician . . . . . . . . . . . . . . . . . . . . . . . . . . . . . . . . . . . . . . . . . . . . . . . . . . . 12<br />
Multiple musicians . . . . . . . . . . . . . . . . . . . . . . . . . . . . . . . . . . . . . . . . . . . . . . . . . 13<br />
Mixed setup . . . . . . . . . . . . . . . . . . . . . . . . . . . . . . . . . . . . . . . . . . . . . . . . . . . . . . 13<br />
CARE AND MAINTENANCE 14<br />
Caring for your product . . . . . . . . . . . . . . . . . . . . . . . . . . . . . . . . . . . . . . . . . . . . . . . . . . 14<br />
Cleaning . . . . . . . . . . . . . . . . . . . . . . . . . . . . . . . . . . . . . . . . . . . . . . . . . . . . . . . . . . . . 14<br />
Troubleshooting . . . . . . . . . . . . . . . . . . . . . . . . . . . . . . . . . . . . . . . . . . . . . . . . . . . . . . . . 14<br />
<strong>Bose</strong> ® Community Message Board . . . . . . . . . . . . . . . . . . . . . . . . . . . . . . . . . . . . . . . 15<br />
Getting service . . . . . . . . . . . . . . . . . . . . . . . . . . . . . . . . . . . . . . . . . . . . . . . . . . . . . . . 15<br />
Accessories . . . . . . . . . . . . . . . . . . . . . . . . . . . . . . . . . . . . . . . . . . . . . . . . . . . . . . . . . . . 15<br />
Limited Warranty and Registration . . . . . . . . . . . . . . . . . . . . . . . . . . . . . . . . . . . . . . . . . . 16<br />
What you must do to obtain Limited Warranty Service: . . . . . . . . . . . . . . . . . . . . . . . . 16<br />
Technical Information . . . . . . . . . . . . . . . . . . . . . . . . . . . . . . . . . . . . . . . . . . . . . . . . . . . . 17<br />
Mechanical . . . . . . . . . . . . . . . . . . . . . . . . . . . . . . . . . . . . . . . . . . . . . . . . . . . . . . . . . . 17<br />
Electrical . . . . . . . . . . . . . . . . . . . . . . . . . . . . . . . . . . . . . . . . . . . . . . . . . . . . . . . . . . . . 17<br />
Audio Input/Output . . . . . . . . . . . . . . . . . . . . . . . . . . . . . . . . . . . . . . . . . . . . . . . . . . . . 17
English TAB TAB TAB 4, 11 TAB 5, 12 TAB 2, 9, 16 TAB 1, 8, 15<br />
Welcome<br />
INTRODUCTION<br />
Thank you for purchasing the <strong>Bose</strong> ® <strong>L1</strong> ® <strong>Compact</strong> Portable Line Array System.<br />
Whether you are a musician amplifying your instruments, a mobile DJ<br />
entertaining an audience, or the host of your own special event, this system<br />
will provide quality sound for audiences of approximately 100 people.<br />
This owner’s guide provides detailed setup and operating instructions for<br />
your <strong>L1</strong> ® <strong>Compact</strong> system and explains how to connect to a variety of<br />
audio sources. For additional information on using this system, including<br />
tips, techniques, and frequently asked questions, please visit<br />
www.<strong>Bose</strong>.com/musicians on the Internet.<br />
Features and benefits<br />
Carry it in one trip – The entire system is light enough to be carried in a single<br />
trip.<br />
Set it up in one minute – The interlocking components of the <strong>L1</strong> ® <strong>Compact</strong><br />
system allow system setup in less than a minute. There are no external<br />
speaker wires required. An integrated bass enclosure with an intuitive user<br />
interface eliminates the need for separate components.<br />
Fill the room with one loudspeaker – Whether you’re performing live<br />
or playing back prerecorded music, whether you’re performing in a<br />
coffeehouse or a 100-seat room, <strong>Bose</strong> ® Spatial Dispersion loudspeaker<br />
technology provides nearly 180º of tonally balanced sound coverage so there<br />
are no dead spots.<br />
PA and monitor combined – Audience members enjoy a more consistent and<br />
intimate listening experience because the system sets up behind the<br />
performer and serves as both the monitor for the stage and amplification<br />
system for the audience. The performer alone controls the sound.<br />
Versatility – In addition to musical performances, the <strong>L1</strong> ® <strong>Compact</strong> provides<br />
quality sound for a wide variety of general-purpose uses including<br />
presentations, celebrations, speeches, and music playback for about<br />
100 people.<br />
Integrated ToneMatch ® signal processing – Provides a high level of tone<br />
customization on your microphone or instrument to provide a listening<br />
experience that most musicians only achieve using a recording studio.<br />
Two setup options – The <strong>L1</strong> ® <strong>Compact</strong> system can be used in either the<br />
collapsed position for smaller audiences or extended positions for larger<br />
audiences.<br />
1
INTRODUCTION<br />
2<br />
TAB TAB TAB TAB 4, 11 TAB 3, 10 TAB 2, 9, 16 English<br />
Product overview<br />
The <strong>L1</strong> ® <strong>Compact</strong> Portable Line Array System is shipped in two cartons.<br />
Carefully unpack the cartons and check that you have all the items listed on this<br />
page.<br />
WARNING: To avoid danger of suffocation, keep the plastic bags out of the reach<br />
of children.<br />
The <strong>L1</strong> ® <strong>Compact</strong> system consists of:<br />
<strong>L1</strong> ® <strong>Compact</strong> Power Stand<br />
<strong>L1</strong> ® <strong>Compact</strong> Loudspeaker Array<br />
<strong>L1</strong> ® <strong>Compact</strong> Extensions<br />
The <strong>L1</strong> ® <strong>Compact</strong> system comes with a slipcover for the Power Stand and a<br />
padded carry bag for the <strong>L1</strong> ® <strong>Compact</strong> Extensions.<br />
Power stand carton Extensions carton<br />
<strong>L1</strong> ® <strong>Compact</strong> Power Stand<br />
with Loudspeaker Array<br />
AC power cord<br />
Power Stand slipcover<br />
Loudspeaker<br />
Array<br />
<strong>L1</strong> ® <strong>Compact</strong> Extensions<br />
Extensions carry bag<br />
For a complete list of optional equipment and accessories, please visit:<br />
www.<strong>Bose</strong>.com/musicians.
English TAB TAB TAB 4, 11 TAB 5, 12 TAB 2, 9, 16 TAB 1, 8, 15<br />
System configurations<br />
SYSTEM SETUP<br />
You can set up the versatile <strong>L1</strong> ® <strong>Compact</strong> system in two unique positions.<br />
The examples below will help you quickly identify the position that can work<br />
best for you.<br />
Collapsed position<br />
Extended position<br />
Tabletop<br />
Power Stand<br />
Loudspeaker<br />
Array<br />
Smaller audiences<br />
Intimate acoustic performances<br />
Music playback<br />
Presentations<br />
Speeches<br />
Power<br />
Stand<br />
Loudspeaker<br />
Array<br />
Extension<br />
Extension<br />
Larger audiences<br />
Musical performances –<br />
auditorium/coffeehouse<br />
DJ events<br />
Announcements – larger spaces<br />
The <strong>L1</strong> ® <strong>Compact</strong> Extensions are not required when using the <strong>L1</strong> ® <strong>Compact</strong><br />
Portable Line Array System in the collapsed position. They are included for<br />
situations where you need to elevate the Loudspeaker Array to project sound<br />
to larger audiences.<br />
3
SYSTEM SETUP<br />
4<br />
TAB TAB TAB TAB 4, 11 TAB 3, 10 TAB 2, 9, 16 English<br />
Setting up the system<br />
Before making any connections, you should set the <strong>L1</strong> ® <strong>Compact</strong> Portable Line<br />
Array System up either in the collapsed position (the system is shipped in the<br />
collapsed position) or the extended position.<br />
Setting up in the collapsed position<br />
To get the most sound quality and ensure that seated audience members enjoy the<br />
full frequency range of the system, position it on a table (shown above) at ear-level<br />
or at the front edge of a stage (not shown). This will allow sound to project clearly<br />
and evenly throughout the audience.<br />
Setting up in the extended position<br />
In larger rooms, or with larger audiences where the sound could be blocked by<br />
obstacles, it is best to set up the <strong>L1</strong> ® <strong>Compact</strong> Portable Line Array System in the<br />
extended position.
English TAB TAB TAB 4, 11 TAB 5, 12 TAB 2, 9, 16 TAB 1, 8, 15<br />
Extending the Loudspeaker Array<br />
Once you have set the system in place:<br />
SYSTEM SETUP<br />
1. Slide the Loudspeaker Array up and out of the Power Stand and temporarily lay<br />
it aside.<br />
Note: The two <strong>L1</strong> ® <strong>Compact</strong> Extensions are identical to each other. Either one can<br />
be used on the top or bottom, but if one extension is used, both must be used.<br />
2. Align the plug on the bottom of the Extension with the socket on the Power<br />
Stand, then slide the extension into the power stand.<br />
Be sure to fully insert the extension into the Power Stand socket to assure<br />
stability and a good connection.<br />
3. Align the remaining Extension and push it firmly in place.<br />
4. Align the Loudspeaker Array and push it firmly in place.<br />
Connecting power to the system<br />
1. Make sure the power switch is off (down position).<br />
2. Plug one end of the power cord into the connector on the power stand.<br />
3. Plug the other end into a live electrical receptacle.<br />
1<br />
3<br />
1 2<br />
3<br />
4. Before turning the system on, connect your sound sources. See “Operating<br />
Information” on page 6, and “Plugging in your sources” on page 7.<br />
4<br />
2<br />
5
6<br />
TAB TAB TAB TAB 4, 11 TAB 3, 10 TAB 2, 9, 16 English<br />
OPERATING INFORMATION<br />
Connections and controls<br />
The power stand control panel provides all the necessary connectors, controls, and indicators<br />
for operation.<br />
1<br />
3<br />
4<br />
5<br />
2<br />
12<br />
Channel 1 (Microphone input) Channel 2 (Utility channel – multiple input)<br />
The channel 1 input is for use only with a<br />
microphone. Integrated ToneMatch ® signal<br />
processing provides a high level of tone<br />
customization to provide a listening experience<br />
that most musicians can only achieve using a<br />
recording studio.<br />
1. Signal/Clip indicator – Displays the input<br />
signal status in color.<br />
Green: Input signal present<br />
Red: Input signal clipping<br />
2. Volume control – Adjusts the volume of<br />
your microphone.<br />
3. Treble control – Adjusts the amount of<br />
treble on your microphone.<br />
4. Bass control – Adjusts the amount bass on<br />
your microphone.<br />
5. Microphone input – Analog input for<br />
connecting a balanced XLR microphone cable.<br />
A ToneMatch ® microphone preset is built in.<br />
7<br />
8<br />
10<br />
6<br />
9<br />
11<br />
6. Signal/Clip indicator – Displays the input<br />
signal status in color.<br />
Green: Input signal present<br />
Red: Input signal clipping<br />
7. Volume control – Adjusts the overall volume<br />
of all input sources connected to Channel 2.<br />
8. ⅛-inch stereo input – Balanced analog input<br />
for connecting audio sources such as portable<br />
mp3 players, satellite radio, laptop computers,<br />
video projectors, and smart boards.<br />
9. RCA stereo input – Analog input for connecting<br />
audio sources such as DVD players, VCR<br />
players, video game consoles, DJ mixers,<br />
Keyboards and other instruments. For best<br />
results, connect both the left and right signals.<br />
10. ¼-inch input – Balanced analog input for<br />
connecting guitars and other instruments.<br />
Accepts either ¼-inch TRS balanced or TS<br />
unbalanced cables.<br />
11. ToneMatch ® switch – When connecting an<br />
acoustic guitar to the ¼-inch input, move the<br />
switch to the position to enable a<br />
ToneMatch ® preset. When connecting anything<br />
other than an acoustic guitar to the ¼-inch<br />
input, move the switch down to the Line Level<br />
position.<br />
12. Power LED – Indicates power status.<br />
Blue: Power on
English TAB TAB TAB 4, 11 TAB 5, 12 TAB 2, 9, 16 TAB 1, 8, 15<br />
¼-inch output RCA output<br />
OPERATING INFORMATION<br />
Rear panel outputs<br />
¼-inch output – Mono analog output that accepts either ¼ inch TRS balanced or<br />
TS unbalanced cables. Can be used to link multiple <strong>L1</strong> ® <strong>Compact</strong> systems together<br />
by connecting the ¼-inch output from one <strong>L1</strong> ® <strong>Compact</strong> system to the ¼-inch input<br />
(Channel 2) on a second <strong>L1</strong> ® <strong>Compact</strong> system. This will provide additional coverage<br />
in larger spaces. You can also use the ¼-inch output to connect to a house PA<br />
system and use the <strong>L1</strong> ® <strong>Compact</strong> system as your personal monitor.<br />
Note: Using a TS unbalanced cable will result in a drop in the audio level of -6dBu.<br />
TRS TS<br />
RCA output – Mono line level analog output for connecting audio devices such as<br />
CD recorders and flash recorders. For best results, connect both the left and right<br />
signals.<br />
Left Right<br />
Plugging in your sources<br />
Before plugging in a sound source, adjust the channel’s Volume control fully<br />
counterclockwise.<br />
7
OPERATING INFORMATION<br />
8<br />
TAB TAB TAB TAB 4, 11 TAB 3, 10 TAB 2, 9, 16 English<br />
Setting the Channel 1 (microphone) controls<br />
Channel 1 is only intended for use with a dynamic handheld microphone. Do not<br />
connect any other sources to this input.<br />
1. Before using the microphone, adjust the Channel 1 Volume control fully counterclockwise.<br />
2. While speaking into the microphone, adjust the Volume control to the desired<br />
level.<br />
For best results, keep the microphone close to your lips when speaking.<br />
Holding the microphone more than 3 inches (7.6 cm) away from your lips when<br />
speaking will lead to less overall volume and may impact overall clarity.<br />
The Channel 1 Microphone Input is equipped with an integrated ToneMatch ®<br />
preset to automatically optimize the sound of your microphone.<br />
3. Adjust the Treble and Bass controls to make further refinements based on your<br />
personal preference.<br />
Setting the Channel 2 controls<br />
When connecting an audio source to any of the Channel 2 inputs, follow these<br />
steps to adjust the volume.<br />
1. On the power stand, adjust the Channel 2 Volume control fully<br />
counterclockwise.<br />
2. Connect the audio source to the appropriate Channel 2 input.<br />
3. Turn the Channel 2 Volume control clockwise until the volume indicator glows<br />
green or yellow.<br />
If the volume indicator steadily glows red, decrease the volume.<br />
Note: You can connect multiple audio sources, one to each of the Channel 2 Inputs,<br />
at the same time. However, you must then adjust the volume on each source device to<br />
achieve the mix you desire.
English TAB TAB TAB 4, 11 TAB 5, 12 TAB 2, 9, 16 TAB 1, 8, 15<br />
OPERATING INFORMATION<br />
Applying the acoustic guitar ToneMatch ® preset<br />
You can access the ToneMatch ® preset by plugging into the ¼-inch input on<br />
Channel 2 and moving the ToneMatch ® switch to the position. The ToneMatch ®<br />
preset is designed specifically for use with an acoustic guitar.<br />
Note: The ToneMatch ® preset switch only affects the ¼-inch input. Sound from devices<br />
connected to the ⅛-inch stereo input and the RCA stereo input are not affected.<br />
Connection scenarios<br />
There are many ways to connect and use the <strong>L1</strong> ® <strong>Compact</strong> system. The following<br />
pages show a few examples of typical scenarios.<br />
Classroom<br />
A typical setup scenario for a classroom could include a DVD player connected to<br />
the <strong>L1</strong> ® <strong>Compact</strong> system.<br />
9
OPERATING INFORMATION<br />
10<br />
TAB TAB TAB TAB 4, 11 TAB 3, 10 TAB 2, 9, 16 English<br />
Presentations<br />
Connect the audio output from your laptop computer and deliver multimedia<br />
presentations.<br />
Within auditoriums, the setup could include two <strong>L1</strong> ® <strong>Compact</strong> systems, several<br />
microphones, and a small mixer.<br />
Wireless Wired
English TAB TAB TAB 4, 11 TAB 5, 12 TAB 2, 9, 16 TAB 1, 8, 15<br />
OPERATING INFORMATION<br />
Solo musical performances<br />
The multiple inputs on the <strong>L1</strong> ® <strong>Compact</strong> system allow a soloist to connect a vocal<br />
microphone, musical instrument, and backing tracks.<br />
DJ events<br />
DJs use multiple input sources (CD player, MP3 player, etc.) plugged into a mixer. In<br />
this scenario, two mixer outputs are fed into two <strong>L1</strong> ® <strong>Compact</strong> systems for stereo<br />
sound.<br />
11
OPERATING INFORMATION<br />
12<br />
TAB TAB TAB TAB 4, 11 TAB 3, 10 TAB 2, 9, 16 English<br />
Advanced setup using the T1 ToneMatch ® audio engine<br />
For more demanding performances, a musician can add the optional<br />
T1 ToneMatch ® audio engine to his or her setup. The T1 offers expanded inputs<br />
and outputs, access to quality effects, dynamics processing, and our most<br />
advanced tone-shaping library. In addition, the T1 ToneMatch ® audio engine<br />
provides additional input/output capabilities.<br />
The optional T1 ToneMatch ® audio engine requires the optional power supply.<br />
To learn more about the T1 ToneMatch ® audio engine, please visit<br />
www.<strong>Bose</strong>.com/musicians.<br />
Single musician<br />
A single musician could add a microphone and T1 ToneMatch ® audio engine to their<br />
setup.
English TAB TAB TAB 4, 11 TAB 5, 12 TAB 2, 9, 16 TAB 1, 8, 15<br />
OPERATING INFORMATION<br />
Multiple musicians<br />
In this scenario, a keyboard-guitar duo sings and plays through a single<br />
T1 ToneMatch ® audio engine and an <strong>L1</strong> ® <strong>Compact</strong> system.<br />
Mixed setup<br />
A more elaborate multiple musician setup could be as shown below. This scenario<br />
employs two <strong>L1</strong> ® <strong>Compact</strong> systems and a T1 ToneMatch ® audio engine.<br />
13
14<br />
TAB TAB TAB TAB 4, 11 TAB 3, 10 TAB 2, 9, 16 English<br />
CARE AND MAINTENANCE<br />
Caring for your product<br />
Cleaning<br />
• Clean the product enclosures using only a soft, dry cloth.<br />
Do not use any solvents, chemicals, or cleaning solutions containing alcohol,<br />
ammonia, or abrasives.<br />
Do not use any sprays near the product or allow liquids to spill into any openings.<br />
If necessary, you may carefully vacuum the grille of the <strong>L1</strong> ® <strong>Compact</strong> Power<br />
Stand.<br />
Troubleshooting<br />
If you experience problems while using this product, try the following solutions.<br />
Recommended troubleshooting tools<br />
Spare AC power cord<br />
XLR and ¼-inch phone plug cables<br />
Problem What to do<br />
System is plugged<br />
in, power switch is<br />
on, but power LED<br />
is off<br />
Power LED is on,<br />
but no sound<br />
Middle to high<br />
frequencies absent<br />
from the <strong>L1</strong> ®<br />
<strong>Compact</strong><br />
Loudspeaker Array<br />
Instrument or audio<br />
source sounds<br />
distorted<br />
Microphone is<br />
encountering<br />
feedback<br />
Make sure you are using the included <strong>L1</strong> ® <strong>Compact</strong> Power Stand power cable.<br />
Make sure the power cable is fully engaged into both the Power Stand and the AC outlet.<br />
Make sure you have power at the AC outlet. Try operating a lamp or other equipment<br />
from the same AC outlet.<br />
Try a different power cable.<br />
If available, try a different Power Stand.<br />
Make sure the Volume control is turned up on the Power Stand.<br />
Make sure the volume control is turned up on your instrument.<br />
Make sure your instrument or audio source is plugged into the appropriate input jack.<br />
Connect your instrument or audio source to the Power Stand using a different cable.<br />
When in the collapsed position, always place the system on a tabletop so it is level with<br />
the listeners’ ears.<br />
Make sure the <strong>L1</strong> ® <strong>Compact</strong> Extensions and <strong>L1</strong> ® <strong>Compact</strong> Loudspeaker Array are firmly<br />
seated in their connectors.<br />
Make sure connections are not bent or broken.<br />
Try cleaning the contacts on the loudspeaker top and bottom with electronic contact<br />
spray cleaner.<br />
Lower the volume of the connected audio source.<br />
If you are connecting an external mixer, make sure the equalization controls for low, mid,<br />
and high on the mixer are set to mid position.<br />
Reduce the output of the mixer.<br />
Position the microphone so it is not pointing directly at its respective <strong>L1</strong> ® <strong>Compact</strong><br />
Loudspeaker array.<br />
Try positioning the microphone so it nearly touches your lips.<br />
Try a different microphone.<br />
Try a different position for the <strong>L1</strong> ® <strong>Compact</strong> Portable Line Array System and/or vocalist<br />
on stage.<br />
Increase the distance from the loudspeaker to the microphone.<br />
If using a vocal effects processor, make sure it is not contributing to the feedback.
English TAB TAB TAB 4, 11 TAB 5, 12 TAB 2, 9, 16 TAB 1, 8, 15<br />
Accessories<br />
CARE AND MAINTENANCE<br />
<strong>Bose</strong> ® Community Message Board<br />
To interact with other <strong>L1</strong> ® product owners and for tips on getting the most out of<br />
your <strong>L1</strong> ® <strong>Compact</strong> Portable Line Array System, please visit the <strong>Bose</strong> ® Musicians<br />
Community Message Board at: http://<strong>Bose</strong>.infopop.cc/eve.<br />
Getting service<br />
For additional help in solving problems, contact the <strong>Bose</strong> ® Live Music Customer<br />
Service Product and Technical Support Team at (877) 335-2673 or visit our support<br />
area online at www.<strong>Bose</strong>.com/musicians.<br />
Visit www.<strong>Bose</strong>.com/musicians, or call (800) 905-0886 for accessory information.<br />
15
CARE AND MAINTENANCE<br />
16<br />
TAB TAB TAB TAB 4, 11 TAB 3, 10 TAB 2, 9, 16 English<br />
Limited Warranty and Registration<br />
Your <strong>L1</strong> ® <strong>Compact</strong> Portable Line Array System is covered by a limited transferable<br />
warranty. Details of the limited warranty are provided on the product registration<br />
card that is included in the carton. Please refer to the card for instructions on how to<br />
register. Failure to register will not affect your limited warranty rights.<br />
What you must do to obtain Limited Warranty Service:<br />
Return product, with proof of purchase from an authorized <strong>Bose</strong> ® dealer, using the<br />
following procedures:<br />
1. Contact the <strong>Bose</strong> organization in your country/region (visit Global.<strong>Bose</strong>.com<br />
for <strong>Bose</strong> contact information in your country/region) for specific return and<br />
shipping instructions;<br />
2. Label and ship the product, freight prepaid, to the address provided by the<br />
authorized service facility; and<br />
3. Place any necessary return authorization number prominently on the outside of<br />
the carton. Cartons not bearing a return authorization number, where required,<br />
will be refused.<br />
The <strong>L1</strong> ® <strong>Compact</strong> Portable Line Array System is covered by patents issued or<br />
pending in the U.S. and other countries.<br />
Serial numbers and product registration<br />
Now is a good time to record the serial numbers of your system here and on your product<br />
registration card.<br />
<strong>L1</strong> ® <strong>Compact</strong> Loudspeaker Array __________________________________________________<br />
<strong>L1</strong> ® <strong>Compact</strong> Power Stand________________________________________________________<br />
<strong>L1</strong> ® <strong>Compact</strong> Extensions _________________________________________________________<br />
<strong>Bose</strong> recommends that you keep your sales receipt together with this guide.
English TAB TAB TAB 4, 11 TAB 5, 12 TAB 2, 9, 16 TAB 1, 8, 15<br />
Technical Information<br />
Mechanical<br />
Part Dimensions Weight<br />
<strong>L1</strong> ® <strong>Compact</strong> Power Stand with<br />
Loudspeaker Array<br />
Electrical<br />
AC power rating<br />
100-240V 50/60Hz 200W max<br />
Peak inrush current<br />
230V: 18.2 Amps<br />
120V: 9.7 Amps<br />
16½" H x 13¼" W x 16¾" D<br />
(41.8 cm x 33.9 cm x 42.6 cm)<br />
<strong>L1</strong> ® <strong>Compact</strong> Loudspeaker Array 16" H x 2¾" W x 2¾" D<br />
(40.8 cm x 7 cm x 7.1 cm)<br />
<strong>L1</strong> ® <strong>Compact</strong> Extensions (2) 32½" H x 2¾" W x 2¾" D<br />
(83 cm x 7 cm x 7.1 cm)<br />
Collapsed position<br />
(assembled)<br />
Extended position<br />
(assembled)<br />
16½" H x 13¼" W x 16¾" D<br />
(41.8 cm x 33.9 cm x 42.6 cm)<br />
78½" H x 13¼" W x 16¾" D<br />
(199.5 cm x 33.9 cm x 42.6 cm)<br />
Shipping Cartons Weight<br />
CARE AND MAINTENANCE<br />
24.6 lbs. (11.2 kg)<br />
3.0 lbs. (1.35 kg)<br />
2.3 lbs. (1.05 kg) each<br />
24.6 lbs. (11.2 kg)<br />
29.2 lbs. (13.3 kg)<br />
<strong>L1</strong> ® <strong>Compact</strong> loudspeakers 30.4 lbs. (13.8 kg)<br />
<strong>L1</strong> ® <strong>Compact</strong> extensions 7.5 lbs. (3.4 kg)<br />
BOSE, <strong>L1</strong>, and TONEMATCH are registered trademarks of <strong>Bose</strong> Corporation in the U.S. and other countries.<br />
17
©2009 <strong>Bose</strong> Corporation, The Mountain,<br />
Framingham, MA 01701-9168 USA<br />
AM317638 Rev.00<br />
www.<strong>Bose</strong>.com/musicians