introduction - Bose
introduction - Bose
introduction - Bose

Create successful ePaper yourself
Turn your PDF publications into a flip-book with our unique Google optimized e-Paper software.
This PDF includes both the English and<br />
the French versions of this document.<br />
Ce PDF inclut les versions anglaises<br />
et françaises de ce document.
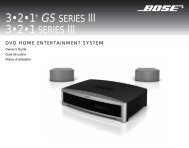
LIFESTYLE ®<br />
HOME ENTERTAINMENT SYSTEMS<br />
<br />
DVD
2<br />
Svenska Nederlands Italiano Français Svenska Nederlands Español Français Deutsch Italiano Deutsch Español Dansk English<br />
Dansk<br />
SAFETY INFORMATION<br />
Please read this guide<br />
Please take the time to follow the instructions in this guide carefully. It will help you set up and operate your system<br />
properly and enjoy all of its advanced features. Please save this guide for future reference.<br />
WARNING: To reduce the risk of fire or electrical shock, do not expose the product to rain or moisture.<br />
WARNING: The apparatus shall not be exposed to dripping or splashing, and objects filled with liquids, such as vases,<br />
shall not be placed on the apparatus. As with any electronic products, use care not to spill liquids into any part of the<br />
system. Liquids can cause a failure and/or a fire hazard.<br />
These CAUTION marks are located on your LIFESTYLE ® media center and Acoustimass ® module enclosures:<br />
The lightning flash with arrowhead symbol within an equilateral triangle alerts the user to the presence of<br />
uninsulated dangerous voltage within the system enclosure that may be of sufficient magnitude to<br />
constitute a risk of electrical shock.<br />
The exclamation point within an equilateral triangle, as marked on the system, is intended to alert the user<br />
to the presence of important operating and maintenance instructions in this owner’s guide.!<br />
Class 1 laser product<br />
This CD player is classified as a CLASS 1 LASER PRODUCT according to !<br />
EN 60825-1:1994+A1+A2, IEC60825-1:1993+A1+A2.!<br />
CLASS 1 LASER PRODUCT<br />
KLASSE 1 LASER PRODUKT<br />
LUOKAN 1 LASER LAITE<br />
KLASS 1 LASER APPARAT<br />
CAUTION: Use of controls or adjustments or performance of procedures other than those specified herein may result<br />
in hazardous radiation exposure. The compact disc player should not be adjusted or repaired by anyone except properly<br />
qualified service personnel.<br />
WARNING: No naked flame sources, such as lighted candles, should be placed on the apparatus.<br />
Class B emissions limits<br />
This Class B digital apparatus meets all requirements of the Canadian Interference-Causing Equipment Regulations<br />
(Canada only).<br />
Please dispose of used batteries properly, following any local regulations. Do not incinerate.<br />
Additional safety information<br />
See the additional instructions on the Important Safety Information sheet enclosed in the shipping carton.<br />
©2005 <strong>Bose</strong> Corporation. No part of this work may be reproduced, modified, distributed or otherwise used without prior written permission.<br />
Dolby and the double-D symbol are trademarks of Dolby Laboratories. Manufactured under license from Dolby Laboratories. Confidential unpublished works. 1992-1997 Dolby Laboratories.<br />
All rights reserved.<br />
This product contains one or more programs protected under international and U.S. copyright laws as unpublished works. They are confidential and proprietary to Dolby Laboratories.<br />
Their reproduction or disclosure, in whole or in part, or the production of derivative works therefrom without the express permission of Dolby Laboratories is prohibited. Copyright<br />
1992-1996 by Dolby Laboratories, Inc. All rights reserved.<br />
“DTS” and “DTS Digital Surround” are registered trademarks of Digital Theater Systems, Inc.<br />
MPEG Layer-3 audio compression technology licensed by Fraunhofer IIS and THOMSON multimedia.<br />
This product incorporates copyright protection technology that is protected by method claims of certain U.S. patents and other intellectual property rights owned by Macrovision Corporation<br />
and other rights owners. Use of this copyright protection technology must be authorized by Macrovision Corporation, and is intended for home and other limited viewing<br />
uses only unless otherwise authorized by Macrovision Corporation. Reverse engineering or disassembly is prohibited.<br />
This product incorporates copyright protected technology and other intellectual property rights owned by Cirrus Logic, Inc. and subject to the copyright protection of the U.S. as well<br />
as other licensing restrictions and protections. Use of this copyright protected technology is limited solely to use with the Cirrus Logic integrated circuits incorporated in this product.<br />
Reverse engineering or disassembly is prohibited.<br />
Consumers should note that not all high definition television sets are fully compatible with this product and may cause artifacts to be displayed in the picture. In case of 525 progressive<br />
scan picture problems, it is recommended that the user switch the connection to the “standard definition” output. If there are questions regarding our TV set compatibility with<br />
this model 525p DVD player, please contact our customer service center.<br />
Designed with UEI Technology Under License from Universal Electronics Inc. © UEI 2000-2002.
English Dansk Deutsch Español Français Italiano Nederlands Svenska<br />
CONTENTS<br />
INTRODUCTION<br />
SYSTEM CONTROLS<br />
SYSTEM OPERATION<br />
CONTROLLING EXTERNAL SOURCES<br />
USING SYSTEM MENUS<br />
CHANGING SOURCE SETTINGS<br />
REFERENCE<br />
INTRODUCTION 5<br />
Welcome . . . . . . . . . . . . . . . . . . . . . . . . . . . . . . . . . . . . . . . . . . . . . . . . . . . . . . . . . . . . . . . . . . . . . . . . . . . . . . . . . . . 5<br />
Clarifying some basics . . . . . . . . . . . . . . . . . . . . . . . . . . . . . . . . . . . . . . . . . . . . . . . . . . . . . . . . . . . . . . . . . . . . . . . . . 5<br />
Types of discs you can use with this system . . . . . . . . . . . . . . . . . . . . . . . . . . . . . . . . . . . . . . . . . . . . . . . . . . . 5<br />
Check DVDs for region number compatibility . . . . . . . . . . . . . . . . . . . . . . . . . . . . . . . . . . . . . . . . . . . . . . . . . . 5<br />
Audio and video terms defined . . . . . . . . . . . . . . . . . . . . . . . . . . . . . . . . . . . . . . . . . . . . . . . . . . . . . . . . . . . . . . . . . . 6<br />
SYSTEM CONTROLS 8<br />
Remote control buttons . . . . . . . . . . . . . . . . . . . . . . . . . . . . . . . . . . . . . . . . . . . . . . . . . . . . . . . . . . . . . . . . . . . . . . . . 8<br />
Getting strong remote control range and response . . . . . . . . . . . . . . . . . . . . . . . . . . . . . . . . . . . . . . . . . . . . . . 11<br />
Media center . . . . . . . . . . . . . . . . . . . . . . . . . . . . . . . . . . . . . . . . . . . . . . . . . . . . . . . . . . . . . . . . . . . . . . . . . . . . . . . . 12<br />
Controls . . . . . . . . . . . . . . . . . . . . . . . . . . . . . . . . . . . . . . . . . . . . . . . . . . . . . . . . . . . . . . . . . . . . . . . . . . . . . . . 12<br />
Display window . . . . . . . . . . . . . . . . . . . . . . . . . . . . . . . . . . . . . . . . . . . . . . . . . . . . . . . . . . . . . . . . . . . . . . . . . 13<br />
SYSTEM OPERATION 14<br />
Initial pointers to get you started . . . . . . . . . . . . . . . . . . . . . . . . . . . . . . . . . . . . . . . . . . . . . . . . . . . . . . . . . . . . . . . . . 14<br />
To turn on your system . . . . . . . . . . . . . . . . . . . . . . . . . . . . . . . . . . . . . . . . . . . . . . . . . . . . . . . . . . . . . . . . . . . 14<br />
To turn on the TV or other external components . . . . . . . . . . . . . . . . . . . . . . . . . . . . . . . . . . . . . . . . . . . . . . . . 14<br />
To watch a DVD . . . . . . . . . . . . . . . . . . . . . . . . . . . . . . . . . . . . . . . . . . . . . . . . . . . . . . . . . . . . . . . . . . . . . . . . . 14<br />
To adjust what you hear or see . . . . . . . . . . . . . . . . . . . . . . . . . . . . . . . . . . . . . . . . . . . . . . . . . . . . . . . . . . . . . 15<br />
Enjoying multiple system sources . . . . . . . . . . . . . . . . . . . . . . . . . . . . . . . . . . . . . . . . . . . . . . . . . . . . . . . . . . . . . . . . 15<br />
Playing a DVD . . . . . . . . . . . . . . . . . . . . . . . . . . . . . . . . . . . . . . . . . . . . . . . . . . . . . . . . . . . . . . . . . . . . . . . . . . . 15<br />
Using DVD parental controls . . . . . . . . . . . . . . . . . . . . . . . . . . . . . . . . . . . . . . . . . . . . . . . . . . . . . . . . . . . . . . . 16<br />
Playing a CD . . . . . . . . . . . . . . . . . . . . . . . . . . . . . . . . . . . . . . . . . . . . . . . . . . . . . . . . . . . . . . . . . . . . . . . . . . . . 17<br />
Using the radio . . . . . . . . . . . . . . . . . . . . . . . . . . . . . . . . . . . . . . . . . . . . . . . . . . . . . . . . . . . . . . . . . . . . . . . . . . 18<br />
Setting, removing, or reassigning radio station presets . . . . . . . . . . . . . . . . . . . . . . . . . . . . . . . . . . . . . . . . . . . 18<br />
Using the headphone jack . . . . . . . . . . . . . . . . . . . . . . . . . . . . . . . . . . . . . . . . . . . . . . . . . . . . . . . . . . . . . . . . . 19<br />
Using the sleep timer . . . . . . . . . . . . . . . . . . . . . . . . . . . . . . . . . . . . . . . . . . . . . . . . . . . . . . . . . . . . . . . . . . . . . 19<br />
CONTROLLING EXTERNAL SOURCES 21<br />
Using your LIFESTYLE ! remote with other components . . . . . . . . . . . . . . . . . . . . . . . . . . . . . . . . . . . . . . . . . . . . . . . 21<br />
Setting the remote to control each component . . . . . . . . . . . . . . . . . . . . . . . . . . . . . . . . . . . . . . . . . . . . . . . . . 21<br />
For TV control . . . . . . . . . . . . . . . . . . . . . . . . . . . . . . . . . . . . . . . . . . . . . . . . . . . . . . . . . . . . . . . . . . . . . . . . . . . 21<br />
For cable/satellite control . . . . . . . . . . . . . . . . . . . . . . . . . . . . . . . . . . . . . . . . . . . . . . . . . . . . . . . . . . . . . . . . . . 23<br />
For VCR (or other video recorder) control . . . . . . . . . . . . . . . . . . . . . . . . . . . . . . . . . . . . . . . . . . . . . . . . . . . . . 24<br />
For AUX control . . . . . . . . . . . . . . . . . . . . . . . . . . . . . . . . . . . . . . . . . . . . . . . . . . . . . . . . . . . . . . . . . . . . . . . . . 25<br />
Assigning channel control to the TV input device . . . . . . . . . . . . . . . . . . . . . . . . . . . . . . . . . . . . . . . . . . . . . . . 25<br />
3<br />
5<br />
8<br />
14<br />
21<br />
27<br />
35<br />
40
4<br />
Svenska Nederlands Français Italiano Deutsch Español English Dansk<br />
USING SYSTEM MENUS 27<br />
Properties that you can adjust . . . . . . . . . . . . . . . . . . . . . . . . . . . . . . . . . . . . . . . . . . . . . . . . . . . . . . . . . . . . . . . . . . . 27<br />
How to enter the System menu . . . . . . . . . . . . . . . . . . . . . . . . . . . . . . . . . . . . . . . . . . . . . . . . . . . . . . . . . . . . . 27<br />
How to make changes . . . . . . . . . . . . . . . . . . . . . . . . . . . . . . . . . . . . . . . . . . . . . . . . . . . . . . . . . . . . . . . . . . . . 28<br />
Audio options . . . . . . . . . . . . . . . . . . . . . . . . . . . . . . . . . . . . . . . . . . . . . . . . . . . . . . . . . . . . . . . . . . . . . . . . . . . . . . . . 28<br />
Video options . . . . . . . . . . . . . . . . . . . . . . . . . . . . . . . . . . . . . . . . . . . . . . . . . . . . . . . . . . . . . . . . . . . . . . . . . . . . . . . . 29<br />
Media center options . . . . . . . . . . . . . . . . . . . . . . . . . . . . . . . . . . . . . . . . . . . . . . . . . . . . . . . . . . . . . . . . . . . . . . . . . . 30<br />
Remote control options . . . . . . . . . . . . . . . . . . . . . . . . . . . . . . . . . . . . . . . . . . . . . . . . . . . . . . . . . . . . . . . . . . . . . . . . 31<br />
DVD Lock options . . . . . . . . . . . . . . . . . . . . . . . . . . . . . . . . . . . . . . . . . . . . . . . . . . . . . . . . . . . . . . . . . . . . . . . . . . . . 33<br />
Using the lock to apply parental control . . . . . . . . . . . . . . . . . . . . . . . . . . . . . . . . . . . . . . . . . . . . . . . . . . . . . . 34<br />
CHANGING SOURCE SETTINGS 35<br />
Quick adjustments as you watch or listen . . . . . . . . . . . . . . . . . . . . . . . . . . . . . . . . . . . . . . . . . . . . . . . . . . . . . . . . . . 35<br />
Where to find the list of options . . . . . . . . . . . . . . . . . . . . . . . . . . . . . . . . . . . . . . . . . . . . . . . . . . . . . . . . . . . . . 35<br />
How to change the settings . . . . . . . . . . . . . . . . . . . . . . . . . . . . . . . . . . . . . . . . . . . . . . . . . . . . . . . . . . . . . . . . 36<br />
CD settings options . . . . . . . . . . . . . . . . . . . . . . . . . . . . . . . . . . . . . . . . . . . . . . . . . . . . . . . . . . . . . . . . . . . . . . . . . . . 37<br />
DVD settings options . . . . . . . . . . . . . . . . . . . . . . . . . . . . . . . . . . . . . . . . . . . . . . . . . . . . . . . . . . . . . . . . . . . . . . . . . . 37<br />
Tuner settings options (FM or AM radio) . . . . . . . . . . . . . . . . . . . . . . . . . . . . . . . . . . . . . . . . . . . . . . . . . . . . . . . . . . . 38<br />
TV settings options (for VCR, CBL/SAT, and AUX) . . . . . . . . . . . . . . . . . . . . . . . . . . . . . . . . . . . . . . . . . . . . . . . . . . . 39<br />
REFERENCE 40<br />
System maintenance . . . . . . . . . . . . . . . . . . . . . . . . . . . . . . . . . . . . . . . . . . . . . . . . . . . . . . . . . . . . . . . . . . . . . . . . . . 40<br />
Replacing the remote control batteries . . . . . . . . . . . . . . . . . . . . . . . . . . . . . . . . . . . . . . . . . . . . . . . . . . . . . . . 40<br />
Changing remote control switch settings . . . . . . . . . . . . . . . . . . . . . . . . . . . . . . . . . . . . . . . . . . . . . . . . . . . . . . 40<br />
Setting up a second room with sound . . . . . . . . . . . . . . . . . . . . . . . . . . . . . . . . . . . . . . . . . . . . . . . . . . . . . . . . . . . . . 42<br />
<strong>Bose</strong> ® link-compatible products make it easy . . . . . . . . . . . . . . . . . . . . . . . . . . . . . . . . . . . . . . . . . . . . . . . . . . 42<br />
Protecting and caring for your system . . . . . . . . . . . . . . . . . . . . . . . . . . . . . . . . . . . . . . . . . . . . . . . . . . . . . . . . . . . . . 43<br />
Troubleshooting . . . . . . . . . . . . . . . . . . . . . . . . . . . . . . . . . . . . . . . . . . . . . . . . . . . . . . . . . . . . . . . . . . . . . . . . . . . . . . 44<br />
Contacting Customer Service . . . . . . . . . . . . . . . . . . . . . . . . . . . . . . . . . . . . . . . . . . . . . . . . . . . . . . . . . . . . . . 46<br />
Limited warranty . . . . . . . . . . . . . . . . . . . . . . . . . . . . . . . . . . . . . . . . . . . . . . . . . . . . . . . . . . . . . . . . . . . . . . . . . . . . . . 46<br />
Accessories . . . . . . . . . . . . . . . . . . . . . . . . . . . . . . . . . . . . . . . . . . . . . . . . . . . . . . . . . . . . . . . . . . . . . . . . . . . . . . . . . 47<br />
Technical information . . . . . . . . . . . . . . . . . . . . . . . . . . . . . . . . . . . . . . . . . . . . . . . . . . . . . . . . . . . . . . . . . . . . . . . . . . 47
English Dansk Deutsch Español Français Italiano Nederlands Svenska<br />
Welcome<br />
Clarifying some basics<br />
INTRODUCTION<br />
Thank you for purchasing a <strong>Bose</strong> ® LIFESTYLE ® DVD home entertainment system. Through<br />
proprietary <strong>Bose</strong> technologies and innovative LIFESTYLE ® system design, this elegant and<br />
easy-to-use system delivers superior performance for both music and video programming.<br />
You may consider yourself a dedicated audiophile or someone who simply loves music.<br />
Regardless of your level of expertise, the explanations that follow may prove helpful in understanding<br />
some of the terms and technologies associated with the advanced audio and video<br />
options available today.<br />
Types of discs you can use with this system<br />
Your system is engineered to play the disc types listed below, some of which are identified by<br />
corresponding logos:<br />
• Audio CDs<br />
– including those with DTS<br />
• CD-R, CD-RW, or CD-ROM<br />
• MP3 CDs created with:<br />
– All tracks burned in a<br />
single, closed session<br />
– Use of ISO9660 disc format<br />
– Each file named with an<br />
“.mp3” extension and no<br />
other periods<br />
– File tags no higher than ID3<br />
(ID3v2).<br />
• SACD content if it is CD-<br />
compatible<br />
• Video CDs (VCDs)<br />
• DVD-R, DVD+R,<br />
DVD-RW, DVD+RW<br />
• Video DVDs<br />
– including those with DTS<br />
– including those with Dolby<br />
Digital<br />
• Regarding copy<br />
protection<br />
Music and other<br />
content may be<br />
protected by international<br />
and domestic<br />
copyright laws and<br />
may contain specific<br />
restrictions on use<br />
and/or reproduction.<br />
Please respect the<br />
rights of the artists<br />
and other copyright<br />
holders.<br />
Any difficulties experienced in playing compatible CDs or DVDs may be related to the rates at<br />
which data was recorded to the disc or to the optical characteristics of the recording device<br />
used.<br />
Check DVDs for region number compatibility<br />
For a DVD disc to be compatible with a player, their respective region numbers must match.<br />
These numbers are assigned by the geographic region where the player and disc are sold.<br />
You can find the region number for your system on the bottom of the media center.<br />
If you have trouble playing a DVD disc, check to see if the region number marked<br />
on the disc label or packaging matches the region number of your system. A DVD<br />
and media center marked for use in Region 1 should display the symbol at right.<br />
5<br />
INTRODUCTION
INTRODUCTION<br />
INTRODUCTION<br />
Audio and video terms defined<br />
6<br />
Svenska Nederlands Français Italiano Deutsch Español English Dansk<br />
A Aspect ratio – An expression for the width of the picture relative to the height and seen when<br />
as a rectangular TV image. For example, if the aspect ratio is 4:3 (read as 4 by 3), the shape of<br />
that picture is 4 units wide by 3 units high. The standard TV aspect ratios are 4:3 and 16:9.<br />
C CD-R, CD-RW – Abbreviations for Recordable (R) and ReWriteable (RW) Compact Disc (CD).<br />
Data can be added to a CD-R once only and to a CD-RW more than once.<br />
CD-ROM – The abbreviation for Read Only Memory (ROM) on a Compact Disc (CD), which<br />
allows no data to be added.<br />
Chapter – A main division of contents in a DVD title.<br />
Component video – Also called YPbPr, this video signal is split into three parts: luminance<br />
and two color signals for considerably better resolution than can be provided by either !<br />
composite or S-video signals. This more complex signal also requires the use of component<br />
connection jacks, which are not available on all televisions or video components.<br />
Composite video – The simplest of three types of video signal, which combines rather than<br />
separates brightness (black and white) and color information. It provides the lowest resolution<br />
of the three, but is compatible with the broadest range of televisions and other video components<br />
and requires a simple video cable connection to RCA jacks.<br />
D Dolby Digital – A perceptual coding system for audio, developed by Dolby Laboratories and<br />
accepted as an international standard. Dolby Digital is the most common means of encoding<br />
multi-channel audio.<br />
– The logo representing Dolby Digital.<br />
DTS – An abbreviation for Digital Theater Systems, a type of multi-channel surround sound<br />
format used on certain CDs and many DVDs.<br />
– The logo representing DTS.<br />
DVD – An abbreviation most commonly known to mean Digital Video Disc or Digital Versatile<br />
Disc. The audio/video/data storage system is based on 12-cm optical discs.<br />
DVD-R, DVD+R, DVD-RW, DVD+RW – Abbreviations for Recordable (R) and ReWriteable<br />
(RW) Digital Video (or Versatile) Disc (DVD). Data can be added to a DVD-R or +R once only,<br />
and to a DVD-RW or +RW more than once.<br />
DVD-ROM – The abbreviation for Read Only Memory (ROM) on a Digital Video (or Versatile)<br />
Disc (DVD), which allows no data to be added.<br />
DVD video – A standard for storing and reproducing audio and video on DVD-ROM discs,<br />
based on MPEG video, Dolby Digital audio, and other proprietary data formats.<br />
DVR – An abbreviation for Digital Video Recording, sometimes used interchangeably with<br />
PVR, for Personal Video Recording.<br />
I IR – An abbreviation for infrared. Pertains to the type of remote that sends/receives !<br />
commands on an infrared light beam.<br />
L Letterbox – A video format that has an aspect ratio wider than 4:3 and is shown with black<br />
bars above and below the picture.<br />
! !
English Dansk Deutsch Español Français Italiano Nederlands Svenska<br />
M<br />
! !<br />
INTRODUCTION<br />
MP3 – MPEG-1 Layer III audio. This is a compressed audio format that allows the recording<br />
of many hours of music on a single CD.<br />
MPEG – An abbreviation for Moving Picture Experts Group, the !ommittee of experts from<br />
the audio, video, and computer industries involved in setting standards for compression of<br />
moving images.<br />
N NTSC – An abbreviation for National Television System Committee and the label for its !<br />
video format standard used for televisions in the U.S. and other countries.<br />
P PAL – An acronym for the Phase Alternate Line video format used extensively in Western<br />
Europe.<br />
Pan & scan – The technique of reframing a picture to conform to a different aspect ratio by<br />
cropping parts of the picture. DVD-video players can use the horizontal offset encoded with<br />
the video on certain DVDs to automatically pan and scan widescreen video to a 4:3 ratio.<br />
PCM – An abbreviation for Pulse Code Modulation. A common form of digital audio signal.<br />
Progressive Scan – A video format that displays all lines of the picture frame in a single pass<br />
and refreshes the TV image 30x/sec. Not compatible with all video displays.<br />
PVR – An abbreviation for Personal Video Recording. Sometimes used interchangeably with<br />
DVR for Digital Video Recording but may include non-digital technology, as used in VCRs.<br />
R RF remote – A remote control that transmits commands to a device using radio frequency<br />
(RF) signals, which have the ability to penetrate walls, unlike the infrared (IR) signals used by<br />
many remote controls.<br />
RDS – A system that displays radio broadcast station and programming information. This !<br />
feature is available on European systems only.<br />
S SACD – An abbreviation for Super Audio Compact Disc, used for high-resolution digital audio<br />
storage on CD-sized discs. New <strong>Bose</strong> ® LIFESTYLE ® systems play the CD-compatible portion<br />
of such discs, identified by the CD disc logo on the front of the disc.<br />
SCART – A type of jack commonly found on consumer electronics products manufactured<br />
for use in Western Europe.<br />
SCMS – A system for preventing second-generation digital copies of copyrighted audio<br />
material. A digital recorder equipped with SCMS will record digitally from another source, but<br />
that recording cannot then be used as a source for a second-generation recording.<br />
Screen ratio – The dimensions of the video display on a television, which can vary from !<br />
4:3 standard to 16:9 widescreen. Also called “letterbox,” widescreen display leaves a black<br />
band above and below the picture on traditional TVs. This does not occur on widescreen TVs.<br />
Subtitles – Text that appears at the bottom of the screen during video playback, and which<br />
may differ from the language of the on-screen dialog.<br />
S-video – Also called Y/C. A video signal that separates the brightness (black and white) and<br />
the color information. S-video provides significantly higher resolution than composite video,<br />
but not as high as from component. This type of connection is compatible with many televisions<br />
and other video components, and requires use of an S-video cable.<br />
T Teletext – An information retrieval service provided by television broadcast companies in<br />
Europe and some other countries, not including the U.S.<br />
V Video CD – A Compact Disc (CD) that contains a video component.<br />
Videostage ® 5 – <strong>Bose</strong> proprietary decoding circuitry that provides five-channel surround<br />
sound performance from varied media – VHS tapes, stereo CDs, even mono TV programs.<br />
Y YPbPr – A component analog video signal containing one luminance and two chrominance<br />
components. Also referred to as YUV or Y, B-Y, R-Y.<br />
7<br />
INTRODUCTION
SYSTEM CONTROLS<br />
SYSTEM CONTROLS<br />
Remote control buttons<br />
8<br />
Svenska Nederlands Français Italiano Deutsch Español English Dansk<br />
The advanced radio frequency (RF) remote control provided with this system works from<br />
almost anywhere inside your home, with no need to aim it in the direction of the system.<br />
!<br />
!<br />
!<br />
Turns the system on and off. Selects the last used source.<br />
!<br />
Mutes the volume for all connected speakers (main and in other rooms).<br />
!<br />
Mutes or unmutes the volume in the current room.<br />
Selects the built-in CD/DVD disc player as source. Turns the system on if it was off.!<br />
Selects the built-in FM/AM radio tuner set to the station last selected. Switches<br />
between FM and AM when the radio is on. Turns the system on if it was off.<br />
Selects an AUX source connected to the media center. Turns the system on if !<br />
it was off.<br />
TV – Selects the TV connected to the media center as source. !<br />
Turns the system on if it was off.<br />
Input – Selects different video inputs on the TV (when the remote has been set<br />
to do so). Enables you to select the input that connects the media center to<br />
the TV.<br />
On/Off – Turns the TV on and off, if the remote is set to control your TV.<br />
CBL-SAT – Selects a cable box or satellite receiver connected to the media center<br />
as the sound source. Turns the system on if it was off.<br />
On/Off – Turns your cable or satellite box on and off, if the remote is set to control it.<br />
VCR – Selects the VCR connected to the media center as the sound source. !<br />
Turns the system on if it was off.<br />
On/Off – Turns your VCR on and off, if the remote is set to control it.<br />
Note: You may set the LIFESTYLE ® remote to control your TV, cable or satellite box, or VCR and<br />
turn these devices on or off. For details, refer to “Using your LIFESTYLE ! remote with other<br />
components” on page 21.<br />
! !
English Dansk Deutsch Español Français Italiano Nederlands Svenska<br />
a<br />
b<br />
! !<br />
SYSTEM CONTROLS<br />
Below this button on your remote, there is one of two symbols. !<br />
Depending on which symbol (a or b, left) appears on your remote, the !<br />
following applies:<br />
When a video source is selected, changes between a 4:3 screen display<br />
ratio and 16:9 widescreen display. This requires a TV that provides that<br />
function. Your remote must also be set up to control the TV.<br />
or<br />
When the TV is selected as source, enters the Teletext mode. !<br />
Works in conjunction with colored FastText buttons on the remote.<br />
Note: For instructions on how to switch functionality of your remote from screen ratio<br />
to Teletext capabilities (or the reverse), refer to “Remote control options” on page 31.<br />
! Enters or exits the Settings menu for the current source.!<br />
!<br />
! Enters or exits the System menu.!<br />
!<br />
! Enters or exits the menu of the DVD disc that is currently loaded.<br />
Enters the main menu of your cable or satellite box, VCR, or DVR !<br />
(a digital video recorder) or another video recording device, if the remote<br />
is set to control it.!<br />
! Displays an electronic program guide (if your TV, cable, satellite box or<br />
VCR/DVR provides this feature) when the remote is set up to control such<br />
components.<br />
! Exits the Settings and System menus.<br />
Exits on-screen menus for TV, cable, satellite box, or VCR/DVR !<br />
(if the remote is set up to control such components).<br />
Tunes the FM/AM radio up or down to the next frequency.<br />
Selects the next or previous item in a menu list.<br />
Confirms the selection of a menu item.<br />
Moves up, down, left, or right in a menu or screen.<br />
9<br />
SYSTEM CONTROLS
SYSTEM CONTROLS<br />
SYSTEM CONTROLS<br />
10<br />
Svenska Nederlands Français Italiano Deutsch Español English Dansk<br />
Skips backward or forward to the next TV, cable, or satellite channel, CD<br />
track, or DVD chapter.<br />
Raises or lowers the volume of the current source. !<br />
Pressing + raises the volume and unmutes the source playing (if muted) in<br />
the current room only. !<br />
Pressing – lowers the volume.<br />
! Stops music (except FM/AM) or video play.<br />
For DVDs and VCDs only, the system bookmarks where the disc stopped,<br />
so you can resume play there. Pressing again clears the bookmark.<br />
Pauses music (except FM/AM) or video play.<br />
Starts music (except FM/AM) or video play.<br />
Moves backward or forward in video. Displays a control bar to adjust the<br />
speed of this movement.<br />
Moves to the previous or next CD track, or strong radio station.<br />
When pressed and held, scans backward or forward through the current<br />
CD or MP3 disc.<br />
Randomly plays music from a CD. Pressing again cancels this style !<br />
of play.<br />
Moves back a few seconds in your DVR (or other digital video recorder) if<br />
the LIFESTYLE ® remote is set up for this control.<br />
Repeats the current music selection on a CD. Pressing again cancels this<br />
style of play.<br />
Moves ahead a few seconds in your DVR (or other digital video recorder) if<br />
the LIFESTYLE ® remote is set up for this control.<br />
Selects the radio station preset, DVD chapter, CD track, or TV channel that<br />
corresponds to the numbers pressed.<br />
Skips to the channel last selected on TV, cable, satellite box, or VCR/DVR<br />
(if applicable) when the remote is set up to control your components.!<br />
Displays or exits the TV, cable, satellite box, or VCR/DVR information on<br />
the TV screen, if the remote is set up to control your components.<br />
During MP3 play, removes or restores track information on the media !<br />
center display.<br />
Moves to the previous (arrow down) or next (arrow up) page in some cable<br />
and satellite on-screen menus and guides.<br />
! !
English Dansk Deutsch Español Français Italiano Nederlands Svenska<br />
! !<br />
SYSTEM CONTROLS<br />
a. If your remote features the button, the four buttons at the bottom function as follows:<br />
In VCR source (or AUX, if a recorder-type device is connected to that input), !<br />
activates the record function. Not available on remotes set to control Teletext.<br />
In Cable source, makes the A selection from a list of options.!<br />
In Cable source, makes the B selection from a list of options.!<br />
In Cable source, makes the C selection from a list of options.!<br />
b. If your remote features the button, the four colored buttons at the bottom function<br />
as follows:<br />
In Teletext mode, selects the content labeled red.!<br />
In Teletext mode, selects the screen content labeled green.!<br />
*<br />
In Teletext mode, selects the screen content labeled yellow.!<br />
In Teletext mode, selects the screen content labeled blue.<br />
Note: To switch your remote from a. functionality to b. (described above), refer to “Remote<br />
control options” on page 31 and locate the “Selecting a Remote Control version” option.<br />
Getting strong remote control range and response<br />
The cord that connects the power supply to the media center contains an antenna for your<br />
RF remote. For good range, it is VERY important that you extend this cord to its full length<br />
and keep it away from other system cables. P!"#$%&'()*'+,-*.'/0++!1',%'()*'2!,,.3'-*!!'4*!,-'<br />
()*'5*6$"'#*%(*.3'+0(/'()*'#,.6'$%'"'7*.($#"!',.$*%("($,%3'-)$#)'$/',+($5058<br />
Note: Also, when using a plasma screen TV, keeping the media center power supply as far from<br />
the TV as is practical improves remote range.<br />
If your system does not respond when you press a button on the remote, it could be time to<br />
change the batteries. For information on the type of batteries to use and how to change them,<br />
refer to “Replacing the remote control batteries” on page 40.<br />
In some buildings, there may be “dead spots” where remote control signals are not effective.<br />
If this happens, move the remote a foot or two and try again. Also make sure the cord that<br />
connects the power supply to the media center (and contains the remote antenna) is<br />
stretched to its full length and is separated from other power cords. If this does not help,<br />
move the media center a few feet to see if a new location provides better response.<br />
If the batteries are not dead and your efforts to avoid dead spots are in vain, you may need an<br />
antenna extender. To contact <strong>Bose</strong> for more information, or to order the extender, refer to the<br />
address list included with the system.<br />
11<br />
SYSTEM CONTROLS
SYSTEM CONTROLS<br />
SYSTEM CONTROLS<br />
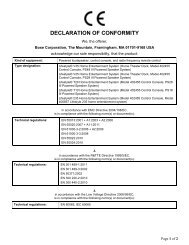
Media center<br />
Figure 1<br />
Front view of the media<br />
center<br />
12<br />
On/Off Source Volume<br />
All Off<br />
Open/Close<br />
Enter<br />
Erase Store<br />
Svenska Nederlands Français Italiano Deutsch Español English Dansk<br />
The disc tray and system controls are located under the front panel door of the media center.<br />
To the right of the system controls is the display window (Figure 1).<br />
CAUTION: Pressing the Open/Close button on the media center is the best way to open and<br />
retract the disc tray. DO NOT press on the tray to make it retract or exert pressure on the front of<br />
the tray while it is moving. Doing so can cause the disc player to malfunction.<br />
An IR (infrared) signal emitter, located under the disc tray, enables you to control other !<br />
components using the LIFESTYLE ® remote. Avoid blocking this emitter, so its signal will have<br />
a clear path to other components or reflective surfaces in the room.<br />
Front panel door – lifts up Disc tray Controls<br />
Controls<br />
! !<br />
Display window<br />
Headphone jack<br />
®<br />
IR emitter<br />
Four of the media center control panel buttons provide similar control to buttons on the<br />
remote control. The other five offer unique functionality.<br />
On/Off<br />
All Off<br />
Source<br />
Enter<br />
Erase<br />
Volume<br />
Store<br />
!<br />
Turns the system on or off in the main room only. Selects the source last used<br />
when it turns on the system.<br />
!<br />
Turns off the system and all connected speakers (in all rooms).<br />
!<br />
Opens/closes the disc tray.<br />
!<br />
Selects the next available sound source in sequence.<br />
!<br />
Initiates DVD play when that option is selected from DVD menu options that<br />
appear on the TV screen.<br />
In combination with the Store button, advances through and selects system !<br />
settings on the media center display.<br />
Removes a radio station from the assigned preset number.<br />
!<br />
Raises the volume of the system and unmutes the speakers (if they are muted).<br />
Lowers the volume of the system but does not unmute the source.<br />
!<br />
When the system is off, resets the remote control house code.<br />
In combination with the Enter button, advances through and selects system !<br />
settings on the media center display.
English Dansk Deutsch Español Français Italiano Nederlands Svenska<br />
Figure 2<br />
Sample of information that<br />
appears on the media<br />
center display<br />
Figure 3<br />
Sleep indicator for<br />
automatic system<br />
shutdown setting<br />
! !<br />
SYSTEM CONTROLS<br />
Display window<br />
The media center display window indicates the state of the system, including which source is<br />
playing, program details, and what option, if any, is selected (Figure 2).<br />
CD 0 : 2 2 !<br />
T R A C K 6 / 1 0<br />
!<br />
When Settings menu items or messages appear in the display, they may scroll to reveal!<br />
information that does not fit in the two lines available.<br />
Light indicators<br />
Sleep Shows when the system is set to shut down automatically.<br />
Settings Shows when the source Settings menu is selected.<br />
Shuffle Shows when tracks from a CD are playing in random order.<br />
Repeat Shows when the track playing is set to play again.<br />
Disc Shows when a selected action applies to the tracks on a disc.<br />
Track Shows when a selected action applies to one track only.<br />
Sleep<br />
Lights briefly when a remote control command is received.<br />
C E N T E R C H A N N E L : + 4<br />
S L E E P T I M E R : O N<br />
Component system setup using the display<br />
The media center display provides access to the System settings required to activate a !<br />
component video connection between the TV and media center and to select progressive<br />
scan.<br />
Note: For detailed instructions on how to activate this feature in your LIFESTYLE ® system, refer<br />
to your Installation Guide.<br />
When activation is completed, you will see the proper results, assuming:<br />
• Your TV supports this feature and is set for it, according to instructions in the owner’s guide !<br />
provided by the TV manufacturer.<br />
• Your TV and media center are properly connected using the supplied component video<br />
adapter.<br />
13<br />
SYSTEM CONTROLS
SYSTEM OPERATION<br />
SYSTEM OPERATION<br />
Initial pointers to get you started<br />
14<br />
Svenska Nederlands Français Italiano Deutsch Español English Dansk<br />
Scanning the following tips may prove worthwhile before using your system.<br />
Note: For information on how to set the remote to operate other components, refer to “Using<br />
your LIFESTYLE ! remote with other components” on page 21.<br />
To turn on your system<br />
• Press the On/Off button on the remote control.<br />
• Or, press the media center On/Off control.<br />
• Or, press the CD/DVD, FM/AM, TV, CBL/SAT, or AUX remote button.<br />
This turns on the system and selects the source at the same time.<br />
To use your system with the TV and other components, review the reminders below. They are<br />
provided to help ensure that it all works together smoothly.<br />
To turn on the TV or other external components<br />
1. Turn on the system.<br />
2. Press the remote control button for the source you want.<br />
3. Turn on the source, as needed.<br />
You can use your LIFESTYLE ® remote to control the above functions as soon as you set it to<br />
operate the TV and other components.<br />
To watch a DVD<br />
Your installation choices may require additional activation settings, as indicated below.<br />
• Getting an image to appear on the TV screen:<br />
! Be sure to select the proper video input on your TV (consistent with the video input that<br />
the media center connects to on the back of the TV). Use the LIFESTYLE ® remote<br />
control Input button (just below the TV source button).<br />
If you have a TV that supports component or progressive scan<br />
The tips below apply only if you have made a component connection between the media<br />
center and your TV.<br />
• Using the component video connection option:<br />
! If you have a component video connection between the TV and the media center,<br />
be sure to make that selection on the display of the media center (see Note below).<br />
Otherwise, you may see nothing on your screen when you select DVD as the source.<br />
• Using the progressive scan capability of your TV:<br />
! Make sure there is a component video connection between the TV and the media<br />
center.<br />
! Be sure to make the Progressive selection on the media center (see Note below).<br />
Otherwise, you may see nothing on your screen when you select DVD as the source.<br />
! For other video components connected to the media center, make sure the component<br />
is also connected using a component video adapter.<br />
Note: For information on selecting component video on the media center (required for use of<br />
progressive scan as well), refer to “Higher-quality connections to consider” in your Installation<br />
Guide.
English Dansk Deutsch Español Français Italiano Nederlands Svenska<br />
Enjoying multiple system sources<br />
! !<br />
SYSTEM OPERATION<br />
To adjust what you hear or see<br />
• To correct sound problems (unexpected boominess, harshness, thinness, or reverberation)<br />
take time to run the ADAPTiQ ® audio calibration program, if you have not done so.<br />
Note: Refer to “Making sure the sound is as good as it gets” in the Installation Guide.<br />
• For lasting adjustment to system operation (for audio, video, media center, remote control,<br />
or DVD lock), use the System menus. For details on the changes you can make, refer to<br />
“Properties that you can adjust” on page 27.<br />
• For temporary adjustments to the particular source playing (like the number of speakers<br />
engaged or the turn-off timer setting), use the on-screen Settings menus. For details on the<br />
changes you can make, refer to “Quick adjustments as you watch or listen” on page 35.<br />
Instructions for selecting and playing the other system sources refer to buttons on the !<br />
LIFESTYLE ® remote control unless otherwise specified.<br />
Once it is set to control other components connected to the system, your LIFESTYLE ®<br />
remote serves as a universal control for those components, as well as for system sources.<br />
Note: For information on how to set the remote to operate other components, refer to “Using<br />
your LIFESTYLE ! remote with other components” on page 21.<br />
Playing a DVD<br />
1. Turn on your TV.<br />
2. Press CD/DVD to select the DVD player. If the system is off, this will turn it on.<br />
3. On the media center, lift the door and press the Open/Close button to expose the !<br />
disc tray.<br />
4. Insert a DVD into the tray (label side up). Be sure the DVD is clean. If not, refer to!<br />
“Protecting and caring for your system” on page 43.<br />
5. On the media center, press the Open/Close button again to retract the disc tray.<br />
6. Press Play to begin DVD play.<br />
You may need to press Play more than once. On most DVDs, the option to play the main feature<br />
is just one of several on-screen selections offered.<br />
Note: Not all DVDs offer the same features. You can choose subtitles only if the disc provides<br />
subtitle information.<br />
Your remote control options<br />
When you want to: Press:<br />
Pause a DVD movie… .<br />
Resume play… again, or .<br />
Stop a DVD movie… .<br />
Then to resume play where the movie stopped.<br />
Or, twice to stop and reset.<br />
Then to restart at the beginning of the DVD.<br />
15<br />
SYSTEM OPERATION
SYSTEM OPERATION<br />
SYSTEM OPERATION<br />
16<br />
Svenska Nederlands Français Italiano Deutsch Español English Dansk<br />
Skip to the next chapter… up.!<br />
Skip to the previous chapter… down twice. !<br />
!<br />
Repeat a chapter… while the chapter you want to repeat plays.<br />
Search backward or forward… for the motion rate control bar to appear. Press<br />
again to adjust the rate of the search and set the direction.<br />
Select a different option offered on<br />
the DVD…<br />
To repeat a segment of the DVD that is playing<br />
To replay a segment of the DVD several times, you can choose the AB repeat option !<br />
in the TV Settings menu, as follows:<br />
1. Press Setting and move down the list of options until you reach the AB icon.<br />
2. Press Enter to activate this selection. The letters "#$ appear in a highlighted box to the<br />
right of the menu list.<br />
3. Press Enter at a point in the DVD where you want to begin or end the segment. The "<br />
changes to %, confirming your action.<br />
4. Move backward or forward to the next point that defines the segment.<br />
5. Press Enter. The $ changes to & to confirm that you have defined the segment. The<br />
repeat of that segment begins.<br />
Repeat continues until you press the Enter or Stop button.<br />
Note: For information on the quick adjustments you can make to DVD settings, refer to<br />
“DVD settings options” on page 37. Instructions on how to enter the menu to make those<br />
changes are available in “Where to find the list of options” on page 35.<br />
Using DVD parental controls<br />
to view the menu shown at the beginning of the!<br />
DVD. Use the left, right, up, or down arrows to!<br />
reach the menu item you want, and press Enter to!<br />
make that selection.<br />
The parental control feature of your LIFESTYLE ® system allows you to restrict access by !<br />
locking any DVD movies that you find inappropriate for members of your family.<br />
Before you can use this feature, you need to choose a password and a level of restriction<br />
(matched to movie rating levels) as found in the System menu. To learn more about parental<br />
controls, refer to “DVD Lock options” on page 33.<br />
Note: Refer to “Troubleshooting” on page 44 if you have trouble with a password.<br />
! !
English Dansk Deutsch Español Français Italiano Nederlands Svenska<br />
! !<br />
SYSTEM OPERATION<br />
Playing a CD<br />
Press CD/DVD to select the CD player. If the system is off, this will turn it on and begin playing a<br />
CD loaded in the disc tray.<br />
To load a disc:<br />
1. On the media center, lift the door and press Open/Close to expose the disc tray.<br />
2. Insert the audio CD into the tray.<br />
3. On the media center, press Open/Close again to retract the disc tray.!<br />
Play begins automatically.<br />
Your remote control options<br />
When you want to: Press:<br />
Pause a CD… .<br />
Resume play of a paused CD… or .<br />
Stop a CD… .<br />
Then to restart at the beginning of the CD.<br />
Clear continuously scrolling track<br />
information (for an MP3 CD only)<br />
from the media center display...<br />
Go to the next track… up.<br />
Go to the beginning of the current<br />
track…<br />
and hold until the display changes.<br />
Repeat to resume display of the scrolling text.<br />
down !<br />
(after a track has played for several seconds).<br />
Go to a previous track… down:<br />
• once if no music is playing.<br />
• twice if the music has begun.<br />
Skip a track… .<br />
!<br />
Scan a CD backward/forward… and hold.<br />
On MP3 discs only, this jumps to the beginning of a track.<br />
Randomly play CD tracks… .<br />
Cancel random play… again.<br />
Repeat a track… .<br />
Repeat a CD… again.<br />
Cancel repeat… a third time.<br />
Note: For information on the quick adjustments you can make to CD settings, refer to<br />
“Tuner settings options (FM or AM radio)” on page 38. Instructions on how to enter the menu to<br />
make these changes are available in “Where to find the list of options” on page 35.<br />
17<br />
SYSTEM OPERATION
SYSTEM OPERATION<br />
SYSTEM OPERATION<br />
18<br />
Svenska Nederlands Français Italiano Deutsch Español English Dansk<br />
Using the radio<br />
Press FM/AM to select the radio tuner. This turns on the system if it was off and tunes to the FM<br />
or AM station last selected.<br />
Changing stations<br />
When you want to: Press:<br />
Switch between FM and AM… .<br />
Seek the next strong station… .<br />
Manually tune to a station…<br />
Select a preset station… or by specific preset number.<br />
! !<br />
.!<br />
Note: For information on the quick adjustments you can make to the radio tuner settings, refer to<br />
“CD settings options” on page 37. Instructions on how to enter the menu to make those changes<br />
are available in “Where to find the list of options” on page 35.<br />
Setting, removing, or reassigning radio station presets<br />
You can establish presets for up to 20 AM and 20 FM stations. This enables you to tune in a<br />
favorite station quickly. There are two ways you can assign presets.<br />
To set a preset, use method A or B below:<br />
A. To assign the next preset number to a station, use the media center control panel and !<br />
follow the next two steps for each station:<br />
1. Tune to the preferred station.<br />
2. On the media center control panel, press the Enter button.<br />
B. Or, to assign a station to a specific number use the LIFESTYLE ® remote control and follow<br />
these steps:<br />
1. Tune to the preferred station.<br />
2. To assign the station a preset number, press and hold that number button.<br />
• For numbers 1 through 9, press a single number and hold it until the display indicates !<br />
PRESET: # SET.<br />
• For numbers 10 through 20, press the first number, then press and hold the second<br />
number until the display indicates PRESET: # SET.<br />
Note: Assigning a preset number to a station will replace any previous assignment to that<br />
number.
English Dansk Deutsch Español Français Italiano Nederlands Svenska<br />
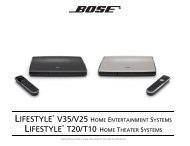
Figure 4<br />
Location of the headphone<br />
jack on the media center<br />
! !<br />
SYSTEM OPERATION<br />
To remove a station preset:<br />
1. Tune to the preset number you want to remove.<br />
2. On the remote control, press and hold the 0 number button until the message PRESET:<br />
## ERASED appears briefly on the media center display. Removal is then complete.<br />
To reassign a preset to a different station:<br />
1. Tune to the station preferred.<br />
2. On the remote control, press and hold the preset number button(s) you choose to !<br />
re-assign to that station.<br />
Using the headphone jack<br />
For private listening, you can connect headphones to the jack, which is located on the right<br />
side of the media center (Figure 4).<br />
Front view<br />
Media center views<br />
Right<br />
side<br />
Front<br />
Headphone<br />
jack<br />
Note: Connecting headphones mutes all main room speakers.<br />
Using the sleep timer<br />
®<br />
Right<br />
side view<br />
You can set the sleep timer to turn off the LIFESTYLE ® system automatically in 10 to 90 !<br />
minutes, depending on the time you select. You can do this in the Settings menu for any<br />
source that is selected.<br />
Note: If you are unfamiliar with use of the Settings menu, refer to “Quick adjustments as you<br />
watch or listen” on page 35.<br />
In the Settings menu on the media !<br />
center display or on the TV screen, !<br />
move around and make changes!<br />
by using the selection buttons.<br />
19<br />
SYSTEM OPERATION
SYSTEM OPERATION<br />
SYSTEM OPERATION<br />
Figure 5<br />
Sleep timer symbol in the<br />
source Settings menu<br />
20<br />
Svenska Nederlands Français Italiano Deutsch Español English Dansk<br />
To set the timer:<br />
On both the media center display and the TV on-screen menu, the same actions apply:<br />
1. Press the Settings button on the LIFESTYLE ® remote to enter the source Settings menu.<br />
2. Move down to the Sleep Timer symbol, the last feature in the menu (Figure 5). If you see<br />
a continuation arrow at the bottom of the menu, move to it to see the other attributes<br />
that are not currently shown.<br />
3. Move right into the options list and up to the delay time you want, from 10 to 90 minutes.<br />
Note: Pressing the up arrow when you reach the 90-minute option turns off the sleep timer.<br />
4. Press Enter to confirm your selection.<br />
5. Press Exit or Settings on the LIFESTYLE ® remote control to leave the menu.<br />
When the time you set elapses, sleep timer turns off the system and the TV (if it is on*), and<br />
resets itself to zero.<br />
*For the TV to turn off automatically, the system must sense that it is on. This is contingent on<br />
your use of the supplied TV sensor. For information on installing and testing the TV sensor,<br />
refer to your Installation Guide.<br />
! !
English Dansk Deutsch Español Français Italiano Nederlands Svenska<br />
Using your LIFESTYLE ! remote with other components<br />
Figure 6<br />
Preview of Remote features<br />
in the System menu<br />
CONTROLLING EXTERNAL SOURCES<br />
You can control most brands of external components – such as TVs, cable/satellite boxes,<br />
and VCR/DVRs – using your LIFESTYLE ® remote control. After you make the proper menu<br />
selections for each component you want to control, the LIFESTYLE ® remote serves as a<br />
universal remote for most of your component operations.<br />
Setting the remote to control each component<br />
Your LIFESTYLE ® system includes an IR (infrared) emitter that sends out signals from the front<br />
of the music center to each component that your LIFESTYLE ® remote is set to control. This<br />
allows you to turn on those sources (which are in the room with the media center) and make<br />
basic selections from them. The additional components may be connected either to the<br />
media center or to the TV.<br />
It may take more than one try<br />
Some manufacturers use a number of similar device codes. After selecting one code, your<br />
remote may turn your TV, cable or satellite box, or VCR on and off successfully. However,<br />
if you cannot change channels or initiate other features using the remote, you may want to<br />
continue testing device codes until you find one that provides greater control.<br />
After trying a few codes, if your component still does not respond, slightly adjust the position<br />
of the component in relationship to the media center. This may better enable the signal from<br />
the media center to reach the component.<br />
Note: IR signals must reach each component for a reliable test of the IR code settings. A good<br />
way to succeed is by using the supplied IR emitter cable, positioning it in front of each component<br />
as you use the LIFESTYLE ® remote to turn it on and off. If you have not yet installed the<br />
emitter, see “IR emitter cable as an option” in your Installation Guide.<br />
For TV control<br />
Note: For general guidelines on using the LIFESTYLE ® System menu, refer to “Using System<br />
Menus” on page 27.<br />
Use the TV remote to turn on the TV. Be sure to select the video input on the TV for the media<br />
center.<br />
Then, using the LIFESTYLE ® remote control:<br />
1. Press TV to select the TV source.<br />
2. Press System. The System menu will appear on the TV screen (Figure 6).<br />
3. Move across the properties to Remote Control to preview these menu options.<br />
4. Press the down arrow or Enter to move into that menu.<br />
01#&/"235<br />
01#6-3(5<br />
6&78#'%0#9(:;*(5<br />
6&78#'%0#&/"235<br />
6&78#'%0#6-3(5<br />
16
CONTROLLING EXTERNAL SOURCES<br />
CONTROLLING EXTERNAL SOURCES<br />
Figure 7<br />
TV brand selection<br />
22<br />
Svenska Nederlands Français Italiano Deutsch Español English Dansk<br />
5. Identify the TV brand:<br />
• From the list of options that appear, select TV Brand (Figure 7).<br />
• Move right into the list of brands and up or down to locate the brand of your TV.<br />
• Press Enter to select the brand.<br />
01#$/"235<br />
01#6-3(5<br />
6&78#'%0#9(:;*(5<br />
6&78#'%0#&/"235<br />
6&78#'%0#6-3(5<br />
16
English Dansk Deutsch Español Français Italiano Nederlands Svenska<br />
Figure 8<br />
Changing the TV Power<br />
1;3(-<br />
01#?-B(/5<br />
01#?-B(/#'+"+.@5<br />
01#%@E(*+#"+;*<br />
01#9(+(*+(3<br />
=#=<br />
=#=<br />
6->E-2(2+<br />
I-/>")<br />
0A(#F(3;"#6(2+(/#*"2#+./2#,-./#01#-2#<br />
".+->"+;*")),#BA(2(:(/#,-.#@()(*+#"#:;3(-#@-./*(4<br />
! !<br />
CONTROLLING EXTERNAL SOURCES<br />
8. Notice the TV Power Status:<br />
• TV Detected means the installed TV sensor is working.<br />
• TV Not Detected means the TV sensor (if installed) is not connected or not positioned<br />
properly.<br />
• Press System or Exit to leave the System menu.<br />
For cable/satellite control<br />
The cable or satellite that is connected to the CBL• SAT input on your media center is the one<br />
you should select. So when you press the CBL• SAT source button and the On/Off button below it,<br />
you are operating that device.<br />
If you own both a cable and satellite box, use the AUX option to designate the second device<br />
brand and code.<br />
Note: For general guidelines on using the LIFESTYLE ® System menu, refer to “Using System<br />
Menus” on page 27.<br />
Follow the cable or satellite process below:<br />
Turn on the cable or satellite box (or other video device) that is connected to the CBL• SAT<br />
Audio IN on the media center. Turn on the TV and be sure to select the TV video input that is<br />
connected to the media center. Using the LIFESTYLE ® remote control, press CBL• SAT and !<br />
follow the steps below:<br />
1. Identify the device:<br />
•From the Remote Control options in the System menu, select CBL• SAT Device.<br />
• Move right and select a device from the multiple options by pressing Enter.<br />
2. Identify the brand:<br />
• In the menu options on the left, select CBL• SAT Brand.<br />
• Move to the right and up or down in the alphabetical list to locate your brand.<br />
• Press Enter to select the brand.<br />
23<br />
CONTROLLING EXTERNAL SOURCES
CONTROLLING EXTERNAL SOURCES<br />
CONTROLLING EXTERNAL SOURCES<br />
24<br />
Svenska Nederlands Français Italiano Deutsch Español English Dansk<br />
3. Choose the device code:<br />
• From the menu options on the left, select CBL• SAT Code.<br />
• Move right to select the first code.<br />
• Press the CBL• SAT On/Off button on your LIFESTYLE ® remote. Press the button again.!<br />
If the cable or satellite box turns off and on, you have chosen the right code. !<br />
If not, select another code, and press the CBL• SAT On/Off button two more times.<br />
• When you have chosen the right code, press Enter.<br />
• Press System or Exit to leave the System menu.<br />
When you complete these settings, you can use CBL• SAT On/Off to turn on your cable or satellite<br />
source, and use other LIFESTYLE ® remote buttons to operate it. If you have both a cable and<br />
satellite box, use AUX to connect the second device and to select it as the source.<br />
For VCR (or other video recorder) control<br />
The list of VCR brands and codes include selections for DVRs (or PVRs) and DVD recorders,<br />
as well. By following the instructions below, you can set the remote to control one or the<br />
other, but not both.<br />
If you have both a VCR and a DVR, set up one as VCR and the other as AUX.<br />
Follow the VCR process below:<br />
Turn on your VCR or other video recorder. Turn on the TV and be sure to select the Video<br />
input on the TV for the media center. Then, using the LIFESTYLE ® remote control, press the<br />
VCR source button and follow the steps below.<br />
1. Identify the device:<br />
•From the Remote Control options in the System menu, select VCR Device.<br />
• Move right and select a device from the multiple options by pressing Enter.<br />
2. Identify the brand:<br />
•From the Remote Control options in the System menu, select VCR Brand.<br />
• Move right into the list of brands and up or down to locate your brand of VCR or DVR.<br />
• Press Enter to select the brand.<br />
3. Choose the device code:<br />
• In the menu options on the left, select VCR Code.<br />
• Move right to select the first code.<br />
• Press the VCR On/Off button on your LIFESTYLE ® remote. Press this button again.!<br />
If the VCR or DVR turns off and on, you have chosen the right code. !<br />
If not, select another code, and press VCR On/Off two more times.<br />
• When you have chosen the right code, press Enter.<br />
• Press System or Exit to leave the System menu.<br />
! !
English Dansk Deutsch Español Français Italiano Nederlands Svenska<br />
! !<br />
CONTROLLING EXTERNAL SOURCES<br />
When you complete these settings and select VCR as the source, you can now use the VCR On/Off<br />
button and press Play, Pause, or Stop and Seek to control your VCR or other video recorder.<br />
On some DVRs, pressing Shuffle and Repeat buttons will allow you to skip backward or forward<br />
quickly.<br />
Note: If your LIFESTYLE ® remote control has the symbol below the button, it also<br />
has a record button ( ) near the bottom of the remote. Use that button to set your VCR/DVR to<br />
record.<br />
For AUX control<br />
If you have a component connected to the AUX input on your media center, you can set your<br />
LIFESTYLE ® remote to control it, although on and off control is not an option.<br />
If you do not have a component connected to AUX, you can still control another device by<br />
selecting it from the list of AUX device choices: Changer, Satellite, Cable, DVR, TV, or VCR.<br />
To exercise this control, you must press the AUX source button first.<br />
Note: For general guidelines on using the LIFESTYLE ® System menu, refer to “Using System<br />
Menus” on page 27.<br />
Follow the AUX process below:<br />
Turn on your component. Turn on the TV and be sure to select the Video input on the TV for<br />
the media center. Then using the LIFESTYLE ® remote control, press AUX and continue:<br />
1. Identify the device:<br />
•From the Remote Control options in the System menu, select AUX Device.<br />
• Move to the right and up or down in the list to select a component by pressing Enter.<br />
2. Identify the brand:<br />
• In the menu options on the left, select AUX Brand.<br />
• Move to the right and up or down in the alphabetical list to locate your brand.<br />
• Press Enter to select the brand.<br />
3. Choose the device code:<br />
• From the menu options on the left, select AUX Code.<br />
• Move right to select the first code.<br />
• Press the Play or Channel/Track up button on the LIFESTYLE ® remote control.!<br />
If the component responds, press other buttons to make sure important functions on<br />
the component also work. If the component does not respond, select a different code<br />
and try again.<br />
• When you have chosen the best code for your component, press Enter.<br />
Press System or Exit to leave the System menu.<br />
Assigning channel control to the TV input device<br />
If you always change channels on your cable or satellite box, and never on your TV, you can<br />
choose to set up your LIFESTYLE ® system for your cable or satellite box when you select TV<br />
as the source. In this case, you need to connect your cable or satellite to the TV Audio IN on<br />
the media center. You will also need to select that option in the System menu.<br />
Note: For general guidelines on using the LIFESTYLE ® System menu, refer to “Properties that<br />
you can adjust” on page 27.<br />
25<br />
CONTROLLING EXTERNAL SOURCES
CONTROLLING EXTERNAL SOURCES<br />
CONTROLLING EXTERNAL SOURCES<br />
Figure 9<br />
Designating the TV as<br />
channel selector (TV tuner)<br />
26<br />
Svenska Nederlands Français Italiano Deutsch Español English Dansk<br />
Make this selection from the Remote Control options in the System menu. Opposite the TV<br />
Control option, select from multiple options the one you want to use as channel selector. Then<br />
press System or Exit to leave the menu.<br />
%LM#9(:;*(5<br />
%LM#&/"235<br />
%LM#6-3(5<br />
01#6-2+/-)5<br />
-+(#1(/@;-2<br />
J
English Dansk Deutsch Español Français Italiano Nederlands Svenska<br />
Properties that you can adjust<br />
Figure 10 .<br />
System menu and preview<br />
of the DVD Lock feature<br />
! !<br />
USING SYSTEM MENUS<br />
Adjustments to system properties are typically those you make only once. If your system<br />
already operates just as you want, there is no need to make such adjustments.<br />
However, for some installation options, changes to the System menu may be required. This is<br />
simply to make the system fully compatible and convenient for your setup.<br />
One example is the adjustments made so the remote control works with any components<br />
that are externally connected to the system.<br />
How to enter the System menu<br />
By pressing the System button on the LIFESTYLE ® remote control, you call up the System<br />
menu. This menu appears on your TV screen only, not on the media center display.<br />
However, if you do NOT see this menu:<br />
• Make sure your TV is turned on.<br />
• Make sure to select the TV Video Input used to connect to the media center.<br />
Note: If you recorded the TV Video Input information on the form in your Installation Guide, refer<br />
to that form as needed.<br />
• Press System on the LIFESTYLE ® remote control, as needed.<br />
What it shows you<br />
When the System menu appears, the first property on the left (Audio) is prominent, and the<br />
preview screen displays those property features. However, as you move across to the right,<br />
different properties become prominent.<br />
At the far right, you reach the DVD Lock property and its preview list of features (Figure 10).<br />
Note: Entering the System menu causes any DVD or VCD that is playing to pause.<br />
Properties – Elements of the system<br />
Features – Submenus<br />
under each property<br />
Preview screen –!<br />
Inactive display<br />
'()(*+#-+(#6-2+/-)#+-#"3K.@+#+A(@(#@,@+(>#-E+;-2@5<br />
navigate<br />
Navigation cue –!<br />
Which remote control buttons to use<br />
6-2+/-));2O#,-./#01#@(+<br />
6-2+/-));2O#,-./#6&7N'%0#/(*(;:(/#<br />
6-2+/-));2O#,-./#16
USING SYSTEM MENUS<br />
USING SYSTEM MENUS<br />
Audio options<br />
Figure 11<br />
Preview of audio features Audio<br />
28<br />
Active list of options<br />
Svenska Nederlands Français Italiano Deutsch Español English Dansk<br />
How to make changes<br />
Making adjustments to system properties in this menu is similar to changing the settings for a<br />
source.<br />
•Move around and make choices by using the selection buttons shown.<br />
•Move right to see a preview of features under each property.<br />
•Press the down arrow or Enter to select and activate that property screen.<br />
Note: When activated, the screen changes from a preview of features to a list of the specific<br />
options you may choose to alter for that property.<br />
• In the active list, press the left, right, up, or down arrows to get to the option you want.<br />
• Press Enter or the left arrow button to confirm your selection and move back to the features<br />
column.<br />
• Repeat these steps for each change you want to make.<br />
• Press Exit to leave the System menu.<br />
Press System on the LIFESTYLE ® remote control. When you see a preview of audio features,<br />
you can press the Enter button to move into the active list of audio options.<br />
'()(*+#%.3;-#+-#"3K.@+#+A(@(#@,@+(>#-E+;-2@5<br />
&"@@#6->E(2@"+;-2<br />
0/($)(#6->E(2@"+;-2<br />
%.3;-#?/-*(@@;2O<br />
J2E.+#7(:()@<br />
%9%?0;P<br />
QDE"2@;-2#?/-+-*-)<br />
navigate select<br />
Bass Compensation 0<br />
(-14 to +14)<br />
Note: Listening to an audio source while you make these adjustments can be helpful. Some<br />
changes will be immediately noticeable and therefore useful in fine-tuning your selections.<br />
Default settings<br />
(Options) Effect of this setting<br />
(-9 to +6)<br />
Normal low-frequency reproduction.<br />
Decreased (-) or increased (+) low-frequency reproduction.<br />
Range available following ADAPTiQ ® system calibration.<br />
Treble Compensation 0 Normal high-frequency reproduction.<br />
-14 to +14 Decreased (-) or increased (+) high-frequency reproduction.<br />
(-9 to +6) Range available following ADAPTiQ system calibration.<br />
! !
English Dansk Deutsch Español Français Italiano Nederlands Svenska<br />
Audio Processing<br />
(Movie EQ, Range Compression,<br />
Mono Decoding)<br />
TV Analog Input Level<br />
TV Digital Input Level<br />
VCR Analog Input Level<br />
VCR Digital Input Level<br />
CBL/SAT Analog Input Level<br />
CBL/SAT Digital Input Level<br />
AUX Analog Input Level<br />
AUX Digital Input Level<br />
Video options<br />
Figure 12<br />
Preview of video features<br />
Automatic<br />
(User Adjustable)<br />
Normal<br />
(-6, -3, +3, +6)<br />
ADAPTiQ ® Off<br />
(On<br />
Erase)<br />
Expansion Protocol<br />
Change this only if instructed<br />
in the owner’s guide supplied<br />
with your <strong>Bose</strong> ® link remote<br />
control.<br />
<strong>Bose</strong> ® link<br />
(Legacy)<br />
USING SYSTEM MENUS<br />
Standard <strong>Bose</strong> ® processing applies.<br />
Allows you to make adjustments to the options (specific to each<br />
sound source) after pressing the Settings button while playing any<br />
internal or external system sound source.<br />
Standard signal level (loudness).<br />
Decreases or increases signal level<br />
(adjustable to match the levels of other components).<br />
Note: You may want to adjust the inputs for each external<br />
component to match the system’s internal FM and CD levels.<br />
No ADAPTiQ audio calibration performed.<br />
Uses ADAPTiQ system adjustments established using Disc 2.<br />
Eliminates the ADAPTiQ system adjustments* when this selection is<br />
followed, within 5 seconds, by pressing the Erase button on the media<br />
center control panel.<br />
Communicates only with <strong>Bose</strong> link-compatible products in other<br />
areas or rooms of your house.<br />
Allows the system to communicate with <strong>Bose</strong> legacy products (like<br />
Wave ® radios or Wave ® radio/CDs, which pre-date <strong>Bose</strong> link compatibility)<br />
and with some non-<strong>Bose</strong> products in other areas or rooms of<br />
your house.<br />
Press System on the LIFESTYLE ® remote control. Move right to see a preview of video features,<br />
and press the Enter button to move into the active list of video options.<br />
Video<br />
'()(*+#1;3(-#+-#"3K.@+#+A(@(#@,@+(>#-E+;-2@5<br />
01#?-B(/<br />
01#?-B(/#'+"+.@<br />
01#%@E(*+#"+<br />
?/-O/(@@;:(#'*"2<br />
Note: DO NOT change settings for<br />
component video using the on-screen<br />
System menu shown here. On some TVs,<br />
the screen will be blank until you make<br />
this change.<br />
Refer to “Component system setup using<br />
the display” on page 13.<br />
* Elimination of ADAPTiQ system adjustments is NOT automatically reversible.<br />
Restoring these adjustments requires re-use of the Setup Disc 2 and the ADAPTiQ system headset supplied with the<br />
system. For information on how to use this process, refer to “Making sure the sound is as good as it gets” in your Installation<br />
Guide.<br />
Through use of this advanced feature, the LIFESTYLE ® system self-adjusts its audio processing to compensate for the<br />
furnishings, speaker placement, and positions of listeners to provide ideal sound in your main room.<br />
**The Automatic feature works only after the optional TV sensor is installed and positioned to detect if the TV is on or off.<br />
For information on using the TV sensor, refer to “Installing the TV on/off sensor” in your Installation Guide.<br />
29<br />
USING SYSTEM MENUS
USING SYSTEM MENUS<br />
USING SYSTEM MENUS<br />
Active list of options<br />
TV Power Automatic<br />
(Manual<br />
Euro)<br />
TV Power Status<br />
(indicator only; not a setting)<br />
Default settings<br />
(Options) Effect of this setting<br />
TV Not Detected<br />
(TV On)<br />
TV Aspect Ratio Normal<br />
(Widescreen)<br />
Widescreen DVDs Modified<br />
(Unmodified)<br />
Video Connector<br />
(See Note on page 29.)<br />
Composite, S-VIDEO<br />
(Component)<br />
Video Black Level Normal<br />
(Extended)<br />
TV Video Format NTSC (US)<br />
PAL (EUROPE)<br />
(MULTISTANDARD)<br />
Progressive Scan Off<br />
(On)<br />
Media center options<br />
Figure 13<br />
Preview of media center<br />
features<br />
30<br />
Svenska Nederlands Français Italiano Deutsch Español English Dansk<br />
TV turns on automatically when a video source is selected.**<br />
TV does not come on automatically.<br />
TV responds to SCART connector input.<br />
Indicates: TV Sensor not installed or not positioned correctly.<br />
Indicates: TV Sensor installed and functioning properly.<br />
4:3 ratio screen display.<br />
16:9 ratio widescreen display.<br />
DVD video reformats, as needed, to fit a 4:3 TV screen.<br />
DVD video does not reformat automatically.<br />
System works with composite and/or S-video TV connection.<br />
System works with component TV connection.<br />
Screen black level generally appropriate for TVs.<br />
Reduces screen black level, appropriate for certain TVs.<br />
Correct for NTSC (US standard) monitors.<br />
Correct for PAL (European standard) monitors.<br />
Proper only for a TV that supports multiple formats (NTSC and PAL).<br />
Screen image repaints in standard style.<br />
Screen image repaints in advanced style (if available on the TV).<br />
Press System on the LIFESTYLE ® remote control. Move right to see a preview of media center<br />
features. Press the Enter button to move into an active display of submenus.<br />
Media Center<br />
'()(*+#F(3;"#6(2+(/#+-#"3K.@+#+A(@(#@,@+(>#-E+;-2@5<br />
9;@E)",#&/;OA+2(@@<br />
9;@E)",#7"2O."O(<br />
SE+;*")#'-./*(<br />
9;O;+")#%.3;-#S.+E.+<br />
0.2(/#'E"*;2O<br />
English Dansk Deutsch Español Français Italiano Nederlands Svenska<br />
Active list of options<br />
Display Brightness 4<br />
(1 to 7)<br />
Display Language English<br />
(Dansk, Deutsch,<br />
Español, Français,<br />
Italiano, Nederlands,<br />
Svenska)<br />
Optical Source None<br />
(TV, VCR, CBL/SAT,<br />
AUX)<br />
Default settings<br />
(Options) Effect of this setting<br />
Media center display lights with a midrange brightness.<br />
Darkens or lightens the media center display (7 = brightest).<br />
On-screen display menus appear in the selected language.<br />
No digital signal received via optical cable.<br />
Digital signal received via optical cable for selected source.<br />
Note: Choosing an optical source here restricts digital connections<br />
to optical only. No digital co-ax connection signal will be processed.<br />
Digital Audio Output Original No processing applied for signals sent to rear panel digital audio<br />
jacks.<br />
PCM Increases digital audio compatibility with other devices.<br />
Tuner Spacing U.S., European Channel spacing for AM/FM radio stations set to selected region<br />
standard.<br />
Restore Settings No<br />
Yes<br />
Remote control options<br />
Figure 14<br />
Preview of remote control<br />
features<br />
User settings, if any, modify system operation.<br />
Overwrites user settings and adjustments with the original settings<br />
established at the factory.<br />
! !<br />
USING SYSTEM MENUS<br />
Press System on the LIFESTYLE ® remote control. Move right to see a preview of remote control<br />
features, and press the Enter button to move into an active list of remote control options.<br />
Remote Control<br />
'()(*+#-+(#6-2+/-)#+-#"3K.@+#+A(@(#@,@+(>#-E+;-2@5<br />
6-2+/-));2O#,-./#01#@(+<br />
6-2+/-));2O#,-./#6&7N'%0#/(*(;:(/#<br />
6-2+/-));2O#,-./#16
USING SYSTEM MENUS<br />
USING SYSTEM MENUS<br />
Active list of options<br />
TV Brand --<br />
(Brand name)<br />
Default settings<br />
(Options) Effect of this setting<br />
Identifies the TV brand for the LIFESTYLE ® remote to control.<br />
TV Code -- Identifies the IR code that works with your TV.<br />
CBL• SAT Device --<br />
(Cable, Cable/DVR,<br />
Satellite, Satellite/DVR,<br />
HDTV Tuner)<br />
Identifies which device is connected to the CBL• SAT input.<br />
CBL• SAT Brand --<br />
(Brand name)<br />
Identifies the device brand for the LIFESTYLE ® remote to control.<br />
CBL• SAT Code -- Identifies the IR code that works with your CBL• SAT device.<br />
VCR Device --<br />
VCR, DVR, Cable/DVR,<br />
Satellite/DVR,<br />
DVD/DVD recorder,<br />
DVD/DVR,<br />
TV/DVD<br />
Identifies what type of device is connected to the VCR input.<br />
VCR Brand --<br />
Brand name<br />
Identifies the device brand for the LIFESTYLE ® remote to control.<br />
VCR Code -- Identifies the IR code that works with your VCR device.<br />
AUX Device --<br />
CD Changer, DVR,<br />
DVD/DVD Recorder,<br />
DVD/DVR, HDTV TV,<br />
TV/DVD, VCR,<br />
Cable/DVR, Cable,<br />
Satellite/DVR,<br />
Satellite, TV<br />
Identifies which type of device is connected to the AUX input.<br />
AUX Brand --<br />
Brand name<br />
Identifies the device brand for the LIFESTYLE ® remote to control.<br />
AUX Code -- Identifies the IR code that works with your AUX device.<br />
TV Control TV<br />
AUX, VCR, CBL• SAT<br />
Determines which device #)"%&*/'#)"%%*!/'-)*%'$%'9:'/,0.#*8<br />
Remote Version Record/ABC, Teletext Sets the functions of some buttons on the remote, such as Screen<br />
ratio control (Record/ABC or Teletext), as provided by your TV or in<br />
your area.<br />
IR Control On<br />
32<br />
Teach<br />
Off<br />
Svenska Nederlands Français Italiano Deutsch Español<br />
English Dansk<br />
System receives IR commands from another remote that has been<br />
taught to operate the system.<br />
System sends out IR commands, in response to the LIFESTYLE ®<br />
remote buttons pressed, to teach another remote to operate the !<br />
system.<br />
System does not allow IR control by another remote or does not teach<br />
IR commands to a learning remote.<br />
! !
English Dansk Deutsch Español Français Italiano Nederlands Svenska<br />
DVD Lock options<br />
Figure 15<br />
Preview of DVD Lock<br />
features<br />
Active list of options<br />
Create Password<br />
(appears only before !<br />
a password is created)<br />
Confirm Password<br />
(appears only when !<br />
a password is created or<br />
changed)<br />
Enter Password<br />
(appears only after !<br />
a password is created)<br />
Change Password<br />
(appears only if !<br />
a password is entered)<br />
! !<br />
USING SYSTEM MENUS<br />
Press System on the LIFESTYLE ® remote control. Move right to see a preview of DVD Lock<br />
features, and press the Enter button to move into an active display of DVD Lock options.<br />
DVD Lock<br />
'()(*+#919#7-*H#+-#"3K.@+#+A(@(#@,@+(>#-E+;-2@5<br />
7-*H#L2/"+(3#9;@*@<br />
7-*H#9;@*@#
USING SYSTEM MENUS<br />
USING SYSTEM MENUS<br />
34<br />
Svenska Nederlands Français Italiano Deutsch Español English Dansk<br />
Using the lock to apply parental control<br />
The parental control feature of the LIFESTYLE ® system lets you restrict viewing of DVDs with<br />
certain ratings. To activate this feature, you need to set a level of restriction and establish a<br />
password in the DVD Lock section of the System menu.<br />
Your password will help prevent unauthorized viewing of DVDs that have a higher rating than<br />
your restriction level. There are eight levels to choose from, matched to movie ratings set by<br />
the Motion Picture Association of America (MPAA), as shown in the table below.<br />
Parental<br />
control<br />
setting<br />
MPAA<br />
rating<br />
Audience<br />
restriction<br />
8 None<br />
7 NC-17 Adult audiences<br />
6 R Mature audiences<br />
5 Mature teenage audiences<br />
4 PG-13 Teenage audiences<br />
3 PG Mature young audiences<br />
2 Most audiences<br />
1 G General<br />
For example, by choosing a Parental Control Setting of 4, you restrict access to videos !<br />
rated above PG-13. Videos with ratings above that may be viewed only after entering the<br />
password.<br />
Your password also prevents others from changing the parental control setting without !<br />
permission.<br />
To set the restriction level and passwords<br />
With the TV turned on, select the proper TV video input for the media center. !<br />
Press System on the LIFESTYLE ® remote control.<br />
When the System menu appears on the TV screen:<br />
1. Move right to DVD Lock for a preview of the selections (as shown on page 33).<br />
2. Press the down arrow or Enter to move into an active list of DVD Lock options (noticeably<br />
different from the preview screen).<br />
3. Use the number buttons on your LIFESTYLE ® remote to enter four digits into the !<br />
password blanks.<br />
4. Press Enter to register your choice.<br />
5. Enter the same four digits in the new blanks and press Enter to register them.<br />
6. Select Lock Discs Rated Above.<br />
7. Move right and up or down to select the restriction level you want.<br />
8. Press Enter or the left arrow to confirm your selection and exit the selection list.<br />
! !
English Dansk Deutsch Español Dansk Français Deutsch Italiano Nederlands Español Français Svenska Italiano Nederlands Svenska<br />
Quick adjustments as you watch or listen<br />
Figure 16<br />
A sample of CD setting<br />
options as they appear on<br />
the media center display<br />
Figure 17<br />
FM radio Settings menu on<br />
the TV screen, with identifying<br />
tags<br />
CHANGING SOURCE SETTINGS<br />
Quick changes to whatever system source is playing are easy to make when you press the !<br />
Settings button on the LIFESTYLE ® remote control. You can boost the system center channel<br />
volume or hear audio from five instead of two of the system speakers, for example.<br />
A dedicated Settings menu for each separate audio source, and one other for all of the video<br />
sources, gives you nearly instant access. Press one button, and you get the appropriate<br />
menu for the source that is currently playing.<br />
Moving about and selecting options from the menu for each source also becomes second<br />
nature quickly. Just try it and see.<br />
Where to find the list of options<br />
To see your options, you must first select a source. Then, on the LIFESTYLE ® remote control,<br />
press Settings to enter the menu for that source.<br />
The menu appears on the media center display and will appear on your TV screen as well, if<br />
the TV is turned on and the proper Video Input for the media center is selected.<br />
• As the settings appear on the media center display (Figure 16), press the down button on<br />
the remote to see more options.<br />
C E N T E R C H A N N E L : + 4<br />
S L E E P T I M E R : O F F<br />
• To see the DVD Settings menu on the TV screen (Figure 17, below), turn on the TV and<br />
select the TV Video Input for the media center.<br />
When the list of options is longer than shown, a small down or up arrow appears at the !<br />
bottom of the list to indicate where to move to see more options.<br />
Navigation cue –!<br />
Buttons to use<br />
Source –!<br />
In use<br />
Feature name –<br />
Full identity<br />
Features –!<br />
Identity icons<br />
FM<br />
or AM<br />
Center Channel<br />
Setting – !<br />
Option chosen<br />
+4<br />
Description – !<br />
What to do !<br />
or to expect<br />
To soften the center-channel presentation, choose<br />
a lower setting. To focus it, choose a higher setting.<br />
When the Settings menu appears on the TV screen, any change you make to settings will be<br />
visible there as well as on the media center display.<br />
35<br />
CHANGING SOURCE SETTINGS
CHANGING SOURCE SETTINGS<br />
CHANGING SOURCE SETTINGS<br />
36<br />
Svenska Nederlands Italiano Français Svenska Nederlands Español Français Deutsch Italiano Deutsch Español Dansk English<br />
Dansk<br />
Figure 18<br />
Changing the number of<br />
speakers playing<br />
How to change the settings<br />
In the Settings menu on the media !<br />
center display or on the TV screen, !<br />
move around and make changes!<br />
by using the selection buttons shown.<br />
On the display or the screen, the same actions apply:<br />
• Press the left, right, up, or down arrows to get to the option you want.<br />
• Press Enter or the left arrow to confirm your selection and move back to the features column.<br />
• Repeat these steps for each change you want to make.<br />
• Press Exit to leave the Settings menu.<br />
The progression below shows how to change the number of speakers used when FM plays !<br />
(Figure 18).<br />
A. The FM Settings menu appears on the TV screen with 5 speakers as the default setting.<br />
B. Arrow buttons move right and up or down to change the number of speakers playing.<br />
C. Enter or the left arrow confirms the new setting and moves back to the list of tuner<br />
attributes.<br />
A. B. C.<br />
FM FM<br />
FM<br />
2-3-5 Speakers: 2-3-5 Speakers:<br />
2-3-5 Speakers:<br />
You can use the actions above to restore the original settings, too. Do this if you do not like<br />
the effect of a change you have made, or accidentally made a change you did not intend.<br />
The original (default) settings for each source are shown as the first option for each feature on<br />
the pages that follow.<br />
You can restore all default settings by choosing Restore Settings in the Systems menu, under<br />
F(3;"#6(2+(/. This reverses all changes you have made in both the Settings or System<br />
menus. Instead of making this overall change, you can note the default setting listed on the<br />
pages that follow, then re-select that setting in any of the sources.
English Dansk Deutsch Español Dansk Français Deutsch Italiano Nederlands Español Français Svenska Italiano Nederlands Svenska<br />
CD settings options<br />
DVD settings options<br />
CHANGING SOURCE SETTINGS<br />
To see the CD Settings menu, you must insert a CD into the disc tray before you select the<br />
source.<br />
CD Features<br />
2-3-5 Speakers 5<br />
(2, 3)<br />
Surround 0<br />
(-5 to +5)<br />
Center Channel 0<br />
(-5 to +5)<br />
Audio Track DTS<br />
(Dolby Digital)<br />
Sleep Timer Off<br />
(10-90)<br />
Set to<br />
(Options) Setting effect<br />
Determines the number of speakers playing.<br />
Establishes relative surround sound volume.<br />
Establishes relative center speaker volume.<br />
Plays audio tracks in the format specified.<br />
Sets system to turn off when the selected<br />
time elapses.<br />
To see the DVD Settings menu, you must insert a DVD into the disc tray before you select the<br />
source.<br />
Three features (shown in italic type below) appear in the DVD menu only if you have set Audio<br />
Processing to User Adjustable in the Audio options of the System menu.<br />
DVD Features<br />
2-3-5 Speakers 5<br />
(2, 3)<br />
Surround 0<br />
(-5 to +5)<br />
Center<br />
Channel<br />
Set to<br />
(Options) Setting effect<br />
0<br />
(-5 to +5)<br />
Movie EQ On<br />
(Off)<br />
Range<br />
Compression<br />
Mono<br />
Decoding<br />
On<br />
(Off)<br />
On<br />
(Off)<br />
Determines the number of speakers playing.<br />
Establishes relative surround sound volume.<br />
Establishes relative center speaker volume.<br />
Adjusts bass-to-treble relationship for proper<br />
movie soundtrack reproduction.<br />
Adjusts volume to maintain dialogue intelligibility<br />
and keep some sounds from overwhelming<br />
others.<br />
Engages Videostage ® 5 mono decoding circuitry<br />
to process mono programs (one-channel audio)<br />
into five-speaker sound.<br />
37<br />
CHANGING SOURCE SETTINGS
CHANGING SOURCE SETTINGS<br />
CHANGING SOURCE SETTINGS<br />
38<br />
Svenska Nederlands Italiano Français Svenska Nederlands Español Français Deutsch Italiano Deutsch Español Dansk English<br />
Dansk<br />
DVD Features<br />
Time 0:00<br />
_:__<br />
Title<br />
Chapter<br />
Tuner settings options (FM or AM radio)<br />
_ of __<br />
___<br />
Audio Track DTS<br />
Dolby Digital<br />
Subtitle<br />
Language<br />
Camera<br />
Angle<br />
English<br />
Other<br />
A/B Repeat a, b<br />
Displays elapsed time.<br />
Advances or reverses the film to the new time.<br />
Advances or reverses the film to another section<br />
of the DVD, according to the number set.<br />
Advances or reverses the film to a new scene,<br />
according to the number set.<br />
Plays an audio format available on the specific<br />
DVD, which may offer more than one choice.<br />
Determines the language used for DVD subtitles<br />
(of the languages available on that disc).<br />
1 of __ Determines the angle used for a movie scene<br />
(of the camera angles available on the disc).<br />
A, B<br />
Sleep Timer Off<br />
10-90<br />
Set to<br />
(Options) Setting effect<br />
Repeats a segment of the DVD after the start<br />
and end points are defined.<br />
For details on how to apply this option, refer to<br />
page 16.<br />
Sets system to turn off when the selected time<br />
elapses.<br />
There are different settings menus for AM and FM. You can adjust the settings differently for<br />
each. Two of the attributes below are available only when the tuner is set to FM.<br />
FM<br />
Set to<br />
(or AM) Features<br />
(Options) Setting effect<br />
2-3-5 Speakers 5<br />
(2, 3)<br />
Determines the number of speakers playing.<br />
Surround 0<br />
(-5 to +5)<br />
Establishes relative surround sound volume.<br />
Center Channel 0<br />
(-5 to +5)<br />
Establishes relative center volume.<br />
Output Mode<br />
(FM-only feature)<br />
RDS Info<br />
(FM-only feature<br />
and available only<br />
outside the U.S.)<br />
Auto<br />
(Mono or Stereo)<br />
Off<br />
(On)<br />
Sleep Timer Off<br />
(10-90)<br />
Sets channel distribution of radio signals.<br />
Displays station and program information<br />
(as available from Radio Data System).<br />
Sets system to turn off when the selected<br />
time elapses.
English Dansk Deutsch Español Dansk Français Deutsch Italiano Nederlands Español Français Svenska Italiano Nederlands Svenska<br />
TV settings options (for VCR, CBL/SAT, and AUX)<br />
CHANGING SOURCE SETTINGS<br />
The settings below affect programs on the TV, even when the source of the program is VCR,<br />
CBL/SAT or AUX. There are no separate settings menus for these sources.<br />
Three features (shown in italic type below) appear in the TV menu only if you have set Audio<br />
Processing to User Adjustable in the Audio options of the System menu.<br />
Set to<br />
TV Features<br />
(Options) Setting effect<br />
2-3-5 Speakers 5<br />
(2, 3)<br />
Determines the number of speakers playing.<br />
Surround 0<br />
(-5 to +5)<br />
Establishes relative surround sound volume.<br />
Center Channel 0<br />
(-5 to +5)<br />
Establishes relative center speaker volume.<br />
Movie EQ On Adjusts bass-to-treble relationship for proper<br />
(Off) movie soundtrack reproduction.<br />
Range<br />
On Adjusts volume by frequency band to moder-<br />
Compression<br />
(Off) ate the difference between dialogue and special<br />
effects. Keeps some sounds from<br />
overwhelming others.<br />
Mono Decoding On Engages Videostage<br />
(Off)<br />
® 5 mono decoding<br />
circuitry, which processes mono audio (onechannel)<br />
programs into five-speaker sound.<br />
Audio 1+1 1 Plays audio content of selected soundtrack(s).<br />
(2, Both) The content of the second soundtrack may be<br />
a second language, for example.<br />
Sleep Timer Off Sets system to turn off when the selected time<br />
(10-90) elapses.<br />
39<br />
CHANGING SOURCE SETTINGS
REFERENCE<br />
REFERENCE<br />
System maintenance<br />
Figure 19<br />
Installing the remote<br />
control batteries<br />
40<br />
Svenska Nederlands Français Italiano Deutsch Español English Dansk<br />
Changing batteries is the only regular maintenance required.<br />
However, switches inside the remote battery case can be changed, as needed (to select a<br />
new house code, for example). Similar changes may be required for any additional remotes,<br />
purchased for use in other rooms.<br />
Note: For further information on switch settings refer to “Changing remote control switch<br />
settings” below.<br />
Replacing the remote control batteries<br />
Replace all four batteries when the remote control stops operating or its range seems<br />
reduced. Alkaline batteries are recommended.<br />
1. Slide open the battery compartment on the back of the remote (Figure 19).<br />
2. Insert four AAA or IEC-LR3 1.5V batteries, or the equivalent, as shown. Match the +<br />
and – symbols on the batteries with the + and – markings inside the compartment.<br />
3. Slide the battery compartment cover back into place.<br />
AAA batteries (4)<br />
Changing remote control switch settings<br />
+<br />
+<br />
Battery<br />
compartment<br />
cover<br />
+<br />
+<br />
Battery<br />
compartment<br />
Each LIFESTYLE ® remote control uses a house code that corresponds to the house code set<br />
in the media center, enabling the two to communicate. If another LIFESTYLE ® system nearby<br />
creates a conflict with your system, you can easily set a new house code in your media center<br />
and its remote control(s) with steps that follow.<br />
Using the remote control:<br />
1. Open the remote control battery cover and locate the miniature switches<br />
(Figure 20 on page 41).<br />
2. Move one or more of switches 1, 2, 3, or 4 in the opposite direction from its current<br />
setting. Use a paper clip, ball point pen, or similar object.<br />
Note: DO NOT change any other switch settings. Moving other switches may disable your<br />
remote control.<br />
3. Replace the battery cover.
English Dansk Deutsch Español Français Italiano Nederlands Svenska<br />
Figure 20<br />
Miniature switches on the<br />
Primary remote are set for<br />
use in the Main room (A)<br />
REFERENCE<br />
Using the media center:<br />
1. Lift the media center door and press the All Off button.<br />
2. Press and hold the Enter button. Your current house code will appear in the media center<br />
display window in the form of four rectangles, which represent the positions of switches<br />
1 through 4:<br />
HOUSE CODE:<br />
Switches 1 - 4 down = 0 0 0 0 (current house code)<br />
3. While holding the Enter button, press any button on the remote control.<br />
The media center displays the new house code, which confirms its recognition of the<br />
new code:<br />
4. Release the Enter button. The system remains off.<br />
5. If you have additional remote controls, change the switches to match those of the first<br />
remote control by following steps 1-3 above. You do not need to repeat steps 4-5.<br />
Note: To verify your system’s house code, press Enter while the system is off. The display<br />
confirms the settings of switches 1-4.<br />
1 2 3 4 5 6 7 8 9<br />
NEW HOUSE CODE:<br />
(Switch 1 up, 2 down, 3 up, and 4 down = 1 0 1 0 (new house code)<br />
Switches (1-4)<br />
as set at the factory:<br />
all switches down.<br />
1 2 3 4 5 6 7 8 9<br />
Other switches<br />
Switch 5 determines which “audio<br />
stream” (of two) you hear.<br />
For more information on streams,<br />
refer to “Setting up a second room<br />
with sound” on page 42.<br />
Switches 6-9 represent the room<br />
where the remote will be used.<br />
In the main room, the primary<br />
remote is set as Room A with all<br />
switches down.<br />
For a <strong>Bose</strong> ® link remote<br />
in another room<br />
Switches 1-4 need to match those<br />
switch settings in your main remote.<br />
Set switches 5-9 for the room where<br />
you will use the <strong>Bose</strong> ® link remote.<br />
41<br />
REFERENCE
REFERENCE<br />
REFERENCE<br />
Setting up a second room with sound<br />
42<br />
Svenska Nederlands Français Italiano Deutsch Español English Dansk<br />
Your LIFESTYLE ® DVD home entertainment system can direct sound to more than one room<br />
at the same time. What’s more, it can direct the audio from two different sound sources (such<br />
as CD, AM/FM tuner, TAPE, or AUX) to these rooms through two independent audio streams.<br />
In additional rooms where you have speakers (beyond the main room where the media center<br />
is located), you can choose to listen to either of the two audio streams. So, when music is<br />
playing in the main room, listeners in other rooms can enjoy that same music or an entirely<br />
different audio source from the system, for true independence.<br />
Capable of supplying up to 14 additional rooms with <strong>Bose</strong> ® quality sound, one LIFESTYLE ®<br />
system can fill your entire living space with music.<br />
<strong>Bose</strong> ® link-compatible products make it easy<br />
As an option to provide sound throughout your home (or even outdoors), the <strong>Bose</strong> ® link !<br />
network connects all the pieces and offers a variety of <strong>Bose</strong> products of consistent quality for<br />
use in other rooms.<br />
These include: the <strong>Bose</strong> link AL8 homewide wireless audio link. You can use it with the Wave ®<br />
music system, 3•2•1 Series II or 3•2•1 GS Series II systems, the LIFESTYLE ® !<br />
RoomMate ® powered speakers, and other unpowered speakers for indoors or out. We also<br />
offer amplifiers of different power ratings, plus the proper cables and adapters to connect it<br />
all together.<br />
With the purchase of a <strong>Bose</strong> ® link remote control for each additional room, managing your<br />
whole-house music system becomes quick and easy. It’s a simple matter to preset each<br />
remote for the room where it will be used and for the audio stream you want it to receive.<br />
For added versatility, you may prefer using a PERSONAL ® music center II to control the sound<br />
in your other rooms. Besides providing the ability to switch between program streams<br />
instantly, this advanced remote provides an LCD screen that shows you what is currently<br />
playing and what other listening options you have.<br />
Regardless of which ones you choose, each <strong>Bose</strong> link-compatible product includes detailed<br />
instructions for adding it to your LIFESTYLE ® DVD home entertainment system.<br />
For more information on your options, or to purchase additional equipment, contact your<br />
local <strong>Bose</strong> dealer. Or, to reach <strong>Bose</strong> directly, refer to the address list included with !<br />
your system.<br />
! !
English Dansk Deutsch Español Français Italiano Nederlands Svenska<br />
<strong>Bose</strong> ® link remote switch settings<br />
These settings apply only to remote controls<br />
with battery compartment switches.*<br />
• House code switches (1, 2, 3, and 4) must<br />
match those on your main remote.<br />
• Consider your choices for Switch 5:<br />
Change the switch so the expansion room<br />
shares the audio stream heard in the main<br />
room (A).<br />
Leave the switch unchanged, so the<br />
expansion room receives a different audio<br />
stream from the main room (A).<br />
• Room code switches (6, 7, 8, and 9) must<br />
be unique to each new remote, unless for<br />
use in the main room (A) along with the<br />
primary remote.<br />
*For a PERSONAL ® music center II, you<br />
make these settings in a menu on the!<br />
display screen.<br />
Protecting and caring for your system<br />
! !<br />
REFERENCE<br />
Follow the guidelines below when cleaning the surfaces.<br />
• Do not use any solvents, chemicals, or cleaning solutions containing alcohol, ammonia, or<br />
abrasives.<br />
• Do not use any sprays near the system.<br />
Cleaning the media center<br />
Use only a soft, dry cloth to clean the outside of the media center.<br />
Cleaning the speakers<br />
Clean the surface of your speakers with a soft, damp cloth. You can use an ammonia-free<br />
window cleaner on a soft cloth to maintain the finish.<br />
The speaker grille panels require no special care, although you may vacuum them carefully, if<br />
necessary.<br />
Cleaning discs<br />
Handle discs by their edges to prevent fingerprints and scratches (Figure 21). Do not write on<br />
or attach labels to the surface of the disc.<br />
• To remove stains or fingerprints from the surface of a disc, use a soft, lint-free, dry cloth.<br />
Wipe in straight movements from the center of the disc to the outside. Do not use any<br />
chemical products; they can damage the disc.<br />
• To minimize exposure to dust and dirt, replace discs in their cases after use. Store each<br />
disc in its case, out of direct sunlight, high temperatures, and humidity.<br />
43<br />
REFERENCE
REFERENCE<br />
REFERENCE<br />
Figure 21<br />
Handling and<br />
cleaning a disc<br />
Troubleshooting<br />
Problem What to do<br />
System doesn’t do !<br />
anything<br />
44<br />
Svenska Nederlands Français Italiano Deutsch Español English Dansk<br />
• Make sure the power connector is inserted securely into the media center, the power cord<br />
is inserted securely into the Acoustimass ® module, and the power pack and power cord<br />
are fully plugged into operating AC wall outlets.<br />
• Be sure to press a source button (CD/DVD, AM/FM, etc.) on the LIFESTYLE ® remote<br />
control.<br />
• Unplug the media center power supply for 60 seconds, then reconnect it. !<br />
This allows the unit to reset itself after a power surge or power interruption.<br />
No sound • Increase the volume.<br />
• Check to see if MUTE is lit on the display. If it is, press the Mute button on the remote control<br />
to unmute the sound.<br />
• Check the connections for any external components. Make sure that you have pressed the !<br />
correct remote button for the source you want to hear.<br />
• For CD or DVD play, be sure the disc is placed correctly, label-side up, in the disc tray.<br />
• Connect the FM and AM antennas.<br />
• Make sure that the power switch on the Acoustimass module is set to ON (I).<br />
• Make sure that the audio input cable:<br />
! Connector is firmly seated in the media center Main Speaker jack.<br />
! Multi-pin connector at the other end is firmly seated in the Acoustimass module !<br />
AUDIO INPUT jack.<br />
• Check connections between the cube speakers and the module.<br />
• Turn off the media center for 60 seconds, then on again, to restore communication<br />
between the media center and the speakers.<br />
• Make sure that the power switch on the Acoustimass module is set to ON (I).<br />
Sound is marred by a<br />
loud hum or buzz, which<br />
may be electrical in<br />
nature (not harmonic)<br />
No sound from center<br />
speaker<br />
Too much sound from<br />
center speaker<br />
• Contact <strong>Bose</strong> ® Customer Service to determine if and how other electrical components in<br />
the room may be creating unwanted signals, and the possible remedies.<br />
• Make sure the center speaker cable is connected at both ends.<br />
• Select 3- or 5-speaker mode.<br />
• Decrease the Center Channel setting.<br />
! !
English Dansk Deutsch Español Français Italiano Nederlands Svenska<br />
Problem What to do<br />
No sound from !<br />
surround speakers<br />
Surround speakers !<br />
are too loud<br />
Storing tracks of a CD<br />
takes much longer than !<br />
it should<br />
LIFESTYLE ® remote<br />
behaves erratically or it<br />
does not work<br />
(If this occurs in !<br />
conjunction with use !<br />
of a plasma-screen TV,<br />
see the problem listed<br />
next.)<br />
With a plasma-screen !<br />
TV turned on, !<br />
the LIFESTYLE ® remote<br />
behaves erratically<br />
System turns on by itself,<br />
or behaves erratically<br />
! !<br />
REFERENCE<br />
• Select 5-speaker mode.<br />
• Increase the Surround setting for the source being played.<br />
• Make sure the video sound source is stereo- and surround-encoded, and the component<br />
used (TV, VCR, DVR, etc.) is stereo.<br />
• Decrease the Surround setting for the source being played.<br />
• Make sure that the left and right front speakers are connected to the front speaker jacks<br />
(blue), and the left and right surround speakers are connected to the surround speaker<br />
jacks (orange).<br />
• Remove the CD and check for scratches, which may slow the process or make it !<br />
impossible to store all tracks.<br />
• Or, if the CD needs cleaning, refer to “Cleaning discs” on page 43.<br />
• Check batteries and their polarity (+ and –).<br />
• Make sure the power cable between the media center and its power source is firmly<br />
seated, uncoiled, and extended to its full length.<br />
• If you are using a plasma-screen TV, make sure the media center power source is as far<br />
away from the TV as possible.<br />
• Move the remote (or the media center) a few feet to avoid an area of “dead spots.”<br />
• Make sure the remote control and media center house codes match.<br />
• Contact <strong>Bose</strong> ® Customer Service for assistance.<br />
• Momentarily disconnect the video cable (composite, S-video, or component) and see if<br />
remote performance improves.<br />
• If performance improves, the problem may be remedied by obtaining “ferrite chokes” and<br />
placing them on the cable to draw away the interference. To purchase the chokes, contact<br />
<strong>Bose</strong> Customer Service for assistance.<br />
• Change the house code setting to prevent signals from conflicting with another nearby!<br />
LIFESTYLE ® system. (See “Changing remote control switch settings” on page 40.)<br />
Radio does not work • Make sure antennas are connected properly.<br />
• Move AM antenna at least 20 inches (50 cm) from the media center.<br />
• Adjust antenna position to improve reception.<br />
• Make sure the AM antenna is in an upright position.<br />
• Move antennas farther from media center, TV, or other electronic equipment.<br />
• Select another station. You may be in an area of weak signal coverage for some stations.<br />
The disc does not play • After pressing the CD/DVD button, wait a few seconds before pressing Play.<br />
• Make sure the disc is properly inserted (label side up).<br />
• Eject the disc and try loading it again.<br />
• The CD may be dirty. See “Cleaning discs” on page 43.<br />
• Try another CD. The CD may be defective or not compatible. See “Clarifying some basics”<br />
on page 5.<br />
45<br />
REFERENCE
REFERENCE<br />
REFERENCE<br />
Problem What to do<br />
A CD or DVD does not<br />
play correctly<br />
Limited warranty<br />
46<br />
Svenska Nederlands Français Italiano Deutsch Español English Dansk<br />
• Check the disc for scratches, fingerprints, smears, or dirt. See “Protecting and caring for<br />
your system” on page 43.<br />
FM sound is distorted • Adjust antenna position to reduce interference.<br />
FM sound is noisy<br />
in surround mode<br />
• Weak FM stations will produce static in the surround speakers. Select the 2-speaker mode<br />
in the Settings menu to minimize noise. See “CD settings options” on page 37.<br />
Sound is distorted • Make sure speaker cables are not damaged and the connections are secure.<br />
• Reduce the output level from any external components connected to the media center.<br />
No sound from<br />
TV, CD/DVD, VCR,<br />
or AUX<br />
No video on screen,<br />
though the TV audio<br />
functions<br />
LIFESTYLE ® remote<br />
does not control<br />
your TV, VCR,<br />
cable/satellite box,<br />
or other external<br />
component<br />
Your TV turns<br />
on and off unexpectedly<br />
TV screen goes dark or<br />
image flips repeatedly<br />
after making a change<br />
to a Video feature in<br />
System settings<br />
You forgot<br />
your password<br />
• Check the connections.<br />
• Make sure that component is turned on.<br />
• Refer to the component owner’s manual.<br />
• Check the TV video input selection. Make sure it is correct for the video source.<br />
• Make sure correct codes are set. See “Using your LIFESTYLE ; remote with other components”<br />
on page 21.<br />
• Make sure that the front of the media center is not obstructed. The IR emitter that sends<br />
commands to your external components is below the disc tray.<br />
• If you still cannot control your external components successfully, you may need to connect<br />
the external IR emitter, included with your system, to the IR EMITTER jack on the rear<br />
panel of the media center. See “IR emitter cable as an option” in your Installation Guide.<br />
• Reposition the TV on/off sensor on the back of your TV. Or check the SCART connector if<br />
you use one.<br />
• Verify that the TV on/off sensor is working properly by choosing TV Power Status under<br />
Video in the System menu.<br />
• Use the media center to check the Video Format and Progressive Scan settings, following<br />
instructions in “Component system setup using the display” on page 13.<br />
! Video Format should be set to NTSC (U.S. standard) or PAL (European standard).<br />
! Make sure the Progressive Scan setting is off, unless you have used a component video<br />
connection and progressive scan is a feature of the TV.<br />
• Enter the numbers 2673 as temporary password to access the parental controls. Then<br />
create a new password.<br />
Contacting Customer Service<br />
For additional help in solving problems, contact <strong>Bose</strong> ® Customer Service. Refer to the<br />
address sheet included in the carton.<br />
This system is covered by a transferable limited warranty.<br />
Details of the limited warranty are provided on the Product Registration Card that came with<br />
your system. Please fill out the information section on the card and mail it to <strong>Bose</strong>. However,<br />
failure to do so will not affect your limited warranty rights.
English Dansk Deutsch Español Français Italiano Nederlands Svenska<br />
Accessories<br />
Technical information<br />
! !<br />
REFERENCE<br />
For information on speaker mounting brackets and stands, additional remote controls, and<br />
connecting additional <strong>Bose</strong> ® powered loudspeakers, contact your <strong>Bose</strong> dealer or call <strong>Bose</strong><br />
Customer Service. See the address and phone number list included with your system.<br />
Media center power pack power rating<br />
USA/Canada: 120V 0.55A 50/60Hz 33VDC 1.1A<br />
International: 220-240V 0.30A 50/60Hz 33VDC 1.1A<br />
Dual voltage: 115/230V 0.55A 50/60Hz 33VDC 1.1A<br />
Speaker system power rating<br />
USA/Canada: 100-120V 50/60Hz 350W<br />
International: 220-240V 50/60Hz 350W<br />
Dual voltage: 100-120/220-240V 50/60Hz 350W<br />
Media center inputs<br />
AUX: 2Vrms, maximum<br />
CBL-SAT: 2Vrms, maximum<br />
VCR: 2Vrms, maximum<br />
TV: 2Vrms, maximum<br />
DIGITAL: SPDIF (1 each for TV, VCR, TAPE, and AUX)<br />
COMPOSITE VIDEO: NTSC or PAL format 1Vp-p with sync 75"<br />
S-VIDEO: Luminance 1Vp-p Chrominance 0.3Vp-p COMPONENT VIDEO: NTSC or PAL 1Vp-p with sync on Y<br />
OPTICAL INPUT: SPDIF digital, mapped to input<br />
FM ANTENNA: 75"<br />
AM ANTENNA: 12µH<br />
TV SENSOR: Scan frequency sensing<br />
Media center outputs<br />
SPEAKER ZONES 1 and 2: Variable audio, user selectable<br />
AUDIO OUT L and R, fixed audio, 2 Vrms maximum<br />
DIGITAL AUDIO OUT: SPDIF<br />
OPTICAL OUTPUT: SPDIF, –15 to –21 dbm<br />
COMPOSITE VIDEO: NTSC or PAL 1Vp-p with sync 75"<br />
S-VIDEO: Luminance 1Vp-p Chrominance 0.3Vp-p COMPONENT VIDEO: NTSC or PAL 1Vp-p with sync on Y<br />
Media center dimensions<br />
15.8"W x 11.0"D x 3.5"H!<br />
(40.1 cm x 27.9 cm x 8.9 cm)<br />
Media center weight<br />
8.2 lb (3.7 kg)<br />
Media center finish<br />
Brushed aluminum<br />
Remote control range<br />
65 ft (20 m)<br />
47<br />
REFERENCE
6<br />
<br />
1
LIFESTYLE ®<br />
HOME ENTERTAINMENT SYSTEMS<br />
<br />
<br />
<br />
DVD
INFORMATIONS RELATIVES À LA SÉCURITÉ<br />
2<br />
Français Español<br />
English<br />
Veuillez lire ce guide<br />
Prenez le temps de lire attentivement les instructions de cette notice d’utilisation. Elles vous seront précieuses pour<br />
installer et utiliser correctement votre système et vous aideront à tirer le meilleur parti de sa technologie. Conservez<br />
cette notice d’utilisation pour référence ultérieure.<br />
AVERTISSEMENT : Pour limiter les risques d’incendie ou d’électrocution, n’exposez pas l’appareil à la pluie ou à l’humidité.<br />
AVERTISSEMENT : Protégez-le de tout risque de ruissellement ou d’éclaboussure. Ne placez pas d’objets contenant<br />
des liquides, tels que des vases, sur l’appareil. Comme avec tout appareil électronique, veillez à ne pas renverser de<br />
liquides sur aucune partie de l’appareil. Les liquides peuvent provoquer des pannes et/ou un risque d’incendie.<br />
Les mises en garde suivantes figurent sur le coffret de votre media center LIFESTYLE ® et de votre module Acoustimass ® :<br />
Le symbole représentant un éclair avec une flèche à l’intérieur d’un triangle équilatéral est utilisé pour<br />
prévenir l’utilisateur de la présence d’une tension électrique dangereuse non isolée à l’intérieur de<br />
l’appareil. Cette tension est d’un niveau suffisamment élevé pour représenter un risque d’électrocution.<br />
Le symbole représentant un point d’exclamation à l’intérieur d’un triangle équilatéral, tel qu’il figure sur le<br />
système, signale à l’utilisateur la présence d’instructions importantes relatives au fonctionnement et à<br />
l’entretien de l’appareil dans cette notice d’utilisation.<br />
Produit laser de classe 1<br />
Ce lecteur de CD est classé CLASS 1 LASER PRODUCT selon les normes !<br />
EN 60825-1:1994+A1+A2, IEC60825-1:1993+A1+A2.<br />
CLASS 1 LASER PRODUCT<br />
KLASSE 1 LASER PRODUKT<br />
LUOKAN 1 LASER LAITE<br />
KLASS 1 LASER APPARAT<br />
ATTENTION : L’utilisation de commandes, réglages ou procédures autres que ceux spécifiés dans le présent<br />
document peuvent provoquer une exposition dangereuse aux rayonnements. Le lecteur compact disque ne doit être<br />
réglé ou réparé que par une personne qualifiée.<br />
AVERTISSEMENT : Ne placez jamais d’objets enflammés, tels que des bougies allumées, sur l’appareil.<br />
Limites d’émission de classe B<br />
Cet appareil numérique de classe B est entièrement conforme à la réglementation canadienne sur les équipements<br />
pouvant causer des interférences (Canada uniquement).<br />
Veillez à vous débarrasser de vos piles usagées conformément aux réglementations locales. !<br />
Ne les incinérez pas.<br />
Informations de sécurité complémentaires<br />
Vous trouverez des instructions complémentaires dans le document intitulé Informations de sécurité importantes<br />
joint au carton d’expédition.<br />
©2005 <strong>Bose</strong> Corporation. Toute reproduction, modification, distribution ou autre utilisation, même partielle, de ce document est interdite sans autorisation écrite préalable.<br />
Dolby et le symbole du double D sont des marques de commerce de Dolby Laboratories. Fabriqué sous licence de Dolby Laboratories. Ouvrage non publié à caractère confidentiel. !<br />
1992-1997 Dolby Laboratories. Tous droits réservés.<br />
Ce produit contient un ou plusieurs programmes protégés par les lois internationales et américaines (États-Unis) de protection des droits d’auteurs en tant que produits non publiés. Ils sont<br />
confidentiels et sont la propriété de Dolby Laboratories. Leur reproduction ou divulgation, en tout ou en partie, ou la production de programmes dérivés sans l’autorisation expresse de Dolby<br />
Laboratories est interdite. Copyright 1992-1996, Dolby Laboratories, Inc. Tous droits réservés.<br />
« DTS » et « DTS Digital Surround » sont des marques déposées de Digital Theater Systems, Inc.<br />
La technologie de compression audio MPEG Layer-3 est sous licence de Fraunhofer IIS et THOMSON Multimedia.<br />
Ce produit intègre une technologie de défense des droits d’auteurs protégée par les revendications de procédés de certains brevets américains et autres droits de propriété intellectuelle détenus<br />
par Macrovision Corporation et autres titulaires de ces droits. L’utilisation de ladite technologie doit être autorisée par Macrovision Corporation. Elle est consentie pour le seul usage domestique et<br />
certains autres usages limités de visionnage, sauf autorisation contraire de Macrovision Corporation. Tout désassemblage ou démontage est interdit.<br />
Ce produit intègre une technologie de défense des droits d’auteurs et d’autres droits de propriété intellectuelle détenus par Cirrus Logic, Inc. Il est soumis aux lois de protection des droits<br />
d’auteurs des Etats-Unis ainsi qu’à d’autres restrictions et protections d’octroi de licence. L’utilisation de ladite technologie se limite uniquement à l’utilisation des circuits intégrés Cirrus Logic<br />
intégrés à ce produit. Tout désassemblage ou démontage est interdit.<br />
Les consommateurs doivent avoir conscience du fait que les téléviseurs haute définition ne sont pas tous entièrement compatibles avec ce produit, ce qui peut provoquer l’affichage de parasites<br />
dans l’image. Pour les problèmes d’image en balayage progressif sur 525 lignes, il est recommandé d’utiliser le connecteur de sortie en définition standard. Pour les questions relatives à la<br />
compatibilité des téléviseurs avec ce modèle de lecteur DVD 525p, veuillez contacter notre service clientèle.<br />
Conçu avec la technologie UEI sous licence de Universal Electronics Inc. © UEI 2000-2002.
English Español Français<br />
TABLE DES MATIÈRES<br />
INTRODUCTION<br />
COMMANDES DU SYSTÈME<br />
FONCTIONNEMENT GÉNÉRAL DU SYSTÈME<br />
CONTRÔLE DES SOURCES EXTERNES<br />
UTILISATION DU MENU SYSTÈME<br />
MODIFICATION DE LA CONFIGURATION DES SOURCES<br />
RÉFÉRENCE<br />
INTRODUCTION 5<br />
Bienvenue . . . . . . . . . . . . . . . . . . . . . . . . . . . . . . . . . . . . . . . . . . . . . . . . . . . . . . . . . . . . . . . . . . . . . . . . . . . . . . . . . . 5<br />
Notions de base . . . . . . . . . . . . . . . . . . . . . . . . . . . . . . . . . . . . . . . . . . . . . . . . . . . . . . . . . . . . . . . . . . . . . . . . . . . . . . 5<br />
Types de disques pouvant être utilisés . . . . . . . . . . . . . . . . . . . . . . . . . . . . . . . . . . . . . . . . . . . . . . . . . . . . . . . 5<br />
Vérification de la compatibilité des disques avec votre zone . . . . . . . . . . . . . . . . . . . . . . . . . . . . . . . . . . . . . . 5<br />
Terminologie audio et vidéo . . . . . . . . . . . . . . . . . . . . . . . . . . . . . . . . . . . . . . . . . . . . . . . . . . . . . . . . . . . . . . . . . . . . . 6<br />
COMMANDES DU SYSTÈME 8<br />
Boutons de la télécommande . . . . . . . . . . . . . . . . . . . . . . . . . . . . . . . . . . . . . . . . . . . . . . . . . . . . . . . . . . . . . . . . . . . 8<br />
Amélioration de la portée et de la réponse de la télécommande . . . . . . . . . . . . . . . . . . . . . . . . . . . . . . . . . . . . 11<br />
Media center . . . . . . . . . . . . . . . . . . . . . . . . . . . . . . . . . . . . . . . . . . . . . . . . . . . . . . . . . . . . . . . . . . . . . . . . . . . . . . . . 12<br />
Commandes . . . . . . . . . . . . . . . . . . . . . . . . . . . . . . . . . . . . . . . . . . . . . . . . . . . . . . . . . . . . . . . . . . . . . . . . . . . . 12<br />
Écran d’affichage . . . . . . . . . . . . . . . . . . . . . . . . . . . . . . . . . . . . . . . . . . . . . . . . . . . . . . . . . . . . . . . . . . . . . . . . 13<br />
FONCTIONNEMENT GÉNÉRAL DU SYSTÈME 14<br />
Quelques conseils de base . . . . . . . . . . . . . . . . . . . . . . . . . . . . . . . . . . . . . . . . . . . . . . . . . . . . . . . . . . . . . . . . . . . . . 14<br />
Pour mettre votre système sous tension : . . . . . . . . . . . . . . . . . . . . . . . . . . . . . . . . . . . . . . . . . . . . . . . . . . . . . 14<br />
Pour mettre en route le téléviseur ou un autre appareil externe . . . . . . . . . . . . . . . . . . . . . . . . . . . . . . . . . . . . 14<br />
Visionnage d’un DVD . . . . . . . . . . . . . . . . . . . . . . . . . . . . . . . . . . . . . . . . . . . . . . . . . . . . . . . . . . . . . . . . . . . . . 14<br />
Pour régler l’image ou le son . . . . . . . . . . . . . . . . . . . . . . . . . . . . . . . . . . . . . . . . . . . . . . . . . . . . . . . . . . . . . . . 15<br />
Connexion à d’autres sources . . . . . . . . . . . . . . . . . . . . . . . . . . . . . . . . . . . . . . . . . . . . . . . . . . . . . . . . . . . . . . . . . . . 15<br />
Lecture d’un DVD . . . . . . . . . . . . . . . . . . . . . . . . . . . . . . . . . . . . . . . . . . . . . . . . . . . . . . . . . . . . . . . . . . . . . . . . 15<br />
Utilisation du contrôle parental . . . . . . . . . . . . . . . . . . . . . . . . . . . . . . . . . . . . . . . . . . . . . . . . . . . . . . . . . . . . . 16<br />
Écoute d’un CD . . . . . . . . . . . . . . . . . . . . . . . . . . . . . . . . . . . . . . . . . . . . . . . . . . . . . . . . . . . . . . . . . . . . . . . . . 17<br />
Utilisation de la radio . . . . . . . . . . . . . . . . . . . . . . . . . . . . . . . . . . . . . . . . . . . . . . . . . . . . . . . . . . . . . . . . . . . . . 18<br />
Enregistrement, suppression et changement des stations radio présélectionnées . . . . . . . . . . . . . . . . . . . . . . 18<br />
Utilisation de la prise casque . . . . . . . . . . . . . . . . . . . . . . . . . . . . . . . . . . . . . . . . . . . . . . . . . . . . . . . . . . . . . . . 19<br />
Utilisation de la minuterie . . . . . . . . . . . . . . . . . . . . . . . . . . . . . . . . . . . . . . . . . . . . . . . . . . . . . . . . . . . . . . . . . . 19<br />
CONTRÔLE DES SOURCES EXTERNES 21<br />
Utilisation de la télécommande LIFESTYLE ! avec d’autres appareils . . . . . . . . . . . . . . . . . . . . . . . . . . . . . . . . . . . . . 21<br />
Configuration de la télécommande pour contrôler tous les appareils . . . . . . . . . . . . . . . . . . . . . . . . . . . . . . . . 21<br />
Pour contrôler le téléviseur . . . . . . . . . . . . . . . . . . . . . . . . . . . . . . . . . . . . . . . . . . . . . . . . . . . . . . . . . . . . . . . . . 21<br />
Pour contrôler le récepteur câble/satellite . . . . . . . . . . . . . . . . . . . . . . . . . . . . . . . . . . . . . . . . . . . . . . . . . . . . . 23<br />
Pour contrôler le magnétoscope ou le graveur de DVD . . . . . . . . . . . . . . . . . . . . . . . . . . . . . . . . . . . . . . . . . . . 24<br />
Pour contrôler la source AUX . . . . . . . . . . . . . . . . . . . . . . . . . . . . . . . . . . . . . . . . . . . . . . . . . . . . . . . . . . . . . . . 25<br />
Contrôle des canaux à partir d’un périphérique sur l’entrée vidéo du téléviseur . . . . . . . . . . . . . . . . . . . . . . . . 26<br />
3<br />
5<br />
8<br />
14<br />
21<br />
27<br />
36<br />
41
4<br />
Français Español<br />
English<br />
UTILISATION DU MENU SYSTÈME 27<br />
Propriétés pouvant être modifiées . . . . . . . . . . . . . . . . . . . . . . . . . . . . . . . . . . . . . . . . . . . . . . . . . . . . . . . . . . . . . . . . 27<br />
Comment afficher le menu Système . . . . . . . . . . . . . . . . . . . . . . . . . . . . . . . . . . . . . . . . . . . . . . . . . . . . . . . . . 27<br />
Comment apporter des modifications . . . . . . . . . . . . . . . . . . . . . . . . . . . . . . . . . . . . . . . . . . . . . . . . . . . . . . . . 28<br />
Options audio . . . . . . . . . . . . . . . . . . . . . . . . . . . . . . . . . . . . . . . . . . . . . . . . . . . . . . . . . . . . . . . . . . . . . . . . . . . . . . . . 28<br />
Options vidéo . . . . . . . . . . . . . . . . . . . . . . . . . . . . . . . . . . . . . . . . . . . . . . . . . . . . . . . . . . . . . . . . . . . . . . . . . . . . . . . . 30<br />
Options du media center . . . . . . . . . . . . . . . . . . . . . . . . . . . . . . . . . . . . . . . . . . . . . . . . . . . . . . . . . . . . . . . . . . . . . . . 31<br />
Options de la télécommande . . . . . . . . . . . . . . . . . . . . . . . . . . . . . . . . . . . . . . . . . . . . . . . . . . . . . . . . . . . . . . . . . . . . 32<br />
Options de verrouillage de DVD . . . . . . . . . . . . . . . . . . . . . . . . . . . . . . . . . . . . . . . . . . . . . . . . . . . . . . . . . . . . . . . . . . 34<br />
Utilisation du verrouillage pour le contrôle parental . . . . . . . . . . . . . . . . . . . . . . . . . . . . . . . . . . . . . . . . . . . . . . 35<br />
MODIFICATION DE LA CONFIGURATION DES SOURCES 36<br />
Réglages rapides pendant l’écoute ou le visionnage . . . . . . . . . . . . . . . . . . . . . . . . . . . . . . . . . . . . . . . . . . . . . . . . . 36<br />
Recherche de la liste des options . . . . . . . . . . . . . . . . . . . . . . . . . . . . . . . . . . . . . . . . . . . . . . . . . . . . . . . . . . . 36<br />
Comment modifier les réglages . . . . . . . . . . . . . . . . . . . . . . . . . . . . . . . . . . . . . . . . . . . . . . . . . . . . . . . . . . . . . 37<br />
Réglages CD . . . . . . . . . . . . . . . . . . . . . . . . . . . . . . . . . . . . . . . . . . . . . . . . . . . . . . . . . . . . . . . . . . . . . . . . . . . . . . . . 38<br />
Réglages DVD . . . . . . . . . . . . . . . . . . . . . . . . . . . . . . . . . . . . . . . . . . . . . . . . . . . . . . . . . . . . . . . . . . . . . . . . . . . . . . . 38<br />
Réglages tuner (radio FM ou AM) . . . . . . . . . . . . . . . . . . . . . . . . . . . . . . . . . . . . . . . . . . . . . . . . . . . . . . . . . . . . . . . . 39<br />
Réglages TV (pour magnétoscope, câble/satellite et Aux) . . . . . . . . . . . . . . . . . . . . . . . . . . . . . . . . . . . . . . . . . . . . . 40<br />
RÉFÉRENCE 41<br />
Entretien du système : . . . . . . . . . . . . . . . . . . . . . . . . . . . . . . . . . . . . . . . . . . . . . . . . . . . . . . . . . . . . . . . . . . . . . . . . . 41<br />
Remplacement des piles de la télécommande . . . . . . . . . . . . . . . . . . . . . . . . . . . . . . . . . . . . . . . . . . . . . . . . . 41<br />
Modification des commutateurs de la télécommande . . . . . . . . . . . . . . . . . . . . . . . . . . . . . . . . . . . . . . . . . . . . 41<br />
Configuration d’une deuxième pièce d’écoute . . . . . . . . . . . . . . . . . . . . . . . . . . . . . . . . . . . . . . . . . . . . . . . . . . . . . . 43<br />
Les produits compatibles avec le réseau <strong>Bose</strong> ® Link simplifient vos décisions . . . . . . . . . . . . . . . . . . . . . . . . 43<br />
Protection et entretien du système . . . . . . . . . . . . . . . . . . . . . . . . . . . . . . . . . . . . . . . . . . . . . . . . . . . . . . . . . . . . . . . 44<br />
Dépannage . . . . . . . . . . . . . . . . . . . . . . . . . . . . . . . . . . . . . . . . . . . . . . . . . . . . . . . . . . . . . . . . . . . . . . . . . . . . . . . . . . 45<br />
Comment contacter le service client . . . . . . . . . . . . . . . . . . . . . . . . . . . . . . . . . . . . . . . . . . . . . . . . . . . . . . . . . 47<br />
Garantie limitée . . . . . . . . . . . . . . . . . . . . . . . . . . . . . . . . . . . . . . . . . . . . . . . . . . . . . . . . . . . . . . . . . . . . . . . . . . . . . . 47<br />
Accessoires . . . . . . . . . . . . . . . . . . . . . . . . . . . . . . . . . . . . . . . . . . . . . . . . . . . . . . . . . . . . . . . . . . . . . . . . . . . . . . . . . 48<br />
Caractéristiques techniques . . . . . . . . . . . . . . . . . . . . . . . . . . . . . . . . . . . . . . . . . . . . . . . . . . . . . . . . . . . . . . . . . . . . 48
English Español Français<br />
Bienvenue<br />
Notions de base<br />
! !<br />
INTRODUCTION<br />
Nous vous remercions d’avoir acheté un système home cinéma <strong>Bose</strong> ® LIFESTYLE ® . Grâce aux<br />
technologies déposées de <strong>Bose</strong> et à la conception novatrice des systèmes LIFESTYLE ® , cet<br />
équipement, à la fois élégant et simple d’utilisation, vous permettra d’obtenir la meilleure des<br />
qualités en termes de son et d’image.<br />
Vous vous considérez peut-être comme un audiophile averti, ou tout simplement comme un<br />
amoureux de la musique. Quelle que soit votre expérience en ma matière, les explications qui<br />
suivent vous aideront peut-être à comprendre les technologies et les termes associés aux<br />
possibilités sophistiquées dont nous disposons aujourd’hui.<br />
Types de disques pouvant être utilisés<br />
Votre système a été conçu pour lire les types de disques suivants (sertains sont identifiés par<br />
le logo correspondant) :<br />
• CD audio<br />
- y compris avec signaux<br />
DTS<br />
• CD-R, CD-RW ou CD-ROM<br />
• CD MP3, dans les conditions<br />
suivantes :<br />
– Toutes les pistes doivent<br />
avoir été gravées!<br />
en une session unique et<br />
finalisée.<br />
– Utilisation du format de<br />
disque ISO 9660<br />
– Chaque fichier doit porter<br />
l’extension « .mp3 » et son<br />
nom ne doit comporter<br />
aucun autre point.<br />
– Les balises du fichier ne<br />
doivent pas être<br />
postérieures à la version ID3<br />
(ID3v2).<br />
• Contenu conforme SACD si<br />
le disque est compatible<br />
CD<br />
• CD vidéo (VCD) !<br />
• DVD-R, DVD+R, !<br />
DVD-RW, DVD+RW<br />
• DVD vidéo<br />
– y compris avec signaux<br />
DTS<br />
– y compris avec signaux<br />
Dolby Digital<br />
• Protection contre<br />
la copie<br />
La musique et les<br />
autres contenus sont<br />
protégés par les lois<br />
nationales et<br />
internationales sur<br />
les droits d’auteurs<br />
et peuvent<br />
comporter des<br />
restrictions<br />
spécifiques sur leur<br />
utilisation et/ou leur<br />
reproduction.<br />
Veuillez respecter les<br />
droits des artistes et<br />
de tous les<br />
détenteurs de droits<br />
d’auteurs.<br />
Toute difficulté durant la lecture de CD ou DVD compatibles peut provenir du débit utilisé<br />
pour l’enregistrement du disque, ou des caractéristiques optiques de l’appareil<br />
d’enregistrement.<br />
Vérification de la compatibilité des disques avec votre zone<br />
Pour qu’un disque et un lecteur DVD soient compatibles, ils doivent avoir le même code de<br />
zone. Les codes de zone sont attribués en fonction de l’endroit où le lecteur et le disque sont<br />
vendus.<br />
Vérifiez le code de zone indiqué sous le media center. Si vous ne parvenez pas à<br />
visionner un DVD, vérifiez que le code de zone indiqué sur son emballage ou son<br />
étiquette est identique à celui de votre appareil. Un DVD et un media center destinés<br />
à être utilisés en zone 1 doivent porter le symbole représenté à droite.<br />
5<br />
INTRODUCTION
INTRODUCTION<br />
INTRODUCTION<br />
Terminologie audio et vidéo<br />
6<br />
! !<br />
Français Español<br />
English<br />
B Balayage progressif - Format vidéo affichant toutes les lignes de l’image en un seul<br />
balayage du faisceau, en actualisant l’image trente fois par seconde. Cet affichage n’est<br />
pas compatible avec tous les types d’écrans.<br />
C CD vidéo - CD (Compact Disc) sur lequel a été enregistré du contenu vidéo.<br />
CD-R, CD-RW - Acronymes de Recordable (R) et ReWriteable (RW) Compact Disc (CD).<br />
Des données peuvent être gravées une seule fois sur un CD-R, et plusieurs fois sur un !<br />
CD-RW.<br />
CD-ROM - Acronyme de Read Only Memory (ROM) pour un Compact Disc (CD). Ce format<br />
ne permet pas d’ajouter des données.<br />
Chapitre - Unité principale de contenu sur un DVD.<br />
D Dolby Digital - Système de codage perceptuel utilisé pour le son, développé par Dolby<br />
Laboratories et reconnu en tant que norme internationale. Dolby Digital est le système de<br />
codage du son sur plusieurs canaux le plus répandu.<br />
- Logo du système Dolby Digital.<br />
DTS - Acronyme de Digital Theater Systems, un type de format de son Surround<br />
multicanaux utilisé sur certains CD et de nombreux DVD.<br />
- Logo du format DTS.<br />
DVD - Acronyme signifiant le plus souvent Digital Video Disc (disque vidéo numérique) ou<br />
Digital Versatile Disc (disque numérique polyvalent). Le stockage de son/images/données<br />
se fait sur des disques optiques de 12 cm.<br />
DVD vidéo - Norme permettant de stocker et de reproduire du son et des images sur des<br />
DVD-ROM, basée sur le format vidéo MPEG, le format audio Dolby Digital ainsi que sur<br />
d’autres formats de données déposés.<br />
DVD-R, DVD+R, DVD-RW, DVD+RW - Acronymes de Recordable (R) et ReWriteable (RW)<br />
DVD. Des données peuvent être gravées une seule fois sur un DVD-R ou +R, et plusieurs<br />
fois sur un DVD-RW ou +RW.<br />
DVD-ROM - Acronyme de Read Only Memory (ROM) pour un disque DVD. Ce format ne<br />
permet pas d’ajouter des données.<br />
DVR - Acronyme de Digital Video Recording. Parfois utilisé comme synonyme de PVR<br />
(Personal Video Recording).<br />
F Format élargi - Technique consistant à recadrer une image pour l’adapter à un rapport<br />
d’écran différent en recadrant certaines parties de l’image. Les lecteurs de DVD vidéo<br />
peuvent afficher automatiquement une version recadrée en 4:3 à partir d’une image en<br />
écran large, en utilisant des informations de décalage horizontal codées avec la vidéo.<br />
I IR - Abréviation du terme « infrarouge ». Signal utilisé par les télécommandes qui envoient/<br />
reçoivent des instructions à l’aide d’un rayon infrarouge.<br />
M MP3 - Son MPEG-1 Layer III. Ce format de son compressé permet d’enregistrer plusieurs<br />
heures de musique sur un seul CD.<br />
MPEG - Acronyme de Moving Picture Experts Group, le !omité d’experts des industries du<br />
son, de la vidéo et de l’informatique qui définit les standards de compression des images<br />
animées.<br />
N NTSC - Acronyme de National Television System Committee. Désignation du format vidéo<br />
standard défini par le comité de télévision et utilisé aux États-Unis et dans d’autres pays.<br />
P PAL - Acronyme de Phase Alternate Line. Format vidéo couramment utilisé en Europe<br />
occidentale.<br />
Panoramique - Format d’image présentant un rapport d’écran plus large que 4:3 et<br />
comportant des bandes noires dans la partie supérieure et la partie inférieure de l’image.
English Español Français<br />
! !<br />
INTRODUCTION<br />
PCM - Acronyme de Pulse Code Modulation. Format courant de signal audio numérique.<br />
PRISE PÉRITEL - Type de fiche courante, disponible sur les appareils audiovisuels<br />
européens.<br />
PVR - Acronyme de Personal Video Recording. Ce terme est parfois utilisé comme<br />
synonyme de DVR (Digital Video Recording), mais il peut aussi concerner des technologies<br />
analogiques, par exemple celle des magnétoscopes.<br />
R Rapport d’image - Expression indiquant le rapport entre la hauteur et la largeur de l’image<br />
affichée sur l’écran d’un téléviseur, qui peut varier du format standard (4:3) au format large<br />
(16:9). Souvent appelé « panoramique », l’affichage sur écran large nécessite l’affichage de<br />
bandeaux noirs au-dessus et en dessous de l’image sur les téléviseurs traditionnels, ce qui<br />
n’est pas le cas sur les téléviseurs à écran large.<br />
Rapport d’écran - Expression indiquant le rapport entre la hauteur et la largeur de l’image<br />
rectangulaire affichée sur l’écran d’un téléviseur. Par exemple, si l’image d’un téléviseur<br />
possède un rapport d’écran de 4:3 (4 sur 3), l’aspect de cette image est de 4 unités en<br />
largeur pour 3 unités en hauteur. Les formats 4:3 et 16:9 sont les deux rapports d’écran<br />
standard pour les téléviseurs.<br />
RDS - Système d’affichage d’informations sur l’émetteur radio et le programme diffusé.<br />
Cette fonction n’existe qu’en Europe.<br />
S SACD - Acronyme de Super Audio Compact Disc. Ce format est utilisé pour le stockage de<br />
son numérique de très haute qualité sur des disques de la taille des CD. Les nouveaux<br />
systèmes <strong>Bose</strong> ® LIFESTYLE ® lisent les parties compatibles CD de ces disques, qui sont<br />
identifiées par le logo CD sur le disque.<br />
SCMS - Système empêchant la copie numérique de seconde génération de sources audio<br />
protégées par copyright. Un enregistreur numérique équipé du système SCMS peut<br />
enregistrer une source audio en numérique, mais il est ensuite impossible d’utiliser cet<br />
enregistrement pour réaliser un enregistrement de seconde génération.<br />
Sous-titres - Texte qui apparaît en bas de l’écran pendant la lecture d’un film, et peut être<br />
dans une langue différente de celle de la bande son.<br />
S-Video - Également appelé signal Y/C. Signal vidéo dans lequel les informations de<br />
luminance (noir et blanc) sont séparées des informations de chrominance (couleur). !<br />
Le S-video offre une résolution nettement supérieure à celle de la vidéo composite, mais<br />
inférieure à celle de la vidéo en composantes. Ce format vidéo, qui nécessite l’utilisation<br />
d’un câble S-vidéo, est compatible avec de nombreux téléviseurs et appareils vidéo.<br />
T Télécommande RF - Télécommande qui transmet les commandes à un appareil en<br />
utilisant des signaux codés en fréquences radio (RF), qui ont la capacité de traverser les<br />
murs, à l’inverse des signaux infrarouges (IR) utilisés par la plupart des télécommandes.<br />
Télétexte - Service de diffusion d’informations proposé par de nombreuses chaînes de<br />
télévision, particulièrement en Europe, mais pas aux États-Unis.<br />
V Videostage ® 5 - Circuit de décodage inventé par <strong>Bose</strong>, qui permet de bénéficier du son<br />
Surround sur cinq canaux, quel que soit le support d’écoute : cassettes VHS, CD stéréo, !<br />
ou même programmes télévisés mono.<br />
Vidéo composite - Ce signal est le plus simple des trois types de signal vidéo ; au lieu de<br />
séparer les informations de luminosité ((noir et blanc) et de couleur, il les combine. Il offre la<br />
résolution la plus médiocre des trois, mais il est compatible avec la quasi-totalité des<br />
téléviseurs et des périphériques vidéo, et ne nécessite qu’une simple connexion par câble<br />
RCA.<br />
Vidéo en composantes - Également appelé YPbPr. Signal vidéo divisé en trois parties : un<br />
signal de luminance et deux signaux de chrominance, afin d’offrir une résolution nettement<br />
supérieure à celle des signaux en vidéo composite ou en S-video. Par ailleurs, ce signal<br />
plus complexe nécessite d’utiliser une prise spéciale pour les connexions en composantes,<br />
et de nombreux téléviseurs et périphériques vidéo n’en sont pas équipés.<br />
Y YPbPr - Signal vidéo analogique en composantes, contenant une composante de<br />
luminance et deux composantes de chrominance. Apparaît aussi sous la forme YUV ou Y,<br />
B-Y, R-Y.<br />
7<br />
INTRODUCTION
COMMANDES DU SYSTÈME<br />
COMMANDES DU SYSTÈME<br />
Boutons de la télécommande<br />
8<br />
! !<br />
Français Español<br />
English<br />
La télécommande à fréquences radio (RF) fournie avec cet appareil fonctionne à partir de<br />
pratiquement tout emplacement de la maison, sans qu’il soit nécessaire de la diriger vers le<br />
système.<br />
!<br />
!<br />
Activation ou désactivation du système. Sélection de la dernière source utilisée.<br />
Coupure du son de toutes les enceintes connectées (qu’elles soient situées dans la<br />
pièce principale ou dans d’autres pièces).<br />
Coupure ou rétablissement du son dans la pièce actuelle.<br />
Sélection du lecteur de disques intégré comme source. Mise en marche du<br />
système s’il était éteint.<br />
Sélection du tuner FM/AM sur la dernière station écoutée. Passage de la bande FM<br />
à la bande AM (et inversement) si le tuner radio est déjà activé. Mise en marche du<br />
système s’il était éteint.<br />
Sélection d’une source AUX connectée au media center. Mise en marche du<br />
système s’il était éteint.<br />
TV - Sélection du téléviseur connecté au media center comme source. !<br />
Mise en marche du système s’il était éteint.<br />
Input - (Entrée) Sélection des différentes entrées vidéo du téléviseur (si la<br />
télécommande a été configurée à cet effet). Sélection de l’entrée qui connecte<br />
le media center au téléviseur.<br />
On/Off - (Marche/Arrêt) Mise en marche ou arrêt du téléviseur si la<br />
télécommande a été configurée à cet effet.<br />
CBL-SAT - Sélection du récepteur câble ou satellite connecté au media center en<br />
tant que source. Mise en marche du système s’il était éteint.<br />
On/Off - (Marche/Arrêt) Mise en marche ou arrêt du récepteur câble ou satellite si la<br />
télécommande a été configurée à cet effet.<br />
VCR - (Magnétoscope) Sélection du magnétoscope connecté au media center en<br />
tant que source audio. !<br />
Mise en marche du système s’il était éteint.<br />
On/Off - (Marche/Arrêt) Mise en marche ou arrêt du magnétoscope si la<br />
télécommande a été configurée à cet effet.<br />
Remarque : Vous pouvez configurer votre télécommande LIFESTYLE ® afin de pouvoir l’utiliser<br />
pour activer et désactiver votre téléviseur, votre récepteur câble/satellite ou votre magnétoscope.<br />
Pour plus d’informations, reportez-vous à la section « Utilisation de la télécommande LIFESTYLE !<br />
avec d’autres appareils » page 21.
English Español Français<br />
a<br />
b<br />
! !<br />
COMMANDES DU SYSTÈME<br />
Deux symboles peuvent apparaître au-dessus de la touche Library<br />
(Catalogue) de la télécommande. Selon le symbole (a ou b, à gauche)<br />
affiché :<br />
Lorsqu’une source vidéo est sélectionnée, cette commande change le<br />
format d’image : 4:3 (standard) ou 16:9 (panoramique). Le téléviseur doit<br />
comporter cette possibilité, et votre télécommande doit avoir été<br />
configurée pour contrôler le téléviseur.<br />
ou<br />
Lorsque le téléviseur a été sélectionné comme source, cette commande<br />
permet d’activer le mode Télétexte. Celui-ci fonctionne en conjonction<br />
avec les touches FastText colorées sur la télécommande.<br />
Remarque : Pour toutes instructions sur la façon d’intervertir cette fonctionnalité<br />
de votre télécommande entre le changement de rapport d’image et le télétexte (et<br />
réciproquement), consultez la section « Options de la télécommande » page 32.<br />
Permet d’afficher ou de fermer le menu Configuration de la source active.!<br />
! Permet d’afficher ou de fermer le menu Système.<br />
Permet d’afficher ou de fermer le menu du DVD actuellement chargé.<br />
Activation du menu principal de votre récepteur câble/satellite,<br />
magnétoscope ou enregistreur numérique, si la télécommande est<br />
configurée à cet effet.<br />
! Affichage d’un Guide électronique des programmes (si votre téléviseur,<br />
votre récepteur câble/satellite ou votre enregistreur offre cette<br />
fonctionnalité et si la télécommande a été configurée pour contrôler ces<br />
composants).<br />
! Permet de fermer les menus Système et Configuration.<br />
Fermeture des menus affichés à l’écran (si la télécommande a été<br />
configurée pour contrôler votre téléviseur, votre récepteur câble/satellite<br />
ou votre enregistreur).<br />
Sélection de la fréquence radio suivante ou précédente sur la bande FM<br />
ou AM.<br />
Sélection de l’élément suivant ou précédent dans un menu.<br />
Modification du réglage d’un élément de menu.<br />
Déplacement du curseur vers le haut, le bas, la gauche ou la droite dans<br />
un menu ou à l’écran.<br />
9<br />
COMMANDES DU SYSTÈME
COMMANDES DU SYSTÈME<br />
COMMANDES DU SYSTÈME<br />
10<br />
! !<br />
Français Español<br />
English<br />
Parcours en avant ou en arrière des pistes d’un CD, des chapitres d’un<br />
DVD, des stations de radio préréglées ou des chaînes de télévision.<br />
Augmentation ou diminution du volume de la source active. !<br />
Une pression sur la touche + augmente le volume (et rétablit le son de la<br />
source en cours de lecture s’il était coupé) dans la pièce actuelle<br />
uniquement. !<br />
Une pression sur la touche - réduit le volume.<br />
! Arrêt de la lecture de la musique (à l’exception de la réception FM/AM) ou<br />
de la vidéo.<br />
Sur les DVD et CD vidéo uniquement, le système mémorise le point où la<br />
musique a été interrompue. Une nouvelle pression sur cette touche annule<br />
cette mise en mémoire.<br />
Mise en pause de la musique (à l’exception de la réception FM/AM) ou de<br />
la vidéo.<br />
Démarrage de la musique (à l’exception de la réception FM/AM) ou de la<br />
vidéo.<br />
Déplacement vers l’avant ou vers l’arrière dans la vidéo. Une barre de<br />
contrôle s’affiche pour permettre de modifier la vitesse de ce<br />
déplacement.<br />
Parcours vers l’avant ou l’arrière des stations de radio ou des pistes de<br />
CD.<br />
Si ces touches sont maintenues enfoncées, elles permettent de passer en<br />
mode avance ou retour rapide pour le CD ou le CD MP3 en cours de<br />
lecture.<br />
Lecture aléatoire de la musique à partir d’un CD. Un nouvel appui sur cette<br />
touche annule ce type de lecture.<br />
Recul de quelques secondes du DVR (ou de tout autre enregistreur<br />
numérique) si la télécommande LIFESTYLE ® a été configurée à cet effet.<br />
Répétition de la sélection musicale actuelle à partir d’un CD. Un nouvel<br />
appui sur cette touche annule ce type de lecture.<br />
Avancement de quelques secondes du DVR (ou de tout autre enregistreur<br />
numérique) si la télécommande LIFESTYLE ® a été configurée à cet effet.<br />
Permet de composer le numéro correspondant à un chapitre de DVD, à<br />
une piste de CD, à une station de radio préréglée ou à une chaîne de<br />
télévision.<br />
Activation du dernier canal sélectionné (si la télécommande a été<br />
configurée pour contrôler votre téléviseur, votre récepteur câble/satellite<br />
ou votre enregistreur).<br />
Affichage ou fermeture des menus affichés à l’écran (si la télécommande a<br />
été configurée pour contrôler votre téléviseur, votre récepteur câble/<br />
satellite ou votre enregistreur).<br />
Pendant la lecture d’un enregistrement MP3, affichage ou suppression<br />
des informations sur la piste, sur l’afficheur du media center.<br />
Parcours vers l’avant (flèche vers le bas) ou l’arrière (flèche vers le haut)<br />
des menus et guides de certains récepteurs câble/satellite.
English Español Français<br />
! !<br />
COMMANDES DU SYSTÈME<br />
a. Si la touche figure sur la télécommande, les quatre touches de la zone inférieure ont<br />
l’effet suivant :<br />
Si la source est un magnétoscope (ou un composant connecté à la prise AUX, si ce<br />
composant est de type enregistreur), activation de la fonction d’enregistrement.<br />
Cette fonction n’est pas disponible si la télécommande a été configurée pour<br />
contrôler le télétexte.<br />
Si la source est de type Câble, sélection de A dans la liste d’options.!<br />
Si la source est de type Câble, sélection de B dans la liste d’options.!<br />
Si la source est de type Câble, sélection de C dans la liste d’options.!<br />
b. Si la touche figure sur la télécommande, les quatre touches de la zone inférieure ont<br />
l’effet suivant :<br />
En mode Télétexte, sélection du contenu identifié en rouge.!<br />
En mode Télétexte, sélection du contenu identifié en vert.!<br />
*<br />
En mode Télétexte, sélection du contenu identifié en jaune.!<br />
En mode Télétexte, sélection du contenu identifié en bleu.<br />
Remarque : Pour faire passer la télécommande de la fonctionnalité a. à la fonctionnalité b.<br />
(décrites ci-dessus), consultez la section « Options de la télécommande » page 32, option<br />
« Choix d’une version de fonctionnement ».<br />
Amélioration de la portée et de la réponse de la télécommande<br />
Le cordon d’alimentation du media center contient l’antenne de réception des signaux de la<br />
télécommande. Pour préserver la portée de cette dernière, il est TRÈS important de dérouler<br />
entièrement ce cordon et de l’éloigner des autres câbles. A$'!B"!$5*%("($,%'*/('+!"#C*'"0'/,!3'<br />
4$*%'+!0/'4"/'=0*'!*'5*6$"'#*%(*.3'!*'#,.6,%'6B"!$5*%("($,%'*/(',.$*%(C'D'!"'7*.($#"!*3'#*'=0$'*/('<br />
/"'+,/$($,%',+($5"!*8<br />
Remarque : Par ailleurs, si vous utilisez un téléviseur à écran plasma, vous améliorerez la portée<br />
de la télécommande en éloignant le plus possible l’alimentation du media center du téléviseur.<br />
Si le système ne réagit pas quand vous appuyez sur les touches de la télécommande, il est<br />
peut-être nécessaire d’en remplacer les piles. Pour toutes informations sur les types de piles<br />
à utiliser et la fréquence à laquelle les changer, reportez-vous à la section « Remplacement<br />
des piles de la télécommande » page 41.<br />
Dans certains bâtiments, vous risquez de rencontrer des « angles morts » où la<br />
télécommande ne fonctionnera pas correctement. Si cela se produit, déplacez la<br />
télécommande de quelques dizaines de centimètres et recommencez. Veillez également à ce<br />
que le cordon d’alimentation du media center (qui contient l’antenne de réception des<br />
signaux de la télécommande) soit intégralement déroulé et ne soit pas en contact avec<br />
d’autres cordons d’alimentation. Si ces solutions ne suffisent pas à régler le problème,<br />
déplacez le media center de quelques dizaines de centimètres jusqu’à un emplacement où il<br />
réagit mieux.<br />
Si les piles sont en bon état et si tous vos efforts pour éviter les angles morts échouent, il<br />
peut être nécessaire d’utiliser un prolongateur d’antenne. Pour plus d’informations, ou pour<br />
contacter <strong>Bose</strong> afin de vous procurer un prolongateur d’antenne, reportez-vous à la liste<br />
d’adresses fournie avec le système.<br />
11<br />
COMMANDES DU SYSTÈME
COMMANDES DU SYSTÈME<br />
COMMANDES DU SYSTÈME<br />
Media center<br />
Figure 1<br />
Vue avant du media center<br />
12<br />
On/Off Source Volume<br />
All Off<br />
Open/Close<br />
Enter<br />
Erase Store<br />
! !<br />
Français Español<br />
English<br />
Le tiroir disque et les commandes du système sont situés sous le capot de la face avant du<br />
media center. L’écran d’affichage est situé à droite des commandes (Figure 1).<br />
ATTENTION : La meilleure façon d’ouvrir et fermer le tiroir disque consiste à appuyer sur la<br />
touche Open/Close du media center. Veillez à NE PAS appuyer sur le tiroir pour le fermer ou<br />
interrompre son ouverture. Vous risqueriez de provoquer un blocage ou un dysfonctionnement.<br />
Un émetteur infrarouge, situé sous le tiroir du lecteur CD/DVD, permet de contrôler d’autres<br />
appareils à l’aide de la télécommande LIFESTYLE ® . Évitez de masquer cet émetteur pour que<br />
ses signaux puissent atteindre les autres appareils ou les surfaces réfléchissantes de la<br />
pièce.<br />
Capot de la face avant - soulever pour ouvrir Tiroir disque Commandes<br />
Commandes<br />
Écran d’affichage<br />
Prise casque<br />
®<br />
Émetteur infrarouge<br />
Quatre boutons du media center offrent des fonctions identiques à des touches de la<br />
télécommande. Les cinq autres boutons n’ont pas d’équivalent sur la télécommande.<br />
On/Off<br />
All Off<br />
Source<br />
Enter<br />
Erase<br />
Volume<br />
Store<br />
Mise en marche ou arrêt du système dans la pièce principale uniquement. !<br />
La dernière source utilisée est automatiquement sélectionnée lors de la mise en<br />
marche du système.<br />
!<br />
Permet de désactiver le système et toutes les enceintes connectées (dans toutes<br />
les pièces).<br />
!<br />
Permet d’ouvrir et de fermer le tiroir disque.<br />
!<br />
Sélectionne la station FM/AM préréglée suivante.<br />
Début de la lecture du DVD si cette option a été sélectionnée dans les options de<br />
menu de DVD qui apparaissent sur l’écran du téléviseur.<br />
Utilisé conjointement avec le bouton Store, ce bouton permet de parcourir les<br />
paramètres système sur l’écran du media center.<br />
Permet de supprimer un préréglage de station de radio.<br />
Augmentation du volume du système et rétablissement du son des enceintes<br />
lorsque le son est coupé.<br />
Diminution du volume sans rétablir le son de la source.<br />
Lorsque le système est désactivé, cette touche permet de rétablir le code interne<br />
de la télécommande.<br />
Utilisée conjointement avec la touche Enter, cette touche permet de parcourir les<br />
paramètres système sur l’écran du media center.
English Español Français<br />
Figure 2<br />
Exemple d’informations<br />
affichées à l’écran du media<br />
center<br />
Figure 3<br />
Indicateur de minuterie pour<br />
le réglage de l’arrêt<br />
automatique du système<br />
! !<br />
COMMANDES DU SYSTÈME<br />
Écran d’affichage<br />
L’écran d’affichage du media center indique l’état du système, notamment la source<br />
sélectionnée, des informations sur le programme actif et les éventuelles options<br />
sélectionnées (Figure 2).<br />
CD 0 : 2 2 !<br />
PISTE 6 / 1 0<br />
!<br />
Il arrive que les messages ou les éléments du menu Configuration défilent à l’écran lorsque<br />
les deux lignes disponibles ne suffisent pas à contenir l’intégralité du message.<br />
Témoins lumineux<br />
Sleep<br />
(Minuterie arrêt)<br />
Indique l’heure à laquelle le système est paramétré pour s’arrêter.<br />
Paramètres Confirme la sélection du menu Configuration de la source.<br />
Aléatoire Indique que les pistes d’un CD sont lues en ordre aléatoire.<br />
Répétition Indique que la lecture de la piste en cours est en mode Répétition.<br />
Disque Confirme qu’une action sélectionnée est appliquée aux pistes d’un disque.<br />
Piste Confirme qu’une action sélectionnée est appliquée à une seule piste.<br />
S’allume brièvement à la réception d’un signal de la télécommande.<br />
C A N A L C E N T R A L : + 4<br />
S L E E P T I M E R : O N<br />
Sleep (Minuterie arrêt)<br />
Configuration des composants du système à l’aide de l’afficheur<br />
L’afficheur du media center permet également d’accéder à la configuration système, afin<br />
d’activer la connexion vidéo en composantes et le balayage progressif.<br />
Remarque : Vous trouverez des instructions détaillées sur l’activation de ces fonctions de votre<br />
système LIFESTYLE ® dans son Guide d’installation.<br />
Lorsque cette activation a été effectuée, les résultats corrects s’affichent sous réserve que :<br />
• Votre téléviseur prenne cette fonction en charge et soit configuré en conséquence, suivant<br />
les instructions du mode d’emploi<br />
• Votre téléviseur et le media center soient connectés correctement, à l’aide de l’adaptateur<br />
pour vidéo en composantes fourni.<br />
13<br />
COMMANDES DU SYSTÈME
FONCTIONNEMENT GÉNÉRAL DU SYSTÈME<br />
FONCTIONNEMENT GÉNÉRAL DU SYSTÈME<br />
Quelques conseils de base<br />
14<br />
! !<br />
Français Español<br />
English<br />
Les quelques conseils suivants faciliteront votre prise en main du système.<br />
Remarque : Pour toutes informations sur la manière de configurer votre télécommande pour<br />
contrôler d’autres appareils, reportez-vous à la section « Utilisation de la télécommande<br />
LIFESTYLE ! avec d’autres appareils » page 21.<br />
Pour mettre votre système sous tension :<br />
• Appuyez sur la touche On/Off de la télécommande.<br />
• Ou appuyez sur le bouton On/Off du media center.<br />
• Ou appuyez sur la touche CD/DVD, FM/AM, TV, CBL/SAT ou AUX de la télécommande.<br />
Cette action permet d’activer le système et de sélectionner en même temps la source<br />
souhaitée.<br />
Pour utiliser votre système avec votre téléviseur et d’autres appareils, lisez bien les rappels<br />
ci-dessous. Ils vous aideront à utiliser tous vos appareils sans problème.<br />
Pour mettre en route le téléviseur ou un autre appareil externe<br />
1. Allumez le système.<br />
2. Appuyez sur la touche de la télécommande correspondant à la source à écouter.<br />
3. Allumez la source si nécessaire<br />
Pour contrôler toutes ces fonctions, vous pouvez utiliser la télécommande LIFESTYLE ® après<br />
l’avoir configurée pour qu’elle fonctionne avec votre téléviseur et d’autres appareils.<br />
Visionnage d’un DVD<br />
L’activation de votre installation peut nécessiter certains réglages, comme indiqué !<br />
ci-dessous.<br />
• Contrôle de l’image affichée sur l’écran du téléviseur :<br />
! Veillez à sélectionner sur le téléviseur l’entrée vidéo appropriée (correspondant à<br />
l’entrée vidéo à laquelle est connecté le media center à l’arrière du téléviseur). !<br />
Utilisez la touche Input de la télécommande LIFESTYLE ® (juste sous la touche TV ).<br />
Si votre téléviseur gère la vidéo en composantes ou l’affichage progressif<br />
Les conseils ci-dessous ne s’appliquent que si vous avez établi une connexion en<br />
composantes entre le media center et votre téléviseur.<br />
• Utilisation de l’option de connexion de type vidéo composante :<br />
! Si vous utilisez une connexion de type vidéo en composantes entre le téléviseur et le<br />
media center, veillez à effectuer la sélection correspondante sur l’écran du media<br />
center (voir la remarque ci-dessous). Sinon, vous risquez de ne rien voir apparaître à<br />
l’écran lorsque vous sélectionnez la source DVD.<br />
• Utilisation de la fonction de balayage progressif sur votre téléviseur :<br />
! Veillez à utiliser une connexion de type vidéo composante entre le téléviseur et le media<br />
center.<br />
! Sélectionnez l’option Progressif sur l’écran du media center (voir la remarque cidessous).<br />
Sinon, vous risquez de ne rien voir apparaître à l’écran lorsque vous<br />
sélectionnez la source DVD.<br />
! Si d’autres appareils vidéo sont connectés au media center, assurez-vous qu’ils sont<br />
branchés à l’aide d’un adaptateur vidéo composante.<br />
Remarque : Pour toutes informations sur la sélection de l’entrée Vidéo en composantes sur le<br />
media center (cette connexion est nécessaire pour afficher une image en balayage progressif sur<br />
un téléviseur), reportez-vous à la section « Quelques propositions de connexions de meilleure<br />
qualité » dans votre Guide d’installation.
English Español Français<br />
Connexion à d’autres sources<br />
! !<br />
FONCTIONNEMENT GÉNÉRAL DU SYSTÈME<br />
Pour régler l’image ou le son<br />
• Pour corriger un problème de son (effet de graves ou d’aiguës trop forts, dureté,<br />
réverbération, etc.) prenez le temps d’exécuter le programme de calibrage audio<br />
ADAPTiQ ® , si ce n’est déjà fait.<br />
Remarque : Reportez-vous à la section « Pour obtenir le meilleur son possible » dans le Guide<br />
d’installation.<br />
• Pour effectuer des modifications permanentes du fonctionnement du système (audio,<br />
vidéo, media center, télécommande ou verrouillage de DVD), utilisez les menus Système.<br />
Pour plus d’informations sur les modifications possibles, reportez-vous à la section<br />
« Propriétés pouvant être modifiées » page 27.<br />
• Pour effectuer des modifications provisoires de la source en cours de lecture (par exemple<br />
le nombre d’enceintes activées ou le réglage de la minuterie d’arrêt), utilisez les menus<br />
Paramètres. Pour plus d’informations sur les modifications possibles, reportez-vous à la<br />
section « Réglages rapides pendant l’écoute ou le visionnage » page 36.<br />
Sauf indication contraire, les instructions sur la sélection et l’écoute des autres sources<br />
correspondent aux touches de la télécommande LIFESTYLE ® .<br />
Vous pouvez configurer la télécommande de votre LIFESTYLE ® pour contrôler d’autres<br />
appareils connectés au media center.<br />
Remarque : Pour toutes informations sur la manière de configurer votre télécommande pour<br />
contrôler d’autres appareils, reportez-vous à la section « Utilisation de la télécommande<br />
LIFESTYLE ! avec d’autres appareils » page 21.<br />
Lecture d’un DVD<br />
1. Mettez votre téléviseur sous tension.<br />
2. Appuyez sur CD/DVD pour sélectionner le lecteur de DVD. Si le système est éteint,<br />
cette opération permet également de l’activer.<br />
3. Sur le media center, appuyez sur la touche Open/Close pour ouvrir le tiroir disque.<br />
4. Insérez un DVD dans le tiroir (étiquette dirigée vers le haut). Assurez-vous que le DVD<br />
est propre. Si ce n’est pas le cas, reportez-vous à la section « Protection et entretien du<br />
système » page 44.<br />
5. Sur le media center, appuyez sur la touche Open/Close pour fermer le tiroir disque.<br />
6. Appuyez sur la touche Play pour commencer la lecture du DVD.<br />
Il peut être nécessaire d’appuyer plusieurs fois sur la touche Play. Avec la plupart des DVD,<br />
l’option de lecture du film principal figure en général parmi plusieurs autres options.<br />
Remarque : Les DVD ne présentent pas tous les mêmes caractéristiques. Par exemple, il n’est<br />
possible d’afficher les sous-titres que si le DVD en comporte.<br />
Options de la télécommande<br />
Pour : Appuyez sur la touche :<br />
Mettre un DVD sur pause… .<br />
Reprendre la lecture… à nouveau, ou sur .<br />
15<br />
FONCTIONNEMENT GÉNÉRAL DU SYSTÈME
FONCTIONNEMENT GÉNÉRAL DU SYSTÈME<br />
FONCTIONNEMENT GÉNÉRAL DU SYSTÈME<br />
16<br />
! !<br />
Français Español<br />
English<br />
Arrêter un DVD… .<br />
Appuyez ensuite sur pour reprendre la lecture à l’endroit<br />
où vous l’avez interrompue.<br />
Vous pouvez également appuyer deux fois sur pour<br />
arrêter et réinitialiser le CD.<br />
Appuyez ensuite sur pour reprendre la lecture du DVD au<br />
début.<br />
Passer au chapitre suivant… vers le haut.!<br />
Revenir au chapitre précédent… 2 fois vers le bas. !<br />
!<br />
Répéter un chapitre… pendant la lecture du chapitre à répéter.<br />
Effectuer une recherche en avant<br />
ou en arrière…<br />
Sélectionner une autre option<br />
disponible sur le DVD…<br />
Pour répéter une séquence du DVD en cours de lecture<br />
Pour visionner à plusieurs reprises une séquence du DVD, choisissez l’option de<br />
répétition AB dans le menu de paramétrage du téléviseur, en procédant comme suit :<br />
1. Appuyez sur la touche Setting et faites défiler la liste des options jusqu’à ce que<br />
l’icône AB soit sélectionnée.<br />
2. Appuyez sur la touche Enter pour activer cette sélection. Les lettres "#$ apparaissent<br />
dans un cadre à droite de la liste des menus.<br />
3. Appuyez sur la touche Enter au point à partir duquel la séquence à sélectionner débute<br />
ou se termine. Le symbole " devient % pour confirmer cette action.<br />
4. Faites défiler le film vers l’avant ou vers l’arrière pour atteindre l’autre point qui définit la<br />
séquence.<br />
5. Appuyez sur Enter. Le symbole $ devient & pour confirmer que vous avez défini une<br />
séquence. La lecture à répétition de cette séquence débute alors.<br />
La répétition se poursuit jusqu’à ce que vous appuyiez sur la touche Exit ou Stop.<br />
Remarque : Pour toutes informations sur les réglages rapides disponibles au niveau des<br />
paramètres de DVD, reportez-vous à la section « Réglages DVD » page 38. Pour toutes<br />
instructions sur la manière d’effectuer ces modifications dans le menu, reportez-vous à la section<br />
« Recherche de la liste des options » page 36.<br />
Utilisation du contrôle parental<br />
pour faire apparaître la barre de contrôle de la<br />
vitesse. Appuyez sur cette touche une nouvelle fois pour<br />
modifier la vitesse et la direction de la recherche.<br />
pour voir le menu affiché au début du DVD. Utilisez les<br />
touches fléchées pour activer l’élément de menu désiré, puis<br />
appuyez sur la touche Enter pour le sélectionner.<br />
La fonction de contrôle parental du système LIFESTYLE ® permet d’interdire le visionnage de<br />
certains DVD, en fonction de leur classification, à des membres précis de votre famille.<br />
Avant de pouvoir utiliser cette fonction, vous devez choisir un mot de passe et un niveau de<br />
restriction (correspondant aux niveaux de classification des films) dans le menu Système.<br />
Pour en savoir plus sur le contrôle parental, reportez-vous à la section « Options de<br />
verrouillage de DVD » page 34.<br />
Remarque : En cas de problème avec un mot de passe, reportez-vous à la section<br />
« Dépannage » page 45.
English Español Français<br />
! !<br />
FONCTIONNEMENT GÉNÉRAL DU SYSTÈME<br />
Écoute d’un CD<br />
Appuyez sur CD/DVD pour sélectionner le lecteur de DVD. Si le système est éteint, cette<br />
action le mettra en route et la lecture du CD inséré dans le tiroir débutera immédiatement.<br />
Pour charger un disque :<br />
1. Sur le media center, appuyez sur la touche Open/Close pour ouvrir le tiroir disque.<br />
2. Insérez le CD audio dans le tiroir.<br />
3. Sur le media center, appuyez sur la touche Open/Close pour fermer le tiroir disque. !<br />
La lecture commence automatiquement.<br />
Options de la télécommande<br />
Pour : Appuyez sur la touche :<br />
Mettre un CD sur pause… .<br />
Reprendre la lecture d’un CD en<br />
pause…<br />
ou .<br />
Arrêter un CD… .<br />
Appuyez ensuite sur pour reprendre la lecture du CD<br />
au début.<br />
Effacer les informations sur la piste<br />
défilant en continu (pour un CD MP3)<br />
sur l’écran du media center...<br />
Passer à la piste suivante… vers le haut.<br />
et maintenez cette touche enfoncée jusqu’à ce que<br />
l’affichage change.<br />
Répétez cette opération pour reprendre l’affichage du<br />
texte défilant.<br />
Passer au début de la piste actuelle... vers le bas !<br />
(alors que la lecture de la plage a commencé<br />
depuis plusieurs secondes.<br />
!<br />
Revenir à une piste précédente… vers le bas :<br />
• une seule fois si le CD est arrêté,<br />
• deux fois si la lecture est en cours.<br />
Sauter la piste en cours... .<br />
Parcourir un CD vers l’avant ou<br />
vers l’arrière…<br />
Lire les pistes d’un CD de façon<br />
aléatoire…<br />
Annuler la lecture aléatoire… à nouveau.<br />
Répéter une piste… .<br />
Répéter un CD… à nouveau.<br />
et maintenir la touche enfoncée.<br />
Sur les CD MP3 uniquement, ces touches permettent<br />
d’accéder au début d’une piste.<br />
Annuler la répétition... une troisième fois.<br />
.<br />
Remarque : Pour toutes informations sur les réglages rapides disponibles au niveau des<br />
paramètres de CD, reportez-vous à la section « Réglages tuner (radio FM ou AM) » page 39.<br />
Pour toutes instructions sur la manière d’effectuer ces modifications dans le menu, reportez-vous<br />
à la section « Recherche de la liste des options » page 36.<br />
17<br />
FONCTIONNEMENT GÉNÉRAL DU SYSTÈME
FONCTIONNEMENT GÉNÉRAL DU SYSTÈME<br />
FONCTIONNEMENT GÉNÉRAL DU SYSTÈME<br />
18<br />
! !<br />
Français Español<br />
English<br />
Utilisation de la radio<br />
Appuyez sur la touche FM/AM de la télécommande pour sélectionner le tuner. Cette opération<br />
active le système le cas échéant, et sélectionne comme source la dernière station FM ou AM<br />
écoutée.<br />
Changement de station<br />
Pour : Appuyez sur la touche :<br />
Passer de la bande FM à la<br />
bande AM et inversement…<br />
Rechercher la station « stable »<br />
suivante…<br />
Régler manuellement une station…<br />
Sélectionner une station<br />
préréglée…<br />
.<br />
.!<br />
.<br />
ou composez le numéro !<br />
de préréglage à l’aide des touches .<br />
Remarque : Pour toutes informations sur les réglages rapides possibles au niveau du tuner<br />
radio, reportez-vous à la section « Réglages CD » page 38. Pour toutes instructions sur la<br />
manière d’effectuer ces modifications dans le menu, reportez-vous à la section « Recherche de la<br />
liste des options » page 36.<br />
Enregistrement, suppression et changement des stations radio<br />
présélectionnées<br />
Il est possible de prérégler jusqu’à 20 stations AM et 20 stations FM. Vous pouvez ainsi<br />
sélectionner rapidement vos stations favorites. Il existe deux façons de définir ces<br />
préréglages.<br />
Pour enregistrer un préréglage, utilisez la méthode A ou B ci-dessous :<br />
A. Pour affecter le numéro de préréglage suivant à une station, utilisez le panneau de<br />
commande du media center et répétez les deux étapes ci-dessous pour chaque station :<br />
1. Sélectionnez votre station favorite.<br />
2. Appuyez sur la touche Enter du panneau de commande du media center.<br />
B. Pour affecter une station à un numéro spécifique, utilisez la télécommande LIFESTYLE ® et<br />
suivez les étapes ci-dessous :<br />
1. Sélectionnez votre station favorite.<br />
2. Pour attribuer un numéro de préréglage à cette station, appuyez sur une touche<br />
numérique et maintenez-la enfoncée.<br />
• Pour les nombres de 1 à 9, appuyez sur un seul chiffre et maintenez la touche enfoncée<br />
jusqu’à ce que l’écran affiche PRÉRÉGLAGE:XX DÉFINI.<br />
• Pour les nombres de 10 à 20, appuyez sur le premier chiffre, puis appuyez sur la touche<br />
correspondant au second chiffre et maintenez-la enfoncée jusqu’à ce que l’écran<br />
affiche PRÉRÉGLAGE:XX DÉFINI.<br />
Remarque : L’affectation d’un numéro de préréglage à une station remplace automatiquement<br />
toute affectation précédente de ce numéro.
English Español Français<br />
Figure 4<br />
Emplacement du<br />
connecteur de casque sur<br />
le media center<br />
! !<br />
FONCTIONNEMENT GÉNÉRAL DU SYSTÈME<br />
Pour supprimer un préréglage de station<br />
1. Composez le numéro de préréglage à supprimer.<br />
2. Sur la télécommande, appuyez sur la touche 0 et maintenez-la enfoncée jusqu’à ce que<br />
le message PRÉRÉGLAGE:XX EFFAC apparaisse brièvement à l’écran du media center.<br />
Le préréglage est alors supprimé.<br />
Pour attribuer un préréglage à une autre station<br />
1. Sélectionnez votre station favorite.<br />
2. Sur la télécommande, composez le numéro de préréglage et maintenez la dernière<br />
touche enfoncée. Ce numéro est alors attribué à la nouvelle station.<br />
Utilisation de la prise casque<br />
Pour écouter de la musique discrètement, vous pouvez connecter un casque à la prise située<br />
sur le côté droit du media center (Figure 4).<br />
Vue avant<br />
Diverses vues du media center<br />
Côté<br />
droit<br />
®<br />
Avant<br />
Prise casque<br />
Côté droit<br />
Remarque : Le branchement d’un casque coupe automatiquement le son de toutes les<br />
enceintes de la pièce principale.<br />
Utilisation de la minuterie<br />
Vous pouvez régler la minuterie pour désactiver automatiquement le système LIFESTYLE ® au<br />
terme d’une durée (comprise entre 10 et 90 minutes) que vous déterminez. Il est possible<br />
d’effectuer ce réglage dans le menu Configuration, quelle que soit la source sélectionnée.<br />
Remarque : Pour plus d’informations sur le menu Configuration, reportez-vous à la section<br />
« Réglages rapides pendant l’écoute ou le visionnage » page 36.<br />
Naviguez et effectuez des<br />
modifications à l’aide des touches de<br />
sélection dans le menu Configuration<br />
affiché à l’écran du media center ou à<br />
l’écran du téléviseur.<br />
19<br />
FONCTIONNEMENT GÉNÉRAL DU SYSTÈME
FONCTIONNEMENT GÉNÉRAL DU SYSTÈME<br />
FONCTIONNEMENT GÉNÉRAL DU SYSTÈME<br />
Figure 5<br />
Symbole Minuterie sommeil<br />
du menu Configuration de<br />
la source<br />
20<br />
! !<br />
Français Español<br />
English<br />
Pour régler la minuterie :<br />
Que vous utilisiez l’écran du media center ou celui du téléviseur, la procédure est la même :<br />
1. Appuyez sur la touche Settings de la télécommande LIFESTYLE ® pour afficher le menu<br />
Configuration de la source.<br />
2. Déplacez le curseur vers le bas jusqu’au symbole Minuterie sommeil, la dernière<br />
fonction du menu (Figure 5). Si une flèche continue apparaît en bas du menu, placez-y<br />
le curseur afin d’afficher les autres éléments actuellement masqués.<br />
3. Déplacez le curseur vers la droite pour afficher la liste d’options, puis déplacez-le vers<br />
le haut jusqu’au délai souhaité (de 10 à 90 minutes).<br />
Remarque : Si vous appuyez sur la flèche dirigée vers le haut après avoir atteint la durée de<br />
90 minutes, vous désactivez la minuterie.<br />
4. Appuyez sur la touche Enter pour confirmer votre sélection.<br />
5. Appuyez sur la touche Exit ou Settings de la télécommande LIFESTYLE ® pour quitter<br />
le menu.<br />
Une fois le délai défini écoulé, le système, le téléviseur (s’il est activé*) et la minuterie se<br />
désactivent automatiquement.<br />
*Pour que le téléviseur puisse se désactiver automatiquement, le système doit pouvoir<br />
détecter qu’il est activé. Pour ce faire, vous devez utiliser le capteur TV fourni. Pour toutes<br />
informations sur l’installation et la vérification du bon fonctionnement du capteur TV,<br />
reportez-vous au Guide d’installation.
English Español Français<br />
CONTRÔLE DES SOURCES EXTERNES<br />
Utilisation de la télécommande LIFESTYLE ! avec d’autres appareils<br />
La télécommande LIFESTYLE ® permet de contrôler la plupart des marques d’appareils<br />
externes (téléviseurs, magnétoscopes et récepteurs câble/satellite). Après avoir effectué les<br />
sélections de menu appropriées pour chaque composant à contrôler, vous pourrez utiliser la<br />
télécommande LIFESTYLE ® comme télécommande universelle pour la plupart des<br />
commandes de vos composants.<br />
Configuration de la télécommande pour contrôler tous les appareils<br />
Votre système LIFESTYLE ® comprend un émetteur infrarouge (IR) qui envoie, depuis la<br />
façade du media center, des signaux à tous les appareils que votre télécommande<br />
LIFESTYLE ® est configurée pour contrôler. Vous pouvez ainsi activer ces sources (dans la<br />
mesure où elles se trouvent dans la même pièce que le media center) et y effectuer des<br />
sélections de base. Les autres composants peuvent être connectés soit au media center, !<br />
soit au téléviseur.<br />
Plusieurs essais peuvent être nécessaires<br />
Certains fabricants utilisent des codes semblables pour leurs appareils. Après sélection d’un<br />
code, votre télécommande peut allumer ou éteindre le téléviseur, le récepteur câble ou<br />
satellite ou le magnétoscope. Toutefois, si vous ne parvenez pas à changer de canal ou à<br />
déclencher d’autres fonctions à l’aide de la télécommande, il peut être nécessaire de<br />
continuer à tester les codes de cet appareil jusqu’à ce que vous en trouviez un plus efficace.<br />
Après avoir essayé plusieurs codes, si le composant ne répond toujours pas modifiez<br />
légèrement sa position par rapport au media center, afin d’améliorer sa réception du signal<br />
provenant de ce dernier.<br />
Remarque : Les signaux infrarouge doivent atteindre chaque composant pour que le test des<br />
réglages infrarouge soit fiable. Pour faciliter cette opération, vous pouvez vous servir du câble<br />
pour émetteur IR fourni, en le positionnant devant chaque composant pendant que vous utilisez<br />
la télécommande LIFESTYLE ® pour l’allumer et l’éteindre. Si vous n’avez pas encore installé<br />
l’émetteur, consultez la section « L’option Câble émetteur IR » dans votre Guide d’installation.<br />
Pour contrôler le téléviseur<br />
Remarque : Pour toutes instructions générales sur l’utilisation du menu Système du<br />
LIFESTYLE ® , reportez-vous à la section « Utilisation du menu Système » page 27.<br />
Mettez votre téléviseur sous tension à l’aide de sa télécommande. Sélectionnez l’entrée<br />
vidéo correspondant au media center sur le téléviseur.<br />
Ensuite, à l’aide de la télécommande LIFESTYLE ® :<br />
1. Appuyez sur la touche TV pour sélectionner le téléviseur comme source.<br />
2. Appuyez sur la touche System.. Le menu Système s’affiche sur l’écran du téléviseur<br />
(Figure 6).<br />
3. Sélectionnez la catégorie Télécommande pour afficher les options proposées.<br />
4. Appuyez sur la flèche dirigée vers le bas ou sur la touche Enter pour vous déplacer dans<br />
le menu.<br />
! !<br />
21<br />
CONTRÔLE DES SOURCES EXTERNES
CONTRÔLE DES SOURCES EXTERNES<br />
CONTRÔLE DES SOURCES EXTERNES<br />
Figure 6<br />
Aperçu des options de la<br />
catégorie Télécommande<br />
du menu Système<br />
Figure 7<br />
Sélection de la marque du<br />
téléviseur<br />
22<br />
F"/X.(#3(#01#5<br />
6-3(#01#5<br />
%EE"/(;)#6&7N'%0#5<br />
F"/X.(#6&7N'%0#5<br />
6-3(#6&7N'%0#5<br />
F"O2Z+-@*-E(#5<br />
=#=<br />
'Z)(*+;-22(U#)"#>"/X.(#3(#:-+/(#014<br />
naviguer sélectionner<br />
0Z)Z*->>"23(<br />
! !<br />
Français Español<br />
English<br />
5. Identifiez la marque du téléviseur :<br />
• Dans la liste d’options qui apparaît, sélectionnez l’option Marque de TV(Figure 7).<br />
• Déplacez le curseur vers la droite pour accéder à la liste de marques, puis déplacez-le<br />
vers le haut ou vers le bas jusqu’à la marque de votre téléviseur.<br />
• Appuyez sur la touche Enter pour sélectionner cette marque.<br />
F"/X.(#3(#01#5<br />
6-3(#01#5<br />
%EE"/(;)#6&7N'%0#5<br />
F"/X.(#6&7N'%0#5<br />
6-3(#6&7N'%0#5<br />
F"O2Z+-@*-E(#5<br />
?A;)(D<br />
?A;)A"/>-2;*<br />
?A;);E@<br />
?A-(2;D<br />
?A-2-)"<br />
'Z)(*+;-22(U#)"#>"/X.(#3(#:-+/(#014#F";2+(2(U#)"#+-.*A(#<br />
C)Z*AZ(#(2C-2*Z(#E-./#3ZE)"*(/#)"#);@+(#E).@#/"E;3(>(2+4<br />
naviguer sélectionner<br />
0Z)Z*->>"23(<br />
6. Sélectionnez le code TV :<br />
• Dans la liste d’options de gauche, sélectionnez l’option Code TV.<br />
• Déplacez le curseur vers la droite pour sélectionner le premier code.<br />
• Appuyez sur la touche TV On/Off de la télécommande LIFESTYLE ® . Appuyez à<br />
nouveau sur la même touche.!<br />
Si le téléviseur s’éteint, puis se rallume, c’est que vous avez choisi le bon code. !<br />
Si le téléviseur ne s’éteint pas, sélectionnez un autre code, puis appuyez à nouveau sur<br />
la touche TV On/Off à deux reprises. Une fois le bon code sélectionné, appuyez sur la<br />
touche Enter.<br />
7. Configurez le téléviseur pour qu’il s’allume automatiquement si nécessaire.<br />
Pour utiliser cette fonction, le capteur TV doit être installé et positionné de façon à<br />
détecter si le téléviseur est allumé ou éteint. Reportez-vous au Guide d’installation pour<br />
toutes informations sur l’installation du capteur.
English Español Français<br />
Figure 8<br />
Sélection du mode<br />
d’alimentation du téléviseur<br />
! !<br />
CONTRÔLE DES SOURCES EXTERNES<br />
Pour activer ce choix :<br />
• Déplacez le curseur vers la liste des catégories du menu Système et sélectionnez la<br />
catégorie Vidéo (Figure 8).<br />
• Dans le menu Vidéo, sélectionnez l’option Alimentation TV.<br />
• Déplacez le curseur vers la droite, puis vers le haut ou vers le bas pour sélectionner une<br />
autre option :<br />
! Péritel (option par défaut pour l’Europe)<br />
! Automatique<br />
! Manuel (option par défaut pour les États-Unis)<br />
• Appuyez sur la touche Enter.<br />
1;3Z-<br />
%);>(2+"+;-2#01#5<br />
[+"+#3\");>(2+"+;-2#01#5<br />
")<br />
7(#>(3;"#*(2+(/#E(.+#>(++/(#".+->"+;X.(>(2+#:-+/(#<br />
+Z)Z:;@(./#@-.@#+(2@;-2#)-/@X.(#:-.@#@Z)(*+;-22(U#.2(#<br />
@-./*(#:;3Z-4<br />
8. Examinez l’option État d’alimentation TV :<br />
• TV active signifie que le capteur TV installé fonctionne.<br />
• Non détecté signifie que le capteur TV (s’il est installé) n’est pas correctement<br />
positionné ou n’est pas connecté.<br />
• Appuyez sur la touche System ou Exit pour quitter le menu Système.<br />
Pour contrôler le récepteur câble/satellite<br />
L’appareil à sélectionner est celui qui est connecté à l’entrée CBL-SAT du media center. Ainsi,<br />
lorsque vous appuyez sur la touche de sélection de la source CBL• SAT et sur la touche On/<br />
Off située en dessous, vous activez cet appareil.<br />
Si vous utilisez à la fois un récepteur stellite et un récepteur câble, utilisez l’option AUX pour<br />
désigner la marque et le code du second appareil.<br />
Remarque : Pour toutes instructions générales sur l’utilisation du menu Système du<br />
LIFESTYLE ® , reportez-vous à la section « Utilisation du menu Système » page 27.<br />
Procédez comme suit pour un décodeur câble/satellite :<br />
Mettez sous tension le récepteur câble ou satellite (ou toute autre source vidéo connectée à<br />
la prise CBL• SAT Audio IN) du media center. Allumez le téléviseur et veillez à sélectionner<br />
l’entrée vidéo correspondant au media center sur le téléviseur. Sur la télécommande<br />
LIFESTYLE ® , appuyez sur la touche de sélection de la source CBL• SAT et procédez comme<br />
suit :<br />
23<br />
CONTRÔLE DES SOURCES EXTERNES
CONTRÔLE DES SOURCES EXTERNES<br />
CONTRÔLE DES SOURCES EXTERNES<br />
24<br />
! !<br />
Français Español<br />
English<br />
1. Identifiez l’appareil :<br />
• Dans la liste d’options de la catégorie Télécommande du menu Système, sélectionnez<br />
l’option Appareil CBL• SAT.<br />
• Déplacez le curseur vers la droite et sélectionnez un appareil parmi les options, en<br />
appuyant sur la touche Enter.<br />
2. Identifiez la marque :<br />
• Dans la liste d’options de gauche, sélectionnez l’option Marque CBL• SAT.<br />
• Déplacez le curseur vers la droite pour accéder à la liste alphabétique, puis déplacez-le<br />
vers le haut ou vers le bas jusqu’à la marque de votre appareil.<br />
• Appuyez sur la touche Enter pour sélectionner cette marque.<br />
3. Sélectionnez le code correspondant à l’appareil :<br />
• Dans la liste d’options de gauche, sélectionnez l’option Code CBL• SAT.<br />
• Déplacez le curseur vers la droite pour sélectionner le premier code.<br />
• Appuyez sur la touche CBL• SAT On/Off de la télécommande LIFESTYLE ® . Appuyez à<br />
nouveau sur la même touche.!<br />
Si le récepteur câble ou satellite s’éteint, puis se rallume, c’est que vous avez choisi le<br />
bon code. !<br />
Dans le cas contraire, sélectionnez un autre code, puis appuyez à nouveau sur la<br />
touche CBL• SAT On/Off à deux reprises.<br />
• Une fois le bon code sélectionné, appuyez sur la touche Enter.<br />
• Appuyez sur la touche System ou Exit pour quitter le menu Système.<br />
Une fois ces réglages terminés, vous pouvez utiliser la touche CBL• SAT On/Off de la<br />
télécommande LIFESTYLE ® pour activer votre récepteur câble ou satellite, et les autres<br />
touches de la télécommande pour le contrôler. Si vous utilisez à la fois un récepteur stellite et<br />
un récepteur câble, utilisez la prise AUX pour connecter le second appareil et le sélectionner<br />
comme source.<br />
Pour contrôler le magnétoscope ou le graveur de DVD<br />
La liste des marques et des codes de magnétoscopes s’applique également aux graveurs de<br />
DVD et autres enregistreurs numériques. La procédure ci-dessous permet de configurer la<br />
télécommande pour un seul de ces appareils uniquement, et non les deux.<br />
Si vous utilisez à la fois un magnétoscope et un enregistreur numérique, configurez le premier<br />
sur l’entrée « VCR » et le second sur l’entrée « AUX ».<br />
Procédez comme suit pour le magnétoscope :<br />
Activez votre magnétoscope ou votre graveur de DVD. Activez le téléviseur et veillez à<br />
sélectionner l’entrée vidéo correspondant au media center sur le téléviseur. Ensuite, sur la<br />
télécommande LIFESTYLE ® , appuyez sur la touche de sélection de la source VCR et<br />
procédez comme suit :<br />
1. Identifiez l’appareil :<br />
• Dans la liste d’options de la catégorie Télécommande du menu Système, sélectionnez<br />
l’option Appareil VCR.<br />
• Déplacez le curseur vers la droite et sélectionnez un appareil parmi les options, en<br />
appuyant sur la touche Enter.<br />
2. Identifiez la marque :<br />
• Dans la liste d’options de la catégorie Télécommande du menu Système, sélectionnez<br />
l’option Marque VCR.<br />
• Déplacez le curseur vers la droite pour accéder à la liste de marques, puis déplacez-le<br />
vers le haut ou vers le bas jusqu’à atteindre la marque de votre magnétoscope ou<br />
graveur de DVD.<br />
• Appuyez sur la touche Enter pour sélectionner cette marque.
English Español Français<br />
! !<br />
CONTRÔLE DES SOURCES EXTERNES<br />
3. Sélectionnez le code correspondant à l’appareil :<br />
• Dans la liste d’options de gauche, sélectionnez l’option Code VCR.<br />
• Déplacez le curseur vers la droite pour sélectionner le premier code.<br />
• Appuyez sur la touche VCR On/Off de la télécommande LIFESTYLE ® . Appuyez à<br />
nouveau sur la même touche.!<br />
Si le magnétoscope ou graveur de DVD s’éteint, puis se rallume, c’est que vous avez<br />
choisi le bon code. !<br />
Si le téléviseur ne s’éteint pas, sélectionnez un autre code et appuyez à nouveau sur la<br />
touche TV On/Off à deux reprises.<br />
• Une fois le bon code sélectionné, appuyez sur la touche Enter.<br />
• Appuyez sur la touche System ou Exit pour quitter le menu Système.<br />
Une fois ces réglages terminés, sélectionnez la source VCR. Vous pouvez désormais utiliser<br />
les touches VCR On/Off, Play, Pause et Stop de la télécommande pour qu’elle fonctionne<br />
avec votre magnétoscope ou graveur de DVD. Sur certains graveurs de DVD, les touches<br />
Shuffle et Repeat permettent de passer rapidement au chapitre suivant ou précédent.<br />
Remarque : Si le symbole apparaît au-dessous de la touche de la télécommande<br />
LIFESTYLE ® , une touche d’enregistrement ( ) figure aussi dans la partie inférieure de la<br />
télécommande. Utilisez cette touche pour déclencher l’enregistrement sur votre magnétoscope/<br />
enregistreur numérique.<br />
Pour contrôler la source AUX<br />
Si vous avez branché un appareil à l’entrée AUX du media center, vous pouvez configurer<br />
votre télécommande LIFESTYLE ® pour le contrôler. Notez cependant que vous ne pourrez ni<br />
allumer, ni éteindre cet appareil à l’aide de la télécommande.<br />
Si aucun appareil n’est branché à l’entrée AUX, vous pouvez tout de même sélectionner un<br />
autre appareil dans la liste des appareils AUX possibles afin de le contrôler : Chargeur CD,<br />
Satellite, Câble, Graveur de DVD, TV ou Magnétoscope.<br />
Pour contrôler l’appareil choisi, appuyez d’abord sur la touche de sélection de la source AUX.<br />
Remarque : Pour toutes instructions générales sur l’utilisation du menu Système du<br />
LIFESTYLE ® , reportez-vous à la section « Utilisation du menu Système » page 27.<br />
Procédez comme suit pour la source AUX :<br />
Mettez votre appareil sous tension. Activez le téléviseur et veillez à sélectionner l’entrée vidéo<br />
correspondant au media center sur le téléviseur. Ensuite, sur la télécommande LIFESTYLE ® ,<br />
appuyez sur la touche de sélection de la source AUX et procédez comme suit :<br />
1. Identifiez l’appareil :<br />
• Dans la liste d’options de la catégorie Télécommande du menu Système, sélectionnez<br />
l’option Appareil AUX.<br />
• Déplacez le curseur vers la droite pour accéder à la liste, puis déplacez-le vers le haut<br />
ou vers le bas jusqu’à atteindre le nom de l’appareil souhaité. Appuyez ensuite sur la<br />
touche Enter pour le sélectionner.<br />
2. Identifiez la marque :<br />
• Dans la liste d’options de gauche, sélectionnez l’option Marque d’appareil AUX.<br />
• Déplacez le curseur vers la droite pour accéder à la liste alphabétique, puis déplacez-le<br />
vers le haut ou vers le bas jusqu’à la marque de votre appareil.<br />
• Appuyez sur la touche Enter pour sélectionner cette marque.<br />
25<br />
CONTRÔLE DES SOURCES EXTERNES
CONTRÔLE DES SOURCES EXTERNES<br />
CONTRÔLE DES SOURCES EXTERNES<br />
Figure 9<br />
Désignation du téléviseur<br />
comme sélecteur de<br />
canaux (tuner TV)<br />
26<br />
! !<br />
Français Español<br />
English<br />
3. Sélectionnez le code correspondant à l’appareil :<br />
• Dans la liste d’options de gauche, sélectionnez l’option Code d’appareil AUX.<br />
• Déplacez le curseur vers la droite pour sélectionner le premier code.<br />
• Sur la télécommande LIFESTYLE ® , appuyez sur la touche Play ou sur la flèche<br />
Channel/Track dirigée vers le haut.!<br />
Si l’appareil réagit, appuyez sur d’autres touches pour vous assurer que ses autres<br />
fonctions importantes fonctionnent également. Si l’appareil ne réagit pas, sélectionnez<br />
un autre code et réessayez.<br />
• Une fois que vous avez sélectionné le code qui correspond le mieux à votre appareil,<br />
appuyez sur la touche Enter.<br />
Appuyez sur la touche System ou Exit pour quitter le menu Système.<br />
Contrôle des canaux à partir d’un périphérique sur l’entrée vidéo du<br />
téléviseur<br />
Si vous changez toujours de chaîne sur votre récepteur câble/satellite, et jamais sur le<br />
téléviseur lui-même, vous pouvez configurer votre système LIFESTYLE ® pour activer votre<br />
récepteur câble/satellite lorsque vous sélectionnez le téléviseur comme source. Dans ce cas,<br />
vous devez connecter votre récepteur câble/satellite to à l’entrée TV Audio IN du media<br />
center, et sélectionner cette option dans le menu Système.<br />
Remarque : Pour toutes instructions générales sur l’utilisation du menu Système LIFESTYLE ® ,<br />
reportez-vous à la section « Propriétés pouvant être modifiées » page 27.<br />
Effectuez cette sélection dans les options de la catégorie Télécommande du menu Système.<br />
En face de l’option Commande de téléviseur, sélectionnez dans la liste le composant à utiliser<br />
comme sélecteur de canaux. Appuyez ensuite sur la touche System ou Exit pour quitter le<br />
menu Système.<br />
%EE"/(;)#%LM#5<br />
F"/X.(#3\"EE"/(;)#%LM#5<br />
6-3(#%LM#5<br />
6->>"23(#3(#+Z)Z:;@(./#5<br />
0Z)Z*->>"23(<br />
6-2+/_)(#J>"23(<br />
%LM<br />
F"O2Z+-@*-E(<br />
6&7N'%0<br />
01<br />
Vous disposez ainsi du son du câble pour accompagner les images du câble, sans devoir<br />
sélectionner CBL• SAT comme source. Vous pouvez également désigner l’appareil CBL• SAT<br />
comme tuner principal pour contrôler la sélection des chaînes.<br />
Cette option n’est un choix judicieux que si vous utilisez votre téléviseur comme moniteur<br />
vidéo uniquement.
English Español Français<br />
Propriétés pouvant être modifiées<br />
Figure 10<br />
Menu Système et aperçu<br />
de la fonctionnalité<br />
Verrouillage DVD<br />
UTILISATION DU MENU SYSTÈME<br />
Les modifications apportées aux propriétés du système sont généralement apportées une fois<br />
pour toutes. Si votre appareil fonctionne déjà comme vous le souhaitez, ces modifications ne<br />
sont pas nécessaires.<br />
Toutefois, pour certaines options d’installation, il peut être nécessaire de procéder à des<br />
modifications dans le menu Système, afin de rendre celui-ci entièrement compatible et d’en<br />
faciliter la configuration.<br />
Par exemple, il est possible de configurer la télécommande pour qu’elle contrôle n’importe<br />
quel appareil connecté en externe au système.<br />
Comment afficher le menu Système<br />
Appuyez sur la touche System de la télécommande LIFESTYLE ® pour afficher le menu<br />
Système. Ce menu s’affiche uniquement sur l’écran du téléviseur, pas sur celui du media<br />
center.<br />
Si vous ne voyez PAS ce menu s’afficher :<br />
• Vérifiez que le téléviseur est allumé.<br />
• Vérifiez que l’entrée vidéo sélectionnée est bien celle qui est connectée au media center.<br />
Remarque : Si vous avez noté les informations sur l’entrée TV dans le formulaire de la page 17<br />
de votre Guide d’installation, vérifiez ces informations.<br />
• Appuyez sur la touche System de la télécommande LIFESTYLE ® selon les besoins.<br />
Affichage du menu<br />
Lorsque le menu Système apparaît, la première catégorie à gauche (Audio) est sélectionnée,<br />
et l’écran affiche les fonctions de cette catégorie. Si vous déplacez la sélection vers la droite,<br />
d’autres catégories sont sélectionnées.<br />
À l’extrême droite apparaît la catégorie Verrouillage DVD avec la liste de ses fonctions<br />
(Figure 10).<br />
Remarque : Le fait d’accéder au menu Système entraîne la mise en pause de tout DVD ou CD<br />
vidéo en cours de lecture.<br />
Propriétés - Éléments du système<br />
Fonctionnalités -<br />
Sous-menus de<br />
chaque propriété<br />
Écran d’aperçu -!<br />
Inactif<br />
Indications de navigation -!<br />
Touches de la télécommande à<br />
utiliser<br />
! !<br />
'Z)(*+;-22(U#1(//-.;))"O(#919#E-./#/ZO)(/#*(@#-E+;-2@#<br />
@,@+`>(#5<br />
6-2+/_)(#3.#+Z)Z:;@(./<br />
6-2+/_)(#3.#/Z*(E+(./#6a$)(N'"+());+(<br />
6-2+/_)(#3.#>"O2Z+-@*-E(#-.#3(#)\(2/(O;@+/(./#:;3Z-#<br />
2.>Z/;X.(<br />
6-2C;O./"+;-2#3\.2#"EE"/(;)#3(#@Z)(*+;-2#3(@#*A"b2(@#01<br />
6A-;D#3\.2(#:(/@;-2#3(#C-2*+;-22(>(2+#3(#)"#<br />
+Z)Z*->>"23(<br />
6-2C;O./"+;-2#3.#*-2+/_)(#J
UTILISATION DU MENU SYSTÈME<br />
UTILISATION DU MENU SYSTÈME<br />
Options audio<br />
Figure 11<br />
Aperçu des fonctions audio Audio<br />
28<br />
Liste active des options<br />
! !<br />
Français Español<br />
English<br />
Comment apporter des modifications<br />
Toute modification dans ce menu est similaire à la modification des réglages d’une source.<br />
•Parcourez le menu et apportez des modifications à l’aide des touches de<br />
sélection ci-contre :<br />
•Déplacez le curseur vers la droite pour afficher un aperçu des fonctions de<br />
chaque catégorie.<br />
•Appuyez sur la flèche dirigée vers le bas ou sur la touche Enter pour<br />
sélectionner les fonctions de cette catégorie.<br />
Remarque : Lorsque la catégorie est activée, l’écran passe de la liste des fonctions à une liste<br />
des options spécifiques que vous pouvez modifier.<br />
• Dans la liste active, appuyez sur les flèches de direction pour accéder à l’option souhaitée.<br />
• Appuyez sur la touche Enter ou sur la flèche dirigée vers la gauche pour confirmer votre<br />
sélection et retourner à la colonne des fonctions.<br />
• Répétez cette procédure pour toutes les modifications que vous souhaitez apporter.<br />
•Appuyez sur Exit pour quitter le menu de configuration.<br />
Appuyez sur la touche System de la télécommande LIFESTYLE ® . Lorsque l’aperçu des<br />
fonctions audio apparaît, appuyez sur la touche Enter pour afficher la liste active des options<br />
audio.<br />
'Z)(*+;-22(U#%.3;-#E-./#/ZO)(/#*(@#-E+;-2@#<br />
@,@+`>(#5<br />
6->E(2@"+;-2#3(@#O/":(@<br />
6->E(2@"+;-2#3(@#";O.@<br />
0/";+(>(2+#".3;-<br />
I;:(".D#3\(2+/Z(<br />
%9%?0;P<br />
?/-+-*-)(#3\(DE"2@;-2<br />
naviguer sélectionner<br />
Remarque : Il peut être utile d’écouter une source audio lorsque vous apportez ce type de<br />
modification. Certains changements sont immédiatement perceptibles et donc utiles pour régler<br />
précisément vos sélections.<br />
Réglages par<br />
défaut<br />
(Options) Effet du réglage<br />
Compensation des graves 0 Reproduction normale des basses fréquences.<br />
(-14 à +14) Reproduction des basses fréquences réduite (-) ou !<br />
augmentée (+).<br />
(-9 à +6) Bande disponible avec le système de calibrage ADAPTiQ ® .
English Español Français<br />
! !<br />
UTILISATION DU MENU SYSTÈME<br />
Compensation des aigus 0 Reproduction normale des hautes fréquences.<br />
-14 à +14 Reproduction des basses fréquences réduite (-) ou augmentée<br />
(+).<br />
Traitement audio<br />
(Égalisation cinéma, Compression<br />
de niveau, Décodage mono)<br />
Niveau d’entrée analogique TV<br />
Niveau d’entrée numérique TV<br />
Niveau d’entrée analogique<br />
magnétoscope<br />
Niveau d’entrée numérique<br />
magnétoscope<br />
Niveau d’entrée analogique<br />
CBL/SAT<br />
Niveau d’entrée numérique<br />
CBL/SAT<br />
Niveau d’entrée analogique AUX<br />
Niveau d’entrée numérique AUX<br />
(-9 à +6) Plage disponible suivant le système de calibrage ADAPTiQ.<br />
Automatique Traitement <strong>Bose</strong> ® standard appliqué.<br />
(Personnalisé) Cette option permet de modifier les options (spécifiques à<br />
chaque source audio) après avoir appuyé sur la touche Settings<br />
pendant qu’un signal audio interne ou externe est en cours de<br />
lecture.<br />
Normal Niveau de signal standard (force).<br />
(-6, -3, +3, +6) Diminue ou augmente le niveau de signal.!<br />
(réglable pour s’adapter aux niveaux des autres éléments)!<br />
Remarque : Il est conseillé d’ajuster les entrées des éléments<br />
externes de façon à ce qu’ils correspondent aux niveaux FM et<br />
CD internes du système.<br />
ADAPTiQ ® Inactif Aucun calibrage audio ADAPTiQ® effectué.<br />
(Actif Utilise les ajustements du système ADAPTiQ réalisés avec le<br />
disque 2.<br />
Effacer= Annule les ajustements* du système ADAPTiQ si, dans les cinq<br />
secondes suivant la sélection de cette option, vous appuyez sur<br />
le bouton Erase du media center.<br />
Protocole d’expansion<br />
Modifiez cette fonction<br />
uniquement si indiqué comme tel<br />
dans la notice d’utilisation de<br />
votre télécommande réseau<br />
<strong>Bose</strong> ® .<br />
Câble <strong>Bose</strong> ® Link Communique uniquement avec des produits compatibles <strong>Bose</strong><br />
Link situés dans d’autres pièces.<br />
(Ancien) Permet au système de communiquer avec d’anciens produits<br />
<strong>Bose</strong> (par exemple les récepteurs radio <strong>Bose</strong> Wave ® ou les<br />
récepteurs radio /lecteurs de CD Wave ® , qui sont antérieurs au<br />
système <strong>Bose</strong> Link), ainsi qu’avec certains appareils non<br />
produits par <strong>Bose</strong> et situés dans d’autres pièces.<br />
*L’élimination des réglages du système ADAPTiQ n’est PAS réversible automatiquement.<br />
La restauration de ces réglages nécessite l’utilisation du disque d’installation 2 et du casque ADAPTiQ fourni avec le<br />
système. Pour plus d’informations sur ce processus, reportez-vous à la section « Pour obtenir le meilleur son possible »<br />
du Guide d’installation du système.<br />
Cette fonctionnalité avancée permet au système LIFESTYLE ® d’ajuster automatiquement son traitement du son pour<br />
compenser divers paramètres (meubles, emplacement des enceintes, position de l’auditeur) afin de produire un son<br />
idéal dans la pièce principale.<br />
29<br />
UTILISATION DU MENU SYSTÈME
UTILISATION DU MENU SYSTÈME<br />
UTILISATION DU MENU SYSTÈME<br />
Options vidéo<br />
Figure 12<br />
Aperçu des fonctions vidéo<br />
30<br />
Liste active des options<br />
! !<br />
Français Español<br />
English<br />
Appuyez sur la touche System de la télécommande LIFESTYLE ® . Déplacez le curseur vers la<br />
droite pour voir l’aperçu des fonctions vidéo, puis appuyez sur la touche Enter pour afficher<br />
la liste active des options vidéo.<br />
Vidéo<br />
'Z)(*+;-22(U#1;3Z-#E-./#/ZO)(/#*(@#-E+;-2@#<br />
@,@+`>(#5<br />
%);>(2+"+;-2#01<br />
[+"+#3\");>(2+"+;-2#01<br />
English Español Français<br />
Options du media center<br />
Figure 13<br />
Caractéristiques du<br />
panneau avant du media<br />
center<br />
! !<br />
UTILISATION DU MENU SYSTÈME<br />
Format vidéo : NTSC (US) Correspond aux écrans NTSC (norme US).<br />
PAL (EUROPE) Correspond aux écrans PAL (norme européenne).<br />
(MULTISTANDARD) Correspond aux téléviseurs multistandards (NTSC et PAL).<br />
Balayage progressif Inactif L’image à l’écran prend le style standard.<br />
(Actif) L’image à l’écran prend le style avancé (si disponible sur le<br />
téléviseur).<br />
Liste active des<br />
options<br />
Appuyez sur la touche System de la télécommande LIFESTYLE ® . Déplacez le curseur vers la<br />
droite pour afficher un aperçu des fonctions du media center. Appuyez sur la touche Enter<br />
pour accéder à un écran actif comportant des sous-menus.<br />
Media center<br />
'Z)(*+;-22(U#F(3;"#6(2+(/#E-./#/ZO)(/#*(@#-E+;-2@#<br />
@,@+`>(#5<br />
7.>;2-@;+Z#3\"CC;*A"O(<br />
7"2O.(#3\"CC;*A"O(<br />
'-./*(#-E+;X.(<br />
'-/+;(#".3;-#2.>Z/;X.(<br />
Q@E"*(>(2+#*"2".D#+.2(/<br />
UTILISATION DU MENU SYSTÈME<br />
UTILISATION DU MENU SYSTÈME<br />
Sortie audio<br />
numérique<br />
Espacement canaux<br />
tuner<br />
Restauration des<br />
réglages d’usine<br />
Options de la télécommande<br />
Figure 14<br />
Aperçu des fonctions de la<br />
télécommande<br />
32<br />
Liste active des<br />
options<br />
! !<br />
Français Español<br />
English<br />
Appuyez sur la touche System de la télécommande LIFESTYLE ® . Déplacez le curseur vers la<br />
droite pour voir l’aperçu des fonctions de la télécommande, puis appuyez sur la touche Enter<br />
pour afficher la liste active des options de la télécommande.<br />
Télécommande<br />
'Z)(*+;-22(U#1(//-.;))"O(#919#E-./#/ZO)(/#*(@#<br />
-E+;-2@#@,@+`>(#5<br />
6-2+/_)(#3.#+Z)Z:;@(./<br />
6-2+/_)(#3.#/Z*(E+(./#6a$)(N'"+());+(<br />
6-2+/_)(#3.#>"O2Z+-@*-E(#-.#3(#)\(2/(O;@+/(./#<br />
:;3Z-#2.>Z/;X.(<br />
6-2C;O./"+;-2#3\.2#"EE"/(;)#3(#@Z)(*+;-2#3(@#*A"b2(@#<br />
01<br />
6A-;D#3\.2(#:(/@;-2#3(#C-2*+;-22(>(2+#3(#)"#<br />
+Z)Z*->>"23(<br />
6-2C;O./"+;-2#3.#*-2+/_)(#J
English Español Français<br />
Magnétoscope --<br />
Magnétoscope, DVR,<br />
Cable/DVR,<br />
Satellite/DVR,<br />
DVD/Graveur DVD,<br />
DVD/DVR,<br />
TV/DVD<br />
Marque<br />
Magnétoscope<br />
--<br />
Marque<br />
Identifie le type d’appareil connecté à l’entrée VCR.<br />
! !<br />
UTILISATION DU MENU SYSTÈME<br />
Identifie la marque de l’appareil que la télécommande LIFESTYLE ®<br />
doit faire fonctionner.<br />
Code magnétoscope -- Identifie le code infrarouge qui fonctionne avec votre magnétoscope.<br />
Appareil AUX --<br />
Changeur de CD, DVR,<br />
DVD/Graveur de DVD,<br />
DVD/DVR, TV HDTV,<br />
TV/DVD,<br />
Magnétoscope,<br />
Câble/DVR, Câble,<br />
Satellite/DVR,<br />
Satellite, TV<br />
Identifie le type d’appareil connecté à l’entrée AUX.<br />
Marque d’appareil<br />
AUX<br />
--<br />
Marque<br />
Identifie la marque de l’appareil que la télécommande LIFESTYLE ®<br />
doit faire fonctionner.<br />
Code AUX -- Identifie le code infrarouge qui fonctionne avec l’appareil connecté à<br />
la prise AUX.<br />
Commande de<br />
téléviseur<br />
TV<br />
AUX, Magnétoscope,<br />
CBL• SAT<br />
Télécommande Enregistrement/ABC,<br />
Télétexte<br />
Détermine l’appareil qui #)"%&*'!*/'#)"E%*/'!,./=0*'!"'/,0.#*'*/('!*'<br />
(C!C7$/*0.8<br />
Définit la fonction de certaines touches de la télécommande, par<br />
exemple le contrôle de rapport d’écran (Enregistrement/ABC ou<br />
Télétexte) pris en charge par votre téléviseur ou dans votre région.<br />
Contrôle IR Actif Le système reçoit les commandes IR d’une autre télécommande qui a<br />
été programmée pour faire fonctionner le système.<br />
Programmation Le système envoie des commandes IR en réponse aux boutons de la<br />
télécommande LIFESTYLE ® utilisés, pour indiquer à une autre<br />
télécommande de faire fonctionner le système.<br />
Inactif Le système ne peut pas être contrôlé par une autre télécommande<br />
infrarouge ou n’enseigne pas les commandes infrarouges à une<br />
télécommande programmable.<br />
33<br />
UTILISATION DU MENU SYSTÈME
UTILISATION DU MENU SYSTÈME<br />
UTILISATION DU MENU SYSTÈME<br />
Options de verrouillage de DVD<br />
Figure 15<br />
Aperçu des fonctions de<br />
verrouillage de DVD<br />
34<br />
Liste active des options<br />
Création d’un mot de passe<br />
(apparaît uniquement avant la<br />
création d’un mot de passe)<br />
Confirmer mot de passe<br />
(apparaît uniquement lors de<br />
la création ou de la<br />
modification d’un mot de<br />
passe)<br />
Saisie/mot de passe<br />
(apparaît uniquement après la<br />
création d’un mot de passe)<br />
Changer mot de passe<br />
(apparaît uniquement après la<br />
saisie d’un mot de passe)<br />
Verrouillage disques non<br />
évalués<br />
Verrouillage disques<br />
évalués au-dessus de<br />
! !<br />
Français Español<br />
English<br />
Appuyez sur la touche System de la télécommande LIFESTYLE ® . Déplacez le curseur vers la<br />
droite pour voir l’aperçu des fonctions de verrouillage de DVD, puis appuyez sur la touche<br />
Enter pour afficher la liste active des options de verrouillage de DVD.<br />
Verrouillage<br />
'Z)(*+;-22(U#1(//-.;))"O(#919#E-./#/ZO)(/#*(@#<br />
-E+;-2@#@,@+`>(4<br />
1(//-.;))"O(#3;@X.(@#2-2#Z:").Z@<br />
1(//-.;))"O(#3;@X.(@#Z:").Z@#".=3(@@.@#3(<br />
c(@+;-2#3(@#>-+@#3(#E"@@(#3(@#919<br />
naviguer sélectionner<br />
Réglages par défaut<br />
(Options) Effet du réglage<br />
_ _ _ _ Crée un code à quatre chiffres pour limiter l’accès aux films en<br />
fonction de leur classification.<br />
_ _ _ _ Vérification du mot de passe à quatre chiffres.<br />
_ _ _ _ Permet d’accéder aux films correspondant à un certain niveau<br />
de classification.<br />
_ _ _ _ Crée un nouveau code à quatre chiffres pour limiter l’accès aux<br />
films en fonction de leur classification.<br />
Inactif Aucune restriction appliquée aux DVD non évalués.<br />
(Actif) Limite l’accès aux titres non évalués lorsqu’un mot de passe est<br />
défini.<br />
1 à 8 Empêche le visionnage des disques dont la classification est<br />
supérieure au chiffre sélectionné, sauf si le mot de passe est<br />
saisi.
English Español Français<br />
Utilisation du verrouillage pour le contrôle parental<br />
! !<br />
UTILISATION DU MENU SYSTÈME<br />
La fonction de contrôle parental du système LIFESTYLE ® permet de limiter l’accès à certains<br />
DVD en fonction de leur classification. Pour activer cette fonction, vous devez définir un<br />
niveau de restriction et créer un mot de passe dans la section Verrouillage DVD du menu<br />
Système.<br />
Le mot de passe empêchera le visionnage non autorisé de DVD dont la classification est<br />
supérieure au niveau de restriction que vous avez défini. Il existe huit niveaux, correspondant<br />
à la classification établie par la Motion Picture Association of America (MPAA). Ces niveaux<br />
sont présentés dans le tableau ci-dessous.<br />
Réglage de<br />
contrôle parental<br />
Classification<br />
MPAA Restriction<br />
8 Aucune<br />
7 NC-17 Public adulte<br />
6 R Public averti<br />
5 Public adolescent averti<br />
4 PG-13 Public adolescent<br />
3 PG Public préadolescent<br />
2 Enfants<br />
1 G Tout public<br />
Par exemple, sSi vous choisissez de régler le contrôle parental sur 4, l’accès aux DVD dont la<br />
classification est supérieure à PG13 sera restreint. Ceux-ci ne pourront être visionnés<br />
qu’après saisie du mot de passe.<br />
Ce mot de passe permet également d’éviter que le paramètre de contrôle parental soit<br />
modifié sans autorisation.<br />
Pour définir un niveau de restriction et un mot de passe<br />
Une fois le téléviseur allumé, sélectionnez l’entrée vidéo TV correspondant au media center.<br />
Appuyez sur la touche System de la télécommande LIFESTYLE ® .<br />
Lorsque le menu Système s’affiche sur l’écran de télévision :<br />
1. Déplacez le curseur vers la droite sur Verrouillage DVD pour ouvrir un aperçu des fonctions<br />
disponibles (comme illustré page 34).<br />
2. Appuyez sur la flèche dirigée vers le bas ou sur la touche Enter pour accéder à l’écran<br />
actif des options de verrouillage de DVD (qui diffère nettement de l’écran d’aperçu).<br />
3. Utilisez le pavé numérique de la télécommande LIFESTYLE ® pour saisir les quatre<br />
chiffres du mot de passe.<br />
4. Appuyez sur la touche Enter pour valider votre choix.<br />
5. Saisissez à nouveau ces quatre chiffres pour confirmer le mot de passe, et appuyez sur<br />
la touche Enter pour les valider.<br />
6. Sélectionnez l’option Verrouillage disques évalués au-dessus de.<br />
7. Déplacez le curseur vers la droite et vers le haut ou le bas pour sélectionner le niveau de<br />
restriction souhaité.<br />
8. Appuyez sur la touche Enter ou sur la flèche dirigée vers la gauche pour confirmer votre<br />
choix et quitter la liste de sélection.<br />
35<br />
UTILISATION DU MENU SYSTÈME
MODIFICATION DE LA CONFIGURATION DES SOURCES<br />
36<br />
Français Español<br />
MODIFICATION DE LA CONFIGURATION DES SOURCES<br />
Réglages rapides pendant l’écoute ou le visionnage<br />
Figure 16<br />
Exemple d’options de<br />
paramétrage de la lecture<br />
de CD, telles qu’elles<br />
apparaissent sur l’écran du<br />
media center<br />
Figure 17<br />
Menu de configuration de la<br />
radio FM tel qu’il apparaît<br />
sur l’écran du téléviseur,<br />
avec indications<br />
descriptives<br />
English<br />
Quelle que soit la source que vous écoutez, il est facile de procéder à des modifications<br />
rapides en appuyant sur la toucheSettings de la télécommande LIFESTYLE ® . Par exemple,<br />
vous pouvez augmenter le volume du canal central ou écouter la musique sur cinq enceintes<br />
au lieu de deux.<br />
Afin de vous offrir un accès presque instantané aux réglages, il existe en effet un menu de<br />
paramétrage pour chaque source audio, et un autre pour les sources vidéo. Appuyez sur une<br />
touche, et le menu approprié s’affiche pour la source qui est en cours de lecture.<br />
Vous verrez que les déplacements dans les menus et la sélection des options propres à<br />
chaque source deviendront vite une seconde nature. Essayez et vous verrez.<br />
Recherche de la liste des options<br />
Pour voir les options disponibles, vous devez d’abord sélectionner une source. Puis, sur la<br />
télécommande LIFESTYLE ® , appuyez sur la touche Settings pour accéder au menu.<br />
Le menu apparaît sur l’écran du media center, ainsi que sur celui de votre téléviseur si !<br />
celui-ci est allumé et si son entrée vidéo correspondant au media center est sélectionnée.<br />
• Lorsque les options apparaissent sur l’écran du media center (Figure 16), appuyez sur la<br />
touche fléchée vers le bas pour voir les autres options.<br />
C A N A L C E N T R A L : + 4<br />
S L E E P T I M E R : O F F<br />
• Pour afficher le menu de configuration de la lecture de DVD sur l’écran du téléviseur<br />
(Figure 17), allumez le téléviseur et sélectionnez l’entrée TV correspondant au media center.<br />
Si la liste des options est trop longue pour être entièrement affichée, une petite flèche pointée<br />
vers le bas ou le haut apparaît à la base de la liste pour indiquer le sens de déplacement pour<br />
voir les autres options.<br />
Source -!<br />
En service<br />
Nom de la fonction -<br />
Identification complète<br />
Fonctions -!<br />
Icônes<br />
d’identification<br />
Indications de navigation -!<br />
Boutons à utiliser<br />
FM<br />
ou AM<br />
Canal central<br />
Paramètre - !<br />
Option choisie<br />
+4<br />
Description -<br />
Que faire ou<br />
qu’attendre<br />
Pour baisser le son du canal central, sélectionnez<br />
un réglage inférieur. Pour l’augmenter, sélectionnez<br />
un réglage supérieur.<br />
Lorsque le menu Configuration est visible sur l’écran du téléviseur, toutes les modifications<br />
apportées aux réglages y apparaissent, ainsi que sur l’écran du media center.
English Español Français<br />
Figure 18<br />
Changement du nombre<br />
d’enceintes utilisées<br />
MODIFICATION DE LA CONFIGURATION DES SOURCES<br />
Comment modifier les réglages<br />
Naviguez et effectuez des modifications à<br />
l’aide des touches de sélection dans le<br />
menu Configuration affiché sur l’écran du<br />
media center ou du téléviseur.<br />
La procédure est la même sur le media center ou le téléviseur :<br />
• Appuyez sur les flèches de direction pour accéder à l’option souhaitée.<br />
• Appuyez sur la touche Enter ou sur la flèche dirigée vers la gauche pour confirmer votre<br />
sélection et retourner à la colonne des fonctions.<br />
• Répétez cette procédure pour toutes les modifications que vous souhaitez apporter.<br />
•Appuyez sur Exit pour quitter le menu de configuration.<br />
La procédure ci-dessous illustre comment changer le nombre d’enceintes utilisées en FM<br />
(Figure 18).<br />
A. Le menu Configuration de la FM s’affiche sur l’écran du téléviseur. Il indique un réglage<br />
par défaut avec 5enceintes.<br />
B. Les touches fléchées permettent de se diriger vers la droite et vers le haut ou le bas pour<br />
changer le nombre d’enceintes utilisées.<br />
C. La touche Enter ou la flèche dirigée vers la gauche permettent de confirmer le nouveau<br />
réglage et de retourner à la liste des attributs du tuner.<br />
A. B. C.<br />
FM FM<br />
FM<br />
Enceintes 2-3-5 : Enceintes 2-3-5 :<br />
Enceintes 2-3-5 :<br />
Vous pouvez également appliquer la procédure ci-dessus pour rétablir les réglages d’origine.<br />
Procédez ainsi si le résultat de la modification apportée ne vous convient pas ou si vous avez<br />
accidentellement apporté une modification non souhaitée.<br />
Les réglages d’origine (par défaut) de chaque source sont répertoriés en tant que première<br />
option pour chacune des fonctions figurant sur la page suivante.<br />
Pour rétablir les réglages par défaut de toutes les fonctions, choisissez l’option Restauration<br />
des réglages d’usine du menu Système, dans la catégorie F(3;"#6(2+(/. Cette opération<br />
annule toutes les modifications que vous avez apportées aux menus Système et<br />
Configuration. Au lieu d’effectuer un changement global, notez le réglage par défaut figurant<br />
page suivante, puis sélectionnez-le pour la source souhaitée.<br />
37<br />
MODIFICATION DE LA CONFIGURATION DES SOURCES
MODIFICATION DE LA CONFIGURATION DES SOURCES<br />
MODIFICATION DE LA CONFIGURATION DES SOURCES<br />
Réglages CD<br />
Réglages DVD<br />
38<br />
Français Español<br />
English<br />
Pour afficher le menu Configuration d’un CD, vous devez insérer un CD dans le tiroir disque<br />
avant de sélectionner la source correspondante.<br />
CD Fonctions<br />
Enceintes<br />
2-3-5<br />
Réglage<br />
(Options) Effet du réglage<br />
5<br />
(2, 3)<br />
Surround 0<br />
(-5 à +5)<br />
Canal central 0<br />
(-5 à +5)<br />
Piste audio DTS<br />
(Dolby Digital)<br />
Minuterie<br />
sommeil<br />
Inactif<br />
(10-90)<br />
Détermine le nombre d’enceintes utilisées.<br />
Règle le volume relatif du son surround.<br />
Règle le volume relatif de l’enceinte centrale.<br />
Lit les pistes audio au format spécifié.<br />
Le système est désactivé après la durée<br />
définie.<br />
Pour afficher le menu Configuration d’un DVD, vous devez insérer un DVD dans le tiroir<br />
disque avant de sélectionner la source correspondante.<br />
Trois fonctions (indiquées en italique ci-dessous) apparaissent dans le menu DVD<br />
uniquement si vous avez réglé Traitement audio sur Réglage utilisateur dans la section Audio<br />
du menu Système.<br />
DVD Fonctions<br />
Enceintes<br />
2-3-5<br />
Réglage<br />
(Options) Effet du réglage<br />
5<br />
(2, 3)<br />
Surround 0<br />
(-5 à +5)<br />
Canal central 0<br />
(-5 à +5)<br />
Égalisation<br />
cinéma<br />
Compression<br />
de niveau<br />
Décodage<br />
mono<br />
Actif<br />
Inactif<br />
Actif<br />
Inactif<br />
Actif<br />
Inactif<br />
Détermine le nombre d’enceintes utilisées.<br />
Règle le volume relatif du son surround.<br />
Règle le volume relatif de l’enceinte centrale.<br />
Ajuste le rapport graves/aigus pour une<br />
reproduction correcte des pistes sonores des<br />
films.<br />
Règle le volume pour préserver l’intelligibilité des<br />
dialogues et empêcher certains sons d’en<br />
couvrir d’autres.<br />
Active les circuits de décodage mono<br />
Videostage ® 5 pour le traitement des<br />
programmes mono (son sur un seul canal) sur<br />
5 enceintes.
English Español Français<br />
DVD Fonctions<br />
Réglages tuner (radio FM ou AM)<br />
Time (Heure) 0:00<br />
_:__<br />
Titre<br />
Chapitre<br />
MODIFICATION DE LA CONFIGURATION DES SOURCES<br />
Le menu Configuration est différent selon que vous choisissez AM ou FM. Vous pouvez donc<br />
ajuster les réglages différemment pour chacune de ces sources. Deux des attributs cidessous<br />
sont disponibles uniquement si le tuner est défini sur FM.<br />
FM<br />
(ou<br />
AM) Fonctions<br />
Enceintes 2-3-5 5<br />
(2, 3)<br />
Surround 0<br />
(-5 à +5)<br />
Canal central 0<br />
(-5 à +5)<br />
Mode de sortie<br />
(fonction FM)<br />
Infos RDS<br />
(uniquement dans<br />
la plage FM et<br />
en-dehors des<br />
USA.)<br />
Minuterie<br />
sommeil<br />
_ sur __<br />
___<br />
Piste audio DTS<br />
Dolby Digital<br />
Langue de<br />
sous-titrage<br />
Angle de<br />
caméra<br />
English<br />
Autre<br />
Répéter AB a, b<br />
Minuterie<br />
sommeil<br />
Réglage<br />
(Options) Effet du réglage<br />
Réglage<br />
(Options) Effet du réglage<br />
Auto<br />
(Mono ou Stéréo)<br />
Affiche le temps écoulé.<br />
Avance ou recule le film sur la nouvelle heure.<br />
Avance ou recule le film vers une autre section<br />
du DVD, en fonction du chiffre défini.<br />
Avance ou recule le film vers une nouvelle scène,<br />
en fonction du chiffre défini.<br />
Lecture d’un format audio disponible sur un DVD<br />
spécifique, qui peut comporter plusieurs choix.<br />
Détermine la langue utilisée pour les sous-titres<br />
d’un DVD (parmi les langues disponibles pour ce<br />
disque).<br />
1 sur __ Détermine l’angle utilisé pour une séquence d’un<br />
DVD (parmi les angles de prise de vue<br />
disponibles sur ce disque).<br />
A, B<br />
Inactif<br />
10-90<br />
Répète une section du DVD, après définition des<br />
points de début et de fin.<br />
Pour plus d’informations sur cette procédure,<br />
reportez-vous à la page 16.<br />
Inactif<br />
(Actif)<br />
Inactif<br />
(10-90)<br />
Le système est désactivé après la durée définie.<br />
Détermine le nombre d’enceintes utilisées.<br />
Règle le volume relatif du son surround.<br />
Règle le volume relatif de l’enceinte<br />
centrale.<br />
Définit la répartition des signaux radio sur<br />
les différents canaux.<br />
Affiche des informations sur la station et le<br />
programme!<br />
(à l’aide du système RDS, Radio Data<br />
System.)<br />
Le système est désactivé après la durée<br />
définie.<br />
39<br />
MODIFICATION DE LA CONFIGURATION DES SOURCES
MODIFICATION DE LA CONFIGURATION DES SOURCES<br />
MODIFICATION DE LA CONFIGURATION DES SOURCES<br />
Réglages TV (pour magnétoscope, câble/satellite et Aux)<br />
40<br />
Français Español<br />
English<br />
Les réglages ci-dessous affectent les programmes de télévision, même si la source est VCR,<br />
CBL/SAT ou AUX. Ces sources ne disposent pas de menus distincts.<br />
Trois fonctions (indiquées en italique ci-dessous) apparaissent dans le menu TV uniquement<br />
si vous avez réglé Traitement audio sur Réglage utilisateur dans la section Audio du menu<br />
Système.<br />
TV Fonctions<br />
Réglage<br />
(Options) Effet du réglage<br />
Enceintes 2-3-5 5<br />
(2, 3)<br />
Détermine le nombre d’enceintes utilisées.<br />
Surround 0<br />
(-5 à +5)<br />
Règle le volume relatif du son surround.<br />
Canal central 0<br />
(-5 à +5)<br />
Règle le volume relatif de l’enceinte centrale.<br />
Égalisation<br />
Actif Ajuste le rapport graves/aigus pour une<br />
cinéma<br />
Inactif reproduction correcte des pistes sonores des<br />
films.<br />
Compression<br />
Actif Ajuste le son par bande de fréquences afin<br />
de niveau<br />
Inactif d’atténuer la différence de volume entre les<br />
dialogues et les effets spéciaux. Empêche<br />
certains sons de recouvrir les autres.<br />
Décodage<br />
Actif Active les circuits de décodage mono<br />
mono<br />
Inactif Videostage ® 5 pour le traitement des<br />
programmes mono (son sur un seul canal) sur<br />
5 enceintes.<br />
Audio 1+1 1 Lit le contenu audio de la piste sonore<br />
(2, Les deux) sélectionnée.<br />
Le contenu de la deuxième piste sonore peut<br />
correspondre à une autre langue, par<br />
exemple.<br />
Minuterie<br />
Inactif Le système est désactivé après la durée<br />
sommeil<br />
(10-90) définie.
English Español Français<br />
Entretien du système :<br />
Figure 19<br />
Mise en place des piles de<br />
la télécommande<br />
! !<br />
RÉFÉRENCE<br />
La seule opération d’entretien régulière nécessaire pour la télécommande consiste à changer<br />
les piles dès que nécessaire.<br />
Notez cependant qu’en cas de besoin, il est possible de changer les commutateurs situés à<br />
l’intérieur du compartiment à piles (pour sélectionner un nouveau code interne, par exemple).<br />
Un changement du même type peut être nécessaire pour les éventuelles télécommandes<br />
supplémentaires, achetées pour être utilisées dans d’autres pièces.<br />
Remarque : Pour plus d’informations, reportez-vous à la section « Modification des<br />
commutateurs de la télécommande » ci-dessous.<br />
Remplacement des piles de la télécommande<br />
Remplacez les quatre piles dès que la télécommande cesse de fonctionner ou que son rayon<br />
d’action semble avoir diminué. Il est conseillé d’utiliser des piles alcalines.<br />
1. Ouvrez le compartiment à piles situé à l’arrière de la télécommande en le faisant glisser<br />
(Figure 19).<br />
2. Insérez quatre piles AAA ou IEC-LR3 1,5 V ou équivalent comme indiqué. Faites<br />
correspondre les symboles + et - des piles avec les repères + et - situés à l’intérieur du<br />
compartiment.<br />
3. Remettez le couvercle en place.<br />
Piles AAA (4)<br />
+<br />
+<br />
Couvercle du<br />
compartiment à piles<br />
+<br />
+<br />
Compartiment à pile<br />
Modification des commutateurs de la télécommande<br />
Toutes les télécommandes LIFESTYLE ® utilisent un code interne qui correspond au code<br />
interne défini dans le media center et qui permet aux deux appareils de communiquer. Si un<br />
autre système LIFESTYLE ® situé à proximité entre en conflit avec le vôtre, vous pouvez<br />
facilement définir un nouveau code interne pour votre media center et ses télécommandes.<br />
Procédez comme indiqué.<br />
Sur la télécommande :<br />
1. Ouvrez le compartiment à piles de la télécommande et repérez les<br />
commutateurs miniature (Figure 20 page 42).<br />
2. Déplacez un ou plusieurs commutateurs (1, 2, 3 ou 4) dans la direction opposée à leur<br />
position actuelle. Utilisez un trombone, un stylo à bille ou un objet de ce type.<br />
Remarque : NE MODIFIEZ PAS les réglages des autres commutateurs. Vous risqueriez de<br />
désactiver votre télécommande.<br />
3. Remettez le couvercle en place.<br />
41<br />
RÉFÉRENCE
RÉFÉRENCE<br />
RÉFÉRENCE<br />
Figure 20<br />
Les commutateurs<br />
miniatures de la<br />
télécommande principale<br />
sont réglés pour être utilisés<br />
dans la pièce principale (A)<br />
42<br />
! !<br />
Français Español<br />
English<br />
Sur le media center :<br />
1. Soulevez le capot du media center et appuyez sur le bouton All Off.<br />
2. Appuyez sur le bouton Enter et maintenez-le enfoncé. Le code interne actuel apparaît sur<br />
la fenêtre d’affichage du media center sous la forme de quatre rectangles représentant la<br />
position des commutateurs 1 à 4 :!<br />
CODE INTERNE :<br />
Commutateurs 1 à 4 abaissés = 0 0 0 0 (code interne actuel)<br />
3. Maintenez le bouton Enter enfoncé et appuyez sur une touche de la télécommande. !<br />
Le media center affiche alors le nouveau code interne afin de confirmer qu’il est bien!<br />
reconnu :!<br />
NOUV. CODE INT. :<br />
commutateur 1 relevé, 2 abaissé, 3 relevé et 4 abaissé = 1 0 1 0 (nouveau code interne)<br />
4. Relâchez le bouton Enter. Le système reste désactivé.<br />
5. Si vous possédez d’autres télécommandes, positionnez leurs commutateurs comme<br />
ceux de cette première télécommande en répétant les étapes 1 à 3 ci-dessus. Il n’est pas<br />
nécessaire de répéter les étapes 4 à 8.<br />
Remarque : Pour vérifier le code interne du système, appuyez sur Enter pendant que le<br />
système est désactivé. L’écran confirme la configuration des commutateurs 1 à 4.<br />
Commutateurs (1 à 4).!<br />
Réglage usine : !<br />
tous les commutateurs sont abaissés.<br />
1 2 3 4 5 6 7 8 9<br />
1 2 3 4 5 6 7 8 9<br />
Autres commutateurs<br />
Le commutateur 5 détermine le<br />
« flux » ou programme que vous<br />
entendez.<br />
Pour plus d’informations sur les<br />
flux, reportez-vous à la section<br />
« Configuration d’une deuxième<br />
pièce d’écoute » page 43.<br />
Les commutateurs 6 à 9<br />
représentent la pièce dans laquelle<br />
la télécommande est utilisée.<br />
Dans la pièce principale, la<br />
télécommande est définie sur Pièce<br />
A, et tous les commutateurs sont<br />
abaissés.<br />
Les commutateurs 1 à 4 doivent être<br />
réglés de la même façon que sur la<br />
télécommande principale.<br />
Définissez les commutateurs 5 à 9<br />
pour la pièce dans laquelle vous<br />
souhaitez utiliser la télécommande<br />
réseau <strong>Bose</strong> ® Pour une télécommande<br />
réseau <strong>Bose</strong><br />
.<br />
® dans une<br />
autre pièce
English Español Français<br />
Configuration d’une deuxième pièce d’écoute<br />
! !<br />
RÉFÉRENCE<br />
Votre système audio/vidéo LIFESTYLE ® peut non seulement restituer du son dans plusieurs<br />
pièces simultanément, mais aussi restituer du son à partir de deux sources différentes (CD,<br />
tuner AM/FM, TAPE ou AUX) vers ces pièces, par l’intermédiaire de deux « flux »<br />
indépendants.<br />
Dans les autres pièces équipées d’enceintes (outre la pièce principale dans laquelle le media<br />
center est installé), vous pouvez choisir l’une de ces deux sources, pour une véritable<br />
indépendance. Si le système est allumé dans la pièce principale, les auditeurs se trouvant<br />
dans les autres pièces peuvent écouter le programme en cours dans la pièce A ou un<br />
programme entièrement différent.<br />
Un seul système LIFESTYLE ® peut restituer du son de qualité <strong>Bose</strong> ® dans 14 pièces en plus<br />
de la pièce A, ce qui vous permet de profiter du système dans l’ensemble de votre maison.<br />
Les produits compatibles avec le réseau <strong>Bose</strong> ® Link simplifient vos<br />
décisions<br />
Si vous souhaitez profiter du son dans l’ensemble de votre maison (et même à l’extérieur),<br />
vous pouvez utiliser le réseau <strong>Bose</strong> ® Link pour connecter toutes les pièces et installer<br />
plusieurs produits <strong>Bose</strong> de même qualité dans les autres pièces.<br />
Par exemple : le réseau audio domestique sans fil <strong>Bose</strong> ® link AL8 Vous pouvez l’utiliser avec<br />
le système Wave ® , les systèmes 3•2•1 série II ou 3•2•1 GS série II, les enceintes amplifiées<br />
LIFESTYLE ® RoomMate ® et autres enceintes non amplifiées pour l’intérieur ou l’extérieur,<br />
<strong>Bose</strong> propose aussi des amplificateurs de diverses puissances nominales, ainsi que des<br />
câbles et des adaptateurs appropriés pour compléter votre système de son.<br />
De plus, si vous achetez une télécommande réseau <strong>Bose</strong> ® Link pour chaque pièce<br />
supplémentaire, la gestion de votre système audio dans toute la maison devient simple et<br />
rapide. Il suffit de prérégler chaque télécommande en fonction de la pièce dans laquelle elle<br />
sera utilisée et du flux audio qu’elle doit recevoir.<br />
Pour plus de polyvalence, vous pouvez utiliser une télécommande PERSONAL ® Music<br />
Center II dans les autres pièces. Outre le fait qu’elle permet de changer les flux de<br />
programmes sans devoir configurer les commutateurs, cette télécommande avancée est<br />
dotée d’un écran à cristaux liquides indiquant les programmes des deux flux et les autres<br />
options d’écoute disponibles.<br />
Quelle que soit la télécommande choisie, chaque produit compatible <strong>Bose</strong> Link est<br />
accompagné d’instructions détaillées permettant de l’insérer aisément dans votre système<br />
home cinéma LIFESTYLE ® .<br />
Pour obtenir des informations complémentaires ou pour vous procurer d’autre appareils,<br />
contactez votre revendeur <strong>Bose</strong>. Vous pouvez également contacter <strong>Bose</strong> directement. !<br />
Il vous suffit de consulter la liste des adresses fournie avec votre système.<br />
43<br />
RÉFÉRENCE
RÉFÉRENCE<br />
RÉFÉRENCE<br />
44<br />
Réglage des commutateurs de la<br />
télécommande de réseau <strong>Bose</strong> ® Link<br />
Ces réglages ne s’appliquent qu’aux<br />
télécommandes dotées de commutateurs<br />
dans le compartiment des piles.*<br />
• Les commutateurs de code interne (1, 2, 3<br />
et 4) doivent être réglés comme ceux de<br />
la télécommande principale.<br />
• Exemple de choix pour le<br />
commutateur 5 :<br />
Changez le commutateur de sorte que la<br />
pièce d’extension partage le même flux<br />
audio que la pièce principale (A).<br />
Ne changez pas le commutateur, de sorte<br />
que la pièce d’extension reçoive un flux<br />
audio différent de celui de la pièce<br />
principale (A).<br />
• Les commutateurs de code de salle (6, 7,<br />
8 et 9) doivent être dans une position<br />
unique pour chaque nouvelle<br />
télécommande, sauf pour un usage dans<br />
la pièce principale (A), parallèlement à la<br />
télécommande principale.<br />
Protection et entretien du système<br />
! !<br />
Français Español<br />
English<br />
*Pour le music center PERSONAL ® II, les réglages ci-dessus sont effectués par l’intermédiaire<br />
d’un menu à l’écran.<br />
Respectez les recommandations suivantes lors du choix d’un emplacement.<br />
• N’utilisez pas de solvants, de produits chimiques, ni de liquides de nettoyage contenant de<br />
l’alcool, de l’ammoniac ou des substances abrasives.<br />
• N’utilisez pas d’aérosols à proximité du système.<br />
Nettoyage du media center<br />
Pour nettoyer l’extérieur du media center, utilisez uniquement un chiffon doux et sec.<br />
Nettoyage des enceintes<br />
Nettoyez la surface des enceintes avec un chiffon doux et humide. Vous pouvez utiliser un<br />
produit à vitres sans ammoniac sur un chiffon doux pour la finition.<br />
Les grilles des enceintes ne nécessitent aucun entretien spécifique. Vous pouvez cependant<br />
passer l’aspirateur dessus, avec précaution, si nécessaire.<br />
Nettoyage des disques<br />
Manipulez les disques par les bords afin d’éviter de déposer des empreintes ou de les érafler<br />
(Figure 21). N’écrivez pas sur la surface du disque et n’y fixez pas d’étiquette.<br />
• Pour effacer les tâches ou les empreintes de la surface d’un disque, utilisez un chiffon<br />
doux, sec et non pelucheux. Procédez par mouvements droits, en partant du centre du<br />
disque vers les bords. N’utilisez pas de produits chimiques. Ils risqueraient d’endommager<br />
le disque.<br />
• Pour réduire l’exposition à la poussière et à la saleté, replacez les disques dans leur boîtier<br />
après utilisation. Rangez chaque disque dans son boîtier et conservez-le dans un endroit<br />
sec, à l’abri de la lumière directe du soleil et de la chaleur.
English Español Français<br />
Figure 21<br />
Manipulation et nettoyage<br />
d’un disque<br />
Dépannage<br />
Problème Mesure corrective<br />
Le système ne<br />
fonctionne pas du tout.<br />
! !<br />
RÉFÉRENCE<br />
• Assurez-vous que le connecteur d’alimentation est correctement inséré dans le media<br />
center, que le câble d’alimentation est correctement inséré dans le module Acoustimass ®<br />
et que le bloc et le câble d’alimentation sont correctement branchés sur des prises de<br />
secteur murales qui fonctionnent.<br />
• Vérifiez que vous avez sélectionné une source (CD/DVD, AM/FM, etc.) sur la<br />
télécommande LIFESTYLE ®<br />
• Débranchez le media center pendant 60 secondes, puis reconnectez-le. Ceci permet à<br />
l’unité de se réinitialiser après une surtension ou une coupure de courant.<br />
Aucun son n’est émis. • Augmentez le volume.<br />
• Vérifiez si le mot MUTE (silence) est affiché à l’écran. Si tel est le cas, appuyez sur la<br />
touche Mute de la télécommande pour rétablir le son.<br />
• Vérifiez les branchements des éventuels autres éléments externes. Assurez-vous d’avoir<br />
appuyé sur la touche correspondant à la source à écouter de la télécommande.<br />
• Pour la lecture de CD ou de DVD, assurez-vous que le disque est bien placé (étiquette<br />
dirigée vers le haut) dans le tiroir disque.<br />
• Connectez les antennes FM et AM.<br />
• Assurez-vous que l’interrupteur situé sur le module Acoustimass est sur ON (I).<br />
• Assurez-vous que :<br />
! le connecteur du câble d’entrée vidéo est correctement inséré dans la fiche Main<br />
Speaker du media center.<br />
! le connecteur multi-broches situé à l’autre extrémité est correctement inséré dans la<br />
prise AUDIO INPUT du module Acoustimass.<br />
• Vérifiez les branchements entre les enceintes cube et le module.<br />
• Désactivez le media center pendant 60 secondes, puis réactivez-le afin de rétablir la<br />
communication entre le media center et les enceintes.<br />
• Assurez-vous que l’interrupteur situé sur le module Acoustimass est sur ON (I).<br />
Le son est parasité par<br />
un bourdonnement ou un<br />
grésillement, qui semble<br />
de nature électrique (pas<br />
harmonique)<br />
Aucun son ne sort de<br />
l’enceinte centrale.<br />
Son trop fort sur<br />
l’enceinte centrale<br />
• Contactez votre revendeur <strong>Bose</strong> ® ou le service client de <strong>Bose</strong> pour déterminer si et<br />
comment d’autres composants électriques peuvent créer des signaux parasites, et pour<br />
connaître les remèdes possibles.<br />
• Assurez-vous que les deux extrémités du câble de l’enceinte centrale sont bien<br />
connectées.<br />
• Sélectionnez le mode 3 ou 5 enceintes.<br />
• Diminuez le réglage Canal central.<br />
45<br />
RÉFÉRENCE
RÉFÉRENCE<br />
RÉFÉRENCE<br />
Problème Mesure corrective<br />
Aucun son sur les<br />
enceintes surround<br />
Son trop fort sur les<br />
enceintes Surround<br />
Le stockage des pistes<br />
d’un CD est plus long<br />
que prévu.<br />
La télécommande<br />
LIFESTYLE ® fonctionne<br />
de manière irrégulière,<br />
voire pas du tout.<br />
(En cas d’utilisation d’un<br />
téléviseur à écran<br />
plasma, voir le problème<br />
ci-dessous.)<br />
Avec un téléviseur à<br />
écran plasma allumé, la<br />
télécommande<br />
LIFESTYLE ® fonctionne<br />
de manière irrégulière<br />
Le système s’active tout<br />
seul ou fonctionne de<br />
manière irrégulière.<br />
La radio ne fonctionne<br />
pas.<br />
46<br />
! !<br />
Français Español<br />
English<br />
• Sélectionnez le mode 5 enceintes.<br />
• Augmentez le réglage Surround pour la source utilisée.<br />
• Assurez-vous que la source de son de la vidéo est stéréo et codée pour le mode Surround,<br />
et que le composant utilisé (TV, magnétoscope, graveur de DVD, etc.) est stéréo.<br />
• Diminuez le réglage Surround pour la source utilisée.<br />
• Assurez-vous que les enceintes avant gauche et droite sont connectées aux prises des<br />
enceintes avant (bleu) et que les enceintes Surround gauche et droite sont connectées aux<br />
prises des enceintes Surround (orange).<br />
• Retirez le CD et vérifiez s’il est rayé. Si tel est le cas, le processus risque d’être ralenti et<br />
toutes les pistes ne pourront pas être stockées.<br />
• S’il est nécessaire de nettoyer le CD, reportez-vous à la section « Nettoyage des disques »<br />
page 44.<br />
• Vérifiez les piles et leur polarité (+ et -).<br />
• Assurez-vous que le câble d’alimentation entre le media center et sa source d’alimentation<br />
est correctement inséré, déroulé et le plus étendu possible.<br />
• Si vous utilisez un téléviseur à écran plasma, vérifiez que l’alimentation du media center<br />
est aussi éloignée que possible du téléviseur.<br />
• Déplacez la télécommande (ou le media center) de quelques dizaines de centimètres pour<br />
éviter tout effet d’angle mort.<br />
• Vérifiez que les codes internes de la télécommande et du media center sont identiques.<br />
• Contactez le service client de <strong>Bose</strong> ® pour obtenir de l’aide.<br />
• Débranchez provisoirement le câble vidéo (composite, S-video ou en composantes) et<br />
vérifiez si le fonctionnement de la télécommande est amélioré.<br />
• Si c’est le cas, il est possible de corriger le problème en acquérant des aimants en ferrite<br />
et en les plaçant sur le câble pour protéger celui-ci des interférences. Pour acheter un<br />
aimant en ferrite, contactez le service client de <strong>Bose</strong>.<br />
• Modifiez la configuration du code interne afin que les signaux n’entrent pas en conflit avec<br />
ceux d’un autre système LIFESTYLE ® situé à proximité. Reportez-vous à la section<br />
« Modification des commutateurs de la télécommande » page 41.<br />
• Assurez-vous que les antennes sont correctement connectées.<br />
• Placez l’antenne AM à au moins 50 cm du media center.<br />
• Réglez la position de l’antenne pour améliorer la réception.<br />
• Assurez-vous que l’antenne AM est en position verticale.<br />
• Éloignez les antennes du media center, du téléviseur ou de tout autre équipement<br />
électronique.<br />
• Sélectionnez une autre station. Il se peut que vous vous trouviez dans une zone de faible<br />
couverture pour certaines stations.<br />
Le disque n’est pas lu. • Après avoir appuyé sur la touche CD/DVD, attendez quelques secondes avant d’appuyer<br />
sur Play (lecture).<br />
• Assurez-vous que le disque est correctement positionné (étiquette dirigée vers le haut).<br />
• Éjectez le disque et essayez de le charger à nouveau.<br />
• Le CD est peut-être sale. Reportez-vous à la section « Nettoyage des disques » page 44.<br />
• Essayez un autre CD. Le CD est peut-être défectueux ou incompatible. Reportez-vous à la<br />
section « Notions de base » page 5.<br />
Impossible de lire un<br />
DVD ou un CD.<br />
• Vérifiez que le CD n’est pas rayé, taché ou sale. Reportez-vous à la section « Protection et<br />
entretien du système » page 44.
English Español Français<br />
Problème Mesure corrective<br />
La réception FM est<br />
mauvaise.<br />
Le son FM présente des<br />
parasites en mode<br />
surround.<br />
Garantie limitée<br />
• Réglez la position de l’antenne pour réduire les interférences.<br />
! !<br />
RÉFÉRENCE<br />
• Les stations FM à faible signal produisent de l’électricité statique dans les enceintes<br />
Surround. Sélectionnez le mode 2 enceintes dans le menu Configuration pour réduire les<br />
parasites. Reportez-vous à la section « Réglages CD » page 38.<br />
Le son est mauvais. • Assurez-vous que les câbles des enceintes ne sont pas endommagés et que les<br />
branchements sont corrects.<br />
• Diminuez le niveau de sortie des éventuels autres éléments externes connectés au media<br />
center.<br />
Aucun son avec une<br />
source TV, CD/DVD, VCR<br />
ou AUX.<br />
Pas de vidéo affichée,<br />
mais le son de la TV<br />
fonctionne<br />
La télécommande<br />
LIFESTYLE ® ne contrôle<br />
pas votre téléviseur,<br />
magnétoscope,<br />
récepteur câble/satellite<br />
ou tout autre élément<br />
externe.<br />
Le téléviseur s’active et<br />
se désactive tout seul.<br />
L’écran TV s’assombrit<br />
ou l’image se retourne<br />
constamment après<br />
qu’une modification a été<br />
apportée à une fonction<br />
Vidéo dans les réglages<br />
système.<br />
Vous avez oublié votre<br />
mot de passe.<br />
• Vérifiez les branchements.<br />
• Assurez-vous que le composant approprié est activé.<br />
• Reportez-vous au manuel du composant concerné.<br />
• Vérifiez le sélecteur d’entrée vidéo du téléviseur. Il doit correspondre à la source désirée.<br />
• Assurez-vous que les codes définis sont corrects. Reportez-vous à la section « Utilisation<br />
de la télécommande LIFESTYLE ; avec d’autres appareils » page 21.<br />
• Assurez-vous que la partie avant du media center est bien dégagée. L’émetteur IR qui<br />
envoie les commandes vers les éléments extérieurs est situé sous le tiroir disque.<br />
• Si vous n’arrivez toujours pas à contrôler les éléments externes, il peut être nécessaire de<br />
connecter l’émetteur IR externe du système sur la prise IR EMITTER du panneau arrière du<br />
media center. Reportez-vous à la section « L’option Câble émetteur IR » du Guide<br />
d’installation.<br />
• Repositionnez le capteur TV situé à l’arrière du téléviseur. Vérifiez également la prise péritel<br />
utilisée.<br />
• Vérifiez que le capteur TV fonctionne correctement. Pour ce faire, sélectionnez État<br />
d’alimentation TV sous Vidéo dans le menu Système.<br />
• Utilisez le media center pour vérifier les réglages Standard vidéo et Balayage progressif.<br />
Reportez-vous aux instructions de la section « Configuration des composants du système<br />
à l’aide de l’afficheur » page 13.<br />
! Le réglage Standard vidéo doit être défini sur NTSC (norme US) ou PAL (norme<br />
européenne).<br />
! Assurez-vous que le réglage Balayage progressif est sur Inactif, sauf si vous utilisez une<br />
connexion de type vidéo en composantes et que votre téléviseur gère le balayage<br />
progressif.<br />
• Entrez les chiffres 2673 comme mot de passe temporaire pour accéder à la fonction de<br />
contrôle parental. Définissez ensuite un nouveau mot de passe.<br />
Comment contacter le service client<br />
Pour obtenir une aide supplémentaire afin de résoudre vos problèmes, contactez le service<br />
client de <strong>Bose</strong> ® . Consultez la liste d’adresses incluse dans le carton d’emballage.<br />
Cet appareil est couvert par une garantie limitée transférable.<br />
Les conditions détaillées de la garantie limitée sont notées sur la carte d’enregistrement qui<br />
accompagne votre système. Remplissez la section « Informations » de la carte et renvoyez-la<br />
par courrier à <strong>Bose</strong>. En cas d’oubli, les droits que vous confère cette garantie limitée ne s’en<br />
trouveront pas affectés.<br />
47<br />
RÉFÉRENCE
RÉFÉRENCE<br />
RÉFÉRENCE<br />
Accessoires<br />
Caractéristiques techniques<br />
48<br />
! !<br />
Français Español<br />
English<br />
Pour toutes informations sur les supports de fixation et les pieds pour enceintes, sur les<br />
télécommandes supplémentaires et sur le branchement de haut-parleurs amplifiés <strong>Bose</strong> ®<br />
supplémentaires, contactez votre revendeur <strong>Bose</strong>, appelez le service client <strong>Bose</strong> ou<br />
consultez le site www.bose.com. Reportez-vous à la liste d’adresses et de numéros de<br />
téléphone fournie avec le système.<br />
Puissance nominale du media center<br />
États-Unis/Canada : 120 V , 0,55 A, 50/60 Hz, 33 Vcc , 1,1 A<br />
International : 220-240 V 0,30A 50/60Hz 33Vcc 1,1A<br />
Bi-tension : 115/230 V , 0,55 A, 50/60 Hz, 33 Vcc , 1,1 A<br />
Puissance nominale du système d’enceintes<br />
États-Unis/Canada : 100-120 V 50/60Hz 350 W<br />
International : 220 à 240 V 50/60 Hz 350 W<br />
Bi-tension : 100-120/220-240 V 50/60 Hz 350 W<br />
Entrées du media center<br />
AUX : 2 Vrms, maximum<br />
CBL-SAT : 2 Vrms, maximum<br />
VCR : 2 Vrms, maximum<br />
TV : 2 Vrms, maximum<br />
NUMÉRIQUE : SPDIF (1 de chaque pour TV, VCR, TAPE et AUX)<br />
VIDÉO COMPOSITE : format NTSC ou PAL 1 V crête à crête avec synchro, 75 #$%&<br />
S-VIDEO : Luminance 1 Vcrête à crête, Chrominance 0,3 Vcrête à crête<br />
VIDÉO EN COMPOSANTES : NTSC ou PAL 1 Vcrête à crête avec synchro sur Y<br />
ENTRÉE OPTIQUE : SPDIF numérique, assignable<br />
ANTENNE FM : 75"<br />
ANTENNE AM : 12 µH<br />
CAPTEUR TV : détection de la fréquence de balayage<br />
Sorties du media center<br />
ENCEINTES ZONES 1 et 2 : audio variable, pouvant être sélectionné par l’utilisateur<br />
SORTIES AUDIO G et D, audio fixe, 2 Vrms maximum<br />
SORTIE AUDIO NUMÉRIQUE : SPDIF<br />
SORTIE OPTIQUE : SPDIF, -15 à -21 dbm<br />
VIDÉO COMPOSITE : NTSC ou PAL 1 Vcrête à crête avec synchro, 75 #$%&<br />
S-VIDEO : Luminance 1 Vcrête à crête , Chrominance 0,3 Vcrête à crête<br />
VIDÉO EN COMPOSANTES : NTSC ou PAL 1 Vcrête à crête avec synchro sur Y<br />
Dimensions du media center<br />
40,1 cm x 27,9 cm x 8,9 cm<br />
Poids du media center<br />
3.7 kg<br />
Finition du media center<br />
Aluminium brossé<br />
Portée de la télécommande<br />
20 m
English Español<br />
Français<br />
! !<br />
49
6<br />
<br />
1