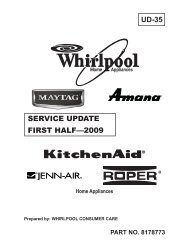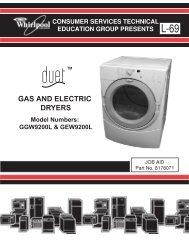
UD-35 SERVICE UPDATE FIRST HALF—2009 - Whirlpool
UD-35 SERVICE UPDATE FIRST HALF—2009 - Whirlpool
UD-35 SERVICE UPDATE FIRST HALF—2009 - Whirlpool

Create successful ePaper yourself
Turn your PDF publications into a flip-book with our unique Google optimized e-Paper software.
<strong>SERVICE</strong> <strong>UPDATE</strong><br />
<strong>FIRST</strong> <strong>HALF—2009</strong><br />
Home Appliances<br />
Prepared by: WHIRLPOOL CONSUMER CARE<br />
<strong>UD</strong>-<strong>35</strong><br />
PART NO. 8178773
FORWARD<br />
The following service update information is provided to make you more knowledgeable<br />
about <strong>Whirlpool</strong>, Roper, KitchenAid, Maytag, Jenn-Air and Amana major appliances.<br />
Service update information is designed for the experienced service specialist. It keeps<br />
you advised of the most recent improvements and product changes, and allows you to<br />
service these products more efficiently.<br />
WHIRLPOOL CORPORATION assumes no responsibility for any repairs made on<br />
our products by anyone other than authorized In-Home Service Professionals.<br />
Copyright © 2009, <strong>Whirlpool</strong> Corporation, Benton Harbor, MI 49022<br />
- ii -
TABLE OF CONTENTS<br />
COOKING .................................................................................................................. Page 1<br />
Product Updates ...................................................................................................... Page 1<br />
KitchenAid Freestanding Electric Range ................................................................. Page 1<br />
KitchenAid and <strong>Whirlpool</strong> Built-In Single and Double Ovens Blower Assembly. ..... Page 2<br />
KitchenAid Freestanding Ranges Storage Drawer .................................................. Page 3<br />
All Gas Ranges Eliminating LP Conversion Kit ....................................................... Page 4<br />
Warming Drawer Feature ........................................................................................ Page 5<br />
LAUNDRY .................................................................................................................. Page 7<br />
Laundry Product Updates ........................................................................................ Page 7<br />
Steam Washer Changes .......................................................................................... Page 7<br />
Extra Thermister ...................................................................................................... Page 7<br />
Different Flow Rate .................................................................................................. Page 8<br />
CCU ......................................................................................................................... Page 9<br />
Drained and Refilled.. ............................................................................................ Page 10<br />
Front Load Washers ................................................................................................Page 11<br />
Failure Codes on Set-up ........................................................................................Page 11<br />
Shaking and Noises ............................................................................................... Page 12<br />
Clinch Lock ............................................................................................................ Page 12<br />
"Sport" Bellow ........................................................................................................ Page 13<br />
Squeaking Noise During Spin ................................................................................ Page 14<br />
Squeaking Noise During Spin ................................................................................ Page 15<br />
Squeaking Noise During Spin ................................................................................ Page 16<br />
Air Trap .................................................................................................................. Page 17<br />
Washer Design Changes ......................................................................................... Page 18<br />
Proper Loading ...................................................................................................... Page 19<br />
HE Top Load Washers ............................................................................................. Page 20<br />
Motor ..................................................................................................................... Page 20<br />
Tier III ........................................................................................................................ Page 21<br />
Classic Top Load Washers ..................................................................................... Page 22<br />
Inlet Valve / Vacuum Break Assembly ................................................................... Page 22<br />
Pressure Switch vs. Pressure Sensors ................................................................. Page 23<br />
Load Sense ........................................................................................................... Page 24<br />
Dryers ....................................................................................................................... Page 25<br />
FL Failure Codes Changing ................................................................................... Page 25<br />
Broken Belt Switch ................................................................................................ Page 25<br />
Dryer tech Sheet Location ..................................................................................... Page 26<br />
In-Door Lint Screen ............................................................................................... Page 26<br />
RAST Connector .................................................................................................... Page 27<br />
DISHWASHER (Clean-up) ...................................................................................... Page 29<br />
Hot Water Dispensers ............................................................................................ Page 29<br />
Replacment Components ...................................................................................... Page 29<br />
Pre-Washing Dishes .............................................................................................. Page 29<br />
2 Piece SS Tank Transition ................................................................................... Page 30<br />
Silverware Zone ..................................................................................................... Page 30<br />
Silverware Zone ..................................................................................................... Page 31<br />
Silverware Zone ..................................................................................................... Page 32<br />
Dish Drawer Door Alignment ................................................................................. Page 33<br />
Horizontal Pump No/Slow Drain ............................................................................ Page 33<br />
Maytag Plastic Tall Tub Dishwashers .................................................................... Page 34<br />
- iii -
TABLE OF CONTENTS<br />
REFRIGERATION <strong>UPDATE</strong> ......................................................................................... Page 36<br />
KABIR Update ........................................................................................................... Page 37<br />
BIR Model Refresh ................................................................................................ Page 37<br />
BIR Model Refresh ................................................................................................ Page 38<br />
Ice and Water Update ............................................................................................ Page 39<br />
Ice Cubes Sticking Together .................................................................................. Page 39<br />
Ice Cubes Sticking Together .................................................................................. Page 40<br />
Dispenser Door With Stepper Motor Not Closing .................................................. Page 40<br />
New Front Water Connection Installation Instructions .......................................... Page 41<br />
New Front Water Connection Installation Instructions ........................................... Page 42<br />
In-Door Ice Diagnostics ......................................................................................... Page 43<br />
In-Door Ice Diagnostics ......................................................................................... Page 44<br />
In-Door Ice Diagnostics ......................................................................................... Page 45<br />
Ice Maker Wiring Issues (bottom mount) ............................................................... Page 46<br />
Water Valve Wiring Issues ..................................................................................... Page 46<br />
Returned Unit - Deemed Not Repairable ............................................................... Page 47<br />
Emitter & Receiver Issues ..................................................................................... Page 47<br />
Returned Unit - Deemed Not Repairable ............................................................... Page 47<br />
Frost Build-Up - Dispenser Door Not Closing ........................................................ Page 48<br />
Cabinet Door Issues .............................................................................................. Page 49<br />
Doors Out of Alignent - SxS FDBM ....................................................................... Page 49<br />
Doors Out of Plane - SxS ...................................................................................... Page 50<br />
To Install Shim Behind RC Bottom Hinge .............................................................. Page 51<br />
To Install Shim Behind RC Bottom Hinge .............................................................. Page 52<br />
BIR Bottom Mount Freezer Drawer Misalignment ................................................. Page 52<br />
BIR Bottom Mount Freezer Drawer Misalignment ................................................. Page 53<br />
Door Not Closing ................................................................................................... Page 54<br />
Door Noise (Light Switch Assy.) ............................................................................. Page 54<br />
Light Switch Pad .................................................................................................... Page 55<br />
Removing the Door Skin ........................................................................................ Page 56<br />
Gap Between UI and FC Door ............................................................................... Page 57<br />
Electrical ................................................................................................................... Page 58<br />
Unit compartment .................................................................................................. Page 58<br />
Main Control .......................................................................................................... Page 59<br />
Main Block Diagram .............................................................................................. Page 60<br />
Dispenser Control .................................................................................................. Page 61<br />
Niagara Block Diagram .......................................................................................... Page 62<br />
Average Crisper Temperatures KABI SxS ............................................................. Page 63<br />
Warm RC, Normal FC Temperatures ..................................................................... Page 64<br />
Intermittent Over temperature ............................................................................... Page 65<br />
Audible Alarm ........................................................................................................ Page 65<br />
Connectors ............................................................................................................ Page 66<br />
Performance Issue ................................................................................................ Page 67<br />
Performance Issue ................................................................................................ Page 68<br />
Performance Update ............................................................................................. Page 68<br />
Performance Update ............................................................................................. Page 69<br />
Sealed System ......................................................................................................... Page 70<br />
Sealed System Update .......................................................................................... Page 70<br />
SxS Sealed System Joint Locations ...................................................................... Page 70<br />
Bottom Mount Sealed System Joint Locations ...................................................... Page 71<br />
Alarms and What They Mean .................................................................................. Page 72<br />
- iv -
TABLE OF CONTENTS<br />
Main User Interface ............................................................................................... Page 73<br />
Diagnostics Mode .................................................................................................. Page 74<br />
Running Diagnostics .............................................................................................. Page 74<br />
Diagnostics ............................................................................................................ Page 74<br />
Diagnostics ............................................................................................................ Page 75<br />
Showroom Floor Mode .......................................................................................... Page 76<br />
Holiday Mode ......................................................................................................... Page 76<br />
Component Testing ................................................................................................ Page 77<br />
Compressor Converter .......................................................................................... Page 77<br />
KABIR Diagnostic Inverter ..................................................................................... Page 78<br />
Air Door ................................................................................................................. Page 78<br />
Air Door ................................................................................................................. Page 79<br />
Checking thermistors ............................................................................................. Page 79<br />
Service Pointers BIR ............................................................................................. Page 80<br />
Literature Revisions ............................................................................................... Page 80<br />
<strong>SERVICE</strong> POINTER INDEX ......................................................................................... Page 81<br />
- v -
- NOTES -<br />
- vi -
COOKING <strong>UPDATE</strong>S<br />
KITCHENAID FREESTANDING ELECTRIC RANGE<br />
ACCU-SIMMER SWITCH<br />
We have seen a condition in the field with the accu-simmer rocker switch used to reduce<br />
the temperature of the right front burner to simmer temperatures. This switch is<br />
used on S-line KitchenAid Freestanding ranges (KERS205SBL0 and KERK901SSS0).<br />
The problem is the switch will not hold up to the high voltage going through it and will<br />
arch or short if the customer sets the switch after the burner is on. The strip circuits<br />
show how the switch is used in a 240 volt circuit and a 120 volt circuit. Engineering<br />
is putting together a field fix kit that will include a new rocker switch, 2 current limit<br />
thermistors one for the L1 side of the circuit and one for the Neutral side of the circuit.<br />
The kit will be available within the next couple of weeks.<br />
1
COOKING <strong>UPDATE</strong>S<br />
KITCHENAID AND WHIRLPOOL BUILT-IN SINGLE<br />
AND DOUBLE OVENS NEW BLOWER ASSEMBLY<br />
Condition<br />
• Oven does not operate after a Self-Clean cycle.<br />
• Oven completely stops during the Self-Clean cycle.<br />
Cause: The oven TOD located at the back of the range has blown because of higher<br />
than expected temperatures.<br />
A new Blower assembly, part number W10176670 (replaces 4457289) has been<br />
made available to reduce temperature build up at the back of the oven. This blower<br />
has been tested and verified to reduce the average temperature at the back of the<br />
oven by 20˚. When replacing the blower also replace the original TOD, from the parts<br />
list.<br />
notes:<br />
• This blower motor assembly is rated at 1200 RPMs versus the 950 RPM blower<br />
assembly that was used in manufacturing and may be slightly louder (3dBA) because<br />
of the increased RPMs.<br />
• For double ovens: only the upper blower should be replaced with the higher speed<br />
blower.<br />
2
COOKING <strong>UPDATE</strong>S<br />
KITCHENAID FREESTANDING RANGES<br />
STORAGE DRAWER<br />
Tulsa Built KitchenAid electric freestanding ranges - If Consumer complains under<br />
the first year warranty about the quality of the storage drawer install Part number<br />
W10238961 drawer kit, which has roller bearing tracks and a new drawer.<br />
3
COOKING <strong>UPDATE</strong>S<br />
ALL GAS RANGES<br />
ELIMINATING LP CONVERSION KIT<br />
Start Date unknown at this time, but will happen in the near future. (June 2009)<br />
4
COOKING <strong>UPDATE</strong>S<br />
WARMING DRAWER FEATURE<br />
Complaint - Control Indicates Warming Drawer Feature Is Not Available (scrolls<br />
across the screen “FEATURE NOT AVAILABLE”)<br />
For <strong>Whirlpool</strong> Ranges built since August of 2008 (WFE and WFG models) there are a<br />
few items that may cause the control to indicate that the warming drawer function is<br />
not available (listed in order of most probable first).<br />
1. The unit is in the self clean mode with the door locked. If the oven door is locked<br />
then the ERC control will not allow the warming drawer to be used.<br />
2. If there are fault codes related to the warming drawer then the warming drawer will<br />
not function. The fault codes can be checked in diagnostic mode.<br />
3. The warming drawer sensor is disconnected, either at the control (P10 connector<br />
pins 3 and 4) or at the in-line connector near the sensor. The warming drawer<br />
sensor can be tested in diagnostic mode to verify that it is reading correctly.<br />
5
- NOTES -<br />
6
LAUNDRY PRODUCT <strong>UPDATE</strong>S<br />
STEAM WASHER CHANGES<br />
Coinciding with a digit change, the steam generator is being replaced with a steam<br />
sump heater.<br />
THE STEAM HEATER<br />
The steam heater is integrated with the wash heater located in the sump. It mounts<br />
the same as the single heater.<br />
EXTRA THERMISTOR<br />
There is an extra thermistor, located on the rear tub. On the 4.0 cu/ft tubs the NTC is<br />
located on top of the rear tub. The 4.4 tubs have the NTC on the back of the rear tub.<br />
7
STEAM WASHER CHANGES (continued)<br />
VALVE HAS A DIFFERENT FLOW RATE<br />
The triple valve has a different flow rate of water for the steam cycle. The water for<br />
the steam portion of the wash enters the sump through the vent tube on the rear of<br />
the machine.<br />
(APS) HAS BEEN IMPROVED<br />
The analogue pressure sensor (APS) has been improved to be more robust, reducing<br />
the tolerance drift and may be used to replace existing sensors.<br />
8
STEAM WASHER CHANGES (continued)<br />
CCU<br />
The CCU incorporates the expansion board and has an accelerometer. It is attached<br />
to the side of the cabinet. The accelerometer consists of a motion sensor and a set<br />
of algorithms. It is able to detect wash unit unbalance. Failures of the accelerometer<br />
will not result in error codes, the machine will default to the traditional unbalance detection<br />
algorithm. If you suspect problems with the accelerometer, make sure that the<br />
unit is level and the CCU is secured tightly to the cabinet.<br />
9
STEAM WASHER CHANGES (continued)<br />
DRAINED AND REFILLED<br />
The Sump Steamer requires that the sump be drained and refilled to the correct level<br />
to generate steam, so the steam portion of the cycles is now at the end of the main<br />
wash cycle.<br />
Customer cannot tell if steam is being produced. The steam will not be visible.<br />
3 new error codes have been added<br />
F-64 for the steam valve<br />
F-60 for the steam heater<br />
F-67 for the steamer NTC<br />
10
FRONT LOAD WASHERS<br />
FAILURE CODES ON SET-UP<br />
The complexity of the electronics in today’s products makes installation issues more<br />
apparent than in the past. Installers are suppose to put newly delivered units into<br />
delivery test cycles. They may get an error code. These codes are built-in to help<br />
assure the installer that they have everything correct with the installation, not to show<br />
that there is something wrong with the unit.<br />
Many people still relate an error code with “a problem with the unit.” Error codes no<br />
longer just mean that there is something wrong with the unit. They can tell you that<br />
the environment is not right. For example, if all of the shipping bolts are not removed<br />
you will have a shaking problem with an error code. Using “old thought“, the process<br />
would go something like this; “There is something wrong with this unit, it must be<br />
defective. After all, there’s an error code telling me that something is wrong with it”.<br />
With “new thought”, it would go like this; “What is this error code telling me and, is it<br />
related to this machine shaking”? This will lead to correcting an installation issue.<br />
In the long run, these error codes are good. They help the installer to correct installation<br />
errors, thus preventing the need for the customer to have a non-warranty service<br />
call. This benefits everyone. Error codes thought patterns need to switch from<br />
negative connotations to thoughts of aid and assistance.<br />
Don’t forget that Steam units may not start right away, due to the Automatic Adjustment<br />
Mode that is built into the electronics.<br />
11
SHAKING AND NOISES<br />
The following information is updates to correcting shaking and noise complaints.<br />
CLINCH LOCK<br />
For loose cabinets, place self-drilling screws in front of each clinch lock.<br />
12
“SPORT” BELLOW<br />
A “softer” bellow is available (W10130455) to help vibration issues on Monterrey<br />
built units. It is the black bellow that is used on commercial units. A softer gray<br />
bellow is scheduled to soon be released.<br />
13<br />
Continued next page
SQUEAKING NOISE DURING SPIN<br />
Check for squeaking noise coming from the bottom of the unit during the spin. Press<br />
the toe panel against the whole unit. If the noise disappears, remove the toe panel<br />
and go to it’s back side.<br />
We will be working on the right hand side, when viewed from the back.<br />
14
SQUEAKING NOISE DURING SPIN<br />
Make a mark 4¾ inches from the inner edge of the side flange. Make sure that you<br />
measure from where the arrow is pointing.<br />
We will be working only with this part of the top flange, a little more than two inches.<br />
15<br />
Continued next page
SQUEAKING NOISE DURING SPIN (continued)<br />
Using a pair of pliers, bend the flange flat, from the edge to the mark you made.<br />
Make sure that you smooth any sharp edges<br />
and use touch-up paint to cover marks and<br />
scratches.<br />
16
AIR TRAP<br />
The air trap may be rattling against the tub. Check the wire tie around the foam. If<br />
the wire tie head is contacting the tub, remove and replace the wire tie, making sure<br />
that the head is away from the tub.<br />
17
WASHER - DESIGN CHANGES<br />
You will be noticing some changes in the design of front load washers. The most obvious<br />
changes being a die-cast pulley and the dispensers will start using Cross Flow<br />
technology.<br />
18
PROPER LOADING<br />
Proper loading of washers (especially front loaders and HE top loaders) aids in reducing<br />
tangling and twisting complaints. For best results, clothes should be loaded in<br />
loose heaps. Allow the washer to rearrange the clothes for best cleaning motion and<br />
balance.<br />
19<br />
Continued next page
HE TOP LOAD WASHERS<br />
MOTOR<br />
The motors on HE top loads will be changing to a new rotor technology - New rotors<br />
will be black (instead of white). They will have stronger magnets that have a different<br />
magnetic pattern. This will allow the use of an aluminum stator. Parts are NOT<br />
backwards compatible. Make sure to order parts using the complete model number<br />
with it’s revision.<br />
20
TIER III<br />
The new Tier III washers boast a 5.0 capacity. This is attained by changing the tub<br />
ring. In order to make room for the extra space, the basket will be dropped by about<br />
1/2”. This means you will need to be sure to order replacement parts by using the<br />
correct and full model number. The suspension rods and drain hose will be longer<br />
and the basket has been revised. The new basket is the only part that will work on<br />
older products. All replacement baskets will be this new design (the bottom skirt has<br />
a cut out). The feet will be factory installed and will not be removable.<br />
21<br />
Continued next page
CLASSIC TOP LOAD WASHERS<br />
PRESSURE SWITCH/HOSE<br />
Replacement parts will come as a kit. They will have the new style barbed pressure<br />
switch, a new pressure hose and a spring clamp.<br />
INLET VALVE/VACUUM BREAK ASSY.<br />
The new Vacuum Break that was introduced in <strong>UD</strong>31 (1st Half 2007) is in production.<br />
It has the water inlet valves and temperature sensor attached to it. This eliminates<br />
the need for a hose and two hose clamps.<br />
22
PRESSURE SWITCH VS PRESSURE SENSORS<br />
Pressure Switches, even<br />
adjustable ones, are only<br />
switches. They do a very<br />
good job but do not have the<br />
sensitivity of Pressure Sensors.<br />
A limiting factor for a<br />
Pressure Switch, when<br />
coupled with electronic<br />
technology, is that if the<br />
water level in the tub drops,<br />
or there is a pressure leak in<br />
the hose, the switch will not<br />
react until there is a sizeable<br />
differential.<br />
The Pressure Sensor, an electronic device, does not switch – it measures and<br />
reports its findings to a control. It has the ability to measure minute drops in water<br />
level or air pressure. So, slight changes from a siphon effect, water leak or pressure<br />
hose leak will get reported to the control. The control will then try to make<br />
adjustments or give failure codes. Diagnosing units that have Pressure Sensors<br />
requires careful inspection of the air dome, pressure hoses, wire connections and<br />
drain systems.<br />
23 Continued next page
LOAD SENSE<br />
The classic top loader’s Load Sense Switch is an example of a pressure sensor.<br />
For consistency’s sake, the parts department has called it a switch - because it takes<br />
place of a water level switch in the control panel. In reality, it is really a pressure<br />
sensor and an electronic control combined together. It monitors and controls several<br />
functions:<br />
1.) Critically senses the water level.<br />
2.) Supplies power to the ATC Switch and the Timer’s #12 (Rinse) contact .<br />
3.) Monitors the volume of water that has entered through the Flow Meter.<br />
4.) Monitors the Fabric Select Switch’s position.<br />
5.) Calculates how much water has been absorbed by the clothes.<br />
6.) Switches power from the fill section to the motor section.<br />
24
DRYERS<br />
FL FAILURE CODES CHANGING<br />
In order to make error coding more consistent across platforms, dryers will<br />
be changing to the use of F and E error codes. This change is due in August.<br />
The tech-sheet will reflect all of the needed information.<br />
BROKEN BELT SWITCH<br />
The broken belt switch design will be changing, coinciding with digit changes. Eventually,<br />
this will be the only design across all dryer platforms. It replaces a 6 piece<br />
assembly into one snap in switch. The motor mounting bracket will be changed to<br />
accept it.<br />
25<br />
Continued next page
DRYER TECH SHEET LOCATION<br />
Look for a change in the dryer’s tech-sheet location, clipped in near the main control.<br />
IN-DOOR LINT SCREEN<br />
A center support rib will be added to the lint screen. The change will happen platform<br />
by platform and replacement parts will change as stock of old parts are depleted.<br />
Both parts are interchangeable and there is no reduction in air flow by adding the rib.<br />
26
RAST CONNECTOR<br />
Care needs to be taken to insert the RAST connectors straight into the receptacle. If<br />
it is inserted at an angle, there is a good chance that the internal wire terminal could<br />
bend. Bending of the terminals contact can keep the connector from properly mating<br />
to the control board contacts, even though it is fully seated into the receptacle.<br />
27
- NOTES -<br />
28
CLEAN UP <strong>UPDATE</strong>S<br />
HOT WATER DISPENSERS<br />
<strong>Whirlpool</strong> Brand is exiting ALL MODELS of the hot water dispenser business effective<br />
12/31/08.<br />
REPLACEMENT COMPONENTS<br />
As stock runs out, original dishwasher replacement parts will sub to a kit that has the<br />
newer RAST connector style component, one of these jumpers and an instruction<br />
sheet. They will be included with the Water Inlet Valve, Turbo Zone Wax Motor, Optical<br />
Water Indicator, Vent Wax Motor and the Drain Motor.<br />
PRE-WASHING DISHES<br />
Customers who pre-wash their dishes and use the Normal Cycle could be getting<br />
poor results. If the customer pre-rinses her dishes, selects the NORMAL CYCLE and<br />
chooses to use no OPTIONS, then the OWI will sense a low soil situation and choose<br />
to use the PRE-WASH water for WASH. If that first fill is at 119°F or higher, it will not<br />
add heat. A 119°F first fill is not sufficient to activate dishwashing detergent. Have<br />
the customer select the HI-TEMP option to improve results.<br />
29<br />
Continued next page
2 PIECE SS TANK TRANSITION<br />
2 PIECE SS TANK<br />
The current two piece tank design will be<br />
changing to a 3 piece design.<br />
SILVERWARE ZONE<br />
30<br />
3 PIECE SS TANK<br />
Replacement parts will sub over to the<br />
3 piece tub as stock is depleted.<br />
A new feature called the Silverware Zone will be offered on some Maytag models in<br />
June 2009.
SILVERWARE ZONE (continued)<br />
It will consist of three new parts, held together with 4 screws….<br />
It will use the current Power Scour system, including the control with no software<br />
change.<br />
Continued next page<br />
31
SILVERWARE ZONE (continued)<br />
With no power to the actuator wax motor, the water will be directed to the middle<br />
spray arm. When the actuator magnet is drawn to the tub, the SS balls will divert the<br />
water to the silverware spray zone.<br />
DOOR HANDLE<br />
MISSING HANDLES ON THE NEW WHIRLPOOL GOLD<br />
FULLY INTEGRATED DISHWASHER MODELS<br />
The Handle for the new <strong>Whirlpool</strong> Gold Fully Integrated dishwasher models<br />
GU2275XTV and GU2475XTV comes packaged along with the dishwasher in the<br />
lower rack (just as with the KitchenAid Fully Integrated models). Please ensure that<br />
your customers are aware of this and do not accidentally discard.<br />
32
DISH DRAWER DOOR ALIGNMENT<br />
Units drawers not lined up and off by<br />
about 1/8”.<br />
HORIZONTAL PUMP NO/SLOW DRAIN<br />
33<br />
Correct alignment may be obtained by<br />
assuring the level and driving the side<br />
mounts according to where you want to<br />
move the drawers.<br />
For no drain or slow drain complaints<br />
on the horizontal pump dishwashers,<br />
the tub’s drain screen height may<br />
be out of spec. Call the techline at<br />
(800) 832-7174 to request a Stainless<br />
Steel Washer to be sent. To install<br />
it, remove the Collector and it’s contents<br />
from the Tub. Insert the washer<br />
between the Funnel and the Gasket.<br />
Reassemble the Collector, test run the<br />
unit for leaks and proper drain function.
MAYTAG PLASTIC TALL TUB<br />
DISHWASHERS<br />
There have been two recent Service Pointers for the Maytag Plastic Tall Tub Dishwashers.<br />
K8178708 (August 2008) “REPLACEMENT TUBS AVAILABLE” is for replacement of<br />
the tub when the tub is damaged or cracked, failing to contain water. Do not order tub<br />
for a complaint of tub-to-door popping or rubbing noises.<br />
K8178759 (December 2008) “DOOR MAKES NOISES” is for replacement of the inner<br />
door panel when the tub lip may be bowed and causes the door panel to rub against<br />
it. The customer complaint is usually a popping or rubbing noise when opening or<br />
closing the door. It is normal for the tub to bow after settling into a new environment.<br />
Tub replacement for this problem may cause the symptoms to return after the<br />
replacement tub settles – resulting in a repeat call. Replacement door panels are<br />
designed to work with tub lip bow and solve the customer complaint of the door popping<br />
or rubbing.<br />
34
- NOTES -
KABIR <strong>UPDATE</strong> - 2009<br />
36
KSSC42QMS03, starting December 2006<br />
•<br />
•<br />
Double lock connectors<br />
Added additional connectors, wire to wire connectors changed to a more<br />
robust connector that should help eliminate back-outs and disconnects.<br />
IDI coupling redesign - Same as freestanding<br />
Bottom layout redesign, fixed drain pan<br />
KSSCQTS00 or KBFO42FTX00, starting March 2007<br />
• SxS features<br />
• Niagara\Advanced dispenser water system (smartvalve, stepper<br />
- motor, etc).<br />
- Fixed drain pan<br />
- Push button water filter<br />
- Redesigned bottom layout carried over from KSSC42QMS03 (ex.) models<br />
•<br />
BMT features<br />
- Temp. controlled pans<br />
- IDI icemaker controls<br />
BIR MODEL REFRESH<br />
BIR MODEL REFRESH<br />
KSSC42QTS02, starting December 2007<br />
37
January 2008, started production of Jenn-Air BIR models in Ft Smith, AR. with the<br />
KitchenAid model line.<br />
BIR MODEL REFRESH<br />
Ft. Smith, AR produced models, starting July ‘08<br />
Model Number Serial Number<br />
38
Original Large Reservoir<br />
Dispenser drip<br />
KABIR <strong>UPDATE</strong> -2009<br />
ICE AND WATER <strong>UPDATE</strong><br />
2327509<br />
Verify the 2327509 tank is installed. This is the smaller baffle tank. See figure 1.<br />
Verify the inlet and outlet is installed correctly from the reservoir tank. The correct<br />
inlet and outlet connections are Critical to ensure dispenser dripping is minimized.<br />
The 2314271 with 5/16” check valve has been helpful at both the door union (Tline<br />
models) and tapped into the line right after the reservoir outlet connection.<br />
Removing the ARD on the M line will help. Use regular ¼ tubing. You will need<br />
a bracket at the top in the dispenser to hold the tube. The water reservoir tank,<br />
2327509, has dramatically reduced our dispenser drip calls. Make sure the<br />
technicians are using this smaller baffle tank as a service part, not the larger<br />
baffle tank. The larger baffle tank does not improve dispenser drip as well as the<br />
2327509 tank does.<br />
39<br />
Inlet<br />
Figure 1<br />
ICE CUBES STICKING TOGETHER<br />
Infrequent Use<br />
Outlet<br />
Ice cubes will stick together over time. Customers that dispense ice infrequently<br />
(more than a week or so between dispensing) will notice this because it is normal.<br />
This is probably the most common cause of cube clumping complaints. Look for<br />
cubes which otherwise appear fairly normal (although over long periods of time some<br />
frost may build). Sublimation and melting occur at the molecular level even at temperatures<br />
which remain well below freezing. The water molecules condense and<br />
refreeze back on the cubes and this will cause cubes to freeze together at points of<br />
contact.<br />
The main points to take away from this are:<br />
Neither warm temperatures nor airflow are necessary for ice cubes to stick together.<br />
Over time, this will occur even at extremely cold temperatures. The cause is that<br />
molecules of water (ice) on adjacent cubes of ice join into the same ice crystal at the<br />
point of contact. The size and strength of the bonds grow with time. It begins happening<br />
immediately, but is at first too weak to notice. Use of the dispenser drives an<br />
auger motor which breaks up bonds, at least until they have grown too strong.
Moisture<br />
ICE CUBES STICKING TOGETHER<br />
Unusual moisture levels in the freezer will accelerate the formation of bonds between<br />
ice cubes. In this case the water forming the bonds do not come from the ice cubes<br />
themselves but from the air. Look for cubes which appear to have frost built up upon<br />
them. The moisture deposits onto the cubes. The moist air may leak in through<br />
damaged or incomplete seals on the dispenser ice door or gaps in the freezer door<br />
gasket. To a lesser extent, unwrapped fresh food items may release moisture which<br />
can get into the freezer through the air return. Moisture causes become more likely in<br />
tropical environments.<br />
Occasional Warm Temperatures<br />
If the temperature goes above freezing, there will be visible melting which will then<br />
refreeze when temperatures return to normal. This is probably the least common<br />
cause of cube clumping complaints. Look for cubes which are misshapen because<br />
they appear to have melted and for over temperature, door open or call service faults.<br />
The most likely causes are power failures, the freezer having been left open for an<br />
extended period, or the ice dispenser door failing to close completely.<br />
DISPENSER DOOR WITH STEPPER<br />
MOTOR NOT CLOSING<br />
P5<br />
Ice Door Stepper Motor<br />
Verify the P5 connections are made and are fully inserted into the connector.<br />
Verify the gasket on the ice door is sealing to the chute<br />
Verify the stepper motor is closing the ice door through operation.<br />
The p5 connection (as shown on the Niagara control board in the upper unit compartment)<br />
is an area to review if there are issues with the dispenser door (with the stepper<br />
motor) not closing. We have seen in some cases a wire backed out of the Molex<br />
connector or wires switched within the connector. This is an area for the technician to<br />
review through diagnosing the root cause for a dispenser door not closing.<br />
40
ICE AND WATER <strong>UPDATE</strong> –cont.<br />
Shortened Water Supply Tube; Production started June 16th.<br />
Improvements:<br />
Installers provide the tubing from the product to the supply valve.<br />
Kinked\damaged supply tubes drastically reduced with short tube<br />
This short water supply tube project has the greatest affect on Installers, not technicians,<br />
but if a technician has to replace the supply tube, use this information for their<br />
reference. Note pictures and the instructions provided on the next slides of this presentation.<br />
This change was made as a running change in production. All T-line digit<br />
03 models will have this change in production as sent out from Ft. Smith.<br />
41
ICE AND WATER <strong>UPDATE</strong> –cont.<br />
Connection point now located<br />
at the front of the product<br />
A shut off valve can be installed at the connection<br />
point<br />
42<br />
Strain relief location for<br />
the 1/4turn filter<br />
Strain relief location for<br />
the push button filter
IN DOOR ICE DIAGNOSTICS<br />
The next three pages steps through the IDI diagnostics sheet, included with the service<br />
and wiring diagram information with the unit. This sheet is located on the side of<br />
the unit cover, folded in a sleeve.<br />
If there is no ice production and you suspect the emitter or receiver, shut the refrigerator<br />
power switch off for one minute and repeat diagnostics. This will eliminate the 40<br />
minute waiting period.<br />
Note: Unscrew light bulbs when making check.<br />
Do not replace boards unless they fail diagnostic test<br />
43
IN DOOR ICE DIAGNOSTICS (continued)<br />
Note, step 7 shows to wait 1 minute prior to opening the door for the icemaker to<br />
cycle.<br />
44<br />
Continued next page
IN DOOR ICE DIAGNOSTICS (continued)<br />
The typical cycle time of an entire revolution of the icemaker averages to be 3 minutes.<br />
We have had a request from an FSR to provide a new diagnostic tool for the icemaker.<br />
This tool jumps the two connection on the receiver to bypass the optics when<br />
diagnosing the root cause for no ice. If you are interested in receiving these tools for<br />
tech usage, please let Tom Kros know, and he will communicate to engineering your<br />
request.<br />
ICE MAKER WIRING ISSUES<br />
(BOTTOM MOUNT)<br />
45<br />
No power to Ice Maker due to a misconnected<br />
wire.<br />
This is more likely than a broken wire<br />
inside the cabinet.<br />
Unit was returned for a broken wire in<br />
the cabinet.
WATER VALVE WIRING ISSUES<br />
(BOTTOM MOUNT)<br />
RETURNED UNIT – DEEMED NOT REPAIRABLE<br />
White wire to Water<br />
Valve backed out<br />
PEX Unit – Deemed Not repairable. The unit could have been easily repaired.<br />
White wire to Water<br />
Valve backed out<br />
PEX Unit – Deemed Not repairable. The unit could have been easily repaired.<br />
46
EMITTER & RECEIVER ISSUES<br />
(BOTTOM MOUNT)<br />
RETURNED UNITS – DEEMED NOT REPAIRABLE<br />
Emitter & Receiver issues - wires backed out. The unit could have been easily repaired.<br />
RETURNED UNIT – DEEMED NOT REPAIRABLE<br />
Bent terminal on Stepper Motor<br />
connector at control board<br />
resulted in return of product.<br />
PEX Unit – Deemed Not repairable.<br />
The unit could have been easily repaired.<br />
47
FROST BUILD UP - DISPENSER DOOR NOT CLOSING<br />
This unit was exchanged as being non repairable. If you are experiencing a “ice<br />
door not sealing condition, Examine this area to insure the dispenser wires are not in<br />
the way of the ice flapper door. A new part has been added at production to prevent<br />
this this issue from from occurring.<br />
PEX PEX Unit – Deemed Not repairable. repairable. The unit could have been easily easily repaired.<br />
No Seal<br />
Good Seal<br />
No Seal<br />
Good Seal<br />
To verify the ice door seal, press the ice flapper door against the ice chute to make an<br />
impression into the seal. Remove the flapper door. If you see an impression across<br />
all four sides of the ice chute, you have a good seal.<br />
48
CABINET & DOOR ISSUES<br />
DOORS OUT OF ALIGNMENT –SXS & FDBM<br />
Condition: Doors are not aligned at top, RC or FC door is higher. RC is pre-set to<br />
be 1.5mm higher than FC at factory, under assumption food load will level them out.<br />
•<br />
Service Fix:<br />
-Check door gaps between RC and FC at top and bottom.<br />
If door out of align and gaps are uneven, loosen hinge screws for door that<br />
is lower, pull top of door toward hinge and hold as you re-tighten the hinge<br />
screws. See figure 1<br />
-If gaps are even or parallel, take clip off of bottom hinge bushing and use<br />
wrench to raise and lower door height. A combination of raising one door<br />
and lowering another should be enough to fix most door alignment issue. Be<br />
sure to check door seal after adjustment. See figure 2<br />
Figure 1<br />
CAB/DOOR ADJUSTMENT RANGE<br />
49<br />
Clip<br />
Figure 2<br />
Right to left – Each door has 10mm, (.4 inches) of total movement right to left. However,<br />
this varies the height by 3mm. There should be a gap of approx. 6mm, (.2<br />
inches) between doors. The top hinge has enough right movement to move too far<br />
to the right causing light switch arm to hit side trim, so always check for interference<br />
when done adjusting. No left right movement in bottom hinge.<br />
Up and down – The bushing on the bottom hinge allows for 10mm, (.4 inches) of<br />
adjustment.<br />
In and out – Top hinge tap plate allows for 5.5mm, (.2 inches) of in and out movement.<br />
No bottom hinge movement.
DOORS OUT OF PLANE –SxS<br />
Condition: Doors are sealing but one door sticks out away from the cab more than<br />
the other by more than 1/4” (1/4” or less is normal but can be adjusted out.) In most<br />
cases there is an apparent difference in the compression of the gaskets on the hinge<br />
and handle side.<br />
•<br />
•<br />
Service Fix: SxS<br />
- Applying permagum under corner of compressed gasket will work in most<br />
cases.<br />
-Heat gasket w/ heat gun or hair dryer, stretching gasket while applying heat,<br />
then apply ice cube to gasket so that it takes new stretched set.<br />
-If loss of door seal, move top hinges in and out by loosening tap plate screws,<br />
not hinge screws. See figure 1<br />
Gasket may be too compressed on hinge side, moving top hinge in has re<br />
verse affect on handle side and pulling hinge out may move handle side in.<br />
50
TO INSTALL SHIM BEHIND RC BOTTOM HINGE<br />
First Remove RC Door:<br />
Start by removing door closer spring. See figure 1. Then remove hinge post top<br />
screw. Next. Remove front two hinge leaf screws, and back out rearmost two almost<br />
all the way out.<br />
Lift hinge up out of the way, and pull door off product.<br />
Note: For 36 BM only, the screw in bottom hinge bushing must be removed.<br />
See figure 2.<br />
Door Spring<br />
Hinge Post Screw<br />
Figure 1 Figure 2<br />
51<br />
Hinge Screw
TO INSTALL SHIM BEHIND RC BOTTOM HINGE (cont.)<br />
With the door removed, peel off the Hinge cover, remove the 4 hinge screws. Be very<br />
careful not to round out the screw head if using a power screwdriver.<br />
Replace hinge after adding 1.5mm (p/n 2207470) shim behind it. Replace hinge<br />
cover, may need 2 sided tape if adhesive is no longer sticky. Check to make sure top<br />
hinge does not need to now be adjusted out (Loosen Tap Plate). Check door seal.<br />
Hinge Cover<br />
BIR BOTTOM MOUNT FREEZER DRAWER<br />
MISALIGNMENT<br />
Condition : Drawer is not level (i.e. one side is higher than other)<br />
52<br />
Hinge Screws
MISALIGNED FREEZER DRAWER (continued)<br />
Always check product levelness, do not reference FC drawer off RC door in case RC<br />
door is sagging or the issue. RC door is easier to adjust.<br />
If product is Overlay, check door alignment with panel off, make sure panel is not the<br />
issue.<br />
Tighten all screws; bolts connecting drawer to basket, see figure 1, screws connecting<br />
basket to slides, see figure 2 and bolts connecting slide brackets to the product, see<br />
figure 3.<br />
Condition: Top/Bottom of drawer is tilted out or drawer is not sealing across the top<br />
or bottom. Loosen top drawer to basket bolts and remove the bottom bolts on each<br />
side. See figure 4.<br />
There are 2 adjustment holes to use to reposition the lower bolts. See figure 5.<br />
Tilt the door in the direction it needs to go, and re-insert the bottom bolts in the corresponding<br />
holes to change the drawer angle.<br />
Figure 4<br />
Drawer to<br />
Basket Bolts<br />
Figure 1<br />
Basket to<br />
Slide Screws<br />
Figure 2<br />
53<br />
Slide Bracket to<br />
Liner Screws<br />
Figure 3<br />
Adjustment Holes<br />
Figure 5
•<br />
•<br />
•<br />
•<br />
•<br />
•<br />
Drawer out of plane side to side<br />
• First make sure it is not the RC door<br />
w/ the issue. Easiest way to check<br />
is to open RC door and look down at<br />
the gasket gap across the top of the<br />
FC Drawer. If the gasket looks more<br />
compressed on one side than the<br />
other it is an FC issue. If Door to product<br />
gap looks even for FC, proceed w/<br />
earlier shim insertion for RC bottom<br />
hinge.<br />
•<br />
It is ok to horizontally slot the Drawer<br />
bracket holes, but by no more than a<br />
¼” on each side. Maker sure when<br />
re-inserting bolts adequate torque is<br />
applied to keep this bolts tight and further<br />
movement of drawer alignment.<br />
DRAWER NOT CLOSING<br />
Make sure Door to basket nuts are on the inside and bolt heads are on the outside.<br />
Check for frost or obstructions along Evaporator cover in back of drawer.<br />
Remove Ice and Crisper Pans to make sure it is not obstructing closing.<br />
Adjust tilt of door if top or bottom of drawer is hitting breaker first.<br />
Make sure drawer is not hitting side trim.<br />
All else fails replace basket and or slides.<br />
DOOR NOISE – PRIMARILY LIGHT SWITCH EXT. ARM<br />
ASSEMBLY<br />
Condition: Popping noise or squeak when cycling door.<br />
Service Fix: Remove screw and add Loc-tite 222MS from approved List, to screw<br />
thread and re-insert.<br />
Add grease to nylon bushing to fix squeak or moan.<br />
Adjustment Holes<br />
New Screws w/ serrated head<br />
54<br />
Nylon Bushing
LIGHT SWITCH PAD<br />
(36BM and 42FDBM Only)<br />
Condition – Door Open Alarm is on. Light switch checks ok and continuity to board<br />
is good. The back of drawer might not be contacting the switch actuating arm. The<br />
switch is located in right rear of FC compartment when closed to turn off FC lights.<br />
See figure 1.<br />
Service Fix – Add SPACER-FC Basket, part number W10221048 (available through<br />
Exparts) to the back of the basket on the right side. Apply 50x50mm Foam Pad w/<br />
Mylar Coat 1” down from back flange and along the fold edge of the side of the basket.<br />
See figure 2.<br />
Info: BIR Bottom Mount products with a serial # of SW33000 or greater will already<br />
have this pad. This pad is approved to be used on any model # for this issue.<br />
Light Switch<br />
(Freezer drawer viewed from the rear)<br />
Figure 1 Figure 2<br />
55<br />
Fold Edge<br />
1” Down<br />
Foam Pad
•<br />
•<br />
•<br />
•<br />
Removing Door Skin Replacing<br />
Handle<br />
Remove hinge side screws,<br />
top screws, and bottom screws.<br />
See figure 1<br />
Figure 1<br />
Pull the spacers from all sides but<br />
handle side (it is 2-sided taped in)<br />
then pull skin off door. See figures 2<br />
and 3.<br />
Remove screws from backer plate to<br />
remove door handle. See figure 4.<br />
For FC skin, there are 2 screws holding<br />
skin to top of Dispenser housing<br />
and 2 screws holding skin to dispenser<br />
housing underneath the drip tray. It<br />
is recommended to remove the door<br />
to remove the skin<br />
REMOVING DOOR SKIN<br />
56<br />
Figure 2<br />
Figure 3<br />
Figure 4
SMALL GAP BETWEEN UI AND FC DOOR<br />
Small Gap between door skin and<br />
Dispenser User Interface. See figure 1<br />
This is usually caused by the UI being<br />
bowed in and not the door skin. Sometimes<br />
bowing occurs over time from use.<br />
Remove the skin, and shim the backside<br />
of this Disp. UI out to close the gap. A<br />
service part is in the works. See figures 2<br />
and 3. Contact Tech line if part is needed.<br />
A service Pointer will be issued.<br />
Figure 2<br />
57<br />
Figure 1<br />
Figure 3
Main Control Board<br />
ELECTRICAL<br />
UNIT COMPARTMENT<br />
The unit compartment is at the top on Built-in’s. All built-ins of the M-line and T-line<br />
(all recent model built-ins) have a Gemini ES—it is the main control board on the<br />
left. T-line dispenser models have a Niagara board as well, it is used to control the<br />
dispenser and smart valve. The unit compartment power switch in the front shuts off<br />
power to everything.<br />
58<br />
Dispenser Control Board
MAIN CONTROL<br />
The Gemini ES is the main control board and is mounted vertically with P1 in the topleft<br />
corner. Neither P1 nor P2 need shunting connectors. If the left two pins of P1<br />
are tied together on an M-line, the unit will go into manufacturing diagnostics mode<br />
each time it is powered up. The NTC (negative temperature coefficient) Thermistors<br />
are connected to connector P3. Line voltage AC inputs go into P4, and the switched<br />
neutral comes out of P4. P8 is in the bottom left corner and gets the AC power<br />
directly from the power switch. On the bottom right, AC outputs are driven out of<br />
P5. On the top right, DC outputs come out of P7. On the top left, the P6 connector<br />
provides 3-wire WISP communications with the user interface in the top of the refrigerator<br />
compartment (RC) from the top row of silo’s; the lower row of 3 silo’s are for<br />
older QUISP style communications.<br />
59
MAIN CONTROL BLOCK DIAGRAM<br />
This is the block diagram for the same control board. The freezer compartment (FC)<br />
thermistor for example is connected through pin 2 of the P3 connector (P3-2) and pin<br />
7 of the same connector (P3-7). This diagram is more conceptual than precise; for<br />
example, the power switch is not show between the service connector and the rest of<br />
the system and the inverter is not shown between the Gemini and the compressor.<br />
60
DISPENSER CONTROL<br />
The Niagara board is present in T-line dispenser models. It is mounted to the right<br />
of the Gemini board with the P1 connector in the upper left (rotated 90º counterclockwise<br />
from the orientation shown in this diagram). P6 and P7 are WIDE serial<br />
communications ports with the dispenser user interface and the smart valve, respectively.<br />
The board is powered through P1 and detects when the FC (freezer<br />
compartment) door switch is closed—the unit will not dispense when the door is open.<br />
61
NIAGARA BLOCK DIAGRAM<br />
This is a block diagram of the same Niagara board. The dispenser housing heater<br />
(connected to P3-1 and P3-2) is line voltage; all other outputs are DC. Use of the<br />
Ice door heater has was discontinued; it is not present in T-line models or later M-line<br />
models.<br />
62
AVERAGE CRISPER TEMPERATURES KABI SXS’S<br />
These are recommended temperature settings. The temps will vary by shelf location<br />
and based on loading and usage and air flow.<br />
•<br />
TEMPERATURE CONTROL PROBLEMS<br />
Cold Freezer with Warm Fresh Food<br />
-This is typically caused by insufficient airflow between the freezer compart<br />
ment and the refrigerator compartment. The low airflow causes the RC<br />
to warm up. The controller sees the warm temperatures which drives the<br />
compressor & evap fan, which in turn makes the FC colder.<br />
-Check the air damper & air return for proper operation or blockage. Check<br />
foam blocks.<br />
63
WARM RC, NORMAL FC TEMPERATURES<br />
Serial numbers less then QT28<br />
Service pointer, 8178478<br />
Top right hand side may be loose, out of<br />
position, damaged or missing.<br />
See figure 1.<br />
Replace the original foam air baffle and<br />
block using kit number 8201798. This kit<br />
contains a redesigned air baffle and three<br />
foam blocks, one each for 36”, 42” and<br />
48”models. See figures 2 and 3. Follow<br />
the instructions completely.<br />
Figure 2.<br />
64
•<br />
•<br />
•<br />
INTERMITTENT OVER TEMPERATURE<br />
Recurring over-temperature alarms can be caused by a bad bimetal. A bimetal<br />
that opens too soon can lead to frost build up that restricts airflow between the FC<br />
& the RC.<br />
Restricted airflow between the FC & the RC can lead to an RC that is too warm<br />
and an FC that is too cold.<br />
A sticking baffle can cause this same situation.<br />
• Associated with a hot or yellowed mullion, a condenser fan could be failing and<br />
causing intermittent over temperature.<br />
The condenser fan motors sometimes develop “a bad spot” such that—if the blades<br />
stop in that position—the motor has trouble starting. A push start (or even vibration<br />
perhaps) could get the fan going. The condenser fans that have this issue have<br />
metal blades. If a unit may have this problem and has a condenser fan with metal<br />
blades, replace the condenser fan with service kit W10181323.<br />
A<strong>UD</strong>IBLE ALARM (LOCATED ON THE USER INTERFACE)<br />
•<br />
•<br />
•<br />
•<br />
•<br />
BIR SxS models have audible and visual alert signals to indicate:<br />
-Door Open<br />
-Over Temperature<br />
-Call Service<br />
The reset turns off the audible alarm.<br />
The piezo will be disabled for that alarm condition until power or cooling is turned<br />
off and then on again.<br />
The piezo is always disabled for bottom mounts.<br />
CONNECTORS<br />
No Connectors Depicted<br />
Schematics typically do not currently show connectors between harnesses<br />
-All schematics created from this point forward for new models will show these<br />
connectors.<br />
65
•<br />
•<br />
•<br />
Loose Connection<br />
CONNECTORS<br />
Figure 1<br />
Connectors can be accessible yet obscured.<br />
A loose connection from the inverter to the compressor resulted in a no cool complaint<br />
and a returned unit. See figure 1.<br />
Re-plugging this connection fixed the no cool condition.<br />
66
Old Cover<br />
Drain pan Overflows<br />
Models produced before November<br />
2006, (example) KSSCQMS02<br />
and prior<br />
Tape over all but the 3 left rows,<br />
see figures 1 and 2, or order grille<br />
part #2307682 with 5 slots<br />
(if customer will not accept tape)<br />
PERFORMANCE ISSUE<br />
67<br />
Service Fix<br />
Tape over all but the<br />
3 left rows<br />
New evaporation kit being tested<br />
Service Kit W10197978<br />
• Aids evaporation using a small fan<br />
• Designed for M-line starting with the 01 digit advance and greater, which<br />
is susceptible to this problem in certain environments. KBRC36FMS01,<br />
KBLC36FMS02,KBRC36FMX03, KBRC36FTX00, KBRC36FTX02 and<br />
KBRC36FTX03<br />
• Kits available through the Techline. The released kit will be available in<br />
the future directly through Plainfield.
PERFORMANCE ISSUE (continued)<br />
Production Fix. New drain pan,<br />
starting November 2006. Example:<br />
KSSCQMS03<br />
•<br />
•<br />
•<br />
PERFORMANCE <strong>UPDATE</strong><br />
Noise\Normal Sounds<br />
T-line BM units have a different<br />
“normal sound” with the evaporator located<br />
vertically. Different noise found<br />
to be related to the air flow through<br />
the compartment (air flow noise noted<br />
in U&C detail).<br />
Lower speed evap. fan motor in<br />
process for BM customers desiring a<br />
quieter product.<br />
68<br />
Front of the Product<br />
Back of the Product
•<br />
•<br />
•<br />
•<br />
•<br />
PERFORMANCE <strong>UPDATE</strong><br />
(continued)<br />
•<br />
PERFORMANCE <strong>UPDATE</strong><br />
The ambient humidity effects the temperature values. These values are based<br />
on 70% humidity.<br />
Internal temperatures, 0º FC, 37º RC<br />
Crispers: Average, 2.5º-3.7º above RC temp.<br />
Temp. controlled pan:<br />
- At coldest setting, a window of approximately 4º below RC average temp.<br />
but greater then 26º.<br />
- Other than coldest setting: Temp setting of 32º or higher. The difference<br />
between the meat pan temp at coldest and warmest settings is<br />
designed to be be at least 4º.<br />
Ice mode: FC automatically goes to -5º F for auto max ice. This temp. may show<br />
on the display until the unit is out of auto max ice mode for a time.<br />
Warm Crisper Complaint SXS; Service<br />
kit being tested for models: M00,<br />
01, 02, 03, and T00.Only available<br />
through the Techline at this time.<br />
- Currently being trialed through<br />
engineering before<br />
the formal service kit is released.<br />
- Purpose of the kit is to improve<br />
the temperature performance in<br />
both the temp. controlled pan as<br />
well as the non-temp. controlled<br />
crisper pans.<br />
69<br />
Parts provided with pre-notched slots on<br />
air baffle assembly.<br />
Add new gasket on temp. control baffle.<br />
Verify the evaporator tube is installed and<br />
installed correctly.
•<br />
•<br />
SEALED SYSTEM<br />
SEALED SYSTEM <strong>UPDATE</strong><br />
Mullion repair service kit. (yellow mullions) Service kit part number W10204863.<br />
UV-Dye drier in production (W10175593). The UV dye drier started in BIR production<br />
with the Ft. Smith transition. T-line 03 digit models include the dye drier.<br />
Service pointer number 4317741.<br />
SXS SEALED SYSTEM JOINT LOCATIONS<br />
SXS Sealed System joints – diagram included in diagnostics packet with the<br />
products. Reference this diagram when diagnosing sealed system leaks.<br />
This diagram is included with the built-in refrigerator, service diagrams (on the side of<br />
the unit compartment, at the top of the product), for reference to the sealed system<br />
joints. If the unit is experiencing a leak in the sealed system, reference these diagrams<br />
to check the sealed system, noting the potential leak points.<br />
70
BOTTOM MOUNT SEALED SYSTEM JOINT LOCATION<br />
This diagram is included with the built-in refrigerator, service diagrams (on the side of<br />
the unit compartment, at the top of the product), for reference to the sealed system<br />
joints. If the unit is experiencing a leak in the sealed system, reference these diagrams<br />
to check the sealed system, noting the potential leak points.<br />
•<br />
•<br />
•<br />
•<br />
SEALED SYSTEM<br />
Serviceable heat exchanger, BIR SxS K and M models<br />
(model number examples)<br />
KSSC42QKS00 KSSC42QMS00<br />
T-line SxS models, with the initial production of T-line, a wiring harness was routed<br />
in the path for the drilled evap tubing hole.<br />
- No - ~QT11 – QW19<br />
- Yes - QW20 – present<br />
Kit number 8201818.<br />
BM heat exchanger, not feasible on current models, being investigated for future<br />
models.<br />
71
•<br />
•<br />
•<br />
•<br />
•<br />
ALARMS AND WHAT THEY MEAN<br />
Door Open Indicator<br />
- Door switch shows door or drawer has been open continuously for<br />
10 minutes.<br />
Over Temperature Indicator<br />
- Temperature is above 15º in freezer or above 48º in the fresh food for<br />
90 minutes without decreasing.<br />
- Indicator will remain on until temperature recovers and reset is pushed.<br />
- Check Refrigerant levels and check frost patterns—check for leaks and<br />
restrictions. Check for excessive frosting, if present replace the bimetal. Run<br />
through diagnostics.<br />
Call Service Indicator<br />
- Check thermistors and thermistor connections. The compressor, fans and air<br />
- door can operate as if on a timer until this is corrected.<br />
Flashing Temperature Display<br />
- Will identify affected compartment for either Over Temperature or Service<br />
Indicators.<br />
Piezo audible tone<br />
- Indicates key press.<br />
- Used in conjunction with alarms in some cases<br />
- The tone beeps a few times every two minutes until the condition is<br />
- fixed or until the tone is silenced.<br />
- Press “Reset” to silence the tone<br />
- If the tone is silenced or the condition is fixed then the tone will not<br />
- recur for the same alarm unless cooling is turned off for ten seconds.<br />
72
•<br />
•<br />
•<br />
MAIN USER INTERFACE<br />
Not all models have all the indicators & buttons shown above<br />
Showroom floor mode: Max Cool & Cooling On/Off<br />
Diagnostics mode: RC (+) & Cooling On/Off<br />
The main user interface (UI) is located at the top of the refrigerator compartment<br />
(RC). Not all models have all of the indicators and buttons shown in the representation<br />
above.<br />
There have been reports of new units out of the box arriving in Showroom floor mode.<br />
There is no cooling in showroom floor mode but the lights, pushbuttons and indicators<br />
work. In a no cool situation, please verify that the unit is not in showroom floor mode.<br />
The unit will not go into diagnostics mode if it is showroom floor mode. You can take<br />
the unit out of showroom floor mode by holding the “Max Cool” and “Cooling On/<br />
Off” buttons simultaneously for 2 seconds (until the unit beeps). If the unit turns off,<br />
you are pressing the “Cooling On/Off” button first; try pressing the “Max Cool” button<br />
first then adding the “Cooling On/Off” button. The unit is placed into showroom floor<br />
mode by this same key sequence. The setting is saved into memory when the door<br />
switch is cycled. On power up, the unit will return to whichever state it was in the last<br />
time the door was open & closed.<br />
To get into diagnostics mode, press and hold the RC temperature up (+) button and<br />
the “Cooling On/Off” button simultaneously for 2 seconds (until the unit beeps). See<br />
the next slide (or the service sheet) for more information regarding diagnostics mode.<br />
Hit the “RC (+)” key again to advance through the diagnostic steps.<br />
Should a service bulletin or technical advisor require firmware version information for<br />
the Gemini-ES, the User Interface, or the Phoenix Zone Control, then this can be displayed<br />
from the UI by holding down the “FC(+)” and the “FC(-)” keys simultaneously<br />
for 2 seconds. The FC display will show “Pb” (Power board) for the Gemini while the<br />
RC displays the firmware version in the Gemini. Next, the FC display will show “UI”<br />
(User Interface) while the RC displays the UI’s software version. The FC will display<br />
“Ph” (Phoenix) while the RC displays the Phoenix board’s software version.<br />
The “door open” alarm indicator will light up if the door is left open for 10 minutes;<br />
the interior illumination will shut off. If this happens when the door has actually been<br />
closed, check the door switches for both the FC and the RC. Touch the “Reset” button<br />
to clear the alarm and turn of the piezo audible alarm.<br />
The “Over Temperature” alarm will come on if the FC temperature is 15ºF or more<br />
for 1.5 hours and is not decreasing, or if the RC temperature is 48ºF or more for 1.5<br />
hours and is not decreasing. The piezo will sound. The piezo will turn off when the<br />
over temperature condition is correct, but the indicator will remain lit until the “Reset”<br />
button is touched.<br />
The “Call Service” indicator will flash when the FC thermistor or RC thermistor has<br />
failed; the system will operate in an error routine since it can not control based on<br />
temperature.<br />
73
•<br />
•<br />
DIAGNOSTICS MODE<br />
RUNNING DIAGNOSTICS<br />
Description The main user interface at the top of the fresh food section allows you<br />
to test one component at a time so that you can see what is working and what is<br />
not.<br />
How to Access Press the RC+ button and the Cooling On/Off button at the same<br />
time (if the unit turns off, then you touched the Cooling On/Off button first). Press<br />
the RC+ button to advance through the steps.<br />
All<br />
BIR<br />
French<br />
Door<br />
Component<br />
Description<br />
FC Thermistor<br />
RC Thermistor<br />
DIAGNOSTICS<br />
FC<br />
Sequence<br />
01<br />
02<br />
RC<br />
Code RC Code Description<br />
01 Freezer Thermistor within "Operating Region"<br />
02 Freezer Thermistor within "Open Region"<br />
03 Freezer Thermistor within "Short Region"<br />
01 Refrigerator Thermistor within "Operating Region"<br />
02 Refrigerator Thermistor within "Open Region"<br />
03 Refrigerator Thermistor within "Short Region"<br />
Evaporator Fan Motor 03 ** Evaporator Fan Motor "ON"<br />
Condenser Fan Motor 04 ** Condenser Fan Motor "ON"<br />
VC Compressor 05<br />
01<br />
02<br />
VC Compressor "On at 4500 RPM"<br />
VC Compressor "OFF waiting in min off delay"<br />
Air Door 06 ** Air Door "opens to full position, closes and stops"<br />
Defrost Heater /Bimetal<br />
07<br />
01<br />
02<br />
Defrost Heater energized "Bi-Metal Closed"<br />
Defrost Heater energized "Bi-Metal Open"<br />
Bin Accent Lighting 08 ** Turn on Bin Accent Lighting "This step only"<br />
01 Left Bin Thermistor " Within Operating Region"<br />
Left Bin Thermistor 09 02 Left Bin Thermistor " Within Open Region"<br />
03 Left Bin Thermistor " Within Short Region"<br />
Left Bin User Selection<br />
LED test<br />
10<br />
01<br />
02<br />
Correct key press<br />
Incorrect key press<br />
Left Bin Air Door 11 ** Air Door "opens to full position, closes and stops"<br />
01 Right Bin Thermistor " Within Operating Region"<br />
Right Bin Thermistor 12 02 Right Bin Thermistor " Within Open Region"<br />
03 Right Bin Thermistor " Within Short Region"<br />
Right Bin User<br />
Selection LED test<br />
13<br />
01<br />
02<br />
Correct key press<br />
Incorrect key press<br />
Right Bin Air Door 14 ** Air Door "opens to full position, closes and stops"<br />
END ROUTINE RESUME NORMAL COOLING<br />
See the previous page for how to enter and advance through diagnostics mode. The<br />
first seven diagnostic steps are available in all BIR, the remainder are only in applicable<br />
models. The sequence (or step number) is shown in the FC display of the<br />
UI, while for some steps an informative code is shown in the RC displays. For steps<br />
such as 03 there is no RC information; the technician will verify that the Evaporator<br />
fan motor runs in this step but in no others.<br />
74
Component<br />
Description<br />
FC Thermistor<br />
RC Thermistor<br />
DIAGNOSTICS MODE (continued)<br />
FC<br />
Sequence<br />
01<br />
02<br />
RC<br />
Code RC Code Description<br />
01 Freezer Thermistor within "Operating Region"<br />
02 Freezer Thermistor within "Open Region"<br />
03 Freezer Thermistor within "Short Region"<br />
01 Refrigerator Thermistor within "Operating Region"<br />
02 Refrigerator Thermistor within "Open Region"<br />
03 Refrigerator Thermistor within "Short Region"<br />
Evaporator Fan Motor 03 ** Evaporator Fan Motor "ON"<br />
Condenser Fan Motor 04 ** Condenser Fan Motor "ON"<br />
VC Compressor 05<br />
01<br />
02<br />
VC Compressor "On at 4500 RPM"<br />
VC Compressor "OFF waiting in min off delay"<br />
Air Door 06 ** Air Door "opens to full position, closes and stops"<br />
Defrost Heater /Bimetal<br />
07<br />
01<br />
02<br />
Defrost Heater energized "Bi-Metal Closed"<br />
Defrost Heater energized "Bi-Metal Open"<br />
Bin Accent Lighting 08 ** Turn on Bin Accent Lighting "This step only"<br />
01 Left Bin Thermistor " Within Operating Region"<br />
Left Bin Thermistor 09 02 Left Bin Thermistor " Within Open Region"<br />
03 Left Bin Thermistor " Within Short Region"<br />
Left Bin User Selection<br />
LED test<br />
10<br />
01<br />
02<br />
Correct key press<br />
Incorrect key press<br />
Left Bin Air Door 11 ** Air Door "opens to full position, closes and stops"<br />
01 Right Bin Thermistor " Within Operating Region"<br />
Right Bin Thermistor 12<br />
02 Right Bin Thermistor " Within Open Region"<br />
03 Right Bin Thermistor " Within Short Region"<br />
Right Bin User<br />
Selection LED test<br />
13<br />
01<br />
02<br />
Correct key press<br />
Incorrect key press<br />
Right Bin Air Door 14 ** Air Door "opens to full position, closes and stops"<br />
END ROUTINE RESUME NORMAL COOLING<br />
See the previous page for how to enter and advance through diagnostics mode. The<br />
first seven diagnostic steps are available in all BIR, the remainder are only in applicable<br />
models. The sequence (or step number) is shown in the FC display of the<br />
UI, while for some steps an informative code is shown in the RC displays. For steps<br />
such as 03 there is no RC information; the technician will verify that the Evaporator<br />
fan motor runs in this step but in no others.<br />
75
•<br />
•<br />
•<br />
•<br />
SHOWROOM FLOOR MODE<br />
Recently some new units have been in showroom floor mode at the time of<br />
installation.<br />
Showroom floor mode has interior lights & user interface functionality, but no<br />
cooling.<br />
Service diagnostics will not function<br />
To remove from diagnostics mode, press the “Max Cool” and “Cooling On/Off”<br />
button<br />
• Door switch needs to be cycled to save the settings.<br />
Always check for showroom floor mode in no-cool situations where the cause is otherwise<br />
unknown. The unit will not go into diagnostics mode if it is in showroom floor mode.<br />
•<br />
•<br />
•<br />
•<br />
HOLIDAY MODE<br />
Disables lights, indicators and ice production.<br />
Instruct customer to allow ice door to close before placing unit in Holiday mode.<br />
New BIR SxS models (e.g. KSSCQTS03) have improved Star-K compliance.<br />
Improvement is backwards compatible and includes Main UI (software update) so<br />
that service diagnostics mode works correctly with the new door switch harness<br />
Touch the “Holiday Mode” button to put the unit in or take it out of holiday mode. Ice production is turned off in<br />
holiday mode on the theory that customers will not need more ice while they are away on vacation. However, the<br />
indicators and illumination are turned off for Star-K compliance (Sabbath observance). The holiday mode light<br />
itself will be on, but the idea is that nothing should turn on or turn off due to customer activity (such as opening the<br />
door) during the Sabbath.<br />
There is a current Star-K issue whereby indicators on the ingredient care center (ICC) and the in-door icemaker<br />
(IDI) can come on when both the FC and the RC door are opened at the same time on a side-by-side. One solution<br />
is just simply not to open both doors during the Sabbath if you observe these prohibitions. However, there<br />
will also be a kit coming out that corrects this situation. The kit consists of a door switch harness and a new UI<br />
with update software. A UI with version 29 or greater (see slide 7 for how to get version information) will work<br />
with the new door switch harness. The harness itself corrects the holiday mode issue, but if a UI with earlier version<br />
software is used then the UI display will be off during diagnostics mode.<br />
76
Compressor Inverter<br />
COMPONENT TESTING<br />
COMPRESSOR INVERTER<br />
RED to RED/WHITE = 3-6 volts DC<br />
BLACK to WHITE = 120 volts AC<br />
Diagnosis Step 5 - Compressor running on high.<br />
240 VAC across any 2 output wires to the compressor<br />
Compressor windings are 9-10 ohms<br />
Compressor Inverter<br />
The compressor is required to run at high speed in diagnostic mode step 5. In step 5,<br />
the Gemini board should be putting 6VDC on the RD to RD/WH control wires going to<br />
the inverter. Assuming the inverter is getting 115 VAC on BK to WH, then the inverter<br />
should output 230 VAC to the compressor.<br />
Air Door<br />
You should see 6-8 V from any of the four winding feeds to P6-6. The controller is actually<br />
switching 0-12 VDC voltages very rapidly on the windings and so as it turns out<br />
with a VOM you should see voltage in the same range with the meter on AC as you<br />
would DC.<br />
77
KABIR DIAGNOSTIC INVERTER<br />
This change will greatly improve the diagnosis of compressor, control and inverter<br />
failures.<br />
Note: Diagnostics aren’t foolproof. Since there is no communication between<br />
the inverter and the Gemini, the inverter displays the most likely failure. The<br />
intent is to point the Tech in the right direction.<br />
AIR DOOR<br />
•<br />
DIAGNOSTIC CODE<br />
• LED Off: No failure detected<br />
• 2 Flashes: No 3-6vdc signal from the<br />
control<br />
• 3 Flashes: Inverter failure<br />
• 4 Flashes: Compressor failure or full<br />
restriction<br />
Air door is driven by a stepper motor.<br />
- Each phase 370 Ω – 460 Ω<br />
- WH to BU and YL to RD should each be 370-460Ω<br />
- Operated by 12VDC pulses<br />
- 200 pulses/second<br />
- 1750 steps open to close<br />
78<br />
Note: Always check wires and connectors<br />
first<br />
During operation (diagnostic step 6), either AC or DC can be measured to ground (e.g. P6-6) VOM<br />
should show 6 to 8 V.<br />
Air Door<br />
VOM voltage readings will show “average” readings of 12V pulses. Diagnostic Step 6 will operate the<br />
door operate the door just once in each direction. On the French Door, diagnostic steps 11 and 14 operate<br />
the same way for the left & right bins, respectively.
AIR DOOR<br />
During operation (diagnostic step 6), either AC or DC can be measured to ground<br />
(e.g. P6-6) VOM should show 6 to 8 V.<br />
P6 is the Gemini board connector with the WISP connection; it is left side of the top<br />
edge on the board. P6-6 is an empty silo in the lower right corner of the connector.<br />
Since it is empty, it can be a convenient place for a VOM probe. P6-6, and P6-3 just<br />
above it with the BK/WH wire, are DC grounded (which is isolated from AC ground).<br />
•<br />
•<br />
•<br />
CHECKING THERMISTORS<br />
Thermistor resistance goes down as the temperature goes up.<br />
The display will flash and show 70°F for shorted Thermistors and -10°F for open<br />
thermistors. The “call service indicator will come on”.<br />
To check the accuracy of a thermistor, disconnect it and check the resistance<br />
with the head (not wires) of the thermistor submerged in ice water. The resistance<br />
should be 8700 to 8800 ohms. If the resistance is off by more than 400<br />
ohms, it is inaccurate by 2°F or more and should be replaced.<br />
79
<strong>SERVICE</strong> POINTERS-BIR<br />
R4317440 Gap between freezer drawer and refrigerator<br />
R4317441 UV drier installed at the factory BIR<br />
R4317433 Mullions discolored<br />
4317426 - Condenser fan motor failure<br />
4317421 – Heat exchanger kit<br />
8178478A – Foam block kit at evaporator<br />
8718568A – Dye Drier, BIR service drier 2317845<br />
8178570 – Will not dispense ice, safety shield<br />
8178548 – Dispenser tabs breaking, M-line models<br />
4317390 – BM overproduction of ice<br />
8178512 – Disp. drip, anti-run-on for M-line models<br />
4317372 – IDI Icemaker fill tube frozen<br />
4317371 – Warm top RC shelf<br />
4317366 – Air return blocked with ice<br />
4317365 – ice door sticks open<br />
4317360 – Crisper support<br />
LITERATURE REVISIONS<br />
KAid SxS, Install-2316565C U&C–W10161714A<br />
KAid BM, Install–2320680B U&C–2320682A<br />
Jenn-Air SxS, Install–W10183782A, U&C–W10151251A<br />
Jenn-Air BM, Install–W10183782A, U&C–W10183787A<br />
80
<strong>SERVICE</strong> POINTER INDEX<br />
COOKING<br />
BRAND & ID# DESCRIPTION DATE ISSUED<br />
KitchenAid<br />
43174<strong>35</strong> Outdoor Cooking Grills 9/08<br />
KNU367TSS, KBSU487TSS, KBSU367TSS, KBNU487TSS<br />
Grill burners will not light and Oven lights go dim.<br />
KitchenAid<br />
4317437 Kitchen Aid Combination Built-In Ovens and<br />
Built-In Microwave Ovens<br />
11/08<br />
Condensation accumulating on the microwave inner door.<br />
KitchenAid<br />
4317438-A K/A Combination Built-In Ovens and 10/08<br />
Built-In Microwave Ovens<br />
KBHS109SSS01, KBHS179SSS01, KEHU309S, KEMD308S<br />
KEMD378S, KEMS308S, KEMS378S<br />
“F6E0” is displayed on the microwave.<br />
KitchenAid / <strong>Whirlpool</strong><br />
4317445 <strong>Whirlpool</strong> and KitchenAid Built-In Single and Double Ovens 12/08<br />
built prior to code date XW49 (December 2008)and All<br />
KitchenAid 24” Built-In ovens<br />
See pointer for Model list<br />
• Oven does not operate after a Self-Clean cycle.<br />
• Oven completely stops during the Self-Clean cycle.<br />
Jenn-Air<br />
8178682 Jenn-Air Wall Oven Electric 9/08<br />
JJW7530DDB/S/W, JJW8527DDB/Q/S/W, JJW8530DDB/Q/S/W<br />
JJW8627DDB/Q/S/W, JJW8630DDB/Q/S/W, JJW9527DDB/S/W<br />
JJW9530DDB/P/S/W, JJW9627DDB/S/W, JJW9630DDB/S/W<br />
JJW9827DDB/P/S/W, JJW9830DDB/P/S/W, JMW858527DAB/Q/S/W<br />
JMW8530DAB/Q/S/W, JMW9527DAB/S/W, JMW9530DAB/S/W<br />
Noise, vibration or rattling in the top of the unit.<br />
Jenn-Air / Amana<br />
8178739 Microwave Hood Combination<br />
AMV5206BA*, JMV8208BA*, JMV8208BA*14, JMV8208BAW15,<br />
JMV8208BC*, JMV8208BC*14, JMV8208BAW15, MMV4205BA*,<br />
MMV5207BA*, MMV5207BC*<br />
5/08<br />
Microwave thermal overload trips/opens and unit stops working<br />
after a few minutes<br />
81
COOKING (continued)<br />
BRAND & ID# DESCRIPTION DATE ISSUED<br />
Maytag / Admiral<br />
Magic Chef<br />
8178740 Ovens<br />
Starts A Bake Or Broil Function Before The<br />
Desired Temperature Is Selected 5/08<br />
AER4311AA*, AGR4412AD*, CER1125AA*, CER1125AC*<br />
CER3725AG*, CER4<strong>35</strong>1AG*, CE<strong>35</strong>400AA*, CE<strong>35</strong>400AC*,<br />
CG31600AD*, CGR1425AD*, CP31600AD*, LLR4451AJ*<br />
MER4<strong>35</strong>1AA*, MER4<strong>35</strong>1AG*, MGR4451AD*, MGR4451BD*,<br />
MGR4452AD*, MGR4452BD*, MLR4451AJ*, PER1125AC*,<br />
PER4311AC*, PGR4420LD*<br />
All<br />
8178744 All Gas Freestanding and Slide-In Ranges 9/08<br />
Oven Does Not Heat<br />
Roper<br />
8178745 Gas Freestanding Ranges Surface Burners may not ignite<br />
FGP305KW6, FGP305KW7, SF110AXSQ1, SF110AXSQ2,<br />
SF111PXSQ1, SF111PXSQ2, SF114PSXB1, SF114PSXQ2,<br />
SF114PXST2, SF114PXSW2, SF216LXSM1, SF216LXSQ1,<br />
TGP305TT0, TGP305TQ0, TGP305TQ1,TGP314TT0<br />
Code Date: VEU49 through VEW21<br />
9/08<br />
Jenn-Air<br />
8178755 Dual Fuel Downdraft Slide-In 9/08<br />
JDS9865BDP, JDS9860BDB, JDS9860BDS, JDS9860BDW<br />
When a two burner cartridge is installed in place of the E-Burner grill,<br />
burners seem to have High and Off settings only.<br />
<strong>Whirlpool</strong><br />
8178756 <strong>Whirlpool</strong>, Estate and Ingles Gas and Electric<br />
Freestanding Ranges<br />
RF114, RF 212, WFE301, WFE361, TES325, TES 326,<br />
TE P340, TGS 325, TGS326, IVE323, IVP338, IVE823,<br />
IVP858, YRF115, YWFE301, YWFE361<br />
9/08<br />
Clock display shows “LOC” and only the “CLOCK”, “OVEN LIGHT”<br />
and “TIMER” keypads work.<br />
Jenn-Air<br />
8178758 Jenn-Air Gas and Duel Fuel Ranges<br />
PRG3010LP PRG3010NP PRG3610LP PRG3610NP<br />
PRG4810LP PRG4810NP PRD3030NP PRD3630NP<br />
Burner flame does not carry completely around the burner.<br />
82<br />
9/08
COOKING (continued)<br />
BRAND & ID# DESCRIPTION DATE ISSUED<br />
All<br />
8178768 “for IKEA by <strong>Whirlpool</strong>” Cooktops and Built-In Ovens<br />
See Pointer for model list 10/08<br />
Model/Serial number is incomplete on tag<br />
KitchenAid<br />
4317439 2008 Dishwasher Drawers<br />
K<strong>UD</strong>D03DTSS/BL/WH/PA, K<strong>UD</strong>D03STSS/BL/WH/PA 12/08<br />
The Drawer Will Not Stay Open<br />
<strong>Whirlpool</strong><br />
8178747 <strong>Whirlpool</strong> Dishwashers<br />
DU1145XTP7, DU1148XTP7, DU1145XTP8, DU1148XTP8 7/08<br />
Serial Numbers: FT01 and later.<br />
Sensing light will not come on after control replacement service<br />
<strong>Whirlpool</strong><br />
8178748 <strong>Whirlpool</strong> Dishwashers<br />
DU1145XTP9, DU1148XTP9, DU1145XTPA, DU1148XTPA 7/08<br />
Serial Numbers: FT01 and later.<br />
Sensing light will not come on after control replacement service<br />
Maytag<br />
8178759 Maytag Plastic Tall Tub Dishwashers<br />
See pointer for model list 12/08<br />
Serial Numbers: All<br />
Door makes noises<br />
CLEAN-UP<br />
83
LAUNDRY<br />
BRAND & ID#<br />
<strong>Whirlpool</strong><br />
DESCRIPTION DATE ISSUED<br />
8178720-A Cabrio and Bravos Clothes Dryer<br />
Noise From Idler Area<br />
11/08<br />
WED6200S*, WED6400S*, MED6300T*, MED6400T*,<br />
WGD6200S*, WGD6400S*, MGD6300T*, MGD6400T*<br />
SERIAL NUMBERS: Prior to MW27*<br />
<strong>Whirlpool</strong><br />
8178742 Cabrio and Bravos Washers 6/08<br />
Intermittent Water Leak<br />
WTW6200S, MTW6300T, WTW6300S, MTW6400T<br />
WTW6400S, MTW6500T, WTW6600S, MTW6600T<br />
WTW6700T, MTW6600T, WTW6200T, MTW6700T<br />
WTW6200V, WTW6500W<br />
Serial Numbers: Prior to CW2270900<br />
<strong>Whirlpool</strong><br />
8178746 <strong>Whirlpool</strong> Built Top Load Washers 6/08<br />
See pointer for model list<br />
Hot Water May Enter When Cold Water Is Selected<br />
<strong>Whirlpool</strong> / Maytag<br />
8178752 Top-Load Washers 8/08<br />
MAT14CS<br />
Serial Numbers Prior TO: CW2600000<br />
Unit will run a complete cycle and will and shut off properly, but will<br />
take money and not start another cycle.<br />
Maytag<br />
8178754 Maytag Neptune Drying Center 8/08<br />
MCE8000AY* MCG8000AW*<br />
Serial Numbers: All<br />
Long Dry Times or Intermittent Steamer, when Both Dryers Are In Use<br />
<strong>Whirlpool</strong><br />
8178764 24 Inch <strong>Whirlpool</strong> Washers 10/08<br />
LHW0050PQ0-4<br />
Serial Numbers: All<br />
The START button sticks<br />
.<br />
<strong>Whirlpool</strong><br />
8178766 24” Thin Twin Washers (Technical Training Pointer) 10/08<br />
A modification to the 24” Thin Twin Washer Suspension Springs was made on the 23rd week of<br />
2007 (date code MU27). Correct installation of these springs is crucial for their proper operation. All<br />
individual Suspension Spring part numbers sub to kit number W10207783. This kit contains three<br />
shocks, three self tapping screws, blue Loctite® and an instruction sheet. Use all of the parts in the kit<br />
and follow the instructions.<br />
<strong>Whirlpool</strong> / Maytag<br />
8178767 HE Top Load Washers 10/08<br />
WTW6200S, WTW6300S, WTW6400S, WTW6600S,<br />
WTW6700T, MTW6300T, MTW6400T, MTW6500T,<br />
MTW6600T, MTW6700T<br />
Serial Numbers: CT01 – CU52<br />
F1 Error Code<br />
84
BRAND & ID# DESCRIPTION DATE ISSUED<br />
Kitchen Aid<br />
4317436 KitchenAid French Door Counter Depth Refrigerator 9/08<br />
KFCS22EVWH, KFCS22EVBL, KFCS22EVMS<br />
Personality code missing digit<br />
KitchenAid,<br />
Jenn-Air<br />
4317441 Service Initiative - Factory Installed UV Dye Drier<br />
Jenn-Air and KitchenAid Built-In Refrigerators Only 10/08<br />
(Technical Training Pointer)<br />
KitchenAid <strong>Whirlpool</strong><br />
Jenn-Air, Maytag<br />
Amana<br />
4317444-A French Door Refrigerators with Ice and Water in the Door 12/08<br />
Refrigerator Compartment Too Cold<br />
ALL<br />
8178760 SXS Refrigerators 10/08<br />
2007 and 2008 SXS’s manufactured with “P trap” drain tubes<br />
Doors hard to open<br />
REFRIGERATION<br />
ALL<br />
8178761 SXS Freezer Doors With In Door Dispensers<br />
All Brands All Models 9/08<br />
(Technical Training Pointer)<br />
<strong>Whirlpool</strong>, Roper,<br />
Amana, Jenn- Air,<br />
Maytag<br />
8178765 SXS Refrigerators – Non IDI (In Door Ice)<br />
See pointer for list of model numbers<br />
Not Dispensing Ice. 10/08<br />
85
TRAINING EVALUATION<br />
Please use this page as a reminder to provide us with feedback on<br />
today’s meeting.<br />
Complete the online evaluation form, located on the Service Matters<br />
website @:<br />
www.servicematters.com<br />
Instructor’s Name:<br />
Today’s Training Date:<br />
86
- NOTES -<br />
87
- NOTES-<br />
88