FOR LOGO!
FOR LOGO!
FOR LOGO!
You also want an ePaper? Increase the reach of your titles
YUMPU automatically turns print PDFs into web optimized ePapers that Google loves.
CM LON <strong>LOGO</strong>! Expansion Module<br />
3. Putting the CM LON into operation<br />
A LONMARK certified application was loaded into the CM<br />
LON at the factory. Other applications can – where available<br />
– also be loaded.<br />
3.1 Step-by-step<br />
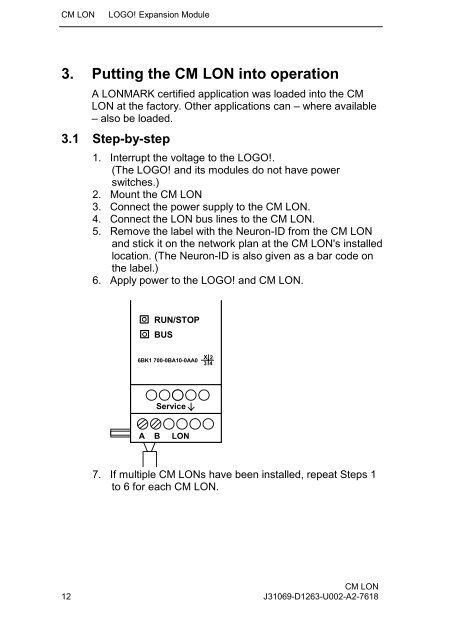
1. Interrupt the voltage to the <strong>LOGO</strong>!.<br />
(The <strong>LOGO</strong>! and its modules do not have power<br />
switches.)<br />
2. Mount the CM LON<br />
3. Connect the power supply to the CM LON.<br />
4. Connect the LON bus lines to the CM LON.<br />
5. Remove the label with the Neuron-ID from the CM LON<br />
and stick it on the network plan at the CM LON's installed<br />
location. (The Neuron-ID is also given as a bar code on<br />
the label.)<br />
6. Apply power to the <strong>LOGO</strong>! and CM LON.<br />
RUN/STOP<br />
BUS<br />
6BK1 700-0BA10-0AA0<br />
Service<br />
A B LON<br />
X 2<br />
34<br />
7. If multiple CM LONs have been installed, repeat Steps 1<br />
to 6 for each CM LON.<br />
CM LON<br />
12 J31069-D1263-U002-A2-7618


