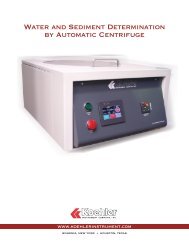
Thermo Scientific Automatic 210 Biopure Distilled Water Center
Thermo Scientific Automatic 210 Biopure Distilled Water Center
Thermo Scientific Automatic 210 Biopure Distilled Water Center

You also want an ePaper? Increase the reach of your titles
YUMPU automatically turns print PDFs into web optimized ePapers that Google loves.
<strong>Thermo</strong> <strong>Scientific</strong><br />
Disassembly for<br />
Cleaning<br />
The frequency of cleaning will depend upon the purity of the water being<br />
used. The distilled water center should be inspected at frequent intervals<br />
until cleaning intervals are determined. Disassemble, inspect, and clean the<br />
distilled water center as follows:<br />
1. Shut off and drain the <strong>Distilled</strong> <strong>Water</strong> <strong>Center</strong> (see Normal Operation).<br />
2. Lift the top hinged cover up so that the unit can be serviced from the<br />
top.<br />
3. Remove the upper front panel by lifting the panel up and pulling it<br />
out.<br />
4. Remove the lower panel by reaching underneath the unit and pushing<br />
the panel retaining strip up to disconnect it from the frame inside and<br />
at the center of the unit and pulling the panel out at the bottom and<br />
down.<br />
5. Slide the vapor pipe connector toward the condenser to disconnect the<br />
vapor pipe/evaporator cover/”Q” baffle assembly from the condenser.<br />
Be careful not to damage the two O-rings in the collar.<br />
6. Disconnect the low water cutoff electrical leads from the electrode<br />
assemblies by pulling the lead clips up from the electrode assembly<br />
terminals.<br />
7. Remove the wing nuts securing the evaporator cover to the evaporator<br />
and remove the evaporator cover.<br />
8. Slide the vapor pipe connector off the portion of the vapor pipe<br />
connecting to the condenser and inspect the O-rings inside the<br />
connector for damage. Replace the O-rings if necessary.<br />
9. Inspect the electrode assemblies for scale and clean as required.<br />
10. Inspect the heating elements inside the evaporator for scale and the<br />
interior of the evaporator for scale and clean as required.<br />
11. Remove and clean the waste cup.<br />
12. Remove and clean the constant level device.<br />
Section 5<br />
Maintenance<br />
13. Unscrew the deconcentrator valve knob until the valve stem is<br />
removed. Inspect and clean the interior of the deconcentrator valve as<br />
required. Replace the O-ring if required.<br />
<strong>Distilled</strong> <strong>Water</strong> <strong>Center</strong> 5-3