Thermo Scientific Automatic 210 Biopure Distilled Water Center
Thermo Scientific Automatic 210 Biopure Distilled Water Center
Thermo Scientific Automatic 210 Biopure Distilled Water Center
Create successful ePaper yourself
Turn your PDF publications into a flip-book with our unique Google optimized e-Paper software.
Heating Element Test<br />
and Repl. (continued)<br />
<strong>Thermo</strong> <strong>Scientific</strong><br />
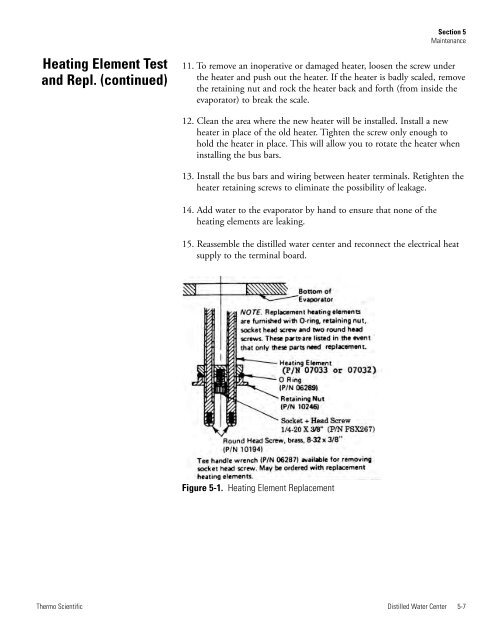
11. To remove an inoperative or damaged heater, loosen the screw under<br />
the heater and push out the heater. If the heater is badly scaled, remove<br />
the retaining nut and rock the heater back and forth (from inside the<br />
evaporator) to break the scale.<br />
12. Clean the area where the new heater will be installed. Install a new<br />
heater in place of the old heater. Tighten the screw only enough to<br />
hold the heater in place. This will allow you to rotate the heater when<br />
installing the bus bars.<br />
13. Install the bus bars and wiring between heater terminals. Retighten the<br />
heater retaining screws to eliminate the possibility of leakage.<br />
14. Add water to the evaporator by hand to ensure that none of the<br />
heating elements are leaking.<br />
Section 5<br />
Maintenance<br />
15. Reassemble the distilled water center and reconnect the electrical heat<br />
supply to the terminal board.<br />
Figure 5-1. Heating Element Replacement<br />
<strong>Distilled</strong> <strong>Water</strong> <strong>Center</strong> 5-7


