caution - Thor Motor Coach
caution - Thor Motor Coach
caution - Thor Motor Coach

You also want an ePaper? Increase the reach of your titles
YUMPU automatically turns print PDFs into web optimized ePapers that Google loves.
Winter Use and Storage<br />
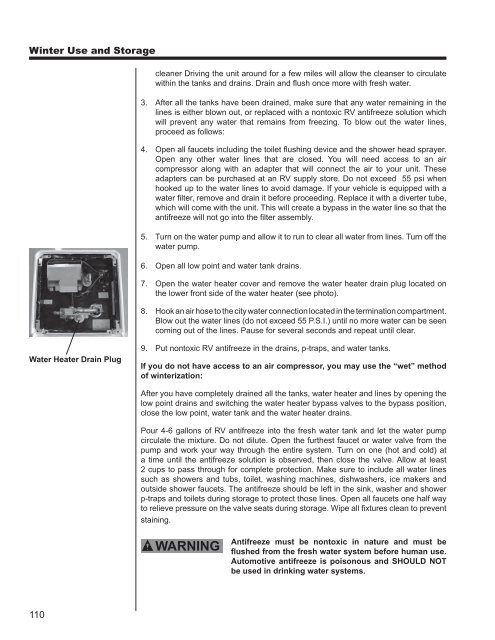
Water Heater Drain Plug<br />
110<br />
cleaner Driving the unit around for a few miles will allow the cleanser to circulate<br />
within the tanks and drains. Drain and flush once more with fresh water.<br />
3. After all the tanks have been drained, make sure that any water remaining in the<br />
lines is either blown out, or replaced with a nontoxic RV antifreeze solution which<br />
will prevent any water that remains from freezing. To blow out the water lines,<br />
proceed as follows:<br />
4. Open all faucets including the toilet flushing device and the shower head sprayer.<br />
Open any other water lines that are closed. You will need access to an air<br />
compressor along with an adapter that will connect the air to your unit. These<br />
adapters can be purchased at an RV supply store. Do not exceed 55 psi when<br />
hooked up to the water lines to avoid damage. If your vehicle is equipped with a<br />
water filter, remove and drain it before proceeding. Replace it with a diverter tube,<br />
which will come with the unit. This will create a bypass in the water line so that the<br />
antifreeze will not go into the filter assembly.<br />
5. Turn on the water pump and allow it to run to clear all water from lines. Turn off the<br />
water pump.<br />
6. Open all low point and water tank drains.<br />
7. Open the water heater cover and remove the water heater drain plug located on<br />
the lower front side of the water heater (see photo).<br />
8. Hook an air hose to the city water connection located in the termination compartment.<br />
Blow out the water lines (do not exceed 55 P.S.I.) until no more water can be seen<br />
coming out of the lines. Pause for several seconds and repeat until clear.<br />
9. Put nontoxic RV antifreeze in the drains, p-traps, and water tanks.<br />
If you do not have access to an air compressor, you may use the “wet” method<br />
of winterization:<br />
After you have completely drained all the tanks, water heater and lines by opening the<br />
low point drains and switching the water heater bypass valves to the bypass position,<br />
close the low point, water tank and the water heater drains.<br />
Pour 4-6 gallons of RV antifreeze into the fresh water tank and let the water pump<br />
circulate the mixture. Do not dilute. Open the furthest faucet or water valve from the<br />
pump and work your way through the entire system. Turn on one (hot and cold) at<br />
a time until the antifreeze solution is observed, then close the valve. Allow at least<br />
2 cups to pass through for complete protection. Make sure to include all water lines<br />
such as showers and tubs, toilet, washing machines, dishwashers, ice makers and<br />
outside shower faucets. The antifreeze should be left in the sink, washer and shower<br />
p-traps and toilets during storage to protect those lines. Open all faucets one half way<br />
to relieve pressure on the valve seats during storage. Wipe all fixtures clean to prevent<br />
staining.<br />
Antifreeze must be nontoxic in nature and must be<br />
flushed from the fresh water system before human use.<br />
Automotive antifreeze is poisonous and SHOULD NOT<br />
be used in drinking water systems.