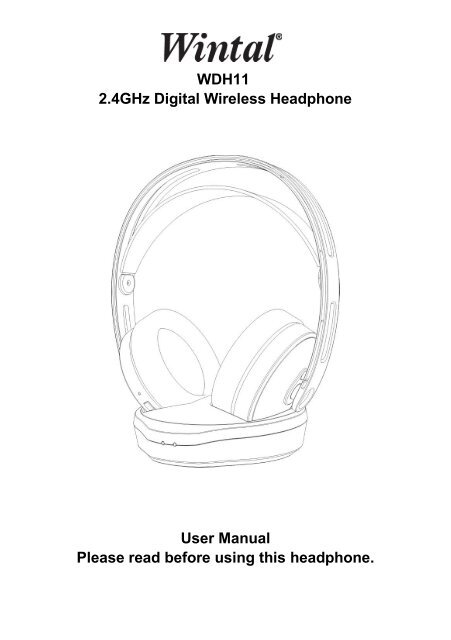
WDH11 2.4GHz Digital Wireless Headphone User Manual ... - Wintal
WDH11 2.4GHz Digital Wireless Headphone User Manual ... - Wintal
WDH11 2.4GHz Digital Wireless Headphone User Manual ... - Wintal

You also want an ePaper? Increase the reach of your titles
YUMPU automatically turns print PDFs into web optimized ePapers that Google loves.
<strong>WDH11</strong><br />
<strong>2.4GHz</strong> <strong>Digital</strong> <strong>Wireless</strong> <strong>Headphone</strong><br />
<strong>User</strong> <strong>Manual</strong><br />
Please read before using this headphone.
INTRODUCTION<br />
This <strong>2.4GHz</strong> <strong>Digital</strong> <strong>Wireless</strong> <strong>Headphone</strong> uses latest digital wireless technology that enables you to<br />
enjoy crystal sound stereo music and TV sound anywhere inside your home. Simply connect the<br />
transmitter to a desired audio source: DVD player, CD player, TV set, VCR , Hi-Fi system, or iPod.<br />
Without complicated wiring and installation, the system enables you to enjoy thrilling, lifelike sound in<br />
minutes.<br />
FEATURES<br />
1. <strong>2.4GHz</strong> <strong>Digital</strong> UHF Technology<br />
2. 31-Channel Frequency Hopping System<br />
3. Smart Volume Memory preset<br />
4. Electronic Volume Control<br />
5. Low Power Indicator Alert<br />
6. Docking Charge Mechanism<br />
7. Auto On/Off (when without signal)<br />
8. Muting<br />
9. Speed charging mechanism
COMPONENT PART LIST<br />
<strong>Headphone</strong> Receiver<br />
1. Signal link LED indicator<br />
2. Volume Up(+) and Down(-) Control<br />
3. Power LED indicator<br />
4. ON/OFF Control<br />
5. Charging contacts<br />
Transmitter<br />
6. Power/Signal LED indicator<br />
7. Charge LED indicator<br />
8. Charging pins<br />
9. Attenuation ( ATT) select switch (0dB and –8dB)<br />
10. RCA Audio In socket<br />
11. DC IN socket<br />
Accessories<br />
12. RCA cable<br />
13. NiMH AAA size batteries for <strong>Headphone</strong> (2 pieces)<br />
14. AC/DC adaptor
INSTALLATION<br />
TRANSMITTER<br />
1. Connect the supplied AC/DC power adaptor to an electrical wall outlet.<br />
2. Plug the AC/DC power adaptor in the DC jack located on the rear of the transmitter. The red<br />
Power/Audio Signal LED starts to flash for around 6 seconds.<br />
2. The rear of the transmitter has one audio cord that can be connected to audio output jack of TV,<br />
VCR, Hi-Fi, CD/MP3/VCD/DVD players, and iPod.<br />
3. For TV/VCR/Hi-Fi, switch the ATT to –8dB. For portable devices, like CD/MP3/VCD/DVD Players,<br />
and IPod, switch the ATT to 0 dB.<br />
Plug the adaptor in the AC source and connect the audio plug to the audio source. Turn on audio<br />
source, then the transmitter will automatically switch on and the Red LED will light up when it receives<br />
an audio signal.<br />
HEADPHONE RECEIVER<br />
1. To install or replace the rechargeable batteries, carefully rotate the Right-Hand Side ( R ) Ear Pad<br />
anti-clockwise and take it out.
2. Insert 2 pieces of AAA size rechargeable batteries (supplied in the package) into the battery<br />
compartment of headphone cabinet with correct polarity.<br />
3. Restore Ear Pad to the earphone cabinet, according to the indication of arrow marking( ), after the<br />
batteries are inserted.<br />
OPERATION<br />
TRANSMITTER<br />
Turn on the audio source (TV or audio component) to which the transmitter is connected with. The<br />
Power / Signal LED on the transmitter will glow in red when it receives the audio signal.<br />
HEADPHONE RECEIVER<br />
1. Turn on the headphone by pressing the Power button for approximately 1 second. The POWER<br />
LED (Red) will light up, and the green LED will be flashing. When the signal link between<br />
transmitter and receiver is established, the green LED will light up steadily.<br />
2. Place the headphone on your head. To obtain the desired sound level, adjust the volume control<br />
on the headphone<br />
3. If interference or poor signal reception occurs when out of the operating distance range, the<br />
headphone will be muted with the green LED turned off. Move closer to the transmitter.<br />
.
4. When the batteries of headphone are at low level, the Power Red LED blinks. There will be a<br />
beeping sound in each minute for the last 5 minutes. After that, the headphone will switch Off<br />
automatically.<br />
5. To charge the batteries in the headphone, turn OFF the headphone by pressing the Power button<br />
for about 1 second. Place the headphone on the transmitter's charging cradle. The charging<br />
process begins automatically, and the Charge Green LED will blinks when the charging contacts<br />
of transmitter and headphone are matched successfully. When the charging process is completed,<br />
the Charge green LED will light up steadily.<br />
Note :For the initial use, please charge the batteries for 7 hours. If the headphone is not in use,<br />
please place it back to the transmitter's charging cradle.
IMPORTANT<br />
1. Switching Off<br />
a) For protection of the transmitter and power saving, the transmitter will be switched off<br />
automatically if there is no audio source signal for approximately 3 minutes. If the audio<br />
source signal returns, the transmitter will be automatically switched on. Then, power on<br />
the headphone again.<br />
b) The headphone will be switched off automatically if there is no signal from the transmitter<br />
for 3 minutes.<br />
2. Make sure the headphone is turned off when charging is in process.<br />
3. Use only the included rechargeable AAA batteries supplied with the product. When the<br />
headphone is not in use, turn the headphone OFF.<br />
4. To ensure a long service life, fully charge the batteries before using the headphone for the first<br />
time. Ensure the charging socket located on the right earphone cabinet connects securely with<br />
the charge prongs on the transmitter cradle. According to the capacity of the rechargeable<br />
battery included, the battery charging process will take approximately 5 to 7 hours.<br />
This device must be used with the AC/DC adaptor supplied in the package.<br />
WARNING<br />
• Never attempt to recharge conventional dry cells.<br />
• Batteries (battery pack or batteries installed) shall not be exposed to excessive heat such as<br />
sunshine, fire or the like.<br />
• Never use another type of battery or non-rechargeable batteries to replace the rechargeable<br />
(LR03/AAA) batteries supplied. When the headphones are not in use, switch it OFF to avoid<br />
damaging the batteries.<br />
• Excessive sound pressure from earphones and headphones can cause hearing loss.
TROUBLE SHOOTING<br />
No Sound<br />
- Ensure the AC/DC adaptor is fully inserted into the AC outlet and the power connection input on<br />
the transmitter.<br />
- Ensure the headphone is switched ON.<br />
- <strong>Headphone</strong> battery charge level may be too low, recharge the batteries fully.<br />
- Ensure the TV or the connected audio device is switched ON.<br />
- The volume of headphone may be too low, adjust the volume to a moderate level.<br />
- The audio signal input level is too low. Increase the volume of the audio source.<br />
Distortion<br />
- Ensure the volume level of headphone is set to an approximate level.<br />
- The headphone is too far from the transmitter, move it closer.<br />
- The audio signal input level is too low. Increase the volume of the audio source.<br />
TECHNICAL SPECIFICATIONS<br />
Transmission Mode : UHF Stereo<br />
Carrier Frequency : <strong>2.4GHz</strong> <strong>Digital</strong><br />
Operation Voltage : Transmitter, DC 5V 550mA<br />
Frequency Response : 30Hz~ 20KHz<br />
Distortion : 0.5%<br />
S/N Ratio : 75dB<br />
Operation Distance : Up to 30 meters (open area)<br />
<strong>Headphone</strong>, 2 x AAA size Rechargeable NiMH batteries (included)