H19 - User Manual - Electronic Reading Systems Ltd.
H19 - User Manual - Electronic Reading Systems Ltd.
H19 - User Manual - Electronic Reading Systems Ltd.

You also want an ePaper? Increase the reach of your titles
YUMPU automatically turns print PDFs into web optimized ePapers that Google loves.
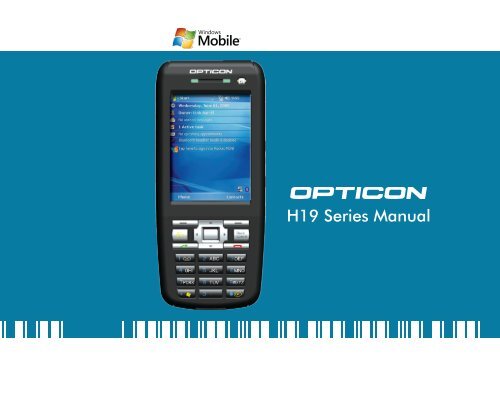
<strong>H19</strong> Series <strong>Manual</strong>
Contents<br />
Chapter 1. Knowing Your Device 9<br />
1.1 Introduction 10<br />
1.2 Accessories 14<br />
1.3 Install SIM Card and Battery 16<br />
1.4 Battery Information 19<br />
1.5 Mini-SD Cards 22<br />
Chapter 2. Basic Operations 23<br />
2.1 Getting Started 24<br />
2.2 Input Methods 28<br />
2.3 Today Screen Components 35<br />
2.4 The Start Menu 37<br />
2.5 Using Calendar 41<br />
2.6 Using Notes 50<br />
2.7 Using Tasks 59<br />
Charter 3. Phone Features 65<br />
3.1 Making a Call 66<br />
3.2 Configuring the Phone 73<br />
3.3 In-Call Options 79<br />
3.4 SIM Manager 82<br />
3.5 Blocking Unwanted Phone Calls 83
Chapter 4. Synchronizing Information 87<br />
4.1 Installing and setting up ActiveSync 88<br />
4.2 Synchronizing Information 89<br />
4.3 Changing Settings for an Information Type 91<br />
4.4 Synchronizing with Exchange Server 91<br />
4.5 Synchronizing via Bluetooth 92<br />
Chapter 5. Bluetooth Connections 93<br />
5.1 Bluetooth Modes 94<br />
5.2 Bluetooth Partnership (Bonding) 96<br />
5.3 Beaming Information (Bluetooth) 98<br />
Chapter 6. Transferring Files To and From Your Device 101<br />
6.1 Using ActiveSync 102<br />
6.2 Transferring from Memory Cards 103<br />
6.3 Using Bluetooth 104<br />
6.4 Transferring to a PC or Other Devices 104<br />
Chapter 7. Connecting to the Internet 105<br />
7.1 Setting up Internet connections 106<br />
7.2 Using Internet Explorer Mobile 111<br />
7.3 Using Wireless Manager 118<br />
7.4 Using Wi-Fi Connection 121
Chapter 8. Messaging & Contacts 127<br />
8.1 Text Messaging 128<br />
8.2 Multimedia Messaging Service 131<br />
8.3 E-mail 134<br />
8.4 Using Contacts 139<br />
Chapter 9. Using Barcode Reader 143<br />
9.1 Setting Barcode Reader 144<br />
9.2 Scanning and <strong>Reading</strong> Barcode labels 154<br />
Chapter 10. Other Applications 157<br />
10.1 Backing up/Recovering 158<br />
10.2 Managing Memory 162<br />
10.3 Windows Live Messenger 163<br />
10.4 Windows Media 167<br />
10.5 Office Mobile 170<br />
10.6 Phone Profile 174<br />
10.7 Formatting Storage Card and DiskOnChip 177<br />
10.8 Setting up GPS 178<br />
Appendix 181<br />
A.1 Regulatory Notices 182<br />
A.2 PC Requirement to Run ActiveSync 4.5 187<br />
A.3 Specifications 188
CAUTION : This information is subject to change without prior notice.<br />
Copyright©2007 Opticon. All Rights Reserved.<br />
This manual may not, in whole or in part, be copied, photocopied, reproduced, translated or<br />
converted to any electronic or machine readable form without prior written consent of Opticon.<br />
Warranty<br />
Unless otherwise agreed in a written contract, all Opticon products are warranted against defects<br />
in materials and workmanship for two years after purchase. Opticon will repair or, at its option,<br />
replace products that are defective in materials or workmanship with proper use during the<br />
warranty period. Opticon is not liable for damages caused by modifications made by a customer.<br />
In such cases, standard repair charges will apply. If a product is returned under warranty and no<br />
defect is found, standard repair charges will apply. Opticon assumes no liability for any direct,<br />
indirect, consequential or incidental damages arising out of use or inability to use both the<br />
hardware and software, even if Opticon has been informed about the possibility of such damages.<br />
Packaging<br />
The packing materials are recyclable. We recommend that you save all packing material to use if<br />
you need to transport your scanner or send it for service. Damage caused by improper packaging<br />
during shipment is not covered by the warranty.<br />
IMPORTANT SAFETY INFORMATION<br />
Please read the following information carefully before you start using this Opticon device to avoid
any damages caused by improper usage:<br />
•The device is not charged when you take it out of the box. The battery should be charged for at<br />
least 8 hours before first use. Do not remove the battery while charging.<br />
• Do not use batteries, which have not been specified by the manufacturer, as this may cause<br />
leakage or rupture.<br />
• Do not charge the battery with an unspecified AC Adapter, as this may cause damage to both<br />
the device and the battery.<br />
• When discarding the batteries, dispose of them in a proper manner, according to the battery<br />
manufacturer’s instructions and your local laws.<br />
• Power off the device and remove the battery before inserting SIM card. Make sure the SIM card<br />
snaps correctly into the SIM socket.<br />
• Do not open the device housing or tamper with the device, as it will void your warranty.<br />
• Do not apply excessive force on this product, as it may cause damage to the screen or the<br />
internal component.<br />
• Do not use the device at gas or refueling stations, chemical plants, and places containing<br />
explosives or flammable materials. Observe local guidelines.<br />
• Use only manufacturer specified stylus. Do not scratch the screen with sharp objects.<br />
• Do not clean the screen with chemical detergents. Only use cloths, specifically designed for<br />
cleaning liquid displays, or a soft cloth moisturized with water drops, to wipe the device screen.<br />
• Do not expose the device to direct sunlight, or leave the device in a humid environment, for<br />
extended periods of time, as this may cause damage to the device and battery.<br />
• Do not immerse the device in water.<br />
• The device may interfere with the navigation and/or communication systems on aircraft. The use<br />
of the device on aircraft is prohibited by laws in most countries. Observe local guidelines.<br />
• This product may cause medical equipment to malfunction. The use of this device is forbidden
in most hospitals and medical clinics. Observe local guidelines.<br />
• Use hands-free devices, if you need to use the telephony services, while driving a vehicle.<br />
Observe local guidelines.<br />
Safety of Laser Products<br />
International Standards (Japan/EU/USA) Laser Class 1<br />
Precautions about the Laser Device<br />
This product using laser complies with JIS C 80 : 00 Class 1, IEC 08 -1+A : 001 Class<br />
1 and 1CFR 10 0.10 and 10 0.11 except for deviations pursuant to Laser Notice No. 0, dated<br />
July , 001.<br />
Class 1 Laser devices are not considered to be hazardous when used for their intended purpose.<br />
Use of controls, adjustment of procedures other than those specified herein may result in<br />
hazardous laser light exposure.<br />
The user should not view directly into the light beam with optical instruments, it may pose an eye<br />
hazard.<br />
Trademarks<br />
Trademarks used are the property of their respective owners.<br />
Opticon is a registered trademark. Microsoft, MS-DOS, Windows, Windows NT, Windows Server,<br />
Windows Mobile, ActiveSync, Excel, Internet Explorer, MSN, Outlook, PowerPoint, and Word are<br />
either registered trademarks or trademarks of Microsoft Corporation in the United States and/or<br />
other countries.
Chapter 1.<br />
Knowing Your Device<br />
1.1 Introduction<br />
1. Accessories<br />
1. Install SIM Card and Battery<br />
1. Battery Information<br />
1. Mini-SD Cards
10<br />
1.1 Introduction<br />
Chapter 1. Knowing Your Device<br />
Views of the Device<br />
1<br />
1<br />
8<br />
10<br />
1 1<br />
1 1<br />
11<br />
1 18<br />
19 0<br />
1<br />
9<br />
8<br />
9<br />
0<br />
1
1 Stylus Write, draw, or make selection on the touch screen.<br />
Scan key (left) Press the key to scan and decode bar code/ D code.<br />
Record key Press and hold this key to record a voice note.<br />
Volume up Press the Volume up button to turn up the PDA receiver volume.<br />
Volume down Press the Volume down button to turn down the PDA receiver volume.<br />
Reset button* Press the Reset button with stylus to soft-reset your device.<br />
Scanner<br />
Point the reading window of the scanner in the direction of bar code/<br />
D code.<br />
8 Wi-Fi/Bluetooth LED Indicates Wi-Fi/ Bluetooth Status.<br />
9 Telephone receiver Listen to a phone call here.<br />
10 GSM/Battery LED Indicates GSM/Battery LED.<br />
11 Power button Power on or off the device.<br />
1 Display .8-inch TFT LCD with touch screen.<br />
1 Soft key (left) Performs the command shown in the label above the button.<br />
1 Soft key (right) Performs the command shown in the label above the button.<br />
1 Fn key<br />
Helps you to perform special functions by using the keypad. For more<br />
information on how to use the Fn key, refer to "ch . Input Methods".<br />
1 Backspace Press this key to erase the letter on the left side of the cursor.<br />
1 Talk key Press this key to dial or answer a call.<br />
11
1<br />
Chapter 1. Knowing Your Device<br />
18 End key End a call or close Phone application.<br />
19<br />
5-way navigation<br />
key<br />
Press the multi directional control up, down, left, or right to move<br />
through menus; carry out the selection by pressing the center button.<br />
0 Numeric keypad Enter numbers or letters by the numeric keypad.<br />
1 Connect pins<br />
Microphone<br />
Eyelet for wrist strap<br />
(1)<br />
Connect the connect pins of the device and the cradle (if any) for<br />
recharging the battery.<br />
Speak into the microphone when talking on the phone or recording a<br />
voice note.<br />
Fix a wrist strap here.<br />
Scan key (right) Press the key to scan and decode bar code/ D code.<br />
Eyelet for wrist strap<br />
(2)<br />
Fix a wrist strap here.<br />
Mini-SD card slot Insert a mini-SD card to expand device memory.<br />
Mini USB connector Mini USB connector for PC sync and battery charging.<br />
8 Earphone Jack Connect a . mm Earphone.<br />
9 Speaker Listen to audio media or listen to a phone call hands-free.<br />
0 Screw hole Fasten the provided strap set here with screws.<br />
1 Cover latch Slide both of the cover latches to remove the battery cover.<br />
Battery cover Remove to place battery and SIM card.<br />
If you press the Reset button when your device is in use, the unsaved data and settings may be<br />
lost.
Clean boot Your Device<br />
You can execute a system cold boot to format both user store and DiskOnChip on your device.<br />
To prompt the instruction for cold boot, press the Reset button, and then press and hold the Power<br />
button immediately until the cold boot screen appears. You can then choose one of the following<br />
steps:<br />
• Pressing the left key of the -way navigation key to format user store.<br />
• Pressing the right key of the -way navigation key to format DiskOnChip.<br />
• Press the up key of the -way navigation key to format both user store and DiskOnChip.<br />
• Press any other key to exit.<br />
The Stylus<br />
• Use the stylus to tap a selection, to drag-and-drop an item, to write, or to draw on the touch<br />
screen.<br />
• Tap and hold the stylus on the screen, icon is displayed and then a pop-up submenu is<br />
displayed.<br />
Notification LEDs<br />
The device has notification LEDs: the left is Wi-Fi/Bluetooth LED and the right is GSM/Battery<br />
LED.<br />
Bluetooth/Wi-Fi LED tells you about the device’s Bluetooth/Wi-Fi status:<br />
Color Bluetooth on Wi-Fi on<br />
Green Off Blink<br />
Blue Blink Off<br />
Green and blue blink alternately while both Bluetooth and Wi-Fi are on.<br />
1
1<br />
Chapter 1. Knowing Your Device<br />
GSM/Battery LED lets you know that you have unanswered calls or tells you about the device’s<br />
GSM/battery status:<br />
Color<br />
1.2 Accessories<br />
Missed Call/ Low<br />
Power<br />
GSM on<br />
(battery full)<br />
GSM on (battery<br />
low)<br />
Red Blink Off Blink Off<br />
Charging<br />
Orange Off Off Off Constantly on<br />
Green Off Blink Off Off<br />
<strong>Manual</strong><br />
QSG<br />
1 2 3 4 5 6 7
8 9 10 11 12 13 14<br />
1 AC adapter Recharge the device battery.<br />
Stereo headset Listen to a phone conversation hands-free.<br />
USB cable Connect the device to a PC.<br />
Getting started CD Windows Mobile TM Getting Started Disc.<br />
<strong>User</strong> manual/Quick guide Provide instructions of device functions.<br />
Pouch Protect the device.<br />
Neck strap<br />
8 Belt clip<br />
Fasten the neck strap with the pouch’s metal clasp to make your device easier to<br />
carry.<br />
Fasten the belt clip with your belt and the pouch’s metal clasp to make your de-<br />
vice easier to carry.<br />
9 Battery Rechargeable Li-ion polymer battery.<br />
10 Strap set<br />
Attach the thin cord of the strap set to the eyelet on the bottom of your device,<br />
and then fasten the metal plate to the back of your device*.<br />
11 UK plug Fit the AC adapter for use in United Kingdom.<br />
1 EU plug Fit the AC adapter for use in Europe.<br />
1 AU plug Fit the AC adapter for use in Australia.<br />
1 Stylus Write, draw, or make selection on the touch screen.<br />
*To fasten the metal plate, affix it to the back of your device, and secure it in place by driving the two<br />
provided screws into the screw holes on the back of your device.<br />
1
1<br />
Chapter 1. Knowing Your Device<br />
1.3 Install SIM Card and Battery<br />
Installing the SIM Card<br />
If you want to use phone features, you must install a GSM SIM card.<br />
• Slide both of the cover latches down and lift the battery cover in the direction of the arrow to<br />
remove the battery cover.<br />
Please do not remove the battery cover when your device is in use; otherwise, the device<br />
power will be shut off automatically and unsaved data may be lost.<br />
• Pull the plastic ribbon to remove the<br />
battery.<br />
• Place the SIM card in the SIM card slot<br />
with the gold contacts facing down. The<br />
SIM card’s cut-off corner should match the<br />
cut-off corner in the SIM card slot.
Installing the Battery<br />
• Press the battery down forcefully into the battery slot.<br />
2<br />
1<br />
• Angle the battery cover as shown in the diagram and close the battery cover.<br />
• Slide both of the cover latches up to lock the battery cover.<br />
1
18<br />
Chapter 1. Knowing Your Device<br />
Replacing the Battery without Turning off the Device<br />
Your device power is automatically shut off while the battery cover is removed. It is recommended<br />
to follow normal power off procedure to remove the battery (see chapter .1 for powering on/off<br />
information); alternatively, you can quickly replace the battery by doing the following:<br />
1. Short-press the Power button to backup current settings and data.<br />
. Unlock and remove the battery cover.<br />
. Wait for five seconds and then replace the battery.<br />
. Close and lock the battery cover.<br />
. Short-press the Power button to recover your device system to the previous state.<br />
The device contains a rechargeable Li-ion polymer battery completely discharged and<br />
should be charged for at least 8 hours before first use. Use only manufacturer-specified<br />
original batteries. Damages caused by using batteries not specified by manufacturer are<br />
not covered under warranty.<br />
It is recommended to follow normal power off procedure to remove the battery, see “Chapter<br />
.1 Powering On/Off the Device”
1.4 Battery Information<br />
Battery performance depends on many factors, including your wireless service provider’s network<br />
configuration, signal strength, the temperature of the environment in which you operate your phone,<br />
the features and/or settings you select and use, items attached to your phone’s connecting ports, and<br />
your voice, data, and other program usage patterns.<br />
Battery life estimates (approximations):<br />
• Talk time: hours<br />
• Standby time: 1 0 hours<br />
Reducing Risk of Fire or Burns<br />
• Do not attempt to open, disassemble, or service the battery pack.<br />
• Do not crush, puncture, short external contacts, or dispose of in fire or water.<br />
• Do not expose to temperatures above 60˚C (140˚F).<br />
• Replace only with the battery pack designated for this product.<br />
• Recycle or dispose of used battery as stipulated by local regulation.<br />
Checking the Battery Power<br />
• Tap > Settings > System tab > Power. You can check the<br />
battery power of both the main battery and the backup battery.<br />
19
0<br />
Chapter 1. Knowing Your Device<br />
The backup battery powers a real-time clock (RTC) which keeps track of the time even when<br />
your device is turned off. When the backup battery power is normal or full, it can keep<br />
accurate real time for five minutes even if the main battery is removed and for up to 1 8<br />
hours while the main battery is low.<br />
Optimizing the Power Performance<br />
• Tap > Settings > System tab > Power > Advanced, and adjust the time for turning off<br />
the device if it is not in use.
Managing a Low Battery<br />
When the low-battery warning appears, tap OK or Dismiss to close the warning and do the<br />
following:<br />
• Start charging or replace your battery.<br />
• Close all applications and turn off the device.<br />
Charging the Battery<br />
1. To charge the battery, place the battery into the battery slot correctly. See previous section for<br />
how to install the battery.<br />
. Do one of the following:<br />
• Connect the device with the AC adapter and plug the AC adapter into a power outlet.<br />
• Connect the device to a PC with the USB cable.<br />
• Place the device in a specific cradle for H-19 (the cradle is optional) and connect the cradle<br />
to an electrical outlet or a USB port on your PC.<br />
To charge the device with the USB cable, you must connect the device to a functioning USB<br />
port on a PC that is powered on.<br />
Do not operate your device to temperatures above 40˚C (72˚F) while charging the battery.<br />
Do not leave the battery in a place above 60˚C (140˚F).<br />
1
1.5 Mini-SD Cards<br />
Chapter 1. Knowing Your Device<br />
Mini-SD is one of the most popular formats for mobile devices. Your device contains a mini-SD card<br />
slot in which you can expand the device’s memory up to GB. Mini-SD provides functions such as<br />
built-in security for copyrighted content along with great performance for storing music, video, and<br />
photographs. Please note that mini HCSD (High Capacity SD) is not supported by this device.<br />
Inserting a Mini-SD Card into the Device<br />
Lift the mini SD card slot cover and insert the mini SD card with the logo side down and push into<br />
place until it clicks down and is held in place.<br />
Mini-SD cards can only be inserted in one direction. Inserting the card in the wrong<br />
direction by force can cause damage to the card and the card slot.<br />
Removing a Mini-SD Card from the Device<br />
1. Gently press the mini-SD card inward (you may feel some resistance) and the card will eject<br />
itself.<br />
. Take out the mini-SD card from the card slot by hand.
Chapter .<br />
Basic Operations<br />
.1 Getting Started<br />
. Input Methods<br />
. Today Screen Components<br />
. The Start Menu<br />
. Using Calendar<br />
. Using Notes<br />
. Using Tasks
2.1 Getting Started<br />
Chapter . Basic Operations<br />
Powering On/Off the Device<br />
Press the POWER button to turn on the device. The POWER button is located on the top of<br />
the front side of the device. When you power on the device for the first time, you are asked to<br />
calibrate the device. Please refer to the “Calibrating your device” section in this chapter for<br />
calibration steps. Press the POWER button again to switch the device to sleep mode. You can still<br />
receive phone calls and messages when the device is operating on sleep mode. To power off the<br />
device completely, press and hold the POWER button for seconds and the system will prompt<br />
you to power off the device.<br />
Calibrating Your Device<br />
Calibrating the device ensures the tapped item is activated. To calibrate your device, tap the<br />
center of the cross with the stylus as the cross moves around the screen. If you would like to recalibrate<br />
the device, follow the steps below:
1. Tap > Settings > System tab > Screen.<br />
. Tap the Align Screen button and follow the on-screen instructions.<br />
Locking/Unlocking the Device<br />
Locking the device turns off keyboard and touch screen functionality. This is a helpful feature if,<br />
for example, the device is turned on and in your pocket, and you want to prevent accidental key<br />
presses.<br />
• To lock the device, tap on the icon on the Today Screen. Once the device is locked, the left<br />
soft key label changes to Unlock.
Chapter . Basic Operations<br />
You can still receive calls and make emergency calls when the keypad is locked.<br />
To unlock the device, tap the Unlock button on the Today screen first,<br />
a screen as below will show. Press * to unlock the device, or tap the<br />
Unlock button on the screen.<br />
You can lock/unlock the device by<br />
pressing the Fn key and Record<br />
key, refer to chapter . for more<br />
information.
Setting Buttons<br />
To change functions for specific buttons in your device:<br />
• Tap > Settings > Buttons > Program Buttons tab. Select a button (Button 1, Button<br />
or Button ) and assign a new program to replace the default one.<br />
• Button 1: Record button.<br />
• Button : Fn + .<br />
• Button : Fn + .<br />
To change Up/Down control and repeat rate:<br />
• Tap > Settings > Buttons > Up/Down Control tab. Drag the slider on the screen to<br />
customize the way your Up/Down control repeats.<br />
To change button locking setting:<br />
• Tap > Settings > Buttons > Buttons Lock tab. Choose to lock all buttons or not when<br />
your device is in sleep mode.<br />
Changing the Backlight Settings<br />
1. Tap > Settings > System tab > Backlight.<br />
. You can customize the following settings:<br />
• Backlight settings while your device is using battery power.<br />
• Backlight settings while your device is using external power.<br />
• Brightness of backlight.
8<br />
2.2 Input Methods<br />
Chapter . Basic Operations<br />
The device contains different input modes: Keyboard, Letter Recognizer, Block Recognizer,<br />
Transcriber, Initial capital, Lowercase and Uppercase. You can enter texts and numbers by using the<br />
keypad or the touch screen.<br />
Using the Touch Screen<br />
Keyboard<br />
Icon Input Modes<br />
Keyboard<br />
Letter/Block Recognizer<br />
Transcriber<br />
Initial capital<br />
Lowercase<br />
Uppercase<br />
• Tap to launch the on-screen keyboard. If on-screen Keyboard is not the selected input<br />
method, tap the input method selector arrow (the upward arrow next to the input method icon)<br />
and select Keyboard.<br />
• To enter text, tap the keys on the on-screen keyboard.
• Tap the CAP key on the on-screen keyboard to enter capital letters and/or symbols.<br />
Letter Recognizer<br />
Letter Recognizer recognizes one letter, number, or symbol at a time.<br />
• To launch Letter Recognizer, tap the input method selector arrow (the upward arrow next to the<br />
input method icon) and select Letter Recognizer.<br />
• Write uppercase letters in the left recognition area (the ABC box).<br />
• Write lowercase letters in the middle recognition area (the abc box).<br />
• Write numbers and symbols in the right recognition area (the 1 box).<br />
Block Recognizer<br />
Block Recognizer recognizes letters written in one stroke.<br />
• To launch Block Recognizer, tap the input method selector arrow (the upward arrow next to the<br />
input method icon) and select Block Recognizer.<br />
• Write lowercase letters in the text recognition area (the abc box).<br />
• Write numbers in the numeric recognition area (the 1 box).<br />
• To input symbols, tap any recognition area, text or numeric, once and write symbols.<br />
9
0<br />
Chapter . Basic Operations<br />
Tap in Letter or Block Recognizer to see a demo on how to write recognizable characters.<br />
Transcriber<br />
Transcriber recognizes handwritings in cursive and/or print. It uses the full screen as its recognition<br />
area. It interprets the movement of the stylus on the screen as you write.<br />
• To launch Transcriber, tap the input method selector arrow (the upward arrow next to the input<br />
method icon) and select Transcriber.<br />
• Write anywhere on the screen.<br />
The Transcriber comes with a detailed help. Tap if you need further assistance.<br />
Using the Keypad<br />
To enter texts by using the keypad, press a number key repeatedly until desired character appears.<br />
If the next letter you want is located on the same key, wait until the cursor appears and blinks<br />
more than twice, then enter the letter. For corresponding letters/numbers/symbols of each key,<br />
please see the table at the end of this section.
Initial capital<br />
To capitalize the first letter of every sentence you enter by using the keypad, do the following:<br />
• Tap the input method selector arrow (the upward arrow next to the input method icon) and<br />
select Initial capital. You can see the input icon is changed to .<br />
Lowercase<br />
To enter lowercase letters constantly by using the keypad, do the following:<br />
• ap the input method selector arrow (the upward arrow next to the input method icon) and select<br />
Lowercase. You can see the input icon is changed to .<br />
Uppercase<br />
To enter uppercase letters constantly by using the keypad, do the following:<br />
• Tap the input method selector arrow (the upward arrow next to the input method icon) and<br />
select Uppercase. You can see the input icon is changed to .<br />
Press * to quickly switch input modes between Initial capital ( ), Lowercase ( )<br />
and Uppercase ( ).<br />
To quickly switch keypad input modes (Initial capital, Lowercase and Uppercase) and on-<br />
screen Keyboard modes ( ), press and hold * for two seconds.<br />
1
Chapter . Basic Operations<br />
Corresponding letters/numbers/symbols for each numeric key:<br />
Numeric<br />
keys<br />
Input mode<br />
Lowercase mode Initial capital mode Uppercase mode<br />
1 . , ? ! @ ` - _ ( ) : ; & / \ % # * 1<br />
abc ABC ABC<br />
def DEF DEF<br />
ghi GHI GHI<br />
jkl JKL JKL<br />
mno MNO MNO<br />
pqrs PQRS PQRS<br />
8 tuv8 TUV8 TUV8<br />
9 wxyz9 WXZY9 WXZY9<br />
* Caps lock / Shift<br />
0 + 0<br />
# Space<br />
Tips of Using the Function Key<br />
The Fn key helps you to execute certain actions quickly such as input mode switching and<br />
backlight turning on. To perform these functions by using the Fn key, press it and check if an<br />
icon appears on the screen, and then press another key to execute the following actions:<br />
• Fn + 1: switch to Numeric mode, you can enter numbers 0 to 9 and * and # constantly by<br />
using the keypad.<br />
• Fn + : switch to Lowercase mode.
• Fn + : switch to Initial capital mode.<br />
• Fn + : switch to Uppercase mode.<br />
• Fn + Action key (the central button of the -way navigation key): perform Enter.<br />
• Fn + * ( ): this is set to open Start menu by default (Programable Button ). Refer to<br />
chapter .1 if you want to change it.<br />
• Fn + # ( ): this is set to perform OK/Close by default (Programable Button ). Refer to<br />
chapter .1 if you want to change it.<br />
• Fn + Record key (on the left side of your device): lock/unlock the device.<br />
Entering Symbols<br />
To enter special symbols and accented letters (e.g. à, Ç, ®…etc.), do the following:<br />
1. After pressing a character (e.g. E), press the Fn key and then the numeric key 0 once to show<br />
an accented type of this character (È).<br />
. To show another accent type, press and hold the Fn key and then press the numeric key 0<br />
repeatedly until desired type is displayed (e.g. press numeric 0 three times to show Ê).<br />
Corresponding letters/symbols for each character:<br />
a à á â ä å æ ã ą ă i ì í î ï ĩ ij<br />
A À Á Â Ä Å Æ Ã Ą Ă I Ì Í Î Ï Ĩ IJ<br />
c ç ć ĉ © l ł<br />
C Ç Ć Ĉ © L Ł<br />
d ð n ñ<br />
D Đ N Ñ<br />
e è é ê ë ę o ò ó ô õ ö ő ø œ
Chapter . Basic Operations<br />
E È É Ê Ë Ę O Ò Ó Ô Õ Ö Ő Ø Œ<br />
p þ y ý<br />
P Þ Y Ý<br />
r ® z ź ż<br />
R ® Z Ź Ż<br />
s ß ş š 0 º<br />
S ß Ş Š 1 ¹<br />
t ţ 2 ² ½<br />
T Ţ 3 ³<br />
u ù ú û ü ű ũ µ 4 ¼ ¾<br />
U Ù Ú Û Ü Ű Ũ µ 8 ⅛ ⅜ ⅝ ⅞
2.3 Today Screen Components<br />
Today Screen<br />
The Today Screen is usually the first screen that appears when you turn on the device for the first<br />
time each day. It displays a summary of information for the day, shows you the system status and<br />
contains a list of shortcuts to programs. The Today screen looks like this:<br />
8<br />
1<br />
Tap here to rotate<br />
the screen<br />
Tap here to trigger the<br />
Wireless Manager<br />
1 Date and time<br />
Wireless status (GSM, Wi-Fi, and Bluetooth)<br />
Owner information<br />
Unread messages including text messages, MMS<br />
messages, and e-mails<br />
Active tasks<br />
Upcoming appointments<br />
Live Search<br />
8 Device lock status<br />
You can also access the Today screen by selecting Today from the Start menu.<br />
To change the items showed in the Today screen, tap > Settings > Today > Items<br />
tab.
Chapter . Basic Operations<br />
Icon Indicators<br />
Status indicators appear at the top of the screen and on the Today screen. The following table lists<br />
common status indicators and their meanings.<br />
New e-mail or text message (SMS) Connection is not active<br />
New voice mail Synchronization in progress<br />
New instant message Ringer on<br />
Voice call Ringer off<br />
Voice call in progress Roaming<br />
Data call in progress No Voice mail<br />
Calls are forwarded Voice mail Lines 1<br />
Call on hold Call Forwarding Lines 1<br />
Missed call Alarm<br />
Battery level 1 GPRS available<br />
Battery level 2 GRPS in use<br />
Low battery No SIM card installed<br />
Extremely low battery EDGE available<br />
Backup battery very low EDGE in use<br />
Battery charging Wi-Fi connection in progress<br />
Signal strength Ringer in vibration mode<br />
Bluetooth bonding in progress Function key on<br />
No signal Synchronization error<br />
Flight mode Barcode reader off<br />
No service Barcode reader on<br />
PC Connection is active
2.4 The Start Menu<br />
The Start menu is divided into groups as described in the following:<br />
1<br />
1 Commonly used items<br />
Recently accessed applications<br />
List of all programs, device settings, and system<br />
List of All Programs<br />
The following table lists icons of the programs that are already installed on your device.<br />
Games<br />
ActiveSync<br />
Backup Manager<br />
Blacklist<br />
Calculator<br />
File Explorer<br />
help<br />
Windows Mobile comes with games: Bubble Breaker and Solitaire.<br />
Synchronizes information between your device and a PC. See “Chapter . Synchronizing<br />
Information” for details.<br />
Lets you backup and recover your data. See “10.1 Backing up/Recovering” for details.<br />
Lets you set up a list of phone numbers to block.<br />
Performs basic arithmetic and calculations such as addition, subtraction, multiplication,<br />
and division.<br />
Lets you organize and manage the files on your device.
8<br />
Chapter . Basic Operations<br />
FormatDisk<br />
Internet Sharing<br />
Messenger<br />
Notes<br />
Phone Profile<br />
Pictures & Video<br />
Search<br />
SIM Manager<br />
Tasks<br />
Windows Live<br />
Windows Media<br />
List of All Settings<br />
Personal<br />
Lets you format an inserted mini-SD card and DiskOnChip in your device<br />
Lets you use your device as an external modem for a PC, connecting through an USB<br />
port and Bluetooth.<br />
Lets you send and receive instant messages with your Windows Live Messenger contacts.<br />
See “ . Notes” for details.<br />
Lets you set different profiles for the phone in different situations. See “10. Phone<br />
Profile” for details.<br />
Collects, organizes, and sorts picture and video files in the My Pictures folder on your<br />
device or on a storage card.<br />
Searches the data stored in your device.<br />
Lets you manager your SIM card. See “ . SIM Manager” for details.<br />
Keeps track of your tasks. See “ .8 Using Tasks” for details.<br />
A network integration service which allows you to access and manage varies Internet<br />
services such as Windows Live Spaces, Windows Live Messenger, Windows Live Space,<br />
Live Search…etc.<br />
Use it to play music and video.<br />
Buttons Configures the device’s buttons.<br />
Input Input method configurations.<br />
Lock Set a password to unlock the device.
System<br />
Menus Configure the Start menu.<br />
Owner Information Enter information about the owner of the device.<br />
Phone Configure the Phone features. See “Chapter Phone Features” for details.<br />
Sounds &<br />
Notifications<br />
Configure program and event sounds.<br />
Today Configure the Today screen items and theme.<br />
About Windows Mobile information and device name.<br />
Backlight Configures the display backlight.<br />
Barcode Settings Change settings of barcode scanner.<br />
Certificates Manages personal and root certificates.<br />
Clock & Alarms Sets time and alarms.<br />
Customer Feedback Allows you to send information about how you use Windows Mobile software to Microsoft.<br />
Device Info Display the device software and hardware version.<br />
Encryption Encrypt files placed on storage cards.<br />
Error Reporting Enable or disable Microsoft product error reporting.<br />
External GPS Helps you to set up an external GPS device on your device<br />
9
0<br />
Connections<br />
Chapter . Basic Operations<br />
Factory Reset Lets you reset all settings to manufacturer default.<br />
Memory Memory and process management.<br />
Power Power management settings.<br />
Regional Settings Configure the device’s locale.<br />
Remove Programs Remove an installed application.<br />
Screen Lets you align the screen. See “Calibrating Your Device” of Chapter for details.<br />
Windows Update Lets you download Windows Mobile updates such as critical security fixes.<br />
Beam Turn on/off the beam feature.<br />
Bluetooth Configure Bluetooth settings. See “Chapter Bluetooth Connections” for detail.<br />
Connections Configure the device’s connections.<br />
Network Cards Configure Network adapter.<br />
USB to PC Enable/Disable advanced network functionality.<br />
WAN Conf<br />
W i - F i N e t w o r k<br />
Manager<br />
Helps you to change authentication schemes for GPRS setting (MS-CHAP, CHAP and PAP).<br />
Please contact your service provider for information on which scheme to select.<br />
Display detail information of Wi-Fi Network including signal strength, IP information...etc.<br />
Wireless Manager Turn on/off wireless and phone features with the Wireless Manager.
2.5 Using Calendar<br />
Use Calendar to schedule appointments, including meetings and other events. Your appointments for<br />
the day can be displayed on the Today screen. If you use Outlook on your PC, you can synchronize<br />
appointments between your device and PC. You can also set Calendar to remind you of appointments<br />
with a sound or flashing light, for example.<br />
You can look at your appointments in several different views (Day, Week, Month, Year and Agenda).<br />
To see detailed appointment information in any view, tap the appointment. For information about<br />
changing the Calendar view, see Change views in Calendar.<br />
Scheduling an Appointment<br />
1. Either tap > Calendar or tap the appointment reminder on the Today Screen.<br />
1
Chapter . Basic Operations<br />
. Tap Menu > New Appointment.<br />
. Enter information about the appointment.<br />
. To schedule an all-day event, under All Day, select Yes.<br />
. To make the appointment recurring, tap on how often it should recur in the Occurs drop-down box.
. Select categories and attendees.<br />
. Tap Notes tab to add details to the appointment if needed.<br />
8. Tap .<br />
All-day events do not occupy blocks of time in Calendar; instead, they appear in banners at<br />
the top of the calendar.<br />
Categories:<br />
Business,Holiday,<br />
Personal, Seasonal.<br />
Add attendees<br />
to the meeting.
Chapter . Basic Operations<br />
Deleting an Appointment<br />
1. Tap > Calendar.<br />
. In Agenda view, select the appointment to delete.<br />
. Tap Menu > Delete Appointment.<br />
. If the appointment is recurring,<br />
tap Yes to delete the series,<br />
or tap No to delete only the<br />
current occurrence.
When you delete an appointment in Calendar on your phone, it is also deleted on your PC<br />
the next time you synchronize. If the appointment has not been synchronized with a PC, it<br />
will be deleted only form the phone.<br />
Calendar items can be deleted only from Agenda view or from an open calendar<br />
appointment. To delete from other views, open the appointment, and Tap Menu > Delete.<br />
Changing the Reminder Time<br />
By default, the reminder time is set 1 minutes prior to an appointment.<br />
1. Tap > Calendar.<br />
. Tap Menu > Tools > Options.<br />
. Tap Appointment tab and change the time.<br />
. Tap .
Chapter . Basic Operations<br />
Changing Calendar Views<br />
You can look at your appointments in Agenda, Day, Week, Month or Year view. To see detailed<br />
appointment information in any view, tap the appointment. To see a list of available actions for an<br />
appointment, tap and hold the appointment.<br />
1. Tap > Calendar.<br />
. Tap Menu > View and select the view you want.<br />
View See Screen<br />
Agenda Your current day's activities at a glance.<br />
Upcoming appointments are bold; past appointments<br />
are dimmed.<br />
Day Your schedule for a single day in a dayplanner<br />
layout. Free and busy times in time<br />
slots of 1/ hour or 1 hour.
View See Screen<br />
Week Your schedule for the whole week.<br />
Month Your free and booked days for a month:<br />
: Current day<br />
: morning appointment<br />
: afternoon appointment<br />
: morning and afternoon appointments<br />
: all-day event with time not marked free<br />
Year A calendar for the entire year.
8<br />
Chapter . Basic Operations<br />
In Month view, a date will appear in red when the Holiday category is assigned to any<br />
appointment for that day.<br />
You can also change the view by tapping Agenda, Day, Week, Month, or Year on the menu<br />
bar.<br />
To quickly see your appointments for the current day, tap Start > Today.<br />
Changing the Display of the Work Week<br />
1. Tap > Calendar.<br />
. Tap Menu > Tools > Options and do one of the flowing:<br />
• To assign a default view, in Start in, select Agenda View, Day View, Week View,<br />
Month View or Year View.
• To specify the first day of the week, in 1st day of week, tap Sunday or Monday.<br />
• To specify the number of days you want to appear in a week, in Week view, tap 5-day<br />
week, 6-day week, or 7-day week.<br />
. Tap .<br />
Setting Options for Displaying Appointment on the Today Screen<br />
You can specify the kind of appointment that show on the Today screen.<br />
1. Tap > Settings > Personal tab > Today > Items tab.<br />
. Select Calendar, and then tap Options.<br />
. Do any of the following:<br />
• Select Next appointment to show only the next appointment in your schedule.<br />
• Select Upcoming appointment to show multiple appointments.<br />
• Select the Display all day events check box to show all-day event.<br />
9
0<br />
2.6 Using Notes<br />
Chapter . Basic Operations<br />
Notes helps you to quickly capture thoughts, questions, reminders, to-do lists, and meeting notes. You<br />
can create handwritten and typed notes, record voice notes, convert handwritten notes to text for easy<br />
readability, and send notes to others.<br />
Your notes and recordings are displayed in the note list. If you have a long list, tap the sort list (labeled<br />
Name by default), and select the option you want. To open a note or play a recording, tap it. To see a<br />
list of available actions for a note or recording, tap and hold the note or recording.<br />
Setting the Default Input Mode<br />
1. Tap > Programs > Notes.<br />
. Tap Menu > Options.<br />
. Select one of the following modes in<br />
Default mode:<br />
• Select Writing if you prefer your notes<br />
to be handwritten.<br />
• Select Typing if you would like your<br />
notes to be typed.<br />
. Tap .
Creating a Note<br />
1. Either tap > Programs > Notes or press the Voice Record button on the left side of the<br />
device.<br />
. Tap New and enter text.<br />
. Tap to save your note.<br />
Press the Voice Record button on the<br />
left side to launch Notes.<br />
1
Chapter . Basic Operations<br />
Creating a Stand-alone Voice Recording<br />
1. Tap > Programs > Notes.<br />
. If the recording toolbar is not shown, tap Menu > View Recording Toolbar.<br />
. Tap the RECORD button on the recording toolbar and speak to the device’s microphone to<br />
record your voice in the notes list.<br />
. Tap the STOP button on the recording toolbar when finished.<br />
. Tap to return to the notes list. In the notes list a stand-alone voice recording is listed with a<br />
icon .<br />
Switching between Typing/Writing Modes<br />
1. Tap > Programs > Notes.<br />
. Create a new note or open an existing note from the notes list.<br />
. Tap Menu > Draw to switch to a different mode.
While in typing mode,<br />
tap Draw to switch to<br />
writing mode<br />
Editing a Handwritten Note<br />
• Tap Menu > Undo/Redo Ink.<br />
• Tap Edit > Select All/Clear.<br />
While in writing mode,<br />
tap Draw to switch to<br />
typing mode<br />
Tap Undo Ink to cancel or<br />
reverse an action.<br />
Re-execute an undone action<br />
by tapping Redo Ink.
Chapter . Basic Operations<br />
Adding a Voice Recording to a Note<br />
1. Tap > Programs > Notes.<br />
. Create a new note or open an existing<br />
note from the notes list.<br />
. If the recording toolbar is not shown, tap<br />
Menu > View Recording Toolbar.<br />
Record<br />
Stop<br />
Play
. Tap the RECORD button on the recording toolbar and speak to the device’s microphone.<br />
. Tap the STOP button on the recording toolbar when finished.<br />
. Tap to return to the notes list if you are adding a voice recording to a note.<br />
Add a voice recording to<br />
a note in typing mode<br />
Add a voice recording to<br />
a note in writing mode
Deleting a Note<br />
Chapter . Basic Operations<br />
1. Tap > Programs > Notes.<br />
. Tap and hold the note and tap Delete.<br />
. Tap the Yes button to delete the selected<br />
note.<br />
Creating a Default Template<br />
1. Tap > Programs > Notes.<br />
. Create a note that you would like to save<br />
as a template.<br />
. In the note list, select the new note and<br />
tap Menu > Rename/Move.
. Enter a name for the new template in the<br />
Name box.<br />
. In the Folder list, select Templates.<br />
. Tap to return to the note list.<br />
Creating a Note by Using a Template<br />
1. Tap > Programs > Notes.<br />
. Tap Menu > Options.<br />
. Select a template from Default template.
8<br />
Chapter . Basic Operations<br />
Template Screen Template Screen<br />
Blank Meeting Notes<br />
Memo Phone Memo<br />
To Do
2.7 Using Tasks<br />
Use Tasks to keep track of things you need to do. A task can occur once or repeatedly (recurring).<br />
You can set reminders for your tasks and you can organize them by using categories.<br />
Your tasks are displayed in a task list. Overdue tasks are displayed in red.<br />
If you use Outlook on your PC, you can synchronize tasks between your device and PC so that<br />
tasks you create or update on your PC will also be updated on your device and vice versa.<br />
To quickly see the number of active tasks you have, tap Start > Today.<br />
Creating a Task<br />
1. Tap > Programs > Tasks.<br />
. Do one of the following:<br />
• In the Tap here to add a new task<br />
box enter the task name and press the<br />
ENTER key.<br />
• Tap Menu > New Task and enter<br />
details about the new task.<br />
9
0<br />
Chapter . Basic Operations<br />
1. Enter or select a subject.<br />
. Select a completion status.<br />
. Pick the start and due time.
. Set a reminder date/time and pick a task<br />
category.<br />
. Select task sensitivity.<br />
Set reminder date<br />
and time.<br />
You can synchronize information on<br />
your phone with your PC to keep your<br />
task list up to date in both locations.<br />
If you create a new task with a<br />
reminder on your PC and then<br />
synchronize tasks with your phone, the<br />
reminder will play at the time it was set<br />
on your PC.<br />
Multi-selection<br />
1
Deleting a Task<br />
Chapter . Basic Operations<br />
1. Tap > Programs > Tasks.<br />
. Select the task, and tap Menu > Delete<br />
Task.<br />
Changing a Task<br />
1. Tap > Programs > Tasks.<br />
. Select the task, and tap Edit.
Viewing Task Details<br />
1. Tap > Programs > Tasks.<br />
. Tap twice on a task to view the details.<br />
Sorting/Filtering Your Tasks<br />
1. Tap > Programs > Tasks.<br />
. Do one of the following:<br />
• To sort the tasks, tap Menu > Sort by<br />
and select a sorting option.<br />
• To filter the tasks by category, tap Menu ><br />
Filter and select a category to display.
Chapter . Basic Operations<br />
Setting Tasks Options<br />
1. Tap > Programs > Tasks.<br />
. Tap Menu > Options, there are options you can set:<br />
• Set reminders for new items<br />
• Show start and due dates<br />
• Show Tasks entry bar<br />
Setting Options for Displaying Tasks on the Today Screen<br />
You can specify the kind of tasks that show on the Today screen.<br />
1. Tap > Settings > Personal tab > Today > Items tab.<br />
. Select Tasks, and then tap Options.<br />
. Under Display number of, select the type of task that you want to show on the Today screen.<br />
. Tap to save this setting.
Chapter .<br />
Phone Features<br />
.1 Making a Call<br />
. Configuring the Phone<br />
. In-Call Options<br />
. SIM Manager<br />
. Blocking Unwanted Phone Calls
Chapter . Phone Features<br />
You can use your phone to make, receive, and keep track of calls, and send text messages (SMS,<br />
Short Message Service) and MMS (Multimedia Messaging Service) messages. You can also dial a<br />
phone number directly from Contacts, and easily copy SIM contacts to Contacts on the phone.<br />
3.1 Making a Call<br />
The Phone Screen<br />
From the Phone screen, you can open, call, or find a contact, and even save a new number in<br />
Contacts. To access the Phone screen, do any of the following:<br />
• Press the Talk key ( ).<br />
• Tap > Phone.<br />
Making a Call by Entering a Phone<br />
Number<br />
To enter phone numbers by tapping the<br />
screen directly, you have to open the Phone<br />
Keypad.<br />
1. On the Phone screen, if the Phone<br />
Keypad doesn’t show automatically, tap<br />
Keypad. A Phone Keypad will show, you<br />
can then enter the phone number.<br />
SIM Contact<br />
Outlook Contact
. Do one of the following after entering the phone number:<br />
• If you see the number or contact name to call, select it, then tap or press the TALK<br />
( ) key.<br />
• If you do not see the number or contact name, finish entering the number, then tap or<br />
press the TALK ( ) key.<br />
TALK Key END Key<br />
Tap on the screen once to erase one single number; tap and hold it to erase a whole<br />
string of numbers.
8<br />
Chapter . Phone Features<br />
Making a Call from Call History<br />
Call History displays calls you have made, received, and missed.<br />
1. On the Phone screen, tap the Call History button on the Phone keypad.<br />
. Select the name or phone number to call.<br />
. Tap Call or press TALK ( ).<br />
Call History<br />
1.Calls you received<br />
.Calls you made<br />
.Calls you missed<br />
Tap a phone number or a contact in the Call History list displays history on all the calls<br />
related to the contact or the phone number.<br />
When someone who isn’t in your list of contacts calls you, you can create a contact during<br />
the call from or from Call History by tapping Menu > Save to Contacts.
Making a Call from Contacts<br />
1. On the Phone screen, tap on the desired contact in the list. You can quickly search through<br />
Contacts by entering the first letter of the contact or the first number of his/her phone number.<br />
. Do one of the following:<br />
• Tap on the number you want to dial;<br />
otherwise, you can tap Call on the<br />
screen or press TALK<br />
( ).<br />
9
0<br />
Chapter . Phone Features<br />
• Tap and hold the contact and select<br />
Call Work, Call Home, or Call<br />
Mobile from the pop-up submenu.<br />
Making a Call from Speed Dial<br />
You can create speed dial entries for<br />
frequently-called numbers or frequentlyaccessed<br />
items so you can dial a number<br />
by pressing a single key. For example, if you<br />
assign location to a contact in Speed Dial,<br />
you can simply press and hold on the<br />
Phone keypad to dial the contact’s number.<br />
Speed dials can be created only for numbers<br />
that are stored in Contacts.<br />
To create a speed dial entry for a contact<br />
1. On the Phone screen, tap Speed Dial.<br />
. Tap Menu > New.
. Tap the contact for whom to create a<br />
speed dial.<br />
. Select the phone number for which to<br />
create a speed dial.<br />
. In Location, select the speed dial number<br />
to use.<br />
. Tap when finished.<br />
1
Chapter . Phone Features<br />
The first speed dial location is generally reserved for your voicemail. Speed Dial uses<br />
the next available location by default. If you want to place a number in a location that is<br />
already used, the new number replaces the existing number.<br />
Tap the Speed Dial button on the phone screen to check the success of creating a Speed<br />
Dial entry.<br />
To retrieve a voicemail message<br />
• On the Today screen, press and hold 1 to access your voice mailbox, and follow the prompts to<br />
retrieve your message.<br />
To delete a speed dial entry<br />
• In the Speed Dial list, tap Menu > Delete.<br />
Receiving/Rejecting a Call<br />
When you receive a phone call, you have the option to answer it or ignore it.<br />
To receive a call<br />
• Tap Answer or press the TALK ( ) key to accept an incoming call.<br />
To end a call<br />
• Tap Ignore or press END ( ) to hang up a call.
3.2 Configuring the Phone<br />
Your wireless service provider may provide useful services such as Call Barring, Caller ID, Call<br />
Forwarding, Call Waiting, Voice Mail and Text Messages and Fixed Dialing. You can get their settings<br />
from the Network and change them.<br />
Activating PIN Security<br />
Most Subscriber Identity Module (SIM) cards are preset with a personal identification number (PIN)<br />
that is provided by your wireless service provider. When PIN Security is activated, you need to<br />
enter the PIN whenever you use your phone.<br />
1. Tap > Settings > Phone > Select Require PIN when phone is used.<br />
. Enter the preset PIN provided by your wireless service provider.<br />
. Tap Enter.
Chapter . Phone Features<br />
If your PIN is entered incorrectly three times, the SIM card will be blocked. If this happens,<br />
you can unblock it with the PIN Unblocking Key (PUK) obtained from your wireless service<br />
provider.<br />
Changing the Ring Type and Ring Tone<br />
You can choose how to be notified for incoming calls.<br />
1. Tap > Settings > Phone.<br />
. In the Ring type list, tap the desired option.<br />
. In the Ring tone list, select a ring tone.<br />
. Tap .<br />
To use custom .wav, .mid, or .wma files as ring tones, use ActiveSync on your PC to copy<br />
the file to the /Windows/Rings folder on your device. Then select the sound from the Ring<br />
tone list.<br />
Changing the Ringer Volume<br />
1. Tap the volume button on the screen.<br />
. Move the slider to the desired volume<br />
level.
Select On, Vibrate or Off to quickly change both the ringer and system volume and settings.<br />
To adjust the earpiece volume during a call, press the VOLUME control on the phone side<br />
panel. Adjusting the volume at any other time can affect the ring and notification and MP<br />
sound levels.<br />
Blocking Incoming or Outgoing Calls<br />
You will not be able to receive or make calls according to the options you choose.<br />
1. Tap > Settings > Phone > Services tab.<br />
. Tap Call Barring > Get Settings.
Chapter . Phone Features<br />
. Choose the calls you want to block, and tap .<br />
• Block incoming calls: All calls, When roaming, Off.<br />
• Block outgoing calls: All calls, International, International except to home country, Off.<br />
Displaying Caller ID<br />
You can provide a way for people to know<br />
your identity when you are calling them.<br />
1. Tap > Settings > Phone ><br />
Services tab.<br />
. Tap Caller ID > Get Settings.<br />
. Select Everyone, No one or Only to<br />
contact, and tap .
Call Waiting<br />
When you are in another call, you will be notified of an incoming call if this option is selected.<br />
1. Tap > Settings > Phone > Services tab > Call Waiting > Get Settings.<br />
. Select Notify me or Do not notify me, and tap .<br />
To change phone settings alternatively, tap Menu > Options > Services tab from the<br />
Phone keypad.<br />
Selecting a Network <strong>Manual</strong>ly<br />
1. Tap > Settings > Phone > Network tab. Alternatively, you can tap Menu > Options<br />
> Network tab from the Phone screen.<br />
. In the Network selection list, tap <strong>Manual</strong>. The list of available network is displayed.
8<br />
Chapter . Phone Features<br />
. Select the network you want to use, then tap .
3.3 In-Call Options<br />
Your phone provides various options for managing multiple<br />
calls at the same time. You are notified when you have another<br />
incoming call, and you have the choice of ignoring or accepting<br />
the call. If you are already on a call and accept the new call,<br />
you can choose to switch between the two callers, or set up a<br />
conference call between all three parties.<br />
Answering Another Call<br />
1. Tap Answer to take the second call and<br />
put the first call on hold.<br />
. To switch between two calls, tap Swap.<br />
. To end the second call and return to the<br />
first call, press END ( ).<br />
In-Call Options<br />
9
80<br />
Chapter . Phone Features<br />
Conference Call<br />
1. Either put a call on hold and dial a second number; or accept a<br />
second incoming call when you have one in progress.<br />
. Tap Menu and select Conference.<br />
If the conference connection is successful, the word “Conference” will appear at the top of<br />
the screen. To add additional persons to your conference call, tap Hold, enter the phone<br />
number, and then tap Swap to return and continue.<br />
Not all service providers support conference calling. Contact your service provider for<br />
details.<br />
Turning On/Off the Speakerphone<br />
Talk hands-free or let others hear your conversation with the built-in speakerphone in your device.<br />
• Tap Speaker On during a call to turn the speaker on.<br />
• Tap Speaker Off to turn the speaker off.
To avoid damage to your hearing, do not hold your phone against your ear when the<br />
Speakerphone is turned on.<br />
Muting the Microphone<br />
The device’s microphone can be turned off during a<br />
call. If you turn off the microphone the caller cannot<br />
hear you. However, you can still hear the caller.<br />
• Tap Mute during a call to turn the microphone off.<br />
• Tap Unmute to turn the microphone on.<br />
81
8<br />
3.4 SIM Manager<br />
Chapter . Phone Features<br />
The SIM Manager helps you to manage the phonebook in your SIM card. Using the SIM Manager,<br />
you can easily transfer phonebook entries from your SIM card to Contacts.<br />
Adding a Phonebook Entry to SIM Card<br />
1. Tap > Programs > SIM Manager.<br />
. Tap Option > Add Entry and enter the name and phone number you want to add.<br />
. Tap .<br />
Deleting Phonebook Entries from SIM Card<br />
1. Tap > Programs > SIM Manager.<br />
. Select the entries you want to delete by checking the checkboxes in front.<br />
. Tap Option > Delete Selected.
Saving Phonebook Entries to Contacts<br />
1. Tap > Programs > SIM Manager.<br />
. Select the entries you want to save to Contacts by checking the checkboxes in front.<br />
. Tap Option > Add to Contacts.<br />
. Tap to close the notification dialog box.<br />
3.5 Blocking Unwanted Phone Calls<br />
You can set up a blacklist to block incoming calls from certain phone numbers. If a call is received<br />
from a blacklisted number, your phone will not ring or vibrate. Instead, this call will be blocked<br />
automatically.<br />
Reject Anonymous Calls<br />
1. Tap > Programs > Blacklist.<br />
8
8<br />
Chapter . Phone Features<br />
. Select or clear the checkbox in front of<br />
Reject anonymous calls to enable or<br />
disable this feature.<br />
. Tap .<br />
Adding a Phone Number to the Blacklist<br />
1. Tap > Programs > Blacklist.<br />
. Tap new and do one of the following:<br />
• Tap Contact and select a contact to add<br />
to the blacklist.<br />
• Tap Number to add a phone number<br />
directly.<br />
. Select the check box of Enable Blacklist<br />
to block numbers listed in the Blacklist.
Removing a Phone Number from the<br />
Blacklist<br />
1. Tap > Programs > Blacklist.<br />
. Select the number you want to remove<br />
from the blacklist.<br />
. Tap Menu > Delete.<br />
. Tap .<br />
8
8<br />
Chapter . Phone Features
Chapter .<br />
Synchronizing Information<br />
.1 Installing and setting up ActiveSync<br />
. Synchronizing Information<br />
. Changing Settings for an Information<br />
Type<br />
. Synchronizing with Exchange Server<br />
. Synchronizing via Bluetooth
88<br />
Chapter . Synchronizing Information<br />
ActiveSync synchronizes information on your phone with information on your PC such as Outlook<br />
content. ActiveSync can also synchronize over a wireless or cellular network with Exchange Server, if<br />
your company or service provider is running Exchange Server with Exchange ActiveSync.<br />
Specifically, you can use ActiveSync to:<br />
• Synchronize information such as Outlook e-mail, contacts, calendar, or tasks information on your<br />
phone with your PC, as well as pictures, video, and music.<br />
• Synchronize Outlook e-mail, contacts, calendar appointments, and tasks on your phone directly with<br />
Exchange Server so that you can stay up to date even when your PC is turned off.<br />
• Copy files between your phone and your PC without synchronizing.<br />
• Select which types of information are synchronized and specify how much information is<br />
synchronized. For example, you can choose how many weeks of past calendar appointments to<br />
synchronize.<br />
4.1 Installing and setting up ActiveSync<br />
1. Install ActiveSync on your PC, as described on the Windows Mobile Getting Started Disc. After<br />
Setup completes, the Synchronization Setup Wizard automatically starts when you connect your<br />
device to the PC.<br />
. Follow the instructions on the screen to complete the wizard. In the Sync Setup Wizard, you<br />
can:<br />
• Create a synchronization relationship between your PC and the device.<br />
• Configure an Exchange Server connection to synchronize directly with Exchange Server. To<br />
synchronize your device with Exchange Server, obtain the name of the Exchange Server, your<br />
user name, password, and domain name from your administrator before completing the<br />
wizard.
• Choose information types to synchronize.<br />
When you finish the wizard, ActiveSync synchronizes your phone automatically. Once<br />
synchronization completes, you can disconnect your phone from your PC.<br />
4.2 Synchronizing Information<br />
To synchronize using ActiveSync, you must install ActiveSync on your PC before connecting your<br />
device to the PC.<br />
Starting and Stopping Synchronization <strong>Manual</strong>ly<br />
1. Turn on the device.<br />
. Connect your device to your PC using a USB cable or Bluetooth. For more detailed information,<br />
see "Connecting a mobile device to a PC" in ActiveSync Help on your PC.<br />
. Tap > Programs > ActiveSync.<br />
. To start synchronizing, tap Sync.<br />
. To stop synchronizing, tap Stop.<br />
You can start and stop synchronization only if your device already has a sync relationship<br />
with a PC or Exchange Server.<br />
Some Anti-Virus software may conflict with ActiveSync.<br />
ActiveSync synchronizes a limited amount of information by default to save storage space on<br />
your phone. You can change the amount of information that is synchronized by performing the<br />
following steps.<br />
89
90<br />
Chapter . Synchronizing Information<br />
Changing Which Information is Synchronized<br />
You can change this setting only if your device already has a sync relationship with a PC.<br />
Please disconnect your device from your PC before changing this setting.<br />
1. Tap > Programs > ActiveSync.<br />
. Tap Menu > Options.<br />
. Do one or more of the following:<br />
• Select the check box for the items you want to synchronize. If you cannot select a check box,<br />
you might have to clear the check box for the same information type elsewhere in the list.<br />
• Clear the check box for any items you want to exclude.<br />
• To customize synchronization of a computer, select the computer name then click Settings.<br />
• To customize synchronization of particular information, select the information type then click<br />
Settings.<br />
• To stop synchronizing with one computer completely, select the computer name and click<br />
Delete.<br />
Outlook e-mail can be synchronized with only one computer.
4.3 Changing Settings for an Information Type<br />
Before changing settings for an information type on the device, disconnect it from your PC.<br />
1. Tap > Programs > ActiveSync > Menu > Options.<br />
. Select one of the information types.<br />
. Do one of the following:<br />
• To view or change settings for an information type (when available), tap Settings.<br />
• To view or change settings for a computer or Exchange Server, tap Settings.<br />
. Change the amount of information to be synchronized or other settings.<br />
. Tap (or Finish in the Exchange Server settings wizard).<br />
4.4 Synchronizing with Exchange Server<br />
To set up your device to synchronize directly with Exchange Server, you will need to get the name of<br />
the server and the server domain name from your service provider or system administrator. You must<br />
also know your Exchange user name and password.<br />
Before changing synchronization settings on the device, disconnect it from your PC.<br />
1. On your device screen, tap > Programs > ActiveSync > Menu > Configure Server.<br />
If you have not yet set up sync with Exchange Server, this will say Add Server Source.<br />
. In Server address, enter the name of the server running Exchange Server, and tap Next.<br />
. Enter your user name, password, and domain name, and tap Next.<br />
. If you want the device to save your password so that you will not need to enter it again when<br />
91
9<br />
Chapter . Synchronizing Information<br />
connecting, select the Save password check box.<br />
. Select the check boxes for the types of information items that you want to synchronize with<br />
Exchange Server.<br />
. To change available synchronization settings, select the type of information, and tap Settings.<br />
. To change the rules for resolving synchronization conflicts, tap Advanced.<br />
8. Tap Finish.<br />
You can also use the Sync Setup Wizard to set up the phone to synchronize remotely with<br />
the Exchange Server. This wizard is started when you connect your phone to your PC after<br />
installing ActiveSync on the PC.<br />
4.5 Synchronizing via Bluetooth<br />
Connecting to a PC Using Bluetooth<br />
1. Follow the instructions in ActiveSync Help on the PC for configuring Bluetooth on your PC to<br />
support ActiveSync.<br />
. Tap > Programs > ActiveSync.<br />
. Tap Menu > Connect via Bluetooth. Ensure that the device and PC are within close range.<br />
. If this is the first time you have connected to this PC via Bluetooth, you must complete the<br />
Bluetooth wizard on the phone and set up a Bluetooth partnership with the PC before<br />
synchronizing.<br />
. Tap Sync.<br />
. When finished, tap Menu > Disconnect Bluetooth.<br />
To preserve battery power, turn off Bluetooth.
Chapter .<br />
Bluetooth Connections<br />
.1 Bluetooth Modes<br />
. Bluetooth Partnership (Bonding)<br />
. Beaming Information (Bluetooth)
9<br />
Chapter . Bluetooth Connections<br />
Bluetooth is a short-range wireless communications technology. Devices with Bluetooth capabilities<br />
can exchange information over a distance of about 10 meters without requiring a physical connection.<br />
You can even beam information to a device in a different room, as long as it is within range.<br />
The software included with your phone allows you to use Bluetooth in the following ways:<br />
• Beam information, such as files, appointments, tasks, and contact cards, between devices that have<br />
Bluetooth capabilities.<br />
• Create a connection between your device and a Bluetooth phone to use the phone as a modem.<br />
5.1 Bluetooth Modes<br />
Bluetooth on your phone operates in three different modes:<br />
1. On. Bluetooth is turned on and you can use Bluetooth features.<br />
. Off. Bluetooth is turned off. In this mode, you can neither send nor receive information using<br />
Bluetooth. You might want to turn off the radio at times to conserve battery power, or in<br />
situations where radio use is prohibited, such as onboard an aircraft and in hospitals.<br />
. Visible. Bluetooth is turned on, and all other Bluetooth-enabled devices within a range of 10<br />
meters can detect your phone.<br />
By default, Bluetooth is turned off. If you turn it on, and then turn off your phone, Bluetooth<br />
also turns off. When you turn on your phone again, Bluetooth automatically turns on.
Turning Bluetooth On or Off<br />
1. Tap > Settings > Connections<br />
tab> Bluetooth.<br />
. Tap Mode tab, check or uncheck the<br />
checkbox in front of Turn on Bluetooth<br />
to turn on or off Bluetooth.<br />
Making Your Device Visible<br />
To receive beamed information, beaming<br />
devices or computers must be able to detect<br />
your device.<br />
1. Tap > Settings > Connections tab<br />
> Bluetooth.<br />
. Select Make this device visible to<br />
other devices, and tap .<br />
Other Bluetooth-enabled devices can now<br />
detect your phone and attempt to beam<br />
information to it, establish a Bluetooth<br />
partnership, or use a Bluetooth service.<br />
9
9<br />
Chapter . Bluetooth Connections<br />
Selecting Make this device Visible to other devices also turns on Bluetooth.<br />
Turning off Bluetooth will make your device not visible, and it will also prevent you from<br />
sending a Bluetooth beam.<br />
5.2 Bluetooth Partnership (Bonding)<br />
A Bluetooth partnership is a relationship that you create between your phone and another Bluetoothenabled<br />
device in order to exchange information in a secure manner. Creating a partnership between<br />
two devices involves entering the same personal identification number (PIN) on both devices, and this<br />
is a one-time process. Once a partnership is created, the devices can recognize the partnership and<br />
exchange information without entering a PIN again. Make sure the two devices are within a range of<br />
10 meters, and Bluetooth is turned on and in discoverable mode.<br />
Creating a Bluetooth Partnership<br />
1. Tap > Settings > Connections<br />
tab> Bluetooth > Devices tab.<br />
. Tap Add new device. Your device<br />
searches for other Bluetooth-enabled<br />
devices and displays them in the list.
. Select the device with which you want to create a Bluetooth<br />
partnership, and tap Next. Tap if the device you<br />
want to connect is not listed.<br />
. In Passcode, if you want to use a passcode (recommended<br />
for enhanced security), enter an alphanumeric passcode<br />
between 1 and 1 characters, and tap Next. Otherwise,<br />
leave the passcode blank.<br />
. Enter the same passcode on the other device.<br />
9
98<br />
Chapter . Bluetooth Connections<br />
. Select the service to use from the device, and tap Finish.<br />
Once you create a partnership, the Bluetooth-enabled devices don't need to be visible to<br />
beam information between them; Bluetooth needs only to be turned on.<br />
5.3 Beaming Information (Bluetooth)<br />
Receiving Beamed Information<br />
1. Tap > Settings > Connections tab > Beam.<br />
. Select Receive all incoming beams.<br />
. To receive beams by using Bluetooth, ensure Bluetooth is turned on<br />
and that your phone is discoverable and within close range.<br />
. Tap .
Once you select Receive incoming beams, your phone automatically receives beams until<br />
you clear this check box.<br />
Your phone can receive all types of beamed files, but you may not be able to view all types<br />
of files on the phone. You may need to copy some files to a PC for viewing.<br />
Beaming an Item<br />
In the Calendar, Contacts, Notes, Tasks, and Pictures programs, you can beam files and<br />
information to other devices using Bluetooth.<br />
1. From the program, select the item you want to beam, such as an appointment in Calendar,<br />
a task in Tasks, a contact card in Contacts, a picture in Pictures, a file in File Explorer. In<br />
Calendar, for example, first open the appointment in Agenda view.<br />
. Tap Menu > Beam.<br />
. Your device will search and show visible devices, select the device to which you want to send<br />
the item.<br />
When using Bluetooth, if the device that you want to beam to doesn't appear in the list,<br />
ensure that the device is turned on, visible, and within close range of your phone. Also,<br />
ensure that Bluetooth is turned on.<br />
You can obtain the Bluetooth BD Address of your device. Tap > Settings > System<br />
tab > Device Info > Identity tab.<br />
99
100<br />
Chapter . Bluetooth Connections
Chapter .<br />
Transferring Files To and<br />
From Your Device<br />
.1 Using ActiveSync<br />
. Transferring from Memory Cards<br />
. Using Bluetooth<br />
. Transferring to a PC or Other<br />
Devices
10<br />
Chapter . Transferring Files To and From Your Device<br />
You may need to transfer application data such as Word documents, Excel spreadsheets, PowerPoint<br />
slides, and/or media files from your PC to your device. This section describes different methods to<br />
transfer files from a PC to your device.<br />
6.1 Using ActiveSync<br />
To transfer files from PC to your device with ActiveSync, you must install Microsoft<br />
ActiveSync on the PC first. Please refer to Chapter Synchronizing Information for detail on<br />
how to install and set up ActiveSync.<br />
1. Connect your device to the PC with the USB cable. Microsoft ActiveSync should be<br />
automatically launched on the PC if it is set up correctly.<br />
. Select an information type under Synchronization Options in the Synchronization Setup Wizard<br />
by checking the checkbox in front of it.<br />
. Click the Settings button and add the files you want to transfer.<br />
Click the OK button when you finish.<br />
. Click Next, and then click Finish to start the synchronization<br />
process.<br />
. On your device, tap > Programs > File Explorer. The files<br />
should be saved to My Documents. Check to see if the files have<br />
been transferred to your device successfully.
6.2 Transferring from Memory Cards<br />
1. Insert your memory card into the device’s mini-SD card slot. (See “1. Mini-SD cards” for<br />
details.)<br />
. Tap > Programs > File Explorer.<br />
. In the Show list, select Storage Card.<br />
. File Explorer should display all the files stored<br />
in your memory card. Tap and hold the file<br />
you want to transfer, and select Copy.<br />
. From the Show list in File Explorer, go to<br />
destination folder. (For example, My Device<br />
> My Documents.)<br />
. Tap Menu > Edit > Paste.<br />
10
10<br />
6.3 Using Bluetooth<br />
Chapter . Transferring Files To and From Your Device<br />
Before receiving files, you must turn Bluetooth on and establish a Bluetooth partnership<br />
between your PC and your device. (See “Chapter . Bluetooth Connections” for details.)<br />
1. On your PC, locate the file you want to send using Bluetooth with Windows Explorer.<br />
. Right-click the file and select the device you want to transfer the file to under “Send To ><br />
Bluetooth.”<br />
. Tap Yes when your device prompts about receiving a file.<br />
. After the transmission process is finished, the file should be saved in your device under My<br />
Documents in the File Explorer.<br />
6.4 Transferring to a PC or Other Devices<br />
Please refer to Section . “Beaming Information (Bluetooth)” for details.
Chapter .<br />
C o n n e c t i n g t o t h e<br />
Internet<br />
.1 Setting up Internet connections<br />
. Using Internet Explorer Mobile<br />
. Using Wireless Manager<br />
. Using Wi-Fi Connection
10<br />
Chapter . Connecting to the Internet<br />
7.1 Setting up Internet connections<br />
Your device’s powerful networking capabilities allow you to access the Internet or your corporate<br />
network at work through wireless and conventional connections. Specifically, you can configure<br />
your device to establish a connection via GPRS or Proxy.<br />
With an active connection on your device, you can browse the Web, download e-mails, or use<br />
MSN Messenger. Check with your service provider to see if a connection has already been set up<br />
for you, and if over-the-air configuration is supported.<br />
If you need to manually set up a connection, it is important that you obtain the following<br />
information from your Internet Service Provider (ISP) or the company whose intranet you are trying<br />
to access:<br />
• <strong>User</strong> name<br />
• Password<br />
• Access point name (required for GPRS connection)<br />
• Domain name (required for accessing a corporate network or an intranet)<br />
Creating a GPRS Connection<br />
Every network connection is different. You should gather all of the relevant information or network<br />
settings you need before starting this process.<br />
1. Tap > Settings > Connections tab > Connections.<br />
. Tap Add a new modem connection.
. Enter the following information (you may or may not need to enter all of the following<br />
information), and tap Finish.<br />
• Enter a name for the connection.<br />
• In Select a modem, select Cellular Line (GPRS). Then tap<br />
Next.<br />
10
108<br />
Chapter . Connecting to the Internet<br />
• In Access point name, enter the access point name, then tap Next.<br />
• In <strong>User</strong> name, enter your user name for the GPRS network, if required.<br />
• In Password, enter your password, if required.
• Tap Advanced > Servers tab. In DNS, enter the primary Domain Name System (DNS)<br />
address, if required.<br />
• In Alt DNS, enter the secondary DNS address, if required.<br />
• Tap TCP/IP tab. In Use specific IP address, enter the Internet Protocol (IP) address for the<br />
device, if required.<br />
The phone uses this connection when you open a program that connects to the Internet.<br />
Creating a Proxy Connection<br />
Every network connection is different. You should gather all of the relevant information or network<br />
settings you need before starting this process.<br />
1. Tap > Settings > Connections tab > Connections.<br />
. Tap Set up my proxy server.<br />
. Check the checkbox in front of This network connects to the Internet.<br />
. Check the checkbox in front of This network uses a proxy server to connect to the<br />
Internet.<br />
. Under Proxy server, enter the proxy server name.<br />
. If the proxy server uses a different port or requires a username<br />
and password tap Advanced, select the proxy type to change its<br />
settings, then enter username, password and/or port number in the<br />
proper fields.<br />
. Tap .<br />
109
110<br />
Chapter . Connecting to the Internet<br />
Deleting a Connection<br />
1. Tap > Settings > Connections tab > connections.<br />
. Tap Manage existing connections.<br />
. Tap and hold on the connection you want to delete and select Delete.<br />
The device can not connect to a PC through ActiveSync while connecting to the Internet<br />
using GPRS.
7.2 Using Internet Explorer Mobile<br />
Internet Explorer Mobile is a full-featured Web browser, optimized for use on your phone. You can use<br />
Internet Explorer Mobile to browse the Internet once you have set up your Internet connection (if you<br />
haven’t done so, please read the previous chapter before continuing).<br />
Browsing the Internet<br />
1. To browse the Internet you must have a valid connection established.<br />
. Tap > Internet Explorer.<br />
. Do any of the following:<br />
• Enter the address in the address bar, then tap .<br />
111
11<br />
Chapter . Connecting to the Internet<br />
• Tap Favorites then select a Web Page. You can scroll down the<br />
Favorites box and select one alternatively.<br />
• Highlight the search box and type in a<br />
term that you want to search for. Then tap<br />
to begin search .<br />
• Select Menu > History, then select a<br />
Web Page. You can scroll down to the<br />
History box and select one alternatively.
To change the Home page, go to a Web page, tap Menu > Tools > Options ><br />
General tab, and choose to use the displayed page as your Home page.<br />
Adding a Web Page to the Favorite List<br />
1. Tap > Internet Explorer.<br />
. Go to the page you want to add, tap Menu > Add to Favorites.<br />
. Confirm or change the name and Web page address.<br />
. In Create in, select a folder for this favorite.<br />
. Tap Add.<br />
A quick way to add favorites to your phone is to synchronize with your PC using ActiveSync.<br />
For more information, see ActiveSync Help on your PC.<br />
Deleting a Favorite<br />
1. Tap > Internet Explorer.<br />
. Tap Favorites.<br />
. Tap Add / Delete tab.<br />
. Select the favorite to delete.<br />
. Tap the Delete button.<br />
. Tap Yes to confirm the deletion.<br />
11
11<br />
Chapter . Connecting to the Internet<br />
Changing the Size of Text on Web Pages<br />
1. Tap > Internet Explorer.<br />
. Tap Menu > View > Text size and select the size you want.<br />
There are five zoom options you can select: Largest / Larger / Medium / Smaller / Smallest.<br />
Showing or Hiding Pictures on Web Pages<br />
1. Tap > Internet Explorer.<br />
. Tap Menu > View > Show Pictures.<br />
A check mark next to Show Pictures indicates that pictures will be displayed.<br />
Changing Web Page Display Options<br />
1. Tap > Internet Explorer.<br />
. Tap Menu > View.<br />
. Select one of the following:<br />
• One Column. Arranges the content into one column that is as wide as the screen. This<br />
means that you will rarely have to scroll horizontally.<br />
• Fit To Screen. Maintains a layout similar to what you see on a desktop computer, but makes<br />
items smaller and arranges the content so that you can see most of it without having to scroll<br />
horizontally.<br />
• Desktop. Keeps the same layout and size as on a desktop computer, which will require both<br />
horizontal and vertical scrolling.
Viewing a Page in Full Screen Mode<br />
1. Tap > Internet Explorer.<br />
. Do either of the following:<br />
• Tap Menu > View > Full Screen.<br />
• Tap and hold on the screen with stylus, and then tap Full Screen on the pop-up menu.<br />
To exit full screen mode, press either SOFT KEY, and then tap Menu > View > Full<br />
Screen to cancel the selection.<br />
Sending a Link via E-mail<br />
1. Tap > Internet Explorer.<br />
. Go to the page you want to send.<br />
. Tap Menu > Tools > Send Link.<br />
11
11<br />
Chapter . Connecting to the Internet<br />
. Select an account.<br />
. A new message is created with the page<br />
address inserted in the message body. You can<br />
then enter the recipient’s phone number and<br />
edit the message.<br />
. Tap Send to send the message.
Copying Text from a Web Page<br />
1. In Internet Explorer Mobile, tap and hold<br />
the page, and tap Select All Text.<br />
. Tap and hold the page, and tap Copy.<br />
. Open an application (e.g. open a new<br />
Note), tap and hold on the screen, and<br />
tap Paste to save the text.<br />
Clearing History or Temporary Files<br />
1. Tap > Internet Explorer.<br />
. Tap Menu > Tools > Options.<br />
. Tap Memory tab.<br />
. Change the number in the day(s) box if<br />
needed.<br />
. Tap Clear History or Delete Files, then<br />
tap .<br />
To clear cookies, tap Menu > Tools<br />
> Options > Security tab, then tap<br />
Clear Cookies.<br />
11
118<br />
Chapter . Connecting to the Internet<br />
7.3 Using Wireless Manager<br />
Wireless Manager is a program that allows you to conveniently turn on or off the various wireless<br />
connections on the Windows Mobile-based device, including cellular phone, Bluetooth and Wi-Fi.<br />
Opening Wireless Manager<br />
To open the Wireless Manager, do one of the following:<br />
• ap icon on the screen to open the Wireless Manager directly.<br />
• Tap > Settings > Connections tab > Wireless Manager.<br />
• Tap the signal strength icon ( ) at the top of the screen, and tap Wireless Manager.<br />
Enabling and Disabling a Feature<br />
There are three buttons in the Wireless Manager; each of them represents one certain feature. You<br />
can simply tap a button to activate its corresponding feature.
• Tap the first button to toggle between enabling or disabling the phone.<br />
• Tap the second button to toggle between turning on or off Bluetooth.<br />
• Tap the third button to toggle between turning on or off Wi-Fi.<br />
Changing Regulatory Setting<br />
The regulations for the frequency, channel and power of Wi-Fi and<br />
Bluetooth are varied in different regions. You can adapt a country’<br />
s telecommunications regulatory settings while you use your device to<br />
access wireless networks in the country.<br />
1. Open Wireless Manager and then tap Settings > Regulatory.<br />
119
1 0<br />
Chapter . Connecting to the Internet<br />
. Select a country/region in which you use this device. Tap Save to confirm the setting.<br />
Wi-Fi can not be turned on if the Regulatory Setting is blank.
7.4 Using Wi-Fi Connection<br />
Wi-Fi is an enabling technology that allows you to quickly access e-mail, the internet, and broadband<br />
multimedia content. When your device encounters a hotspot (a place where you can access Wi-Fi<br />
networks), it can then connect to that network wirelessly. While some hotspots are free, the most robust<br />
public Wi-Fi networks are provided by private internet service providers (ISPs) that charge a fee for<br />
users to connect to the internet.<br />
Connecting to a Wi-Fi Network<br />
1. Tap > Settings > Connections tab > Wireless Manager.<br />
. Tap the third button to turn on Wi-Fi connection.<br />
. Available wireless networks will be<br />
detected and showed on a pop-up<br />
window. Select the desired wireless<br />
network and tap OK.<br />
1 1
1<br />
Chapter . Connecting to the Internet<br />
. Select The Internet if the wireless network connects your device to the Internet; select Work if<br />
the wireless network connects to a private network. Then tap Connect.<br />
. Enter a network key if required. Then tap Connect.<br />
. When Wi-Fi connection is activated, the icon shows on the title bar.<br />
You may need to consult your ISP before you try to run this utility.<br />
You can obtain the Wi-Fi address of your device. Tap > Settings > System tab ><br />
Device Info > Hardware tab and refer to WiFi MAC Address.
Checking Wi-Fi Connection<br />
You can check the current wireless connection status via Wi-Fi Network Manager after connecting<br />
to a Wi-Fi Network.<br />
1. Tap > Settings > Connections tab > Wi-Fi Network Manager.<br />
. In Status tab, you can see information of link status, SSID, Signal strength…etc.<br />
. In Info tab, you can check values of servers and IP address and renew IP if needed.<br />
. In Advanced tab, you can refer to MAC address and version information.<br />
Configuring Wi-Fi Settings<br />
You can configure wireless networks on your device by adding new Wi-Fi connections and editing<br />
currently available networks.<br />
The screen for wireless networks configuration can only be accessed after a Wi-Fi network is<br />
connected.<br />
Creating a Wireless Connection<br />
1. Open Wireless Manager and then tap Settings > Wi-Fi<br />
Settings.<br />
1
1<br />
Chapter . Connecting to the Internet<br />
. In Wireless tab, tap Add New… on the screen.<br />
. Enter the Network name and Network<br />
type, then tap Next. If you want to<br />
connect to another device instead of a<br />
network through an access point, select<br />
This is a device-to-device (ad-hoc)<br />
connection.
. Select Authentication type and Data Encryption and enter the Network key and Key<br />
index if needed. Tap Next.<br />
. Select Use IEEE 802.1x network access control to use EAP (Extensible Authentication<br />
Protocol). Select EAP type: PEAP or Smart Card or Certificate.<br />
. Tap Finish.<br />
1
1<br />
Chapter . Connecting to the Internet<br />
Editing a Wireless Network<br />
1. Open Wireless Manager and then tap Settings > Wi-Fi Settings.<br />
. In Wireless tab, you can see currently available wireless networks. Tab and hold the network<br />
you want to edit, and then tap Edit on the pop-up screen.<br />
. Changing settings of this wireless network and tap Finish to save them.
Chapter 8.<br />
Messaging & Contacts<br />
8.1 Text Messaging<br />
8. Multimedia Messaging Service<br />
8. E-mail<br />
8. Using Contacts
1 8<br />
Chapter 8. Messaging & Contacts<br />
Messaging is the unified point of access for all message types within your device. With Messaging, you<br />
can send and receive text messages, e-mails, and MMS messages.<br />
Contacts helps you to manage your contact information. Using Contacts you can quickly communicate<br />
with people.<br />
This section describes the procedure on sending and receiving different kinds of messages, and using<br />
Contacts to manage addresses and phone numbers.<br />
8.1 Text Messaging<br />
Creating a Text Message<br />
1. Tap > Messaging > Text Messages.<br />
. In the message list, tap Menu > New.<br />
. Do either of the following:<br />
• Enter the recipient’s text message number in the To field. Insert a<br />
semicolon (;) between multiple text message numbers.<br />
• Tapping Menu > Add Recipient, and then select a name.<br />
• Enter your message and tap Send. Text messages are sent<br />
immediately.
Using Preset Text Messages<br />
You can quickly insert preset or frequently used messages into your text message. While<br />
composing a message, tap Menu > My Text and select a preset message to insert.<br />
To edit a preset message:<br />
1. While composing a message, tap Menu > My Text > Edit My Text Messages.<br />
. Select a message and edit.<br />
. Tap .<br />
<strong>Reading</strong> a Text Message<br />
1. Tap > Messaging > Text Message.<br />
. Select Inbox under Text Messages.<br />
. In the message list, tap the text message you want to read.<br />
1 9
1 0<br />
Chapter 8. Messaging & Contacts<br />
Requesting Message Delivery Notification<br />
1. Tap > Messaging > Text Messages.<br />
. Tap Menu > New.<br />
. Tap Menu > Message Options.<br />
. Select this check box to request a message delivery notification.<br />
. Tap .<br />
To change options for the Text Message, tap > Messaging > Menu > Tools ><br />
Options, and select the type of options to change.
8.2 Multimedia Messaging Service<br />
Creating and sending Multimedia Message Service (MMS) messages to your friends and family is fun<br />
and easy. You can include or capture photos or video clips, include or record audio, add text, then<br />
send them along with your MMS message.<br />
Composing a MMS Message<br />
MMS messages can be composed in a combination of various slides where each of the slides can<br />
be any combinations of audio or video clip, an image, and/or text.<br />
1. Tap > Messaging, and select MMS.<br />
. Tap Menu > New.<br />
. In To, Cc, and/or Bcc, enter recipient e-mail addresses. Insert a semicolon (;) between multiple<br />
addresses. You can tap Menu > Add Recipient to add recipients.<br />
1 1
1<br />
Chapter 8. Messaging & Contacts<br />
. In Subject, enter a subject.<br />
. To create a slide, do any combinations of the following:<br />
• Tap Insert Picture/Video and select a picture or video clip.<br />
• Tap Insert Audio and select a audio clip.<br />
• Tap Insert Text and enter a message.<br />
• Tap Menu > Insert > Sound Recorder and tap RECORD ( ) button to record a new<br />
audio clip. Tap STOP (<br />
) button to stop recording.<br />
• Tap Menu > Options > Background Color and select a background color for the slide.<br />
. Tap Send.<br />
After the first slide is filled with content, you can tap Menu > Slides > Insert to add<br />
another slide to your MMS message.<br />
Previewing a MMS Message<br />
You can preview a MMS message before sending it.<br />
1. To preview your MMS message, tap Menu > Preview after you composed your message.<br />
. Tap Done or Replay.<br />
<strong>Reading</strong> a MMS Message<br />
1. Tap > Messaging > MMS.
. Select Inbox under MMS.<br />
. In the message list, tap the MMS message you want to read.<br />
Configuring MMS Settings<br />
1. Tap > Messaging > MMS.<br />
. Tap Menu > MMS Settings.<br />
. Select the type of options to change.<br />
. Tap .<br />
1
1<br />
8.3 E-mail<br />
Chapter 8. Messaging & Contacts<br />
Setting Up an Internet E-mail Account <strong>Manual</strong>ly<br />
Before you set up your Internet e-mail account, please ensure that you have the necessary<br />
information.<br />
Setting Description<br />
<strong>User</strong> name Usually the first part of your e-mail address, which appears before<br />
the “at” sign (@).<br />
Password Choose a strong password. You will have the option to save<br />
your password, so that you do not need to enter it each time<br />
you connect to your e-mail server.<br />
Domain The domain name. This may be required.<br />
Server type The type of e-mail server that hosts your mailbox (POP or<br />
IMAP ).<br />
Account name A name for this account. You must use a different name for<br />
each account that you set up.<br />
Network The type of network your e-mail server connects to.<br />
Incoming mail server The name of your e-mail server (POP or IMAP ).
Setting Description<br />
Require SSL connection Select this to ensure you always receive e-mail for this account<br />
using an SSL connection. This enables you to receive personal<br />
information more securely. Please note that if you select this and<br />
your ISP does not support an SSL connection, you will not be<br />
able to connect to receive e-mail.<br />
Outgoing mail server The name of your outgoing e-mail server (SMTP).<br />
Outgoing server requires authentication<br />
Your outgoing e-mail server (SMTP) may require authentication.<br />
Note: Your user name and password from above will be used.<br />
Outgoing server settings Your outgoing e-mail server may require different authentication<br />
settings than your incoming e-mail server.<br />
Use different user name for<br />
outgoing server<br />
A check box that lets you enter separate settings for your outgoing<br />
e-mail server.<br />
<strong>User</strong> name Your user name for the outgoing e-mail server.<br />
Password Your password for the outgoing e-mail server.<br />
Domain The domain name of the outgoing e-mail server.<br />
Require SSL connection (Outgoing<br />
mail server only)<br />
A connection that enables you to send personal information<br />
more securely. Note that if you select this and your ISP does not<br />
support an SSL connection, you will not be able to send e-mail.<br />
1
1<br />
Chapter 8. Messaging & Contacts<br />
Now you are ready to set up your<br />
account:<br />
1. Tap > Messaging.<br />
. Tap Menu > Tools > New Account.<br />
. Enter your e-mail address, select the<br />
check box of Try to get e-mail settings<br />
automatically from the Internet, and<br />
tap Next.<br />
. Ta p N e x t , a n d t h e A u t o S e t u p<br />
automatically enters your servers settings.<br />
. Enter the name you want to appear when<br />
you send messages, then tap Next.
. Enter your password. Select Save<br />
password if you want, or you can enter<br />
the password each time you send and<br />
receive e-mail. Then tap Next.<br />
. In Automatic Send/Receive, select a<br />
frequency for sending/receiving e-mail.<br />
Tap Review all download settings to<br />
change your e-mail settings; otherwise,<br />
tap Finish to start downloading<br />
messages.<br />
If Auto Setup was not successful, enter required information (Incoming mail server, <strong>User</strong><br />
name, Password, Outgoing mail server) manually until setup is complete.<br />
To change options for an e-mail account, tap > Messaging > Menu > Tools ><br />
Options, and select the type of options to change.<br />
If you save your password and then lose your phone, someone finding your phone might be<br />
able to gain access to your e-mail.<br />
1
1 8<br />
Chapter 8. Messaging & Contacts<br />
Composing an E-mail Message<br />
1. Tap > Messaging.<br />
. Select an e-mail account.<br />
. Tap Menu > New.<br />
. In To, Cc and/or Bcc, enter recipient e-mail addresses. Insert a semicolon (;) between multiple<br />
addresses.<br />
. In Subject, enter a subject.<br />
. Enter a message.<br />
. Tap Send. E-mail messages are stored in Outbox and are sent to recipients the next time you<br />
synchronize or connect to your e-mail server and send and receive mail.<br />
You can quickly enter e-mail addresses from your contact cards. Tap on To and select a<br />
recipient from the list. Then, select the recipient’s e-mail address.<br />
<strong>Reading</strong> an E-mail Message<br />
1. Tap > Messaging.<br />
. Select an e-mail account.<br />
. Tap Inbox under this e-mail account.<br />
. In the message list, tap the e-mail message you want to read.
E-mail Message Options<br />
1. Tap > Messaging, and select an e-mail account.<br />
. Tap Menu > New.<br />
. Tap Menu > Message Options.<br />
. Select the type of options to change.<br />
. Tap .<br />
8.4 Using Contacts<br />
Contacts is your address book and information storage for the people and businesses you<br />
communicate with. It stores phone numbers, e-mail addresses, home addresses, and any other<br />
information that relates to a contact, such as a birthday or an anniversary date. You can also add a<br />
picture or assign a ring tone to a contact.<br />
From the contact list, you can quickly communicate with people. Click a contact in the list for a<br />
summary of contact information. From there, you can call or send a message.<br />
If you use Outlook on your PC, you can synchronize contacts between your phone and PC.<br />
1 9
1 0<br />
Chapter 8. Messaging & Contacts<br />
Creating a New Contact<br />
1. Tap > Contacts > New.<br />
. Select Outlook Contact.<br />
. Enter information for the new contact.<br />
. Tap .<br />
If someone who isn't in your list of contacts calls you, you can create a contact from Call<br />
History. Tap and hold the item and then select Save to Contacts on the pop-up submenu.<br />
To save an existing contact to your SIM, open the contact and tap Menu > Save to SIM.<br />
Viewing and Editing Contact Information<br />
1. Tap > Contacts.<br />
. Tap the contact whose information you want to view. You can quickly search through Contacts<br />
by entering the first letter of the contact.
. To edit the information, tap Menu > Edit.<br />
. Do any of the following:<br />
• Tap Picture and select a picture you<br />
want to add.<br />
• Tap Ring tone and select the ring tone<br />
you want.<br />
. When finished making changes, tap .<br />
1 1
1<br />
Chapter 8. Messaging & Contacts<br />
Sending an E-mail to a Contact<br />
1. Tap > Contacts.<br />
. Tap the contact you want to send an e-mail to.<br />
. Tap the e-mail address.<br />
. Select the e-mail account to use.<br />
. Enter a subject, compose your message, and then tap Send.<br />
Sending a Text Message to a Contact<br />
1. Tap > Contacts.<br />
. Tap the contact you want to send a text message to, and tap Menu > Send Text Message.<br />
. Compose your message, and tap Send.<br />
Creating a SIM Contact<br />
Contacts can be created and stored on a subscriber identity module (SIM.) If you move the SIM to<br />
another phone, your SIM contacts are moved as well.<br />
1. Tap > Contacts.<br />
. Tap New > SIM Contact.<br />
. Enter the name and phone number of the contact and tap .<br />
Remember to install a valid SIM to your device before creating a SIM Contact.
Chapter 9.<br />
Using Barcode Reader<br />
9.1 Setting Barcode Reader<br />
9. Scanning and <strong>Reading</strong> Barcode<br />
labels
1<br />
Chapter 9. Using Barcode Reader<br />
In the top of your device, a reader for barcode/ D code reading and decoding is built in, with which<br />
various types of barcode/ D code labels are decoded into readable information such as letters and<br />
numbers. Settings of barcode/ D code reader can be changed to fit your specific requests.<br />
9.1 Setting Barcode Reader<br />
Changing Options in Barcode Reader<br />
Barcode reader is set to be disabled by default, please remember to activate it before scanning.<br />
1. Tap > Settings > System tab > Barcode settings > Options tab.<br />
. Check the check box of Barcode reader or/and Keyboard hook.<br />
When Keyboard hook is enabled, data is received as key message; when Keyboard hook is<br />
disabled, data is stored in the memory?buffer temporarily. To retrieve the data, use specific<br />
software development kit (SDK) and compatible Windows application program interfaces (APIs).<br />
You can download the?SDK from http://www.opticon.com.
Keyboard hook can convert received characters to keyboard messages; therefore, you can<br />
read barcode in applications such as Notes, Tasks, Excel Mobile and Word Mobile as long<br />
as you enable the keyboard hook.<br />
. In Read Mode, tap the upward/downward arrow to<br />
toggle between Multiple and Single. Multiple read<br />
mode enables reading of multiple barcodes within a<br />
specified time after one time triggering, while being<br />
in single read mode needs the reader to be triggered<br />
again to read another label.<br />
. In Buzzer, check the checkbox of Goodread<br />
sound. It enables the function of playing a sound<br />
effect after a barcode has been decoded successfully.<br />
You can change the sound effect by tapping the<br />
upward/downward arrow and play the sound effect<br />
you choose by tapping the Sound button on the<br />
screen.<br />
1
1<br />
Chapter 9. Using Barcode Reader<br />
. In Additional trigger key, tap the upward/downward arrow to<br />
choose another access key for the reader. Otherwise you can set the<br />
additional trigger key to be none.<br />
Choosing Barcode Types<br />
Your device is capable of scanning and decoding<br />
various barcode types; to check what kind of<br />
barcode is readable and to assign specific barcode<br />
types to scan for, do as follows:<br />
1. Tap > Settings > System tab > Barcode<br />
settings > Barcodes tab.<br />
. Select specific barcode types or select all of<br />
them.<br />
. Tap .
Advanced Setting<br />
You can set specific configuration to your barcode reader by editing a list of codes in the menu<br />
codes file. The codes you enter will be stored in the menu code file and replace default settings.<br />
For descriptions of menu codes, refer to Universal Menu Book (you can download it from www.<br />
opticon.com). Please note that supported menu codes depend on the module type or the firmware<br />
version of your device.<br />
Inputting Menu Codes from a File<br />
You can input menu codes automatically from a file, please do as follow to access the file and<br />
configure the barcode reader.<br />
1. Tap > Settings > System tab > Barcode settings > Menu codes tab.<br />
. Tap to view available files in your device.<br />
Tap Cancel if you want<br />
to stop the procedure.<br />
1
1 8<br />
Chapter 9. Using Barcode Reader<br />
. Tap after you select a file.<br />
. Tap to continue.<br />
Editing Existent Menu Codes<br />
You can input characters directly to edit an<br />
existent menu codes file.<br />
1. Ta > Settings > System tab ><br />
Barcode settings > Menu codes tab.<br />
. Tap .<br />
. Tap .
. Input or delete menu codes.<br />
. Tap .<br />
Returning to Defaults<br />
You can cancel all personalized settings in<br />
the barcode reader.<br />
1. Tap > Settings > System tab ><br />
Barcode settings > Menu codes tab.<br />
. Tap .<br />
1 9
1 0<br />
Chapter 9. Using Barcode Reader<br />
. Tap to continue. . Tap .<br />
Firmware Update<br />
How to update the firmware of your device<br />
You can update the firmware of the barcode reader from an adapted file on your device or a<br />
Mini-SD card inserted to your device. Please connect your device with the AC adapter before<br />
updating the firmware.<br />
1. Tap > Settings > System tab > Barcode setting > Firmware Update tab.
. Tap to view available files and select one of them.<br />
Tap Cancel if you want<br />
to stop the procedure.<br />
. Tap the file you want to update the firmware from. The selected file will be showed on the<br />
screen then.<br />
1 1
1<br />
Chapter 9. Using Barcode Reader<br />
. I n p u t t h e d e f a u l t p a s s w o r d<br />
“1 890AB” and tap<br />
. You can then see current completed<br />
percentage of the update to be displayed<br />
on the screen.<br />
. Tap to complete the operation.<br />
Change Password<br />
You can change the default password of<br />
firmware update to another one.<br />
1. Tap > Settings > System tab ><br />
Barcode setting > Firmware Update<br />
tab.<br />
. Tap .
. Input old password first. In Password<br />
Information, input your new password<br />
in both of the boxes in sequence for<br />
double confirmation. Then tap .<br />
. Tap to complete the procedure.<br />
You can see more information about the barcode reader such as scanner version, please<br />
tap > Settings > System tab > Barcode settings > About tab.<br />
1
1<br />
Chapter 9. Using Barcode Reader<br />
9.2 Scanning and <strong>Reading</strong> Barcode labels<br />
Your device can scan and decode barcode labels depending on the scanner equipped with your<br />
device. If you prefer to read a barcode on your device right after scanning, open an application in<br />
which letters and numbers can be displayed before you activate the barcode reader.<br />
1. Open an application, e.g. Notes, Tasks and Contacts, in which you want to display converted<br />
barcode information after scanning.<br />
. Do one of the following to enable barcode reader and keyboard hook:<br />
• Tap > Settings > System tab > Barcode settings > Options tab. Then check the<br />
checkboxes of Barcode reader and Keyboard hook.<br />
• Tap icon on the screen and tap in the dialog box to active barcode reader and<br />
keyboard hook directly.
. Point the barcode reader to a barcode label and press the scan key (left scan key, right scan<br />
key or the assigned trigger key).<br />
. Adjust the distance between your device and the label, and make sure the light emitted from<br />
the scanner exceeds the width of the label.<br />
D code<br />
o p t o e l e c t r o n i c s<br />
o p t o e l e c t r o n i c s<br />
o p t o e l e c t r o n i c s<br />
o p t o e l e c t r o n i c s<br />
Bar code<br />
o p t o e l e c t r o n i c s<br />
o p t o e l e c t r o n i c s<br />
o p t o e l e c t r o n i c s<br />
o p t o e l e c t r o n i c s<br />
. A Goodread Sound plays and the content of the barcode shows when the label is decoded<br />
successfully.<br />
1
1<br />
Chapter 9. Using Barcode Reader
Chapter 10.<br />
Other Applications<br />
10.1 Backing up/Recovering<br />
10. Managing Memory<br />
10. Windows Live Messenger<br />
10. Windows Media<br />
10. Office Mobile<br />
10. Phone Profile<br />
10. Formatting Storage Card and<br />
DiskOnChip<br />
10.8 Setting up GPS
1 8<br />
Chapter 10. Other Applications<br />
10.1 Backing up/Recovering<br />
It is advisable to take backups of your device data regularly in case important data is accidentally<br />
lost or damaged. You can recover your data from those backup copies as needed. Device data<br />
can be backed up to or be recovered from DiskOnChip of your device or a compatible memory<br />
card.<br />
DiskOnChip is flash memory device (essentially a hard disk on a chip) which locates in an<br />
independent area of OS. DiskOnChip keeps the data even after a factory reset.<br />
Backing up Data<br />
1. Tap > Programs > Backup Manager.<br />
. Tap the Backup button.
. Select the check box(es) of the item(s) that<br />
you want to backup.<br />
. Input a file name for the backup copy. To<br />
name it automatically, tap .<br />
. Select a destination for storing the backup<br />
copy: Storage Card or DiskOnChip.<br />
. Tap the Backup Button.<br />
1 9
1 0<br />
. tap .<br />
Recovering Data<br />
Chapter 10. Other Applications<br />
1. Tap > Programs > Backup<br />
Manager.<br />
. Tap the Recover button.
. Do one of the following to select a file:<br />
• Tap > Program > File Explorer > Backup File folder and select a file. Please note<br />
the Backup File may be located under My Documents, DiskOnChip or Storage card. It<br />
depends on the backup path you had chosen.<br />
• Tap on the screen to view available files. You can then select one of them.<br />
. Tap the Recover Button.<br />
. Tap .<br />
Only items that have already been backed up can be recovered from their backup copies.<br />
Installed applications will not be backed up.<br />
1 1
1<br />
Chapter 10. Other Applications<br />
10.2 Managing Memory<br />
Checking Available Storage<br />
1. Tap > Settings > System tab > Memory.<br />
. In Main tab, you can see how much storage is available on the<br />
main memory of your device.<br />
. To see how much storage is available on your storage cards, tap<br />
Storage Card tab.<br />
. Use the drop-down menu to select your available storage cards and<br />
view their available memory.<br />
Closing a Running Program<br />
1. Tap > Settings > System tab > Memory > Running Programs tab.<br />
. In Running Program List, select a program. You can tap Stop on the screen to close the<br />
program or tap Stop All to close all programs.
10.3 Windows Live Messenger<br />
You can send instant messages with Windows Live Messenger.<br />
Your device must be connected to the Internet before you can start using Windows Live<br />
Messenger. To connect to the Internet, refer to “Chapter . Connecting to the Internet” for<br />
details.<br />
Signing In/Out Windows Live Messenger<br />
With Windows Live Messenger, you can send and receive instant messages from other Windows<br />
Live Messenger users.<br />
You must have a valid Microsoft .NET Passport or Hotmail account before you can sign in<br />
to Windows Live Messenger.<br />
To sign in Windows Live Messenger<br />
1. Tap > Programs > Messenger.<br />
. In Sign in as, select a condition which<br />
you want to show on your Windows Live<br />
Messenger. Then tap Sign in.<br />
1
1<br />
Chapter 10. Other Applications<br />
. Tap OK to continue.<br />
. Tap Accept.<br />
. Enter your e-mail and password and tap<br />
Next.<br />
. Select where to show Windows Live on the<br />
Toady screen or not. Then tap Next.
. Select what you want to sync on your<br />
device. Then tap Next.<br />
8. System will sign in to Windows Live<br />
automatically while all procedures are<br />
done.<br />
To sign out Windows Live Messenger<br />
• Tap Menu > Sign out.<br />
Adding/Deleting a Windows Live<br />
Messenger Contact<br />
1. Sign in Windows Live Messenger.<br />
. Do any of the following:<br />
• To add a contact, tap Menu > Add<br />
New Contact, and follow the onscreen<br />
instructions.<br />
• To delete a contact, tap and hold the<br />
contact name in the Windows Live<br />
contact list, then tap View contacts’<br />
info. Next, Tap Menu > Delete<br />
Contact.<br />
Sending an Instant Message<br />
1. Sign in Windows Live Messenger.<br />
. Select the contact’s name to whom you<br />
want to send a message to. Then tap<br />
Send IM.<br />
. Enter a message and tap Send.<br />
. To close the dialog box of instant<br />
m e s s a g e s , t a p M e n u > E n d<br />
conversation.<br />
1
1<br />
Chapter 10. Other Applications<br />
Changing Windows Live Messenger<br />
Display Name<br />
1. Sign in Windows Live Messenger.<br />
. Tap Menu > Change appearance.<br />
. Enter a new display name and tap Done.<br />
Blocking/Unblocking a Contact<br />
• To block a contact from seeing you online,<br />
select the contact and tap Menu ><br />
Contact options > Block contact.<br />
• To unblock a contact, select the contact<br />
and tap Menu > Contact options ><br />
Unblock contact.<br />
Changing Windows Live Messenger<br />
Settings<br />
1. Sign in Windows Live Messenger.<br />
. Tap Menu > Options.<br />
. Select the type of options to change.<br />
. Tap Done.
10.4 Windows Media<br />
You can play digital audio and video files that are stored on your device or on a network.<br />
Transferring Your Music and Videos to Your Device<br />
When synchronizing media files, your will need a MB or larger storage card in your<br />
device.<br />
1. On your computer, open Windows Media Player.<br />
. Connect your device to your computer using a USB cable.<br />
. In Windows Media Player on your computer, click Sync.<br />
. Drag each item you want to synchronize to the device pane on the right side of the computer<br />
screen.<br />
. At the bottom of the device pane, click Start Sync. The file will be synchronized to your device.<br />
. After transferring your media files, update your mobile device Media Library:<br />
I. Tap > Programs > Windows Media.<br />
II. Tap Menu > Library.<br />
1
1 8<br />
Chapter 10. Other Applications<br />
III. Tap Library , then select Storage<br />
Card.<br />
IV. Tap Menu > Update Library.<br />
V. Tap Done when update is completed.
Playing Media File on Your Device<br />
1. Tap Menu > Library to open the Library screen.<br />
. Select a category (e.g. My Music > All Music).<br />
. Select an item, and tap Play.<br />
. You can then use the following functions<br />
when playing audio or video files:<br />
: Display the video in full screen<br />
: Displays a Web site where you can find music and<br />
videos to play.<br />
: Skip to the beginning of the current file or to the<br />
previous file.<br />
: Pause/Play<br />
: Skip to the next file.<br />
: Decrease the volume level.<br />
: Increase the volume level.<br />
: Adjust the playback progress of a<br />
selected file.<br />
1 9
1 0<br />
Chapter 10. Other Applications<br />
Saving a New Playlist<br />
1. Tap > Programs > Windows Media.<br />
. Tap Menu > Library.<br />
. Select a category (e.g. My Music > All Music).<br />
. Select an item, then tap Menu > Queue Up. Selected item will be added to the Now Playing<br />
list immediately.<br />
. Tap Menu > Now Playing.<br />
. Tap Menu > Save Playlist.<br />
. Enter a name for the playlist and tap Done.<br />
10.5 Office Mobile<br />
Excel Mobile<br />
With Excel Mobile, you can create, view and edit spreadsheet on your device. Moreover, you can<br />
edit documents created on your desktop computer.<br />
Unlike Microsoft Excel, you can only have one document open at a time in Excel Mobile.<br />
Creating a New Spreadsheet<br />
1. Tap > Office Mobile > Excel Mobile.<br />
. Enter text, numbers, and formulas as desired.<br />
. Tap Menu > File > Save As.<br />
. Enter a name for the document and tap the Save button.<br />
You can also tap Ok to save a spreadsheet and Excel Mobile gives it a name automatically.
Excel Mobile Formatting Toolbar<br />
The formatting toolbar in Excel Mobile provides a quick way to apply common functions such as<br />
create a chart or align text to the left.<br />
• In an Excel Mobile workbook, tap View > Toolbar.<br />
A check mark appears next to Toolbar when the toolbar is visible.<br />
Tap To<br />
Create a chart from the selected cells<br />
Align text to the left<br />
Center the selected text<br />
Align text to the right<br />
Add all contiguous numbers in a column or row<br />
Add a currency symbol<br />
Add the default thousands separator<br />
Add a decimal point<br />
Increase and decrease the magnification<br />
1 1
1<br />
Chapter 10. Other Applications<br />
PowerPoint Mobile<br />
With PowerPoint Mobile, you can view PowerPoint slides on you device.<br />
PowerPoint Mobile only supports slides in .ppt and .pps formats.<br />
Starting a PowerPoint Presentation<br />
1. Tap > Office Mobile > PowerPoint Mobile.<br />
. Tap the slide show you want to view in the presentation list.<br />
. Tap the current slide to advance to the next slide if slides don’t advance automatically.<br />
. Tap Menu > Rename/Move .<br />
. Enter a name for the document and tap .<br />
Stopping a PowerPoint Presentation<br />
• In a slide show, tap > End Show.<br />
Navigating Between Slides<br />
• Tap > Next to go to the next slide.<br />
• Tap > Previous to go back to the previous slide.<br />
• To jump to any slide in the slide show, tap > Go to Slide and tap on the slide you want<br />
to view.
Word Mobile<br />
With Word Mobile, you can create and edit Microsoft Word documents and templates, plain text<br />
files, and/or rich text format files.<br />
Unlike Microsoft Word, you can only have one document open at a time in Word Mobile.<br />
Creating a Document<br />
1. Tap > Office Mobile > Word Mobile.<br />
. Tap New, if a new document is not opened by itself.<br />
. Enter text as desired.<br />
. Tap Menu > File > Save As.<br />
. Enter a name for the document and tap the Save button.<br />
You can also tap Ok to save a document after you finish entering text. This way, the first few<br />
words of the document is being used as the filename.<br />
Word Mobile Formatting Toolbar<br />
The Formatting toolbar in Word Mobile provides a quick way to apply common formatting such<br />
as bold type, bulleted or numbered lists, and paragraph indentation to your text.<br />
• In a Word Mobile document, tap View > Toolbar.<br />
A check mark appears next to Toolbar when the toolbar is visible.<br />
Tap To<br />
Make the selected text bold<br />
Make the selected text italic<br />
Underline the selected text<br />
1
1<br />
10.6 Phone Profile<br />
Chapter 10. Other Applications<br />
Tap To<br />
Align text to the left<br />
Center the text<br />
Align text to the right<br />
Add or remove a numbered list in the selected text<br />
Add or remove bullets in the selected text<br />
Increase the indent of numbered or bulleted list text one tab stop to the right<br />
Decrease the indent of numbered or bulleted list text one tab stop to the left<br />
Phone Profile defines how your device reacts when you receive a call or a message, how your keypad<br />
sounds when you press a key, and more. Select or customize the most suitable profile for your<br />
situation, such as when you are in a meeting or outdoors. The phone profiles available are Normal,<br />
Silent, Vibrate, Outdoor, Headset, and <strong>User</strong> define.<br />
Only <strong>User</strong> defined profile can be customized.
Selecting a Profile<br />
1. Tap > Programs > Phone Profile.<br />
. Select the most suitable profile for your<br />
situation from the list.<br />
. Tap Menu > Select. Then Tap .<br />
. Tap OK to confirm the selection.<br />
1
1<br />
Chapter 10. Other Applications<br />
Viewing Profile Details<br />
1. Tap > Programs > Phone Profile.<br />
. Select the profile you want to view its details.<br />
. Tap Detail.<br />
Defining Your Own Profile<br />
1. Tap > Programs > Phone Profile.<br />
. Select <strong>User</strong> Defined, and tap Menu ><br />
Edit.<br />
. Select the type of options to change.<br />
. Tap .
10.7 Formatting Storage Card and DiskOnChip<br />
With Format Disk, you can format and check the capacity of an inserted storage card and DiskOnChip<br />
in your device.<br />
1. Tap > Programs > Format Disk.<br />
. Select the area and file system.<br />
. Tap .<br />
. Tap Yes to continue.<br />
1
1 8<br />
Chapter 10. Other Applications<br />
. Tap the Info tab.<br />
. Tap and check the capacity of an inserted storage card and/or DiskOnChip.<br />
Only a valid storage card can be formatted with Format Disk.<br />
10.8 Setting up GPS<br />
A GPS (Global Positioning System) signal receiver is built in your device. You have to install a mapping<br />
software and make GPS settings on your device to start navigating. Please follow the instruction<br />
of your mapping software to install it and use the navigation functions. For setting up GPS, do the<br />
following:<br />
1. Tap > Settings > System tab > External GPS > Hardware tab.<br />
. In GPS hardware port, select COM4.
. In Baud rate, select 57600.<br />
. Tap to save your setting.<br />
GPS positioning is limited by weather<br />
and usage location (e.g. tall buildings,<br />
tunnels, underpasses, tress, bridges…<br />
etc). Most GPS do not work indoors,<br />
nor can GPS signals penetrate<br />
buildings, car sun shades and heat<br />
reflective film with metallic content.<br />
1 9
180<br />
Chapter 10. Other Applications
Appendix<br />
A.1 Regulatory Notices<br />
A. PC Requirement to Run ActiveSync<br />
A. Specifications
18<br />
Appendix<br />
A.1 Regulatory Notices<br />
European Union Notice<br />
Product with CE marking comply with the R&TTE Directive (99/ /EC), the EMC Directive (89/ /<br />
EEC), and the Low Voltage Directive ( / /EEC) issued by the Commission of the European<br />
Community.<br />
Compliance with these directives implies conformity to the following European Norms (in parentheses<br />
are the equivalent international standards).<br />
• ETSI EN 01 81-1<br />
Electromagnetic compatibility and Radio spectrum Matters (ERM); ElectroMagnetic Compatibility<br />
(EMC) standard for radio equipment and services; Part 1: Common technical requirements.<br />
• ETSI EN 00 8<br />
Electromagnetic compatibility and Radio spectrum Matters (ERM); Wideband Transmission<br />
systems; data transmission equipment operating in the . GHz ISM band and using spread<br />
spectrum modulation techniques.<br />
• EN 0 0: 001<br />
Product standard to demonstrate the compliance of mobile phones with the basic restrictions<br />
related to human exposure to electromagnetic fields ( 00MHz – GHz)<br />
• ETSI EN 01 89-<br />
Eletromagnetic compatibility and Radio spectrum matters (ERM); ElectroMagnetic Compatibility<br />
(EMC) standard for radio equipment and services; Part : Specific conditions for mobile and<br />
portable radio and ancillary equipment of digital cellular radio telecommunications systems<br />
(GSM and DCS).<br />
• ETSI EN 01 89-1
Electromagnetic compatibility and Radio spectrum Matters (ERM); ElectroMagnetic Compatibility<br />
(EMC) standard for radio equipment and services; Part 1 : Specific conditions for . GHz<br />
wideband transmission systems and GHz high performance RLAN equipment.<br />
• EN 09 0-1 (IEC 09 0-1)<br />
Safety of information Technology Equipment.<br />
• ETSI EN 01 11<br />
Global system for mobile communications (GSM); Harmonized EN for mobile stations in the<br />
GSM 900 and GSM 1800 bands, covering essential requirements of article . of the R&TT<br />
directive (199 / /EC).<br />
Federal Communications Commission Notice<br />
This device complies with part 1 of the FCC Rules. Operation is subject to the following two<br />
conditions: (1) This device may not cause harmful interference, and ( ) this device must accept<br />
any interference received, including interference that may cause undesired operation. This<br />
equipment has been tested and found to comply with the limits for a Class B digital device,<br />
pursuant to Part 1 of the FCC Rules. These limits are designed to provide reasonable protection<br />
against harmful interference in a residential installation. This equipment generates, uses, and can<br />
radiate radio frequency energy and, if not installed and used in accordance with the instructions,<br />
may cause harmful interference to radio communications. However, there is no guarantee does<br />
cause harmful interference to radio or TV reception, which can be determined by turning the<br />
18
18<br />
Appendix<br />
equipment on and off, the user is encourage to try to correct the interference by one or more of<br />
the following measures:<br />
• Reorient or relocate the receiving antenna.<br />
• Increase the separation between the equipment and receiver.<br />
• Connect the equipment into an outlet on a circuit different from that to which the receiver is<br />
connected.<br />
• Consult the dealer or an experienced radio or television technician for help.<br />
RF Exposure Information (SAR)<br />
This device meets the government’s requirements for exposure to radio waves. This device is<br />
designed and manufactured not to exceed the emission limits for exposure to radio frequency (RF)<br />
energy set by the Federal Communications Commission of the U.S. Government.<br />
The exposure standard for wireless devices employs a unit of measurement known as the Specific<br />
Absorption Rate, or SAR. The SAR limit set by the FCC is 1. W/kg. *Tests for SAR are conducted<br />
using standard operating positions accepted by the FCC with the device transmitting at its highest<br />
certified power level in all tested frequency bands. Although the SAR is determined at the highest<br />
certified power level, the actual SAR level of the device while operating can be well below the<br />
maximum value. This is because the device is designed to operate at multiple power levels so as<br />
to use only the poser required to reach the network. In general, the closer you are to a wireless<br />
base station antenna, the lower the power output.<br />
While there may be differences between the SAR levels of various devices and at various positions,<br />
they all meet the government requirement.
The FCC has granted an Equipment Authorization for this device with all reported SAR levels<br />
evaluated as in compliance with the FCC RF exposure guidelines. SAR information on this device<br />
is on file with the FCC and can be found under the Display Grant section of http://www.fcc.gov/<br />
oet/ea after searching on FCC ID:UFOBC01 AAA 90.<br />
For body worn operation, this device has been tested and meets the FCC RF exposure guidelines<br />
for use with an accessory that contains no metal and the positions the handset a minimum of 1.<br />
cm from the body. Use of other enhancements may not ensure compliance with FCC RF exposure<br />
guidelines. If you do no t use a body-worn accessory and are not holding the device at the ear,<br />
position the handset a minimum of 1. cm from your body when the device is switched on.<br />
SAR Information<br />
Certificate<br />
Maximum Scaled SAR Values (W/kg)<br />
FCC CE<br />
Band GSM8 0 PCS1900 Wi-Fi GSM900 DCS1800<br />
Head SAR<br />
(Held to ear)<br />
0. 9 0. 0.0 0. 89 0.1 1<br />
Body SAR<br />
(Worn)<br />
0.991 0.8 0.1 8<br />
Exposure to Radio Frequency (RF) Signals<br />
Your wireless phone is a radio transmitter and receiver. It is designed and manufactured not<br />
to exceed the emission limits for exposure to radio frequency (RF) energy set by the Federal<br />
Communications Commission of the U.S. Government. These limits are part of comprehensive<br />
guidelines and establish permitted levels of RF energy for the general population. The guidelines<br />
18
18<br />
Appendix<br />
are based on the safety standards previously set by both U.S. and international standards bodies:<br />
• American National Standards Institute (ANSI) IEEE. C9 .1-199<br />
• National Council on Radiation Protection and Measurement (NCRP). Report 8 . 198<br />
• International Commission on Non-Ionizing Radiation Protection (ICNIRP) 199<br />
• Ministry of Health (Canada), Safety Code . The standards include a substantial safety margin<br />
designed to assure the safety of all persons, regardless of age and health.<br />
In the U.S. and Canada, the SAR limit for mobile phones used by the public is 1. Watts/kg<br />
(W/kg) averaged over one gram of tissue. The standard incorporates a substantial margin of<br />
safety to give additional protection for the public and to account for any variations in usage.<br />
Normal conditions only ensure the radiative performance and safety of the interference. As with<br />
other mobile radio transmitting equipment, users are advised that for satisfactory operation of the<br />
equipment and for the safety of personnel, it is recommended that no part of the human body be<br />
allowed to come too close antenna during operation of the equipment.<br />
Warning!<br />
DANGER OF EXPLOSION IF BATTERY IS INCORRECTLY REPLACED. TO REDUCE RISK OF FIRE<br />
OR BURNS, DO NOT DISASSEMBLE, CRUSH, PUNCTURE, SHORT EXTERNAL CONTACTS,<br />
EXPOSE TO TEMPERATURE ABOVE 0.C (1 0.F), OR DISPOSE OF IN FIRE OR WATER. REPLACE<br />
ONLY WITH SPECIFIED BATTERIES. RECYCLE OR DISPOSE OF USED BATTERIES ACCORDING<br />
TO THE LOCAL REGULATIONS OR REFERENCE GUIDE SUPPLIED WITH YOUR PRODUCT.
A.2 PC Requirement to Run ActiveSync 4.5<br />
To connect your device to the PC, you must have Microsoft ActiveSync program installed on<br />
your PC. ActiveSync . is included in the Installation CD, which is compatible with the following<br />
operating systems and applications:<br />
• Microsoft Windows 000 Service Pack<br />
• Microsoft Windows Server 00 Service Pack 1<br />
• Microsoft Windows Server 00 IA Edition Service Pack 1<br />
• Microsoft Windows Server 00 x Edition Service Pack 1<br />
• Microsoft Windows XP Professional Service Packs 1 and<br />
• Microsoft Windows XP Home Service Packs 1 and<br />
• Microsoft Windows XP Tablet PC Edition 00<br />
• Microsoft Windows XP Media Center Edition 00<br />
• Microsoft Windows XP Professional x Edition<br />
• Microsoft Outlook XP and Microsoft Outlook 00 messaging and collaboration clients<br />
• Microsoft Office XP<br />
• Microsoft Office 00<br />
• Microsoft Internet Explorer .0 or later (required)<br />
• Microsoft <strong>Systems</strong> Management Server .0<br />
18
188<br />
Appendix<br />
A.3 Specifications<br />
System Information<br />
CPU Samsung S C 0A, 00MHz<br />
Operating System Windows Mobile , Professional Edition<br />
Memory MB RAM<br />
1 MB ROM<br />
Dimension and Weigh<br />
Dimension 1 0.8 x . x . ( . ) mm<br />
Weight 19 ± g with battery<br />
1 ± g without battery<br />
199± g with battery<br />
1 9± g without battery
Key and Indication<br />
Key • -way navigation with action input<br />
• Scan key<br />
•Volume up and down<br />
•Power button<br />
•Talk key and End key<br />
•Reset button<br />
•Voice Record<br />
• Soft key<br />
•Fn key and Backspace key<br />
•1 key numeric dial pad<br />
Indication •Vibrate<br />
•Audible<br />
•Visual message<br />
•LED 1: Wi-Fi (Green)/Bluetooth(Blue)<br />
•LED : Low Power/Missed Call(Red)/Charging(Orange)/GSM on(Green)<br />
Display<br />
Type Transflective TFT LCD with touch panel and backlight<br />
Mode Portrait/Landscape<br />
Size/Resolution/Color .8", 0x 0, K colors<br />
189
190<br />
Appendix<br />
Scanner/Barcode Reader<br />
1D Model Red laser diode<br />
Supported Symbologies<br />
1D : EAN, JAN, UPC-A, UPC-E, Industrial of , IATA, Interleaved of ,<br />
NW- (CODABAR), CODE- 9, CODE-9 , CODE-1 8, and so on<br />
1D/ D Model CMOS Area Sensor<br />
Supported Symbologies<br />
1D : EAN, JAN, UPC-A, UPC-E, Industrial of , IATA, Interleaved of ,<br />
NW- (CODABAR), CODE- 9, CODE-9 , CODE-1 8, and so on<br />
D : PDF 1 , Micro PDF 1 , QR Code, Data Matrix, Maxi Code, and<br />
so on<br />
Connectivity<br />
Bluetooth Bluetooth 1. compliant<br />
Wi-Fi IEEE 80 .11 b/g compliant<br />
Telecom GSM/GPRS/EDGE 8 0/900/1800/1900,<br />
GPRS class 1 , EDGE class 10<br />
USB mini USB (ver.1.1 client)
GPS<br />
Built-in GPS module SiRF Star III<br />
Cold Start Time s<br />
Warm Start Time s<br />
Hot Start Time 10s<br />
Reacquisition Time < 1s<br />
Accuracy Static: m Dynamic: 0m<br />
External Antennal I/F yes<br />
External Memory Card<br />
Card Slot Mini-SD card slot<br />
Battery and Power<br />
Main Battery Li-Ion Polymer . V 1 0mAh<br />
Talk Time hours<br />
Standby Time 1 0 hours<br />
Battery Charing Time hours (AC charger via mini USB)<br />
hours (USB cable connected to PC)<br />
Backup Battery minute RTC after main battery removal<br />
1 8 hours RTC in main battery low power<br />
191
19<br />
Appendix<br />
WEEE Notice<br />
The Waste Electrical and <strong>Electronic</strong> Equipment (WEEE) Directive is designed to encourage and<br />
regulate the collection, reuse, recycling and recovery of waste electrical and electronic equipment,<br />
which entered into force as European law on 1 th February 00 . The Directive aims to improve<br />
the level of recycling of electrical and electronic equipment (EEE) and encourages designers<br />
to develop products with recycling efficiency in mind; it also aims to improve our environment,<br />
reduce risks to human health through the proper treatment of discarded goods.<br />
The WEEE logo ( ) on the product and its accessories or on its box indicates that this product<br />
must be disposed of or dumped with your other household wastes. You are liable to dispose of all<br />
your electronic or electrical waste equipment by relocating over to the specified collection point<br />
for recycling of such hazardous waste. Isolated collection and proper recovery of your electronic<br />
and electrical waste equipment at the time of disposal will allow us to help conserving natural<br />
resources. Moreover, proper recycling of the electronic and electrical waste equipment will ensure<br />
safety of human health and environment.<br />
For more information about electronic and electrical waste equipment disposal, recovery and<br />
collection point, please contact your local city center, household waste disposal service, shop from<br />
where you purchased the equipment, or manufacturer of the equipment.<br />
RoHS Compliance<br />
This product is in compliance with Directive 00 /9 /EC of the European Parliament and of<br />
the Council of January 00 , on the restriction of the use of certain hazardous substances in<br />
electrical and electronic equipment (RoHS) and its amen