IT13 Operation - Euroheat
IT13 Operation - Euroheat
IT13 Operation - Euroheat

Create successful ePaper yourself
Turn your PDF publications into a flip-book with our unique Google optimized e-Paper software.
Cleaning The Insert<br />
Cleaning The Glass<br />
Properly operated, with the correct fuel, your glass will remain clean. Slight staining may appear when the insert<br />
is lit and below its operating temperature. This will normally clear as the inserts temperature rises.<br />
If it becomes necessary to clean the glass by hand do not attempt to do so unless the insert is cold. Proprietary<br />
glass cleaning agents are available but they must specifically state its suitability for insert glass before being used<br />
because the glass in you insert is not ordinary glass and may be damaged with an unsuitable cleaner.<br />
Newspaper moistened with water to which a little vinegar has been added will normally remove most staining,<br />
but for really stubborn marks, gentle polishing with fine steel wool lubricated with a few drops of dish washing<br />
detergent will need to be employed. Great care must be taken not to clean the glass too vigorously as particles<br />
of grit may have adhered with the stain and these could cause scratching if dragged across the glass. However<br />
well the insert burns it will eventually become necessary to clean the glass, but if cleaning becomes necessary<br />
too often we advise you to review your operating procedures to determine whether cleaner and more efficient<br />
combustion can be achieved.<br />
The Insert Body<br />
Dusting the insert may be carried out when the insert is at its minimum heat output temperature, using light<br />
strokes of a real bristle paint brush. Thorough cleaning, or any attempt to remove marks on the insert body must<br />
only be done when the insert is cold. Inserts with an enamel finish should be cleaned with a damp cloth, or very<br />
gentle use of a cleaner recommended for enamel finishes. It should be noted that even approved cleaners will<br />
damage the enamel finish of the insert if used too vigorously. All traces of the cleaner must be removed before<br />
the insert is lit and no finishing polishes must ever be used as these will leave unsightly streaks on the insert<br />
when it becomes hot.<br />
The cast black paint finish internal to the insert can be cleaned by brushing with a stiff real bristle paint brush will<br />
remove all dust, but where the paint is marked, the stains are better obliterated with a spray of suitable stove/<br />
insert paint rather than attempts made to clean them off. Suitable paint may be purchased from a insert shop or<br />
direct from <strong>Euroheat</strong>.<br />
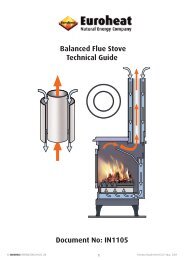
The Flue<br />
Even if your flue is correctly lined it is advisable to run your insert at a high setting to thoroughly warm the flue<br />
periodically and ensure it is swept regularly. If the insert has not been used for some time it will be necessary<br />
to ensure the flue has not been blocked with twigs from home building birds or blocked with other obstructions<br />
before the insert is lit. Lighting a small piece of paper within the insert will determine the flue’s ability to remove<br />
any products of combustion.<br />
National Chimney Sweeps Association 01785 811732<br />
The Solid Fuel Association 0845 6014406 .<br />
Simple Maintenance<br />
The insert must be cleaned of ash and any tarring as often as your use of<br />
the insert and fuel dictate. All deposits on the insert interior will insulate the<br />
insert body from the fire and will reduce the insert’s efficiency. Flue ways which<br />
become choked will not only reduce the inserts performance but can become a<br />
serious health risk if the flue is not taking away all the products of combustion.<br />
Do not use a vacuum cleaner unless it is fitted with an additional hot ash filter<br />
bin<br />
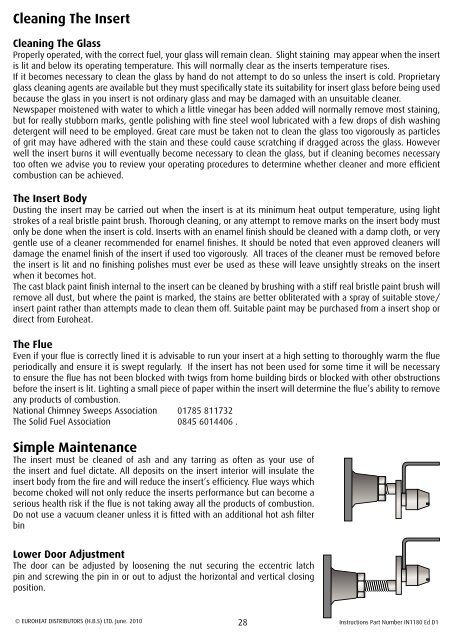
Lower Door Adjustment<br />
The door can be adjusted by loosening the nut securing the eccentric latch<br />
pin and screwing the pin in or out to adjust the horizontal and vertical closing<br />
position.<br />
© EUROHEAT DISTRIBUTORS (H.B.S) LTD. June. 2010 28<br />
Instructions Part Number IN1180 Ed D1