WafflePro® Taste/Texture Select® Instructions ... - Amazon S3
WafflePro® Taste/Texture Select® Instructions ... - Amazon S3
WafflePro® Taste/Texture Select® Instructions ... - Amazon S3
Create successful ePaper yourself
Turn your PDF publications into a flip-book with our unique Google optimized e-Paper software.
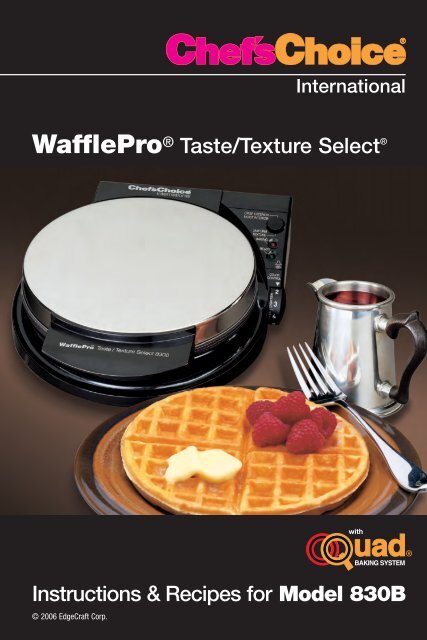
WafflePro ® <strong>Taste</strong>/<strong>Texture</strong> Select ®<br />
<strong>Instructions</strong> & Recipes for Model 830B<br />
© 2006 EdgeCraft Corp.<br />
International<br />
with
IMPORTANT SAFEGUARDS<br />
When using electrical appliances, basic safety precautions should always be<br />
followed including the following:<br />
1. Read all instructions before using the WafflePro ® .<br />
2. Do not touch hot surfaces. Always use plastic handle on lid and do not touch stainless<br />
cover when hot.<br />
3. To protect against fire, electric shock and injury to persons, do not immerse cord, plug<br />
or waffle maker in water or other liquid.<br />
4. Close supervision is necessary when any appliance is used by or near children.<br />
5. Before use, unwind the power cord completely and keep the cord away from the hot<br />
parts of the appliance.<br />
6. Do not let power cord hang over edge of table or counter or touch hot surfaces.<br />
7. Do not place on or near hot gas or electric burner or in a heated oven.<br />
8. Extreme caution must be used when moving an appliance containing hot oil or other<br />
hot liquids.<br />
9. Only operate the waffle maker on a dry, flat, non-slip surface.<br />
10.Do not use WafflePro ® outdoors.<br />
11.Do not operate the WafflePro ® with a damaged cord or plug. If it malfunctions or has<br />
been damaged in any manner, return WafflePro ® to the EdgeCraft Corporation Service<br />
Department for examination, repair or adjustment.<br />
12.The use of accessory attachments not recommended by the EdgeCraft Corporation<br />
may result in fire, electric shock or injury to persons.<br />
13.Always unplug the waffle maker from electrical outlet when not in use and before<br />
cleaning to avoid accidental electrical shock. Allow to cool before cleaning.<br />
14.As long as the appliance is hot, even if unplugged, there is the danger of someone<br />
getting burned. Do not touch hot surfaces and do not put it into storage while hot.<br />
15.Do not use the WafflePro for other than intended use.<br />
16.For use only on 120V 60HZ power. Use a socket with a good ground connection.<br />
17.For household use only.<br />
18.SAVE THESE INSTRUCTIONS.<br />
2<br />
YOU MADE<br />
A GOOD<br />
CHOICE<br />
The WafflePro ® <strong>Taste</strong>/<strong>Texture</strong> Select ® Model 830B comes to you<br />
from Chef’sChoice ® , the maker of the world’s finest professional<br />
household gourmet products. The WafflePro ® brings to the home<br />
features found only in commercial waffle makers. Its unique Quad ®<br />
Baking System allows you to select that “just right” texture and taste.<br />
A highly versatile waffle maker, WafflePro ® allows you to bake rapidly<br />
for a crisp golden brown exterior while retaining a moist interior, like<br />
crusty bread hot from the oven. Or, with the flick of a switch,<br />
WafflePro ® makes a crunchy waffle with a uniform texture throughout.<br />
Remember when waffles were only for the weekends, when Mom and<br />
Dad had more time? The WafflePro ® puts waffles back on the menu<br />
everyday! It heats up while the coffee is being brewed and your first<br />
waffle is ready when your coffee is poured. And because the<br />
WafflePro ® heats so rapidly, you’ll be making waffles just about as<br />
fast as they can be eaten.<br />
Imagine waffles with the natural aroma and taste of freshly baked<br />
bread and pastries. Make up a batch of a quick Basic Waffle recipe the<br />
night before so it’s ready to bake in the heated WafflePro ® every<br />
morning. Enjoy!<br />
The Chef’sChoice ® WafflePro ® Model 830B creates a waffle pattern<br />
virtually identical to the most popular waffles of Belgium and Holland.<br />
The resulting waffle has deep pockets, ideal for toppings such as fresh<br />
fruits, sauces and syrups. The authentic Belgian waffle maker can be<br />
rectangular, square or round. Regardless of the overall shape, the<br />
individual depressions in a Belgian Waffle are deep.<br />
3
GETTING TO KNOW THE WafflePro ®<br />
Take a minute to identify the key features and controls of the WafflePro ® , (Figure 1) made of<br />
high strength, high temperature engineering plastics with a polished stainless steel lid.<br />
To open the lid, lift by the insulated front plastic handle. Electronic controls are on the control<br />
panel, Figure 2.<br />
Particularly important is the circular black Rocker Switch, Figures 1 and 2. Press the upper portion<br />
of the rocker switch for a fast bake and for waffles with “Crisp Exterior/Moist Interior”, or<br />
press at the bottom of the rocker switch for a deep bake and for waffles that have a more<br />
“Uniform <strong>Texture</strong>” throughout.<br />
Below the rocker switch is a red light marked “Baking” to indicate when the waffle plates are<br />
being heated. Below that is a green light marked “Ready” to indicate either the waffle plate is<br />
at baking temperature or the waffle is “Ready” to be served.<br />
An audible “Ready Beeper” sounds when the green light comes on to further indicate when the<br />
waffle is ready to serve.<br />
The color control wheel is graduated numerically. The waffle will be darker or lighter in color<br />
depending on the exact setting of this wheel and the position of the rocker switch. This control<br />
wheel is relatively sensitive and fractional numerical changes can make a notable difference in<br />
color. The common operating range for the color control is 3 1 ⁄2 to 5. To darken the waffle, move<br />
toward a higher number.<br />
The lid has a unique hinge that allows the back of the lid to raise slightly as needed to maintain<br />
a uniform thickness of the waffle as it bakes and rises.<br />
Provision has been made for cord storage as described in Storage Section. The cord can be<br />
stored under the WafflePro ® with its end secured in a slot molded into the base.<br />
The WafflePro ® can be stored upright to save shelf space. Simply close the lid and stand it<br />
upright resting on the flat hinged end.<br />
Figure 1. WafflePro ® <strong>Taste</strong>/<strong>Texture</strong> Select ®<br />
4<br />
Rocker Switch<br />
Control Panel<br />
Color Control Dial<br />
Handle for Lid<br />
USING THE WafflePro ® FOR THE FIRST TIME<br />
Insert the WafflePro ® power cord into a grounded 120 volt outlet and close the cover. The red<br />
“baking” light will turn on immediately indicating the waffle plates are heating. Turn the color<br />
control dial to 4. You can shorten the warm-up time by pressing firmly the top of the black<br />
circular rocker switch adjacent to the marking “Crisp Exterior/Moist Interior.”<br />
In about 31 ⁄2 minutes the red light will turn off, the green Ready light will turn on and the<br />
Beeper will sound indicating the WafflePro ® is ready for baking. On the first heating you may<br />
sense a slight odor during the heat-up cycle, typical of new heating elements with non-stick<br />
surface coatings.<br />
When “Ready”, open the lid and brush a light coating of vegetable or corn oil, melted margarine<br />
or butter on the entire surface area of both the upper and lower heated grids (or you may use<br />
non-stick cooking spray). Because both of the baking surfaces are factory finished with an antistick<br />
coating, it is necessary to oil the surfaces only before the first time you use the WafflePro ® .<br />
It should not be necessary to oil again on subsequent use.<br />
Pour about 1 ⁄2 cup of waffle batter onto the middle of the lower grid and close the lid. Discard<br />
the first waffle as it will absorb the excess oil you used on the grids.<br />
WARM UP AND BAKING PROCEDURE<br />
If the WafflePro ® has not been used before, follow instructions above for “Using the WafflePro ®<br />
for the First Time.”<br />
If your are looking for a good recipe, see “Some Favorite Recipes”, (page 9).<br />
WARM-UP<br />
Plug the power cord into a grounded 120 volt outlet. Set the rocker switch to “Crisp Exterior/<br />
Moist Interior” to begin the heat-up cycle. This setting places maximum heat on the waffle grids<br />
and they will warm up in only 3 1 ⁄2 minutes. If the switch is set to Uniform <strong>Texture</strong>, warm up time<br />
will be about twice that long.The red “Baking” light will come on when the WafflePro ® is plugged<br />
Figure 2. Control Panel<br />
5<br />
Rocker Switch<br />
• Press here for fast bake<br />
• Press here for deep bake<br />
Audible “Ready” Beeper<br />
Color Control Wheel
in. Set the color control wheel to 4. When the heat-up period is complete the red light will go off,<br />
the “Ready” light will come on and the beeper will briefly sound to remind you the grid is up to<br />
temperature and ready for you to begin baking. When the green light comes on the heaters are<br />
deactivated until the grids cool slightly below the baking temperature.<br />
Keep hands away from the hot stainless cover and grid surfaces. Touch only the plastic parts<br />
and handle provided.<br />
SELECT THE TASTE/TEXTURE – WHICH IS JUST RIGHT FOR YOU<br />
The versatile Quad ® Baking System, unique to the WafflePro ® , lets you control the baking condition<br />
best suited to your taste and allows you to vary and modify the taste, texture and aroma<br />
of the waffles any time you wish. By adjusting the batter you can further widen the flavors and<br />
textures available. You can find the perfect combination for each recipe and for any of your<br />
favorite toppings. Caution - Do not rely on the age-old notion that the waffle is done when the<br />
waffle maker stops steaming. Because of the unique Quad ® Baking System, the waffle may be<br />
ready to serve while the WafflePro ® is still steaming. Learn to rely on the green light and beeper<br />
and vary the settings to your taste.<br />
MAKING WAFFLES WITH CRISP EXTERIOR/MOIST INTERIOR<br />
Waffles made with the Crisp Exterior/Moist Interior setting will retain more of the freshly–baked aroma<br />
and flavor. The degree of exterior crispness will depend on the recipe and the color control setting.<br />
1. Depress the upper portion of the black circular rocker switch marked “Crisp Exterior/Moist<br />
Interior.” Set the color control to 4 for the first waffle.<br />
2. Pour or ladle about 1 ⁄2 cup of batter from a ladle or pitcher in the middle of the lower waffle<br />
grid.A thicker batter, thin enough to just pour slowly works best.Avoid putting too much batter<br />
on grid as that will cause an overflow and increase clean up time. Too little batter will<br />
not fill the grid and heating will be uneven.<br />
3. Close the lid immediately after adding batter so as to spread out the batter uniformly. Press<br />
down lightly on the lid handle for several seconds in order to help level the batter. A special<br />
hinge at the rear of lid adjusts automatically to ensure a uniform thickness of the waffle.<br />
4. The red light will come on indicating the waffle is baking. This means the heater is powered<br />
to continue the cooking process.<br />
5. When the waffle is ready, the green light comes on, the red light goes off and the beeper<br />
sounds briefly.<br />
6. Lift the lid slightly and inspect the waffle color. If necessary, close the lid and continue heating<br />
a little longer until desired color is obtained. On the next baking cycle adjust the color<br />
control wheel as necessary to obtain a better setting. Movement to a higher number will<br />
darken the waffle. Commonly the necessary adjustment is less than one whole number.<br />
7. When the waffle is done, remove it by lifting one edge with a heat-resistant plastic fork or<br />
spatula. (If you use a metal fork, use care not to contact grid surfaces as that might scratch<br />
the non-stick surface and decrease its effectiveness.)<br />
8. After removal of waffle, the WafflePro ® can be immediately refilled with batter or it can be<br />
closed until you are ready to bake again. If you do not start another waffle immediately the<br />
green light will stay on until the grids cool slightly, then the red light will come on briefly indicating<br />
the grids are being reheated to maintain readiness for the next use. When the green<br />
light comes on again the next waffle can be poured and baked.<br />
6<br />
9. When finished baking, be certain to unplug the WafflePro ® . Only then is the power to the<br />
waffle maker switched off.<br />
MAKING WAFFLES WITH UNIFORM TEXTURE<br />
Waffles made with the “Uniform <strong>Texture</strong>” baking cycle will be evenly baked throughout their<br />
thickness. They will have a crunchy and drier texture. The amount of moisture retention will<br />
depend on the color control setting. Generally the color control setting will be lower and the baking<br />
time will be about twice that expected with the “Crisp Exterior/Moist Interior” setting.<br />
1. Depress the lower portion of the black circular rocker switch marked “Uniform <strong>Texture</strong>”. Set<br />
the color control dial to 3 1 ⁄2 for the first waffle.<br />
2. Pour or ladle about 1 ⁄2 level cup of batter from a ladle or pitcher in the middle of the lower waffle<br />
grid. A thicker batter, thin enough to just pour slowly works best. Do not overfill the grid.<br />
3. Close the lid immediately after adding the batter so that the lid will level out the batter.<br />
A special hinge at the rear adjusts automatically to ensure a uniform thickness of the waffle.<br />
4. The red light will come on indicating the waffle is baking.<br />
5. When the waffle is ready the red light goes off, the green light comes on, and the beeper<br />
sounds briefly.<br />
6. Lift the lid and inspect the waffle. If you want a slightly browner waffle, close the lid and<br />
cook for another 20 seconds or so.<br />
7. When the color is right, remove waffle with a plastic spatula or fork. As needed increase or<br />
decrease the color control for the next cycle. Once you establish the optimum color setting,<br />
it will not require any change in the future unless you alter the waffle recipe or switch to<br />
“Crisp Exterior/Moist Interior.”<br />
8. Add batter for the next waffle or close lid until you are again ready to bake. The green light<br />
will remain on until WafflePro ® cools slightly. Then the red light will alternately come on to<br />
keep the grids hot until you are ready for the next waffle.<br />
9. When finished baking, be certain to unplug the WafflePro ® . Only then is the power to the<br />
waffle maker switched off.<br />
Always unplug the WafflePro ® immediately after use. Never leave it unattended when plugged in.<br />
Children should not be allowed to use a waffle maker except in the presence of an attentive adult.<br />
The WafflePro ® cools faster when its lid is left fully open. Store only when cold. Save shelf space<br />
by storing the WafflePro ® upright resting on its hinged flat end.<br />
WAFFLE BASICS<br />
Superb waffles begin with a good recipe but depend on a versatile waffle maker to fully develop<br />
the flavor, texture and aroma of the batter. A perfect waffle is no accident. It is the combination<br />
of a brownish crisp exterior and an interior texture baked the way you like it. Some of us prefer<br />
a waffle with a moist interior like freshly baked bread. Such a waffle has the greatest flavor<br />
and aroma. Others want a uniformly crunchy waffle, one that is baked slowly with less interior<br />
moisture. You may like to bake breakfast waffles that are crisp on the outside and fluffy inside<br />
but you may want a chocolate dessert waffle, destined to be served with a scoop of ice cream,<br />
that is crunchy throughout.<br />
The WafflePro ® incorporates the unique Quad ® baking system to ensure a waffle baked the<br />
way you prefer. You select either a fast bake or a deep bake. Then you select a color control<br />
7
setting. And the color control adjusts for either baking setting to give you a toasty, brown<br />
exterior and the interior texture you want.<br />
The Quad ® baking system on the WafflePro ® works this way. The “Crisp Exterior/Moist Interior”<br />
setting gives you a fast bake while the “Uniform <strong>Texture</strong>” setting gives a slow deep bake. The<br />
Color Control setting controls the surface temperature of the waffle and determines its color.<br />
To get a crisp exterior with a contrasting steamy aromatic interior, you need a waffle iron with<br />
a fast bake. The WafflePro ® is unique among all waffle makers in its ability to cook rapidly<br />
enough to create this delectable combination.<br />
WAFFLE INGREDIENTS AND TECHNIQUES<br />
Sugar in waffle batter enhances the browning of the waffle especially on the surface where<br />
the temperatures are highest. If your diet permits, a small amount of sugar can do wonders<br />
for the waffles.<br />
Cornmeal in waffle batter adds extra crunch. Only a few tablespoons are needed to add texture.<br />
Butter and oil enhance flavor and can increase the darkening of the waffle. But, too much of<br />
these liquids inhibits surface browning.<br />
Eggs add their own flavor to the mix and importantly they reduce the tendency of waffles to “split”.<br />
The consistency of your batter will effect the end result. A slightly thick batter, one that pours<br />
slowly, some say like slow moving lava, works the best. If the batter pours freely, add more flour<br />
to thicken.<br />
Regardless of the recipe, the WafflePro ® works best with a level 1 ⁄2 cup of batter. This amount<br />
fills the waffle iron without risk of overflow. Use a pitcher, a measuring cup or ladle to pour batter<br />
onto the WafflePro ® grids.<br />
When making waffle batter, add milk slowly and mix with a power mixer or by hand until the<br />
right consistency is reached. Blend just until the desired consistency is reached. You may not<br />
need to use all of the milk or liquid called for in a recipe. If you add too much liquid, simply stir<br />
in additional flour (or dry mix) to thicken the batter.<br />
Some recipes may call for separating the eggs, beating the whites and folding them in at the<br />
end of the mix. This step gives a slightly lighter waffle with a less uniform texture but it is not<br />
essential. Whole eggs may be used.<br />
Always preheat the WafflePro ® before adding the batter. Set the Color Control to 4 if you are<br />
just getting started, otherwise set it to your own preference. Read the instructions beginning on<br />
Page 5 before making your first waffles.<br />
Remember when the green light and beeper signal that the waffle is “Ready”, you can briefly<br />
lift the lid to check the degree of browning and, if desired, close the lid to bake the waffle for<br />
another 20 to 30 seconds for more crispness.<br />
Because the WafflePro ® heats so rapidly on the “Crisp Exterior/Moist Interior” setting, you will<br />
be able to prepare waffles about as fast as they can be eaten. Waffles taste best “hot off the<br />
griddle” but you might let them cool on a wire rack for 20 to 30 seconds before serving. This<br />
gives the waffle a chance to release some steam and stiffen slightly. (If a waffle is placed<br />
directly on a plate, the steam condenses under the waffle causing the crisp exterior to soften.)<br />
For an express breakfast it is hard to beat our Basic Waffle recipe prepared from a packaged<br />
mix. Try the European Home Style Waffle if you like the flavor of buttermilk. Whichever recipe<br />
8<br />
you choose, serve the waffles hot, spread with butter, maple syrup or your favorite jams, jellies<br />
or fruit. Chef’sChoice ® offers a Gourmet Waffle Mix formulated just for waffles, richly flavored<br />
and ready to use with addition of only water.<br />
SOME FAVORITE RECIPES<br />
Basic Wheat Flour Waffles<br />
A simple recipe that produces a light and crisp waffle.<br />
2 cups all-purpose flour<br />
3 tablespoons sugar<br />
1 tablespoon baking powder<br />
1 teaspoon salt<br />
2 eggs<br />
1 ⁄4 cup melted butter<br />
1 1 ⁄4 - 1 1 ⁄2 cups milk, as needed<br />
Makes 6 waffles<br />
1. Place the flour, sugar, baking powder and salt in a small bowl. Stir with a wire whisk to evenly<br />
distribute the ingredients. Add the melted butter, eggs and about 1 1 ⁄4 cups of milk. Blend with a<br />
wire whisk until smooth and free from lumps. Batter should be thick but still pour slowly from a<br />
ladle or measuring cup. Add more milk as needed to obtain a thick but pourable consistency. If<br />
the batter becomes too thin, stir in a teaspoon or two of additional flour.<br />
2. Preheat the WafflePro ® at:<br />
“Crisp Exterior/Moist Interior” @ Color Control 4 or “Uniform <strong>Texture</strong>” @ Color Control 3 1 ⁄2<br />
3. Pour a level 1 ⁄2 cup of batter onto preheated waffle grid. Close the lid, press it down lightly to level<br />
batter. Bake until the signals indicate waffle is done.<br />
4. Remove waffle and place on a wire rack for about 30 seconds, then serve immediately.<br />
Note: Waffles may be kept warm in a preheated 300°F oven for 5 to10 minutes but their consistency may change.<br />
Batter can be held overnight under refrigeration. If it thickens, add milk to restore to the desired consistency.<br />
9
Basic Waffles Using Packaged Mix *<br />
There are many commercial mixes available at your favorite grocer that are excellent and can save<br />
preparation time. The flavors will vary slightly. Use the recipe on the box or mix as follows:<br />
2 cups prepared pancake or waffle mix<br />
1 egg<br />
2 tablespoons vegetable oil<br />
2 tablespoons of sugar (adjust to your taste)<br />
1 teaspoon vanilla<br />
11 ⁄2 cups milk, as needed<br />
Makes 5-6 waffles<br />
1. Place the waffle mix, egg, vegetable oil, vanilla and sugar in a small bowl. Add about 1 cup of the<br />
milk. Blend with a wire whisk until smooth and free from lumps. Batter should be thick but still<br />
pour slowly from the measuring cup. If the batter seems too thick add as much of the additional<br />
milk as needed to obtain the right consistency. If it is too loose, stir in a teaspoon or two of pancake<br />
mix.<br />
2. Preheat the WafflePro ® at:<br />
“Crisp Exterior/Moist Interior” @ Color Control 4 or “Uniform <strong>Texture</strong>” @ Color Control 31 ⁄2<br />
3. Pour a level 1 ⁄2 of a cup waffle batter onto preheated waffle grid. Close the lid and bake until signal<br />
indicates waffle is done.*<br />
4. Remove waffle and place on a wire rack for about 30 seconds then serve immediately.<br />
*A wide variety of trademarked mixes are available including General Mills Bisquick ® , Pillsbury Hungry<br />
Jack ® and Quaker Oats Aunt Jemima ® . Chef’sChoice ® Gourmet Waffle Mix is ready to use and does not<br />
require additives other than water.<br />
Note: Waffles may be kept warm in a preheated 300° F oven for 5 to10 minutes but their consistency<br />
may change.<br />
This batter works equally well if made the night before, stored covered in the refrigerator. If it thickens,<br />
stir in additional milk to restore the desired consistency.<br />
Delicious Fruit Additions to the Basic Waffle Recipes<br />
Spicy Banana<br />
Fold in 1 ⁄2 cup of mashed ripe bananas and 1 teaspoon cinnamon.<br />
Country Apple<br />
Fold in 1 ⁄2 cup of finely chopped (peeled) apples and 1 ⁄4 to 1 ⁄2 cup of chopped pecans or walnuts.<br />
Blueberry<br />
Fold in 1 ⁄2 cup canned Maine (small) blueberries and a pinch of nutmeg. If unavailable, fresh or<br />
frozen blueberries are fine. We recommend small berries for best results.<br />
10<br />
European Home Style Waffles<br />
For those who like the tang of buttermilk, this recipe makes a light waffle with a delicate golden color.<br />
2 cups all purpose flour<br />
1 ⁄2 teaspoon baking soda<br />
1 1 ⁄2 teaspoons baking powder<br />
1 ⁄2 teaspoon salt<br />
2 tablespoons sugar<br />
1 ⁄2 cup buttermilk<br />
2 eggs, separated<br />
4 tablespoons butter, melted<br />
1 cup milk, more if needed<br />
Makes 5 waffles<br />
1. Stir together the flour, baking soda, baking powder, salt and sugar. Set aside.<br />
2. In a small bowl combine the egg yolks, buttermilk, milk and melted butter. Using a rubber spatula,<br />
gently fold the liquid into the dry ingredients.<br />
3. In a separate bowl beat the egg whites until they are foamy and hold soft peaks. Gently fold the<br />
egg whites into the batter.<br />
4. Preheat the WafflePro ® set at:<br />
“Crisp Exterior/Moist Interior” @ Color Control 4 to 4 1 ⁄2 or “Uniform <strong>Texture</strong>” @ Color Control 3 1 ⁄2<br />
5. Pour about a level 1 ⁄2 cup waffle batter onto preheated waffle grid. Close the lid and bake until<br />
signal indicates waffle is done.<br />
6. Remove waffle and place on a wire rack for about 30 seconds, then serve immediately.<br />
Note: Waffles may be kept warm in a preheated 300°F oven for 5 to 10 minutes, but their consistency may change.<br />
The Authentic Belgian Waffle Recipe<br />
This authentic recipe, preferred in Belgium and the Netherlands, is much richer and sweeter than the<br />
American recipes. Both children and adults love this Belgian treat. It is particularly good for dessert,<br />
at parties and for special occasions.<br />
8 oz. granulated sugar<br />
1 cup (8 oz.) melted butter<br />
4 eggs – separated<br />
11 ⁄2 cups self-rising flour<br />
Makes about 4 waffles in WafflePro ® 830B<br />
1. Place the granulated sugar in a medium size bowl. Mix in the melted butter. Mix in the 4 egg<br />
yolks. Add and then mix in thoroughly the self-rising flour.<br />
2. In a small bowl beat the 4 egg whites until stiff. Stir the egg whites into the mixture until all is<br />
fully blended. Add more flour as necessary to stiffen the batter. The batter should flow off a spoon<br />
but only slowly.<br />
3. Preheat the WafflePro ® 830B set on “Uniform <strong>Texture</strong>”, with the Color Control Dial set at 3.<br />
4. Pour or spoon onto the preheated griddle 1 ⁄2 to 5 ⁄8 cup of the batter. Close the lid and bake until the<br />
“Ready” light and beeper signals.<br />
Because this batter has so much butter, some batter could seep out of the front and sides of the waffle<br />
maker during the baking process. This is normal. The waffle will be soft and fragile (compared to<br />
American waffles) when “ready”, but it will stiffen quickly when removed from the griddle. Because<br />
it is very sweet and filling you will find that 4 waffles will satisfy a group of 6-8 people.<br />
11
Cornmeal Waffles<br />
The crunchy yet airy texture of this waffle is matched by it’s excellent taste.<br />
1 1 ⁄2 cups all purpose flour<br />
1 ⁄2 cup yellow cornmeal<br />
1 tablespoon baking powder<br />
2 tablespoons sugar<br />
1 teaspoon salt<br />
1 ⁄2 teaspoon baking soda<br />
2 eggs, lightly beaten<br />
5 tablespoons vegetable oil<br />
1 cup milk, depending on batter consistency<br />
Makes 4-5 waffles<br />
1. Combine all dry ingredients in a large bowl. Stir to blend well.<br />
2. Make a well in the center of the dry ingredients. Add the eggs and oil. Slowly pour in the milk,<br />
mixing constantly until a thick batter is obtained.<br />
3. Preheat the WafflePro ® at:<br />
“Crisp Exterior/Moist Interior” @ Color Control 4 1 ⁄2 or “Uniform <strong>Texture</strong>” @ Color Control 3 1 ⁄2<br />
4. Pour about a level 1 ⁄2 of a cup waffle batter onto preheated waffle grid. Close the lid and bake until<br />
signal indicates waffle is done.<br />
5. Remove waffle and place on a wire rack for about 30 seconds then serve immediately.<br />
Note: Waffles may be kept warm in a preheated 300°F oven for 5 to 10 minutes but their consistency<br />
may change.<br />
If you prefer more of a cornbread style waffle, substitute more cornmeal for some of the flour in the<br />
recipe. 1 ⁄2 cup of flour to 1 1 ⁄2 cups of cornmeal is ideal. Add more milk to make a thick batter and bake<br />
as directed.<br />
12<br />
TWO RECIPES FOR THE CHOCOLATE LOVER<br />
Chocolate Chip Waffles<br />
A light waffle full of chocolate surprises, this recipe is sure to become one of your family’s favorites.<br />
2 cups all purpose flour<br />
2 tablespoons sugar<br />
2 teaspoons baking powder<br />
1 ⁄2 teaspoon salt<br />
2 eggs, lightly beaten<br />
4 tablespoons vegetable oil<br />
1 ⁄2 cup small chocolate chips<br />
1 cup milk<br />
Makes about 4-5 waffles<br />
1. Combine all dry ingredients in a large bowl. Stir to blend well.<br />
2. Add the eggs and oil, then slowly pour in the milk while stirring constantly with a rubber spatula.<br />
Add just enough milk to make a batter that mounds slightly when poured. Stir in the chocolate<br />
chips and blend to distribute them evenly.<br />
3. Preheat the <strong>WafflePro®</strong> at:<br />
“Crisp Exterior/Moist Interior” @ Color Control 4 or “Uniform <strong>Texture</strong>” @ Color Control 3 1 ⁄2<br />
4. Spoon a level 1 ⁄2 cup waffle batter onto preheated waffle grid. Close the lid and bake until signal<br />
indicates waffle is done.<br />
5. Remove waffle and place on a wire rack to cool for about 30 seconds then serve immediately.<br />
6. This batter may leave some melted chocolate on the waffle grids. To clean, let the WafflePro ®<br />
cool and wipe off chocolate with a warm moist cloth.<br />
Note: Waffles may be kept in a preheated 300°F oven for 5 to 10 minutes but their consistency may change.<br />
For a lighter waffle, the eggs in this recipe can be separated and the yolks added to the batter along<br />
with the milk. The whites can be beaten stiff, then folded into the batter.<br />
13
Waffle Brownies<br />
The child in everyone will love this waffle as a tea-time snack or baked-to-order dessert. For a<br />
special treat, serve these with whipped cream, or in a Brownie Sundae with ice cream and hot fudge<br />
sauce. Superb!!<br />
3 oz. (3 squares) unsweetened chocolate melted<br />
1 ⁄2 cup (8 tablespoons) butter or shortening, melted<br />
3 eggs<br />
1 ⁄2 teaspoon salt<br />
2 ⁄3 cup sugar<br />
1 teaspoon vanilla<br />
1 1 ⁄2 cups all purpose flour<br />
1 ⁄2 - 3 ⁄4 cup chopped nuts, (walnuts or pecans)<br />
3 ⁄4 cup milk<br />
powdered sugar, optional<br />
Makes 4-5 waffles<br />
1. Preheat the WafflePro ® at:<br />
“Crisp Exterior/Moist Interior” @ Color Control 4 1 ⁄2 or “Uniform <strong>Texture</strong>” @ Color Control 3 1 ⁄4<br />
2. Place the chocolate and butter or shortening in a small saucepan. Melt over low heat. Set aside<br />
to cool.<br />
3. In a separate bowl, beat the eggs and salt until light in color. Add the sugar and vanilla. Beat by<br />
hand to combine, then fold in the cooled chocolate mixture.<br />
4. Stir in the flour and nuts. Slowly add just enough milk to make a thick batter spoonable into the<br />
waffle grid.<br />
5. Spoon a level 1 ⁄2 cup waffle batter onto preheated waffle grid. Close the lid and bake until signal<br />
indicates waffle is done.<br />
6. Remove waffle and serve immediately. Dust with powdered sugar if using.<br />
Note: Waffle brownies will store well for several days if wrapped in plastic.<br />
14<br />
CORD SAFETY<br />
A short power supply cord is provided with this appliance to reduce the risk of someone becoming<br />
entangled in or tripping over a longer cord and causing the WafflePro ® to overturn, spilling<br />
its hot contents. While EdgeCraft does not recommend it, extension cords are available and may<br />
be used if care is exercised in their use. If an extension cord is used, the marked electrical rating<br />
of the extension cord should be at least 10 amperes. The longer cord should be arranged<br />
so that it will not hang over the counter top or tabletop where it can be pulled on by children or<br />
pets or tripped over.<br />
CLEANING AND STORAGE<br />
Before cleaning the WafflePro ® , always unplug the power cord. Wait until the WafflePro ® cools<br />
to room temperature. Never clean the appliance under water. If you find it necessary to clean<br />
the baking surface, use a soft brush, a moist Q-tip or a flexible moist cloth. Never use sharp or<br />
pointed tools as they will damage the anti-stick surfaces. The exterior can be safely cleaned<br />
with a mild detergent on a damp soft cloth, a Q-tip, or small soft brush. Then use a dampened<br />
cloth followed by drying with a dry soft cloth.<br />
Store the power cord under the bottom as shown in Figure 3 and insert the end of the cord,<br />
(that is the strain relief adjacent to the power plug) into the plastic slot under the left side of the<br />
WafflePro ® . You will find it is easy to store vertically resting on the top hinged face as shown.<br />
Clip<br />
Clip<br />
Cord snaps<br />
into plastic<br />
retainer slot<br />
Figure 3. Cord clips under base. WafflePro ® stores upright as shown.<br />
15<br />
Clip<br />
Loop cord here<br />
Loop cord here
Limited Warranty: Used with normal care, this EdgeCraft product is guaranteed against<br />
defective material and workmanship for a period of one (1) year from the date of<br />
original purchase (“Warranty Period”). We will repair or replace, at our option, any<br />
product or part that is defective in material or workmanship without charge if the product<br />
is returned to us postage prepaid with dated proof of purchase within the Warranty<br />
Period. This warranty does not apply to commercial use or any product abuse. ALL<br />
IMPLIED WARRANTIES, INCLUDING IMPLIED WARRANTIES OF MERCHANTABILITY AND<br />
FITNESS FOR A PARTICULAR PURPOSE, ARE LIMITED TO THE WARRANTY PERIOD.<br />
EDGECRAFT CORPORATION SHALL NOT BE LIABLE FOR ANY INCIDENTAL OR<br />
CONSEQUENTIAL DAMAGES. Some states do not allow limitations on how long an<br />
implied warranty lasts and some states do not allow exclusions or limitation of<br />
incidental or consequential damages, so the above limitations or exclusions may not<br />
apply to you. This Limited Warranty gives you specific legal rights, and you may also<br />
have other rights which vary from state to state.<br />
SERVICE<br />
This appliance is for household use only. No user-serviceable parts are inside. Refer servicing<br />
to qualified personnel.<br />
In the event service is needed, return your WafflePro ® to EdgeCraft Corporation, where the<br />
cost of repair or electrical or mechanical adjustment can be estimated before the repair is<br />
undertaken. If failure occurs within the warranty period there may be no charge.<br />
Please include your return address and a brief description of the problem or damage to the<br />
waffle maker on a separate sheet inside the box.<br />
Send your unit (postage prepaid) to:<br />
EdgeCraft Corporation<br />
825 Southwood Road, Avondale, PA 19311<br />
Customer Service 1-800-342-3255 or 610-268-0500<br />
www.edgecraft.com<br />
© EdgeCraft Corporation 2006<br />
REVISED 04/06 Part No. W831641<br />
16<br />
®


