CD40022 Dispenser - Technical Manual - Ice-O-Matic
CD40022 Dispenser - Technical Manual - Ice-O-Matic
CD40022 Dispenser - Technical Manual - Ice-O-Matic

You also want an ePaper? Increase the reach of your titles
YUMPU automatically turns print PDFs into web optimized ePapers that Google loves.
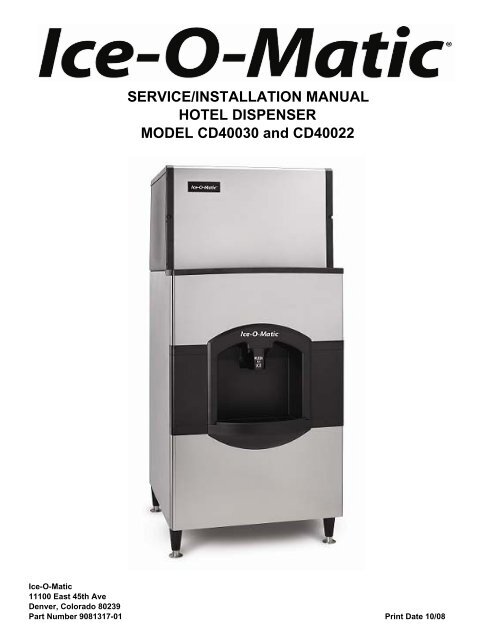
SERVICE/INSTALLATION MANUAL<br />
HOTEL DISPENSER<br />
MODEL CD40030 and <strong>CD40022</strong><br />
<strong>Ice</strong>-O-<strong>Matic</strong><br />
11100 East 45th Ave<br />
Denver, Colorado 80239<br />
Part Number 9081317-01 Print Date 10/08
ICE-O-<strong>Matic</strong><br />
11100 East 45th Ave<br />
Denver, Colorado 80239<br />
SERVICE PARTS MANUAL<br />
22 INCH WIDE ICE SERIES CUBERS<br />
MODEL-ICE0320, ICE0520<br />
Includes 50Hz. Units<br />
Part Number 9081297-01 PD04/02 Rev1/05
Introduction CD40030/<strong>CD40022</strong><br />
To the owner or user: This product manual is a source of information about the installation,<br />
start up, cleaning, maintenance and repair of the product.<br />
Table of Contents<br />
Introduction Page 1<br />
General Description and Warranty Information Page 2<br />
Specification/Limitations Page 5<br />
Product Description Page 6<br />
Unpacking Page 7<br />
Installation-Plumbing Page 8<br />
Installation-Electrical and <strong>Ice</strong> Machine Assembly Page 9<br />
Final Check List/Initial Start Up Page 10<br />
<strong>Dispenser</strong> Use Page 11<br />
General Care and Cleaning Page 12<br />
Maintenance Page 14<br />
Adjustments Page 15<br />
Service Diagnosis Page 16<br />
Wiring Diagram-115 volt 60Hz. Basic and Water Station Page 17<br />
Wiring Diagram-Coin Mechanism Page 18<br />
Wiring Diagram-230 volt, 50HZ basic Page 19<br />
<strong>Ice</strong>-O-<strong>Matic</strong><br />
11100 E. 45 th Ave.<br />
Denver, Co. 80239<br />
800-423-3367<br />
The CD400 Service Parts <strong>Manual</strong> is available separately, Part Number 9081317-02<br />
Page 1
General Description CD40030/<strong>CD40022</strong><br />
The <strong>CD40022</strong> is a 22 inch wide hotel/motel cubed ice dispenser. It is designed to use an<br />
<strong>Ice</strong>-O-<strong>Matic</strong> ICE0320 or ICE0520 cube ice machine as the source for ice.<br />
The CD40030* is a 30 inch wide version of the <strong>CD40022</strong> and is designed to use <strong>Ice</strong>-O-<strong>Matic</strong><br />
ICE0250 through ICE0500 cubers as its source of ice. Note: 22 inch wide ice machines<br />
are not for use on the 30 inch wide dispensers.<br />
*Higher capacity cubers, ICE0606, ICE0806 and ICE1006 may also be used, but they require<br />
230-volt power.<br />
<strong>Ice</strong> from the cuber falls into the insulated hopper, where it is stored until needed. When a<br />
user pushes the dispense chute a rotating wheel scoops the ice up to the top front of the<br />
hopper where there is an outlet to the ice chute. <strong>Ice</strong> is directed into the users container.<br />
Flaked or nugget ice should not be used in these dispensers.<br />
Do not double stack cubers on these dispensers.<br />
Condensate drain pumps are not recommended for drainage.<br />
This is not a waterglass style dispenser.<br />
Basic Specifications<br />
Model Dimensions Electrical Model Description Bin Storage<br />
W x H x D Capacity ARI<br />
With 6” Legs<br />
<strong>CD40022</strong> 22 x 53 x 33½ 115/60/1 Basic 22” Model 60 Hz. 120 Lbs.<br />
CD40522 22 x 53 x 33½ 230/50/1 Basic 22” Model 50 Hz. 120 Lbs.<br />
Note: The factory installed Water <strong>Dispenser</strong> and Coin /Token features are not available on the<br />
22-inch wide Basic Push Button dispenser and are not available as a field installed kits.<br />
CD40030 30 x 53 x33½ 115/60/1 Basic 30” Model 60 Hz 180 Lbs.<br />
CD40130 30 x 53 x33½ 115/60/1 Basic 30” / Water Filler 180 Lbs.<br />
CD40230 30 x 53 x33½ 115/60/1 Coin/Token 180 Lbs.<br />
CD40530 30 x 53 x33½ 230/50/1 Basic 30” Model 50 Hz. 180 Lbs.<br />
Note: The factory installed Water <strong>Dispenser</strong> is only available on the 30-inch wide Basic Push<br />
Button dispenser and is not available as a field installed kit. The Coin/Token model is not<br />
available with a Water Filler and is not available as a field installed Water Filler Kit.<br />
Basic models dispense ice when their chute is pushed and will continue to dispense ice until<br />
the chute is released or the bin is emptied. Coin/Token models require a coin or token first.<br />
Tokens are available from <strong>Ice</strong>-O-<strong>Matic</strong>, the part number for 500 tokens is TKNS. Water<br />
<strong>Dispenser</strong> models are basic models with a factory installed separate water dispenser.<br />
Bin Thermostats<br />
Bin Thermostats are not required in ICE series cubers on CD400 Series <strong>Dispenser</strong>s.<br />
Warranty<br />
The CD40030 and <strong>CD40022</strong> have a 3 year parts and labor warranty from date of install.<br />
Page 2
650.6<br />
25 5/8"<br />
General Description CD40030/<strong>CD40022</strong><br />
Dimensions<br />
<strong>CD40022</strong><br />
850.1<br />
33 1/2"<br />
RIGHT SIDE<br />
558.8<br />
22"<br />
FRONT<br />
Page 3<br />
152.4<br />
6"<br />
1351.3<br />
53 1/4"<br />
ICE FILL STATION<br />
8 3/4 [221.5] HIEGHT<br />
13 1/2 [342.9] WIDTH<br />
8 1/2 [215.9] DEPTH
650.5<br />
25 5/8"<br />
General Description CD40030/<strong>CD40022</strong><br />
Dimensions<br />
CD40030<br />
254.8<br />
10"<br />
WATER VALVE HEIGHT<br />
(WATER FILLER ONLY - Optional)<br />
849.4<br />
33 1/2"<br />
609.6<br />
24"<br />
RIGHT SIDE<br />
762.4<br />
30"<br />
FRONT<br />
179.1<br />
7"<br />
Page 4<br />
152.4<br />
6"<br />
Machine Support<br />
1351.3<br />
53 1/4"<br />
451.1<br />
17 3/4"<br />
Screwed to Back Panel<br />
189.4<br />
7 1/2"<br />
3/4 FPT<br />
DRAIN<br />
BACK<br />
ICE FILL STATION<br />
8 3/4 [221.5] HIEGHT<br />
13 1/2 [342.9] WIDTH<br />
8 1/2 [215.9] DEPTH<br />
189.7<br />
7 1/2"<br />
(2) 5/16-18 UNC<br />
ICE HEAD MOUNTING<br />
24.1<br />
1"<br />
POWER<br />
CORD<br />
WATER INLET<br />
3/8 FLARE<br />
(WATER FILLER ONLY)<br />
444.4<br />
17 1/2"
Specification & Limitations CD40030/<strong>CD40022</strong><br />
This dispenser is designed to be installed and operated indoors, in a controlled<br />
environment. It’s minimum and maximum operating temperature limits are the same as<br />
those for the ice machine.<br />
Minimum Maximum<br />
Air Temp 50 o F 100 o F<br />
Water Pressure* 20 psi 60 psi * for water dispenser model<br />
Check the dispenser nameplate, located on the back of the cabinet for specific information.<br />
<strong>Ice</strong>-O-<strong>Matic</strong> reserves the right to make design changes and/or improvements at any time.<br />
Specifications and designs are subject to change without notice.<br />
<strong>Ice</strong>-O-<strong>Matic</strong> assumes no liability or responsibility of any kind for products manufactured by<br />
<strong>Ice</strong>-O-<strong>Matic</strong> that have been altered in any way, including the use of any parts and/or other<br />
components not specifically approved by <strong>Ice</strong>-O-<strong>Matic</strong>.<br />
Models<br />
There are three versions of the CD40030 dispensers: Basic, Coin/token and Water<br />
<strong>Dispenser</strong>. The Basic version is constructed to deliver ice when the ice chute is pushed in,<br />
and it continues to vend ice as long as the ice chute is held in or until the bin is empty.<br />
The Coin/token version is designed to deliver ice after a coin or token is inserted into the coin<br />
slot and then the ice chute is pushed in. <strong>Ice</strong> vending is limited to a preset time per coin or<br />
token use. Coins or tokens are collected in a coin box at the bottom of the dispenser. A keyed<br />
door allows access to the coin box without removing the front panel.<br />
The Water <strong>Dispenser</strong> version is a Basic version with a mechanical water faucet added to the<br />
left of the ice chute. Water is dispensed whenever the faucet lever is pushed back. The<br />
CD40030 is available in all versions; the <strong>CD40022</strong> is only available as a Basic model.<br />
The Basic models of the <strong>CD40022</strong> and CD40030 are available in 230 volt 50 Hz electrical for<br />
those countries with that type of electrical service.<br />
Kits: Bin tops and bin thermostats are not required. No other kits are available.<br />
Warranty If, during the warranty period, customer uses a part for this <strong>Ice</strong>-O-<strong>Matic</strong> equipment<br />
other than that an unmodified new part purchased directly from <strong>Ice</strong>-O-<strong>Matic</strong>, <strong>Ice</strong>-O-<strong>Matic</strong><br />
Distributors, or any of its authorized service agents and/or the part being used is modified<br />
from its original configuration, this warranty will be void. Further, <strong>Ice</strong>-O-<strong>Matic</strong> and its affiliates<br />
will not be liable for any claims, damages or expenses incurred by customer which arises<br />
directly or indirectly, in whole or in part, due to the installation of any modified part and/or part<br />
received from an unauthorized service center. Adjustments are not covered under warranty.<br />
Warranty Procedure If the customer is using a part that results in a voided warranty and an<br />
<strong>Ice</strong>-O-<strong>Matic</strong> authorized representative travels to the installation address to perform warranty<br />
service, the service representative will advise customer the warranty is void. Such service<br />
call will be billed to the customer at the authorized service center’s then-applicable time and<br />
material rates.<br />
Page 5
Product Description CD40030/<strong>CD40022</strong><br />
All models consist of a plastic lined, insulated hopper mounted to a metal base. The hopper<br />
contains a 15 blade plastic dispense wheel and a stainless steel sweep arm. The top front of<br />
the hopper has a removable door to facilitate maintenance and cleaning of the hopper without<br />
removal of the ice machine.<br />
The dispense wheel and sweep arm rotate when the ¼ HP dispense drive motor is actuated.<br />
The drive motor’s actuation is controlled by the agitation timer or the vend switch. When the<br />
ice dispense chute is pushed back it moves the actuation lever up. The actuation lever<br />
releases the chute door and pushes the vend switch arm up. When the vend switch arm has<br />
moved a preset distance the vend switch contacts close, providing power to the dispense<br />
drive motor. <strong>Ice</strong> is delivered to the top end of the ice chute by the dispense wheel and it<br />
slides down the chute to the container below. The container rests on a grill, the grill’s<br />
openings are over the ice catch pan, and any spilled ice goes there. The grill has a flange at<br />
the front to help contain the ice if it spills during vending.<br />
After the ice dispense chute is released, the ice chute door closes to stop ice flow. <strong>Ice</strong> in the<br />
chute will eventually melt. Melted ice water is routed to the drain through a hose<br />
attached to the bottom of the chute. Spilled ice is contained in an<br />
insulated ice catch pan. Melted ice water from the ice catch pan is<br />
Bin<br />
routed to the drain. User debris is kept away from the drain in the<br />
catch pan by a slotted shield.<br />
The side and front exterior panels are stainless steel.<br />
The vending area and top panel are made of<br />
plastic.<br />
Coin / Token Model<br />
The coin op model’s operation is identical to the<br />
basic operation described above with the exception<br />
that no power is provided to the vend switch until the<br />
coin mechanism has activated the vend timer. The<br />
vend timer then allows the vend switch to be<br />
activated for a set time, during that time the user<br />
must dispense the ice. A green “ready” light over<br />
the vending area will glow when the vend timer is<br />
armed and ready for dispensing.<br />
Chute<br />
Drive motor<br />
Catch Pan<br />
Dispense Wheel<br />
Page 6
Unpacking CD40030/<strong>CD40022</strong><br />
After removing the carton, check for the loose-shipped parts packed in the storage bin. The<br />
parts will include a carton with four legs. Remove the leg carton and any other loose-shipped<br />
items.<br />
To remove the skid, place part of the carton behind the unit and tip the unit on its back.<br />
Remove the bolts holding the skid to the base of the CD dispenser and separate the skid<br />
from the unit.<br />
Install the legs into the base of the unit, using the holes where the skid bolts were. Turn the<br />
leg leveler part of the legs in all the way, adjust them later after the unit is in its final installed<br />
position.<br />
Move the dispenser to an upright position and set it in the location where it will be installed.<br />
Note where the drain lines and electrical connections will be made.<br />
Front Panel Removal<br />
The front panel rests on the base and is located with pins that stick up from the base. It is<br />
retained to the side panels by strikes and latches. The top panel keeps the front panel from<br />
moving forward.<br />
To remove:<br />
1. Disconnect electrical power.<br />
2. Remove the two screws holding the<br />
top panel to the dispenser. Lift the top<br />
panel up and off the dispenser.<br />
3. Pull the top edge of the front panel<br />
forward until the two snaps disengage.<br />
•If the unit is a coin op model, reach<br />
behind the front panel and<br />
disconnect the coin mechanism<br />
harness from the front panel.<br />
•If the unit is a water dispenser<br />
model, reach behind the front panel<br />
and shut off the water supply valve<br />
to the water faucet. Then disconnect<br />
the water line from the shut off valve.<br />
4. Lift the front panel up and off the<br />
base.<br />
Page 7
Installation - Plumbing CD40030/<strong>CD40022</strong><br />
Drain:<br />
All models of the dispenser have a 3/4" FPT drain fitting at the bottom of the back panel.<br />
Connect 3/4" rigid tubing to this connection, a vent is recommended for most installations.<br />
Route the drain tubing to the building drain.<br />
Note: Drain fitting material is plastic. If using copper, sweat the copper tube to copper<br />
fitting together before installing on the dispenser.<br />
Note: Keep PVC solvent away from all plastic parts of the dispenser.<br />
Follow all applicable plumbing codes.<br />
Because the drain tubing will be very cold, insulation is recommenced for the tubing.<br />
Water:<br />
CD40030 water dispenser models must be connected to a source of potable water.<br />
Flush the water supply line before connecting it to the dispenser.<br />
Follow All Local, State and National Codes<br />
Caution: Do not use a<br />
condensate pump in place of<br />
a floor drain.<br />
Page 8
Installation – Continued CD40030/<strong>CD40022</strong><br />
The dispenser is supplied with a power cord. Do not use with an extension cord. The unit<br />
must be plugged into a properly grounded outlet.<br />
The dispenser must be installed so that it is a separate piece of equipment from the ice<br />
machine. The drains and electrical supply must be separate.<br />
Follow All Local, State and National Codes<br />
<strong>Ice</strong> Machine<br />
All models: Place the dispenser in the location where it will be<br />
used. Level the top edge of the dispenser front to back and left to<br />
right.<br />
Sanitize the dispenser bin with a locally approved sanitizer.<br />
See page 12.<br />
Place the ice machine on the dispenser and secure it to the<br />
dispenser with the hardware and bracket from the dispenser.<br />
Install it according to the instructions in the manual included with<br />
the ice machine.<br />
Caution: Do not use<br />
a condensate pump<br />
in place of a floor<br />
drain.<br />
Route drains separately to a floor drain. Rear View of Typical Installation<br />
Page 9
Final Check List CD40030/<strong>CD40022</strong><br />
1. Check that electrical power has been supplied.<br />
2. Check that a drain, separate from the ice<br />
machine, insulated and made of rigid tubing,<br />
has been connected to the dispenser.<br />
3. Check that the ice machine has been properly<br />
installed per the ice machines installation<br />
directions. This includes the machine support<br />
included with the dispenser.<br />
4. Check that the ice machine/dispenser<br />
assembly is level front to back and left to right.<br />
5. Check that the coin box access key, if used, is<br />
available.<br />
To Start:<br />
1. Connect electrical power. The dispensing<br />
system will cycle on for a few seconds.<br />
2. Go thru ice machine start up procedures.<br />
Let the ice machine make two harvests.<br />
3. Push the ice chute in.<br />
4. Dispense wheel turns.<br />
5. <strong>Ice</strong> will be dispensed from ice chute.<br />
6. Fill out the warranty registration form and place<br />
it in the mail.<br />
7. Give the operator any keys and the instructions<br />
on the operation and maintenance of the<br />
product.<br />
Check that the operator knows who to call for<br />
service, and has the product/service manuals for the<br />
machines.<br />
Electrical Sequence<br />
Pushing the ice chute closes a contact to the<br />
gear motor.<br />
The gearmotor will have power and the dispenser will<br />
continue to operate as long as the ice chute is pushed<br />
in. This model also has an agitation cycle of 3<br />
seconds every 6 hours. Since the ice chute is not<br />
pushed in during agitation no ice is dispensed.<br />
Page 10
<strong>Dispenser</strong> Use CD40030/<strong>CD40022</strong><br />
Basic Model<br />
After the ice machine has operated for a few hours, the CD dispenser can be used. Pushing<br />
the ice chute back will activate the dispense mechanism and ice will drop out of the chute into<br />
the user’s container.<br />
Coin/Token Model Operation<br />
Without activation the dispenser<br />
will not dispense ice when the ice<br />
chute is depressed.<br />
To activate the dispense system,<br />
the user must insert a quarter or a<br />
token in the coin mechanism. If the<br />
quarter or token is accepted, the<br />
Ready Light above the ice chute<br />
glows green, indicating that ice can<br />
now be dispensed. The dispense<br />
system will allow ice vending for a<br />
pre-set time. Once activated,<br />
pushing the chute in (like the basic<br />
model) causes the ice to vend. At<br />
the end of the pre-set time vending<br />
stops.<br />
Free Vend: There is a free vend<br />
switch inside the unit, switch it to<br />
ON to bypass the coin mechanism<br />
and vend ice anytime the chute is<br />
pushed back.<br />
When switched to Free Vend the<br />
Ready light will be ON.<br />
When switching from Free Vend to<br />
Coin / Token operation the Ready<br />
light will be ON for a few seconds.<br />
Water <strong>Dispenser</strong> Model<br />
In addition to dispensing ice like<br />
the Basic model, the water<br />
dispenser model has a water faucet<br />
located to the left of the ice chute.<br />
The water’s temperature is not<br />
affected by the dispenser. Pushing<br />
in on the faucet lever opens the valve<br />
and water flows out into the users container.<br />
Page 11
General Care and Cleaning CD40030/<strong>CD40022</strong><br />
Periodically inspect and clean the ice dispenser to keep it operating at peak performance.<br />
Wash the outside of the dispenser with warm water and soap. Rinse off and wipe dry.<br />
Cleaning and Sanitizing of the <strong>Ice</strong> Storage Bin:<br />
The minerals, chlorine and other impurities in the water are rejected from the water during the<br />
freeze cycle of the ice machine. These minerals will collect in the storage bin. The ice storage<br />
bin should be cleaned and sanitized every 90 days.<br />
1. Remove all of the ice stored inside the dispenser bin and shut off the ice maker.<br />
2. Disconnect electrical power to the dispenser.<br />
3. Remove top front panel (in front of ice machine).<br />
4. Remove the front panel.<br />
5. Remove the deflector (30 inch wide<br />
only).<br />
6. Lift up and remove the access door at<br />
the front of the bin<br />
7. Reach into the opening, locate the hair<br />
pin and pull it out of the drive shaft.<br />
(Ref. Page 13)<br />
8. Pull the sweep arm off the drive shaft<br />
and remove it from the dispenser.<br />
9. Pull the dispense wheel off the drive<br />
shaft and remove it from the dispenser.<br />
10. Mix a solution of 5 ounces of ice<br />
machine cleaner to 1 gallon of warm<br />
(95 o F-115 o F) water. Wash the entire bin<br />
area and the delivery area. Use a clean<br />
brush or cloth.<br />
Page 12<br />
Access Door
General Care and Cleaning CD40030/<strong>CD40022</strong><br />
10. Rinse all areas washed with clean, fresh water<br />
11. Using the ice machine cleaning solution, clean the ice grill, sink, sweep arm and dispense<br />
wheel. Rinse these parts with clean fresh water.<br />
12. To sanitize: Use a locally approved sanitizer per label instruction. Wash all interior<br />
surfaces, the sweep arm and dispense wheel with the sanitizer solution. Use a clean<br />
cloth.<br />
13. Allow the parts to air dry.<br />
14. Reassemble wheel and sweep arm onto<br />
drive shaft. Be sure to reinsert hairpin.<br />
15. Replace all panels.<br />
16. Reconnect power, be sure ice machine is<br />
switched back on.<br />
Dispense Wheel<br />
Page 13<br />
Hair Pin
Maintenance CD40030/<strong>CD40022</strong><br />
Spilled ice and user debris will collect in the ice catch pan, located just below the sink grill.<br />
Occasionally the debris will need to be removed and the drain flushed out to prevent water<br />
back ups.<br />
Note: Failure to clean out the ice catch pan will likely result in a water leak, one that is NOT<br />
covered by warranty.<br />
To clean out the ice catch pan:<br />
1. Disconnect electrical power.<br />
2. Remove the two screws holding the top panel to the<br />
dispenser. Lift the top panel up and off the dispenser.<br />
3. Pull the top edge of the front panel forward until<br />
the two snaps disengage.<br />
If the unit is a coin op model, reach<br />
behind the front panel and disconnect the<br />
coin mechanism harness from the front<br />
panel.<br />
If the unit is a water dispenser model,<br />
reach behind the front panel and shut off<br />
the water supply valve to the water faucet.<br />
Then disconnect the water line from the<br />
shut off valve.<br />
4. Remove the front panel.<br />
5. Pull the ice catch pan forward a few<br />
inches until the drain hose can be<br />
reached.<br />
6. Pull the drain hose from the ice catch pan.<br />
7. Slide the ice catch pan out of the ice<br />
dispenser and clear it of any debris. Wash<br />
out the drain.<br />
8. Return the ice catch pan to its normal<br />
position.<br />
9. Re-attach the drain hose.<br />
10. Reassemble and connect<br />
power.<br />
Page 14
Adjustments CD40030/<strong>CD40022</strong><br />
The dispenser is preset at the factory. Adjustments are rarely needed.<br />
Agitation Time Recommandations:<br />
The standard time is 3 seconds on every<br />
6 hours. Adjust to agitate more frequently<br />
if the unit is installed in a low<br />
temperature environment. However, if<br />
the ice being dispensed is in small<br />
crushed pieces, adjust to agitate less<br />
frequently.<br />
Coin or Token Operation<br />
The standard time for vending is pre set at<br />
20 seconds on the Vend Ready Timer.<br />
This includes time allowed for vending and<br />
customer activation. If necessary, adjust<br />
this timer to a higher number to deliver<br />
more ice, or a smaller number for less ice.<br />
Water Filler<br />
The water faucet can be adjusted for<br />
flow. There is a screw adjustment in the<br />
top of the valve body. Loosen the<br />
locknut and rotate the screw CW for less<br />
water flow. Be sure to re-tighten the<br />
lock-nut or a water leak may develop.<br />
Page 15
Service Diagnosis CD40030/<strong>CD40022</strong><br />
Symptom Probable Cause Possible Fix<br />
No ice is dispensed No power to dispenser. Check for proper power.<br />
Basic Model Is dispenser plugged in?<br />
No ice. Check ice machine.<br />
Vend switch does not close. Check vend switch.<br />
Check chute for proper motion.<br />
Interlock switch open. Check interlock switch, be sure<br />
top panel is in place.<br />
Drive motor windings open. Check drive motor.<br />
Drive gears failed. Check gear reducer.<br />
No ice is dispensed Same as above plus coin Check coin switch.<br />
Coin Op Model switch does not close<br />
Vend timer does not work. Connect power to post 6 of<br />
coin mech timer, timer should<br />
activate, ready light should be<br />
ON and pushing the chute<br />
should start the gear motor,<br />
If not replace the vend timer.<br />
Only dispenser small Sweep arm damaged. Check/replace sweep arm.<br />
amounts of ice.<br />
No water dispensed, Water shut off. Check water supply to unit,<br />
Water <strong>Dispenser</strong> model check shutoff valve inside<br />
cabinet.<br />
Water leak Drain is plugged Check drain for restriction<br />
<strong>Ice</strong> catch pan has overfilled Remove excess ice.<br />
<strong>Ice</strong> catch pan screened plugged Clean screen<br />
Seal between ice machine Remove ice machine and<br />
And dispenser leaking replace gasket tape.<br />
Water drip from spout Some dripping is normal, Check spout drain for<br />
but if severe: restriction.<br />
Page 16
Wiring Diagram CD40030/<strong>CD40022</strong><br />
Wiring Diagram, 115 volt, 60Hz. Basic and Water Station<br />
17-2956-01<br />
INLET<br />
POWER<br />
CORD<br />
ALL CONTROLS SHOWN IN<br />
NORMAL ICE DISPENSING MODE<br />
W<br />
BK<br />
OFF CYCLE<br />
AGITATION<br />
TIMER<br />
EARTH<br />
GROUND<br />
3 2 1<br />
6 HOURS OFF<br />
3 SEC. ON<br />
ADJUSTABLE<br />
USE COPPER CONDUCTORS ONLY<br />
BK<br />
W<br />
Page 17<br />
DISPENSING<br />
SWITCH<br />
BU<br />
COM NO<br />
RUN<br />
CAP<br />
R<br />
BU<br />
6<br />
W<br />
BN<br />
BK<br />
5<br />
GEAR<br />
MOTOR<br />
W<br />
BN<br />
4<br />
R<br />
3<br />
W<br />
2<br />
O<br />
O<br />
1<br />
INTERLOCK<br />
SWITCH
Wiring Diagram CD40030/<strong>CD40022</strong><br />
Wiring Diagram for Coin Mechanism Model<br />
INLET<br />
POWER<br />
CORD<br />
17-2967-01<br />
W<br />
BK<br />
W/BU<br />
BK<br />
EARTH<br />
GROUND<br />
3<br />
1<br />
2<br />
ADJ. COIN<br />
MECHANISM<br />
TIMER<br />
1<br />
OFF CYCLE AGITATION<br />
TIMER: 3 SEC. ON<br />
6 HRS. OFF (ADJ.)<br />
6<br />
2 3<br />
R/W<br />
FREE VEND<br />
SWITCH<br />
W/BU<br />
USE COPPER CONDUCTORS ONLY<br />
R/W<br />
Y<br />
Page 18<br />
O<br />
(2) 15K OHM<br />
2 WATT<br />
RESISTOR<br />
COIN MECH.<br />
INDICATOR<br />
LIGHT<br />
BK/W<br />
BK<br />
W<br />
DISPENSING<br />
SWITCH<br />
BU<br />
COM<br />
NO<br />
COIN MECH.<br />
SWITCH<br />
R<br />
BK<br />
BU<br />
6<br />
W<br />
GEAR<br />
MOTOR<br />
BN<br />
5 4 3 2 1<br />
W<br />
INTERLOCK<br />
SWITCH<br />
ALL CONTROLS SHOWN IN<br />
NORMAL ICE DISPENSING MODE<br />
R<br />
W<br />
BN<br />
O<br />
O<br />
RUN<br />
CAP
Wiring Diagram CD40030/<strong>CD40022</strong><br />
17-2987-01<br />
Wiring Diagram 230 volt, 50 Hz. Basic<br />
INLET<br />
POWER<br />
CORD<br />
ALL CONTROLS SHOWN IN<br />
NORMAL ICE DISPENSING MODE<br />
BU<br />
BN<br />
OFF CYCLE<br />
AGITATION<br />
TIMER<br />
EARTH<br />
GROUND<br />
3<br />
6 HOURS OFF<br />
3 SEC. ON<br />
ADJUSTABLE<br />
USE COPPER CONDUCTORS ONLY<br />
2<br />
1<br />
BK<br />
DISPENSING<br />
SWITCH<br />
BK/W<br />
BU<br />
COM<br />
RUN<br />
CAP<br />
Page 19<br />
NO<br />
BK<br />
BU<br />
BN<br />
BK<br />
GEAR<br />
MOTOR<br />
BN<br />
R<br />
R<br />
W<br />
O<br />
O<br />
INTERLOCK<br />
SWITCH