CD40022 Dispenser - Technical Manual - Ice-O-Matic
CD40022 Dispenser - Technical Manual - Ice-O-Matic
CD40022 Dispenser - Technical Manual - Ice-O-Matic

You also want an ePaper? Increase the reach of your titles
YUMPU automatically turns print PDFs into web optimized ePapers that Google loves.
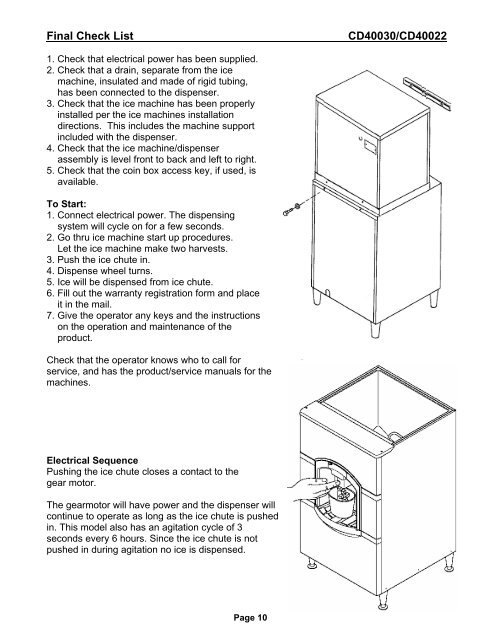
Final Check List CD40030/<strong>CD40022</strong><br />
1. Check that electrical power has been supplied.<br />
2. Check that a drain, separate from the ice<br />
machine, insulated and made of rigid tubing,<br />
has been connected to the dispenser.<br />
3. Check that the ice machine has been properly<br />
installed per the ice machines installation<br />
directions. This includes the machine support<br />
included with the dispenser.<br />
4. Check that the ice machine/dispenser<br />
assembly is level front to back and left to right.<br />
5. Check that the coin box access key, if used, is<br />
available.<br />
To Start:<br />
1. Connect electrical power. The dispensing<br />
system will cycle on for a few seconds.<br />
2. Go thru ice machine start up procedures.<br />
Let the ice machine make two harvests.<br />
3. Push the ice chute in.<br />
4. Dispense wheel turns.<br />
5. <strong>Ice</strong> will be dispensed from ice chute.<br />
6. Fill out the warranty registration form and place<br />
it in the mail.<br />
7. Give the operator any keys and the instructions<br />
on the operation and maintenance of the<br />
product.<br />
Check that the operator knows who to call for<br />
service, and has the product/service manuals for the<br />
machines.<br />
Electrical Sequence<br />
Pushing the ice chute closes a contact to the<br />
gear motor.<br />
The gearmotor will have power and the dispenser will<br />
continue to operate as long as the ice chute is pushed<br />
in. This model also has an agitation cycle of 3<br />
seconds every 6 hours. Since the ice chute is not<br />
pushed in during agitation no ice is dispensed.<br />
Page 10