6. Sending email communications
6. Sending email communications
6. Sending email communications

Create successful ePaper yourself
Turn your PDF publications into a flip-book with our unique Google optimized e-Paper software.
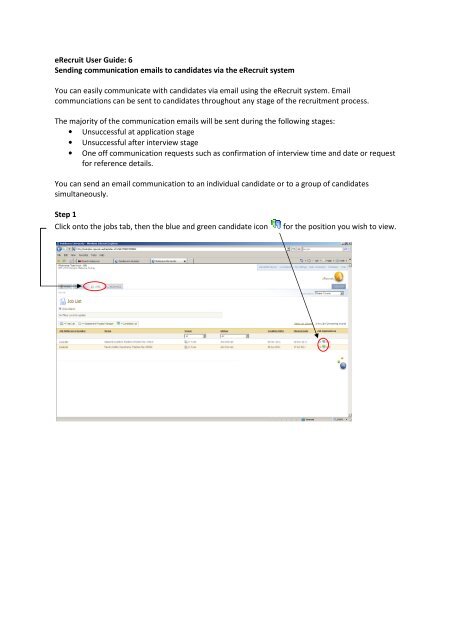
eRecruit User Guide: 6<br />
<strong>Sending</strong> communication <strong>email</strong>s to candidates via the eRecruit system<br />
You can easily communicate with candidates via <strong>email</strong> using the eRecruit system. Email<br />
communciations can be sent to candidates throughout any stage of the recruitment process.<br />
The majority of the communication <strong>email</strong>s will be sent during the following stages:<br />
• Unsuccessful at application stage<br />
• Unsuccessful after interview stage<br />
• One off communication requests such as confirmation of interview time and date or request<br />
for reference details.<br />
You can send an <strong>email</strong> communication to an individual candidate or to a group of candidates<br />
simultaneously.<br />
Step 1<br />
Click onto the jobs tab, then the blue and green candidate icon for the position you wish to view.
Step 2<br />
Select the applicant(s) you wish to <strong>email</strong> by using the tick boxes.<br />
Or select multiple groups by ticking ‘Select all on page’ or ‘Select all in list’ boxes.<br />
Once the applicants have been selected, choose ‘New Email’ from the Actions drop down list and<br />
click on the ‘Go’ button.
Step 4<br />
You can now choose to use an <strong>email</strong> template or to create an <strong>email</strong> yourself. To create your own<br />
<strong>email</strong>, fill in the <strong>email</strong> subject and <strong>email</strong> body text box.<br />
To use an <strong>email</strong> template, click the ‘Get Email Template’ button.<br />
Step 5<br />
Select the <strong>email</strong> template you would like to use from the drop down menu.
The <strong>email</strong> will appear with merge fields in the content section. Click the ‘Use Template’ button to<br />
continue.<br />
Note: Items appearing in brackets [ ] such as First Name, Job Title will be populated automatically.<br />
Step 6<br />
You can now edit the <strong>email</strong> before you send the final version to the candidates. Once you have made<br />
any edits, click on the ‘Preview’ button.
Step 7<br />
If you are satisfied with the final <strong>email</strong>, click the ‘Send’ button and your <strong>email</strong> will be sent to all the<br />
selected candidates.