PX 738 - Zibro
PX 738 - Zibro
PX 738 - Zibro

Create successful ePaper yourself
Turn your PDF publications into a flip-book with our unique Google optimized e-Paper software.
2<br />
6<br />
5<br />
3<br />
4<br />
><br />
1<br />
:<br />
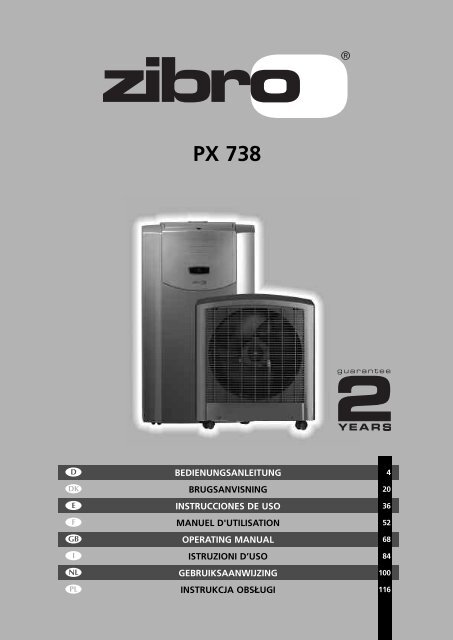
<strong>PX</strong> <strong>738</strong><br />
BEDIENUNGSANLEITUNG<br />
BRUGSANVISNING<br />
INSTRUCCIONES DE USO<br />
MANUEL D'UTILISATION<br />
OPERATING MANUAL<br />
ISTRUZIONI D’USO<br />
GEBRUIKSAANWIJZING<br />
INSTRUKCJA OBSŁUGI<br />
4<br />
20<br />
36<br />
52<br />
68<br />
84<br />
100<br />
116
2 ALLGEMEINE SICHERHEIT<br />
Aus Sicherheitsgründen bitten wir Sie, die Bedienungsanleitung vor Inbetriebnahme<br />
sorgfältig zu lesen! Personen, die mit der Bedienungsanleitung nicht vertraut sind, dürfen<br />
das Gerät nicht bedienen.<br />
A. Kein beschädigtes Kabel verwenden.<br />
B. Kabel nicht zusammendrücken oder knicken.<br />
C. Unbedingt waagerecht aufstellen.<br />
D. Nicht vor geöffneten Fenstern aufstellen.<br />
E. Nicht mit Chemikalien in Kontakt bringen.<br />
F. Nicht bei Wärmequellen aufstellen.<br />
6 SIKKERHED GENERELT<br />
Læs denne brugsanvisning grundigt igennem af hensyn til sikkerheden! Personer, som<br />
ikke er fortrolige med brugsanvisningens indhold, må ikke anvende dette klimaanlæg.<br />
Vi anbefaler, at De gemmer denne brugsanvisning et sikkert sted med henblik på senere<br />
brug.<br />
A. Brug ikke beskadigede kabler.<br />
B. Kabel må ikke sættes i klemme eller knækkes.<br />
C. Anbringes på et plant gulv.<br />
D. Må ikke anbringes ved et åbent vindue.<br />
E. Må ikke komme i kontakt med kemikalier.<br />
F. Må ikke anbringes ved en varmekilde.<br />
5 MEDIDAS DE SEGURIDAD<br />
¡Consulte atentamente el modo de empleo y preste atención a las medidas de seguridad!<br />
Aquellos que no estén familiarizados con estas medidas de seguridad, no deben<br />
utilizar este acondicionador de aire. Aconsejamos guardar en sitio seguro este manual<br />
para poder consultar en caso necesario.<br />
A. No utilizar un cable deteriorado.<br />
B. No averiar o doblar el cable.<br />
C. Colocar en superficie llana<br />
D. No colocar delante de ventana abierta.<br />
E. No poner en contacto con productos químicos.<br />
F. No poner en contacto con fuente de calor.<br />
3 SÉCURITÉ GÉNÉRALE<br />
Par mesure de sécurité, consulter attentivement ce manuel d’instructions! Les personnes<br />
qui ne sont pas familiarisées avec ce manuel d’instructions, ne doivent pas utiliser<br />
ce climatiseur. Nous vous conseillons de ranger ce manuel d’instructions à un endroit<br />
sûr pour pouvoir le consulter ultérieurement.<br />
A. Ne pas utiliser de câble endommagé.<br />
B. Ne pas serrer ou plier le câble.<br />
C. Placer sur une surface plane.<br />
D. Ne pas placer devant une fenêtre ouverte.<br />
E. Ne pas mettre en contact avec des produits chimiques.<br />
F. Ne pas placer auprès d’une source de chaleur.<br />
2<br />
G. Nicht in Wasser eintauchen.<br />
H. Kein Flüssigkeiten verschütten.<br />
I. Keine Gegenstände in das Gerät stecken.<br />
J. Kein Verlängerungskabel verwenden.<br />
K. Außer Reichweite von Kindern halten.<br />
L. Nicht selbst reparieren.<br />
G. Må ikke sænkes ned i vand.<br />
H. Pas på med at spilde.<br />
I. Der må ikke stikkes noget ind i apparatet.<br />
J. Der må ikke bruges kabeltrommel.<br />
K. Bruges uden for børns rækkevidde.<br />
L. De må ikke selv reparere apparatet.<br />
G. No sumergir en líquidos.<br />
H. No verter líquidos.<br />
I. No introducir objetos en el aparato.<br />
J. No utilizar cable de extensión.<br />
K. Poner fuera del alcance de los niños.<br />
L. No hacer reparaciones.<br />
G. Ne pas immerger.<br />
H. Ne pas renverser.<br />
I. Ne rien introduire dans l’appareil.<br />
J. Ne pas utiliser de câble de rallonge.<br />
K. A tenir hors de portée des enfants.<br />
L. Ne pas réparer soi-même.<br />
A<br />
B<br />
C<br />
D<br />
E<br />
F
G<br />
H<br />
I<br />
J<br />
K<br />
L<br />
4 GENERAL SAFETY<br />
For safety reasons, please read this manual carefully before operating. Persons who are<br />
not familiar with this manual must not use this air conditioner. We strongly recommend<br />
keeping this manual in a safe place for future reference.<br />
> SICUREZZA<br />
Per motivi di sicurezza, si raccomanda di leggere attentamente il manuale prima di utilizzare<br />
l’apparecchio. Le persone che non conoscono il funzionamento del climatizzatore<br />
non devono usarlo. Si raccomanda di riporre il manuale in un luogo sicuro per<br />
future referenze.<br />
1 VEILIGHEID ALGEMEEN<br />
Bestudeer voor de veiligheid deze gebruiksaanwijzing zorgvuldig! Personen, die met<br />
de gebruiksaanwijzing niet vertrouwd zijn, mogen deze airconditioner niet gebruiken.<br />
Wij raden u aan deze gebruiksaanwijzing op een veilige plaats te bewaren voor latere<br />
raadpleging.<br />
: OGóLNE ZASADY BEZPIECZEńTWA<br />
Dla własnego bezpieczeństwa przeczytaj dokładnie treść instrukcji obsługi klimatyzatora!<br />
Osobom, które nie zapoznały się z instrukcją obsługi niniejszego urządzenia, zabrania się z<br />
niego korzystać. Radzimy przechowywać instrukcję obsługi w bezpiecznym miejscu, aby w<br />
razie potrzeby móc skorzystać z niej w przyszłości.<br />
TR<br />
A. Do not use a damaged cable.<br />
B. Do not clamp or bend the cable.<br />
C. Do not place unevenly.<br />
D. Do not place in front of an open window.<br />
E. Do not bring in contact with chemicals.<br />
F. Do not place near a heat source.<br />
A. Non usare il cavo, se danneggiato.<br />
B. Non bloccare o piegare il cavo.<br />
C. Collocare l’apparecchio su una superficie piana.<br />
D. Non collocare l’apparecchio davanti alla finestra<br />
aperta.<br />
E. Non porlo a contatto con prodotti chimici.<br />
F. Non posizionarlo vicino ad una fonte di calore.<br />
A. Gebruik geen beschadigde kabel.<br />
B. Kabel niet afklemmen of knikken.<br />
C. Plaats op een vlakke ondergrond.<br />
D. Niet voor een open raam plaatsen.<br />
E. Niet met chemicaliën in contact brengen.<br />
F. Niet bij een warmtebron plaatsen.<br />
A. Nie używać uszkodzonego przewodu zasilającego.<br />
B. Nie uciskać ani nie zginać przewodu.<br />
C. Urządzenie umieścić na płaskim podłożu.<br />
D. Nie umieszczać urządzenia przed otwartym oknem.<br />
E. Nie stosować żadnych środków chemicznych.<br />
F. Nie umieszczać w bezpośrednim sąsiedztwie źródeł<br />
ciepła.<br />
GENEL GÜVENL‹K<br />
Güvenlik aç›dan çal›flt›rmaya bafllamadan önce lütfen kullanma talimat›n› dikkatlice okuyunuz!<br />
Kullanma talimat›n› bilmeyen kiflilerin aleti kullanmas› yasakt›r.<br />
A. Hasar görmüfl kablo kullanmay›n›z.<br />
B. Kabloyu ezmeyiniz ve katlamay›n›z.<br />
C. Mutlaka yatay kurunuz.<br />
D. Aç›k pencerelerin önüne kurmay›n›z.<br />
E. Kimyasal maddelerle temas ettirmeyiniz.<br />
F Is› kaynaklar›n bulundu¤u yerlere kurmay›n›z.<br />
G. Do not immerse in water.<br />
H. Do not spill.<br />
I. Do not insert anything.<br />
J. Do not use an extension cord.<br />
K. Keep out of the reach of children.<br />
L. Do not repair.<br />
G. Non immergerlo nell’acqua.<br />
H. Non versare liquidi sull’apparecchio.<br />
I. Non inserire alcun oggetto nell’apparecchio.<br />
J. Non usare prolunghe.<br />
K. Tenere l’apparecchio lontano dalla portata dei<br />
bambini.<br />
L. Non cercare di riparare l’apparecchio.<br />
G. Niet onderdompelen.<br />
H. Niets morsen.<br />
I. Niets in het apparaat steken.<br />
J. Geen verlengkabel gebruiken.<br />
K. Buiten bereik van kinderen houden.<br />
L. Niet zelf repareren.<br />
G. Nie zanurzać w wodzie.<br />
H. Nie rozlewać cieczy.<br />
I. Nie wtykać obcych przedmiotów do aparatu.<br />
J. Nie używać przedłużacza.<br />
K. Trzymać z daleka od dzieci.<br />
L. Nie próbować naprawiać klimatyzatora samodzielnie.<br />
G. Suya bat›rmay›n›z.<br />
H. Üzerine s›v› dökmeyiniz.<br />
I. Aletin içine cisim sokmay›n›z.<br />
J. Uzat›c› kablo kullanmay›n›z.<br />
K. Çocuklar›n eriflemeyece¤i yerelerde muhafaza ediniz.<br />
L. Kendiniz tamir etmeyiniz.<br />
3
IMPORTANT<br />
COMPONENTS<br />
<br />
<br />
<br />
<br />
<br />
<br />
<br />
<br />
<br />
<br />
<br />
<br />
<br />
<br />
<br />
<br />
<br />
<br />
<br />
<br />
21<br />
Remote control /<br />
Control panel<br />
On/off switch<br />
Air inlet<br />
Air outlet<br />
Filter holder<br />
Filter clamp<br />
Air filters<br />
(active carbon + 3MTM FiltreteTM filter) **<br />
Indoor unit<br />
Connection tube<br />
Cabinet cover for<br />
quick connector<br />
shielding<br />
Water drain<br />
Spanners<br />
Handles<br />
Protection caps for<br />
connector<br />
Plug for water drain<br />
Power cord<br />
Frame lead through<br />
Casters<br />
Air inlet for air to be<br />
cooled/filtered<br />
Exhaust for<br />
cooled/filtered air<br />
Outdoor unit<br />
1. FIRST READ THE INSTRUCTIONS.<br />
2. IF YOU HAVE ANY DOUBTS, CONSULT YOUR DEALER.<br />
4<br />
68<br />
<br />
<br />
<br />
<br />
<br />
<br />
21
Dear Sir, Madam,<br />
Congratulations on the purchase of your airconditioner. This airconditioner has three<br />
functions besides cooling the air, namely dehumidification, air circulation and air filtration.<br />
This mobile airconditioner is extremely easy to operate and move. You have acquired a<br />
high quality product that will give you many years of pleasure on condition that you use it<br />
properly. Read this manual first in order to optimise the life span of your airconditioner.<br />
We wish you coolness and comfort with your airconditioner.<br />
Yours sincerely,<br />
PVG International B.V.<br />
Customer Service Department<br />
4<br />
69
4<br />
70<br />
A SAFETY REGULATIONS<br />
<br />
IMPORTANT<br />
• The installation must be completely in accordance with local<br />
regulations, ordinances and standards.<br />
• The indoor unit is suitable exclusively for use in dry places, indoors.<br />
• Check the mains voltage. This device is suitable exclusively for<br />
earthed sockets – connection voltage 220-240 Volt/ 50 Hz.<br />
• The device MUST always have an earthed connection. You may<br />
absolutely not connect the device if the power supply is not earthed.<br />
• The plug must always be easily accessible when the device is<br />
connected.<br />
• Read these instructions carefully and follow the directions.<br />
Before connecting the device, check that:<br />
• The connection voltage corresponds to that on the type plate.<br />
• The socket and power supply are suitable for the device.<br />
• The plug on the cable fits the socket.<br />
• The device is on a stable and flat surface.<br />
Have the electrical installation checked by a recognised expert if you are not sure<br />
that everything is allright.<br />
• The airconditioner is a safe device, manufactured in accordance with CE<br />
safety standards. Nevertheless, as with every electrical device, exercise<br />
caution when using it.<br />
• Never cover the air inlets and outlets.<br />
• Empty the water reservoir through the water drain before moving it.<br />
• Never allow the device to come into contact with chemicals.<br />
• Do not insert objects into the openings of the device.<br />
• Do not spray the device with water or submerge it as this may cause a short<br />
circuit.<br />
• Always take the plug out of the socket before cleaning or replacing the<br />
device or a part of the device.<br />
• NEVER connect the device with the aid of an extension cable. If a suitable,<br />
earthed socket is not available, have one fitted by a recognised electrician.<br />
• Always consider the safety of children in the vicinity of this device, as with<br />
every electrical device.<br />
• Always have any repairs – beyond regular maintenance – carried out by a<br />
recognised service engineer. Failure to do so may lead to invalidation of the<br />
guarantee.<br />
• Always take the plug out of the socket when the device is not in use.<br />
• A damaged electricity cable may only be replaced by the supplier or an<br />
authorised person/service point.
ATTENTION!<br />
• Never use the device with a damaged cable or plug. Never allow the<br />
cable to be pinched off or come into contact with sharp edges.<br />
• Failure to follow the instructions may lead to invalidation of the<br />
guarantee on the device.<br />
• Always lift the device with three people.<br />
B THE INSTALLATION<br />
<br />
ATTENTION!<br />
• Your airconditioner must be standing upright for at least two hours<br />
before use.<br />
• Ensure that the air outlet on the front of the unit is always open<br />
when the device is in use. The device may be damaged if this is closed<br />
while the device is in use. The user is responsible for the correct use of<br />
the airconditioner.<br />
The indoor and outdoor unit are portable and can easily be moved from one<br />
room to another. They are connected to each other by a 2.5 metre flexible tube.<br />
The outdoor unit can be placed on the floor (for example the floor of a balcony).<br />
When handling the units, take the following into account:<br />
1<br />
2<br />
3<br />
4<br />
5<br />
6<br />
7<br />
8<br />
Ensure that the device is upright and on a flat surface.<br />
Place the filters supplied in the filter holder (see chapter D).<br />
For optimum air-circulation, keep at least 50 cm (20 inches) of space free<br />
around the indoor unit.<br />
Open the exhaust for cooled/filtered air on the top of the airconditioner.<br />
Please keep a distance of at least 5 cm between the outdoor unit air inlet and<br />
wall or other objects and a distance of at least 120 cm between the outdoor<br />
unit exhaust air outlet and wall or other objects to ensure proper air<br />
circulation.<br />
The maximum distance from the top of the outdoor unit to the floor is 1.5 m.<br />
To avoid damaging the connection tube, leave the window ajar. The frame<br />
lead through can be used to prevent this.<br />
Close the window or door as much as possible to prevent outside air from<br />
entering the room.<br />
4<br />
71
4<br />
72<br />
<br />
TIP!<br />
If you use the unit for cooling purposes, we recommend you keep the<br />
outdoor unit in a place which is as cool as possible (e.g. in the shade).<br />
<br />
WARNING<br />
Ensure a good air flow through the units. The exhaust air must flow<br />
freely. Any blockage can lead to damage or improper operation of the<br />
air conditioner.<br />
Take care to prevent any bow or bend in the connection tube.<br />
IMPORTANT<br />
<br />
The condensation water must flow freely to the outdoor unit. Blockage<br />
of the drainage tube in the connection tube can result in water leakage<br />
or improper operation of the unit.<br />
C OPERATION / REMOTE CONTROL<br />
Symbols:<br />
On/off<br />
Fan speed<br />
Function<br />
selector switch<br />
Down<br />
Ventilator speed indicator<br />
Function indicator<br />
Automatic<br />
Cooling<br />
Dehumidifying<br />
Circulating<br />
High ventilator speed<br />
Medium ventilator speed<br />
Low ventilator speed<br />
Signal indicator<br />
Clock<br />
LCD display<br />
Clock<br />
Timer<br />
Negative ion function indicator<br />
Timer setting indicator<br />
Timer on/off<br />
Celsius / Fahrenheit control light<br />
Temperature setting indicator<br />
Temperature display selector<br />
button (Celsius / Fahrenheit)<br />
Up
Cooling mode (blue)<br />
ATTENTION!<br />
Without the remote control, the air-conditioner can be operated by<br />
using the button on the front of the device. In this event however, only<br />
the automatic function can be used.<br />
PLACING BATTERIES IN THE REMOTE CONTROL<br />
Remove the battery cover by pressing the clips and then pulling the cover towards<br />
you. Place the new batteries as indicated (pay attention to the plus (+) and minus<br />
(-) poles). Now replace the battery cover.<br />
<br />
NOTE!<br />
Use 2 AAA (1.5 Volt) batteries. Do not use rechargeable batteries.<br />
Replace batteries with new batteries of the same type when the display<br />
becomes fuzzy or the signal deteriorates.<br />
1<br />
2<br />
3<br />
Push the plug into the socket.<br />
ATTENTION!<br />
If the airconditioner does not respond to the remote control, follow the<br />
following procedures:<br />
• Ensure that there are batteries in the remote control.<br />
• Ensure that the plug of the airconditioner is inserted in the socket<br />
and switched off.<br />
• Press the on/off switch on the front of device and hold it down<br />
until after the beep signal after approximately 8 seconds.<br />
• Briefly press the on/off button of the remote control.<br />
• The remote control is ready for use after the beep signal.<br />
Press the C/F-button to set °C (Celsius) or °F (Fahrenheit).<br />
The default setting is °C (Celsius).<br />
The following functions can be selected with the mode button on the<br />
remote control.<br />
Automatic regulation of ventilator speed<br />
Cooling;<br />
Dehumidifying<br />
Circulating<br />
COOLING<br />
When the cooling mode is activated, the transparent ring around the button on<br />
the front of the device emits a BLUE light.<br />
The following settings are possible in the cooling mode:<br />
4<br />
73
Dehumidifying mode (yellow)<br />
25°C<br />
18°C<br />
Fan mode (green)<br />
Cooling<br />
Dehumidify<br />
Circulating<br />
4<br />
74<br />
• The ventilator speed can be adjusted by pressing the<br />
Automatic regulation of ventilator speed<br />
High<br />
Medium<br />
Low<br />
-button<br />
• The temperature can be set between 18°C and 32°C by pressing the and <br />
buttons. The display on the remote control shows the set temperature.<br />
<br />
NOTE!<br />
Whether the desired temperature can actually be reached depends on<br />
the ambient conditions. The room temperature remaining above the set<br />
temperature is normal.<br />
DEHUMIDIFICATION<br />
When the dehumidification mode is activated, the transparent ring around the<br />
button on the front of the device turns YELLOW.<br />
During the dehumidification, the ventilator speed cannot be adjusted. The<br />
speed is set automatically to medium. The and buttons are inactive.<br />
CIRCULATION<br />
When the air circulation mode is selected, the transparent ring around the button<br />
on the front of the device emits GREEN light. In this mode, the air is circulated<br />
and filtered but not cooled or dehumidified. In this mode, only the ventilator<br />
speed can be adjusted by pressing the -button:<br />
Automatic regulation of ventilator speed<br />
High<br />
Medium<br />
Low<br />
AUTOMATIC<br />
In the automatic mode , the device will cool, dehumidify or circulate<br />
depending on the ambient temperature. When the temperature in the room<br />
changes, the mode changes automatically in order to maintain the desired<br />
temperature as accurately as possible. The ventilator speed is also adjusted<br />
automatically. The colour of the transparent ring around the button on the front<br />
of the device will change depending on the operating mode.<br />
<br />
NOTE!<br />
• Negative ions are generated in every operating mode (automatic,<br />
cooling, dehumidification and circulation).<br />
• In cooling and dehumidifying mode condensation water is discharged<br />
via the connection tube to the outdoor unit. Here the water is<br />
evaporated. By removing the rubber plug from the water drain ,<br />
the water will run out here. Water must always be able to flow freely.
4<br />
5<br />
ADJUSTING THE TIMER<br />
You can use the timer function to set in advance when the airconditioner is to<br />
switch on or off.<br />
Switching off<br />
The timer OFF function can be set when the airconditioner is switched on:<br />
• Press<br />
• Set the number of hours desired (1-12) with the aid of and <br />
• Press<br />
Switching on<br />
The timer ON function can be set when the airconditioner is switched off<br />
(stand-by):<br />
• Press<br />
• Set the number of hours desired (1-12) with the aid of and <br />
• Press<br />
You can delete the set timer function by pressing the on the remote<br />
control.<br />
When the set time is at “00”, the timer is switched off. When the Timer<br />
function has been set the light in the button on the front of the device will<br />
switch on.<br />
ADJUSTING THE CLOCK<br />
Press the -button. Change the time by pressing the and -button.<br />
When the desired time has been set, press the<br />
to save the setting.<br />
-button again in order<br />
<br />
TIP!<br />
The light of the display fades when the remote control has not been<br />
used for some time. This is reactivated when you touch any button.<br />
<br />
NOTE!<br />
The compressor has been set so that it starts functioning three minutes<br />
after the (re)start of the air conditioner.<br />
The compressor will be switched off when the room temperature is<br />
lower than the set temperature. Operation is continued in the<br />
circulation mode. When the room temperature is higher than the set<br />
temperature, the compressor switches on again.<br />
<br />
ATTENTION<br />
Avoid the remote control from getting wet. Remove it from the unit<br />
when condensation can occur.<br />
4<br />
75
4<br />
76<br />
D AIR FILTER<br />
This airconditioner is equipped with a 3-layer filter to purify the air circulated by<br />
the indoor unit. The airconditioners are supplied with a separately packaged 3MTM FiltreteTM filter and active carbon filter. These filters must be placed in accordance<br />
with the instructions before the airconditioner is used.<br />
1<br />
2<br />
3<br />
Wire mesh filter to remove coarse dust particles.<br />
3MTM FiltreteTM filter to remove particles from the air that are detrimental to<br />
your health, such as pollen, bacteria, flakes of animal skin and dust.<br />
Active carbon filter to remove odours.<br />
The mesh filter is part of the filter holder. The filter holder can be opened. The<br />
activated carbon filter and the 3MTM FiltreteTM filter can be removed.<br />
1<br />
2<br />
3<br />
The mesh filter must be cleaned regularly with a vacuum cleaner in order to<br />
prevent blockage of the air flow.<br />
We recommend replacing the positively/negatively electrostatically charged<br />
3MTM FiltreteTM filter every three months.<br />
new filter recommended change of filter<br />
If it has become dusty, the activated carbon filter can be cleaned with a<br />
vacuum cleaner, but it must be replaced simultaneously with the 3MTM Filtrete TM filter.<br />
Excessive dust, construction work, pets, the presence of smoke and frequent use<br />
of the device affect the lifespan of the 3MTM FiltreteTM filter. A signal is given after<br />
approximately 650 hours of operation in order to prevent you from forgetting to<br />
replace the filter: The light in the button on the front of the device is blinking.<br />
Take the following action:<br />
1<br />
2<br />
3<br />
Switch the unit off, but leave the mains cable in the socket.<br />
Replace the old filters with new, original filters that are available from your<br />
dealer;<br />
• Remove the filter holder from the airconditioner<br />
• Open the filter holder , take the filter clamp off the filter holder and<br />
remove the old filters. Place the new activated carbon filter (black) and<br />
3MTM FiltreteTM filter (white) in the filter holder .<br />
• Fit the filter clamp back onto the holder.<br />
• Put the filter holder back into the airconditioner.<br />
Press the on/off button on the front of the device until you hear a beep (after<br />
approximately 4 seconds).
4<br />
5<br />
E AIR FLOW<br />
The indicator light is switched off.<br />
The old filters can be disposed in the non-biological garbage container.<br />
<br />
NOTES!<br />
• Never use the airconditioner without the mesh filter!<br />
• To run the unit without active carbon filter and/or 3MTM FiltreteTM filter does not bring any harm to the air conditioner. In that case<br />
odours and unhealthy dust are not removed from the circulated air.<br />
• Filter packages are available at your dealer.<br />
• Only use suitable <strong>Zibro</strong> filters. This will prevent any damage to your<br />
airconditioner. Using other than the original filters is entirely at the<br />
risk of the consumer. This may have a negative effect on the<br />
operation of the device and may result in damage. The device may<br />
also leak water subsequent to the formation of ice.<br />
You can change the direction of the air flow by adjusting the positions of the<br />
horizontal and vertical louvers.<br />
F DRAINAGE<br />
Under normal conditions the condensation water is pumped to the outdoor unit<br />
through the connection tube. When the water flow is blocked or the position of<br />
the outdoor unit is too high, water may accumulate in the indoor water container<br />
of the unit.<br />
When the internal water container is full, the transparant ring around the button<br />
on the front of the device flashes RED. The unit will switch off automatically. To<br />
empty the water container, take the following action:<br />
1<br />
2<br />
3<br />
4<br />
5<br />
Do not move the unit. Drastic movements can cause water leakage.<br />
Switch off the unit and remove the plug from the wall outlet.<br />
Place a pan or appropriate tray on the floor underneath the water drain<br />
tube.<br />
Remove the rubber plug from the drain tube and let the water run out<br />
(± 0.5 litre).<br />
Replace the rubber plug , put the plug into the wall outlet, and switch on<br />
the unit. The warning light should be off.<br />
4<br />
77
4<br />
78<br />
<br />
NOTE!<br />
When the air conditioner is in use, under normal circumstances the<br />
condensed water will be discharged through the outdoor unit 21<br />
.<br />
G (DIS)CONNECTING THE INDOOR AND OUTDOOR UNIT<br />
(FOR QUALIFIED PERSONNEL ONLY)<br />
DISCONNECTING<br />
1<br />
2<br />
3<br />
4<br />
5<br />
6<br />
7<br />
8<br />
Switch off the unit, remove the plug from the mains and leave it idle for at<br />
least 30 minutes.<br />
Open the cabinet cover for quick connector shielding .<br />
Disconnect the electric cable.<br />
Disconnect the drain tube.<br />
Remove the isolation material from the connectors.<br />
Remove the metal brackets which are holding the tubes and wire.<br />
Disconnect the refrigerant tubes using the spanners provided. The<br />
terminals are fitted with automatic self-sealing valves to prevent the<br />
refrigerant from leaking. Loosen the nuts quickly, so the seal is made<br />
promptly. During the operation take extreme care not to break or bend the<br />
refrigerant tubes.<br />
Screw the protection caps for the connectors onto the ends of the<br />
refrigerant tubes connectors.<br />
<br />
IMPORTANT<br />
• Never store the indoor/outdoor unit disconnected.<br />
• Do not operate the indoor unit if the quick-connectors are<br />
disconnected. This might cause harm to people and property.<br />
CONNECTING<br />
1<br />
2<br />
3<br />
4<br />
Pass the connection tube through the hole (at least Ø 50 mm) in the wall.<br />
Remove the protection caps from the ends of the refrigerant tubes.<br />
Reconnect the refrigerant tubes according to the marking (tighten the nuts<br />
quickly to make a good seal), the drain tube and the electrical cable.<br />
Put back the metal brackets which are holding the tubes and wire.
5<br />
6<br />
7<br />
Put the isolation material around the connectors / tubing again.<br />
Close the cabinet cover for quick connector shielding .<br />
Store the protection caps in a safe place.<br />
<br />
WARNING<br />
After connecting the refrigerant tubes, take care that these are well<br />
isolated again. If this is not done properly, damage because of<br />
condensation water can occur!<br />
H MAINTENANCE<br />
<br />
ATTENTION!<br />
Switch off the device and pull the plug out of the socket before you<br />
clean the device or filter or when you replace the filters.<br />
Use a soft, damp cloth for the regular cleaning of the exterior of the device. Never<br />
use aggressive cleaning agents, solvents, benzene or abrasives. Refer to chapter D<br />
“Air Filter” for filter maintenance.<br />
NOTE!<br />
I STORAGE<br />
1<br />
2<br />
3<br />
4<br />
Empty the water reservoir (see chapter F).<br />
Clean the mesh filter (see chapter D).<br />
• Remove the 3M Filtrete filter and active carbon filter before seasonal<br />
storage and install new filters at the beginning of the new season. The<br />
old filters can be disposed in the ‘Non-biological garbage container’.<br />
• New filters are available at your dealer.<br />
Switch the device to air circulation mode for several hours. This will<br />
completely dry out the interior.<br />
Protect against dust and store in a dry place that is not accessible to children.<br />
NOTE!<br />
Never use the device without the mesh filter.<br />
Do not store the units disconnected, to prevent leakage of refrigerant.<br />
4<br />
79
4<br />
80<br />
J PROBLEMS AND SOLUTIONS<br />
Problem Cause Solution<br />
The device does not work<br />
and the transparent ring<br />
around the button on the<br />
front of the device flashes<br />
RED.<br />
The internal water reservoir<br />
is full.<br />
The device does not work<br />
and the top horizontal edge<br />
of the transparent ring The room temperature<br />
around the button on the sensor is defective.<br />
front of the device flashes<br />
BLUE.<br />
The device does not work<br />
and the lower horizontal<br />
edge of the transparent<br />
ring around the button on<br />
the front flashes BLUE.<br />
The temperature sensor of<br />
the heat exchanger is<br />
disrupted or has short<br />
circuited.<br />
The device does not work. No power supply.<br />
The device works<br />
insufficiently.<br />
The device is noisy.<br />
The compressor does not<br />
work.<br />
The remote control does<br />
not respond.<br />
Standing in direct sunlight.<br />
Windows or doors are open<br />
or there are a large number<br />
of people or heat sources in<br />
the room.<br />
The filter is dirty.<br />
Air inlet or exhaust is<br />
blocked.<br />
The device is standing on an<br />
uneven surface.<br />
The overheating safety<br />
feature has been activated.<br />
The distance is too big. The<br />
batteries are empty.<br />
The signal of the remote<br />
control cannot be received<br />
by the unit.<br />
Empty the internal water<br />
reservoir (see chapter F).<br />
Consult your dealer.<br />
Consult your dealer.<br />
Insert the plug into a socket<br />
that is live.<br />
Move the device into the<br />
shade.<br />
Close windows and/or doors<br />
or place an extra<br />
airconditioner.<br />
Clean the filter or replace it<br />
(see chapter D).<br />
Remove the blockage.<br />
Place the device on an even<br />
surface (less vibration).<br />
Wait 30 minutes until the<br />
temperature has dropped<br />
and then switch it on again.<br />
Replace the batteries.<br />
Restore the connection<br />
between the remote control<br />
and the air conditioner (see<br />
chapter C).<br />
Never attempt to disassemble or repair the device. Inexpert repairs invalidate the<br />
guarantee and can endanger the users of the device.
K GUARANTEE CONDITIONS<br />
The air conditioner is supplied with a 24-month guarantee, commencing on the<br />
date of purchase. All material and manufacturing defects will be repaired or<br />
replaced free of charge within this period. The following rules apply:<br />
1. We expressly refuse all further damage claims, including claims for collateral<br />
damage.<br />
2. Repairs to or replacement of components within the guarantee period will<br />
not result in an extension of the guarantee.<br />
3. The guarantee is invalidated if any modifications have been made, non<br />
genuine parts are fitted or repairs are carried out by third parties.<br />
4. Components subject to normal wear, such as the filter, are not covered by the<br />
guarantee.<br />
5. The guarantee is valid only when you present the original, dated purchase<br />
invoice and if no modifications have been made.<br />
6. The guarantee is invalid for damage caused by neglect or by actions that<br />
deviate from those in this instruction booklet.<br />
7. Transportation costs and the risks involved during the transportation of the<br />
air conditioner or air conditioner components shall always be for the account<br />
of the purchaser.<br />
8. Refrigerant loss and/or leakage because of incompetent (dis)connecting the<br />
units is not covered by the guarantee conditions applicable to this product.<br />
9. Damage, caused by not using suitable <strong>Zibro</strong> filters falls outside the<br />
guarantee.<br />
To prevent unnecessary expense, we recommend that you always first carefully<br />
consult the instructions for use. Take the air conditioner to your dealer for repairs<br />
if these instructions do not provide a solution.<br />
4<br />
81
4<br />
82<br />
L TECHNICAL SPECIFICATIONS<br />
Use indicatively, subject to change.<br />
Model<br />
* Conform EN 14511<br />
** Moisture removal at 32°C, 80% RH<br />
<strong>PX</strong> <strong>738</strong><br />
Cooling capacity* W 3800<br />
EE Class<br />
EER*<br />
Waste electrical products should not be disposed with household waste. Please<br />
recycle where facilities exist. Check with your local authority or retailer for<br />
recycling advice.<br />
D<br />
2.62<br />
Power consumption (max.) W 1450<br />
Current (nom.) A 6.3<br />
Mains V/Hz/PH 220 – 240 / 50 / 1<br />
Air delivery max. (indoor unit) m 3 /h 450<br />
Dehumidification max. ** L/24h 53<br />
Room size m 3 115<br />
Refrigerant type/gr R410a / 1350<br />
Thermostatic range °C 18 - 32<br />
Operating range °C 18 - 35<br />
Noise level indoor unit dB(A) 55<br />
Noise level outdoor unit dB(A) 58<br />
Dimensions indoor unit (W x D x H) mm 508 x 330 x 908<br />
Dimensions outdoor unit (W x D x H) mm 550 x 305 x 625<br />
Weight indoor unit kg 37<br />
Weight outdoor unit kg 20<br />
Compressor type<br />
Fan speeds<br />
Rotary<br />
Length connection tube m 2.5<br />
Unit protection indoor unit<br />
Unit protection outdoor unit<br />
Fuse rating<br />
3<br />
IP X1<br />
IP X4<br />
250V, T3.15A
4<br />
83
DISTRIBUTED IN EUROPE BY PVG INTERNATIONAL B.V.<br />
i ÖSTERREICH<br />
PVG Austria VertriebsgmbH<br />
Salaberg 49<br />
3350 HAAG<br />
tel: +43 7434 44867<br />
fax: +43 7434 44868<br />
email: pvgaustria@zibro.com<br />
e BELGIË<br />
PVG Belgium NV/SA<br />
Industrielaan 55<br />
2900 SCHOTEN<br />
tel: +32 3 326 39 39<br />
fax: +32 3 326 26 39<br />
email: pvgbelgium@zibro.com<br />
q SCHWEIZ<br />
PVG Schweiz AG<br />
Genuastrasse 15<br />
4142 MÜNCHENSTEIN<br />
tel: +41 61 337 26 51<br />
fax: +41 61 337 26 78<br />
email: pvgint@zibro.com<br />
2 DEUTSCHLAND<br />
PVG Deutschland GmbH<br />
Beiersdorfstraße 4<br />
46446 EMMERICH<br />
tel: +49 2821 76713<br />
fax: +31 412 622 893<br />
email: pvgint@zibro.com<br />
6 DANMARK<br />
PVG Scandinavia A/S<br />
Niels Bohrsvej 10<br />
6100 HADERSLEV<br />
tel: +45 73 53 02 02<br />
fax: +45 73 53 02 04<br />
email: pvgdenmark@zibro.com<br />
5 ESPAÑA<br />
PVG España S.A.<br />
Pol. Ind. San José de Valderas II<br />
Comunidad ”La Alameda”<br />
C/ Aurora Boreal, 19<br />
28918 LEGANÉS (Madrid)<br />
tel: +34 91 611 31 13<br />
fax: +34 91 612 73 04<br />
email: pvgspain@zibro.com<br />
3 FRANCE<br />
PVG France SARL<br />
4, Rue Jean Sibélius<br />
B.P. 185<br />
76410 SOTTEVILLE SOUS LE VAL<br />
tel: +33 2 32 96 07 47<br />
fax: +33 0 820 34 64 84<br />
email: pvgfrance@zibro.com<br />
4 UNITED KINGDOM<br />
Lister Gases<br />
Bridge Street<br />
Holloway Bank, Wednesbury<br />
West Midlands WS10 OAW<br />
tel.: +44 121 506 1818<br />
fax: +44 121 505 1744<br />
email: gases@lister.co.uk<br />
> ITALIA<br />
PVG Italy SRL<br />
Via Niccolò Copernico 5<br />
50051 CASTELFIORENTINO (FI)<br />
tel: +39 571 628 500<br />
fax: +39 571 628 504<br />
email: pvgitaly@zibro.com<br />
u NORGE<br />
Sunwind - Gylling A/S<br />
Rudsletta 71-75 / P.O. Box 64<br />
N-1309 RUD<br />
tel: +47 67 17 13 70<br />
fax: +47 67 17 13 80<br />
email: pvgint@zibro.com<br />
1 NEDERLAND<br />
PVG International B.V.<br />
P.O. Box 96<br />
5340 AB OSS<br />
tel: +31 412 694 694<br />
fax: +31 412 622 893<br />
email: pvgnl@zibro.com<br />
9 PORTUGAL<br />
Gardena, Lda<br />
Recta da Granja do Marquês<br />
ALGUEIRÃO<br />
2725-596 MEM MARTINS<br />
tel: + 35 21 92 28 530<br />
fax: + 35 21 92 28 536<br />
email: pvgint@zibro.com<br />
: POLSKA<br />
PVG Polska Sp. z. o. o.<br />
ul. Kościelnej 110<br />
26-800 Białobrzegi<br />
tel: +48 48 613 00 70<br />
fax: +48 48 613 00 70<br />
email: pvgpoland@zibro.com<br />
TR<br />
TURKEY<br />
PVG Is›tma Klima So¤utma Ltd.Sti.<br />
Ataturk Cad. No 380 Ak Ishani Kat 6<br />
35220 Alsancak<br />
IZMIR - TURKEY<br />
tel: + 90 232 463 33 72<br />
fax: + 90 232 463 69 91<br />
email: pvgturkey@zibro.com<br />
PVG Traffic avg©060404 man_<strong>PX</strong><strong>738</strong>