User Manual
User Manual
User Manual

You also want an ePaper? Increase the reach of your titles
YUMPU automatically turns print PDFs into web optimized ePapers that Google loves.
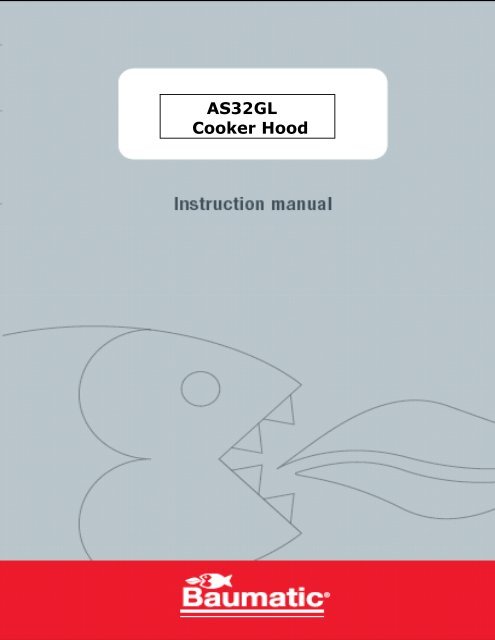
AS32GL<br />
Cooker Hood
<strong>User</strong> <strong>Manual</strong> for your Baumatic<br />
AS32GL Cooker Hood<br />
90 cm Glass Island Hood<br />
NOTE: This <strong>User</strong> Instruction <strong>Manual</strong> contains important<br />
information, including safety & installation points, which will<br />
enable you to get the most out of your appliance. Please keep it<br />
in a safe place so that it is easily available for future reference.
YOUR COOKER HOOD’S SPECIFICATIONS ….……………..………….4<br />
IMPORTANT SAFETY INFORMATION……………………………….…5-6<br />
CARING FOR THE ENVIRONMENT…………………………………………7<br />
MAINTAINING AND CLEANING YOUR COOKER HOOD ……….8<br />
INSTALLATION INSTRUCTIONS ……………………….……...….9-17<br />
ELECTRICAL CONNECTION……………9<br />
REPLACING THE CARBON FILTER………17<br />
TOUCH CONTROL PANEL OPERATION..…18-19<br />
TROUBLESHOOTING ……………………………………………20<br />
CONDITIONS OF GUARANTEE……………………………………………21<br />
CONTACT DETAILS…………………………………………………………..22<br />
3<br />
CONTENTS<br />
HT MOD 05/07/06
4<br />
Specifications of your AS32GL Cooker Hood<br />
Congratulations on purchasing a Baumatic Cooker<br />
Hood!<br />
To fully enjoy using your appliance long into the future,<br />
please firstly familiarise yourself with its specifications,<br />
safety advice and operational instructions included in this<br />
manual. You will also need this manual to ensure that your<br />
Cooker Hood has been installed properly.<br />
DIMENSIONS<br />
Width (canopy): 900 mm<br />
Depth (canopy): 650 mm<br />
Height (adjustable): 655 mm to 925 mm<br />
Dimensions of Chimney Section:<br />
300 mm X 377 mm<br />
Your stainless steel Cooker Hood is fitted with:<br />
• Superior extraction capacitor motor<br />
• Touch control operation<br />
• Metallic grease filter<br />
• 5 Speeds and Booster<br />
• 2 Halogen Lights<br />
• Cut off timer (15 mins)<br />
• Service warning indicator<br />
Extraction capacity – 750 m³/hr<br />
Optional Extra: 1 x C1 Carbon filters for air recirculation.
Important Safety Information: Please Read this before installing & using.<br />
o Any installation work must be<br />
carried out by a qualified<br />
electrician or competent person.<br />
o The hood must be installed in<br />
accordance with the installation<br />
instructions and all measurements<br />
followed.<br />
o If the cooker hood is installed<br />
for use above a gas appliance then<br />
the provision for ventilation must<br />
be in accordance with the Gas<br />
Safety Codes of Practice BS.6172,<br />
BS.5440 & BS.6891 (Natural Gas)<br />
and BS.5482 (LP Gas) 1994, the<br />
Gas Safety (Installation & Use)<br />
Regulations, the Building<br />
Regulations issued by the<br />
Department of the Environment,<br />
the Building Standards (Scotland)<br />
(Consolidated) Regulations issued<br />
by the Scottish Development<br />
Dptmt.<br />
o It is dangerous to alter the<br />
specifications or to modify this<br />
product in any way. Do not tamper<br />
with it or attempt to alter it in the<br />
attempt to customise it further.<br />
o When installing the hood,<br />
ensure that the following<br />
recommended distances are being<br />
observed between the cooker top<br />
and the bottom of the cooker hood:<br />
5<br />
Electric cookers:<br />
700 mm<br />
Gas cookers:<br />
700 mm<br />
Coal/ oil cookers:<br />
800 mm<br />
* NOTE - DO NOT SET YOUR<br />
COOKER HOOD LESS THAN<br />
700mm ABOVE YOUR COOKER!<br />
o When installed between<br />
adjoining wall cabinets,<br />
the cabinets must not<br />
overhang the hob.<br />
o The edges of the cooker<br />
hood are sharp – be<br />
mindful of this as you<br />
handle your appliance,<br />
especially during<br />
installation and cleaning.<br />
DO NOT CLEAN IN<br />
BEHIND THE GREASE<br />
FILTERS!<br />
o If the room where the<br />
cooker hood is to be used<br />
contains a fuel burning<br />
appliance such as a<br />
central heating boiler<br />
then its flue must be of<br />
the sealed or balanced<br />
flue type.<br />
o If other types of flue or<br />
appliances are fitted,<br />
ensure that there is an<br />
adequate supply of air in<br />
the room.<br />
o When the hood is being<br />
used in its extractor<br />
function, ensure that the<br />
ducting is fire retardant<br />
and that there are no<br />
bends sharper than 90<br />
degrees as this will<br />
reduce the efficiency of<br />
the hood.
Important Safety Information: Please Read this before installing & using.<br />
6<br />
o Ensure the ducting for<br />
the extractor function<br />
has the same diameter as<br />
the outlet hole all the<br />
way through.<br />
o Keep young children from<br />
using, playing with or<br />
tampering with the<br />
cooker hood. Older<br />
children and infirm<br />
persons should be<br />
supervised if they are<br />
using the cooker hood.<br />
o Your cooker hood is for<br />
domestic use only.<br />
o Please dispose of the<br />
packing material<br />
carefully – children are<br />
especially vulnerable to<br />
it.<br />
o Dirty oil is an even<br />
greater fire risk.<br />
o Always put lids on pots<br />
and pans when cooking<br />
on a gas cooker.<br />
o The manufacturer<br />
refuses to accept any<br />
responsibility for<br />
damages arising to the<br />
hood or it’s catching on<br />
fire from failure to<br />
observe fire safety advice<br />
in these instructions.<br />
o Remember that when in<br />
extraction mode, your<br />
cooker hood is removing<br />
air from your room.<br />
Ensure that proper<br />
ventilation measures are<br />
being observed. Note<br />
that it removes odours<br />
from your room, not<br />
steam.<br />
o Warning - Always ensure<br />
that the cooker hood has<br />
been disconnected from<br />
the power supply before<br />
carrying out any work on<br />
the hood, including<br />
replacing light bulbs.<br />
Do not connect the<br />
ducting system of this<br />
appliance to any existing<br />
ventilation system which<br />
is being used for any<br />
other purpose.<br />
Do not install above a<br />
cooker with a high level<br />
grill.<br />
Never leave frying pans<br />
unattended during use as<br />
overheated fats and oils<br />
might catch fire.<br />
Do not leave naked<br />
flames under the cooker<br />
hood.<br />
Do not attempt to use<br />
the cooker hood if it is<br />
damaged in any way.<br />
Never attempt to use it<br />
without the grease filters<br />
fitted or if the filters are<br />
excessively greasy!<br />
Never flambé cook under<br />
this cooker hood.
7<br />
Environmental Note<br />
Note: Before discarding an old appliance, switch off and<br />
disconnect it from the power supply. Cut off and render any plug<br />
useless. Cut the cable off directly behind the appliance to prevent<br />
misuse. This should be undertaken by a competent person.<br />
CONFORMITY TO W.E.E.E. DIRECTIVE
IMPORTANT: Before cleaning, always ensure that you have<br />
switched your cooker hood OFF at the power supply switch.<br />
Clean the external parts with<br />
mild liquid detergents on a<br />
damp cloth.<br />
Never use abrasive powder,<br />
corrosive solvents or brushes.<br />
Never insert pointed objects<br />
into the motor’s protective grid.<br />
Only clean the control panel<br />
and filter grill with a damp<br />
cloth and delicate detergents.<br />
8<br />
Cleaning your Baumatic Cooker Hood:<br />
Cleaning<br />
Be sure to replace the<br />
carbon filters at the<br />
recommended intervals.<br />
Build up could cause a<br />
fire hazard.<br />
Never take out the<br />
grease filters and<br />
attempt to clean the<br />
space above where they<br />
are set.<br />
________________________________________________<br />
Anti-Grease Grille<br />
Your cooker hood includes an anti-grease grille<br />
which helps absorb vapour-suspended grease<br />
particles to protect your kitchen & furniture from<br />
greasy residues.<br />
The metal grille may become inflammable if it<br />
becomes saturated with greasy residue.<br />
To prevent this fire hazard, the grille should be<br />
cleaned regularly (depending on use) every 10-15<br />
days and at least once a month in hot water with<br />
normal washing-up detergent. DO NOT USE A<br />
DISHWASHER TO ACHIEVE THIS.
4) INSTALLATION Reposition INSTALLATION the anti-grease INSTRUCTIONS INSTRUCTIONS metallic – filter Electrical grilles. - Electrical Connection.<br />
Before installation and usage, read all the instructions and make sure that the<br />
voltage (V) and the frequency (Hz) indicated on the identification plate (found<br />
inside your Cooker Hood) and all the data inside the appliance are exactly the<br />
same as the voltage and frequency in your home.<br />
NOTE: The manufacturer declines all responsibility in the event of failure to observe all the<br />
accident-prevention regulations in force which are necessary for normal use and regular<br />
operation of the electric system.<br />
______________________________________________<br />
ELECTRICAL CONNECTION<br />
Your cooker hood is intended for fitted and permanent installation.<br />
installation<br />
o The power cable must be<br />
connected to the terminals<br />
marked L (live) and N (neutral)<br />
in the hood and fixed with a<br />
cable clamp.<br />
o The cooker hood’s power cable<br />
must be fitted upstream from the<br />
electrical connection using an<br />
omni-polar switch with a contact<br />
distance of at least 3mm.<br />
NOTE: (UK only) WARNING – THIS APPLIANCE MUST NOT BE EARTHED. It should only be<br />
connected by a competent person using fixed wiring via a DOUBLE POLE SWITCHED FUSED<br />
SPUR OUTLET.<br />
We recommend that the appliance is connected by a qualified electrician who is a member<br />
of the N.I.C.E.I.C. and who will comply with the I.E.E. and local regulations. The wires in<br />
the mains lead are coloured in accordance with the following U.K. code:<br />
Blue= Neutral, Brown = Live, Green/Yellow = Ground<br />
If you can only find two wires in the cable (blue and brown), neither must be<br />
connected to the Earth terminal!<br />
• As the colours of the wires in the appliance’s mains lead may not<br />
correspond with the coloured markings identifying the terminals in<br />
your spur box, please proceed as follows:<br />
__________________________________________________________<br />
1) The BLUE WIRE<br />
must be connected<br />
to the terminal<br />
marked ‘N’<br />
(Neutral), or<br />
coloured Black.<br />
9<br />
2) The BROWN<br />
WIRE must be<br />
connected to the<br />
terminal marked<br />
‘L’ (‘Live’), or<br />
coloured RED<br />
(Fig. 7 – at left)
2<br />
TYPE<br />
Cod.<br />
SERIE BATCH<br />
V Hz W tot<br />
W<br />
10<br />
L L<br />
M2<br />
W MAX<br />
1 2 3<br />
M1<br />
ON<br />
OFF<br />
70 - 75cm
3<br />
1<br />
4<br />
11<br />
10mm<br />
ø6<br />
2 3 4
5<br />
12<br />
S>150 cm²
6<br />
7<br />
13
8<br />
9 10<br />
14<br />
1 2 3
17<br />
ON<br />
OFF<br />
1<br />
4 5<br />
2 3<br />
ON<br />
OFF<br />
6
18<br />
THE ELECTRONIC CONTROLS ON YOUR COOKER HOOD HAVE<br />
MULTIPLE FUNCTIONS:<br />
FEATURES:<br />
Touch Control Panel Operation<br />
Start and Increase Speed (6 speeds)<br />
The Cooker hood motor is turned on by pressing button 1. The hood<br />
automatically sets itself to speed Level 1 when activated. Speed is<br />
increased by pressing button 1 for less than 1 second; a dedicated<br />
screen displays the speed level.<br />
Keeping button 1 pressed longer than 1 second top speed is selected.<br />
Motor stopping and speed decreasing<br />
The fan operating speed is decreased by pressing button 2 for less<br />
than 1 second; the display indicates the speed level.<br />
Keeping button 1 pressed longer than 1 second turns the hood off.<br />
Timer Function<br />
This function allows you to program the cooker hood’s motor and lights<br />
in order to have them automatically switched off 15 minutes after you<br />
have activated this function. To program: press button 3.<br />
When timer function is activated you will see the number displayed<br />
pulsing on and off.<br />
Light on-off function<br />
Light is turned on and off by pressing button 4.
19<br />
Touch Control Panel Operation- continued:<br />
Specific features<br />
Your cooker hood’s electronic system is equipped with special functions<br />
designed to facilitate maintenance and correct utilisation.<br />
Metal filters cleaning required warning<br />
Every 30 hours of utilisation the microprocessor warns the user, by<br />
means of a pulsing “A” on the display, that it is time to clean the anti-<br />
grease metal filters. Cleaning the filters will guarantee better ducting<br />
performance and improved hygiene. To delete this prompt, once the<br />
filters have been cleaned and with the cooker hood off (not powered),<br />
hold buttons 2 and 3 pressed for more than 4 seconds: on the screen<br />
the number “8” will be displayed, it will disappear after 4 seconds.<br />
The microprocessor will reset the filters’s cleaning clock and begin the<br />
countdown to the next prompt.<br />
Carbon filters cleaning warning (only if mounted)<br />
If your cooker hood utilises the re-circulation air filtering system, and<br />
therefore is equipped with active carbon filters to purify the recirculated<br />
air, it is necessary to set the Cooker hood controls<br />
accordingly. While the hood is not in operation, hold button 3 for more<br />
than 4 seconds. On the screen will be displayed the symbol “-” (this<br />
means that the hood, for the time being, is not utilising the carbon<br />
filter), this symbol will be replaced after 4 seconds by the letter “C”<br />
(this means that the hood is now using the Carbon Filter).<br />
From now on the microprocessor will prompt for “Carbon<br />
Filters cleaning required” every 120 hours of utilisation by displaying a<br />
pulsing “C” on the screen. Cleaning the filter will guarantee better<br />
ducting performance and improved hygiene. To delete this prompt,<br />
once the filters have been replaced and with the cooker hood off (not<br />
powered), hold buttons no. 1 and no.3 pressed for more than 4<br />
seconds: on the screen will be displayed the number “8”, it will<br />
disappear after 4 seconds hence the microprocessor will reset the<br />
filter’s cleaning clock and begin to count the 120 hours to the next<br />
prompt for filters cleaning.
If something has gone wrong with your Cooker Hood, checking<br />
against this chart might keep you from having to call for service.<br />
Symptom Solution<br />
The cooker hood will not start!<br />
The cooker hood is not working<br />
effectively!<br />
The cooker hood has switched off<br />
during operation!<br />
20<br />
Troubleshooting<br />
• Check that the hood is connected<br />
to the electricity supply.<br />
• Check that the fan speed control is<br />
set properly.<br />
• The fan speed is not set high enough.<br />
• The grease filter is dirty.<br />
• The kitchen is not ventilated well<br />
enough.<br />
• If the hood is set for recirculation,<br />
check that the carbon filters have not<br />
expired.<br />
• If the hood is set for extraction, check<br />
that the ducting and outlets are not<br />
blocked.<br />
• The safety cut-out device has been<br />
tripped.<br />
• Turn off the hob and then wait for the<br />
device to reset.<br />
• Note that if you have installed your<br />
cooker hood too low, this will happen.<br />
If it happens frequently, it will be<br />
damaged.
Baumatic Ltd. Conditions of guarantee<br />
Dear Customer,<br />
Your new Baumatic appliance comes complete with a free 12 month guarantee covering both parts and<br />
labour costs resulting from defective materials or workmanship.<br />
Baumatic also gives you the opportunity to automatically extend the guarantee period for a further 12<br />
months at no extra cost, giving an initial guarantee period of 24 months. The extended guarantee period<br />
applies to England, Scotland, Wales and Northern Ireland only.<br />
To qualify for your full 24 months guarantee you must register your appliance within 28 days of purchase<br />
to be covered under this guarantee. This can be done online via: www.baumatic.co.uk or through returning<br />
the guarantee card which can be found in each new Baumatic appliance.<br />
* In addition, your appliance is covered by a 5 year parts warranty. Baumatic Ltd will provide free of<br />
charge the parts required to repair the appliance, only if they are fitted by a Baumatic engineer, for any<br />
defect that arises due to faulty materials or workmanship within a period of 5 years from the original<br />
purchase date.<br />
* An additional 1 to 3 year insurance scheme for labour is available should you wish to extend the<br />
warranty period.<br />
Should any person other than an authorised representative of Baumatic Ltd interfere with the appliance, the<br />
policy is negated and Baumatic Ltd will be under no further liability.<br />
The guarantee covers the appliance for normal domestic use only, unless otherwise stated.<br />
Any claims made under the terms of the guarantee must be supported by the original invoice/bill of sale<br />
issued at the time of purchase.<br />
This guarantee is transferable only with the written consent of Baumatic Ltd.<br />
If the appliance fails and is considered either not repairable or uneconomical to repair between 12 months<br />
(2 years if registered) and five years, a free of charge replacement will not be offered.<br />
The guarantee for any replacement will only be for the remainder of the guarantee on the original product<br />
purchased.<br />
The guarantee does not cover:<br />
- Sinks and taps<br />
- Failure to comply with the manufacturers instructions for use.<br />
- The replacement of cosmetic components of accessories<br />
- Accidental damage or wilful abuse.<br />
- Subsequent loss or damage owing to the failure of the appliance or electrical supply<br />
- Incorrect installation<br />
- Losses caused by Acts of God, civil war, failure to obtain spare parts, strikes or lockouts<br />
- Filters, fuses, light bulbs, external hoses, damage to bodywork, paintwork, plastic items, covers,<br />
baskets, trays, shelves, burner bases, burner caps, decals, corrosion, rubber seals.<br />
In the course of the work carried out it may be necessary to remove the appliance from it operating<br />
position. Whilst all reasonable care will be taken, Baumatic Ltd cannot accept responsibility for damage<br />
sustained to any property whatsoever in this process.<br />
This guarantee is in addition to and does not diminish your statutory or legal rights.<br />
Contacting Baumatic Ltd<br />
Sales Service Spares Technical/Advice<br />
TEL: 0118 933 6900 TEL: 0118 933 6911 TEL: 0118 933 6922 0118 933 6933<br />
FAX: 0118 931 0035 FAX: 0118 986 9124 FAX: 0118 933 6942 0118 933 6942<br />
For ROI (Republic of Ireland), please contact one of the numbers below:<br />
TEL: 01 – 6266798 FAX: 01 - 6266634<br />
Thanks you for buying Baumatic.<br />
* Applies to UK, Scotland, Wales & Northern Ireland only (Republic of Ireland has 1 year labour & 1 year parts warranty only)
Headquarters<br />
Baumatic Ltd.<br />
Baumatic Buildings,<br />
6 Bennet Road,<br />
Reading,<br />
Berkshire<br />
RG2 0QX, United Kingdom<br />
Sales Telephone<br />
+44 118 933 6900<br />
Sales Fax<br />
+44 118 931 0035<br />
Service Telephone<br />
+44 118 933 6911<br />
Service Fax<br />
+44 118 986 9124<br />
Spares Telephone<br />
+44 118 933 6922<br />
Technical / Advice Telephone<br />
+44 118 933 6933<br />
E-mail:<br />
sales@baumatic.co.uk<br />
technical@baumatic.co.uk<br />
Http (Internet site):<br />
www.baumatic.com