Operating Instructions - Bit 25
Operating Instructions - Bit 25
Operating Instructions - Bit 25

You also want an ePaper? Increase the reach of your titles
YUMPU automatically turns print PDFs into web optimized ePapers that Google loves.
ISO 14001 ISO 9001<br />
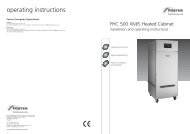
00-556435 Oct 2011 Issue 1<br />
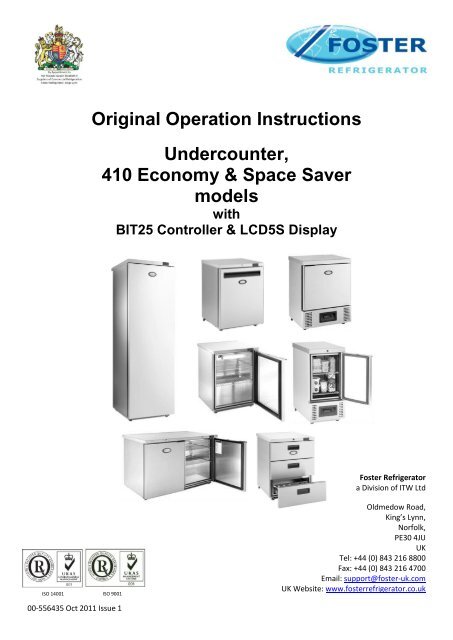
Original Operation <strong>Instructions</strong><br />
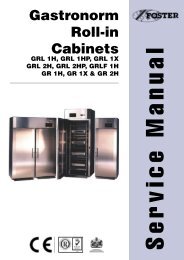
Undercounter,<br />
410 Economy & Space Saver<br />
models<br />
with<br />
BIT<strong>25</strong> Controller & LCD5S Display<br />
Foster Refrigerator<br />
a Division of ITW Ltd<br />
Oldmedow Road,<br />
King’s Lynn,<br />
Norfolk,<br />
PE30 4JU<br />
UK<br />
Tel: +44 (0) 843 216 8800<br />
Fax: +44 (0) 843 216 4700<br />
Email: support@foster-uk.com<br />
UK Website: www.fosterrefrigerator.co.uk
Important Note To The Installer:<br />
If you are not the user please pass this document on to them as it contains important guidelines on<br />
operation, loading, cleaning and general maintenance and should be kept for reference.<br />
Disposal requirements<br />
If not disposed of properly all refrigerators have components that can be harmful to the environment. All old<br />
refrigerators must be disposed of by appropriately registered and licensed waste contractors, and in accordance<br />
with national laws and regulations.<br />
Start-Up and Operation<br />
After unpacking leave to stand for 60 minutes and clean before turning on (cleaning directions supplied within this<br />
manual). Please think of where the cabinet is to be situated as cold air from air conditioning units & direct heat<br />
sources can affect its performance, also warm air is produced from the rear of the unit. Make sure that a minimum<br />
clearance of 50mm above and beside the cabinet is available for ventilation and effective operation.<br />
Insert the mains plug into the wall socket and turn on, please do not plug or unplug the unit with wet hands. The<br />
cabinet will start automatically displaying the actual internal temperature of the unit (area where product is stored).<br />
As the operating temperature has been pre-set no adjustments are required. Allow the cabinet to reach its normal<br />
operating temperature before loading.<br />
Controller Buttons & Warnings<br />
Controller Operation Alarms/Warnings<br />
Info/Set point Button<br />
Controller in stand-by<br />
Manual defrost /Decrease Button<br />
Manual activation /Increase Button/<br />
Exit/Stand-by Button<br />
Condenser high pressure alarm<br />
Room high temperature alarm<br />
Room low temperature alarm<br />
Compressor Output Probe T1 failure (Air)<br />
Fan Output<br />
Alarm<br />
Generic Alarm<br />
Condenser high temperature alarm<br />
Defrost Output Defrost in progress<br />
Activation of 2 nd parameter set<br />
Door open alarm<br />
Condenser clean warning<br />
Standby<br />
Pressing this<br />
button for 5<br />
seconds will<br />
allow the unit to<br />
be turned on or<br />
put into standby.<br />
Keypad Unlock<br />
Press & release<br />
then use<br />
to select ‘LOC’.<br />
Press and hold<br />
to change<br />
from ‘YES’ to<br />
‘NO’. Leave for<br />
10 seconds or<br />
briefly press<br />
to resume.<br />
Shelves, Supports & Drawers.<br />
Shelves – ‘H’ models are supplied with slotted removable shelf supports. The rear supports have an inbuilt ‘slot’ to<br />
prevent the shelf from damaging the rear air duct.<br />
‘L’ models have fixed shelves that are part of the freezer system and cannot be removed.<br />
Refrigerated Drawers can be removed by pulling out to their full extent and lifting so that the rollers pass through<br />
the slots in the drawer runners. Please make a note of which drawers came from which runners.<br />
Food<br />
Cover all foods and separate raw and cooked foods to avoid cross contamination.<br />
Loading & Airflow<br />
Evenly distribute loads on shelves making sure that no more than <strong>25</strong>kg is placed on each. Also ensure the air can<br />
circulate around/through the stored product.
Internal Light (where fitted)<br />
The on/off switch is located on the front of the light fitting.<br />
Door Lock<br />
To lock insert the key and turn 90°, turn in the opposite direction to unlock.<br />
Defrost<br />
‘H’ models are fitted with an automatic defrost function ensuring the cooling plate remains free from ice. The<br />
condensed water is automatically evaporated using the heat from the refrigeration system. ‘L’ models have static<br />
freezer shelves and require manual defrosts. The entire stored product should be removed and placed in a separate<br />
freezer. Switch off the mains electric and leave the cabinet’s door open while placing a bowl inside to catch the<br />
water as it defrosts. Once fully defrosted and dry inside the cabinet can be turned on again at the mains. Do not<br />
replace frozen food into the cabinet until it has reached its normal operating temperature. Do not use sharp<br />
implements or heat to remove ice from the freezer as this may cause damage or injury.<br />
Cleaning and Maintenance<br />
Important: Before cleaning the power supply should be turned off at the mains, please do not plug or unplug the<br />
unit with wet hands. Only when cleaning has been completed and the unit is dry may the cabinet be turned back<br />
on at the mains.<br />
Regular Maintenance:<br />
As and when required remove all product and shelving (beware of cold and or sharp componants) from the<br />
unit. Clean exterior and interior surfaces with mild liquid detergent, following the directions on the pack at<br />
all times. Rinse surfaces with a damp cloth containing clean water. Never use wire wool, scouring<br />
pads/powders or high alkaline cleaning agents i.e bleaches, acids and chlorines as these may cause damage.<br />
Clean the condenser at least once a month (it is located at the rear of the units; beware of hot and possible<br />
sharp components). Use a soft brush or vacuum cleaner to remove dirt/dust. If there are any stubborn<br />
grease deposits left on or through the condenser call your supplier to carry out a full service (this is normally<br />
chargeable). Failure to maintain the condenser may invalidate the warranty of the condensing unit and<br />
cause premature failure of the motor/compressor. DO NOT use a wire brush to clean the condenser. Re-fit<br />
any panels removed after cleaning.<br />
Door gaskets should be inspected on a regular basis and replaced if damaged. To clean, wipe with a warm<br />
damp soapy cloth followed by a clean damp cloth. Finally thoroughly dry before closing the door.<br />
Shelves and their supports should be removed to clean. The shelves are dishwasher safe; however the<br />
vertical supports should be cleaned with warm soapy water then rinsed & dried like the gaskets.<br />
Troubleshooting<br />
Before calling your supplier please make sure that:<br />
a) The plug has not come out of the socket and the mains power supply is on i.e. are the lights working?<br />
b) The fuse for the cabinet has not blown<br />
c) The cabinet is positioned correctly – cold air from air conditioning units & direct heat sources as can affect<br />
performance<br />
d) The condenser is neither blocked nor dirty<br />
e) The products are placed in the unit correctly<br />
f) Defrost is not in progress or required<br />
g) Check at regular intervals that the operating noise of the unit is normal and the condenser is clean<br />
If the reason for the malfunction cannot be identified, disconnect the electrical supply to the unit and contact your<br />
supplier.<br />
When requesting a service call quote the model and serial number which can be found on the silver label located on<br />
the inside of the units door (starts E5…….).