2005 Reign SERIES DUAL-SUSPENSION BIKE ... - Giant Bicycles
2005 Reign SERIES DUAL-SUSPENSION BIKE ... - Giant Bicycles
2005 Reign SERIES DUAL-SUSPENSION BIKE ... - Giant Bicycles

You also want an ePaper? Increase the reach of your titles
YUMPU automatically turns print PDFs into web optimized ePapers that Google loves.
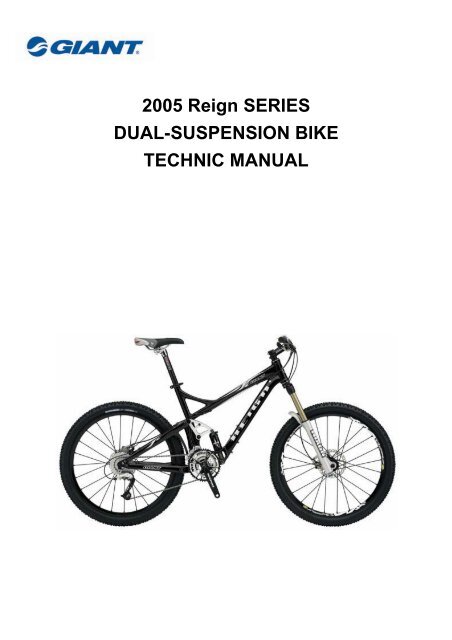
<strong>2005</strong> <strong>Reign</strong> <strong>SERIES</strong><br />
<strong>DUAL</strong>-<strong>SUSPENSION</strong> <strong>BIKE</strong><br />
TECHNIC MANUAL<br />
1
CONTENTS<br />
PRODUCT FEATURE<br />
SECTION 1. SIZING<br />
SECTION 2. REAR SHOCK<br />
SECTION 3. TORGUE SETTING<br />
SECTION 4. EXPLOADE DRAWING<br />
2
<strong>Reign</strong> Product feature<br />
This bike is long travel XC bike. It can be go anywhere and anything.<br />
The rear suspension system is a new design which is called maestro, this maestro feature is vpp<br />
design and to get the overall suspension behavior to the best not only one point is the best .<br />
1. Minimal power loss<br />
2. Low kickback<br />
3. Minimal brake lockout<br />
4. Linear rising rate suspension design<br />
5. Best traction<br />
The <strong>Reign</strong> has some features are design as below<br />
1. 5.8” rear travel and 6” front fork<br />
2. Full cartridge bearing design<br />
3. Diamond shape frame design for light weight and better rigidity<br />
4. Full seat post adjustment<br />
5. Full range size (15”~21”)<br />
6. Aluxx SL tube<br />
3
1. Sizing<br />
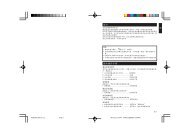
The actual frame measurements and geometries are listed below.<br />
Size 15.5〞 16” 18〞 20〞 21”<br />
Top Tube (mm) 560 570 590 613 630<br />
Seat Tube (mm) 394 406 457 508 533<br />
Seat Angle 73.5° 73.5° 73.5° 73° 73°<br />
Head Angle 70° 70° 70° 70° 70°<br />
B.B. Drop (mm) -12 -12 -12 -12 -12<br />
Rear Center (mm) 438 438 438 438 438<br />
Wheel Base (mm) 1071.4 1082.2 1105.5 1127.1 1145.5<br />
2.Rear shock<br />
The <strong>Reign</strong> series is all purpose dual suspension long travel XC bike. The <strong>Reign</strong> bike is capable of<br />
climbing and descent the most technical of trails. The <strong>Reign</strong> offer three ProPedal damping setting to<br />
reduces pedal induced suspension bob. You can find s setting that suits your riding style. Please<br />
follow the guidelines below in setting up and maintaining your <strong>Giant</strong> Trance bike.<br />
pump<br />
4
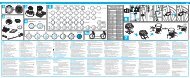
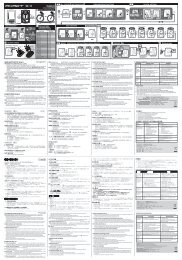
Rebound adjuster<br />
Air valve<br />
SPV Air Valve<br />
SPV 3 WAY SHOCK<br />
Setup<br />
SPV SET-UP QUICK REFERENCE GUIDE<br />
This quick reference guide is to be used for setting up the any Swinger shock. Follow this order to<br />
ensure the best possible tuning.<br />
* Coil and Air Shock Initial Set Up<br />
1. Adjust Sag:<br />
Sag is the amount the shock compresses under normal body weight. On the air shock, there are sag<br />
incrementations on the inside of the shock that can be used to help adjust sag.<br />
Cross country:<br />
Freeriding:<br />
25-30% Sag<br />
30-40% Sag<br />
2. Set SPV Pressure:<br />
Range should be between 75 and 150 psi. Pressure should be between 50-70% of body weight. More<br />
pressure will create more compression damping, hold the bike up more and pedal better. Less pressure<br />
will create less compression damping, allow more sag, and be more responsive and supple.<br />
3. Set SPV Volume:<br />
You should begin with the 16mm adjuster completely backed out. Turning the volume adjuster<br />
inwards will create a more progressive damping effect making the suspension firmer from the middle<br />
to bottom out. Turning the volume adjuster outwards will make the rear shock more linear in<br />
compression damping and be a softer finish.<br />
4. Rebound Damping:<br />
Turn the blue knob located on the eyelet mount clockwise to increase rebound damping.<br />
5. Low Speed Compression Damping (6-way adjust only):<br />
Turn in the red adjustment knob to increase chassis stability (also may decrease supply feel of shock).<br />
6. High Speed Compression Damping (6-way adjust only):<br />
Turn in the black adjustment knob to increase high-speed bottom resistance.<br />
5
*Note:<br />
On the 6-way shock, please make sure that the two compression adjuster knobs on the reservoir are<br />
fully open when setting the shock pressure and volume. You can turn them after you set up the<br />
pressure and volume adjuster to achieve more compression damping.<br />
6
3. Torque settings<br />
The bolts used to attach the rear suspension unit are very high grade products factory installed to<br />
specific torque specification. If it becomes necessary to remove or tighten the pivot bolts extreme care<br />
should be taken when re-tightening them.<br />
All bolts should be cleaned and re-set using LocTite Primer (#243)<br />
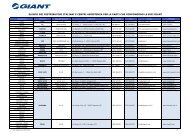
All bolts location and tighten torque please refer to the illustration below.<br />
2 7<br />
4<br />
3<br />
1 5<br />
6<br />
Torque settings:<br />
1. Main pivot 120 -150 Kgf/cm. or 104 -130 in-lbs.<br />
2. Seatstay pivot 120 -150 Kgf/cm. or 104 -130 in-lbs.<br />
3. Main linkage pivot 90 -110 Kgf/cm. or 78 - 95 in-lbs.<br />
4. Upper shock mount 90 -110 Kgf/cm. or 78 - 95 in-lbs.<br />
5. Lower shock mount 120 -150 Kgf/cm. or 104 -130 in-lbs.<br />
6. Chainstay pivot 120 -150 Kgf/cm. or 104 -130 in-lbs.<br />
7. Llinkage connect pivot 90 -110 Kgf/cm. or 78 - 95 in-lbs.<br />
7
4.Explode Drawing<br />
THE DRAWING BELOW SHOWS RELATIONS OF EVERY PARTS AND FRAME<br />
8