INTRODUCTION TO BATTLE ANALYSIS - UNC Charlotte Army ROTC
INTRODUCTION TO BATTLE ANALYSIS - UNC Charlotte Army ROTC
INTRODUCTION TO BATTLE ANALYSIS - UNC Charlotte Army ROTC

You also want an ePaper? Increase the reach of your titles
YUMPU automatically turns print PDFs into web optimized ePapers that Google loves.
Section<br />
2<br />
<strong>INTRODUCTION</strong> <strong>TO</strong><br />
<strong>BATTLE</strong> <strong>ANALYSIS</strong><br />
Key Points<br />
1 Battle Analysis Checklist<br />
2 The Staff Ride<br />
Officership Track<br />
3 Abbreviated Case Study:<br />
The Battle of Kasserine Pass<br />
e<br />
Training and leader development must include<br />
a historical perspective—especially of the conduct<br />
of battle.<br />
GEN Frederick M. Franks Jr.
Introduction to Battle Analysis n 51<br />
Introduction<br />
As an MSL II Cadet, you were introduced to the principles of war. As an MSL III<br />
Cadet, you applied those principles to the Civil War Battle of Chancellorsville.<br />
The method you used in that case study can be described as an abbreviated<br />
application of battle analysis that focused on the principles of war. The US <strong>Army</strong><br />
Command and General Staff College developed the battle analysis method to help<br />
students structure their studies of battles and campaigns. Any military professional<br />
seeking insight from historical battles and campaigns can easily apply the format<br />
to help deepen his or her understanding of warfare and the profession of arms.<br />
This section will review the battle analysis method and then present a partial<br />
case study of the Battle of Kasserine Pass in Tunisia during World War II.<br />
battle analysis<br />
a method used by<br />
the <strong>Army</strong> to provide<br />
a systematic approach<br />
to the study of battles,<br />
campaigns, and other<br />
operations—it is designed<br />
as a general guide to<br />
ensure that significant<br />
actions or factors<br />
affecting the outcome<br />
of a battle or operation<br />
are not overlooked<br />
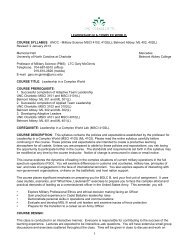
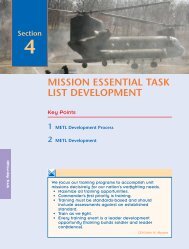
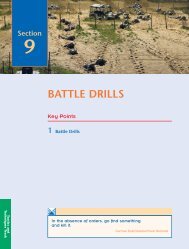
Soldiers engaged in battle in World War II
52 n SECTION 2<br />
Battle Analysis Checklist<br />
The battle analysis process is a checklist that ensures that you examine all the critical aspects<br />
of the battle or the campaign in question. The checklist is divided into four sections:<br />
• Define the subject<br />
• Set the stage (strategic, operational, and tactical settings)<br />
• Describe the action<br />
• Draw lessons learned.<br />
First you decide which battle to study. Once you’ve chosen a battle, you gather the<br />
information necessary for a thorough and balanced study and organize it logically so you<br />
can analyze it. Then you perform the analysis and list the lessons learned.<br />
You don’t have to follow the checklist to the letter, or even use every part of it in<br />
your study. Don’t let the format’s order disrupt the flow of your study, either—but be sure<br />
at least to consider all the elements.<br />
Define the Subject<br />
Like any military operation, your study of military history needs a clear, obtainable objective.<br />
So you should begin by defining what you will study. Determine what, where, when,<br />
who, and why. Frame your study by determining the date of the battle or campaign, its<br />
location, and the adversaries involved.<br />
Next look for good sources that will help you make a systematic and balanced study.<br />
You can use books, articles, the Internet, video, audio, and other electronic means.<br />
Look for a variety of books to get a balanced account of the battle. You should consult<br />
memoirs, biographies, operational histories, and institutional histories for information on your<br />
subject. Don’t overlook general histories, which can help provide the battle’s strategic setting.<br />
Articles from professional military publications and historical journals can also be<br />
excellent sources of information. Video and film documentaries containing footage of actual<br />
events or interviews with people who took part in a battle can add to your understanding<br />
of the events. Check to see if transcribed oral history interviews with battle participants<br />
are available. In addition, check the Internet for electronic documents on more recent<br />
military operations as well as historical campaigns.<br />
Regardless of what you’re researching, it’s always useful to evaluate your sources. Despite<br />
the large volume of published material and the enormous amount of raw information<br />
available on the Internet, finding good sources is not always easy. As you gather your research<br />
material, you should consider each potential source in terms of its content and bias. What<br />
information can the source give you? Is it relevant? Will it help you complete the study? Is<br />
there a clear bias, and if so, what is it? Does the bias interfere with your use of the source?<br />
Some sources are so biased that their credibility is suspect. However, a source can be<br />
extremely biased yet still contain useful information or observations.<br />
Set the Stage<br />
You need a good understanding of the strategic, operational, and tactical situations before<br />
you can analyze the battle. The amount of detail you go into depends on the purpose of<br />
your study and the audience you’re addressing. If everyone knows the causes of the war and<br />
the opponents, for example, you may not need to describe these in much detail. A few<br />
paragraphs may be enough to place the battle in its proper context. For example, you<br />
probably don’t need an abundance of detail on the causes of World War II to analyze the<br />
Battle of Okinawa. But you will need a thorough knowledge of the campaign in the Pacific.
Introduction to Battle Analysis n 53<br />
First you should consider the strategic factors: What caused the war? Who were the<br />
opponents? What were their war aims? What armed forces did the adversaries possess?<br />
How well trained, equipped, and armed were they? Which significant social, political,<br />
economic, or religious factors influenced the armies?<br />
Next describe the operational settings: What campaign was the battle part of? What were<br />
the campaign’s objectives? Did any military factors—alliances, tactics, doctrine, or personality<br />
traits—affect the campaign? How did the battle fit into the overall campaign?<br />
Then review the tactical situation: Since these factors have a direct effect on the<br />
operation, this part of the format will often answer why a commander took or didn’t take<br />
a particular action. You study the area of operations much as you have learned to do as a<br />
platoon leader. What was the weather like in the area of operations? How did it affect the<br />
operation? Use OAKOC (observation and fields of fire, avenues of approach, key and<br />
decisive terrain, obstacles, cover and concealment) factors to describe the terrain in the<br />
area of operations. What advantages did it give to the attackers or to the defenders?<br />
Compare the opposing forces: In many ways, this is the heart of your study. Describe<br />
and analyze the forces involved using the following terms:<br />
OAKOC<br />
Observation and<br />
fields of fire<br />
Avenues of Approach<br />
Key and decisive terrain<br />
Obstacles<br />
Cover and concealment<br />
(FM 3-0)<br />
Size and composition. Which principal combat and supporting units were involved<br />
in the operation? What were their numerical strengths in troops and key weapons<br />
systems? How did the commanders organize them?<br />
Technology. What were the battlefield technologies—such as tanks, small arms, close<br />
air support aircraft—of the opposing forces? Did one side have a technological<br />
advantage over the other?<br />
Logistical systems. How did logistics affect the battle? Did one side have an advantage<br />
in available supplies or transportation?<br />
Command, control, and communications (C3). What kind of C3 systems did the<br />
opposing forces employ? Were these systems under centralized or decentralized<br />
control? How were the staffs organized, and how effective were they?<br />
Intelligence. What intelligence was available to the opposing forces? How well was it<br />
used? What were the major sources of intelligence? Did one side have an advantage<br />
over the other in intelligence resources?<br />
Doctrine and training. What was the tactical doctrine of the opposing forces, and how<br />
did they use it? What was the level of training in the opposing forces? Were some troops<br />
experienced veterans, some not, and some in-between?<br />
Condition and morale. What was the morale of the troops before the fighting, and did<br />
it change after the fighting began? How long had the troops been committed, and<br />
how did weather and terrain affect them? Did specific leaders affect morale?<br />
Leadership. Who were the leaders, and how effective had they been in past actions?<br />
What was their training and level of experience?<br />
You won’t always be able to answer all these questions. But you should go through the<br />
list to determine what information you have and where you may need to do more research.
54 n SECTION 2<br />
Describe the Action<br />
Describing the battle itself is what most people consider to be real military history. The format<br />
below takes a chronological approach to studying a battle. But you shouldn’t feel locked<br />
into it. If you need to skip a phase in order to examine a specific topic—such as maneuver<br />
or logistics—because it is more important to your overall objective, feel free to do so.<br />
1. State the opposing forces’ missions: What were their objectives? What missions<br />
did the commanders develop to achieve the objectives? Were there other options—<br />
such as attacking, defending, or withdrawing—open to the two sides? Were those<br />
options feasible?<br />
2. Describe the initial disposition of forces: What were the locations of the opposing<br />
forces’ units? How were the units deployed tactically?<br />
3. Describe the opening moves of the battle: Examine each side’s initial actions.<br />
Did one side gain an advantage over the other in the opening phase of the battle?<br />
4. Detail the battle’s major phases: Establish a chronology for the battle while<br />
examining the actions after the opening moves. Look for key events or decisions<br />
that turned the battle toward one side or the other.<br />
5. State the outcome: Who (if anyone) won the battle? Did either side achieve<br />
its objectives? Did the battle provide an advantage to the winning side, and what<br />
was it? Did the battle have any long-term effects, and, if so, what were they?<br />
Draw Lessons Learned<br />
This is the most important part of battle analysis. In this step, you turn the historical<br />
facts of the battle into finished analysis, with lessons to learn and apply today. In trying<br />
to distill lessons from the study of any battle, it’s important to look at why something<br />
happened. To do so, you will look at what caused the outcome. Look for those essential<br />
elements that determined the victory or defeat.<br />
The insights, or “constants of war,” gained from the study should transcend time,<br />
place, and doctrine.<br />
e<br />
To be a successful Soldier, you must know history.<br />
LTG George S. Patton Jr.<br />
e<br />
The only right way of learning the science of war is<br />
to read and reread the campaigns of the great captains.<br />
Napoleon
Introduction to Battle Analysis n 55<br />
The Staff Ride<br />
An excellent method of studying battles and drawing lessons from them is the staff ride.<br />
Different from battlefield tours, staff rides combine a rigorous course of historical<br />
preparation with an examination of the terrain on which an actual battle occurred. The<br />
idea behind the staff ride is that you study the battle thoroughly before arriving at the<br />
battlefield site—this guarantees thought, analysis, and discussion. A staff ride links a<br />
historical event, a systematic preliminary study, and a visit to the actual terrain to produce<br />
a three-dimensional battle analysis. You will participate in a staff ride later in the semester;<br />
this section gives you the tools to make the most of the experience.<br />
Abbreviated Case Study:<br />
The Battle of Kasserine Pass<br />
Many important elements of <strong>Army</strong> doctrine grew out of lessons learned at the Battle of<br />
Kasserine Pass. Those lessons would prove crucial to the Allied invasion of France that<br />
began on the Normandy beaches in June 1944. The following section focuses briefly on<br />
the unity of command and strategic vision, tactics and maneuver, and leadership of the<br />
forces that met there.<br />
staff ride<br />
systematic preliminary<br />
study of a selected<br />
campaign, an extensive<br />
visit to the actual<br />
sites associated with<br />
that campaign, and<br />
an opportunity to<br />
integrate the lessons<br />
derived from each<br />
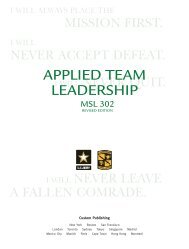
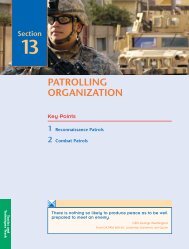
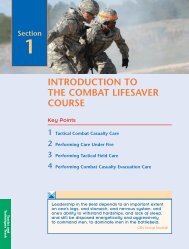
T3 tank in the Battle of Kasserine Pass
56 n SECTION 2<br />
When the US and Britain<br />
invaded North Africa<br />
in 1942, Morocco,<br />
Algeria, and Tunisia were<br />
French colonies under<br />
the control of the French<br />
government at Vichy—<br />
a Nazi puppet regime.<br />
In the first few days of<br />
the invasion, the Vichy<br />
French forces resisted, but<br />
the British and US forces<br />
quickly defeated them<br />
and turned them to<br />
the Allied side. For many<br />
months thereafter, the<br />
Allies labored to unite<br />
the French North African<br />
forces with those of the<br />
Free French in London<br />
under GEN Charles<br />
De Gaulle, who gained<br />
the upper hand and<br />
later became president<br />
of the French provisional<br />
government.<br />
The US <strong>Army</strong> that invaded North Africa during World War II, with its British allies in<br />
November 1942, was inadequately equipped, under-trained, and inexperienced. Its leaders<br />
were not all of the highest quality, and command arrangements proved unequal to the task.<br />
Despite heavy losses in Soldiers and equipment, the Allies managed to hold on and turn<br />
back a powerful and determined Axis counterattack—those engagements in February 1943<br />
that became known as the Battle of Kasserine Pass.<br />
One historian of that battle has called it a “disaster for the US <strong>Army</strong>”:<br />
About 30,000 Americans engaged in the Kasserine fighting under II Corps, and probably<br />
300 were killed, almost 3,000 wounded, nearly 3,000 missing. It would take 7,000<br />
replacements to bring the units to authorized strengths. The 34th Division under the<br />
French XIX Corps at Sbiba sustained approximately 50 men killed, 200 wounded, and<br />
250 missing. II Corps lost 183 tanks, 104 half-tracks, 208 artillery pieces, and 512 trucks<br />
and jeeps, plus large amounts of supplies—more than the combined stocks in American<br />
depots in Algeria and Morocco (Blumenson, 1986).<br />
Collision in Tunisia<br />
The French authorities in North Africa, after agreeing to a truce, joined the British<br />
and Americans who, by then, in accordance with prior plans, had turned eastward<br />
from Algeria and entered Tunisia, and were driving toward Bizerte and Tunis,<br />
their ultimate objectives. On the way they quickly ran into opposition. Axis troops<br />
had entered Tunisia from Italy shortly after [Operation] Torch [the code name<br />
of the Allied invasion of North Africa], and eventually a field-army-size force, under<br />
General Juergen von Arnim, built up an extended bridgehead covering Bizerte<br />
and Tunis in the northeastern corner. Von Arnim sought to prevent the Allies from<br />
overrunning Tunisia and also to permit [German GEN Erwin] Rommel’s army to<br />
finish withdrawing from Libya into southern Tunisia. The Axis would then hold the<br />
eastern seaboard of the country. To guarantee their security on the eastern coastal<br />
plain, von Arnim and Rommel needed to control the passes in the Eastern Dorsale,<br />
a mountain range running generally north and south. Through that chain were<br />
four major openings—Pichon and Fondouk in the north and Faid and Rebaou<br />
in the south. Von Arnim seized Pichon in mid-December 1942. Toward the end<br />
of January 1943, as Rommel settled into the Mareth Line in southern Tunisia,<br />
the Axis desire for the other passes initially spurred what developed into<br />
the Battle of Kasserine Pass.<br />
M. Blumenson, Kasserine Pass, 30 January–22 February 1943,<br />
in C. Heller & W. Stofft, eds., America’s First Battles, 1776–1965
Introduction to Battle Analysis n 57<br />
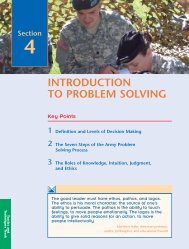
Figure 2.1<br />
Northern Tunisia, Showing the Eastern and Western Dorsale Mountains<br />
Taken from America’s First Battles, 1776–1965, Blumenson (1986).
58 n SECTION 2<br />
Unity of Command and Strategic Vision<br />
In the battle, both sides suffered from divided command arrangements that interfered with<br />
the ability of maneuver commanders to carry out operations successfully.<br />
Phase I—Assault on the Eastern Dorsale Begins<br />
Allied command lines were less than firm. General Sir Kenneth A.N. Anderson,<br />
at the head of the British First <strong>Army</strong>—with the British V Corps, several British<br />
divisions, and some American and French units in the north—was the overall<br />
tactical commander in Tunisia, but Americans found him difficult to work with.<br />
[MG Lloyd R.] Fredendall [commander of one of three Allied task forces in<br />
North Africa] exacerbated the problem because he saw his role as autonomous.<br />
The French, who had General Louis-Marie Koeltz’s XIX Corps in the center,<br />
a division in the north, another in the south, and miscellaneous detachments<br />
scattered virtually everywhere, refused to serve under direct British command.<br />
As a consequence, General Alphonse Juin, commander of the French land and<br />
air forces in French Northwest Africa, exercised loose direction and provided<br />
liaison and guidance to all French formations.<br />
Fredendall had small packets of troops dispersed over a very large area—<br />
one battalion of the 1st Infantry Division at Gafsa, another blocking the Fondouk<br />
road to Sbeitla, Combat Command A (CCA) of the 1st Armored Division at<br />
Sbeitla, Combat Command B (CCB) near Tebessa. He could bolster the French<br />
garrisons holding the Faid and Rebaou Passes, keep his forces concentrated<br />
in a central location and ready to counterattack, or strike toward the east coast<br />
to sever the contact between von Arnim’s and Rommel’s armies. He sought<br />
to do the latter by raiding a small Italian detachment at Sened on 24 January.<br />
The action was highly successful as a morale builder but had no real result<br />
except to squander Fredendall’s meager resources.<br />
The Axis command correctly read the situation and continued planning to take<br />
control of the Eastern Dorsale. Rommel established his headquarters in southern<br />
Tunisia on 26 January, and two days later Comando Supremo in Rome approved<br />
a cautious push to take the Fondouk and Faid Passes and to advance on Gafsa.<br />
With Rommel’s 10th and 21st Panzer Divisions temporarily under von Arnim’s<br />
control, von Arnim attacked on 30 January to open the Battle of Kasserine Pass.<br />
Just before dawn, thirty tanks struck 1,000 French troops in the Faid Pass while<br />
another contingent of German tanks, infantry, and artillery drove through the<br />
Rebaou defile ten miles to the south, overran several hundred French defenders,<br />
and came up behind the French holding Faid. Encircled and outnumbered,<br />
the French fought gallantly for more than twenty-four hours until they<br />
were overwhelmed.
Figure 2.2 Battle of Kasserine Pass, 14–18 February 1943<br />
Introduction to Battle Analysis n 59
60 n SECTION 2<br />
Five hours after the German attack started, Anderson instructed Fredendall<br />
rather vaguely to restore the situation at Faid. Because [American MG Orlando]<br />
Ward, the 1st Armored Division commander, was at Gafsa supervising the<br />
Sened raid and other useless actions, Fredendall communicated directly with<br />
the CCA commander at Sbeitla, Brig. Gen. Raymond McQuillin, who was old<br />
in appearance, mild in manner, and cautious in outlook. McQuillin sent out<br />
two small reconnaissance units toward the Faid and Rebaou Passes to determine<br />
what was happening. At noontime, even though the French at Faid were still<br />
resisting, the reconnaissance elements erroneously reported the Germans in control<br />
at both passes. McQuillin decided to counterattack. As he moved his assault forces<br />
forward, German planes bombed and attacked his units and disrupted the advance.<br />
American aircraft dispatched to intercept the Germans dropped bombs on the<br />
CCA command post by mistake, and American antiaircraft gunners shot down an<br />
American plane. McQuillin then waited for nightfall. During the hours of darkness,<br />
he pushed his forces about halfway to Faid and Rebaou.<br />
On the morning of 31 January, more than twenty-four hours after the German<br />
attack, McQuillin committed a small-tank infantry force under Col. Alexander<br />
N. Stark, Jr., to strike to Faid and another such force under Col. William B. Kern<br />
to go for Rebaou. Late getting under way, the effort was badly coordinated<br />
and too weak to attain the objectives. Heavy German defensive fires, together<br />
with effective bombing and strafing from the air, knocked out several tanks and<br />
induced terror, indecision, and paralysis among the American units. McQuillin’s<br />
effort petered out. As Fredendall, the II Corps commander, was thinking on<br />
1 February of moving CCB from Tebessa to Sbeitla, Anderson, the First British<br />
<strong>Army</strong> commander, instructed him to dispatch CCB toward Fondouk, where<br />
von Arnim had struck Koeltz’s French elements, seized the pass, and threatened<br />
a serious penetration.<br />
Fredendall complied. McQuillin tried again that day to reach Faid but failed<br />
because, he said, of the disgraceful performance of Stark’s infantry. Von Arnim,<br />
now in control of the four major passes, called off further endeavor. With the<br />
10th Panzer Division at Fondouk and the 21st at Faid and Rebaou, von Arnim,<br />
instead of returning both divisions to Rommel, hoped to keep them for use in<br />
the north. The front in Tunisia now became quiet, and the first or preliminary<br />
phase of what would develop into the Battle of Kasserine Pass ended.<br />
On the Allied side, [Supreme Allied Commander GEN Dwight D.] Eisenhower<br />
questioned Fredendall’s competence, Anderson doubted the battleworthiness<br />
of American troops, Fredendall wondered whether Ward was proficient,<br />
McQuillin castigated Stark, and so it went down the line. American ineptitude<br />
and failure to rescue the French defenders at Faid had shocked the French.
Introduction to Battle Analysis n 61<br />
Additional American units—parts of Maj. Gen. Terry Allen’s 1st Infantry Division<br />
and of [US MG Charles W.] Ryder’s 34th Division—moved into southern Tunisia<br />
but they were split into small parcels and physically separated.<br />
M. Blumenson, Kasserine Pass, 30 January–22 February 1943,<br />
in C. Heller & W. Stofft, eds., America’s First Battles, 1776–1965<br />
The Axis suffered from similar problems, only to a worse degree. The Germans and Italians<br />
didn’t trust each other. The Axis effort was technically under command of the Comando<br />
Supremo in Rome, which had to authorize all actions. The two German commanders on<br />
the scene, von Arnim and Rommel, nursed petty jealousies and struggled over command<br />
of the two panzer (tank) divisions.<br />
Tactics and Maneuver<br />
During the North African invasion, American forces in particular demonstrated serious<br />
shortcomings in training, tactics, maneuver, and skill in using their equipment. Some of<br />
that equipment, notably American light tanks, was clearly no match for the heavy German<br />
Tiger tanks. These problems gave the German-Italian forces—who were battle-hardened<br />
and well-trained, and enjoyed close coordination between infantry, tanks, artillery, and<br />
close air support—a distinct tactical advantage in the battle.<br />
Phase II—Defeat and Retreat<br />
The second phase of the Kasserine battle started very early on the morning<br />
of 14 February, before [COL Thomas D.] Drake could institute his bazooka-firing<br />
training program on Djebel Ksaira. [His troops had just received the antitank<br />
weapons and did not know how to use them.] During a raging sandstorm,<br />
more than 200 German tanks, half-tracks, and guns of both panzer divisions<br />
came through Faid. One task force swung around the northern side of Lessouda<br />
and encircled the hill; another swung around the southern side of Ksaira and<br />
surrounded the height. [LTC John K.] Waters’ and Drake’s forces, Fredendall’s<br />
blocking positions, were thus marooned. A series of American mishaps,<br />
due largely to inexperience, then permitted the Germans rather easy and quick<br />
success. The bad weather relaxed the Americans’ security arrangements, and<br />
they were unable to react quickly and firmly. Until the storm lifted, men on the<br />
hill had difficulty identifying the German elements and held their fire. At 0730,<br />
as the weather cleared, McQuillin initiated planned countermeasures. He limply<br />
told [US LTC Louis] Hightower to clear up the situation. As Hightower prepared<br />
to drive to Djebel Lessouda and relieve the American defenders, enemy aircraft<br />
struck Sidi bou Zid and temporarily disrupted McQuillin’s command post and<br />
Hightower’s preparations. Throughout the rest of the day, German planes<br />
harassed the Americans. Despite repeated requests for air support, only one<br />
flight of four American aircraft appeared briefly over the battlefield.
62 n SECTION 2<br />
Hightower went into action with forty-seven tanks. Although outnumbered,<br />
he fought bravely against the more effective German tanks. By midafternoon,<br />
all but seven of his tanks had been destroyed. During the engagement, some<br />
American artillerymen panicked and abandoned their guns. The 1st Armored<br />
Division Reconnaissance Battalion, ready to rescue Drake’s men on Djebel Ksaira,<br />
was unable to even start its counterattack because some of the German tanks<br />
surrounding Drake had thrust forward toward Sidi bou Zid and captured<br />
a reconnaissance company. The rest of the American reconnaissance units<br />
then pulled out and headed for Sbeitla.<br />
With his command post in Sidi bou Zid directly threatened, McQuillin,<br />
covered by Hightower’s engagement, decided to withdraw to Sbeitla. He phoned<br />
and asked Ward to provide a shield by blocking the main road from Faid to<br />
Sbeitla. Ward sent Kern and his infantry battalion to take up defensive positions<br />
eleven miles east of the town at a road intersection that became known as<br />
Kern’s Crossroads. Around noon, McQuillin started to move his artillery units<br />
and command post out of Sidi bou Zid. German dive bombers attacked them<br />
and prompted confusion. As a consequence, for several hours McQuillin lost<br />
communications with his subordinate units. That afternoon a swirling mass<br />
of American troops—McQuillin’s command post, miscellaneous elements,<br />
Hightower’s remnants, artillery pieces, tank destroyers, engineer trucks, and foot<br />
Soldiers—fled toward Sbeitla. McQuillin reestablished his command post there<br />
and began to assemble and reorganize his units. Initial estimates of losses on<br />
that day were shocking: 52 officers and more than 1,500 men missing. The final<br />
numbers of casualties on 14 February were much smaller: 6 killed, 32 wounded,<br />
and 134 missing. But between Faid and Kern’s Crossroads on the Sbeitla plain,<br />
forty-four tanks, fifty-nine half-tracks, twenty-six artillery pieces, and at least<br />
two dozen trucks were wrecked, burning, or abandoned. An artillery commander,<br />
Charles P. Summerall, Jr., took his men out during the night to recover guns,<br />
trucks, and ambulances; on the following morning, he had eight instead<br />
of his normal twenty-four pieces—the others were lost—backing the troops<br />
at Kern’s Crossroads.<br />
In Algiers, Eisenhower ordered American units in Algeria to start for<br />
Kasserine Pass, a movement requiring several days’ travel. News of their departure,<br />
he surmised, would perhaps hearten the troops in Tunisia. While Eisenhower,<br />
Anderson, and Fredendall prepared to withdraw to the Western Dorsale, Ward<br />
looked forward confidently to his counterattack on 15 February. [COL Robert I.]<br />
Stack’s infantry and [LTC James D.] Alger’s tanks were to marry up at Kern’s<br />
Crossroads, drive to Sidi bou Zid, then rescue the troops on the heights of<br />
Lessouda and Ksaira. While Alger, who had yet to lead his troops in combat,
Introduction to Battle Analysis n 63<br />
studied the terrain from a hill on the morning of 15 February and Stack readied<br />
his infantry for the advance, a flight of German bombers struck their formations<br />
and prompted enormous confusion. The counterattack finally started at 1240<br />
in great precision across the Sbeitla plain. Alger’s tank battalion led, his three<br />
tank companies advancing in parallel columns with a company of tank destroyers,<br />
half-tracks mounting 75-mm guns, flaring out on the flanks and protecting two<br />
batteries of artillery. Behind rode Stack’s infantry in trucks and half-tracks with<br />
several antiaircraft weapons as protection. Unfortunately, steep-sided wadis—<br />
dry stream beds—crossed the plain irregularly and disturbed the careful spacing<br />
of the attacking troops. As the tanks crossed the first ditch, German dive bombers<br />
jumped them. They bombed and strafed again at the second gully. At the third<br />
depression, German artillery began firing. Finally, German tanks emerged from<br />
hiding and started to encircle the entire American force. The Americans, fighting<br />
bravely and desperately against superior German weapons and experienced<br />
German troops, tried to beat back the German wings threatening to surround<br />
them. At 1800, Stack ordered all units to disengage and return to Kern’s<br />
Crossroads. The infantry and artillery escaped relatively unscathed. The tanks<br />
were completely destroyed. Alger was taken prisoner, 15 of his officers and<br />
298 enlisted men were missing, and 50 of his tanks had been knocked out.<br />
In two days of battle, the 1st Armored Division lost ninety-eight tanks,<br />
fifty-seven half-tracks, and twenty-nine artillery pieces.<br />
Just before darkness, a pilot dropped a message from Ward to the troops<br />
on Lessouda. They were to get out during the night. Waters having been<br />
captured, Maj. Robert R. Moore, who had taken command of the 2d Battalion,<br />
168th Infantry, fewer than two weeks earlier, displayed magnificent leadership<br />
and marched out about one-third of the 900 troops on Lessouda to Kern’s<br />
Crossroads. The other men, together with vehicles and equipment, fell into<br />
German hands. Drake on Djebel Ksaira received a message from McQuillin on<br />
the afternoon of the following day, 16 February, to fight his way out. That night,<br />
Drake led his men off the hill and across the plain. German troops intercepted<br />
them and captured almost all. Only a handful reached safety. The two battalions<br />
of the 168th Infantry involved on Lessouda and Ksaira sustained losses of<br />
about 2,200 men. Two hundred of the Soldiers reported missing were from<br />
the southwestern Iowa National Guard units. Meanwhile, when Rommel’s attack<br />
forces, an Italo-German group of 160 tanks, half-tracks, and guns, learned on<br />
the afternoon of 15 February that the Allies had abandoned Gafsa, they advanced<br />
to the town, entered, and patrolled toward Feriana. That brought the second<br />
phase of the battle to a close.
64 n SECTION 2<br />
That evening, Comando Supremo gave von Arnim permission to attack Sbeitla,<br />
and he jumped off at once. After nightfall, preceded by reconnaissance units,<br />
German tanks approached Sbeitla in three columns, firing as they advanced.<br />
Shells dropping into Sbeitla prompted McQuillin to shift his CCA headquarters<br />
to a location west of the town. Many American troops misinterpreted the<br />
movement and believed a wholesale evacuation was in progress. A good part<br />
of the CCA defenders panicked and fled. Why?<br />
Night fighting was a new and terrifying experience for most of the men.<br />
The solidity of the defensive line was more apparent on a map than<br />
on the ground. Because of the darkness, the troops were not well placed.<br />
Because of the haste of the withdrawal, they were not well dug in.<br />
The harrowing events of three days of defeat had exhausted many Soldiers,<br />
morally and physically. Uncertain and nervous, fatigued and confused,<br />
hemmed in by widespread firing that seemed to be all around them, believing<br />
that the Germans were already in Sbeitla, demoralized by the piecemeal<br />
commitment and intermingling of small units, no longer possessing a firm<br />
sense of belonging to a strong and self-contained organization, and numbed<br />
by a pervading attitude of weariness and bewilderment, many men lost<br />
their confidence and self-discipline.<br />
A churning mass of vehicles surged through the town and departed. When<br />
engineers demolished an ammunition dump, they intensified fear and prompted<br />
additional departures. Around midnight, concerned over his ability to hold<br />
Sbeitla, Ward telephoned Fredendall and suggested reinforcing Kasserine<br />
in strength.<br />
M. Blumenson, Kasserine Pass, 30 January–22 February 1943,<br />
in C. Heller & W. Stofft, eds., America’s First Battles, 1776–1965<br />
Leadership<br />
As the battle progressed, it became clear to the Allies that stronger command was required.<br />
The British general in charge of Allied forces in Tunisia and deputy Allied commander,<br />
British MG Harold Alexander, conferred with Eisenhower and visited the Allied sectors.<br />
On the Axis side, Rommel, a leader of strong will and highly respected by his troops, moved<br />
to the front to command his forces directly. But in the end, his indecisiveness in choosing<br />
a point of attack, his own fatigue and that of his soldiers (Rommel still had to worry<br />
about British GEN Bernard Montgomery’s Eighth <strong>Army</strong> approaching from the east), and<br />
an inability to coordinate with von Arnim led the German-Italian troops to break off the<br />
attack and withdraw.
Introduction to Battle Analysis n 65<br />
Phase III—The Line Holds<br />
On the Allied side on 18 February, the shock of defeat was visible among the<br />
troops. Everyone was tired. Units were mauled, dispersed, and mixed; had no<br />
specific missions; lacked knowledge of adjacent formations. The troops seemed<br />
to be slipping out of control. Eisenhower sent artillery and tank destroyers<br />
from Algeria to Tunisia. A shipment of 295 new Sherman tanks had just arrived,<br />
but unwilling to risk losing them all, he released 30 to the British and 30<br />
to the 1st Armored Division. Alexander had come to Algiers on 15 February<br />
in accordance with agreements reached at the Allied Casablanca Conference<br />
in January and prepared to take command of the ground forces in Tunisia—<br />
Anderson’s First <strong>Army</strong> and Montgomery’s Eighth—which were approaching<br />
the Mareth Line. Alexander conferred with Eisenhower, then toured the British<br />
front on 16 February, visited the French sector on 17 February, and traveled on<br />
18 February to the II Corps area. He was horrified to see the state of confusion<br />
and uncertainty and was upset by the absence of a coordinated plan of defense.<br />
Instead of waiting to take command of the ground forces on 20 February, he<br />
assumed command on the nineteenth and ordered everyone to hold in place.<br />
There was to be no withdrawal from the Western Dorsale.<br />
[US COL] Anderson Moore’s 19th Engineers had been laying mines between<br />
the village of Kasserine and the pass, five miles beyond. On 18 February, having<br />
covered the withdrawal of CCB through the village and the pass, Moore moved<br />
his men through the pass and organized defensive positions. Just beyond the<br />
pass, on the western side, the road splits: one route leads to the west toward<br />
Tebessa; the other, the main road, goes north to Thala. Moore, with about<br />
200 engineers and infantrymen armed with small arms and automatic weapons<br />
and supported by two batteries of US 105-mm howitzers, a battery of French 75s,<br />
and a battalion of tank destroyers in the rear, covered the road to Tebessa.<br />
An infantry battalion defended the road to Thala. Most of the troops were<br />
inexperienced and nervous. On the evening of 18 February, Anderson instructed<br />
Koeltz to dispatch a brigade of [British MG Sir Charles] Keightley’s 6th Armored<br />
Division from Sbiba to Thala. [French] Brig. Charles A.L. Dunphie’s 26th Armored<br />
Brigade moved. He was thus in place to help the American battalion defending<br />
the road from Kasserine to Thala. Or he could move back to Sbiba if the main<br />
German threat developed there.<br />
The Casablanca<br />
Conference<br />
US President Franklin<br />
D. Roosevelt and<br />
British Prime Minister<br />
Winston Churchill met<br />
in Casablanca, Morocco,<br />
in January 1943 in their<br />
fifth war conference.<br />
At the meeting, the two<br />
Allied leaders agreed to<br />
demand the unconditional<br />
surrender of the Axis<br />
powers (Germany, Italy,<br />
and Japan). They also<br />
appointed American<br />
GEN Dwight D.<br />
Eisenhower as Supreme<br />
Allied Commander and<br />
named British MG Harold<br />
Alexander as his deputy<br />
and commander of Allied<br />
forces in Tunisia. They<br />
forced the Free French<br />
leader De Gaulle and<br />
the French North African<br />
commander to negotiate<br />
(unsuccessfully) and made<br />
important decisions about<br />
aid to the Soviet Union<br />
and China, which were<br />
also fighting off Axis<br />
invasions.
66 n SECTION 2<br />
Figure 2.3 The Battle of Kasserine Pass, 19–22 February 1943<br />
Meanwhile, CCA of the 1st Armored Division, having given Keightley’s and<br />
Ryder’s forces, as well as the French, time to set up defensive positions at the<br />
Sbiba Pass, drove through Sbiba to Tebessa. On 19 February, CCA arrived at the<br />
three minor passes south and west of Kasserine to bolster remnants of a French<br />
division, two American battalions (one of Rangers, the other of infantry), the<br />
Derbyshire Yeomanry, and CCB. When German reconnaissance units probed the<br />
Kasserine Pass on the evening of 18 February, some of Moore’s engineers fled.<br />
That night Fredendall put Stark in command of all the units defending the pass.<br />
Stark arrived on the morning of 19 February as the Germans attacked in earnest.
Introduction to Battle Analysis n 67<br />
Seeking surprise, an infantry battalion of the Afrika Korps [Germany’s veteran<br />
forces in North Africa, under Rommel’s command] advanced through Kasserine<br />
Pass without artillery preparation. When the troops met opposition, a panzer<br />
grenadier battalion backed by an 88-mm cannon reinforced them. A unit of British<br />
mortars and some reconnaissance elements had just arrived at the Kasserine<br />
Pass, and they helped the Americans hold off the Germans. When Moore asked<br />
for more infantry to support his engineers, Stark seized on a battalion of the<br />
9th US Infantry Division that had just arrived from Algeria. Stark sent two rifle<br />
companies to Moore—one for each flank of Moore’s defenses—and kept one<br />
for the Thala road, thereby splitting the battalion.<br />
Rommel himself came to Kasserine, was impressed by the opposition,<br />
and decided to take his main effort toward Sbiba. But he wished the attack at<br />
Kasserine to continue. After clearing the pass, his troops were to strike westward<br />
toward Tebessa in order to stretch the Allied defenses. The 21st Panzer Division<br />
had attacked Sbiba that morning, but Koeltz, Keightley, and Ryder had stopped<br />
the thrust. Rommel then changed his mind and decided to concentrate in the<br />
Kasserine area. He ordered the 10th Panzer Division, which was on its way to<br />
Sbeitla, to continue on to the Kasserine Pass. The division was at half strength,<br />
for von Arnim had refused to release some units, particularly the heavy panzer<br />
battalion, which had about two dozen enormous Tiger tanks. Because the<br />
10th was moving slowly, an impatient Rommel brought up the [Italian] Centauro<br />
Division. He now wished the Afrika Korps to open the pass and to drive westward<br />
toward Tebessa. The 10th Panzer Division, after going through the Kasserine Pass,<br />
was to strike at Thala. That evening, the 16th Infantry of the 1st Division marched<br />
from the Sbiba area to the Kasserine area. Fredendall sent it to bolster the<br />
minor passes south and west of Kasserine. He gave General Allen, the 1st Division<br />
commander who was with the regiment, the job of coordinating the defenses<br />
of these passes. Fredendall then ordered CCB of the 1st Armored Division to<br />
back up the engineers on the Tebessa road at Kasserine Pass where the defenses<br />
seemed on the verge of collapse. Dunphie, commander of the 26th Armored<br />
Brigade at Thala, asked permission to reinforce Stark, but Keightley wanted<br />
him to be on hand if he was needed at Sbiba. Dunphie nonetheless sent eleven<br />
of his tanks from Thala to buttress Stark’s positions that night.<br />
On 20 February, the 21st Panzer Division attacked Sbiba again and made no<br />
progress. But at Kasserine, the shrieks of the nebelwerfer, multiple rocket launchers<br />
that had been recently introduced by the Germans, unnerved Moore’s engineers<br />
holding the Tebessa road. They fell apart, and by afternoon—having lost eleven<br />
men killed, twenty-eight wounded, and eighty-nine missing in three days (and<br />
many more had temporarily vanished)—they no longer existed as a coherent<br />
force. Fortunately, [BG Paul] Robinett’s CCB arrived and blocked the road.
68 n SECTION 2<br />
On the main route to Thala, although jittery, the defenders held. Rommel then<br />
became even more impatient for a quick victory at Sbiba and Kasserine. He was<br />
apprehensive over the Mareth Line positions, for Montgomery had just that day<br />
attacked his outposts in southern Tunisia. Late in the afternoon, on Anderson’s<br />
order, Keightley dispatched Brig. Cameron Nicholson, his assistant division<br />
commander, from Sbiba to Thala with miscellaneous troops. No longer confident<br />
of Fredendall’s ability, Anderson wished Nicholson to command, as Fredendall’s<br />
representative, all the British, American, and French fighting on the west side<br />
of Kasserine Pass. What actually developed was that Fredendall and Robinett<br />
commanded the forces blocking the Tebessa road, and Nicholson and Dunphie<br />
took control of the units defending the Thala road.<br />
On 21 February, Rommel let the attacks in the Sbiba area continue but looked<br />
for decisive success at Kasserine. He decided to make his main effort to Thala and<br />
to head for Le Kef beyond. Furious fighting on both the Tebessa and Thala roads<br />
resulted in a slight German advance toward Tebessa and the prospect of German<br />
tactical success at Thala. By now, Stark’s force on the Thala road had virtually<br />
evaporated, and Dunphie emerged as the chief Allied protagonist. Committing<br />
his tanks and infantry against a strong thrust directed by Rommel himself, who<br />
took control of the battle for several hours, Dunphie lost the bulk of his armor<br />
and had to withdraw to the final line of defense before Thala. The Germans<br />
followed, and fierce combat erupted after darkness and ended in a draw.<br />
Both sides retired 1,000 yards—Dunphie to the north, the Germans to the south.<br />
The final defensive line was virtually uncovered, and Rommel seemed about to<br />
enter Thala. Expecting just that, Anderson asked Koeltz, who had again stopped<br />
the Germans at Sbiba, to send a battalion of infantry and whatever else he could<br />
to Thala. Because Ryder was making some local adjustments, Koeltz requested<br />
Keightley to dispatch elements. That night, a battalion of British infantry and<br />
some tanks traveled along a mountain trail to reinforce Nicholson and Dunphie.<br />
Meanwhile, Allied units were coming from Algeria. A battalion of French<br />
infantry moved from Constantine and arrived at Sbiba. Fifty-two Sherman tanks<br />
and crews were en route to Tebessa. A provisional British unit with twenty-five new<br />
Churchill tanks reached Sbiba. The 47th Infantry of the 9th US Division was on the<br />
way from Oran to Tebessa. Most important, Brig. Gen. S. LeRoy Irwin’s 9th Division<br />
Artillery, with three artillery battalions and two cannon companies, traveling<br />
from western Algeria, got to Tebessa on the afternoon of 21 February. Ordered<br />
to Thala at once, Irwin’s guns were in position by midnight. Nicholson placed<br />
Irwin in charge of all the artillery at Thala, and Irwin sited his forty-eight pieces,<br />
plus thirty-six other guns of various calibers, to cover the all-but-abandoned<br />
final line of defense, manned now by British infantry reinforced by stragglers
Introduction to Battle Analysis n 69<br />
rounded up by Stark, about twenty tanks of Dunphie’s brigade, plus the British<br />
infantry battalion and a few tanks, some of them new Shermans released by<br />
Eisenhower, coming from Sbiba. Less than a mile away were at least 50 German<br />
tanks, 2,500 infantry, 30 artillery pieces, and other weapons, including the<br />
notorious nebelwerfer.<br />
The 10th Panzer Division was ready to start what Rommel expected would be<br />
the advance into Thala on the morning of 22 February, when Irwin’s guns opened<br />
up. Expecting a counterattack, the Germans postponed their effort. Nicholson<br />
launched a foray and, although he lost five tanks, bluffed the Germans. Rommel<br />
came up the Thala road, noted the increased volume of Allied shelling, and gave<br />
permission to delay the offensive. Now Robinett and his CCB seemed about to<br />
be overwhelmed. During the previous night, approximately a battalion of German<br />
and Italian troops had infiltrated the American positions. Intending to strike<br />
toward Tebessa, they became lost. On the morning of 22 February, they arrived<br />
in the rear of the miscellaneous Allied troops—American, French, and British—<br />
guarding the Bou Chebka Pass, one of the minor defiles south and west of<br />
Tebessa. The Axis force captured several American howitzers and antiaircraft<br />
guns and prompted considerable anxiety over the security of that pass and<br />
two others nearby. It took most of the day to track down, disperse, and capture<br />
the Italo-German unit. Under the impression that Allied defenses were caving<br />
in, Fredendall went to the commander of the under-strength French division in<br />
the area and asked him to defend Tebessa. While Fredendall was gone, someone<br />
at the II Corps headquarters decided to move the corps command post to avoid<br />
being overrun. When Fredendall returned, he found his headquarters half<br />
abandoned; many clerks and radio operators were on the way to Le Kef and<br />
Constantine. Feeling unable to maintain control, Fredendall, having already<br />
passed responsibility to Allen for the minor passes, now instructed Ward to<br />
coordinate the defenses on the Tebessa road. Learning that the 47th Infantry<br />
of the 9th Division was about thirty miles south of Constantine, Fredendall<br />
asked the regiment to remain where it was in order to protect Constantine<br />
in case the Axis forces broke through Thala and Tebessa.<br />
During the night of 22 February, Anderson, whose British First <strong>Army</strong><br />
headquarters was nine miles north of Sbiba, shifted his command post behind<br />
Le Kef. Koeltz almost pulled his headquarters back too, for von Arnim had<br />
attacked half-heartedly in the Pichon area. But Koeltz drew Keightley’s and<br />
Ryder’s divisions out of Sbiba and faced them toward Thala to meet the expected<br />
breakthrough there. Sbiba lay open to German entry. However, nothing happened<br />
at Sbiba or at Kasserine. After conferring with [German Field Marshal Albert]<br />
Kesselring, who came to Tunisia on the afternoon of 22 February, Rommel
70 n SECTION 2<br />
called off his attack. [Kesselring, stationed in Rome, was the de facto German<br />
theater commander for the Mediterranean.] He [Rommel] had been unable<br />
to secure von Arnim’s cooperation. He thought it impossible to obtain a decisive<br />
victory before Montgomery attacked the Mareth Line. His units were fatigued,<br />
and Rommel himself was extremely tired and discouraged. That night, Rommel<br />
ordered his forces to withdraw to the Eastern Dorsale and the east coast.<br />
They did so early on the morning of 23 February, leaving a profusion of mines<br />
and destroyed bridges in their wake. There was no Allied pursuit of the departing<br />
enemy. According to Koeltz, the Allied units “were in such disorder and their<br />
commanders so shaken” that no immediate reaction was possible. The Battle<br />
of Kasserine Pass was over.<br />
M. Blumenson, Kasserine Pass, 30 January–22 February 1943,<br />
in C. Heller & W. Stofft, eds., America’s First Battles, 1776–1965<br />
Lessons Learned<br />
Estimated Losses<br />
at Kasserine Pass<br />
Killed<br />
Germans—200<br />
Americans—350<br />
Wounded<br />
Germans—550<br />
Americans—3,200<br />
Missing<br />
Germans—250<br />
Americans—3,000<br />
Equipment<br />
Germans—<br />
14 guns,<br />
61 motor vehicles,<br />
6 halftracks, and<br />
20 tanks<br />
Americans (II Corps)—<br />
183 tanks,<br />
104 halftracks,<br />
208 artillery pieces,<br />
512 trucks and Jeeps<br />
(Italian losses for the<br />
battle are unknown.)<br />
The significant losses in men and materiel during the Battle of Kasserine Pass led to a harsh<br />
reappraisal by US commanders of American training, tactics, and equipment, which resulted<br />
in significant changes in <strong>Army</strong> doctrine and field manuals. But the battle also exposed<br />
serious Axis weakness as well.<br />
In the areas of unity of command and strategic vision, the lack of trust between the Germans<br />
and the Italians, who were unable to work as effectively in coalition as the British, Americans,<br />
and French, impeded operations. Technically fighting under Italian command, Rommel<br />
and von Arnim had to get Comando Supremo approval for their overall plans. The disputes<br />
and rivalries between the two German generals only made matters worse. “Had Axis forces<br />
been closely coordinated by an overall commander in pursuit of bold objectives enunciated<br />
by a self-confident coalition, the Axis would, no doubt, have attained a strategic victory<br />
instead of merely a tactical success” (Blumenson, 1986).<br />
The Allies had their own disputes, of course. The French still deeply resented the British<br />
destruction of their fleet in Algeria after the fall of France in 1940 and quarreled among<br />
themselves. For their part, the British were not impressed by the American performance on<br />
the battlefield, or by the leadership of generals such as Fredendall. Command lines between<br />
and among the Allied forces were fuzzy at best. Nevertheless, the Allies were able to work<br />
together well enough to blunt a determined Axis offensive; the command team of Eisenhower<br />
and Alexander (who would later become a field marshal) proved particularly effective in<br />
appraising the situation and providing the necessary support.<br />
In tactics and maneuver, the veteran German and Italian forces’ experience, coupled<br />
with their superior equipment (especially in tanks and rockets) clearly gave them the edge<br />
in the battle. They also demonstrated the effectiveness of tactical air support of ground<br />
operations, and they benefited from a numerical advantage of two armies to one on the<br />
battlefield (before Montgomery’s Eighth <strong>Army</strong> arrived from the east).
Introduction to Battle Analysis n 71<br />
The Americans, on the other hand, demonstrated inexperience with their equipment,<br />
some of which—many tanks, for example—was seriously inferior to the Germans’. US<br />
Soldiers often could not distinguish enemy from friendly equipment on the battlefield. The<br />
Americans received little direct support from their armor or friendly aircraft (which also<br />
caused numerous Allied casualties). Too many US planes bombed their own forces—if their<br />
own forces didn’t shoot them down first. Not until after the Normandy invasion the<br />
following year would Allied pilots be able to talk directly to the ground units they were<br />
supporting or would tactical air commands work closely with field armies. Likewise, infantry<br />
and armored units would not train together until late in 1943.<br />
Allied commanders lacked the ability to coordinate units in battle, set unit boundaries,<br />
mass their fires, and handle traffic on the roads or prisoners of war. They dispersed units<br />
and tanks and employed them piecemeal rather than concentrating their firepower. The<br />
defensive attitude American Soldiers adopted undermined “the offensive spirit by which<br />
alone we can win battles,” in one general’s informed opinion. Allied forces were so shaken<br />
by the battle that it took them two days to figure out that Rommel had withdrawn from<br />
the battlefield. America had been unprepared for war when war came, and Americans at<br />
Kasserine “paid in blood the price of battlefield experience.”<br />
The battle likewise taught grim lessons regarding leadership. The Allied commanders’<br />
orders were vague and imprecise. Fredendall was arrogant, opinionated, and “perhaps less<br />
than stable,” while McQuillin and Stark’s reactions were “slow, cautious, and characteristic<br />
of World War I operations.” On several occasions, senior US generals lost contact with<br />
subordinate units or their own headquarters. Commanders at the front had to relay too<br />
many questions to higher headquarters, with decisions often coming back after it was too<br />
late. Despite these shortcomings, however, several individuals—Ward, Robinett, Hightower,<br />
and others—demonstrated solid leadership ability.<br />
The two sides studied the results of this first contact between US and German forces<br />
carefully. Rommel developed a low opinion of US tactics and equipment—an appraisal that<br />
would serve him poorly a year later in France. For in the face of a tactical defeat, the American<br />
forces recovered and showed they could learn from their mistakes. After Kasserine, their<br />
competence and confidence grew, they received better equipment and used it more<br />
effectively, and they developed a better ability to work with their allies (Blumenson, 1986).<br />
The Americans made many mistakes in this first large-scale engagement of the war<br />
in Europe, but they learned from their errors and made adjustments that enabled them<br />
to go on to victory in Tunisia and beyond. The defeat at Kasserine showed the <strong>Army</strong><br />
what troops had to learn and to do. That they quickly became proficient in the warfare<br />
of the 1940s confirmed their spirit, their flexibility, their strong sense of purpose—<br />
their will to win (Blumenson, 1986).<br />
Critical Thinking<br />
e<br />
Which factor do you think played the biggest role in the Axis’ initial victory<br />
at Kasserine Pass—unity of command and strategic vision, tactics and maneuver,<br />
or leadership? Which factors later allowed Allied powers there to check<br />
the German advance? With all the challenges they faced, why did the Allies<br />
succeed in later turning defeat into victory in North Africa?
72 n SECTION 2<br />
e<br />
CONCLUSION<br />
The purpose of battle analysis and the study of military history—in war and<br />
in peace—is to learn the important lessons the past has to teach today’s Soldiers.<br />
The study of military history also allows you to understand military concepts,<br />
study the lives of Soldiers in the past, understand how doctrine has evolved,<br />
broaden your military knowledge, understand leadership issues, and learn<br />
about strategy and tactics.<br />
The study of military history should be an integral part of your career<br />
as an <strong>Army</strong> officer, regardless of rank or years of service. You’ll find that as you<br />
grow in experience, your study of military history and your skill at battle analysis<br />
will become more and more relevant to the challenges you and the <strong>Army</strong> face.<br />
Key Words<br />
battle analysis<br />
staff ride<br />
Learning Assessment<br />
1. Describe the four steps of battle analysis.<br />
2. Explain the purpose of battle analysis.
Introduction to Battle Analysis n 73<br />
References<br />
Anderson, C. R. (n.d.). The US <strong>Army</strong> Campaigns of World War II: Tunisia. Washington,<br />
DC: US <strong>Army</strong> Center for Military History. Retrieved 6 December 2005 from http://www.<br />
army.mil/cmh/brochures/tunisia/tunisia.htm<br />
Austerman, W., & Poyas, F. (n.d.). The Battle Analysis Paper and Presentation: AMEDD<br />
Officer Advanced Course. Retrieved 25 November 2008 from http://www.cs.amedd.<br />
army.mil/History/ba/intro.html<br />
Blumenson, M. (1986). Kasserine Pass, 30 January–22 February 1943. In C. Heller & W.<br />
Stofft (Eds.), America’s First Battles, 1776–1965 (pp. 226–265). Lawrence, KS: University<br />
of Kansas Press. Retrieved 5 January 2005 from http://www.army.mil/cmh/books/Staff-<br />
Rides/kasserine/Vol-I-Part_1.pdf<br />
Blumenson, M. (1987). Constants of War: The Relevance of Kasserine. <strong>Army</strong>, 37.<br />
Field Manual 3-0, Operations. 27 February 2008.<br />
Field Manual 5-0, <strong>Army</strong> Planning and Orders Production. 20 January 2005.<br />
Robertson, W. G. (1987). The Staff Ride. Washington, DC: US <strong>Army</strong> Center for Military<br />
History. Retrieved 6 December 2005 from http://www-cgsc.army.mil/carl/resources/csi/<br />
robertson/robertson.asp<br />
TSP 155-H-0010, Integrate Historical Awareness and Critical Thinking Skills Derived from<br />
Military History Methodologies into the Training and Education of Self and Subordinate<br />
Leaders. 1 January 1999.