Daikin ENVi Thermostat Installation Manual - Daikin AC
Daikin ENVi Thermostat Installation Manual - Daikin AC
Daikin ENVi Thermostat Installation Manual - Daikin AC

Create successful ePaper yourself
Turn your PDF publications into a flip-book with our unique Google optimized e-Paper software.
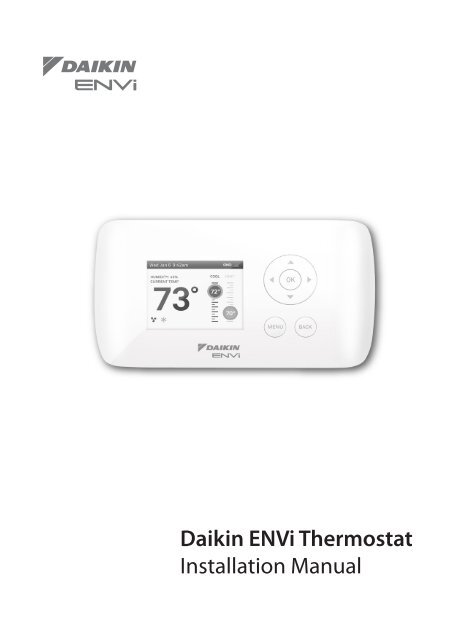
<strong>Daikin</strong> <strong>ENVi</strong> <strong>Thermostat</strong><br />
<strong>Installation</strong> <strong>Manual</strong>
SAFETY CONSIDERATIONS<br />
Read these SAFETY CONSIDERATIONS for <strong>Installation</strong> carefully before installing the<br />
<strong>Daikin</strong> <strong>ENVi</strong> thermostat kit. After completing the installation, make sure that the unit<br />
operates properly.<br />
Instruct the customer on how to operate and maintain the thermostat. Inform<br />
customers that they should store this <strong>Installation</strong> <strong>Manual</strong> with the Operation<br />
<strong>Manual</strong> for future reference.<br />
Always use a licensed installer or contractor to install this product. Improper<br />
installation can result in electric shock or fire.<br />
All electrical work must be carried out in accordance with local, state and national<br />
regulations.<br />
Safely dispose all packing materials in accordance with federal/state/local laws or<br />
ordinances.<br />
Only qualified personnel must carry out the installation work. <strong>Installation</strong> must be<br />
done in accordance with this installation manual. Improper installation may result<br />
in electric shock or fire.<br />
Use only specified accessories and parts for installation work. Failure to use<br />
specified parts may result in electric shock, fire or the unit failing.<br />
Make sure that all wiring is secured, that specified wires are used, and that no<br />
external forces act on the terminal connections or wires. Improper connections or<br />
installation may result in fire.<br />
Before touching electrical parts, turn off the unit.<br />
Do not touch the thermostat with wet fingers. Touching the thermostat with wet<br />
fingers can cause electric shock.<br />
Do not allow children to play with the unit to prevent injury.<br />
Do not install the thermostat in the following locations:<br />
- Where a mineral oil mist or oil spray or vapor is produced, for example, in a<br />
kitchen.<br />
- Where corrosive gas such as sulfurous acid gas is produced.<br />
- Near machinery emitting electromagnetic waves. Electromagnetic waves may<br />
disturb the operation of the control system and cause the unit to malfunction.<br />
Disposal of the unit must be done in accordance with the relevant local, state and<br />
national regulations.
CONTENTS<br />
GETTING STARTED 1<br />
Welcome 1<br />
Contractor <strong>Thermostat</strong> Registration 1<br />
Package Contents 2<br />
Before You Begin 3<br />
<strong>Daikin</strong> System Compatibility 4<br />
Approvals 4<br />
FCC Compliance Statement 4<br />
Specifications 6<br />
Wiring Requirements 7<br />
INSTALLING THE THERMOSTAT KIT 7<br />
Step 1. Power Off the <strong>Daikin</strong> Indoor Unit 7<br />
Step 2. Position and Wire the DPCA 8<br />
Step 3. Install the <strong>Daikin</strong> <strong>ENVi</strong> <strong>Thermostat</strong> 10<br />
Step 4. Connect the <strong>Thermostat</strong> Wiring 12<br />
Step 5. Mount the DPCA 13<br />
Step 6. Power On <strong>Daikin</strong> Indoor Unit 13<br />
NAVIGATING THE MENUS 14<br />
Using the Navigation Buttons 14<br />
CONFIGURING THE DAIKIN <strong>ENVi</strong> THERMOSTAT 16<br />
Preferences 16<br />
<strong>Installation</strong> Settings 17<br />
Reset Equipment or User Settings 22<br />
Rebooting the <strong>Daikin</strong> <strong>ENVi</strong> thermostat 23<br />
Sensors 23<br />
CONFIGURING REMINDERS AND ALERTS 24<br />
List of Alerts 26<br />
ONE-YEAR LIMITED WARRANTY 27
GETTING STARTED<br />
Welcome<br />
The <strong>Daikin</strong> <strong>ENVi</strong> thermostat kit has been<br />
designed to ensure the installation process<br />
is simple and efficient. This step-by-step<br />
<strong>Installation</strong> <strong>Manual</strong> will walk you through all<br />
aspects of the installation.<br />
To ensure an on-going service relationship with<br />
your customers, please register all of your <strong>Daikin</strong><br />
<strong>ENVi</strong> thermostats in your Contractor Portal.<br />
Contractor <strong>Thermostat</strong><br />
Registration<br />
Use the serial number sticker (included in<br />
package) for Contractor Portal registration.<br />
1
Package Contents<br />
The <strong>Daikin</strong> <strong>ENVi</strong> thermostat kit includes the<br />
following items.<br />
<strong>ENVi</strong> <strong>Thermostat</strong> Trim Plate DPCA with Power Cable<br />
Wiring Harness<br />
Double-Sided Adhesive<br />
Screws (4) and<br />
Drywall Anchors (4)<br />
<strong>Installation</strong> and User<br />
<strong>Manual</strong>s<br />
Serial Number<br />
Sticker<br />
Wire Ties (2)<br />
<strong>Daikin</strong> <strong>ENVi</strong> <strong>Thermostat</strong> Kit Contents<br />
2
Before You Begin<br />
This product is intended to be installed by<br />
trained service professionals.<br />
This manual explains the procedures for<br />
installing the <strong>Daikin</strong> <strong>ENVi</strong> thermostat.<br />
Please read it carefully before beginning the<br />
installation.<br />
For information on how to operate the <strong>Daikin</strong><br />
<strong>ENVi</strong> thermostat, please see the <strong>Daikin</strong> <strong>ENVi</strong> User<br />
<strong>Manual</strong>.<br />
The <strong>Daikin</strong> <strong>ENVi</strong> thermostat is designed to be<br />
mounted on the homeowner’s wall in a<br />
convenient location.<br />
!<br />
Caution: Disconnect electric power to the<br />
<strong>Daikin</strong> Indoor Unit before installing this<br />
product. Failure to do so could result in electric<br />
shock and/or equipment damage.<br />
All wiring must conform to your local electrical<br />
code.<br />
Mercury Notice: This product does not contain<br />
mercury. If you are replacing a product that<br />
does contain mercury, contact your local<br />
waste-management authority for disposal<br />
instructions. Do not discard the old product in<br />
the regular trash.<br />
3
<strong>Daikin</strong> System Compatibility<br />
The <strong>Daikin</strong> <strong>ENVi</strong> thermostat is designed to<br />
operate only with the <strong>Daikin</strong> Heat Pump and<br />
Cooling Indoor Units where the BRC944 wired<br />
remote controller is applicable.<br />
The <strong>Daikin</strong> <strong>ENVi</strong> thermostat supports the<br />
following systems:<br />
Single-Split system<br />
Multi-Split system (2 to 8 ports)<br />
SkyAir FTXS Indoor Units<br />
Applicable indoor unit models:<br />
FTXS, FTXN (09/12 requires KRP980B1<br />
interface adapter), CTXS, FDXS and CDXS<br />
The <strong>Daikin</strong> <strong>ENVi</strong> thermostat can also support a<br />
single-stage auxiliary heater.<br />
!<br />
Any auxiliary heater that requires air flow<br />
from the Indoor Unit should be equipped<br />
with an air flow switch for safety. The indoor<br />
unit fan could stop during the defrost cycle<br />
and other situations.<br />
Approvals<br />
This product was designed and built in<br />
accordance to RoHS directive 2002/95/EC and<br />
contains no hazardous substances as defined by<br />
this directive.<br />
FCC Compliance Statement<br />
This equipment has been tested and found to<br />
comply with the limits for Class B digital devices,<br />
4
pursuant to Part 15 of the FCC Rules. These limits<br />
are designed to provide reasonable protection<br />
against harmful interference in a residential<br />
installation. This equipment generates, uses,<br />
and can radiate radio frequency energy and,<br />
if not installed and used in accordance with<br />
the instruction manual, may cause harmful<br />
interference to radio communications. However,<br />
there is no guarantee that interference will<br />
not occur in a particular installation. If this<br />
equipment does cause harmful interference<br />
to radio or television reception, which can be<br />
determined by turning the equipment off and<br />
on, the user is encouraged to try to correct the<br />
interference by one or more of the following<br />
measures:<br />
Reorient or relocate the receiving antenna.<br />
Increase the separation between the<br />
equipment and receiver.<br />
Connect the equipment to an outlet on a<br />
different circuit from the receiver.<br />
Consult the dealer or an experienced radio/<br />
TV contractor for help.<br />
To satisfy FCC/IC RF exposure safety<br />
requirements, a separation distance of 8 inches<br />
(20 cm) or more should be maintained between<br />
this device and persons. To ensure compliance,<br />
operation at closer than this distance is not<br />
allowed.<br />
FCC ID: XF6-RS91-10N1102<br />
IC: 8407A-91101102<br />
Warning: Changes or modifications not expressly<br />
approved by <strong>Daikin</strong> <strong>AC</strong> (Americas) could void<br />
the user’s authority to operate the equipment.<br />
5
Specifications<br />
<strong>Thermostat</strong> Specifications<br />
Temperature<br />
Heat Set Point Range<br />
Cool Set Point Range<br />
Display Range<br />
Sensitivity<br />
Operating Range<br />
Humidity<br />
Display Range<br />
Sensitivity<br />
Operating Range<br />
Auxiliary Heater Relay<br />
Electric Rating<br />
Dimensions<br />
Width x Height x Depth<br />
45 to 80 °F (7 to 26.5 °C)<br />
65 to 95 °F (18.5 to 35 °C)<br />
40 to 100 °F (5 to 37 °C)<br />
+/- 1 °F (0.5 °C)<br />
32 to 130 °F (0 to 55 °C)<br />
20 to 90% R.H.<br />
+/- 5% R.H.<br />
5 to 95% R.H.<br />
(non-condensing)<br />
30V<strong>AC</strong>, Max Current 3A<br />
5.5 x 3.25 x 1 inches<br />
(139.5 x 82.5 x 25 mm)<br />
Power<br />
24 V<strong>AC</strong> (3VA maximum) (provided from the DPCA)<br />
DPCA Specifications<br />
Temperature<br />
Operating Range<br />
Humidity<br />
Operating Range<br />
Dimensions<br />
Width x Height x Depth<br />
20 to 140 °F (–7 to 60 °C)<br />
5 to 95% R.H.<br />
(non-condensing)<br />
4.7 x 2.0 x 1.3 inches<br />
(120 x 50 x 32.5 mm)<br />
Power<br />
208/230 V<strong>AC</strong> (provided from Indoor Unit)<br />
6
Wiring Requirements<br />
The <strong>Daikin</strong> <strong>ENVi</strong> thermostat uses 4-wire low-voltage cable to<br />
connect to the <strong>Daikin</strong> Power and Communication Adapter<br />
(DPCA) which in turn connects to the Indoor Unit.<br />
The maximum wire length between the <strong>Daikin</strong> <strong>ENVi</strong> thermostat<br />
and the DPCA is as follows:<br />
18 AWG: 1250 ft/380 m<br />
20 AWG: 800 ft/240 m<br />
22 AWG: 500 ft/150 m<br />
INSTALLING THE THERMOSTAT KIT<br />
There are 5 steps to install the <strong>Daikin</strong> <strong>ENVi</strong> thermostat kit:<br />
Step 1. Power Off the <strong>Daikin</strong> Indoor Unit<br />
Step 2. Position and Wire the DPCA<br />
Step 3. Install the <strong>Daikin</strong> <strong>ENVi</strong> thermostat<br />
Step 4. Connect the <strong>Thermostat</strong> Wiring<br />
Step 5. Mount the DPCA<br />
Step 6. Power On <strong>Daikin</strong> Indoor Unit<br />
Step 1. Power Off the <strong>Daikin</strong> Indoor Unit<br />
Before installing the <strong>Daikin</strong> <strong>ENVi</strong> thermostat kit, disconnect the<br />
power to the Indoor Unit.<br />
WARNING: The Indoor Unit uses a high-voltage 208/230V<br />
power source. Always DISCONNECT power to the Indoor Unit<br />
before connecting any power wires. Failure to do can result in<br />
death, fire, or electrical shock.<br />
7
Step 2. Position and Wire the DPCA<br />
The <strong>Daikin</strong> Power and Communication Adapter (DPCA) provides<br />
an interface between the thermostat and Indoor Unit.<br />
To install the DPCA:<br />
1. Position the DPCA in a suitable location, away from water<br />
and near the Indoor Unit (for example, a backside cavity of<br />
a wall-mounted unit). The DPCA is not plenum rated and<br />
should be mounted in a non-plenum space.<br />
2. Connect the DPCA power cable to the Indoor Unit power<br />
supply terminals. Ensure that the electrical connections are<br />
securely tightened.<br />
3. Remove the DPCA cover by grasping both sides and pulling<br />
along the length of the DPCA.<br />
4. Use the Wiring Harness to connect the P2 terminal<br />
on the DPCA to the S21 terminal on the Indoor Unit’s<br />
main PCB. Refer to the <strong>Daikin</strong> system installation<br />
manual for information about accessing the S21<br />
terminal.<br />
8
Power Cable<br />
Power cable to terminal block on Indoor Unit<br />
Indoor Unit Terminal Block<br />
1 2 3<br />
Wires to outdoor unit<br />
are not shown<br />
L1 L2 G<br />
Black<br />
Red<br />
Green<br />
DPCA<br />
P1 Terminal<br />
4-wire low-voltage<br />
cable to thermostat<br />
(not included)<br />
Cover<br />
P2 Terminal<br />
Wire harness to Indoor Unit (included)<br />
P2<br />
1 2 3 4 5<br />
Wire Harness<br />
To terminal S21<br />
on Indoor Unit<br />
main control board<br />
DPCA Wiring Connectors<br />
9
Step 3. Install the <strong>Daikin</strong> <strong>ENVi</strong> <strong>Thermostat</strong><br />
The ideal location for the thermostat is approximately 5 ft (1.5 m)<br />
above floor level in the main living area.<br />
Do not install the thermostat:<br />
Close to sources of heat such as incandescent lights<br />
Near supply heating/cooling sources<br />
In direct sunlight<br />
On exterior, non-insulated or poorly insulated walls<br />
In the kitchen or other areas of potentially high heat and/or<br />
humidity<br />
In an area that could restrict air flow<br />
To install the thermostat:<br />
1. If necessary, remove the previous thermostat.<br />
1. Gently separate the backplate from the <strong>Daikin</strong> <strong>ENVi</strong><br />
thermostat.<br />
2. Place the thermostat backplate on the wall. Make sure that<br />
any existing wires can be inserted through the opening for<br />
the wiring.<br />
If the backplate does not adequately cover the area where<br />
the previous thermostat was installed, attach the trim plate<br />
to the back of the backplate to increase its coverage.<br />
3. Using the backplate as a template, mark the location of the<br />
mounting holes on the wall as shown.<br />
10
D-<br />
D+<br />
C<br />
AUX<br />
R AUX<br />
R<br />
The solid color indicates mounting holes<br />
4. Move the backplate out of the way and make holes where<br />
indicated in the previous step. The mounting holes can<br />
accommodate a #6 pan-head screw. It is recommended to<br />
use the included fasteners to ensure proper fitting of the<br />
front housing.<br />
5. Use the included drywall plugs (or other suitable anchors) to<br />
ensure the thermostat can be mounted securely to the wall.<br />
6. Fasten the backplate and optional trim plate to the wall<br />
using the screws provided (or other suitable screws).<br />
11
Step 4. Connect the <strong>Thermostat</strong><br />
Wiring<br />
Use the field-supplied 4-wire low-voltage cable<br />
to connect the thermostat to the DPCA.<br />
To connect the thermostat to the DPCA:<br />
1. Connect the wires as shown:<br />
P1 Terminal on DPCA<br />
D-<br />
D+<br />
C<br />
R<br />
Optional Auxiliary Heater<br />
24V<strong>AC</strong><br />
C<br />
<strong>Daikin</strong> <strong>ENVi</strong> <strong>Thermostat</strong><br />
D-<br />
D+<br />
C<br />
R<br />
AUX<br />
R<br />
AUX<br />
2. Attach the <strong>Daikin</strong> <strong>ENVi</strong> thermostat to the<br />
backplate. Ensure that the pins on the<br />
thermostat align with the terminal block on<br />
the backplate.<br />
12
Step 5. Mount the DPCA<br />
After you make the necessary wiring<br />
connections, mount the DPCA by using the<br />
adhesive sticker or mounting screws as needed.<br />
Step 6. Power On <strong>Daikin</strong> Indoor<br />
Unit<br />
After you’ve completed the wiring, you can<br />
apply power to the <strong>Daikin</strong> Indoor Unit. The<br />
<strong>Daikin</strong> <strong>ENVi</strong> thermostat receives power from the<br />
equipment and will automatically power on.<br />
After you power on the Indoor Unit:<br />
1. Verify the green LED on the DPCA has turned<br />
on. Upon verification, re-attach the DPCA<br />
cover.<br />
2. Use the wire ties to secure the wires as<br />
needed.<br />
13
NAVIGATING THE MENUS<br />
The <strong>Daikin</strong> <strong>ENVi</strong> thermostat has an easy-to-read<br />
color screen that displays all the information<br />
you need to configure the thermostat. Use<br />
the navigation buttons on the right to quickly<br />
change the temperature, access features, and<br />
configure settings.<br />
OK<br />
Using the Navigation Buttons<br />
The navigation buttons let you select options<br />
and control the <strong>Daikin</strong> <strong>ENVi</strong> thermostat.<br />
▲ (up) On the Home screen, press ▲ to<br />
increase the temperature set point by 1°F<br />
(0.5°C). For menus, press ▲ to move up.<br />
▼ (down) On the Home screen, press ▼ to<br />
decrease the temperature set point by 1°F<br />
(0.5°C). For menus, press ▼ to move down.<br />
◀ (left) On the Home screen, if Auto mode<br />
is enabled, press ◀ to switch between heat<br />
and cool set points. For menus, press ◀ to go<br />
back to the previous screen.<br />
▶ (right) On the Home screen, if Auto mode<br />
is enabled, press ▶ to switch between heat<br />
and cool set points. For menus, press ▶ to<br />
choose the currently highlighted option.<br />
OK On a menu screen, press OK to choose<br />
the currently highlighted option. If a<br />
configuration option is selected, pressing OK<br />
will keep its new value and return back to the<br />
previous screen.<br />
14
MENU Pressing MENU displays a list of<br />
all available options. If a menu is currently<br />
displayed, pressing MENU will cancel any<br />
unsaved changes and return to the Home<br />
screen.<br />
B<strong>AC</strong>K On a menu screen, press B<strong>AC</strong>K to go<br />
back to the previous screen.<br />
MENU<br />
B<strong>AC</strong>K<br />
On-Screen Keyboard<br />
If you need to type in any information, an onscreen<br />
keyboard will appear. To enter a letter or<br />
number, move to the character by pressing the<br />
arrow keys and then press OK to select it.<br />
Select to enter capital letters; select<br />
to enter commonly used symbols. If you<br />
make a mistake, press to delete the text .<br />
To keep your changes, select<br />
your changes, press B<strong>AC</strong>K.<br />
. To cancel<br />
15
CONFIGURING THE DAIKIN<br />
<strong>ENVi</strong> THERMOSTAT<br />
The first step after installing the <strong>Daikin</strong> <strong>ENVi</strong><br />
thermostat is to configure the thermostat<br />
settings for the Indoor Unit.<br />
Preferences<br />
This section describes the user preferences that<br />
should be configured during installation. For a<br />
complete description of all user preferences, see<br />
the <strong>Daikin</strong> <strong>ENVi</strong> User <strong>Manual</strong>.<br />
To configure the<br />
intelligent eye:<br />
From the Home screen,<br />
press MENU.<br />
Select Settings ▶<br />
Preferences.<br />
Select Intelligent Eye.<br />
Enable (Yes) or disable<br />
(No) the intelligent eye<br />
sensor.<br />
Intelligent Eye<br />
Some models of the Indoor Unit include an<br />
intelligent eye, an infrared sensor that detects<br />
room occupancy. It adjust the set point by 3.6°F<br />
(2°C) if no movement is detected in order to<br />
save energy (+3.6°F/+2°C if cooling, –3.6°F/–2°C<br />
if heating).<br />
To use intelligent eye, you must enable this<br />
option in the <strong>Daikin</strong> <strong>ENVi</strong> thermostat and<br />
then enable it with the <strong>Daikin</strong> wireless remote<br />
controller. If enabled, the thermostat’s Smart<br />
Recovery and Temp Alert functions are not<br />
available.<br />
By default, intelligent eye is disabled on the<br />
thermostat.<br />
Do NOT enable the intelligent eye with the <strong>Daikin</strong><br />
wireless remote controller when it is disabled on<br />
the thermostat as this may cause suboptimal<br />
operation and result in invalid recovery and alert<br />
messages. Also, if an auxiliary heater is configured,<br />
enabling intelligent eye may energize the auxiliary<br />
heater more often than would normally be<br />
required.<br />
16
<strong>Installation</strong> Settings<br />
The <strong>Installation</strong> Settings let you configure<br />
the equipment connected to the <strong>Daikin</strong> <strong>ENVi</strong><br />
thermostat.<br />
Allow Auto Heat/Cool<br />
Enabling this option allows the user to select<br />
auto change-over as a system mode.<br />
Only visible if the Indoor Unit supports heat or an<br />
auxiliary heat source is configured.<br />
Heat/Cool Min Delta<br />
Sets the minimum difference between the heat<br />
mode set temperature and the cool mode set<br />
temperature when the system mode is in autochangeover.<br />
The delta is adjustable from 2 to 10<br />
°F (1.1 to 5.5 °C). The default value is 5 °F (2.8 °C).<br />
Only visible if the Indoor Unit supports heat or an<br />
auxiliary heat source is configured.<br />
System Settings<br />
The System Settings let you configure general<br />
heat pump settings.<br />
Min Cycle Off Time Sets the minimum<br />
equipment off time between cycles: 240 to<br />
900 seconds (default is 240 seconds).<br />
Min Cycle On Time Sets the minimum<br />
equipment run time in cool mode: 1 to 20<br />
min (default is 3 min).<br />
Min Outdoor Temp Disables the compressor<br />
when the outside air temperature reaches<br />
the configured minimum setting. This<br />
performs two functions. It prevents the<br />
compressor from running when the outdoor<br />
temperature is too low, thus resulting in<br />
To configure the<br />
system settings:<br />
From the Home screen,<br />
press MENU.<br />
Select Settings ▶<br />
<strong>Installation</strong> Settings.<br />
Configure the devices<br />
connected to the<br />
thermostat.<br />
17
damage to the compressor. You can also set<br />
this value to determine when you want the<br />
auxiliary heat (if installed) to engage to help<br />
meet the set temperature. The temperature<br />
range is adjustable from –10 to 65 °F (–23.3 to<br />
18.3 °C) or disabled by default.<br />
This feature uses the Internet to obtain the<br />
current outdoor temperature. If no Internet is<br />
available, the Outdoor Unit’s temperature sensor<br />
is used instead.<br />
Cool Differential Temp The minimum<br />
difference between the current temperature<br />
and set temperature before the system calls<br />
for cool. A smaller difference means shorter<br />
cycle times, whereas a larger difference results<br />
in longer cycle times. The temperature range<br />
is adjustable from 0.5 to 3 °F (0.3 to 1.7 °C) in<br />
0.5°F (0.3°C) increments.<br />
Cool Dissipation Time The amount of time<br />
the fan will run after the cool has been turned<br />
off. Running the fan for a period of time allows<br />
for any cooled air left in the ducts to circulate<br />
throughout the home. The time is adjustable<br />
from 0 to 900 seconds (default is 0 seconds).<br />
<strong>AC</strong> Overcool Max When using the <strong>AC</strong> to<br />
dehumidify, the setting configures how<br />
many degrees below the current set point<br />
the thermostat will run in order to reach the<br />
dehumidify set point. Options are Disabled<br />
(default) and 0.5 to 3 °F (0.3 to 1.8°C) in 0.5 F<br />
(0.3°C) increments.<br />
Heat Differential Temp The minimum<br />
difference between the current temperature<br />
and set temperature before the system calls<br />
for heat. A smaller difference means shorter<br />
cycle times, whereas a larger difference results<br />
18
in longer cycle times. The temperature range<br />
is adjustable from 0.5 to 3 °F (0.3 to 1.7 °C) in<br />
0.5°F (0.3°C) increments. The default offset is<br />
0.5°F (0.3°C).<br />
If the Indoor Unit is <strong>AC</strong> only and an auxiliary<br />
heater is configured, this option appears under<br />
the Aux Heat Settings menu.<br />
Heat Dissipation Time The amount of time<br />
the fan will run after the heat set point has<br />
been reached and the call for heat has been<br />
turned off. Running the fan for a period<br />
of time allows for heated air to circulate<br />
throughout the home. The time is adjustable<br />
from 0 to 900 seconds (default is 0 seconds).<br />
If the Indoor Unit is <strong>AC</strong> only and an auxiliary<br />
heater is configured, this option appears under<br />
the Aux Heat Settings menu.<br />
Indoor Unit Temp Offset Depending on its<br />
type, the Indoor Unit uses a temperature<br />
offset for the heating set point, taking<br />
into consideration the higher sensing<br />
temperature. The <strong>Daikin</strong> <strong>ENVi</strong> thermostat<br />
applies the offset to the set point which is<br />
sent to the Indoor Unit. The offset should be<br />
3.5°F (2.0°C) for wall-mounted and ducted<br />
indoor units, and 0°F (0°C) for floor-standing<br />
indoor units (available in the future). The<br />
offset range is adjustable from 0°F (0°C) to<br />
5.5 °F (3.0°C) in 0.5°F (0.3°C) increments to<br />
allow for future indoor unit expansions. The<br />
default offset is 3.5°F (2.0°C).<br />
Heat Pump to Aux Temp Delta The<br />
minimum difference between the current<br />
temperature and the set temperature that<br />
will activate Aux Heat (regardless if the<br />
maximum run time of the heat pump was<br />
19
20<br />
reached). Options are Auto (default) and 1 to<br />
10 °F (0.6 to 5.6 °C).<br />
Only visible if Indoor Unit supports heat and an<br />
auxiliary heat source is also configured.<br />
Heat Pump to Aux Runtime The maximum<br />
amount of time the heat pump will run<br />
before engaging Aux Heat. Options are Auto<br />
(default), Disabled, and 10 to 180 minutes.<br />
Only visible if Indoor Unit supports heat and an<br />
auxiliary heat source is also configured.<br />
Aux Heat Settings<br />
The Aux Heat Settings configure an auxiliary heat<br />
source.<br />
If you want to test the auxiliary heater during<br />
installation, set Aux Heat Installed to Yes and set<br />
Allow HP with Aux Heat to No. Then, adjust the heat<br />
set point to enable the auxiliary heater.<br />
Aux Heat Installed When set to Yes,<br />
configures the thermostat to control an<br />
auxiliary heat source.<br />
Aux Heat Requires Fan When set to Yes,<br />
configures the thermostat to control the fan<br />
when auxiliary heat is used.<br />
Allow HP with Aux Heat When set to Yes,<br />
it will turn on auxiliary heat in addition to<br />
the heat pump. For information about how<br />
auxiliary heat will be engaged with the heat<br />
pump, see the settings Heat Pump to Aux<br />
Temp Delta and Heat Pump to Aux Runtime.<br />
Aux Min On Time Sets the minimum<br />
equipment run time for auxiliary heat: 1 to 20<br />
min (default is 5 min).<br />
Max Outdoor Temp Configures the<br />
maximum outdoor temperature threshold.
Above this level, the auxiliary heat will not be<br />
activated. The temperature is adjustable from 0<br />
to 80 °F (-17.8 to 26.5 °C) in increments of 0.5°F<br />
(0.3°C). The default value is 70°F (21°C).<br />
Fan Configuration<br />
The Fan Configuration settings map the Indoor<br />
Unit’s internal fan speeds to the fan speed options<br />
displayed to the user on the thermostat.<br />
Heating Mode Speeds Configures fan speed<br />
when the user selects High, Medium or Low<br />
while the system is in heat mode. The possible<br />
speeds for each value are High, Medium High,<br />
Medium, Medium Low, and Low.<br />
Cooling Mode Speeds Configures fan speed<br />
when the user selects High, Medium or Low<br />
while the system is in cool mode. The possible<br />
speeds for each value are High, Medium High,<br />
Medium, Medium Low, and Low.<br />
Fan Only Mode Speeds Configures fan speed<br />
when the user selects High, Medium or Low<br />
while the system is not actively cooling or<br />
heating the room. The possible speeds for<br />
each value are High, Medium High, Medium,<br />
Medium Low, and Low.<br />
Aux Fan Min Speed Configures minimum fan<br />
speed used when Aux Heat requires a fan. The<br />
possible speed is High, Medium High, Medium,<br />
Medium Low, or Low.<br />
Force System Off<br />
Force System Off is used to clear a latched system<br />
error status in the indoor unit by turning off the<br />
equipment for five seconds after system servicing.<br />
Operation will automatically resume with the<br />
previous settings once complete.<br />
21
Tstat Temp Correction<br />
Lets you program an offset between the<br />
real temperature at the thermostat and the<br />
displayed temperature. If you find that the<br />
temperature where the thermostat is located<br />
does not represent the room temperature,<br />
change the offset to compensate for the<br />
difference. The correct temperature is adjustable<br />
from +/- 10°F (+/-5 .6°C) in 0.5°F (0.3°C)<br />
increments.<br />
Installer Code<br />
To prevent accidental modifications to the<br />
installation settings, you can enable the<br />
following installer code: 3262. The code is fixed<br />
and cannot be changed.<br />
To reset the <strong>Daikin</strong> <strong>ENVi</strong><br />
thermostat:<br />
From the Home screen,<br />
press MENU.<br />
Select Settings ▶ Reset.<br />
Select the desired reset<br />
method.<br />
Reset Equipment or User Settings<br />
You can restore equipment or user settings on<br />
the <strong>Daikin</strong> <strong>ENVi</strong> thermostat back to their factory<br />
defaults.<br />
Reset Registration Resets the connection<br />
between the <strong>Daikin</strong> <strong>ENVi</strong> thermostat and the<br />
user’s personalized Web Portal.<br />
Preferences and Schedule Resets<br />
all preferences, reminders, alerts and<br />
programming back to the default state.<br />
HV<strong>AC</strong> Equipment Settings Resets the<br />
configuration of the Indoor Unit and/or<br />
auxiliary heat equipment.<br />
All Settings Resets the <strong>Daikin</strong> <strong>ENVi</strong><br />
thermostat back to its default factory<br />
settings.<br />
22
Reset Contractor Info Resets any<br />
information about the Contractor who<br />
installed the <strong>Daikin</strong> <strong>ENVi</strong> thermostat.<br />
Rebooting the <strong>Daikin</strong> <strong>ENVi</strong><br />
thermostat<br />
You can reboot the <strong>Daikin</strong> <strong>ENVi</strong> thermostat by<br />
pressing the physical hardware reset button,<br />
located through an opening in the bottom left<br />
corner of the <strong>Daikin</strong> <strong>ENVi</strong> thermostat. Rebooting<br />
will not alter programming or configuration<br />
options.<br />
Reset button<br />
Sensors<br />
By default, the <strong>Daikin</strong> <strong>ENVi</strong> thermostat’s Internal<br />
Sensor is used for an accurate indication of the<br />
room temperature (recommended setting).<br />
The Indoor Unit is also equipped with a room<br />
temperature sensor which you can use instead.<br />
You can also enable both sensors to provide<br />
an average sensing temperature. However, the<br />
Indoor Unit sensor and averaging methods are<br />
not recommended because the Indoor Unit<br />
sensor, especially wall-mounted models, can be<br />
affected by certain operations such as starting<br />
up and defrosting in a short time which may<br />
cause improper control of the indoor unit by the<br />
<strong>ENVi</strong> <strong>Thermostat</strong>.<br />
To select the<br />
temperature sensor:<br />
From the Home screen,<br />
press MENU.<br />
Select Sensors ▶<br />
Configure.<br />
Enable or disable each<br />
sensor by selecting<br />
Internal Sensor or Indoor<br />
Unit and then selecting<br />
Yes or No.<br />
23
CONFIGURING REMINDERS<br />
AND ALERTS<br />
To configure Reminders<br />
and Alerts<br />
From the Home screen,<br />
press MENU.<br />
Select Reminders and<br />
Alerts.<br />
Configure the Reminder<br />
and Alert settings as<br />
required.<br />
The <strong>Daikin</strong> <strong>ENVi</strong> thermostat can generate<br />
periodic maintenance reminders that help the<br />
homeowner know when to perform periodic<br />
maintenance.<br />
The thermostat can also generate alerts if the<br />
system detects an error or if the temperature in<br />
the home goes over or under a pre-programmed<br />
level (which protects the home from damage<br />
due to freezing and/or excessive heat).<br />
Alerts are displayed on the screen. They include<br />
a description, error code (in the case of a<br />
system error), and optional technician contact<br />
information.<br />
If the homeowner registers the thermostat, the<br />
alert will be emailed to them and be displayed in<br />
the web portal.<br />
System Service<br />
The system service (maintenance) reminder<br />
generates an alert telling the homeowner that<br />
regularly scheduled maintenance is required.<br />
This reminder, along with technician contact<br />
information, can be displayed on the screen.<br />
If homeowners register their thermostats, the<br />
reminders will be emailed to them and be<br />
displayed in the web portal.<br />
You can set the Last Service date, turn the<br />
Reminder On or Off, and to set the Frequency of<br />
the maintenance interval in months.<br />
24
Low Temp Limit<br />
Sets the temperature at which the thermostat<br />
will generate a Low Temperature Limit alert. The<br />
range can be:<br />
Disabled – No alert will be generated.<br />
Enabled –Set temperature range of 35 to 68<br />
°F (1.5 to 20 °C).<br />
High Temp Limit<br />
Sets the temperature at which the thermostat<br />
will generate a High Temperature Limit alert. The<br />
range can be:<br />
Disabled – No alert will be generated.<br />
Enabled – Set temperature range of 60 to<br />
104 °F (15.5 to 40 °C).<br />
Display Alerts on <strong>Thermostat</strong><br />
Select No if you do not want any of the alerts<br />
to be displayed on the <strong>Daikin</strong> <strong>ENVi</strong> thermostat<br />
screen. Alerts will continue to be displayed on<br />
the web portal and sent via email.<br />
Enable Heating/Cooling Alerts<br />
Select No to disable alerts for heat/cool error<br />
conditions. If disabled, alerts indicating that the<br />
system failed to heat or cool will not be appear<br />
in the screen, web portal, or emails.<br />
25
List of Alerts<br />
Below is a complete list of alerts. Depending on your configuration,<br />
some of these may not apply.<br />
Low Temp Limit<br />
High Temp Limit<br />
Temperature in the home is too low.<br />
Temperature in the home is too high.<br />
Heat Not<br />
Responding<br />
Cool Not<br />
Responding<br />
System Service<br />
Auxiliary Heat Run<br />
Time<br />
Auxiliary Outdoor<br />
Temperature<br />
System error, service<br />
required<br />
Lost communication<br />
The system has failed to heat the home.<br />
The system has failed to cool the home.<br />
HV<strong>AC</strong> system due for regular maintenance.<br />
Auxiliary heat source is running too often.<br />
Your auxiliary heat has been called to run when the<br />
outdoor temperature exceeds the programmed set<br />
point.<br />
A system error occurred.<br />
If the Indoor Unit’s status LED is blinking after<br />
the error has been corrected, select Settings ▶<br />
<strong>Installation</strong> Settings ▶ Force System Off to reset<br />
the latched error status and turn off the blinking<br />
LED.<br />
Communication with the Indoor Unit has been lost.<br />
Check the wiring connections between the DPCA,<br />
<strong>ENVi</strong> thermostat and Indoor Unit. The green LED on<br />
DPCA should be on and solid.<br />
Upon initial power up of the system communication,<br />
this alert may be generated. Wait up 10 minutes<br />
for system to initialized before troubleshooting.<br />
The alert will be removed automatically once<br />
communication has been established.<br />
26
ONE-YEAR LIMITED WARRANTY<br />
<strong>Daikin</strong> <strong>AC</strong> (Americas), Inc., (“<strong>Daikin</strong> <strong>AC</strong>”) warrants that for a period of one (1) year from the date of<br />
purchase by the end-user (“Customer”), the <strong>Daikin</strong> <strong>ENVi</strong> thermostat (the “Product”) shall be free of<br />
defects in materials and workmanship under normal use and service. During the limited warranty<br />
period, <strong>Daikin</strong> <strong>AC</strong> shall, at its option, repair or replace any defective Products, at no charge. Any<br />
replacement and/or repaired device are warranted for the remainder of the original limited warranty<br />
or ninety (90) days, whichever is longer.<br />
NO LABOR WARRANTY<br />
This limited warranty will apply with respect to parts only and not labor. Accordingly, subject to the<br />
conditions and limitations set forth herein, the limited warranty entitles the Customer to receive, at<br />
the option of <strong>Daikin</strong> <strong>AC</strong> only, a repaired or replacement part.<br />
If the Product is defective, please call the third party contractor (“Installing Contractor”). After<br />
consulting with the Installing Contractor, <strong>Daikin</strong> <strong>AC</strong> will make the determination whether a<br />
replacement Product can be sent to you or whether the Product should be returned to the following<br />
address: <strong>Daikin</strong> <strong>AC</strong> (Americas), Inc. 1645 Wallace Drive, Suite 110, Carrollton, TX 75006. In the event of<br />
a failure of a Product, Customer may:<br />
• contact the Installing Contractor from whom the Product was purchased to obtain an<br />
equivalent replacement product, provided the Installing Contractor determines that the<br />
returned Product is defective and Customer is otherwise eligible to receive a replacement<br />
product<br />
This limited warranty does not cover removal, freight or reinstallation costs and shall not apply if the<br />
damages were found to be caused by something other than defects in materials or workmanship.<br />
The limited warranty will be void and of no effect, and <strong>Daikin</strong> <strong>AC</strong> will have no liability to Customer or<br />
anyone, including without limitation, if the Product:<br />
• was operated/stored in abnormal use or maintenance conditions not prescribed in the User<br />
<strong>Manual</strong>;<br />
• is repaired, modified or altered by any source other than <strong>Daikin</strong> <strong>AC</strong>, its agents or a licensed<br />
Heating Ventilating and Air Conditioning (HV<strong>AC</strong>) contractor and <strong>Daikin</strong> <strong>AC</strong> expressly authorizes<br />
such repair;<br />
• the Product was subjected to misuse, abuse, negligence , electrical fault, improper handling or<br />
improper or inadequate maintenance accident or acts of nature;<br />
• the Product is not operated or maintained and serviced in compliance with the printed<br />
instructions and recommendations of <strong>Daikin</strong> <strong>AC</strong>;<br />
• the serial number of the Product has been altered, defaced, or removed;<br />
• the Product is mishandled by Customer or any third party;<br />
• lightning, fluctuations in electrical power or acts of God have occurred;<br />
• problems arise from normal wear and tear;<br />
• the Product has not been purchased from an authorized <strong>Daikin</strong> <strong>AC</strong> distributor or sales<br />
representative (an “Authorized Seller”) or from a party or contractor who has purchased the<br />
Product from an Authorized Seller;<br />
• was not installed by a licensed Heating Ventilating and Air Conditioning (HV<strong>AC</strong>) contractor or<br />
was installed improperly.<br />
27
The limited warranty is for repair or replacement of parts or Product only. Except to that limited<br />
extent, <strong>Daikin</strong> <strong>AC</strong> will not under any circumstances be liable for any loss, cost, damage, or expense of<br />
any kind arising out of a breach of this limited warranty or otherwise. Without intending to limit the<br />
foregoing sentence, it is specifically provided as follows: DAIKIN <strong>AC</strong> SHALL NOT BE LIABLE FOR ANY<br />
INDIRECT, INCIDENTAL, CONSEQUENTIAL, EXEMPLARY, SPECIAL, OR PUNITIVE DAMAGES, OR FOR<br />
ANY LOSS OF REVENUE, PROFIT OR USE, ARISING OUT OF A BRE<strong>AC</strong>H OF THIS LIMITED WARRANTY<br />
(INCLUDING BUT NOT LIMITED TO DAMAGE RESULTING FROM MOLD OR OTHER CONTAMINATES) OR<br />
IN CONNECTION WITH THE SALE, MAINTENANCE, USE, OPERATION, SERVICING OR REPAIR OF ANY<br />
DAIKIN <strong>AC</strong> PRODUCT. IN NO EVENT WILL DAIKIN <strong>AC</strong> BE LIABLE FOR ANY AMOUNT GREATER THAN THE<br />
PURCHASE PRICE OF A DEFECTIVE PRODUCT.<br />
THIS LIMITED WARRANTY IS THE SOLE AND EXCLUSIVE WARRANTY FOR DAIKIN <strong>AC</strong> PRODUCT,<br />
AND IS IN LIEU OF ALL OTHER WARRANTIES EXPRESS OR IMPLIED, IN LAW OR IN F<strong>AC</strong>T. DAIKIN <strong>AC</strong><br />
SPECIFICALLY DISCLAIMS ALL OTHER WARRANTIES EXPRESS OR IMPLIED, INCLUDING BUT NOT<br />
LIMITED TO ALL IMPLIED WARRANTIES OF MERCHANTABILITY AND OF FITNESS FOR A PARTICULAR<br />
USE OR PURPOSE OR OF NON-INFRINGEMENT, OR ANY IMPLIED WARRANTY ARISING OUT OF<br />
A COURSE OF DEALING OR OF PERFORMANCE OR USAGE OF TRADE. NO PERSON OR ENTITY IS<br />
AUTHORIZED TO BIND DAIKIN <strong>AC</strong> TO ANY OTHER WARRANTY, OBLIGATION OR LIABILITY FOR ANY<br />
DAIKIN <strong>AC</strong> PRODUCT. <strong>AC</strong>CEPTANCE, INSTALLATION, OPERATION OR USE OF THE DAIKIN <strong>AC</strong> PRODUCT<br />
FOR WHICH THIS WARRANTY IS ISSUED WILL CONSTITUTE <strong>AC</strong>CEPTANCE OF THE TERMS HEREOF.<br />
SOME JURISDICTIONS MAY NOT ALLOW THE EXCLUSION OR LIMITATION OF INDIRECT, INCIDENTAL<br />
OR CONSEQUENTIAL DAMAGES, OR OF ANY EXPRESS OR IMPLIED WARRANTIES, SO TO SUCH EXTENT<br />
THE ABOVE EXCLUSIONS MAY NOT APPLY TO CERTAIN CUSTOMERS. THIS LIMITED WARRANTY<br />
PROVIDED BY DAIKIN <strong>AC</strong> GIVES CUSTOMERS SPECIFIC LEGAL RIGHTS, AND CUSTOMERS MAY ALSO<br />
HAVE OTHER RIGHTS WHICH VARY FROM JURISDICTION TO JURISDICTION. The disclaimers of liability<br />
included in this limited warranty shall remain in effect and shall continue to be enforceable in the<br />
event that any remedy herein shall fail of its essential purpose<br />
No one is authorized by <strong>Daikin</strong> <strong>AC</strong> to modify this limited warranty in any respect or to create for<br />
<strong>Daikin</strong> <strong>AC</strong> any other obligation or liability in connection with the Product unless done so in a written<br />
agreement bearing the handwritten signature of the President of <strong>Daikin</strong> <strong>AC</strong>. Customer agrees that<br />
any purported change by <strong>Daikin</strong> <strong>AC</strong> shall be null and void unless the President of <strong>Daikin</strong> <strong>AC</strong> shall<br />
have expressly so agreed to such change.<br />
This limited warranty gives you specific rights, and you may also have other rights which vary from<br />
jurisdiction to jurisdiction. If you have any questions regarding this limited warranty, please write<br />
<strong>Daikin</strong> <strong>AC</strong> (Americas), Inc., 1645 Wallace Drive, Suite 110, Carrollton, TX 75006.<br />
28
www.<strong>Daikin</strong><strong>ENVi</strong>.com<br />
<strong>Daikin</strong> <strong>AC</strong> (Americas), Inc.<br />
1645 Wallace Drive, Suite 110<br />
Carrollton, TX 75006 USA<br />
IM-TS1-1-1305