M16DXWS05—Using the M-16DX with a DAW - Roland
M16DXWS05—Using the M-16DX with a DAW - Roland
M16DXWS05—Using the M-16DX with a DAW - Roland

Create successful ePaper yourself
Turn your PDF publications into a flip-book with our unique Google optimized e-Paper software.
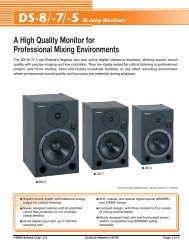
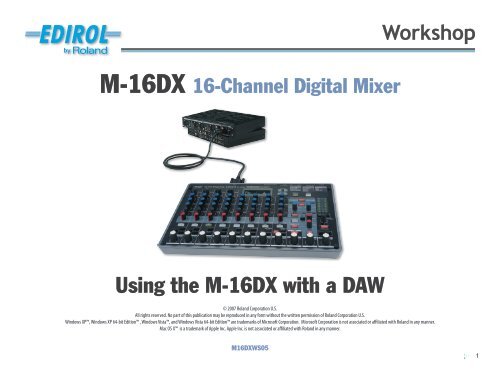
M-<strong>16DX</strong> 16-Channel Digital Mixer<br />
Workshop<br />
Using <strong>the</strong> M-<strong>16DX</strong> <strong>with</strong> a <strong>DAW</strong><br />
© 2007 <strong>Roland</strong> Corporation U.S.<br />
All rights reserved. No part of this publication may be reproduced in any form <strong>with</strong>out <strong>the</strong> written permission of <strong>Roland</strong> Corporation U.S.<br />
Windows XP, Windows XP 64-bit Edition , Windows Vista, and Windows Vista 64-bit Edition are trademarks of Microsoft Corporation. Microsoft Corporation is not associated or affiliated <strong>with</strong> <strong>Roland</strong> in any manner.<br />
Mac OS X is a trademark of Apple Inc. Apple Inc. is not associated or affiliated <strong>with</strong> <strong>Roland</strong> in any manner.<br />
M<strong>16DX</strong>WS05<br />
1
About <strong>the</strong> Workshop Booklets<br />
The EDIROL M-<strong>16DX</strong> 16-Channel Digital Mixer delivers <strong>the</strong> power of digital<br />
mixing to musicians at an incredibly affordable price. This crystal-clear 24-bit<br />
digital mixer supports sample rates up to 96 kHz, and it’s extremely flexible,<br />
<strong>with</strong> a wide range of analog and digital inputs and outputs, and effects. The<br />
M-<strong>16DX</strong>’s USB connectivity makes it an ideal partner for a computer-based<br />
digital audio workstation, and features such its pro EQ and <strong>the</strong> innovative<br />
Room Acoustic Control make it an excellent live mixer as well.<br />
Each M-<strong>16DX</strong> Workshop Series booklet focuses on one M-<strong>16DX</strong> topic, and is<br />
intended as a companion to <strong>the</strong> M-<strong>16DX</strong> Owner’s Manual.<br />
The M-<strong>16DX</strong> Workshop booklets require M-<strong>16DX</strong> O.S. Version 2.00 or higher.<br />
You can download <strong>the</strong> latest O.S. for free from www.<strong>Roland</strong>US.com/EDIROL.<br />
About This Booklet<br />
The M-<strong>16DX</strong> makes an excellent companion to a digital<br />
audio workstation—or “<strong>DAW</strong>”—on a personal computer.<br />
Its USB 2.0 connectivity makes it easy to get audio from<br />
<strong>the</strong> M-<strong>16DX</strong> into <strong>the</strong> <strong>DAW</strong>. Within <strong>the</strong> <strong>DAW</strong>, you can grab<br />
audio from any of <strong>the</strong> M-<strong>16DX</strong>’s 16 input channels or <strong>the</strong><br />
M-<strong>16DX</strong>’s stereo main mix bus.<br />
Every <strong>DAW</strong> deals <strong>with</strong> audio in basically <strong>the</strong> same way. This booklet discusses<br />
<strong>the</strong> universal issues and possibilities you’ll find <strong>with</strong> any <strong>DAW</strong> when you’re<br />
working <strong>with</strong> <strong>the</strong> M-<strong>16DX</strong>. O<strong>the</strong>r Workshop booklets detail using <strong>the</strong><br />
M-<strong>16DX</strong> <strong>with</strong> specific <strong>DAW</strong>s—you should read this booklet first, though, to<br />
make sure you’re clear about <strong>the</strong> overall process.<br />
With its Version 2.00 operating system software or higher, <strong>the</strong> M-<strong>16DX</strong> can<br />
act as a control surface, allowing you to operate <strong>DAW</strong>s directly from <strong>the</strong><br />
M-<strong>16DX</strong>. To learn more—after reading <strong>the</strong> booklet you’re reading now—see<br />
<strong>the</strong> Using <strong>the</strong> M-<strong>16DX</strong> as a <strong>DAW</strong> Controller Workshop booklet.<br />
Understanding <strong>the</strong> Symbols in This Booklet<br />
Throughout this booklet, you’ll come across information that deserves<br />
special attention—that’s <strong>the</strong> reason it’s labeled <strong>with</strong> one of <strong>the</strong> following<br />
symbols.<br />
A note is something that adds information about <strong>the</strong> topic at hand.<br />
A tip offers suggestions for using <strong>the</strong> feature being discussed.<br />
Warnings contain important information that can help you avoid<br />
possible damage to your equipment, your data, or yourself.<br />
Hot Links<br />
Each Workshop booklet is meant to be read in order from beginning<br />
to end. However, if we mention an upcoming section—and you see<br />
this arrow—you can click <strong>the</strong> arrow to jump <strong>the</strong>re immediately.<br />
The Basics of Working <strong>with</strong> a <strong>DAW</strong><br />
Using <strong>the</strong> M-<strong>16DX</strong> <strong>with</strong> a computer requires <strong>the</strong> installation<br />
of M-<strong>16DX</strong> driver software on <strong>the</strong> computer. We’ll describe<br />
in detail how to obtain and install this software a bit later. If<br />
you’re experienced <strong>with</strong> using audio interfaces and <strong>DAW</strong>s, you<br />
can jump to <strong>the</strong>se instructions now.<br />
When you’re using <strong>the</strong> M-<strong>16DX</strong>—or any audio interface, really—<strong>with</strong> a <strong>DAW</strong>,<br />
<strong>the</strong> two things to get a handle on are how<br />
1<br />
2<br />
audio gets into a <strong>DAW</strong><br />
you listen to what you’re doing.<br />
2
How Audio Gets Into a <strong>DAW</strong><br />
Once you’ve set everything up:<br />
• Audio arrives at an M-<strong>16DX</strong> input channel— When you connect a mic,<br />
instrument, or o<strong>the</strong>r audio device to an M-<strong>16DX</strong> input jack, its audio is<br />
automatically routed to <strong>the</strong> corresponding M-<strong>16DX</strong> input channel.<br />
About Multitrack Session Monitoring<br />
Latency<br />
While modern electronic devices do things astoundingly fast, things still<br />
take a little time to do. It only makes sense that it takes some time for audio<br />
to travel from a voice or instrument to an audio interface, <strong>the</strong>n through a<br />
cable to a computer’s hardware, through that hardware to <strong>the</strong> computer’s<br />
system software, from that software to a <strong>DAW</strong>’s track, and <strong>the</strong>n from <strong>the</strong><br />
track to your ears. The musical ear is very sensitive to even tiny timing issues,<br />
which—of course—amount to rhythmic issues in music.<br />
The lag in time that occurs as audio travels from a mic or instrument into<br />
and out of a <strong>DAW</strong> track is called “latency,” and it’s enough of a lag to make<br />
performing perfectly in time along <strong>with</strong> <strong>the</strong> <strong>DAW</strong>’s metronome or already<br />
recorded tracks difficult, or even impossible <strong>with</strong> a slower computer.<br />
• You select <strong>the</strong> desired M-<strong>16DX</strong> channel<br />
or main mix bus as <strong>the</strong> audio a <strong>DAW</strong><br />
track will record—Each track in a <strong>DAW</strong><br />
can record audio from any M-<strong>16DX</strong><br />
input or its main mix bus.<br />
Once you’ve recorded audio into a <strong>DAW</strong>, any changes you want to make<br />
to <strong>the</strong> recorded audio’s sound get made in <strong>the</strong> <strong>DAW</strong> itself, including any<br />
effects you want to add. When you mix, you also mix inside <strong>the</strong> <strong>DAW</strong>.<br />
This is because when you listen to yourself through a<br />
<strong>DAW</strong> while recording, latency causes <strong>the</strong> “you” that you<br />
hear to be late compared to <strong>the</strong> <strong>DAW</strong>’s timing. What<br />
you’ll hear is rhythmically a bit off—just how bad <strong>the</strong><br />
latency is depends on <strong>the</strong> speed of your computer<br />
and a few o<strong>the</strong>r things. Even though your recorded<br />
performance may actually be in time, that’s not what<br />
you’ll hear as you record.<br />
Fortunately, <strong>the</strong>re’s a solution.<br />
What you hear is not<br />
what you get.<br />
How You Listen to What You’re Doing<br />
When you’re working <strong>with</strong> a <strong>DAW</strong>, your listening, or “monitoring,” setup<br />
depends on <strong>the</strong> kind of session you’re working on:<br />
• In a multitrack session— you record voices and instruments on <strong>the</strong>ir own<br />
tracks. You can use this technique for building an arrangement a trackat-a-time,<br />
or for doing a live recording of an entire group. Each track<br />
records audio from a single M-<strong>16DX</strong> mono or stereo input channel.<br />
• In a two-track session— you capture a final musical performance by one<br />
or more musicians on a single stereo <strong>DAW</strong> track by recording from <strong>the</strong><br />
M-<strong>16DX</strong>’s main mix bus.<br />
Zero-Latency Monitoring<br />
When <strong>the</strong> M-<strong>16DX</strong> is connected to a computer via USB, <strong>the</strong> audio output<br />
of <strong>the</strong> computer is returned to <strong>the</strong> M-<strong>16DX</strong> through its stereo USB channel,<br />
Channel 13/14. This allows you to monitor <strong>the</strong> <strong>DAW</strong>’s output side-by-side<br />
<strong>with</strong> what you’re currently recording using zero-latency monitoring.<br />
With faster systems, latency can be more subtle, and you may choose<br />
to listen through <strong>the</strong> <strong>DAW</strong> as you record anyway so you can hear <strong>the</strong><br />
<strong>DAW</strong>’s effects. Still, since <strong>the</strong>re’s always some lag no matter how fast<br />
your system is, we generally recommend zero-latency monitoring.<br />
3
When you listen to <strong>the</strong> M-<strong>16DX</strong> stereo main mix bus <strong>with</strong> zero-latency<br />
monitoring, what you hear is<br />
• what you’re recording— directly through its M-<strong>16DX</strong> channel.<br />
• <strong>the</strong> <strong>DAW</strong>’s output— including its metronome and/or already-recorded<br />
tracks, through M-<strong>16DX</strong> Channel 13/14.<br />
If you listen to <strong>the</strong> <strong>DAW</strong> in <strong>the</strong> M-<strong>16DX</strong>’s main mix while you’re<br />
recording that same mix into <strong>the</strong> <strong>DAW</strong>, <strong>the</strong> <strong>DAW</strong>’s output gets sent back<br />
to itself in a feedback loop.<br />
When you play back <strong>the</strong> recording, you turn on Channel 13/14’s USB button<br />
and listen to <strong>the</strong> <strong>DAW</strong>.<br />
Channel 13/14’s<br />
USB button is lit<br />
during recording<br />
and playback in a<br />
multitrack session.<br />
Channel 13/14’s USB<br />
button is lit during<br />
playback in a twotrack<br />
session.<br />
or<br />
or<br />
About Two-Track Session Monitoring<br />
While you’re recording a performer or group live from <strong>the</strong> M-<strong>16DX</strong>’s main<br />
mix bus, you turn off Channel 13/14’s USB button and listen only to <strong>the</strong><br />
M-<strong>16DX</strong>’s main mix since it’s what’s being sent to <strong>the</strong> <strong>DAW</strong> for recording.<br />
In a two-track<br />
session, Channel<br />
13/14’s USB button<br />
is unlit during<br />
recording.<br />
Setting Up<br />
Installing M-<strong>16DX</strong> Drivers<br />
The M-<strong>16DX</strong> works <strong>with</strong> <strong>the</strong> following computer operating (OS) systems:<br />
• Windows XP<br />
• Windows XP 64-bit Edition<br />
• Mac OS X<br />
• Windows Vista 32-bit Edition • Windows Vista 64-bit Edition<br />
In <strong>the</strong> following steps we’ll describe <strong>the</strong> installation of drivers for Windows<br />
XP 32-bit and Mac OS X, <strong>the</strong> two most common operating systems. (All of <strong>the</strong><br />
M-<strong>16DX</strong> driver installers come <strong>with</strong> installation instructions in any event.)<br />
or<br />
The following instructions assume you’re familiar <strong>with</strong> <strong>the</strong> operation of<br />
your computer. If you’re not, consult its documentation.<br />
4
Downloading Drivers<br />
1<br />
2<br />
3<br />
4<br />
5<br />
6<br />
Each driver installer includes details regarding <strong>the</strong> OS system<br />
requirements for its driver, as well as a list of cautions and<br />
limitations.<br />
Point your browser to <strong>the</strong> following URL or click <strong>the</strong> link below:<br />
http://www.rolandus.com/products/productdetails.aspx?ObjectId=860<br />
In your browser, click <strong>the</strong> Downloads tab.<br />
Locate <strong>the</strong> desired driver, and click its name.<br />
In <strong>the</strong> “End-User License Agreement,” click “I AGREE AND WISH<br />
TO PROCEED WITH DOWNLOAD”—<strong>the</strong> file downloads to your<br />
computer.<br />
On a<br />
• PC— <strong>the</strong> downloaded file is automatically uncompressed. Locate<br />
<strong>the</strong> folder called “M-<strong>16DX</strong>_win_xp.”<br />
• Mac— locate and double-click <strong>the</strong> M<strong>16DX</strong>USBDriver.tar file to<br />
create a folder called “M<strong>16DX</strong>USBDriver.”<br />
Inside your driver folder, you’ll find <strong>the</strong> driver installer.<br />
Windows XP Driver Installation<br />
1 Power up your PC <strong>with</strong> all USB cables disconnected except for your<br />
keyboard and mouse.<br />
2 If any applications are running, quit <strong>the</strong>m.<br />
3 Open up <strong>the</strong> M-<strong>16DX</strong>_win_xp folder, and double-click <strong>the</strong> Setup file<br />
inside to display <strong>the</strong> following window:<br />
If an “Install Program as O<strong>the</strong>r User” dialog appears, quit <strong>the</strong> installer,<br />
and <strong>the</strong>n log in as <strong>the</strong> system administrator before installing <strong>the</strong><br />
M-<strong>16DX</strong> driver.<br />
4<br />
Click Next to display <strong>the</strong> installation start window:<br />
5
If you see <strong>the</strong> Software Installation window instead of <strong>the</strong> one<br />
shown above, click Continue Anyway. If you can’t continue,<br />
see “About Driver Signing Options” later in this booklet.<br />
7 Select Install <strong>the</strong> software automatically (Recommended), and <strong>the</strong>n<br />
click Next.<br />
When <strong>the</strong> driver’s installed, <strong>the</strong> wizard announces <strong>the</strong> completion of<br />
<strong>the</strong> installation process.<br />
A progress bar appears for a moment, and <strong>the</strong>n <strong>the</strong> following<br />
screen:<br />
If <strong>the</strong> “Software installation” window appears, click Continue<br />
Anyway. If you can’t continue, see “About Driver Signing<br />
Options” later in this booklet.<br />
5<br />
6<br />
With <strong>the</strong> M-<strong>16DX</strong>’s power turned off, plug one end of <strong>the</strong> included<br />
USB cable into its USB jack, and <strong>the</strong> o<strong>the</strong>r end into <strong>the</strong> USB jack on<br />
your computer that you want to use.<br />
Turn on <strong>the</strong> M-<strong>16DX</strong>—after a few moments, <strong>the</strong> PC’s Found New<br />
Hardware Wizard opens.<br />
If you’re asked if you want to connect to Windows Update, select No,<br />
not this time, and <strong>the</strong>n click Next.<br />
If <strong>the</strong> “System Settings Change” window appears, click Yes to<br />
restart Windows, and jump ahead to “System Settings on Your<br />
Computer” after restarting.<br />
8 Click Finish.<br />
Windows displays “Your new hardware is ready to use.”<br />
9 If <strong>the</strong> Driver Setup window’s still open, click its Close button.<br />
10 Jump ahead to “System Settings on Your Computer.”<br />
Should you ever need to remove <strong>the</strong> M-<strong>16DX</strong> driver from your system,<br />
<strong>the</strong> driver installer folder also contains an uninstaller. You can hold<br />
onto this file, or re-download <strong>the</strong> driver folder later should you need<br />
<strong>the</strong> uninstaller at some point in <strong>the</strong> future.<br />
6
About Driver Signing Options<br />
The Driver Signing window lets you select whe<strong>the</strong>r Windows should block<br />
<strong>the</strong> installation of an unknown driver, warn you about it, or just install it.<br />
1<br />
2<br />
In <strong>the</strong> Start menu, select Control Panel.<br />
If you’re in<br />
• Category View— click Performance and Maintenance, and <strong>the</strong>n<br />
click System.<br />
• Classic View— double-click System.<br />
Mac OS X Driver Installation<br />
1 Start up your computer <strong>with</strong> all USB cables disconnected except for<br />
your keyboard and mouse.<br />
2 Open up <strong>the</strong> M<strong>16DX</strong>USBDriver folder, and double-click <strong>the</strong><br />
M<strong>16DX</strong>USBDriver.pkg file inside to display <strong>the</strong> following window:<br />
If you see this dialog at any time during <strong>the</strong> installation process, click<br />
Continue.<br />
3<br />
Click <strong>the</strong> Hardware tab, and <strong>the</strong>n click Driver Signing.<br />
4 Set “What action do you want Windows to take?” to Ignore or Warn.<br />
5<br />
Click OK to close <strong>the</strong> Driver Signing window.<br />
3<br />
Click Continue—<strong>the</strong> installer scans your hard drives before displaying<br />
<strong>the</strong>m in a new window.<br />
6<br />
7<br />
Click OK to close <strong>the</strong> System Properties window.<br />
Return to <strong>the</strong> driver installation instructions earlier in this booklet.<br />
4<br />
Click your bootup hard drive so that a green arrow appears on it as<br />
shown above.<br />
7
5<br />
6<br />
7<br />
8<br />
Click Continue, and <strong>the</strong>n click Install, or Upgrade if you’ve previously<br />
installed an earlier version of <strong>the</strong> M-<strong>16DX</strong> driver.<br />
If <strong>the</strong> computer asks you to enter your computer’s administrator<br />
password, type it in and click OK.<br />
When <strong>the</strong> computer tells you you’ll need to restart <strong>the</strong> computer<br />
after <strong>the</strong> installation, click Continue Installation.<br />
After <strong>the</strong> driver’s been installed, you’ll see this screen.<br />
System Settings for Your Computer<br />
Optimizing Your Windows PC for Audio<br />
To optimize Windows XP for <strong>DAW</strong> audio operations<br />
1<br />
2<br />
In <strong>the</strong> Start menu, select Control Panel.<br />
If you’re in<br />
• Category View— click Performance and Maintenance, and <strong>the</strong>n<br />
click System.<br />
• Classic View— double-click System.<br />
9<br />
10<br />
Click Restart.<br />
After <strong>the</strong> computer restarts, <strong>with</strong> <strong>the</strong> M-<strong>16DX</strong> turned off, plug one<br />
end of <strong>the</strong> included USB cable into its USB jack, <strong>the</strong> o<strong>the</strong>r end into a<br />
USB jack on your computer, and <strong>the</strong>n turn on <strong>the</strong> M-<strong>16DX</strong>.<br />
3<br />
Click <strong>the</strong> Advanced tab, and <strong>the</strong>n click <strong>the</strong> Performance Settings<br />
button.<br />
11<br />
Read “System Settings on Your Computer” in <strong>the</strong> next column.<br />
Should you ever need to remove <strong>the</strong> M-<strong>16DX</strong> driver from your system,<br />
<strong>the</strong> driver installer folder also contains an uninstaller. You can hold<br />
onto this file, or re-download <strong>the</strong> driver folder later on should you<br />
need <strong>the</strong> uninstaller at some point in <strong>the</strong> future.<br />
8
4<br />
In <strong>the</strong> Performance Options window, click <strong>the</strong> Advanced tab.<br />
5 Select Background Services as shown here.<br />
Sending Windows XP System Sounds to <strong>the</strong> M-<strong>16DX</strong><br />
1 In <strong>the</strong> Start menu, select Control Panel.<br />
2 If you’re in<br />
• Category View— click Sounds, Speech, and Audio Devices, and<br />
<strong>the</strong>n click Sounds and Audio Devices.<br />
• Classic View— double-click Sounds and Audio Devices.<br />
6<br />
Click OK to close <strong>the</strong> Performance Options window, and <strong>the</strong>n click OK<br />
to close <strong>the</strong> System Properties window.<br />
You’ll find more tips on tweaking Windows XP for recording and<br />
playback at MusicXP.net, http://musicxp.net/tuning_tips.php.<br />
3<br />
Click <strong>the</strong> Hardware tab to display a list of devices.<br />
Using <strong>the</strong> M-<strong>16DX</strong> for System Sounds<br />
In addition to using <strong>the</strong> M-<strong>16DX</strong> <strong>with</strong> a <strong>DAW</strong>, you can use it for all of your<br />
computer’s operating system sounds if you like. The following sections<br />
explain how to set this up.<br />
It’s a good idea to turn off your system sounds while you’re actually<br />
working <strong>with</strong> your <strong>DAW</strong> for a couple of reasons. First, <strong>the</strong>y may<br />
provide an extra burden for your computer’s processor when it’s busy<br />
recording and playing tracks in your <strong>DAW</strong>. Second, if you’re recording<br />
<strong>the</strong> M-<strong>16DX</strong>’s main mix bus into your <strong>DAW</strong> in a two-track session, <strong>the</strong><br />
system sounds will be included in <strong>the</strong> recording.<br />
9
4<br />
Double-click your current sound card in <strong>the</strong> list.<br />
Sending Mac OS X System Sounds to <strong>the</strong> M-<strong>16DX</strong><br />
1<br />
Open your System Preferences window.<br />
5<br />
6<br />
You’ll need to disable <strong>the</strong> sound card so it doesn’t conflict <strong>with</strong> <strong>the</strong><br />
M-<strong>16DX</strong>. If you want to disable <strong>the</strong> card<br />
• for <strong>the</strong> current user of <strong>the</strong> PC— set Device usage to Do not use this<br />
device in <strong>the</strong> current hardware profile (disable).<br />
• for all users of <strong>the</strong> PC— set Device usage to Do not use this device<br />
in any hardware profile (disable).<br />
Click OK.<br />
7 In <strong>the</strong> list, double-click EDIROL M-<strong>16DX</strong>.<br />
2<br />
3<br />
Click Sound—circled above—to open <strong>the</strong> Sound control panel.<br />
Click <strong>the</strong> Output tab, and select EDIROL M-<strong>16DX</strong>.<br />
In <strong>the</strong> Sound control panel, you’ll see <strong>the</strong> M-<strong>16DX</strong>’s current sample rate<br />
after “EDIROL M-<strong>16DX</strong>.” We’ll discuss sample rates in a bit.<br />
8 Set Device usage to Use this device (enable), and <strong>the</strong>n click OK.<br />
10
4<br />
Click <strong>the</strong> Input tab, and select EDIROL M-<strong>16DX</strong>.<br />
Matching Sample Rates<br />
In digital audio, <strong>the</strong> number of times per second that a sample—<br />
essentially a snapshot—is taken of your audio is called <strong>the</strong> “sample<br />
rate.” CDs use a sampling rate of 44.1 kHz, or 44,100 samples per<br />
second.<br />
5<br />
Close <strong>the</strong> Preferences window.<br />
The M-<strong>16DX</strong> Driver Settings<br />
The M-<strong>16DX</strong> driver installer adds an M-<strong>16DX</strong> control panel to Windows, and<br />
a Preferences pane to Mac OS X. In <strong>the</strong>se windows, you’ll find controls you<br />
may need as you set up and work <strong>with</strong> your <strong>DAW</strong>.<br />
The M-<strong>16DX</strong> can operate at 44.1 kHz, 48 kHz, and 90 kHz sampling rates, and<br />
you can select any one <strong>with</strong> which your <strong>DAW</strong> is also compatible. Use<br />
• 44.1 kHz— if you’re recording music strictly for CD. Since 44.1 kHz is<br />
<strong>the</strong> sampling rate CDs use, you’ll avoid having to apply sample-rate<br />
conversion later on.<br />
• 48 kHz— for slightly better audio quality than 44.1 kHz if your destination<br />
media isn’t a CD. If it is, you can still use 48 kHz, but <strong>the</strong> sample-rate<br />
conversion process you’ll need to get <strong>the</strong> recording onto a CD will<br />
probably take away any benefits <strong>the</strong> higher sample rate’s gotten you.<br />
• 96 kHz— for very high-quality audio. Again this is mostly for recordings<br />
not destined for CD, for <strong>the</strong> same reasons as 48 kHz.<br />
You set <strong>the</strong> sample rate for <strong>the</strong> M-<strong>16DX</strong> in its UTILITY screen, by setting <strong>the</strong><br />
Sample Freq parameter as described in <strong>the</strong> Using <strong>the</strong> M-<strong>16DX</strong> <strong>with</strong> a <strong>DAW</strong><br />
Workshop booklet.<br />
After you change <strong>the</strong> M-<strong>16DX</strong>’s sample rate while it’s connected to a<br />
computer via USB, you’ve got to ei<strong>the</strong>r power <strong>the</strong> off and back for <strong>the</strong><br />
sample rate change to take effect, or disconnect and reconnect ei<strong>the</strong>r<br />
end of <strong>the</strong> USB cable connecting <strong>the</strong> M-<strong>16DX</strong> and <strong>the</strong> computer.<br />
Windows XP<br />
Mac OS X<br />
To gain access to your individual M-<strong>16DX</strong> channels <strong>with</strong>in your <strong>DAW</strong> in<br />
Windows XP, checkmark <strong>the</strong> Use Separated Ports Audio Port parameter.<br />
The Audio Buffer size parameter can be helpful if you’re having trouble<br />
successfully record or playing back. Larger buffer settings can get rid of clicks<br />
and pops, though <strong>the</strong>y also increase latency in <strong>the</strong> <strong>DAW</strong>.<br />
The sample rate of <strong>the</strong> M-<strong>16DX</strong> and your <strong>DAW</strong> has to be <strong>the</strong> same to ensure<br />
<strong>the</strong> successful passing of audio back and forth via USB. In <strong>the</strong> case of<br />
• system sounds— your computer will automatically change its sample<br />
rate to match when <strong>the</strong> M-<strong>16DX</strong>’s sample rate is changed.<br />
• your <strong>DAW</strong>— it’s a good idea to quit and re-launch your <strong>DAW</strong> after<br />
changing <strong>the</strong> M-<strong>16DX</strong>’s sample rate. Also, make sure <strong>the</strong> sample rate<br />
of any new project you create matches <strong>the</strong> M-<strong>16DX</strong>’s sample rate. If<br />
you’re working on a pre-existing project, set <strong>the</strong> M-<strong>16DX</strong>’s sample rate<br />
to match <strong>the</strong> project’s.<br />
11
Getting to Work <strong>with</strong> <strong>the</strong> M-<strong>16DX</strong> and a <strong>DAW</strong><br />
Configuring Your <strong>DAW</strong><br />
The rest of <strong>the</strong> setting-up you need to do takes place in your <strong>DAW</strong>. We’ll<br />
give specific instructions on how to do <strong>the</strong>se things in <strong>the</strong> individual <strong>DAW</strong>specific<br />
Workshop booklets.<br />
Keeping Audio Clean<br />
Getting a clean audio signal when you’re recording electric or electronic<br />
instruments is pretty simple—use good-quality cables. When you’re using<br />
mics, however, a little thought is required.<br />
If you’re recording yourself through mics, it’s a good idea to listen through<br />
headphones connected to <strong>the</strong> M-<strong>16DX</strong>’s PHONES jack, whose level is<br />
controlled by <strong>the</strong> PHONES/CTRL ROOM knob. If you work on speakers, your<br />
mic will pick up <strong>the</strong> M-<strong>16DX</strong>’s main mix and that’ll get recorded behind your<br />
audio—not usually a good thing.<br />
If you’re recording someone else who’s in your studio while you’re in <strong>the</strong><br />
control room<br />
• you listen to <strong>the</strong> M-<strong>16DX</strong> main mix in your control room— by connecting<br />
<strong>the</strong> CONTROL ROOM L and R jacks to your control room speaker amp or<br />
to powered speakers. Adjust your listening volume using <strong>the</strong> PHONES/<br />
CTRL ROOM knob.<br />
• your performer listens to Aux Bus 1 through headphones— connected to<br />
a headphone amp plugged into <strong>the</strong> M-<strong>16DX</strong>’s AUX SEND 1 jack. Locate<br />
<strong>the</strong> USB to AUX1 parameter in <strong>the</strong> M-<strong>16DX</strong>’s UTILITY menu and turn <strong>the</strong><br />
parameter on so <strong>the</strong> <strong>DAW</strong>’s signal goes to AUX 1. Press <strong>the</strong> AUX 1 button<br />
so it lights, and <strong>the</strong>n use your input channel’s AUX 1 knob to balance<br />
<strong>the</strong> performer’s live signal against <strong>the</strong> audio coming from <strong>the</strong> <strong>DAW</strong>.<br />
If you’re recording a group of musicians toge<strong>the</strong>r, <strong>the</strong>y should listen<br />
through headphones connected to a multi-output headphone amp<br />
plugged into <strong>the</strong> M-<strong>16DX</strong>’s AUX SEND 1 jack.<br />
Session Monitoring Procedures<br />
Listening in a Multitrack Session<br />
On <strong>the</strong> LEVEL<br />
When you select an M-<strong>16DX</strong> mono channel—<br />
or pair of channels—to be recorded on a track<br />
in a <strong>DAW</strong>, <strong>the</strong> track grabs <strong>the</strong> audio from <strong>the</strong><br />
channel before it reaches its LEVEL knob. This<br />
means <strong>the</strong> LEVEL knob has no effect on <strong>the</strong><br />
volume of <strong>the</strong> audio as it’s recorded on <strong>the</strong><br />
<strong>DAW</strong> track. The LEVEL knob only controls <strong>the</strong><br />
volume of <strong>the</strong> channel’s signal as it goes into<br />
<strong>the</strong> M-<strong>16DX</strong>’s main mix, which is what you<br />
listen to as you record into <strong>the</strong> <strong>DAW</strong>.<br />
While a channel’s LEVEL-knob setting has no effect on <strong>the</strong> volume of<br />
its signal when it goes to <strong>the</strong> <strong>DAW</strong>, <strong>the</strong> channel’s EQ controls above <strong>the</strong><br />
knob do shape <strong>the</strong> tone of <strong>the</strong> audio <strong>the</strong> <strong>DAW</strong> records.<br />
Balancing Your Monitoring Mix<br />
Audio leaves<br />
<strong>the</strong> channel<br />
from here.<br />
As you record, you’ll set up your monitor mix by<br />
• setting <strong>the</strong> desired listening volume of <strong>the</strong> audio you’re now recording<br />
using its channel’s LEVEL knob.<br />
• turning on <strong>the</strong> USB button and setting <strong>the</strong> desired<br />
listening volume of <strong>the</strong> <strong>DAW</strong> using <strong>the</strong> Channel 13/14<br />
LEVEL knob.<br />
• setting <strong>the</strong> overall volume of <strong>the</strong> main mix using<br />
<strong>the</strong> MAIN MIX LEVEL knob as loud as you can<br />
<strong>with</strong>out lighting <strong>the</strong> red indicators in <strong>the</strong> M-<strong>16DX</strong>’s<br />
main meters.<br />
• adjusting <strong>the</strong> volume of your headphones or<br />
speakers using <strong>the</strong> PHONES/CTRL knob.<br />
12
Using Effects in Your Monitoring Mix<br />
The M-<strong>16DX</strong>’s loop effect—<strong>the</strong> one produced by its FX processor—adds an<br />
effected copy of a channel’s signal to <strong>the</strong> M-<strong>16DX</strong>’s main mix. Since you’re<br />
not recording <strong>the</strong> main mix, this effected copy isn’t recorded in <strong>the</strong> <strong>DAW</strong>.<br />
While loop effects aren’t recorded in a <strong>DAW</strong> when you’re recording<br />
input channels, Channel 1’s and Channel 2’s insert effects are.<br />
This means you can use an M-<strong>16DX</strong> loop effect just to make things sound<br />
better during recording. For example, some singers find it easier to get a<br />
good performance when <strong>the</strong>y hear reverb on <strong>the</strong>ir voice. Use as much reverb<br />
or delay as you want in <strong>the</strong> main mix, since it won’t be going into <strong>the</strong> <strong>DAW</strong>.<br />
For an introduction to loop and insert effects, see <strong>the</strong> Getting Started<br />
<strong>with</strong> <strong>the</strong> M-<strong>16DX</strong> Workshop booklet. To learn more about <strong>the</strong> M-<strong>16DX</strong>’s<br />
effects, see <strong>the</strong> Workshop booklet The M-<strong>16DX</strong> Effects.<br />
Two-Track Session Monitoring<br />
What You Hear Is Exactly What You Get<br />
In a two-track session, <strong>the</strong> M-<strong>16DX</strong> main mix you hear is what you’ll be<br />
recording, so make sure that <strong>the</strong> volume balance between your channels is<br />
exactly how you want it. Use <strong>the</strong>ir LEVEL knobs to set this balance. Also, any<br />
effects you hear will be recorded, so make sure you’re happy <strong>with</strong> <strong>the</strong>m.<br />
Your main mix level is of critical importance in a twotrack<br />
session since it sets <strong>the</strong> main mix’s recording<br />
level in <strong>the</strong> <strong>DAW</strong>. Make <strong>the</strong> mix as loud as you<br />
can <strong>with</strong>out lighting <strong>the</strong> M-<strong>16DX</strong>’s main meters or<br />
overloading <strong>the</strong> <strong>DAW</strong> track’s input.<br />
You may want to use <strong>the</strong> M-<strong>16DX</strong>’s Finalize<br />
feature to tighten up your mix before recording—<br />
see <strong>the</strong> M-<strong>16DX</strong> Owner’s Manual for details. Your<br />
<strong>DAW</strong> may also offer similar functionality you can<br />
apply after recording if you prefer.<br />
The Role of <strong>the</strong> USB Button in Two-Track Recording<br />
Since <strong>the</strong> USB button switches <strong>the</strong> feed of <strong>the</strong> <strong>DAW</strong> into <strong>the</strong> main mix on or<br />
off, its setting is important. During<br />
• recording— turn off <strong>the</strong> USB button to avoid sending<br />
<strong>the</strong> <strong>DAW</strong>’s output, including your new recording, into<br />
<strong>the</strong> main mix and back to <strong>the</strong> <strong>DAW</strong>, over and over.<br />
• playback— turn on <strong>the</strong> USB button so it’s lit to hear<br />
your recorded <strong>DAW</strong> tracks play back after recording.<br />
Recording Setup Procedures<br />
Here’s a general description of <strong>the</strong> steps you’ll take to set up a <strong>DAW</strong> track you<br />
want to record—you’ll find specific instructions in <strong>the</strong> Workshop booklet<br />
detailing <strong>the</strong> M-<strong>16DX</strong>’s use <strong>with</strong> your <strong>DAW</strong>.<br />
Select <strong>the</strong> Audio You Want to Record<br />
Once <strong>the</strong> <strong>DAW</strong> has been configured properly, you’ll typically be able to select<br />
<strong>the</strong> desired M-<strong>16DX</strong> input, pair of inputs, or main mix for a track using a popup<br />
menu associated <strong>with</strong> <strong>the</strong> track.<br />
Turn Off Monitoring Through <strong>the</strong> <strong>DAW</strong><br />
For zero-latency monitoring, you’ll want to begin by making sure you’re not<br />
listening to incoming audio through your <strong>DAW</strong>. Each <strong>DAW</strong> has its way of<br />
handling this, In some <strong>DAW</strong>s:<br />
• you can turn off <strong>the</strong> monitoring of incoming audio globally, for all tracks<br />
at once.<br />
• you turn <strong>the</strong> monitoring of incoming audio off for each individual track.<br />
Since you won’t be listening to your live audio through <strong>the</strong> <strong>DAW</strong>, you<br />
won’t hear any <strong>DAW</strong> effects on <strong>the</strong> audio until you play it back.<br />
13
Arm and Record Your Track<br />
Consult your <strong>DAW</strong>’s documentation to learn how to arm a track for recording,<br />
and how to begin recording.<br />
Playing Back Your Recording<br />
Your <strong>DAW</strong>’s documentation will tell you how to disarm a track, and how to<br />
play it back.<br />
In <strong>the</strong> M-<strong>16DX</strong>, you listen to <strong>the</strong> main mix, which includes <strong>the</strong> <strong>DAW</strong>’s output<br />
coming through Channel 13/14. (Make sure <strong>the</strong> channel’s USB button is lit.)<br />
Overdubbing<br />
If you’re doing a multitrack session, you can add more tracks to your <strong>DAW</strong><br />
project by assigning <strong>the</strong> desired M-<strong>16DX</strong> input channels to <strong>the</strong>m and <strong>the</strong>n<br />
recording <strong>the</strong> channels’ audio while listening to <strong>the</strong> live audio side-byside<br />
<strong>with</strong> your already-recorded tracks, as we discussed in “Zero-Latency<br />
Monitoring” on Page 3.<br />
The End<br />
We hope you’ve found this workshop helpful. You’ll find o<strong>the</strong>r M-<strong>16DX</strong><br />
Workshop booklets available for downloading at www.<strong>Roland</strong>US.com/<br />
EDIROL.<br />
14