A-90/EX TurboStart - Roland
A-90/EX TurboStart - Roland
A-90/EX TurboStart - Roland

Create successful ePaper yourself
Turn your PDF publications into a flip-book with our unique Google optimized e-Paper software.
®ÂØÒňΠ®<br />
A-<strong>90</strong>/<strong>EX</strong><br />
Expandable Controller <strong>TurboStart</strong><br />
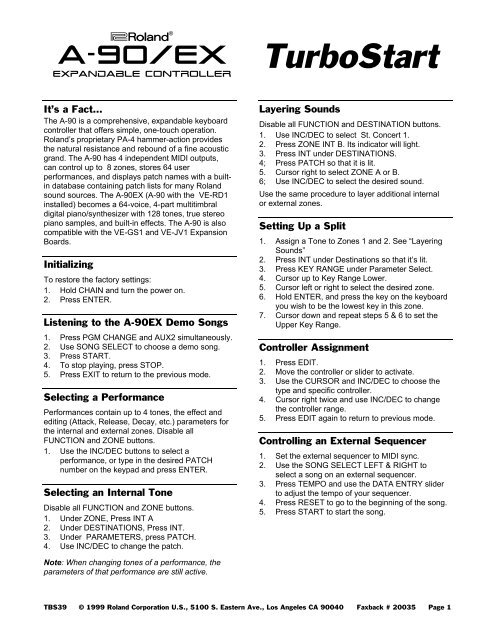
It’s a Fact…<br />
The A-<strong>90</strong> is a comprehensive, expandable keyboard<br />
controller that offers simple, one-touch operation.<br />
<strong>Roland</strong>’s proprietary PA-4 hammer-action provides<br />
the natural resistance and rebound of a fine acoustic<br />
grand. The A-<strong>90</strong> has 4 independent MIDI outputs,<br />
can control up to 8 zones, stores 64 user<br />
performances, and displays patch names with a builtin<br />
database containing patch lists for many <strong>Roland</strong><br />
sound sources. The A-<strong>90</strong><strong>EX</strong> (A-<strong>90</strong> with the VE-RD1<br />
installed) becomes a 64-voice, 4-part multitimbral<br />
digital piano/synthesizer with 128 tones, true stereo<br />
piano samples, and built-in effects. The A-<strong>90</strong> is also<br />
compatible with the VE-GS1 and VE-JV1 Expansion<br />
Boards.<br />
Initializing<br />
To restore the factory settings:<br />
1. Hold CHAIN and turn the power on.<br />
2. Press ENTER.<br />
Listening to the A-<strong>90</strong><strong>EX</strong> Demo Songs<br />
1. Press PGM CHANGE and AUX2 simultaneously.<br />
2. Use SONG SELECT to choose a demo song.<br />
3. Press START.<br />
4. To stop playing, press STOP.<br />
5. Press <strong>EX</strong>IT to return to the previous mode.<br />
Selecting a Performance<br />
Performances contain up to 4 tones, the effect and<br />
editing (Attack, Release, Decay, etc.) parameters for<br />
the internal and external zones. Disable all<br />
FUNCTION and ZONE buttons.<br />
1. Use the INC/DEC buttons to select a<br />
performance, or type in the desired PATCH<br />
number on the keypad and press ENTER.<br />
Selecting an Internal Tone<br />
Disable all FUNCTION and ZONE buttons.<br />
1. Under ZONE, Press INT A<br />
2. Under DESTINATIONS, Press INT.<br />
3. Under PARAMETERS, press PATCH.<br />
4. Use INC/DEC to change the patch.<br />
Note: When changing tones of a performance, the<br />
parameters of that performance are still active.<br />
Layering Sounds<br />
Disable all FUNCTION and DESTINATION buttons.<br />
1. Use INC/DEC to select St. Concert 1.<br />
2. Press ZONE INT B. Its indicator will light.<br />
3. Press INT under DESTINATIONS.<br />
4; Press PATCH so that it is lit.<br />
5. Cursor right to select ZONE A or B.<br />
6; Use INC/DEC to select the desired sound.<br />
Use the same procedure to layer additional internal<br />
or external zones.<br />
Setting Up a Split<br />
1. Assign a Tone to Zones 1 and 2. See “Layering<br />
Sounds”<br />
2. Press INT under Destinations so that it’s lit.<br />
3. Press KEY RANGE under Parameter Select.<br />
4. Cursor up to Key Range Lower.<br />
5. Cursor left or right to select the desired zone.<br />
6. Hold ENTER, and press the key on the keyboard<br />
you wish to be the lowest key in this zone.<br />
7. Cursor down and repeat steps 5 & 6 to set the<br />
Upper Key Range.<br />
Controller Assignment<br />
1. Press EDIT.<br />
2. Move the controller or slider to activate.<br />
3. Use the CURSOR and INC/DEC to choose the<br />
type and specific controller.<br />
4. Cursor right twice and use INC/DEC to change<br />
the controller range.<br />
5. Press EDIT again to return to previous mode.<br />
Controlling an External Sequencer<br />
1. Set the external sequencer to MIDI sync.<br />
2. Use the SONG SELECT LEFT & RIGHT to<br />
select a song on an external sequencer.<br />
3. Press TEMPO and use the DATA ENTRY slider<br />
to adjust the tempo of your sequencer.<br />
4. Press RESET to go to the beginning of the song.<br />
5. Press START to start the song.<br />
TBS39 © 1999 <strong>Roland</strong> Corporation U.S., 5100 S. Eastern Ave., Los Angeles CA <strong>90</strong>040 Faxback # 20035 Page 1
®ÂØÒňΠ®<br />
A-<strong>90</strong>/<strong>EX</strong><br />
Expandable Controller <strong>TurboStart</strong><br />
Viewing Patch Names of External<br />
Devices<br />
Disable all FUNCTION and DESTINATION buttons.<br />
1. Press EDIT.<br />
2. Cursor to select SYS, then press ENTER.<br />
3. Cursor down to display N-MAP Assign.<br />
4. Press ZONE <strong>EX</strong>T A so that it’s lit.<br />
5. Use INC/DEC to select the desired Patch Map.<br />
6. Press EDIT.<br />
7. Under DESTINATIONS, press <strong>EX</strong>T.<br />
8. Press BANK SELECT.<br />
9. Cursor up to display BM in upper left corner.<br />
10. Cursor left to select ZONE A.<br />
11. Use the Ten-Key pad to Enter MSB/CC 0 value<br />
(i.e. 81).<br />
12. Cursor down to display BL in upper left corner.<br />
13. Use the Ten-Key pad to enter LSB/CC 32 value<br />
(i.e. 0).<br />
14. Under PARAMETER SELECT, press PGM<br />
CHANGE.<br />
15. Use the INC/DEC to select the desired tones.<br />
Writing a Performance to Memory<br />
1. Press UTILITY.<br />
2. Cursor to WRITE and press ENTER.<br />
3. Use INC/DEC to select the memory location.<br />
4. Press ENTER twice.<br />
TBS39 © 1999 <strong>Roland</strong> Corporation U.S., 5100 S. Eastern Ave., Los Angeles CA <strong>90</strong>040 Faxback # 20035 Page 2