Logitech Pedal Maintenance
Logitech Pedal Maintenance
Logitech Pedal Maintenance
You also want an ePaper? Increase the reach of your titles
YUMPU automatically turns print PDFs into web optimized ePapers that Google loves.
New! This article is now available in a printer friendly (black text on white background) .PDF format. In order to acess the file,<br />
Adobe Acrobat Reader must be installed on one's PC.<br />
Click to download the file. Click to download the free software.<br />
These modifications and tips are applicable to the <strong>Logitech</strong> MOMO Force, the <strong>Logitech</strong> Wingman Formula Force (red wheel,<br />
manufactured in Taiwan or China), the <strong>Logitech</strong> Wingman Formula (yellow wheel, USB), and the <strong>Logitech</strong> Wingman Formula<br />
(black wheel, serial port). As I'm unfamiliar with units from other manufacturers, it is unknown whether these mods can be applied.<br />
Most sim racing veterans will be well versed with these methods, thus this tutorial is aimed at the newer PC racer. I don't pretend<br />
to be an expert in these matters; the information presented here has been gathered through several years experience, and of<br />
course, trial and error. The main objective is to install a squash ball in place of the OEM brake pedal spring in the <strong>Logitech</strong> pedals,<br />
as some confusion over the procedure exists. While the unit is apart, it's a good idea to thoroughly inspect and clean the inner<br />
workings.<br />
Okay, so why a squash ball? One of the most common complaints of racing game controllers is the unrealistic feel of the brake<br />
pedal; it's simply too light. This makes modulation and, in particular, heavy braking maneuvers very difficult and inconsistent. One<br />
might rig up a complex and cumbersome mechanism involving bungee cords, or pieces of foam or similar material stuffed in and<br />
around the brake pedal, but there is a better way. The unlikely squash ball provides the perfect solution, offering consistent braking<br />
with the required resistance, and a progressive feel. Once this easy task is complete, your <strong>Logitech</strong> pedals will offer greater control<br />
(though it can't be guaranteed, in theory at least, lap times should improve), while retaining their factory appearance, all for the low,<br />
low cost of about $3.00. It's the simplest, most inexpensive, and effective tweak available
Tools required:<br />
●<br />
●<br />
●<br />
●<br />
●<br />
●<br />
#1 phillips screwdriver<br />
transparent tape<br />
squash ball<br />
lithium grease<br />
TV tuner control cleaner<br />
about 15-30 minutes<br />
Which Squash Ball?<br />
There's been some discussion over which<br />
squash ball, specifically, is the best for this<br />
purpose. Some swear by the blue dot squash<br />
balls, others prefer the red dot balls, and still<br />
some others, believe it or not, choose the<br />
yellow dots. I've not noticed a great difference<br />
among different coloured balls, but for what it's<br />
worth, mine is a blue dot.<br />
Step 1:<br />
Shut off PC and disconnect wheel and pedals. Turn the pedal unit upside down, and remove the ten screws. Remove the cover.<br />
Though likely unnecessary to mention, I'm going to offer this bit of advice anyway: remember, when the pedals are inverted, the<br />
throttle is on the left, and the brake is on the right! 'Nuff said.<br />
Step 2:<br />
Remove the brake pedal spring (that's the one on the right when viewed upside down, right?). Throw the old spring into your spare<br />
parts bin.
Step 3:<br />
Place the pedal unit cover before you, and note the indentation formerly used for the brake pedal spring. This is where the squash<br />
ball shall be placed. Lightly fasten the ball in place with a piece of household transparent tape. As the unit will be reassembled<br />
upside down, the tape will ensure the ball is held securely in place.<br />
Step 4:<br />
The following procedure is only for older wheels, and/or for those who are experiencing trouble with calibration. As stated above,<br />
I'm no expert, but I do know that after many hours of hard sim racing action, it will become necessary to clean the potentiometers,<br />
or "pots", as they are more commonly known. If you're having difficulty achieving or maintaining the maximum numerical value<br />
when calibrating your pedals within GPL, particularly the throttle, this step will likely solve your problem. It's an easy job, requiring<br />
little or no mechanical aptitude. Heck, even I can do it!<br />
Okay, for those of you who are really bored, let's clean the pots. You'll require some sort of TV tuner control cleaner. I use<br />
Techcessories Tuner Control Cleaner & Lubricant, part #64-4315, available from Radio Shack in Canada and the United States.<br />
Do not use WD-40, or a similar product. I understand that this will dry out the seals, and further and more frequent cleaning and<br />
lubing of the pots will become standard procedure. While it's not necessary to remove any wires from the pots when cleaning, one<br />
should gently lift the pot from its' position, and place a piece of paper towel beneath. Lightly spray the area where the rotating shaft<br />
enters the pot. Turn the shaft back and forth several times to work the cleaner into the device. Allow to air dry for a moment.<br />
Repeat for the other pot.
It's also a good idea at this time to regrease the pedal bearing surfaces, especially if your wheel is of an older vintage. Lithium<br />
grease is the preferred stuff for this purpose. Stay away from wheel bearing or chassis grease, 3-in-1 oil, or other petroleum based<br />
greases, as the plastic will react poorly to it. Clean the old grease off the pivoting ends of the pedals, as well as the bearing races,<br />
then apply the new grease.
Reassembly:<br />
With the unit inverted, make sure that all components are correctly positioned. This includes the pots, the pedals, the throttle pedal<br />
spring, and the wiring. Take great care to ensure that the wiring is routed through the various indentations provided, to prevent the<br />
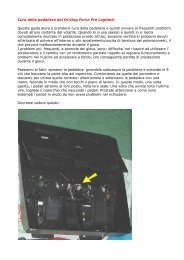
wires from becoming crimped or cut when the cover is installed. The photo below illustrates how my own MOMO pedals were<br />
carelessly assembled at the factory.<br />
Here's the proper way to do the job:<br />
If you've removed the pedals entirely, pay attention to the tabs on the pedals. Each pedal must be installed with the tab on the<br />
inside of the pedal box. It's better to double check now, than to finish the job and discover that your pedals have zero travel.
The final step is to install the cover. Place the cover on the pedal unit, and install the screws. It's a bit tricky holding everything<br />
together at first, but certainly not impossible. I suggest inserting the screws which hold the pivoting ends of the pedals first (screws<br />
4-7, as seen in the photo below), then the remaining six screws. One final piece of advice: do not over tighten! This unit is made<br />
of plastic, thus the holes can be easily stripped.<br />
Once the wheel and pedals are connected to the PC, recalibrate the device within your favourite sim (Grand Prix Legends, right?<br />
).<br />
Core.ini settings: These settings are not carved in stone, rather they're settings to which I've become accustomed. Copy and<br />
paste to your core.ini file, typically located here: C:\sierra\gpl<br />
<strong>Logitech</strong> MOMO Force<br />
[ Joy ]<br />
allow_force_feedback = 1<br />
force_feedback_damping = 200.00<br />
force_feedback_latency = 00.001<br />
max_steering_torque = 250.00<br />
<strong>Logitech</strong> Wingman Formula Force<br />
[ Joy ]<br />
allow_force_feedback = 1<br />
force_feedback_damping = 95.00<br />
force_feedback_latency = 0.150<br />
max_steering_torque = 140.0<br />
<strong>Logitech</strong> Wingman Profiles: Ensure you're running current software for your <strong>Logitech</strong> wheel. Check www.wingmanteam.com<br />
for the latest release.
These files allow one to map various keyboard functions from GPL to the steering wheel. Two profiles are available for on and<br />
offline use. The offline profile differs from the online one in that the "raise arm" button has been changed to "pause". Note that the<br />
online profile, intended for use with WinVROC, must be pointed at the GPLLaunch.exe, located in the WinVROC folder:<br />
C:\Program Files\VROC\WinVROC. Download the profiles here.<br />
Got a problem with your wheel? Don't ask me, I'm little more than a simple idiot; ask the experts at the Race Sim Central GPL<br />
Forum.<br />
Some handy links:<br />
Jens Schumacher LogiCorner - Jens has forgotten more about <strong>Logitech</strong> wheels than most of us will ever know<br />
Wingman Team - source for Wingman software and technical information; also has a useful forum<br />
Spark's Wheel World - a hot rodded LWFF<br />
Tweaks and Reviews - fine tune your game hardware, by GTX_SlotCar<br />
eRacer Garage - the internet home for sim racing hardware<br />
With a little care and effort, these simple tips will provide many hours of happy sim racing competition. Good luck - Johnny Lugnuts<br />
Disclaimer: The author makes no claims or guarantees as to the effectiveness or safety of these modifications; the author shall not be held liable<br />
in any way if one should follow these instructions and bugger their equipment. All images and text © 2002 Johnny Lugnuts<br />
GPL related crap | screenshots | Rouen retro | desktop wallpaper | the littlest racer | Johnny's racecar | 1:18 diecasts | 1:32 slot cars | other crap<br />
<strong>Logitech</strong> tune-up | Rennsport Reunion photos | Mosport ALMS photos | Watkins Glen BMW photos | CART Pool | essential links | faq | e-mail


