Kayak HD Installation & Service Manual, version 6.9.4 - Grass Valley
Kayak HD Installation & Service Manual, version 6.9.4 - Grass Valley
Kayak HD Installation & Service Manual, version 6.9.4 - Grass Valley

Create successful ePaper yourself
Turn your PDF publications into a flip-book with our unique Google optimized e-Paper software.
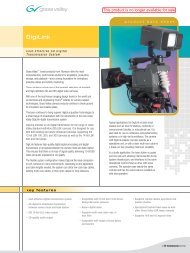
<strong>Kayak</strong> <strong>HD</strong><br />
DIGITAL PRODUCTION SWITCHER<br />
<strong>Installation</strong> Planning Guide<br />
Software Version <strong>6.9.4</strong><br />
071845105<br />
MAY 2011
CERTIFICATE<br />
Certificate Number: 510040.001<br />
The Quality System of:<br />
<strong>Grass</strong> <strong>Valley</strong> USA, LLC and its <strong>Grass</strong> <strong>Valley</strong> Affiliates<br />
Headquarters:<br />
400 Providence Mine Road<br />
Nevada City, CA 95945<br />
United States<br />
15655 SW Greystone Ct.<br />
Beaverton, OR 97006<br />
United States<br />
Brunnenweg 9<br />
D-64331 Weiterstadt<br />
Germany<br />
Kapittelweg 10<br />
4827 HG Breda<br />
The Nederlands<br />
2300 So. Decker Lake Blvd.<br />
Salt Lake City, UT 84119<br />
United States<br />
Including its implementation, meets the requirements of the standard:<br />
ISO 9001:2008<br />
Scope:<br />
The design, manufacture and support of video and audio hardware and software products and related<br />
systems.<br />
This Certificate is valid until: June 14, 2012<br />
This Certificate is valid as of: December 23, 2010<br />
Certified for the first time: June 14, 2000<br />
H. Pierre Sallé<br />
President<br />
KEMA-Registered Quality<br />
The method of operation for quality certification is defined in the KEMA General Terms And Conditions For<br />
Quality And Environmental Management Systems Certifications. Integral publication of this certificate is allowed.<br />
KEMA-Registered Quality, Inc.<br />
4377 County Line Road<br />
Chalfont, PA 18914<br />
Ph: (215)997-4519<br />
Fax: (215)997-3809<br />
CRT 001 042108<br />
Accredited By:<br />
ANAB
<strong>Kayak</strong> <strong>HD</strong><br />
DIGITAL PRODUCTION SWITCHER<br />
<strong>Installation</strong> Planning Guide<br />
Software Version <strong>6.9.4</strong><br />
071845105<br />
MAY 2011
Contacting <strong>Grass</strong> <strong>Valley</strong><br />
International<br />
Support Centers<br />
Local Support<br />
Centers<br />
(available<br />
during normal<br />
business hours)<br />
France<br />
24 x 7<br />
Asia<br />
United States/Canada<br />
+800 8080 2020 or +33 1 48 25 20 20<br />
+1 800 547 8949 or +1 530 478 4148<br />
24 x 7<br />
Hong Kong, Taiwan, Korea, Macau: +852 2531 3058 Indian Subcontinent: +91 22 24933476<br />
Southeast Asia/Malaysia: +603 7805 3884 Southeast Asia/Singapore: +65 6379 1313<br />
China: +861 0660 159 450 Japan: +81 3 5484 6868<br />
Australia and New Zealand: +61 1300 721 495 Central/South America: +55 11 5509 3443<br />
Middle East: +971 4 299 64 40 Near East and Africa: +800 8080 2020 or +33 1 48 25 20 20<br />
Europe<br />
Belarus, Russia, Tadzikistan, Ukraine, Uzbekistan: +7 095 2580924 225 Switzerland: +41 1 487 80 02<br />
S. Europe/Italy-Roma: +39 06 87 20 35 28 -Milan: +39 02 48 41 46 58 S. Europe/Spain: +34 91 512 03 50<br />
Benelux/Belgium: +32 (0) 2 334 90 30 Benelux/Netherlands: +31 (0) 35 62 38 42 1 N. Europe: +45 45 96 88 70<br />
Germany, Austria, Eastern Europe: +49 6150 104 444 UK, Ireland, Israel: +44 118 923 0499<br />
Copyright © <strong>Grass</strong> <strong>Valley</strong> USA, LLC. All rights reserved.<br />
This product may be covered by one or more U.S. and foreign patents.<br />
<strong>Grass</strong> <strong>Valley</strong> Web Site<br />
The www.grassvalley.com web site offers the following:<br />
Online User Documentation — Current <strong>version</strong>s of product catalogs, brochures,<br />
data sheets, ordering guides, planning guides, manuals, and release notes<br />
in .pdf format can be downloaded.<br />
FAQ Database — Solutions to problems and troubleshooting efforts can be<br />
found by searching our Frequently Asked Questions (FAQ) database.<br />
Software Downloads — Download software updates, drivers, and patches.<br />
4 <strong>Kayak</strong> <strong>HD</strong> — <strong>Installation</strong> Planning Guide
Contents<br />
Contents<br />
Section 1 — System Overview. . . . . . . . . . . . . . . . . . . . . . . . . . . . . . . . . . . . . . . . . . . 7<br />
Introduction . . . . . . . . . . . . . . . . . . . . . . . . . . . . . . . . . . . . . . . . . . . . . . . . . . . . . . . . . . . 7<br />
<strong>Kayak</strong> <strong>HD</strong> or SD Switcher Models . . . . . . . . . . . . . . . . . . . . . . . . . . . . . . . . . . . . . . 7<br />
<strong>Kayak</strong> <strong>HD</strong> Standard Features . . . . . . . . . . . . . . . . . . . . . . . . . . . . . . . . . . . . . . . . . . 8<br />
<strong>Kayak</strong> <strong>HD</strong> Options . . . . . . . . . . . . . . . . . . . . . . . . . . . . . . . . . . . . . . . . . . . . . . . . . . 10<br />
Supported Control Protocols . . . . . . . . . . . . . . . . . . . . . . . . . . . . . . . . . . . . . . . . . . 11<br />
Specifications . . . . . . . . . . . . . . . . . . . . . . . . . . . . . . . . . . . . . . . . . . . . . . . . . . . . . . . . . 12<br />
<strong>Kayak</strong> <strong>HD</strong> Systems . . . . . . . . . . . . . . . . . . . . . . . . . . . . . . . . . . . . . . . . . . . . . . . . . . 12<br />
Section 2 — Control Surfaces. . . . . . . . . . . . . . . . . . . . . . . . . . . . . . . . . . . . . . . . . . . 15<br />
<strong>Kayak</strong> <strong>HD</strong> Control Panels . . . . . . . . . . . . . . . . . . . . . . . . . . . . . . . . . . . . . . . . . . . . . . 15<br />
<strong>Kayak</strong> <strong>HD</strong> 100C Control Panel . . . . . . . . . . . . . . . . . . . . . . . . . . . . . . . . . . . . . . . . 15<br />
Dimensions . . . . . . . . . . . . . . . . . . . . . . . . . . . . . . . . . . . . . . . . . . . . . . . . . . . . . . . 16<br />
<strong>Kayak</strong> <strong>HD</strong> 150C, 200C, 200 Control Panels . . . . . . . . . . . . . . . . . . . . . . . . . . . . . . 18<br />
Dimensions . . . . . . . . . . . . . . . . . . . . . . . . . . . . . . . . . . . . . . . . . . . . . . . . . . . . . . . 19<br />
<strong>Kayak</strong> <strong>HD</strong> 250C, 250, 300 Control Panels . . . . . . . . . . . . . . . . . . . . . . . . . . . . . . . 21<br />
Dimensions . . . . . . . . . . . . . . . . . . . . . . . . . . . . . . . . . . . . . . . . . . . . . . . . . . . . . . . 22<br />
Panel Mounting Options . . . . . . . . . . . . . . . . . . . . . . . . . . . . . . . . . . . . . . . . . . . . . 23<br />
Table Top Use. . . . . . . . . . . . . . . . . . . . . . . . . . . . . . . . . . . . . . . . . . . . . . . . . . . . . 23<br />
Surface Mount Cutout Dimensions. . . . . . . . . . . . . . . . . . . . . . . . . . . . . . . . . . . 23<br />
Securing Panels to Mounting Surface . . . . . . . . . . . . . . . . . . . . . . . . . . . . . . . . . 23<br />
Section 3 — Frames . . . . . . . . . . . . . . . . . . . . . . . . . . . . . . . . . . . . . . . . . . . . . . . . . . . . . 25<br />
General Rack Mounting Instructions . . . . . . . . . . . . . . . . . . . . . . . . . . . . . . . . . . . . . 25<br />
4 RU Compact Frame . . . . . . . . . . . . . . . . . . . . . . . . . . . . . . . . . . . . . . . . . . . . . . . . . . 26<br />
Video Processor Frame <strong>Installation</strong> . . . . . . . . . . . . . . . . . . . . . . . . . . . . . . . . . . . . 26<br />
4 RU Compact Frame Dimensions . . . . . . . . . . . . . . . . . . . . . . . . . . . . . . . . . . . 26<br />
4 RU Compact Frame Rack Mounting . . . . . . . . . . . . . . . . . . . . . . . . . . . . . . . . . . 28<br />
<strong>Kayak</strong> <strong>HD</strong> Video Processor 4 RU Frame . . . . . . . . . . . . . . . . . . . . . . . . . . . . . . . . 29<br />
8 RU Frame. . . . . . . . . . . . . . . . . . . . . . . . . . . . . . . . . . . . . . . . . . . . . . . . . . . . . . . . . . . 30<br />
Video Processor Frame <strong>Installation</strong> . . . . . . . . . . . . . . . . . . . . . . . . . . . . . . . . . . . . 30<br />
8 RU Frame Dimensions . . . . . . . . . . . . . . . . . . . . . . . . . . . . . . . . . . . . . . . . . . . . 30<br />
8 RU Frame Rack Mounting. . . . . . . . . . . . . . . . . . . . . . . . . . . . . . . . . . . . . . . . . . . 32<br />
Cabling . . . . . . . . . . . . . . . . . . . . . . . . . . . . . . . . . . . . . . . . . . . . . . . . . . . . . . . . . . . . . . 35<br />
<strong>Kayak</strong> <strong>HD</strong> 100C Control Cabling . . . . . . . . . . . . . . . . . . . . . . . . . . . . . . . . . . . . . . 35<br />
<strong>Kayak</strong> <strong>HD</strong> 150C, 200C, and 200 Panel Control Cabling. . . . . . . . . . . . . . . . . . . . 36<br />
Network Cabling . . . . . . . . . . . . . . . . . . . . . . . . . . . . . . . . . . . . . . . . . . . . . . . . . . . . 37<br />
Ethernet Switches and Hubs . . . . . . . . . . . . . . . . . . . . . . . . . . . . . . . . . . . . . . . . 37<br />
Factory Network Settings . . . . . . . . . . . . . . . . . . . . . . . . . . . . . . . . . . . . . . . . . . . 38<br />
Video Cabling for all <strong>Kayak</strong> <strong>HD</strong> Switchers . . . . . . . . . . . . . . . . . . . . . . . . . . . . . . 38<br />
Inputs. . . . . . . . . . . . . . . . . . . . . . . . . . . . . . . . . . . . . . . . . . . . . . . . . . . . . . . . . . . . 38<br />
Outputs . . . . . . . . . . . . . . . . . . . . . . . . . . . . . . . . . . . . . . . . . . . . . . . . . . . . . . . . . . 39<br />
Reference Input . . . . . . . . . . . . . . . . . . . . . . . . . . . . . . . . . . . . . . . . . . . . . . . . . . . 39<br />
Section 4 — Options. . . . . . . . . . . . . . . . . . . . . . . . . . . . . . . . . . . . . . . . . . . . . . . . . . . . . 41<br />
K<strong>HD</strong>-PSU Internal Redundant Power Supply Option . . . . . . . . . . . . . . . . . . . . . . 41<br />
<strong>Kayak</strong> <strong>HD</strong> — <strong>Installation</strong> Planning Guide 5
Contents<br />
KDD-PSU Power Supply Option . . . . . . . . . . . . . . . . . . . . . . . . . . . . . . . . . . . . . . 42<br />
<strong>Installation</strong> . . . . . . . . . . . . . . . . . . . . . . . . . . . . . . . . . . . . . . . . . . . . . . . . . . . . . . . . . 43<br />
Pin Assignments. . . . . . . . . . . . . . . . . . . . . . . . . . . . . . . . . . . . . . . . . . . . . . . . . . . . . . 44<br />
GPI / Tally Connections . . . . . . . . . . . . . . . . . . . . . . . . . . . . . . . . . . . . . . . . . . . . . . . 45<br />
<strong>Kayak</strong> <strong>HD</strong> GPI and Tally Interface . . . . . . . . . . . . . . . . . . . . . . . . . . . . . . . . . . . . 45<br />
GPI Inputs . . . . . . . . . . . . . . . . . . . . . . . . . . . . . . . . . . . . . . . . . . . . . . . . . . . . . . . . . 46<br />
GPI Input Structure. . . . . . . . . . . . . . . . . . . . . . . . . . . . . . . . . . . . . . . . . . . . . . . . 47<br />
GPI / Tally Outputs . . . . . . . . . . . . . . . . . . . . . . . . . . . . . . . . . . . . . . . . . . . . . . . . . 48<br />
Index. . . . . . . . . . . . . . . . . . . . . . . . . . . . . . . . . . . . . . . . . . . . . . . . . . . . . . . . . . . . . . . . . . . . . . 55<br />
6 <strong>Kayak</strong> <strong>HD</strong> — <strong>Installation</strong> Planning Guide
Section 1<br />
System Overview<br />
Introduction<br />
The <strong>Grass</strong> <strong>Valley</strong> <strong>Kayak</strong> <strong>HD</strong> digital production switcher is an affordable,<br />
compact, and flexible system that offers an array of high-end features for<br />
everything from live studio and mobile production to small corporate<br />
studios and editing applications. The <strong>Kayak</strong> <strong>HD</strong> switcher leverages many<br />
of the features found in the <strong>Grass</strong> <strong>Valley</strong> <strong>Kayak</strong>DD2 and Zodiak<br />
switchers. The result is a compact system with superior image quality and<br />
features not found in any other product.<br />
<strong>Kayak</strong> <strong>HD</strong> or SD Switcher Models<br />
• <strong>Kayak</strong> <strong>HD</strong> or SD 100C, which includes a 1 M/E Control Panel and a<br />
compact 4 RU Video Processor Frame<br />
• <strong>Kayak</strong> <strong>HD</strong> or SD 150C, which includes a 2 M/E Control Panel and a 4<br />
RU Video Processor frame equipped with one M/E module and the<br />
license for a Half M/E<br />
• <strong>Kayak</strong> <strong>HD</strong> or SD 200C, which includes a 2 M/E Control Panel and a 4<br />
RU Video Processor frame equipped with two M/E modules<br />
• <strong>Kayak</strong> <strong>HD</strong> or SD 200, which includes a 2 M/E Control Panel and a 8 RU<br />
Video Processor frame equipped with two M/E modules<br />
• <strong>Kayak</strong> <strong>HD</strong> or SD 250C, which includes a 3 M/E Control Panel and a 4<br />
RU Video Processor frame equipped with two M/E modules and the<br />
license for a Half M/E<br />
• <strong>Kayak</strong> <strong>HD</strong> or SD 250, which includes a 3 M/E Control Panel and an 8<br />
RU Video Processor frame equipped with two M/E modules and the<br />
license for a Half M/E<br />
• <strong>Kayak</strong> <strong>HD</strong> or SD 300, which includes a 3 M/E Control Panel and an 8<br />
RU Video Processor frame equipped with three M/E modules<br />
<strong>Kayak</strong> <strong>HD</strong> — <strong>Installation</strong> Planning Guide 7
Section 1 — System Overview<br />
Frame-only models are available for the configurations listed above and<br />
include the following:<br />
• <strong>Kayak</strong> <strong>HD</strong> or SD 350 Frame-only which includes an 8 RU Video Processor<br />
frame equipped with three mix/effects and the license for a Half<br />
M/E<br />
• <strong>Kayak</strong> <strong>HD</strong> or SD 400 Frame-only which includes an 8 RU Video Processor<br />
frame equipped with four mix/effects<br />
• <strong>Kayak</strong> <strong>HD</strong> or SD 450 Frame-only which includes an 8 RU Video Processor<br />
frame equipped with three mix/effects and the license for a Half<br />
M/E<br />
<strong>Kayak</strong> <strong>HD</strong> Standard Features<br />
• Switchable between several <strong>HD</strong> formats<br />
• Supports SD production<br />
• Fully digital 10-bit, 4:2:2 inputs, outputs<br />
• Compact 4 RU and 8 RU lightweight frames<br />
• Low power consumption<br />
• Hot swappable, front removable modules and power supplies<br />
• Intuitive menu with touch screen<br />
• One DPM Channel standard per M/E with planar 3D effects, remaining<br />
channels optional, adding non-linear and lighting effects (Software<br />
License Key (SLK)<br />
• Two high-quality chroma keyers standard<br />
• Number of M/Es:<br />
• One for <strong>Kayak</strong> <strong>HD</strong> 100C<br />
• 1.5 for <strong>Kayak</strong> <strong>HD</strong> 150C<br />
• Two for <strong>Kayak</strong> <strong>HD</strong> 200, 200C<br />
• 2.5 for <strong>Kayak</strong> <strong>HD</strong> 250, 250C<br />
• Three for <strong>Kayak</strong> <strong>HD</strong> 300<br />
• 3.5 for <strong>Kayak</strong> <strong>HD</strong> 350<br />
• 4 for <strong>Kayak</strong> <strong>HD</strong> 400<br />
• 4.5 for <strong>Kayak</strong> <strong>HD</strong> 450<br />
Note<br />
.5 M/E includes cuts and mixes, no wipes or iDPM, with simple linear/luminance<br />
keyers and no chroma keys.<br />
8 <strong>Kayak</strong> <strong>HD</strong> — <strong>Installation</strong> Planning Guide
Introduction<br />
• Number of inputs:<br />
• 24 to 48 for <strong>Kayak</strong> <strong>HD</strong> 100C, 150C<br />
• 48 for <strong>Kayak</strong> <strong>HD</strong> 200C, 250C<br />
• 48 to 96 for <strong>Kayak</strong> <strong>HD</strong> 200, 250<br />
• 72 to 96 for <strong>Kayak</strong> <strong>HD</strong> 300, 350<br />
• 96 for <strong>Kayak</strong> <strong>HD</strong> 400, 450<br />
• Number of outputs:<br />
• 12 to 24 for <strong>Kayak</strong> <strong>HD</strong> 100C, 150C<br />
• 24 for <strong>Kayak</strong> <strong>HD</strong> 200C, 250C<br />
• 24 to 48 for <strong>Kayak</strong> <strong>HD</strong> 200, 250<br />
• 36 to 48 for <strong>Kayak</strong> <strong>HD</strong> 300, 350<br />
• 48 for <strong>Kayak</strong> <strong>HD</strong> 400, 450<br />
• Video outputs programmable as M/E, Program or AUX bus outputs<br />
• GPI (General Purpose Interface) inputs:<br />
• Eight to 16 for <strong>Kayak</strong> <strong>HD</strong> 100C, 150C<br />
• 16 for <strong>Kayak</strong> <strong>HD</strong> 200C, 250C<br />
• 16-32 for <strong>Kayak</strong> <strong>HD</strong> 200, 250<br />
• 24-32 for <strong>Kayak</strong> <strong>HD</strong> 300, 350<br />
• 32 for <strong>Kayak</strong> <strong>HD</strong> 400, 450<br />
• GPI/Tally Outputs:<br />
• 32-64 for <strong>Kayak</strong> <strong>HD</strong> 100C, 150C<br />
• 64 for <strong>Kayak</strong> <strong>HD</strong> 200C, 250C<br />
• 64-128 for <strong>Kayak</strong> <strong>HD</strong> 200, 250<br />
• 96-128 for <strong>Kayak</strong> <strong>HD</strong> 300, 350<br />
• 128 for <strong>Kayak</strong> <strong>HD</strong>400, 450<br />
• Four full-function keyers per full M/E, each with linear and luminance<br />
keying<br />
• Five background generators include black, white, and three color backgrounds<br />
• Test Pattern Generator<br />
• Two analog reference inputs (tri-level sync and black burst) and <strong>HD</strong>/<br />
SD serial digital input reference<br />
• White or colored pushbutton keycaps (factory installed, choose when<br />
ordered)<br />
• Freeze frame buffer on every full-function keyer<br />
<strong>Kayak</strong> <strong>HD</strong> — <strong>Installation</strong> Planning Guide 9
Section 1 — System Overview<br />
• Two main wipe generators and 4 keyer wipe generators per M/E<br />
• YUV Color correction on every keyer and background bus<br />
• Internal four-port Gigabit Ethernet (10/100/1000 base T) switch<br />
• Eight serial ports for external machine control<br />
<strong>Kayak</strong> <strong>HD</strong> Options<br />
• Internal six-channel RAMRecorder option for video clips and stills<br />
• Three additional iDPMs with 2D transforms and crops on keyers 2, 3,<br />
and 4 per M/E<br />
• DPM Kurl per M/E. Adds Kurl effects to all of the enabled DPMs in one<br />
M/E. Includes Page Turn, Page Roll, Spheres, Ripples, Splits, Mirrors,<br />
and Slits<br />
• DPM Spektra Lighting, Defocus, Glow, and Output Recursives. Adds<br />
Spektra effects to all of the enabled DPMs in one M/E.<br />
• Four channels of eDPM with 2D transforms and crops that re-enter on<br />
any M/E<br />
• Kurl for eDPM<br />
• Spektra for eDPM<br />
• RGB color correction option on every keyer and background bus, or per<br />
input<br />
• Dual Chromatte chroma keyers, with flexible licenses allowing<br />
assignment of Chroma keys to different keyers<br />
• Remote monitoring and diagnostic support via NetCentral software<br />
• K<strong>HD</strong>-PSU internal redundant power supply unit<br />
• KDD-PSU rack-mounted remote power supply unit for remote (or<br />
additional) control panels<br />
• MatchDef Dual Video Source Scalar for converting 2 SD or <strong>HD</strong><br />
sources to the production format, maximum of 4 for up to 8 sources in<br />
the 4 RU models, up to 16 sources in the 8 RU models. One Mix/Effects<br />
or IOXPAND option required for every four sources. Scalars accept<br />
either <strong>HD</strong> or SD input and act as a frame-sync when not converting or<br />
being bypassed.<br />
• DSK (Downstream Keyer)/ Half M/E option for full M/E systems.<br />
(SLK)<br />
• Adds four DSKs for up to 20 keyers for 4.5 M/Es in the 8RU frame<br />
• Adds four DSKs for up to 12 keyers in the 4RU frame<br />
• Or Half M/E Mode with A/B background mix and four Lin/Lum<br />
keyers<br />
10 <strong>Kayak</strong> <strong>HD</strong> — <strong>Installation</strong> Planning Guide
Introduction<br />
• I/O Expander Module adds 24 SDI inputs, 12 SDI outputs, 8 GPI<br />
inputs, 32 GPI outputs/tallies, and optionally 4 MatchDef scalar<br />
inputs. Fits in any available M/E slot.<br />
• Full M/E Upgrade Option. Adds one Mix/Effects module to any<br />
<strong>Kayak</strong> <strong>HD</strong> chassis. Order one or more options to get the total M/Es<br />
required. The 4RU chassis holds up to two M/E modules and/or I/O<br />
Expander modules. One M/E upgrade option can be added to a <strong>Kayak</strong><br />
<strong>HD</strong> 1-M/E or 1.5-M/E system if it does not also have an I/O Expander<br />
module. The 8RU chassis holds up to four M/E modules and/or I/O<br />
Expander modules. One or two upgrade options can be added to a<br />
<strong>Kayak</strong> <strong>HD</strong> or SD 2-M/E system, less any I/O Expander modules in the<br />
chassis.<br />
• Upgrade Kit for minor modifications of XtenDD panels to enable<br />
control of a <strong>Kayak</strong> <strong>HD</strong>/SD video processor frame.<br />
Supported Control Protocols<br />
• VTRs (BVW-75)<br />
• AMP (Advanced Media Protocol). For Profile PVS, XP, K2, M Series,<br />
and Turbo DDRs. RS422 Serial supported<br />
• Video servers (Louth VDCP, Odetics)<br />
• Routers/Routing Control Systems (Trinix, Venus, Triton, and<br />
third party routers; Jupiter and Encore router control systems)<br />
• Control Systems (<strong>Grass</strong> <strong>Valley</strong> Andromeda and third-party systems)<br />
• <strong>Grass</strong> <strong>Valley</strong> Under Monitor Displays (Serial tally for UMD. Requires<br />
<strong>Grass</strong> <strong>Valley</strong> Andromeda system or third-part tally box such as Tally<br />
Display Corp. or Image Video.)<br />
• <strong>Grass</strong> <strong>Valley</strong> external Remote AUX Panels (CP-300 Series)<br />
• ESAM II for audio-follow-video applications<br />
• Edit controllers (native and <strong>Grass</strong> <strong>Valley</strong> Model 100 and 200 or DD35)<br />
<strong>Kayak</strong> <strong>HD</strong> — <strong>Installation</strong> Planning Guide 11
Section 1 — System Overview<br />
Specifications<br />
<strong>Kayak</strong> <strong>HD</strong> Systems<br />
Table 1. <strong>Kayak</strong> Mechanical Specifications<br />
Component Depth Width Height Weight a<br />
Control Surfaces<br />
<strong>Kayak</strong> <strong>HD</strong> 100C<br />
<strong>Kayak</strong> <strong>HD</strong> 150C, 200C, 200<br />
<strong>Kayak</strong> <strong>HD</strong> 250C, 250, 300<br />
Frames<br />
<strong>Kayak</strong> <strong>HD</strong> Compact 4 RU Frame<br />
<strong>Kayak</strong> <strong>HD</strong> 100C and 150C<br />
<strong>Kayak</strong> <strong>HD</strong> 200C and 250C<br />
<strong>Kayak</strong> <strong>HD</strong> 8 RU Frame<br />
<strong>Kayak</strong> <strong>HD</strong> 200 and 250<br />
<strong>Kayak</strong> <strong>HD</strong> 300<br />
KDD-PSU Remote Panel Power<br />
Supply Option<br />
a<br />
All weights approximate.<br />
418 mm<br />
(16.5 in.)<br />
418 mm<br />
(16.5 in.)<br />
544 mm<br />
(21.42 in.)<br />
546.10 mm<br />
(21.5 in.)<br />
546.10 mm<br />
(21.5 in.)<br />
522.73 mm<br />
(20.58 in.)<br />
522.73 mm<br />
(20.58 in.)<br />
240 mm<br />
(9.45 in.)<br />
448 mm<br />
(17.6 in.)<br />
809 mm<br />
(31.8 in.)<br />
1132 mm<br />
(44.57 in.)<br />
482.60 mm<br />
(19 in.)<br />
482.60 mm<br />
(19 in.)<br />
482.60 mm<br />
(19 in.)<br />
482.60 mm<br />
(19 in.)<br />
482 mm<br />
(19 in.)<br />
145.80 mm<br />
(5.74 in.)<br />
145.80 mm<br />
(5.74 in.)<br />
162 mm<br />
(6.38 in.)<br />
177.8 mm<br />
(7 in.)<br />
177.8 mm<br />
(7 in.)<br />
441.96 mm<br />
(17.4 in.)<br />
441.96 mm<br />
(17.4 in.)<br />
44 mm<br />
(1.73 in.)<br />
7 kg<br />
(15.4 lbs)<br />
10 kg<br />
(22 lbs)<br />
18 kg<br />
(39.68 lbs)<br />
16.33 kg<br />
(36 lbs)<br />
17.69 kg<br />
(39 lbs)<br />
29.03 kg<br />
(64 lbs)<br />
Rack Units<br />
n/a<br />
n/a<br />
n/a<br />
30.39 kg<br />
(67 lbs)<br />
8<br />
2.8 kg<br />
(6.2 lb.) 1<br />
4<br />
4<br />
8<br />
Table 2. Environmental<br />
Storage temperature -20 to 70 deg C (-4 to 158 deg F)<br />
Operating temperature 0 to 40 deg C (68 to 104 deg F)<br />
Relative humidity<br />
0-95% (non-condensing)<br />
Electromagnetic environment E2 (according to EN55103-1, -2)<br />
Table 3. Control Panel Connection<br />
Type of connection<br />
10/100 Base T<br />
Protocol<br />
TCP(UDP)/IP<br />
Cable and connectors<br />
CAT5 UTP, RJ45 connectors;<br />
Max. Cable Length<br />
100m / 300ft<br />
1 Frame and up to 4 Panels connect without use of external hub/switch.<br />
12 <strong>Kayak</strong> <strong>HD</strong> — <strong>Installation</strong> Planning Guide
Specifications<br />
Table 4. Power<br />
4 RU Frame<br />
Line voltage<br />
Line frequency 50/60Hz +/- 5%<br />
Power consumption<br />
Leakage current<br />
DC-OUT for control panel<br />
8 RU Frame<br />
Line voltage<br />
100V-240V AC +/-10% autorange, power factor corrected. Automatic linevoltage<br />
sensing for 120V and 240V sources.<br />
max. 400W<br />
< 2.5 mA<br />
48V DC, max 3A<br />
Line frequency 50/60Hz +/- 5%<br />
Power consumption<br />
Leakage current<br />
DC-OUT for control panel<br />
<strong>Kayak</strong> <strong>HD</strong> 100C Control Panel<br />
100V-240V AC +/-10% autorange, power factor corrected. Automatic linevoltage<br />
sensing for 120V and 240V sources.<br />
max. 800W<br />
< 2.5 mA<br />
48V DC, max 3A<br />
DC-IN 48V DC In, max 1.3A<br />
<strong>Kayak</strong> <strong>HD</strong> 150C, 200C, 200 Control Panel<br />
DC-IN 48V DC In, max 1.3A<br />
<strong>Kayak</strong> <strong>HD</strong> 250C AND 250 Control Panels<br />
DC-IN 48V DC In, max 1.3A<br />
<strong>Kayak</strong> <strong>HD</strong> 300 Control Panel<br />
DC-IN 48V DC In, max 1.3A<br />
KDD-PSU Frame (Remote Control Panel Power Supply)<br />
Line voltage<br />
Line frequency 50/60Hz +/- 5%<br />
Power consumption<br />
Leakage current<br />
100V-240V AC +/-10%, power factor corrected<br />
max. 375W<br />
< 2 mA at 250V AC<br />
Table 5. Serial Digital Video Inputs<br />
Format<br />
Number of Inputs<br />
Return loss<br />
ITU-R656, SMPTE 259M, 270Mbit/s.<br />
SMPTE 292M, 1.5Gbit/s<br />
<strong>Kayak</strong> <strong>HD</strong> 100C, 150C: 24 to 48<br />
<strong>Kayak</strong> <strong>HD</strong> 200C, 250C: 48<br />
<strong>Kayak</strong> <strong>HD</strong> 200, 250: 48 to 96<br />
<strong>Kayak</strong> <strong>HD</strong> 300: 72 to 96<br />
> 15 db, 5 MHz to 1.5 GHz<br />
Type of Connector 75 ohm BNC (SMPTE 259M)<br />
Interface<br />
Nominal Amplitude<br />
Autophasing range<br />
<strong>HD</strong> Video Formats SMPTE 292M-1998<br />
SD Video Formats SMPTE 259M-1997<br />
800mV peak-to-peak terminated<br />
TBD<br />
<strong>Kayak</strong> <strong>HD</strong> — <strong>Installation</strong> Planning Guide 13
Section 1 — System Overview<br />
Channel Coding<br />
Ancillary Data<br />
Embedded audio<br />
EDH<br />
Input Impedance<br />
Max cable length<br />
conforms to SMPTE 259M, SMPTE 292M<br />
Blanked or passed (user selectable)<br />
Blanked or passed (user selectable)<br />
Blanked<br />
75 ohm<br />
<strong>HD</strong> Video 100 meters using Belden 1694A type cable<br />
SD Video 300 meters using Belden 1694A type cable<br />
Table 6. Serial Digital Video Outputs<br />
Format<br />
Number of Outputs<br />
Return loss<br />
ITU-R656, SMPTE 259M, 270Mbit/s.<br />
SMPTE 292M, 1.5Gbit/s<br />
<strong>Kayak</strong> <strong>HD</strong> 100C, 150C: 12 min., Up to 24<br />
<strong>Kayak</strong> <strong>HD</strong> 200C, 250C: 24<br />
<strong>Kayak</strong> <strong>HD</strong> 200, 250: 24 min., Up to 48<br />
<strong>Kayak</strong> <strong>HD</strong> 300: 36 min., Up to 48<br />
> 15 db, 5 MHz to 1.5 GHz<br />
Type of Connector 75 ohm BNC (SMPTE 259M)<br />
Interface<br />
Nominal Amplitude<br />
Rise & Fall Times<br />
Jitter ITU R 601/656<br />
Output Impedance<br />
DC Offset<br />
<strong>HD</strong> Video Formats SMPTE 292M-1998<br />
SD Video Formats SMPTE 259M-1997<br />
800 mv peak-to-peak across 75 ohm<br />
400 to 1400picoseconds 75 ohm termination<br />
between 20% and 80% amplitude<br />
75 ohm<br />
< 50mV with 75 ohm termination<br />
Table 7. Analog Reference Input<br />
Video Standard<br />
Return loss<br />
Connectors<br />
Impedance<br />
For <strong>HD</strong> Video: Tri-level Sync, Analog equivalent to the standard being used<br />
For SD Video: Color Black, Analog equivalent to the standard being used<br />
> 40dB, up to 5 MHz<br />
2 each BNC loop through for both <strong>HD</strong> and SD inputs<br />
75 ohm external<br />
Table 8. <strong>Kayak</strong> <strong>HD</strong> Video Standards<br />
<strong>HD</strong> Mode<br />
SD Mode<br />
1080i 29.97/30 SMPTE 274M Table 1-4, 5 525i 59.94 SMPTE 259M<br />
1080i 25 SMPTE 274M Table 1-6 625i 50 SMPTE 259M<br />
1080p 24/23.976 SMPTE 274M Table 1-10, 11<br />
1080sF 24/23.976 SMPTE 211 Table 1-15, 16<br />
720p 60/59.94/50 SMPTE 296 Table 1-1, 2<br />
14 <strong>Kayak</strong> <strong>HD</strong> — <strong>Installation</strong> Planning Guide
Section 2<br />
Control Surfaces<br />
<strong>Kayak</strong> <strong>HD</strong> Control Panels<br />
<strong>Kayak</strong> <strong>HD</strong> Production Switcher systems use a control panel with integrated<br />
menu display (color TFT with touch-screen). Three control panels<br />
and two electronics frames provide seven unique <strong>Kayak</strong> <strong>HD</strong> systems.<br />
<strong>Kayak</strong> <strong>HD</strong> 100C systems use a one M/E panel.<br />
The control panel used in <strong>Kayak</strong> <strong>HD</strong> 150C, 200C, and 200 systems provides<br />
one M/E plus program/preset, or two M/E (depending upon electronics<br />
frame configuration).<br />
The control panel used in <strong>Kayak</strong> <strong>HD</strong> 250C, 250, and 300 systems provides<br />
two M/E plus program/preset, or three M/E (depending upon electronics<br />
frame configuration).<br />
<strong>Kayak</strong> <strong>HD</strong> 100C Control Panel<br />
Figure 1. Control Panel<br />
<strong>Kayak</strong> <strong>HD</strong> — <strong>Installation</strong> Planning Guide 15
Section 2 — Control Surfaces<br />
Figure 2. 1 M/E Control Panel, Rear View<br />
PS/2 Port USB #4<br />
(Future use)<br />
Dimensions<br />
Figure 3. <strong>Kayak</strong> <strong>HD</strong> 100C Control Panel Dimensions 1 of 2<br />
418 mm<br />
16.46 in.<br />
145 mm<br />
5.69 in.<br />
260 mm<br />
10.23 in.<br />
66 mm<br />
2.55 in.<br />
20°<br />
16 mm<br />
0.60 in.<br />
81 mm<br />
3.19 in.<br />
7°<br />
34 mm<br />
1.31 in.<br />
11 mm<br />
0.40 in.<br />
398 mm<br />
15.66 in.<br />
Left side view<br />
10 mm<br />
0.39 in.<br />
8324_01_r2<br />
16 <strong>Kayak</strong> <strong>HD</strong> — <strong>Installation</strong> Planning Guide
<strong>Kayak</strong> <strong>HD</strong> Control Panels<br />
Figure 4. <strong>Kayak</strong> <strong>HD</strong> 100C Control Panel Dimensions 2 of 2<br />
Front view<br />
10 mm<br />
0.39 in.<br />
448 mm<br />
17.64 in.<br />
428 mm<br />
16.85 in.<br />
10 mm<br />
0.39 in.<br />
418 mm<br />
16.5 in.<br />
Top view<br />
448 mm<br />
17.64 in.<br />
8324_02_ r2<br />
<strong>Kayak</strong> <strong>HD</strong> — <strong>Installation</strong> Planning Guide 17
Section 2 — Control Surfaces<br />
<strong>Kayak</strong> <strong>HD</strong> 150C, 200C, 200 Control Panels<br />
Figure 5. <strong>Kayak</strong> <strong>HD</strong> 150C, 200C, and 200 Control Panel<br />
Figure 6. 2 M/E Control Panel, Rear View<br />
PS/2 Port<br />
USB #4<br />
P/S 2 3 USB 4<br />
(Future use)<br />
(Future use)<br />
8448_05_r0<br />
48V DC Power In<br />
(from Frame)<br />
Redundant<br />
DC Power In<br />
USB #2<br />
LAN RS 485 RS 232<br />
18 <strong>Kayak</strong> <strong>HD</strong> — <strong>Installation</strong> Planning Guide
<strong>Kayak</strong> <strong>HD</strong> Control Panels<br />
Dimensions<br />
Figure 7. <strong>Kayak</strong> <strong>HD</strong> 150C, 200C, and 200 Control Panels Dimensions 1 of 2<br />
418 mm<br />
16.46 in.<br />
1445 mm<br />
5.69 in.<br />
260 mm<br />
10.23 in.<br />
65 mm<br />
2.55 in.<br />
81 mm<br />
3.19 in.<br />
20°<br />
7°<br />
16 mm<br />
0.60 in.<br />
34 mm<br />
1.31 in.<br />
8451_08_r2<br />
11 mm<br />
0.40 in.<br />
398 mm<br />
15.66 in.<br />
10 mm<br />
0.39 in.<br />
<strong>Kayak</strong> <strong>HD</strong> — <strong>Installation</strong> Planning Guide 19
Section 2 — Control Surfaces<br />
Figure 8. <strong>Kayak</strong> <strong>HD</strong> 150C, 200C, and 200 Control Panel Dimensions 2 of 2<br />
Front view<br />
10 mm<br />
0.39 in.<br />
809 mm<br />
31.9 in.<br />
789 mm<br />
31.1 in.<br />
10 mm<br />
0.39 in.<br />
418 mm<br />
16.5 in.<br />
Top view<br />
809 mm<br />
31.9 in.<br />
8451_09_r0<br />
20 <strong>Kayak</strong> <strong>HD</strong> — <strong>Installation</strong> Planning Guide
<strong>Kayak</strong> <strong>HD</strong> Control Panels<br />
<strong>Kayak</strong> <strong>HD</strong> 250C, 250, 300 Control Panels<br />
Figure 9. <strong>Kayak</strong> <strong>HD</strong> 250C, 250, and 300 Control Panel<br />
Figure 10. 3 M/E Control Panel, Rear View<br />
KAYAK<br />
DIGITAL PRODUCTION SWITCHER<br />
8448_12_r0<br />
TE<br />
J1A<br />
DC POWER IN<br />
48V/1.3A max.<br />
RED. DC POWER IN USB LAN RS 485 RS 232<br />
48V/1.3A max.<br />
1 2 COM 2 COM 1<br />
Spare<br />
J1B<br />
J2 J3 J4 J5 J5<br />
48V DC Power In<br />
(from Frame)<br />
Redundant<br />
DC Power In<br />
USB LAN RS 485 RS 232<br />
<strong>Kayak</strong> <strong>HD</strong> — <strong>Installation</strong> Planning Guide 21
Section 2 — Control Surfaces<br />
Dimensions<br />
Figure 11. <strong>Kayak</strong> <strong>HD</strong> 250C, 250, and 300 Control Panels Dimensions<br />
65 mm<br />
2.54 in.<br />
20°<br />
97 mm<br />
3.79 in.<br />
7°<br />
Left side view<br />
34 mm<br />
1.31 in.<br />
10 mm<br />
0.39 in.<br />
524 mm<br />
20.63 in.<br />
10 mm<br />
0.39 in.<br />
8451_01_r0<br />
0.39 in.<br />
10 mm<br />
43.78 in.<br />
1112 mm<br />
44.57 in.<br />
1132 mm<br />
Front view<br />
0.39 in.<br />
10 mm<br />
21.42 in.<br />
544 mm<br />
8451_10_r0<br />
Top view<br />
22 <strong>Kayak</strong> <strong>HD</strong> — <strong>Installation</strong> Planning Guide
<strong>Kayak</strong> <strong>HD</strong> Control Panels<br />
Panel Mounting Options<br />
<strong>Kayak</strong> <strong>HD</strong> control panels may be placed on a table or similar stable surface,<br />
or they may be recessed into a control console in an appropriately sized<br />
cutout.<br />
Table Top Use<br />
High-friction feet prevent inadvertent movement of the panel. The panel is<br />
ventilated at its sides. Ensure that production materials and other equipment<br />
does not block the ventilation holes on the sides of the panel.<br />
CAUTION At least 2 in. (50mm) of open space on the sides of the panel is required for<br />
proper air flow.<br />
Surface Mount Cutout Dimensions<br />
Table 1. <strong>Kayak</strong> <strong>HD</strong> Surface Mount Cutout Dimensions<br />
Cutout Dimensions<br />
Control Surfaces A B<br />
<strong>Kayak</strong> <strong>HD</strong> 250C, 250, 300 526 mm (20.71 in.)<br />
1114 mm (43.86<br />
in.)<br />
<strong>Kayak</strong> <strong>HD</strong> 150C, 200C, 200 400 mm (15.75 in.) 791 mm (31.14 in.)<br />
<strong>Kayak</strong> <strong>HD</strong> 100C 400 mm (15.75 in.) 430 mm (16.93 in.)<br />
A<br />
B<br />
0619_00_27_r1<br />
CAUTION At least 50 mm (2 in.) of clear space on the sides of the panel below the<br />
mounting surface is required for proper air flow. Provide at least 50 mm (2<br />
in.) of clear space in the rear of the panel for cable clearance.<br />
Securing Panels to Mounting Surface<br />
When mounting the panel in a tabletop cutout, four M4 threaded holes<br />
(two each on the left and right side of the panel) are available for securing<br />
the panel in the cutout (Figure 12).<br />
<strong>Kayak</strong> <strong>HD</strong> — <strong>Installation</strong> Planning Guide 23
Section 2 — Control Surfaces<br />
Figure 12. <strong>Kayak</strong> <strong>HD</strong> Panel Mounting Holes<br />
5 mm (0.2 in.)<br />
panel edge to centerline<br />
of threaded hole<br />
8324_10_r3<br />
24 <strong>Kayak</strong> <strong>HD</strong> — <strong>Installation</strong> Planning Guide
Section 3<br />
Frames<br />
General Rack Mounting Instructions<br />
The maximum ambient temperature for this unit is 40-degrees C (104-<br />
degrees F).<br />
Installing the frame in a closed or multi-unit rack assembly together with<br />
other units could increase the maximum ambient temperature for this unit.<br />
If the unit is installed in a rack, no ventilation openings should be blocked<br />
or otherwise covered. Make sure you install the frame so that you allow for<br />
cooling airflow.<br />
Make sure that you mount the unit in the rack so that it is evenly balanced<br />
to prevent damage to the frame and to avoid creating a hazardous condition.<br />
When connecting the unit to the supply circuit be sure that the supply<br />
circuit of the rack is not overloaded. The unit must be well-grounded using<br />
the ground connector on the rear. When connecting the unit in a closed or<br />
multi-unit rack assembly together with other units be sure that the sum of<br />
the touch (leakage) currents for all power supplies does not exceed 3.5 mA.<br />
CAUTION Ambient air temperature must be taken into consideration when installing<br />
your <strong>Kayak</strong> video processor chassis. Do not place the air intake side of the<br />
<strong>Kayak</strong> chassis near the air output of another piece of equipment if that output<br />
exceeds the maximum Operating Temperature specification.<br />
<strong>Kayak</strong> <strong>HD</strong> — <strong>Installation</strong> Planning Guide 25
Section 3 — Frames<br />
4 RU Compact Frame<br />
Video Processor Frame <strong>Installation</strong><br />
4 RU Compact Frame Dimensions<br />
Figure 13. <strong>Kayak</strong> <strong>HD</strong> 4 RU Frame Dimensions<br />
482 mm<br />
19.0 in.<br />
465 mm<br />
18.31 in.<br />
165 mm<br />
6.5 in.<br />
177 mm<br />
6.97 in.<br />
Front view<br />
8451_15.1_r1<br />
26 <strong>Kayak</strong> <strong>HD</strong> — <strong>Installation</strong> Planning Guide
4 RU Compact Frame<br />
Figure 14. <strong>Kayak</strong> <strong>HD</strong> 4 RU Frame Dimensions<br />
442 mm<br />
17.4 in.<br />
523 mm<br />
20.58 in.<br />
541 mm<br />
21.29 in.<br />
7.5 mm<br />
0.3 in.<br />
37 mm<br />
1.43 in.<br />
Top view<br />
8451_15.2_r0<br />
<strong>Kayak</strong> <strong>HD</strong> — <strong>Installation</strong> Planning Guide 27
Section 3 — Frames<br />
4 RU Compact Frame Rack Mounting<br />
Figure 15. <strong>Kayak</strong> <strong>HD</strong> 4 RU Compact Frame Rack Mounting<br />
Air<br />
Exhaust<br />
Rear Rack<br />
Support<br />
8451_05_r3<br />
Air<br />
Intake<br />
CAUTION Mounting using only the front rack ears is sufficient for fixed installations.<br />
Additional support, like the rear rack support or slide rails, is required for<br />
mobile applications.<br />
The Rear Rack support provides additional support and stability for the<br />
<strong>Kayak</strong> <strong>HD</strong> frame to ensure that it remains horizontal.<br />
Make sure to provide adequate ventilation for the <strong>Kayak</strong> <strong>HD</strong> Frame. When<br />
installing the frame in the rack, take care that no ventilation holes are<br />
blocked. This can prevent cooling air from reaching the frame and cause it<br />
to overheat.<br />
There are air intake holes on the right side of the frame (as you face the<br />
frame front) and air exhaust holes on the left.<br />
CAUTION A minimum vertical clearance of 7.62 mm (0.3-in.) above the <strong>Kayak</strong> <strong>HD</strong> 4 RU<br />
Compact frame door is required to remove the door. When installing the<br />
<strong>Kayak</strong> <strong>HD</strong> 4 RU Compact frame in the rack, take care to leave room for<br />
removal of the front door. The front door lifts off vertically and must have sufficient<br />
clearance room in order to remove it. If you have equipment mounted<br />
too close to the <strong>Kayak</strong> <strong>HD</strong> 4 RU Compact Frame, you may not be able to<br />
remove the door.<br />
28 <strong>Kayak</strong> <strong>HD</strong> — <strong>Installation</strong> Planning Guide
4 RU Compact Frame<br />
<strong>Kayak</strong> <strong>HD</strong> Video Processor 4 RU Frame<br />
Fan Assembly<br />
Top M/E Slot<br />
M/E 0 (PP)<br />
Figure 16. <strong>Kayak</strong> <strong>HD</strong> 4RU Frame, Front View with Door Removed<br />
Controller<br />
(and 0.5 M/E)<br />
Flash<br />
Memory<br />
Power<br />
Switch<br />
Reset<br />
Button RS-232<br />
VGA PS2<br />
Keyboard<br />
2 USB Bottom M/E Slot<br />
(unused) (M/E 1) Air Filter<br />
OFF<br />
ON<br />
Power Supply Unit 1<br />
Redundant Power Supply Unit 2 (option)<br />
8448_01_r1<br />
Video In<br />
1 M/E: 1-24<br />
2 M/E: 1-48<br />
Figure 17. <strong>Kayak</strong> <strong>HD</strong> 4RU Frame, Backplane View<br />
Video Out<br />
1 M/E: 1-12<br />
2 M/E: 1-24<br />
GPI In 1-8<br />
GPI Out 1-32 LAN<br />
(Internal Switch<br />
with 4 Ports)<br />
SD Reference In<br />
<strong>HD</strong> Reference In<br />
Tri Level Sync<br />
RS422/485<br />
Serial Ports<br />
(8)<br />
LINK/ACTIVITY<br />
OFF-10<br />
AMBER-100<br />
GREEN-1000<br />
8448_06_r1<br />
Grounding Lug 48V DC Power Out Redundant AC 100-240V AC GPI In 9-16<br />
(to Control Panel) Power Supply 2 Power Supply 1 GPI Out 33-64<br />
(option)<br />
(2 M/E only)<br />
<strong>Kayak</strong> <strong>HD</strong> — <strong>Installation</strong> Planning Guide 29
Section 3 — Frames<br />
8 RU Frame<br />
Video Processor Frame <strong>Installation</strong><br />
8 RU Frame Dimensions<br />
Figure 18. <strong>Kayak</strong> <strong>HD</strong> 8 RU Frame Dimensions 1 of 2<br />
465 mm<br />
18.31 in.<br />
483 mm<br />
19.0 in.<br />
166 mm<br />
6.5 in.<br />
355 mm<br />
13.97 in.<br />
178 mm<br />
7.0 in.<br />
8451_16_r0<br />
Front view<br />
30 <strong>Kayak</strong> <strong>HD</strong> — <strong>Installation</strong> Planning Guide
8 RU Frame<br />
Figure 19. <strong>Kayak</strong> <strong>HD</strong> 8 RU Frame Dimensions 2 of 2<br />
Cable Support Wires<br />
Top view<br />
541 mm<br />
21.29 in.<br />
523 mm<br />
20.58 in.<br />
37 mm<br />
1.43 in.<br />
442 mm<br />
17.4 in.<br />
8451_13_r1<br />
<strong>Kayak</strong> <strong>HD</strong> — <strong>Installation</strong> Planning Guide 31
Section 3 — Frames<br />
8 RU Frame Rack Mounting<br />
Figure 20. <strong>Kayak</strong> <strong>HD</strong> 8 RU Frame Dimensions<br />
Air<br />
Exhaust<br />
Air<br />
Intake<br />
Rear Rack<br />
Support<br />
8451_14_r1<br />
CAUTION Mounting using only the front rack ears is sufficient for fixed installations.<br />
Additional support, like the rear rack support or slide rails, is required for<br />
mobile applications.<br />
The Rear Rack support provides additional support and stability for the<br />
<strong>Kayak</strong> <strong>HD</strong> frame to ensure that it remains horizontal.<br />
32 <strong>Kayak</strong> <strong>HD</strong> — <strong>Installation</strong> Planning Guide
8 RU Frame<br />
Make sure to provide adequate ventilation for the <strong>Kayak</strong> <strong>HD</strong> Frame. When<br />
installing the frame in the rack, take care that no ventilation holes are<br />
blocked. This can prevent cooling air from reaching the frame and cause it<br />
to overheat.<br />
There are air intake holes on the right side of the frame (as you face the<br />
frame front) and air exhaust holes on the left.<br />
CAUTION A minimum vertical clearance of 7.62 mm (0.3-in.) above the <strong>Kayak</strong> <strong>HD</strong> 8 RU<br />
frame door is required to remove the door. When installing the <strong>Kayak</strong> <strong>HD</strong> 8<br />
RU frame in the rack, take care to leave room for removal of the front door.<br />
The front door lifts off vertically and must have sufficient clearance room in<br />
order to remove it. If you have equipment mounted too close to the <strong>Kayak</strong> <strong>HD</strong><br />
8 RU Frame, you may not be able to remove the door.<br />
Fan Assembly<br />
Figure 21. <strong>Kayak</strong> <strong>HD</strong> 8RU Frame, Front View with Door Removed<br />
Flash<br />
Memory<br />
Power<br />
Switch<br />
Reset<br />
Button<br />
RS-232<br />
VGA<br />
PS2<br />
Keyboard<br />
2 USB<br />
(unused)<br />
Air Filter<br />
M/E 0<br />
(PP)<br />
M/E 1<br />
Controller<br />
(and 0.5 M/E)<br />
OFF<br />
ON<br />
M/E 2<br />
M/E 3<br />
Expansion<br />
Slot<br />
Power Supply Unit 1 Power Supply Unit 2 Power Supply Unit 3 (Optional)<br />
8448 11 r1<br />
<strong>Kayak</strong> <strong>HD</strong> — <strong>Installation</strong> Planning Guide 33
Section 3 — Frames<br />
Video In<br />
1 M/E: 1-24<br />
2 M/E: 1-48<br />
3 M/E: 1-96<br />
Figure 22. <strong>Kayak</strong> <strong>HD</strong> 8RU Frame, Backplane View<br />
Video Out<br />
1 M/E: 1-12<br />
2 M/E: 1-24<br />
3 M/E: 1-48<br />
GPI In 1-8<br />
GPI Out 1-32<br />
GPI In 9-16<br />
GPI Out 33-64<br />
(2 M/E only)<br />
LAN<br />
(Internal Switch<br />
with 4 Ports)<br />
RS422/485<br />
Serial Ports<br />
(8)<br />
SD Reference In<br />
<strong>HD</strong> Reference In<br />
Tri Level Sync<br />
8448_64_r0<br />
Grounding Lug<br />
48V DC Power Out<br />
(to Control Panel)<br />
Redundant AC<br />
Power Supply 3<br />
(option)<br />
100-240V AC<br />
Power Supply 2<br />
100-240V AC<br />
Power Supply 1<br />
34 <strong>Kayak</strong> <strong>HD</strong> — <strong>Installation</strong> Planning Guide
Cabling<br />
Cabling<br />
The <strong>Kayak</strong> <strong>HD</strong> system uses Ethernet, serial, and USB connections. Tally<br />
and GPI I/O (General Purpose Interface Input/Output) control are also<br />
available. A simple <strong>Kayak</strong> <strong>HD</strong> system consisting of a Control Panel and<br />
Video Processor frame does not require connection to an external Ethernet<br />
Local Area Network (LAN). The video processor frame incorporates an<br />
Ethernet switch for this purpose.<br />
There are two AC power supply inputs to the frame. If the redundant<br />
power supply option is installed, power can be provided by one or both<br />
line cords to two different AC circuits.<br />
<strong>Kayak</strong> <strong>HD</strong> 100C Control Cabling<br />
Figure 23. <strong>Kayak</strong> <strong>HD</strong> 100C Standard Control Cabling<br />
PS/2<br />
Port<br />
2 USB<br />
Ports<br />
Control Panel<br />
Video Processor Frame<br />
Supplied CAT5 Cable<br />
LINK/ACTIVITY<br />
OFF-10<br />
AMBER-100<br />
GREEN-1000<br />
Supplied DC<br />
Interconnect Cable<br />
48V DC Output<br />
to Control Panel<br />
100-240V AC<br />
Power Supplies<br />
8324_07_r1<br />
<strong>Kayak</strong> <strong>HD</strong> — <strong>Installation</strong> Planning Guide 35
Section 3 — Frames<br />
<strong>Kayak</strong> <strong>HD</strong> 150C, 200C, and 200 Panel Control Cabling<br />
Figure 24 shows the basic control cabling for a <strong>Kayak</strong> <strong>HD</strong> 150C, 200C, or<br />
200 system.<br />
Figure 24. <strong>Kayak</strong> <strong>HD</strong> 150C, 200C, or 200 Standard Control Cabling<br />
PS/2<br />
Port<br />
2 USB<br />
Ports<br />
P/S 2 3 USB 4<br />
Control Panel<br />
Supplied CAT5 Cable<br />
Video Processor Frame<br />
LINK/ACTIVITY<br />
OFF-10<br />
AMBER-100<br />
GREEN-1000<br />
8324_13_r1<br />
Supplied DC Interconnect Cable<br />
48V DC Output<br />
to Control Panel<br />
100-240V AC<br />
Power Supplies<br />
The <strong>Kayak</strong> <strong>HD</strong> 150C, 200C, or 200 system uses Ethernet, serial, and USB<br />
connections. Tally and GPI/O control are also available. A simple <strong>Kayak</strong><br />
<strong>HD</strong> 100C system consisting of a Control Panel and Video Processor frame<br />
uses point-to-point connections and does not require connection to an<br />
external Ethernet Local Area Network (LAN). The video processor frame<br />
incorporates an Ethernet switch for this purpose.<br />
There are two AC power supply inputs to the frame. If the redundant<br />
power supply option is installed, power can be provided by one or both<br />
line cords to two different AC circuits.<br />
36 <strong>Kayak</strong> <strong>HD</strong> — <strong>Installation</strong> Planning Guide
Cabling<br />
Network Cabling<br />
Ethernet Switches and Hubs<br />
A <strong>Kayak</strong> <strong>HD</strong> system requires a LAN when components other than a<br />
Control Panel and Video Processor frame are connected, or when external<br />
network access to a file system is desired. An appropriately-sized Ethernet<br />
switch may be required. An existing facility Ethernet switch (not hub) can<br />
support <strong>Kayak</strong> <strong>HD</strong> if an adequate number of ports are available.<br />
A hub can be used only if there is a need to exceed 328 ft. (100 m) between<br />
a Control Panel and Video Processor frame. If a hub is used, connect the<br />
hub to the switch via the Uplink port, or through a peer-to-peer crossover<br />
cable.<br />
Table 9 details Ethernet specifications. All Ethernet components are to be<br />
supplied by the customer except the CAT5 crossover cable provided<br />
Note<br />
The supplied crossover cable works with the <strong>Kayak</strong> <strong>HD</strong> switcher because the<br />
frame has an auto-sensing Ethernet switch.<br />
Table 9. Ethernet Specifications<br />
Cables<br />
Switch<br />
Type<br />
Connectors<br />
Length<br />
Speed<br />
Ports<br />
Unmanaged<br />
Managed<br />
10BaseT and 100BaseT compatible.<br />
Category 5 cable, 8 conductor twisted pair.<br />
The system will work at 10BaseT with reduced performance. 100BaseT<br />
components are highly recommended.<br />
RJ-45 male connector at each end of cable.<br />
10BaseT: 984 ft. (300 m) maximum.<br />
100BaseT: 328 ft. (100 m) maximum.<br />
Use hub or switch to exceed maximum cable runs.<br />
10/100/1000 Mbps<br />
RJ-45 auto-negotiating 10/100 Mbps; number of ports required is<br />
dependent upon system size. Frame ports are capable of 1000 Mbps.<br />
Using a 1000 Mbps Ethernet switch enhances RAM Recorder transfer<br />
speeds.<br />
Recommended. Configuration not required, but does not provide<br />
remote monitoring capability.<br />
May be used. Requires configuration, but offers remote monitoring<br />
capability.<br />
CAUTION An existing facility Ethernet switch (not hub) can support <strong>Kayak</strong> <strong>HD</strong> if an adequate<br />
number of ports are available. Keep your facility network and technical<br />
network separate in order to avoid network traffic negatively affecting <strong>Kayak</strong><br />
<strong>HD</strong> system operation.<br />
The <strong>Kayak</strong> <strong>HD</strong> backplane has four RJ45 Ethernet connectors for its built-in<br />
Ethernet switch, each capable of 10/100/1000 Mbps. All Ethernet connectors<br />
share the same speed- and direction-sensing features.<br />
One Ethernet connector must connect to the Control Panel. It may go<br />
through a switch to make the Control Panel connection, but at least one<br />
<strong>Kayak</strong> <strong>HD</strong> — <strong>Installation</strong> Planning Guide 37
Cabling<br />
Outputs<br />
The outputs on the back of the Video Processor frame are numbered 1<br />
through 12 and 13 through 24 on the 4RU frame. All of the outputs carry<br />
the same video format, as determined by standard selected and by the reference<br />
signals connected. The number of outputs that are active depends<br />
on the number of full mix/effects or I/O Expansion modules installed in<br />
the chassis. There are 12 outputs active for every mix/effects and expansion<br />
module installed.<br />
Reference Input<br />
There are two separate, looping reference input pairs. The upper pair<br />
accepts analog 525 or 625 composite video. Burst is not required, but typically<br />
facility reference color black is used. <strong>Kayak</strong> <strong>HD</strong> can auto-sense<br />
whether the reference is 525 or 625 and can change the internal standard<br />
accordingly.<br />
The lower looping reference input pair is for <strong>HD</strong> production and uses<br />
analog tri-level sync.<br />
75-ohm termination of one of each of these looping inputs is required,<br />
either directly on the adjacent connector or at the end of a daisy chain<br />
looping to other equipment.<br />
Any one of the SDI inputs can also be used as reference in the respective<br />
standard.<br />
<strong>Kayak</strong> <strong>HD</strong> — <strong>Installation</strong> Planning Guide 39
Section 3 — Frames<br />
40 <strong>Kayak</strong> <strong>HD</strong> — <strong>Installation</strong> Planning Guide
Section 4<br />
Options<br />
K<strong>HD</strong>-PSU Internal Redundant Power Supply Option<br />
This option provides redundant power for the <strong>Kayak</strong> <strong>HD</strong> video processor<br />
chassis and control panel. It slides into an extra power supply slot in the<br />
video processor chassis.<br />
Figure 25. K<strong>HD</strong>-PSU Internal Redundant Power Supply Option<br />
<strong>Kayak</strong> <strong>HD</strong> — <strong>Installation</strong> Planning Guide 41
Section 4 — Options<br />
KDD-PSU Power Supply Option<br />
The KDD-PSU option is a 1RU frame unit designed for rack mounting as<br />
shown in Figure 27 on page 43. It features a wide range AC power supply<br />
providing power for a remotely-mounted <strong>Kayak</strong> <strong>HD</strong> Control Panel or for<br />
each additional Control Panel connected to the same processor chassis.<br />
Power output is sufficient for two 1 M/E systems or one 2 M/E system.<br />
<strong>Grass</strong> <strong>Valley</strong> recommends that customers purchase this option if the distance<br />
from the Frame to the Control Panel is more than 100 meters.<br />
Figure 26. KDD-PSU<br />
KDD-PSU-Front-Left<br />
42 <strong>Kayak</strong> <strong>HD</strong> — <strong>Installation</strong> Planning Guide
K<strong>HD</strong>-PSU Internal Redundant Power Supply Option<br />
<strong>Installation</strong><br />
Figure 27. KDD-PSU Rack <strong>Installation</strong><br />
8324_14_r1<br />
Cut fastening metal so that the<br />
ventilation openings are not covered<br />
<strong>Kayak</strong> <strong>HD</strong> — <strong>Installation</strong> Planning Guide 43
Section 4 — Options<br />
Pin Assignments<br />
RS 422/485 Port<br />
Table 10.<br />
Socket Pin Bus Controller Tributary<br />
1 Chassis Ground Chassis Ground<br />
D-9 Female<br />
2 RxA (-) TxA (-)<br />
Pin 5 Pin 1<br />
3 TxB (+) RxB (+)<br />
4 Signal Ground Signal Ground<br />
5 Not used Not used<br />
6 Signal Ground Signal Ground<br />
Pin 9 Pin 6<br />
7 RxB (+) TxB (+)<br />
8 TxA (-) RxA (-)<br />
9 Chassis Ground Chassis Ground<br />
There are 8 RS485 ports that can be used for Machine Control of various<br />
devices, or for switcher control by an external controller.<br />
RS 232 Port<br />
Table 11.<br />
Socket Pin Signal<br />
1 Chassis Ground<br />
D-9 Female<br />
2 Transmit Data<br />
Pin 5 Pin 1<br />
3 Receive Data<br />
4 Not used<br />
5 Signal Ground<br />
6 Not used<br />
Pin 9 Pin 6<br />
7 Clear to Send<br />
8 Request to Send<br />
9 Not used<br />
There is an RS232 serial port, a keyboard port, and a VGA video output<br />
located on front of the Controller Board. These ports are used for diagnostics.<br />
If you need to use these ports to diagnose problems with the <strong>Kayak</strong> <strong>HD</strong><br />
switcher, please contact your <strong>Grass</strong> <strong>Valley</strong> Customer <strong>Service</strong> Representative.<br />
44 <strong>Kayak</strong> <strong>HD</strong> — <strong>Installation</strong> Planning Guide
GPI / Tally Connections<br />
Control Panel DC Power In<br />
Table 12.<br />
Socket Pin Signal<br />
A1 48 V (+)<br />
D-Sub Male<br />
A2 48 V (-)<br />
Pin 1 Pin 2<br />
1 -<br />
2 -<br />
3 -<br />
Pin A1 Pin A2<br />
4 -<br />
Pin 3 Pin 5<br />
5<br />
-<br />
Frame DC Power Out<br />
Socket Pin Signal<br />
A1 48 V (+)<br />
A2 48 V (-)<br />
D-Sub Female<br />
1 -<br />
Pin 2 Pin 1<br />
2 -<br />
3 -<br />
4 -<br />
Pin A2 Pin A1<br />
-<br />
5<br />
Pin 5 Pin 3<br />
GPI / Tally Connections<br />
The <strong>Kayak</strong> <strong>HD</strong> GPI / Tally system has universal relays that interface source<br />
tally and GPI Output information to an external system through the Tally<br />
Port connectors. The channels can be assigned in the Setup menu.<br />
Tallies are a source attribute and relays can be assigned to a source when<br />
source definitions are defined in the Setup menu during initial system configuration.<br />
The nominal rating specification for each relay is 1A, 60 V.<br />
The GPI (General Purpose Interface) and Tally Interface provides a means<br />
to transfer commands to and from the switcher to external customer provided<br />
equipment. A “one wire per function” parallel hardware connection<br />
is used.<br />
Connectors and pins are provided to create a mating connector.<br />
<strong>Kayak</strong> <strong>HD</strong> GPI and Tally Interface<br />
The <strong>Kayak</strong> <strong>HD</strong> is highly modular and configurable. This document<br />
describes various possibilities for tally interconnections.<br />
<strong>Kayak</strong> <strong>HD</strong> — <strong>Installation</strong> Planning Guide 45
Section 4 — Options<br />
There are two 50 pin female subminiature 'D' connectors on the rear of the<br />
4 RU <strong>Kayak</strong> <strong>HD</strong> frame and four connectors on the rear of the 8 RU <strong>Kayak</strong><br />
<strong>HD</strong> frame. Each connector is activated by the presence of a Mix/Effects<br />
module installed in the frame. A one M/E switcher (4 RU or 8 RU frame)<br />
activates only the first connector. Two M/Es activate two connectors, and<br />
so forth, up to four connectors activated by a four M/E system.<br />
GPI inputs and outputs are assigned as follows:<br />
• GPI in 1 - 8 and GPI/Tally out 1 - 32 routed to the first connector.<br />
• GPI in 9 - 16 and GPI/Tally out 33 - 64 routed to the second connector.<br />
• GPI in 17 - 24 and GPI/Tally out 65 - 96 routed to the third connector (8<br />
RU frame only).<br />
• GPI in 25 - 32 and GPI/Tally out 97 - 128 routed to the fourth connector<br />
(8 RU frame only).<br />
For pinouts of these connectors refer to the listings in:<br />
• 4 RU and 8RU Frame Tally (GPI In 1-8, GPI Out 1-32) on page 51<br />
• 4 RU and 8RU Frame Tally (GPI In 9-16, GPI Out 33-64) on page 52<br />
• 8RU Frame Tally (GPI In 17-24, GPI Out 65-96) on page 53<br />
• 8RU Frame Tally (GPI In 25-32, GPI Out 97-128) on page 54<br />
These four connectors do not share any signals in common other than<br />
ground reference and chassis ground. Because of this, some GPI / Tally<br />
interconnects may require external common connections between connectors,<br />
as explained below.<br />
GPI Inputs<br />
The purpose of the GPI In pins is to provide a stimulus from the customer's<br />
equipment to the switcher.<br />
A simple connection to the two connectors (or four in the case of the 8 RU<br />
frame) activates the corresponding input. This kind of control is suitable for<br />
a connection to a relay contact or to an open-collector output.<br />
WARNING When connecting to an open-collector output, there is no ground potential<br />
isolation between the Video Processor frame and controlling devices.<br />
Since the circuit ground is led out of the device, the cabling has to be<br />
shielded for this kind of control. Non-shielded cables may cause EMC and/<br />
or ESD problems.<br />
To activate a GPI In you must provide switch closure between a particular<br />
GPI In pin and one of the two GPI In Com pins (Pins 1 and 34).<br />
46 <strong>Kayak</strong> <strong>HD</strong> — <strong>Installation</strong> Planning Guide
GPI / Tally Connections<br />
GPI Input Structure<br />
Figure 28. GPI Input Connections (Typical 2 of 8 connections)<br />
+ 3.3 V<br />
50-pin Connector<br />
Pin Numbers<br />
18<br />
150 ohm<br />
Opto Isolator<br />
(1 of 8)<br />
GPI 1<br />
Open<br />
Collector<br />
2<br />
+ 3.3 V<br />
35<br />
GPI 5<br />
19<br />
3<br />
150 ohm<br />
Opto Isolator<br />
(5 of 8)<br />
36<br />
20<br />
4<br />
1<br />
34<br />
Ground and<br />
Chassis<br />
User Equipment<br />
<strong>Kayak</strong> <strong>HD</strong> Frame<br />
8448_08r0<br />
Pins 1 and 34 of each of the two (four) connectors are connected to ground.<br />
For applications that span across more than one connector, only one<br />
ground (common) connection is required.<br />
The function of each GPI input is user assignable. The activation of the<br />
function can be programmed to occur on the leading edge or the trailing<br />
edge of the closure, or both edges. The switch must be closed for at least one<br />
field.<br />
<strong>Kayak</strong> <strong>HD</strong> — <strong>Installation</strong> Planning Guide 47
Section 4 — Options<br />
Refer to the Install Menus section of the <strong>Kayak</strong> <strong>HD</strong> User <strong>Manual</strong> for details<br />
on setting the input signal activating edge.<br />
Refer to the Configuration Menu section of the <strong>Kayak</strong> <strong>HD</strong> User <strong>Manual</strong> for<br />
details on setting the function of a GPI input.<br />
GPI / Tally Outputs<br />
There is a great deal of flexibility in the hardware and programmability of<br />
the GPI / Tally outputs.<br />
Outputs are arranged in groups of four. Each group has its own common<br />
connection. These are labeled GPI_OUT_COM_A through<br />
GPI_OUT_COM_H for the first connector (corresponding to GPI /Tally<br />
OUTs 1 - 32). These commons can all be tied together, forming one common<br />
bus for all 32 outputs. Alternatively, multiple smaller commons can be constructed<br />
to interface with systems that need isolated common connections.<br />
This common or isolated bus scheme can extend across multiple connectors.<br />
For example, a 4 M/E system could have all commons of all connectors<br />
tied together. All 128 relay closures will connect to one common bus.<br />
Another case may require two isolated common busses - half of the<br />
commons form the first common bus and the other half form the second<br />
common bus.<br />
The example in Figure 29 on page 49 shows two common busses. The first<br />
four outputs (COMMON A) have the common bus tied to ground. This<br />
drives a logic system. The last outputs (COMMON G & COMMON H)<br />
have the common bus tied to +12 volts. This drives a tally lamp system.<br />
48 <strong>Kayak</strong> <strong>HD</strong> — <strong>Installation</strong> Planning Guide
GPI / Tally Connections<br />
Figure 29. GPO Tally Connections<br />
50-pin Connector<br />
Pin Numbers<br />
1A of 32<br />
21<br />
2A of 32<br />
3A of 32<br />
5<br />
38<br />
Logic<br />
4A of 32<br />
22<br />
Common A<br />
37<br />
5B of 32<br />
6B of 32<br />
39<br />
23<br />
Common B<br />
27G of 32<br />
48<br />
12V Lamp<br />
28G of 32<br />
32<br />
Common G<br />
47<br />
29H of 32<br />
49<br />
12V Lamp<br />
30H of 32<br />
33<br />
31H of 32<br />
17<br />
12V Lamp<br />
32H of 32<br />
50<br />
<strong>Kayak</strong> <strong>HD</strong> Frame<br />
Common H<br />
16<br />
User Equipment<br />
+ 12V DC<br />
8448_09r0<br />
<strong>Kayak</strong> <strong>HD</strong> — <strong>Installation</strong> Planning Guide 49
Section 4 — Options<br />
Although the diagram above implies mechanical relays, the actual outputs<br />
are implemented with solid state relays. Interface specifications are:<br />
Maximum current for any one output: 1 amp AC/DC<br />
Maximum current for any one common: 2 amp AC/DC.<br />
Maximum off (open circuit) voltage between output and common: 60<br />
Volts peak.<br />
Maximum voltage between any point and ground (chassis): 60 Volts<br />
peak.<br />
The solid state relays are bidirectional; either polarity voltage can be<br />
applied. If the switcher GPI / Tally outputs are used to drive downstream<br />
DC relays, be sure to install diodes across the relay coils to clamp inductive<br />
spikes. Shielded cable is recommended for the connection from the<br />
switcher to the user tally system.<br />
Each output can be programmed for function, steady state or pulse, output<br />
polarity, and pulse duration.<br />
Refer to the Install Menus section of the <strong>Kayak</strong> <strong>HD</strong> User <strong>Manual</strong> for details<br />
on setting the characteristics of the output signal (steady state, polarity,<br />
pulse duration, etc.).<br />
Refer to the Configuration Menu section of the <strong>Kayak</strong> <strong>HD</strong> User <strong>Manual</strong> for<br />
details on setting the function of a GPO / Tally output (tally, auto trans,<br />
recall register, and so forth).<br />
50 <strong>Kayak</strong> <strong>HD</strong> — <strong>Installation</strong> Planning Guide
GPI / Tally Connections<br />
4 RU and 8RU Frame Tally (GPI In 1-8, GPI Out 1-32)<br />
Socket Ribbon Cable 50-Pin D-Sub Signal<br />
1 1 GPIInCom<br />
2 34 GPIInCom<br />
D-50 Female<br />
3 18 GPIIn1<br />
Pin 18<br />
4 2 GPIIn2<br />
5 35 GPIIn3<br />
Pin 1<br />
6 19 GPIIn4<br />
Pin 34<br />
7 3 GPIIn5<br />
8 36 GPIIn6<br />
9 20 GPIIn7<br />
10 4 GPIIn8<br />
11 37 GPIOutComA<br />
12 21 GPIOut1A<br />
13 5 GPIOut2A<br />
Pin 33 14 38 GPIOut3A<br />
15 22 GPIOut4A<br />
Pin 17<br />
16 6 GPIOutComB<br />
17 39 GPIOut5B<br />
Pin 50<br />
18 23 GPIOut6B<br />
19 7 GPIOut7B<br />
20 40 GPIOut8B<br />
21 24 GPIOutComC<br />
22 8 GPIOut9C<br />
23 41 GPIOut10C<br />
24 25 GPIOut11C<br />
25 9 GPIOut12C<br />
26 42 GPIOutComD<br />
27 26 GPIOut13D<br />
28 10 GPIOut14D<br />
29 43 GPIOut15D<br />
30 27 GPIOut16D<br />
31 11 GPIOutComE<br />
32 44 GPIOut17E<br />
33 28 GPIOut18E<br />
34 12 GPIOut19E<br />
35 45 GPIOut20E<br />
36 29 GPIOutComF<br />
37 13 GPIOut21F<br />
38 46 GPIOut22F<br />
39 30 GPIOut23F<br />
40 14 GPIOut24F<br />
41 47 GPIOutComG<br />
42 31 GPIOut25G<br />
43 15 GPIOut26G<br />
44 48 GPIOut27G<br />
45 32 GPIOut28G<br />
46 16 GPIOutComH<br />
47 49 GPIOut29H<br />
48 33 GPIOut30H<br />
49 17 GPIOut31H<br />
50 50 GPIOut32H<br />
<strong>Kayak</strong> <strong>HD</strong> — <strong>Installation</strong> Planning Guide 51
Section 4 — Options<br />
4 RU and 8RU Frame Tally (GPI In 9-16, GPI Out 33-64)<br />
Socket Ribbon Cable 50-Pin D-Sub Signal<br />
1 1 GPIInCom<br />
2 34 GPIInCom<br />
D-50 Female<br />
3 18 GPIIn9<br />
Pin 18<br />
4 2 GPIIn10<br />
5 35 GPIIn11<br />
Pin 1<br />
6 19 GPIIn12<br />
Pin 34<br />
7 3 GPIIn13<br />
8 36 GPIIn14<br />
9 20 GPIIn15<br />
10 4 GPIIn16<br />
11 37 GPIOutComJ<br />
12 21 GPIOut33J<br />
13 5 GPIOut34J<br />
Pin 33 14 38 GPIOut35J<br />
15 22 GPIOut36J<br />
Pin 17<br />
16 6 GPIOutComK<br />
17 39 GPIOut37K<br />
Pin 50<br />
18 23 GPIOut38K<br />
19 7 GPIOut39K<br />
20 40 GPIOut40K<br />
21 24 GPIOutComL<br />
22 8 GPIOut41L<br />
23 41 GPIOut42L<br />
24 25 GPIOut43L<br />
25 9 GPIOut44L<br />
26 42 GPIOutComM<br />
27 26 GPIOut45M<br />
28 10 GPIOut46M<br />
29 43 GPIOut47M<br />
30 27 GPIOut48M<br />
31 11 GPIOutComN<br />
32 44 GPIOut49N<br />
33 28 GPIOut50N<br />
34 12 GPIOut51N<br />
35 45 GPIOut52N<br />
36 29 GPIOutComP<br />
37 13 GPIOut53P<br />
38 46 GPIOut54P<br />
39 30 GPIOut55P<br />
40 14 GPIOut56P<br />
41 47 GPIOutComQ<br />
42 31 GPIOut57Q<br />
43 15 GPIOut58Q<br />
44 48 GPIOut59Q<br />
45 32 GPIOut60Q<br />
46 16 GPIOutComR<br />
47 49 GPIOut61R<br />
48 33 GPIOut62R<br />
49 17 GPIOut63R<br />
50 50 GPIOut64R<br />
52 <strong>Kayak</strong> <strong>HD</strong> — <strong>Installation</strong> Planning Guide
GPI / Tally Connections<br />
8RU Frame Tally (GPI In 17-24, GPI Out 65-96)<br />
Socket Ribbon Cable 50-Pin D-Sub Signal<br />
1 1 GPIInCom<br />
2 34 GPIInCom<br />
D-50 Female<br />
3 18 GPIIn17<br />
Pin 18<br />
4 2 GPIIn18<br />
5 35 GPIIn19<br />
Pin 1<br />
6 19 GPIIn20<br />
Pin 34<br />
7 3 GPIIn21<br />
8 36 GPIIn22<br />
9 20 GPIIn23<br />
10 4 GPIIn24<br />
11 37 GPIOutComS<br />
12 21 GPIOut65S<br />
13 5 GPIOut6S<br />
Pin 33 14 38 GPIOut67S<br />
15 22 GPIOut68S<br />
Pin 17<br />
16 6 GPIOutComT<br />
17 39 GPIOut69T<br />
Pin 50<br />
18 23 GPIOut70T<br />
19 7 GPIOut71T<br />
20 40 GPIOut72T<br />
21 24 GPIOutComU<br />
22 8 GPIOut73U<br />
23 41 GPIOut74U<br />
24 25 GPIOut75U<br />
25 9 GPIOut76U<br />
26 42 GPIOutComV<br />
27 26 GPIOut77V<br />
28 10 GPIOut78V<br />
29 43 GPIOut79V<br />
30 27 GPIOut80V<br />
31 11 GPIOutComW<br />
32 44 GPIOut81W<br />
33 28 GPIOut82W<br />
34 12 GPIOut83W<br />
35 45 GPIOut84W<br />
36 29 GPIOutComX<br />
37 13 GPIOut85X<br />
38 46 GPIOut86X<br />
39 30 GPIOut87X<br />
40 14 GPIOut88X<br />
41 47 GPIOutComY<br />
42 31 GPIOut89Y<br />
43 15 GPIOut90Y<br />
44 48 GPIOut91Y<br />
45 32 GPIOut92Y<br />
46 16 GPIOutComZ<br />
47 49 GPIOut93Z<br />
48 33 GPIOut94Z<br />
49 17 GPIOut95Z<br />
50 50 GPIOut96Z<br />
<strong>Kayak</strong> <strong>HD</strong> — <strong>Installation</strong> Planning Guide 53
Section 4 — Options<br />
8RU Frame Tally (GPI In 25-32, GPI Out 97-128)<br />
Socket Ribbon Cable 50-Pin D-Sub Signal<br />
1 1 GPIInCom<br />
2 34 GPIInCom<br />
D-50 Female<br />
3 18 GPIIn25<br />
Pin 18<br />
4 2 GPIIn26<br />
5 35 GPIIn27<br />
Pin 1<br />
6 19 GPIIn28<br />
Pin 34<br />
7 3 GPIIn29<br />
8 36 GPIIn30<br />
9 20 GPIIn31<br />
10 4 GPIIn32<br />
11 37 GPIOutComAA<br />
12 21 GPIOut97AA<br />
13 5 GPIOut98AA<br />
Pin 33 14 38 GPIOut99AA<br />
15 22 GPIOut100AA<br />
Pin 17<br />
16 6 GPIOutComAB<br />
17 39 GPIOut101AB<br />
Pin 50<br />
18 23 GPIOut102AB<br />
19 7 GPIOut103AB<br />
20 40 GPIOut104AB<br />
21 24 GPIOutComAC<br />
22 8 GPIOut105AC<br />
23 41 GPIOut106AC<br />
24 25 GPIOut107AC<br />
25 9 GPIOut108AC<br />
26 42 GPIOutComAD<br />
27 26 GPIOut109AD<br />
28 10 GPIOut110AD<br />
29 43 GPIOut111AD<br />
30 27 GPIOut112AD<br />
31 11 GPIOutComAE<br />
32 44 GPIOut113AE<br />
33 28 GPIOut114AE<br />
34 12 GPIOut115AE<br />
35 45 GPIOut116AE<br />
36 29 GPIOutComAF<br />
37 13 GPIOut117AF<br />
38 46 GPIOut118AF<br />
39 30 GPIOut119AF<br />
40 14 GPIOut120AF<br />
41 47 GPIOutComAG<br />
42 31 GPIOut121AG<br />
43 15 GPIOut122AG<br />
44 48 GPIOut123AG<br />
45 32 GPIOut124AG<br />
46 16 GPIOutComAH<br />
47 49 GPIOut125AH<br />
48 33 GPIOut126AH<br />
49 17 GPIOut127AH<br />
50 50 GPIOut128AH<br />
54 <strong>Kayak</strong> <strong>HD</strong> — <strong>Installation</strong> Planning Guide
Index<br />
Numerics<br />
100 C Control Panel 15<br />
Dimensions 16<br />
150C, 200C, 200 Control Panels 18<br />
150C, 200C, and 200 Control Panels<br />
Dimensions 19<br />
Panel Control Cabling 36<br />
250C, 250, and 300 Control Panels<br />
Dimensions 22<br />
4 RU Frame 26<br />
Dimensions 26<br />
Rack Mounting 28<br />
Video Processor 29<br />
8 RU Frame 30<br />
Dimensions 30<br />
Rack Mounting 32<br />
Video Processor <strong>Installation</strong> 30<br />
C<br />
Cabling 35, 54<br />
100C Control Cabling 35<br />
Control, 100c 35<br />
Control, 150C, 200C, and 200 36<br />
Network 37<br />
Control Cabling<br />
100C 35<br />
150C, 200C, and 200 36<br />
Control Panels<br />
100C, Dimensions 15<br />
150C, 200C, 200 18<br />
150C, 200C, and 200, Dimensions 19<br />
250C, 250, and 300<br />
Dimensions 22<br />
Control Cabling 36<br />
Control Protocols<br />
Supported 11<br />
D<br />
Dimensions<br />
100C Control Panel 16<br />
150C, 200C, and 200 Control Panels 19<br />
250C, 250, and 300 Control Panels 22<br />
4 RU Compact Frame 26<br />
8 RU Frame 30<br />
Surface Mount Cutout (All Panels) 23<br />
documentation online 4<br />
E<br />
Ethernet Switches and Hubs 37<br />
F<br />
Factory Network Settings 38<br />
FAQ database 4<br />
Frame<br />
Video Processor <strong>Installation</strong> 26<br />
frequently asked questions 4<br />
G<br />
GPI<br />
Inputs 46<br />
Outputs 48<br />
GPI Input Structure 47<br />
GPI Interface 45<br />
<strong>Grass</strong> <strong>Valley</strong> web site 4<br />
H<br />
Hubs<br />
Ethernet 37<br />
I<br />
Inputs<br />
GPI 46<br />
Reference 39<br />
Video Cabling 38<br />
<strong>Installation</strong><br />
8 RU Video Processor 30<br />
KDD-PSU Power Supply Option 43<br />
<strong>Kayak</strong> <strong>HD</strong> — <strong>Installation</strong> Planning Guide 55
Index<br />
K<br />
Video Processor Frame 26<br />
<strong>Kayak</strong> <strong>HD</strong><br />
100C Control Cabling 35<br />
100C Control Panel 15<br />
Backplane 37<br />
GPI and Tally Interface 45<br />
Introduction 7<br />
Network Cabling 37<br />
Switcher Models 7<br />
Systems 12<br />
Video Cabling 38<br />
<strong>Kayak</strong> <strong>HD</strong> 250C, 250, 300 Control Panels 21<br />
<strong>Kayak</strong> <strong>HD</strong> Control Panels 15<br />
KDD-PSU<br />
Power Supply Option 42<br />
Power Supply Option, <strong>Installation</strong> 43<br />
K<strong>HD</strong>-PSU<br />
Internal Redundant Power Supply Option 41<br />
N<br />
Network<br />
Cabling 37<br />
Settings, Factory default 38<br />
O<br />
online documentation 4<br />
Options 41<br />
<strong>Kayak</strong> <strong>HD</strong> 10<br />
Outputs<br />
GPI 48<br />
Video Cabling 39<br />
P<br />
Panel Mounting Options 23<br />
Pin Assignments 44<br />
Power<br />
KDD-PSU Power Supply Option 42<br />
K<strong>HD</strong>-PSU Internal Redundant Power Supply<br />
Option 41<br />
Protocols<br />
Supported Control Protocols 11<br />
R<br />
Rack Mounting<br />
4 RU Compact Frame 28<br />
8 RU Frame 32<br />
Instructions 25<br />
Reference<br />
Video Cabling Input 39<br />
S<br />
software download from web 4<br />
Specifications 12<br />
Standard Features<br />
<strong>Kayak</strong> <strong>HD</strong> 8<br />
Supported Control Protocols 11<br />
Surface Mount Cutout Dimensions 23<br />
Switcher Models<br />
<strong>Kayak</strong> <strong>HD</strong> 7<br />
Switches<br />
Ethernet 37<br />
T<br />
Table Top Use 23<br />
Tally (GPI In 1-8, GPI Out 1-32) 51, 53<br />
Tally (GPI In 9-16, GPI Out 33-64) 52, 54<br />
Tally Interface 45<br />
V<br />
Video Cabling<br />
Inputs 38<br />
Outputs 39<br />
Reference Input 39<br />
Video Processor<br />
4 RU Frame 29<br />
8 RU Frame <strong>Installation</strong> 30<br />
Frame <strong>Installation</strong> 26<br />
W<br />
web site documentation 4<br />
web site FAQ database 4<br />
web site <strong>Grass</strong> <strong>Valley</strong> 4<br />
web site software download 4<br />
56 <strong>Kayak</strong> <strong>HD</strong> — <strong>Installation</strong> Planning Guide
Index<br />
Z<br />
Zodiak 7<br />
<strong>Kayak</strong> <strong>HD</strong> — <strong>Installation</strong> Planning Guide 57
Index<br />
58 <strong>Kayak</strong> <strong>HD</strong> — <strong>Installation</strong> Planning Guide