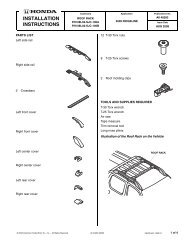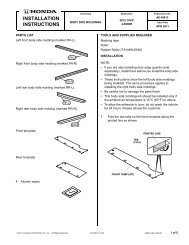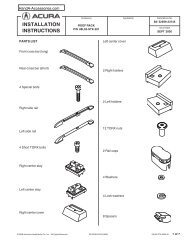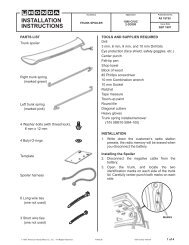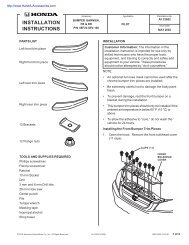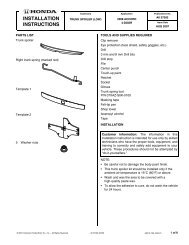
installation instructions - H and A Accessories
installation instructions - H and A Accessories
installation instructions - H and A Accessories

You also want an ePaper? Increase the reach of your titles
YUMPU automatically turns print PDFs into web optimized ePapers that Google loves.
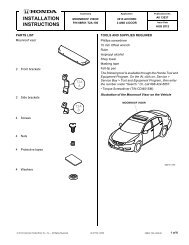
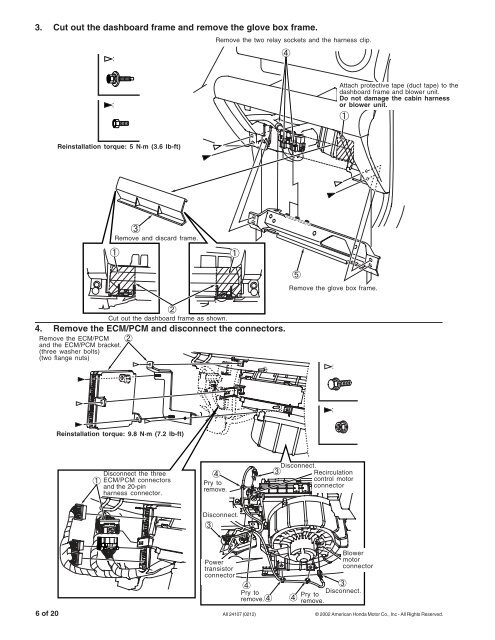
3. Cut out the dashboard frame <strong>and</strong> remove the glove box frame.<br />
Remove the two relay sockets <strong>and</strong> the harness clip.<br />
Attach protective tape (duct tape) to the<br />
dashboard frame <strong>and</strong> blower unit.<br />
Do not damage the cabin harness<br />
or blower unit.<br />
Re<strong>installation</strong> torque: 5 N·m (3.6 lb-ft)<br />
Remove <strong>and</strong> discard frame.<br />
Remove the glove box frame.<br />
Cut out the dashboard frame as shown.<br />
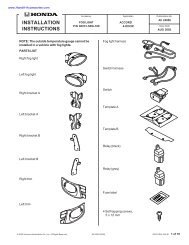
4. Remove the ECM/PCM <strong>and</strong> disconnect the connectors.<br />
Remove the ECM/PCM<br />
<strong>and</strong> the ECM/PCM bracket.<br />
(three washer bolts)<br />
(two flange nuts)<br />
Re<strong>installation</strong> torque: 9.8 N·m (7.2 lb-ft)<br />
Disconnect the three<br />
ECM/PCM connectors<br />
<strong>and</strong> the 20-pin<br />
harness connector.<br />
Pry to<br />
remove.<br />
Disconnect.<br />
Recirculation<br />
control motor<br />
connector<br />
Disconnect.<br />
Power<br />
transistor<br />
connector<br />
Blower<br />
motor<br />
connector<br />
Pry to<br />
remove.<br />
Disconnect.<br />
Pry to<br />
remove.<br />
6 of 20 AII 24107 (0212) © 2002 American Honda Motor Co., Inc - All Rights Reserved.