

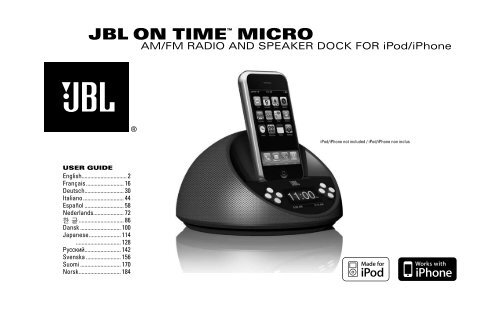
jbl On TIME™ MIcrO
jbl On TIME™ MIcrO
jbl On TIME™ MIcrO

Create successful ePaper yourself
Turn your PDF publications into a flip-book with our unique Google optimized e-Paper software.
<strong>jbl</strong> <strong>On</strong> TIME <br />
Micro<br />
AM/FM RADIO AND SPEAKER DOCK FOR iPod/iPhone<br />
iPod/iPhone not included / iPod/iPhone non inclus<br />
User Guide<br />
English............................... 2<br />
Français........................... 16<br />
Deutsch........................... 30<br />
Italiano............................. 44<br />
Español............................ 58<br />
Nederlands..................... 72<br />
한 글................................ 86<br />
Dansk............................. 100<br />
Japanese...................... 114<br />
............................... 128<br />
Русский......................... 142<br />
Svenska......................... 156<br />
Suomi............................. 170<br />
Norsk............................. 184
Important Safety Instructions<br />
1. Read these instructions.<br />
2. Keep these instructions.<br />
3. Heed all warnings.<br />
4. Follow all instructions.<br />
5. Do not use this apparatus near water.<br />
6. Clean only with a dry cloth.<br />
7. Do not block any ventilation openings. Install in accordance<br />
with the manufacturer’s instructions.<br />
8. Do not install near any heat sources such as radiators, heat<br />
registers, stoves or other apparatus (including amplifiers) that<br />
produce heat.<br />
9. Do not defeat the safety purpose of the polarized or grounding-type<br />
plug. A polarized plug has two blades with one wider than the other.<br />
A grounding-type plug has two blades and a third grounding prong.<br />
The wide blade or the third prong is provided for your safety. If the<br />
provided plug does not fit into your outlet, consult an electrician for<br />
replacement of the obsolete outlet.<br />
10. Protect the power cord from being walked on or pinched,<br />
particularly at plugs, convenience receptacles and the point where<br />
they exit from the apparatus.<br />
11. <strong>On</strong>ly use attachments/accessories specified by the manufacturer.<br />
12. Use only with the cart, stand, tripod, bracket or table<br />
specified by the manufacturer or sold with the apparatus.<br />
When a cart is used, use caution when moving the<br />
cart/apparatus combination to avoid injury from tip-over.<br />
13. Unplug this apparatus during lightning storms or when unused<br />
for long periods of time.<br />
14. Refer all servicing to qualified service personnel. Servicing is<br />
required when the apparatus has been damaged in any way, such as<br />
power supply cord or plug is damaged, liquid has been spilled or objects<br />
have fallen into the apparatus, the apparatus has been exposed<br />
to rain or moisture, does not operate normally, or has been dropped.<br />
15. Do not expose this apparatus to dripping or splashing and<br />
ensure that no objects filled with liquids, such as vases, are<br />
placed on the apparatus.<br />
16. To completely disconnect this apparatus from the AC<br />
mains, disconnect the power supply cord plug from the<br />
AC receptacle.<br />
17. The mains plug of the power supply cord shall remain<br />
readily operable.<br />
18. Do not expose batteries to excessive heat such as sunshine,<br />
fire or the like.<br />
The lightning flash with arrowhead symbol, within<br />
an equilateral triangle, is intended to alert the<br />
user to the presence of uninsulated “dangerous<br />
voltage” within the product’s enclosure that may<br />
be of sufficient magnitude to constitute a risk of<br />
electric shock to persons.<br />
The exclamation point within an equilateral<br />
triangle is intended to alert the user to the<br />
presence of important operating and maintenance<br />
(servicing) instructions in the literature<br />
accompanying the product.<br />
WARNING: To reduce the risk of fire or electric shock, do not<br />
expose this apparatus to rain or moisture.<br />
Important Note for All<br />
Electronic Products:<br />
Before inserting or unplugging audio cables from the source device’s<br />
headphones or line-level output jacks, it is good practice to turn off the<br />
device first. This will prolong the life of your unit, help protect your device<br />
from static electricity and prevent potential damage.<br />
2 JBL <strong>On</strong> Time MICRO USER GUIDE
English<br />
FCC STATEMENT AND WARNING<br />
This device complies with Part 15 of the FCC Rules. Operation is subject to the following two conditions: 1) this device may not cause harmful<br />
interference, and 2) this device must accept any interference received, including interference that may cause undesired operation.<br />
This equipment has been tested and found to comply with the limits for a Class B digital device, pursuant to Part 15 of the FCC Rules.<br />
These limits are designed to provide reasonable protection against harmful interference in a residential installation.<br />
This equipment generates, uses and can radiate radio frequency energy and, if not installed and used in accordance with the instructions,<br />
may cause harmful interference to radio communications. However, there is no guarantee that interference will not occur in a particular<br />
installation. If this equipment does cause harmful interference to radio or television reception, which can be determined by turning the<br />
equipment off and on, the user is encouraged to try to correct the interference by one or more of the following measures:<br />
• Reorient the receiving antenna.<br />
• Increase the separation between the equipment and receiver.<br />
• Connect the equipment into an outlet on a circuit different from that to which the receiver is connected.<br />
• Consult the dealer or an experienced radio/TV technician for help.<br />
MODIFICATIONS NOT EXPRESSLY APPROVED BY THE MANUFACTURER COULD VOID THE USER AUTHORITY TO OPERATE THE EQUIPMENT<br />
UNDER FCC RULES.<br />
IC Statement and Warning<br />
This Class B digital apparatus complies with Canadian ICES-003. Cet appareil numérique de la classe B est conforme à la norme NMB-003 du Canada<br />
THE LIGHTNING<br />
FLASH AND<br />
ARROWHEAD<br />
WITHIN THE<br />
TRIANGLE IS A<br />
WARNING SIGN<br />
ALERTING YOU<br />
TO DANGEROUS<br />
VOLTAGE INSIDE<br />
THE PRODUCT.<br />
CAUTION<br />
RISK OF ELECTRIC<br />
SHOCK — DO NOT OPEN<br />
CAUTION: TO REDUCE<br />
THE RISK OF SHOCK, DO<br />
NOT REMOVE COVER. NO<br />
USER-SERVICEABLE PARTS<br />
INSIDE. REFER SERVICING<br />
TO QUALIFIED SERVICE<br />
PERSONNEL.<br />
THE EXCLAMATION<br />
POINT WITHIN<br />
THE TRIANGLE IS<br />
A WARNING SIGN<br />
ALERTING YOU<br />
TO IMPORTANT<br />
INSTRUCTIONS<br />
ACCOMPANYING<br />
THE PRODUCT.<br />
WARNING: TO PREVENT FIRE OR<br />
ELECTRICAL SHOCK HAZARD, DO NOT EXPOSE<br />
THIS PRODUCT TO RAIN OR MOISTURE.<br />
Important:<br />
The appropriate adapter must be installed before<br />
inserting your iPod/iPhone into the JBL ® PRODUCT.<br />
Make sure that the CONNECTOR FOR the iPod/iPhone is<br />
properly aligned with the JBL PRODUCT’s connector<br />
when installing your iPod/iPhone. Failure to do so<br />
may cause permanent damage to the CONNECTOR FOR<br />
the iPod/iPhone, rendering the iPod/iPhone inoperable.<br />
www.<strong>jbl</strong>.com<br />
3
<strong>jbl</strong> <strong>On</strong> TIME MICRO<br />
The JBL <strong>On</strong> Time Micro high-performance loudspeaker dock and clock radio for iPod/iPhone will revolutionize the way you listen to your<br />
radio, use your iPod/iPhone, and wake from a good night’s sleep.<br />
The JBL <strong>On</strong> Time Micro system is a revolution in time travel. Imagine waking up to music on your favorite station or your iPod/iPhone,<br />
with no more buzzer or bad radio reception. The compact time machine and sound center, when connected to your iPod/iPhone, MP3<br />
player or other music source, produces clean, powerful sound while providing time-keeping, alarm and radio features.<br />
The JBL <strong>On</strong> Time Micro loudspeaker dock has full ability to navigate your iPod via IR remote. Also, not only can you wake up to your<br />
favorite radio station or song on your iPod/iPhone, but with the multiple alarm setting option, you can set up to seven different alarms for<br />
“His” and “Hers,” at whatever day or frequency needed.<br />
Evercharge topology<br />
The JBL <strong>On</strong> Time Micro speaker dock charges your iPod/iPhone, even when the system is off. The system’s memory is maintained by a<br />
backup battery. Even with the power out, it will provide the alarm function.<br />
COE (Computer-Optimized Equalization)<br />
The JBL <strong>On</strong> Time Micro system equalization is computer-optimized to provide a rich, complete soundstage.<br />
OCT (Optimized Compression Topology)<br />
The JBL <strong>On</strong> Time Micro radio and loudspeaker dock utilizes a proprietary compression technology to ensure clean, accurate sound at<br />
high output levels.<br />
DISPLAY<br />
The large, backlit LCD enables easy viewing and menu navigation. Automatic dimming sets the correct brightness level in any<br />
room environment.<br />
4<br />
JBL <strong>On</strong> Time MICRO USER GUIDE
2<br />
English<br />
Unpacking your JBL <strong>On</strong> Time MICRO<br />
Carefully unpack your speaker system and identify all its components:<br />
JBL <strong>On</strong> Time Micro Apple Adapter IR remote Power supply FM antenna AM antenna Battery Installation Battery Installation<br />
Quick setup instructions<br />
• Place Apple adapter into the docking unit, if necessary. Then place your iPod/iPhone into the adapter.<br />
• For backup memory, install three AAA batteries in the battery compartment underneath the unit.<br />
• Connect the external AM antenna for better reception.<br />
• Unwind the FM antenna and straighten the wire for the best reception.<br />
• Plug the power adapter into the “DC In” jack and then plug the adapter into a wall outlet.<br />
• If an additional audio source is used, connect the source to the “Aux In” jack (cable sold separately).<br />
BATTERY DISPOSAL<br />
Alkaline batteries are considered nonhazardous.<br />
Rechargeable batteries (i.e., nickel cadmium, nickel<br />
metal-hydride, lithium and lithium-ion) are considered<br />
hazardous household materials and may pose an<br />
unnecessary health and safety risk. In the European<br />
Union and other locations, it is illegal to dispose of any<br />
battery with household trash. All batteries must be<br />
disposed of in an environmentally sound manner. Contact<br />
your local waste management officials for information<br />
regarding the environmentally sound collection,<br />
recycling and disposal of used batteries.<br />
Aux In<br />
DC In<br />
www.<strong>jbl</strong>.com<br />
5
CONTROLS<br />
Setting the Clock<br />
1. Press Menu/Up Level at any screen to display Top Menu (may require repeated presses, depending on which menu state the unit<br />
was previously in).<br />
2. Use Up/Down arrows to highlight Clock. Press Enter to confirm.<br />
3. Use Up/Down arrows to highlight 12-hour or 24-hour format. Press Enter to confirm.<br />
4. Use Up/Down arrows to set Hour. Press Enter to confirm. Minute field becomes highlighted.<br />
5. Use Up/Down arrows to set Minutes. Press Enter to confirm. AM/PM field becomes highlighted.<br />
6. Use Up/Down arrows to set Day of Week. Press Enter to confirm. The clock is set!<br />
Note: During clock-setting, if there is no user input for 2 seconds, display will return to the Now Playing screen. Press any one of the Enter, Up/Down arrows, or<br />
Menu/Up Level to return to setting selection.<br />
Base Unit Control<br />
Power<br />
Navigation<br />
Select Up<br />
Alarm<br />
Source<br />
Menu/Up Level<br />
Enter<br />
Preset<br />
Select Down<br />
6<br />
JBL <strong>On</strong> Time MICRO USER GUIDE
English<br />
Playing Music<br />
1. Press Source button to select the source (iPod/iPhone, AM, FM, Aux).<br />
2. Press “+” button to increase volume.<br />
3. Press “–” button to decrease volume.<br />
Languages/Region<br />
1. Press the Menu/Up Level button until you reach the Top Menu screen.<br />
2. Use Up/Down arrows to select Region and press Enter.<br />
3. Use Up/Down arrows to select language. Press Enter.<br />
4. Use Up/Down arrows to select radio band region type. Press Enter.<br />
Power<br />
Radio Tuning<br />
1. If AM or FM radio is already selected and playing, use Up/Down arrows to<br />
tune frequency; hold either button and release to scan for the next station.<br />
2. Otherwise, press Source until FM or AM is selected.<br />
3. Tune to the desired frequency using Up/Down arrows; hold either button and<br />
release to scan for the next station.<br />
Alarm<br />
Preset<br />
Select Up<br />
Source<br />
Menu/Up Level<br />
Enter<br />
Setting Presets<br />
1. While listening to AM/FM radio, press and hold Preset for 2 seconds.<br />
The Radio Preset screen will be displayed.<br />
2. Use Up/Down arrows to select slot to store preset. Press Enter to confirm.<br />
Preset is stored!<br />
Select Down<br />
To Select a Preset for Listening<br />
1. Press Preset once at any screen to display the Preset list.<br />
2. Use Up/Down arrows to highlight Preset. Press Enter to confirm. Preset station will begin playing!<br />
www.<strong>jbl</strong>.com<br />
7
CONTROLS (CONT.)<br />
Alarm Setting †<br />
1. Press Menu/Up Level at any screen to display Top Menu (may require repeated presses,<br />
depending on which menu state the unit was previously in).<br />
2. Use Up/Down arrows to highlight Alarm. Press Enter to confirm; or press Alarm to go directly to the Alarm menu.<br />
3. Use Up/Down arrows to select an Alarm slot to edit. Press Enter to confirm. Hour field becomes highlighted.<br />
4. Use Up/Down arrows to set Hour. Press Enter to confirm. Minute field becomes highlighted.<br />
5. Use Up/Down arrows to set Minutes. Press Enter to confirm. AM/PM field becomes highlighted.<br />
6. Use Up/Down arrows to set AM/PM. Press Enter to confirm.<br />
7. Use Up/Down arrows to set Day of Week, Weekdays, Weekends, Everyday or <strong>On</strong>e-Time. Press Enter to confirm.<br />
8. Use Up/Down arrows to set Alarm source. Press Enter to confirm. Alarm is set!<br />
Note: During alarm-setting, if there is no user input for 2 seconds, display will return to the Now Playing screen. Press any one of the<br />
Enter, Up/Down arrows, or Menu/Up Level to return to setting selection.<br />
† Use this same procedure to modify a previously set Alarm.<br />
To Enable/Disable a Set Alarm<br />
1. Press Menu/Up Level at any screen to display the Top Menu (may require repeated presses,<br />
depending on which menu state the unit was previously in).<br />
2. Use Up/Down arrows to highlight Alarm. Press Enter to confirm;<br />
or press Alarm to go directly to the Alarm menu.<br />
3. Use Up/Down arrows to highlight Alarm. Press Alarm to enable/disable the alarm.<br />
An icon will be displayed on the left when the alarm is enabled, and the alarm will sound at the set time.<br />
Alarm<br />
Menu/Up Level<br />
Power<br />
Preset<br />
Select Up<br />
Source<br />
Enter<br />
Waking to the iPod/iPhone<br />
1. Use the steps under Alarm Setting and choose “iPod” as the source.<br />
2. <strong>On</strong> your iPod/iPhone, choose the song you would like to awaken to and press Play.<br />
3. Put your iPod/iPhone to sleep by holding down the Play/Pause button (older iPod models may vary).<br />
4. The JBL <strong>On</strong> Time Micro system can be put to sleep by pressing the Power button.<br />
Select Down<br />
Note: If you choose the last song on your iPod/iPhone, please place the iPod/iPhone in repeat mode, which will ensure that the iPod/iPhone will continue playing past<br />
the last song.<br />
8<br />
JBL <strong>On</strong> Time MICRO USER GUIDE
English<br />
Screen Contrast/Brightness<br />
1. Press the Menu/Up Level button until you reach the Top Menu screen.<br />
2. Use Up/Down arrows to select Display and press Enter.<br />
3. Use Up/Down arrows to select Brightness or Contrast. Press Enter.<br />
4. Adjust settings using Up/Down arrows.<br />
Note: To set brightness to Auto, press the Down arrow until Auto is highlighted.<br />
Sleep Timer<br />
1. Press the Menu/Up Level button until you reach the Top Menu screen.<br />
2. Use Up/Down arrows to select Sleep and press Enter.<br />
3. Use Up/Down arrows to select minutes and press Enter.<br />
4. The sleep timer is started and the unit will power off when the timer reaches zero.<br />
Snooze Timer Set<br />
1. Press and hold the Snooze button for 3 seconds until you reach the Set Snooze Timer screen.<br />
2. Use Up/Down arrows to select minutes and press Enter.<br />
3. Snooze feature will use this value the next time it is activated.<br />
www.<strong>jbl</strong>.com<br />
9
Remote Navigation<br />
Button<br />
Function<br />
Turns main unit power on and off. Button is active in any menu state.<br />
Preset the hot key. A single press brings up the preset screen from any menu. Repeated presses cycle through the preset list to the next<br />
preset slot. Press and hold for 2 seconds when listening to the radio and the Now Playing screen is displayed, to store current radio station.<br />
Volume Increase. Display changes to Volume screen. Increases volume level, turns Amps on if off, then increases volume. If in snooze<br />
mode, cancels snooze mode and turns Amps on. Times out back to current menu.<br />
Volume Decrease. If in snooze mode, no action. If not in snooze mode and Amps are on, displays changes to Volume screen and decreases<br />
volume level. Times out back to current menu. Does not turn Amps on if off.<br />
Enter or Selection Confirmation button. Confirms selection on any JBL <strong>On</strong> Time Micro settings screen. If Now Playing screen is displayed,<br />
returns to last-used menu screen.<br />
Scroll Up/Tune Up. Moves highlighted box up on any JBL <strong>On</strong> Time Micro menu setting screen. Increases digit value when setting Time<br />
(hours and minutes) and Snooze Timer. In radio mode, manually increases tuning frequency; hold for Seek.<br />
Scroll Down/Tune Down. Moves highlighted box down on any menu setting screen. Decreases digit value when setting Time (hours and<br />
minutes) and Snooze Timer. In radio mode, manually decreases tuning frequency; hold for Seek.<br />
Menu or Up Level button. If Now Playing screen is displayed, takes user to top-level menu screen. If in menu settings, steps up one level to<br />
previous field or menu screen. Hold for 2 seconds to return to Now Playing screen.<br />
Alarm hot key. Takes user to Alarms settings of menu tree. Button is active in any menu state. If alarm is sounding, turns alarm off. When<br />
viewing alarms list, enables or disables selected alarm.<br />
Snooze button and Snooze Timer setting hot key. If alarm is sounding, enables snooze mode. Press and hold for 2 seconds to enter Snooze<br />
Timer setting screen.<br />
Directly switches the JBL <strong>On</strong> Time Micro source to iPod/iPhone.<br />
Sends Scroll Down command to iPod/iPhone navigation. Works in iPod/iPhone navigation only.<br />
Sends Scroll Up command to iPod/iPhone navigation. Works in iPod/iPhone navigation only.<br />
Cycles to next source. AM FM iPod/iPhone AUX.<br />
A single press starts sleep time countdown, using currently set timer. Press and hold for 2 seconds to enter Sleep Timer setting screen<br />
(similar to base unit).<br />
Next Track in iPod/iPhone navigation only. Does not affect JBL <strong>On</strong> Time Micro menu navigation or function.<br />
Previous Track in iPod/iPhone navigation only. Does not affect JBL <strong>On</strong> Time Micro menu navigation or function.<br />
Enter/Select in iPod/iPhone navigation only. Does not affect JBL <strong>On</strong> Time Micro menu navigation or function. Similar function to the center<br />
button of the iPod/iPhone.<br />
Menu/Up Level in iPod/iPhone navigation only. Does not affect JBL <strong>On</strong> Time Micro menu navigation or function. Similar function to the<br />
Menu button of the iPod/iPhone.<br />
Play/Pause/Mute button. When iPod/iPhone is the active source, a single press sends the Play/Pause command to the iPod/iPhone. When<br />
AM, FM or AUX is the active source, a single press mutes audio/amp on the JBL <strong>On</strong> Time Micro system.<br />
10<br />
JBL <strong>On</strong> Time MICRO USER GUIDE
English<br />
JBL <strong>On</strong> Time MICRO MENU TREE<br />
Now Playing<br />
(ON)<br />
Now Playing<br />
(Off)<br />
Clock Alarm<br />
Display Sleep<br />
Region<br />
Press and hold for 2 sec at<br />
any point in menu structure,<br />
to return to now Playing<br />
screen.<br />
12H<br />
HR<br />
Min<br />
A Selection command<br />
displays setting<br />
confirmation and returns<br />
state to Top Level Menu<br />
screen.<br />
AL1-AL7<br />
Select Alarm<br />
HOT KEY POINT<br />
(on remote or base unit)<br />
am/pm Enable/<br />
Adjust Adjust<br />
Hr<br />
Disable<br />
set day<br />
24H<br />
HR<br />
Min<br />
Min<br />
MO/TU/<br />
WED/TH/FR/<br />
SA/SU/WK/<br />
ED/WE<br />
AM<br />
FM<br />
iPod/<br />
iPhone<br />
Aux<br />
Tone<br />
A Selection command<br />
displays setting<br />
confirmation and returns<br />
state to Top Level Menu<br />
screen.<br />
Brightness<br />
Contrast<br />
A Selection command<br />
returns state to display<br />
menu screen.<br />
set sleep timer:<br />
15-30-60<br />
A Selection command<br />
displays setting<br />
confirmation and returns<br />
state to Top Level Menu<br />
screen.<br />
HOT KEY POINT<br />
(on remote)<br />
Set Language:<br />
English<br />
Spanish<br />
French<br />
German<br />
Italian<br />
Dutch<br />
Set Radio Type:<br />
U.S.<br />
Europe<br />
Japan<br />
A Selection command<br />
displays setting<br />
confirmation and returns<br />
state to Top Level Menu<br />
screen.<br />
www.<strong>jbl</strong>.com<br />
11
JBL <strong>On</strong> Time MICRO MENU TREE (CONT.)<br />
PRESET<br />
HOT KEY POINT<br />
(on remote or base unit)<br />
SOURCE<br />
HOT KEY POINT<br />
(on remote or base unit)<br />
SNOOZE<br />
HOT KEY POINT<br />
(hold button for 3 sec on base unit)<br />
SNOOZE<br />
Preset 1-10<br />
Select and<br />
begin<br />
playing preset<br />
station.<br />
Press and hold Preset<br />
button while listening to<br />
radio to store current<br />
station. Select slot 1-10 and<br />
press enter to store.<br />
AM<br />
FM<br />
iPod/<br />
iPhone<br />
Aux<br />
set snooze<br />
timer<br />
A Selection command<br />
displays setting<br />
confirmation and returns<br />
state to Top Level Menu<br />
screen.<br />
12<br />
JBL <strong>On</strong> Time MICRO USER GUIDE
English<br />
SPECIFICATIONS<br />
JBL <strong>On</strong> Time MICRO<br />
Frequency Response: 70Hz – 20kHz<br />
Power Consumption: 30 Watts maximum<br />
JBL <strong>On</strong> Time Micro Transducer: Phoenix SE<br />
1-3/4" (45mm) x 2 (full range per channel)<br />
Power: 2 x 6 Watts<br />
Input Impedance: >5k Ohms<br />
Signal-to-Noise Ratio: >80dB<br />
Input Sensitivity: 350mV RMS for rated power output<br />
Power (USA/Canada): 120 Volts, 60Hz AC<br />
Power (Europe/UK): 220 – 230 Volts, 50Hz or 60Hz AC<br />
Power (Japan): 100 Volts, 50Hz or 60Hz AC<br />
Power (Australia): 240 Volts, 50Hz or 60Hz AC<br />
UL/CUL/CE-Approved<br />
Dimensions: 8" x 8" x 4-9/16"<br />
(W x D x H) (203mm x 203mm x 116mm)<br />
Weight: 1.8 lb (0.8kg)<br />
IMPORTANT:<br />
Batteries for <strong>On</strong> Time Micro: Use only UM4/AAA/<br />
LR03 alkaline-type nonrechargeable, quantity 3.<br />
Battery for Remote Control: Use only CR2025,<br />
quantity 1.<br />
troubleshooting<br />
SOUND QUALITY<br />
Symptom Possible Problem Solution Note<br />
No sound from the<br />
JBL <strong>On</strong> Time Micro unit<br />
No sound or weak signal from<br />
the AM/FM radio<br />
Sound comes from one<br />
side/channel only<br />
Distortion (static, crackling or<br />
hissing sounds)<br />
Too much bass or treble<br />
JBL <strong>On</strong> Time Micro unit emits<br />
a loud hum or buzzing noise<br />
No power to the unit<br />
Incorrect source selection<br />
Bad reception from current location<br />
Interference<br />
iPod/iPhone or audio cable is not seated<br />
properly<br />
Noise may be caused by interference<br />
from a monitor, cell phone or other<br />
transmitting device<br />
JBL <strong>On</strong> Time Micro unit is being overdriven<br />
by an amplified audio source<br />
Volume level may be too high<br />
Check the EQ setting on your iPod/<br />
iPhone or source device<br />
Aux In cable (if used) is not plugged<br />
in properly<br />
Make sure the wall power outlet or power strip<br />
has power. Make sure all switches for outlet/<br />
power strip are on and that all switches for speaker<br />
system are on.<br />
Make sure the correct source is selected; choose<br />
FM radio as a source. Turn up the volume. Check<br />
the system with a known good source, such as your<br />
iPod/iPhone. Connect an Aux In cable (sold separately)<br />
to the headphone jack on your iPod/iPhone.<br />
Reposition your JBL <strong>On</strong> Time Micro unit until you<br />
find better reception.<br />
Check surrounding area for any possible<br />
interference; wrap up any excess cables.<br />
Make sure the iPod/iPhone or Aux In cable is<br />
seated all the way into the JBL <strong>On</strong> Time Micro unit.<br />
Turn monitor off to see whether noise is eliminated.<br />
Move JBL <strong>On</strong> Time Micro unit’s cables farther away<br />
from monitor.<br />
Make sure the unit is connected to an appropriate<br />
source device. Make sure all signal cables are<br />
inserted snugly into receptacles.<br />
Check volume of source device; some devices<br />
will distort the output signal if the volume is set to<br />
maximum.<br />
We recommend that the source device EQ be set<br />
to Flat or Off.<br />
Check input cable connection.<br />
Is the display on? If not,<br />
power is not getting to<br />
your JBL <strong>On</strong> Time Micro;<br />
try the solutions shown.<br />
If you are still getting a weak signal<br />
from AM broadcasts, connect the<br />
external AM antenna to the AM<br />
antenna jack.<br />
Speaker system experiences<br />
radio frequency interference<br />
or picks up a radio station<br />
Aux In cable (if used) may be picking<br />
up interference<br />
Wrap up excess input cable to make it as short<br />
as possible.<br />
Purchase a ferrite clamp and attach it over the<br />
input cable; a clamp can be purchased at your local<br />
electronics store.<br />
www.<strong>jbl</strong>.com<br />
13
troubleshooting<br />
CHARGING AND SYNCING<br />
Symptom Possible Problem Solution Note<br />
iPod/iPhone will not charge Wrong adapter is used Make sure correct adapter is used for your specific<br />
iPod/iPhone model.<br />
The iPod/iPhone is not making full<br />
contact with the docking station<br />
Make sure the iPod/iPhone is seated securely into<br />
the docking station.<br />
CLOCK SET AND CLOCK MEMORY<br />
Symptom Possible Problem Solution Note<br />
Clock is not set to correct time Incomplete setup Be sure to follow the clock setting procedure<br />
through, to the end. A confirmation screen will be<br />
displayed when set completely.<br />
JBL <strong>On</strong> Time Micro unit does<br />
not retain memory settings<br />
when there is a power outage,<br />
or if the unit is unplugged<br />
There are no batteries installed in<br />
the unit<br />
Batteries may be low<br />
Make sure you install three AAA batteries in the<br />
base of the JBL <strong>On</strong> Time Micro unit.<br />
If you have installed three AAA batteries, replace<br />
them, as they may be defective.<br />
14 JBL <strong>On</strong> Time MICRO USER GUIDE
JBL is a trademark of Harman International Industries, Incorporated, registered in the United States and/or other countries.<br />
JBL <strong>On</strong> Time is a trademark of Harman International Industries, Incorporated.<br />
iPod is a trademark of Apple Inc., registered in the U.S. and other countries. “Made for iPod” means that an electronic accessory has been designed to connect specifically to iPod<br />
and has been certified by the developer to meet Apple performance standards. “Works with iPhone” means that an electronic accessory has been designed to connect specifically<br />
to iPhone and has been certified by the developer to meet Apple performance standards. Apple is not responsible for the operation of this device or its compliance with safety and<br />
regulatory standards. iPhone is a trademark of Apple Inc.<br />
JBL est une marque commerciale de Harman International Industries, Incorporated, déposée aux États-Unis et/ou dans d’autres pays.<br />
JBL <strong>On</strong> Time est une marque commerciale de Harman International Industries, Incorporated.<br />
iPod est une marque commerciale d'Apple Inc., déposées aux États-Unis et dans d’autres pays. « Made for iPod » signifie que le dispositif électronique a été spécialement conçu<br />
pour se connecter à l’iPod et qu’il est certifié par le développeur comme conforme aux normes de performance Apple. « Works with iPhone » signifie que le dispositif électronique<br />
a été spécialement conçu pour se connecter à l’iPhone et qu’il est certifié par le développeur comme conforme aux normes de performance Apple. Apple n’est pas responsable du<br />
fonctionnement de ce dispositif ou de sa conformité avec les normes de sécurité ou réglementaires. IPhone est une marque déposée d'Apple Inc.<br />
Harman Consumer Group, Inc.<br />
8500 Balboa Boulevard, Northridge, CA 91329 USA<br />
516.255.4525 (USA only)<br />
www.<strong>jbl</strong>.com<br />
© 2009 Harman International Industries, Incorporated. All rights reserved. Tous droits réservés.<br />
Document Number: 950-0275-001 REV. A<br />
www.<strong>jbl</strong>.com


