PSC 2100 Operating Instructions - Hayward
PSC 2100 Operating Instructions - Hayward
PSC 2100 Operating Instructions - Hayward

You also want an ePaper? Increase the reach of your titles
YUMPU automatically turns print PDFs into web optimized ePapers that Google loves.
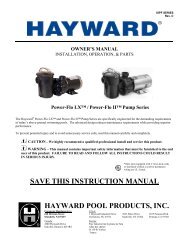
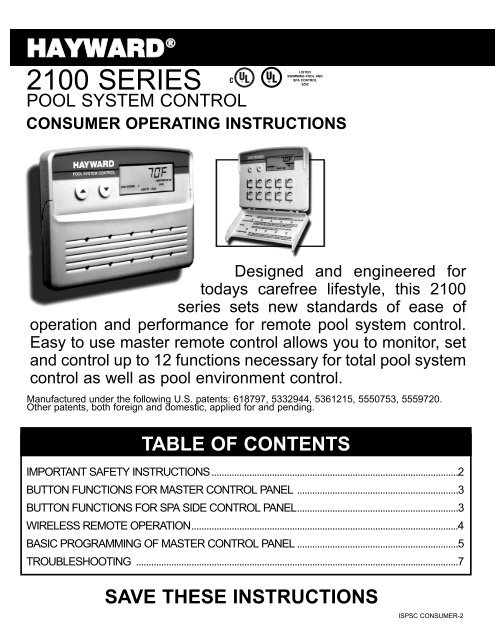
HAYWARD ®<br />
<strong>2100</strong> SERIES<br />
POOL SYSTEM CONTROL<br />
LISTED<br />
SWIMMING POOL AND<br />
SPA CONTROL<br />
3Z62<br />
CONSUMER OPERATING INSTRUCTIONS<br />
Designed and engineered for<br />
todays carefree lifestyle, this <strong>2100</strong><br />
series sets new standards of ease of<br />
operation and performance for remote pool system control.<br />
Easy to use master remote control allows you to monitor, set<br />
and control up to 12 functions necessary for total pool system<br />
control as well as pool environment control.<br />
Manufactured under the following U.S. patents: 618797, 5332944, 5361215, 5550753, 5559720.<br />
Other patents, both foreign and domestic, applied for and pending.<br />
TABLE OF CONTENTS<br />
IMPORTANT SAFETY INSTRUCTIONS..................................................................................................2<br />
BUTTON FUNCTIONS FOR MASTER CONTROL PANEL ................................................................3<br />
BUTTON FUNCTIONS FOR SPA SIDE CONTROL PANEL................................................................3<br />
WIRELESS REMOTE OPERATION..........................................................................................................4<br />
BASIC PROGRAMMING OF MASTER CONTROL PANEL ................................................................5<br />
TROUBLESHOOTING ................................................................................................................................7<br />
SAVE THESE INSTRUCTIONS<br />
IS<strong>PSC</strong> CONSUMER-2
IMPORTANT SAFETY INSTRUCTIONS<br />
WHEN USING THIS ELECTRICAL EQUIPMENT, BASIC SAFETY PRECAUTIONS SHOULD BE FOLLOWED, INCLUDING<br />
THE FOLLOWING: FAILURE TO FOLLOW INSTRUCTIONS MAY RESULT IN INJURY.<br />
READ AND FOLLOW ALL INSTRUCTIONS<br />
1. DANGER - Risk of electric shock. Do not permit any electrical appliance such as a light, telephone, radio, or<br />
television within 5 feet (1.5M) of a pool or spa.<br />
2. All electrical work must be performed by a qualified electrician and must conform to all national, state, and local codes.<br />
3. This product has not been designed to permit children to use it without supervision.<br />
4. This control system is provided with an Integral Ground-Fault Circuit Interrupter (GFCI) for the<br />
underwater lighting circuit. It is located on the right side of the control enclosure under a<br />
Weather-Tite cover. (See illustration)<br />
This GFCI must be tested before each use of the pool or spa. To test the GFCI, follow the<br />
following steps:<br />
1. Turn on the underwater pool lighting circuit.<br />
2. Press the ‘RESET’ button fully.<br />
3. Check the underwater lights to be sure they are illuminated.<br />
4. Press the ‘TEST’ button in order to trip the GFCI. The ‘RESET’ button will pop out and<br />
the underwater lights will go out.<br />
5. Press the ‘RESET’ again and the underwater lights will again be illuminated.<br />
If this GFCI fails to operate in this manner there is a ground current flowing indicating the possibility of an electric<br />
shock. Disconnect the power until the fault has been identified and corrected.<br />
5. WARNING - Risk of Accidental Drowning. Extreme caution must be exercised to prevent unauthorized access by<br />
children. To avoid accidents, ensure that children cannot use the spa or pool to which this Control System is<br />
connected unless they are closely supervised at all times.<br />
6. DANGER - To reduce the risk of drowning from hair or body entrapment, assure that the suction fittings, skimmers<br />
and main drains in the spa or pool connected to this Control System are approved for the application.<br />
7. DANGER - To reduce the risk of injury, do not remove the suction fittings or main drain covers. Never operate the<br />
spa or pool if these covers are broken or missing.<br />
8. Warning - To reduce the risk of injury:<br />
A. The water in a spa to which the Control System is connected should never exceed 104°F (40°C). Water<br />
temperatures between 100°F (38°C) and 104°F (40°C) are considered safe for a healthy adult. Lower water<br />
temperatures are recommended for young children and when spa use exceeds 10 minutes.<br />
B. Since excessive water temperatures have high potential for causing fetal damage during the early months of<br />
pregnancy, pregnant or possibly pregnant women should limit spa water temperatures to 100°F (38°C).<br />
C. Before entering a spa, the user should measure the water temperature with an accurate thermometer since<br />
the tolerance of water temperature-regulating devices vary.<br />
D. Prolonged immersion in water hotter than 104°F (40°C) may cause hyperthermia. Hyperthermia occurs when<br />
the internal body temperature reaches a level several degrees above normal body temperature of 98.6°F<br />
(37°C). The symptoms of hyperthermia include dizziness, fainting, drowsiness, lethargy, and an increase in<br />
the internal temperature of the body. The effects of hyperthermia include:<br />
1. Unawareness of impending hazard.<br />
2. Failure to perceive heat.<br />
3. Failure to recognize the need to exit the spa.<br />
E. The use of alcohol, drugs, or medication can greatly increase the risk of fatal hyperthermia.<br />
F. Leave the spa immediately if nausea, dizziness or headaches occur. Immediately cool the body by taking a<br />
cool shower or by applying cold towels or ice packs. If the symptoms persist, seek medical attention.<br />
G. The use of alcohol, drugs, or medication before or during spa use may lead to unconsciousness with the<br />
possibility of drowning.<br />
H. Obese persons and persons with a history of heart disease, low or high blood pressure, circulatory system<br />
problems, or diabetes should consult a physician before using a spa.<br />
I. Persons using medication should consult a physician before using a spa since some medication may induce<br />
drowsiness or may affect heart rate, blood pressure, and circulation.<br />
9. Occasional users of the spa should be made aware of these important Safety <strong>Instructions</strong>.<br />
10. WARNING - People with infectious diseases should not use a spa or pool.<br />
11. WARNING - To avoid injury, exercise care when entering and exiting a spa or pool.<br />
12. WARNING - Do not use a spa immediately following strenuous exercise.<br />
13. CAUTION - Maintain water chemistry to provide safe bathing environment.<br />
SAVE THESE INSTRUCTIONS<br />
2<br />
GFCI CIRCUIT<br />
BREAKER<br />
4. Physical inability to exit the spa.<br />
5. Fetal damage in pregnant women.<br />
6. Unconsciousness resulting in a danger of drowning.
BUTTON FUNCTIONS FOR MASTER CONTROL PANEL<br />
& SPA SIDE CONTROL PANEL<br />
MASTER CONTROL PANEL BASIC FUNCTION BUTTONS<br />
UP BUTTON- Used in conjunction with Program<br />
button for many automatic settings, including fill<br />
valve operation (if installed). 1-2 hour time out.<br />
DOWN BUTTON- Displays Ph and/or ORP<br />
and/or PSI with each press (if installed). Used in<br />
conjunction with Program button.<br />
PROGRAM BUTTON- Used when setting<br />
automatic features and water temperatures and<br />
fill features.<br />
FILTER BUTTON- Turns the filter pump on<br />
and off, 4 hour time out. NOTE: If the filter<br />
pump is 2-speed: the sequence is low, high,<br />
off. When the filter program is engaged, the<br />
low speed pump will run. When Aux 1 is a<br />
cleaner pump, it will automatically engage the<br />
high-speed filter pump. It will always run in<br />
high speed when calling for heat.<br />
LIGHT BUTTON- Switches the light(s) between<br />
high, medium, and low intensity on 120V<br />
systems only. Turns light(s) on/off on low<br />
voltage lighting system. 12 hour time out.<br />
SPA BUTTON- Switches the valve between spa<br />
and pool, 24 hour time out when in Spa position,<br />
turns the filter pump on in the spa position. Filter<br />
pump will turn off when valves are turning.<br />
HEATER BUTTON- Enables/Disables Heat<br />
Seek feature.<br />
NOTE: Heater Cool Down Feature -<br />
The pump will stay on after the heater turns off<br />
for a 10-minute cool down period. This safety<br />
feature also extends the life of the heater.<br />
NOTE: Heat Seek Feature (temp polling) -<br />
Once the set temp has been realized, the heater<br />
will go into sleep mode. Every hour the pump<br />
will turn on for 5 minutes to register the<br />
temperature. If it is 2 degrees below the set<br />
temp, the heater will enable. If the temp has not<br />
dropped below 2 degrees of the set temp, the<br />
system will go back into sleep mode.<br />
The Spa Aux may also be turned on from the Master Panel by pressing “SPA” followed by “AUX1” within 5 seconds.<br />
SPA SIDE CONTROL PANEL BASIC FUNCTION BUTTONS<br />
AUXILIARY 1 - 6A max<br />
A. Turns the pool feature on and off. Will not<br />
activate filter pump if dip switch #4 is down.<br />
B. Controls the cleaner pump in conjunction<br />
with the filter pump if dip switch #4 is in the<br />
up position.<br />
C. If dip switch #4 is in the up position and the<br />
filter pump is running when the Aux 1 button<br />
is pushed, the cleaner pump comes on<br />
immediately.<br />
D. If the filter pump is not running when the<br />
Aux 1 button is pushed, the cleaner pump<br />
will delay for 4 minutes before it comes on;<br />
24 hour time out.<br />
E. Auxiliary 1 disabled in spa mode if dip switch<br />
#4 is in the up position.<br />
AUXILIARY 2 -<br />
Turns the feature on and off; 12 hour time out.<br />
AUXILIARY 3 -<br />
Turns the feature on and off; 24 hour time out.<br />
Filter pump turns on with feature.<br />
(If in Spa Mode - valves switch to Pool Mode)<br />
AUXILIARY 4 -<br />
Optional Pool Light:<br />
A. Controls the optional pool lighting circuit.<br />
The 1st press turns on the light.<br />
B. The button is pressed again AFTER 5<br />
SECONDS, the light turns off.<br />
C. If the button is pressed again BEFORE 5<br />
SECONDS, the Aux 4 option will operate.<br />
D. The next press stops the Aux 4 option and<br />
the next turns the light off. 12 hour time out.<br />
On/Off Light Option:<br />
The 1st press turns the light on. The 2nd press<br />
turns the light off; 12 hour time out.<br />
AUXILIARY 5 -<br />
Turns auxiliary 5 output on the expander board<br />
on and off. 12 hour time out.<br />
AUXILIARY BUTTON - turns the spa auxiliary on and off, 2 hour time out. If blower feature is enabled,<br />
sequence is: Spa Aux, Blower, Spa Aux and Blower, Off.<br />
TEMP BUTTON - controls the set temperature of the spa.<br />
A. Press the temp button once to display the temperature previously set.This display will revert back to the current<br />
air/water temperature.<br />
B. Pressing the temp button again will cause the temperature setting to increase or decrease depending on what<br />
direction was last chosen. Each press to follow will change the temperature in the same direction.<br />
C. If the opposite direction is desired, release the button and allow display to cycle back to current air/water<br />
temperature.<br />
D. Press temp button again to display the temperature set. Press temp button again to change temperature setting<br />
in desired direction.<br />
SPA BUTTON - switches the valve between spa and pool, 24 hour time out when in the spa position, turns the<br />
filter pump on in the spa position.<br />
LIGHT BUTTON - switches the light(s) between high, medium, and low intensity on 120V systems<br />
only. Turns light ON/OFF on low voltage systems. 12 hour time out.<br />
3
WIRELESS REMOTE OPERATION<br />
RF SPA REMOTE BASIC BUTTON FUNCTIONS<br />
TEMP UP BUTTON - Increases temperature (same increments as when changing<br />
the temperature from the spa side control panel).<br />
TEMP DOWN BUTTON - Decreases temperature (same decrements as when<br />
changing the temperature from the spa side control panel).<br />
SPA BUTTON - Switches the valve between spa and pool, 24 hour timeout<br />
when in the spa position, turns the filter pump on in the spa position.<br />
JETS/BLOWER BUTTON - Turns the jets and blower on and off, 2 hour<br />
timeout. The sequence is: Jets, Blower, Jets and Blower, Off.<br />
If there is no blower; this button turns the jets on and off.<br />
LIGHTS BUTTON - Switches the light(s) between high, medium, and low<br />
intensity on 120V systems only. Turns light(s) on/off on low voltage lighting<br />
system. 12 hour timeout.<br />
AUX 2 BUTTON - Turns the feature on and off; 12 hour timeout.<br />
HEATER BUTTON - Enables the heater for heating whichever position the valves are in, whether it be<br />
pool or spa.<br />
AUX 4 BUTTON - Optional Pool Light:<br />
A. Controls the optional pool lighting circuit. The 1st press turns on the light.<br />
B. The button is pressed again AFTER 5 SECONDS, the light turns off.<br />
C. If the button is pressed again BEFORE 5 SECONDS, the Aux 4 option will operate.<br />
D. The next press stops the Aux 4 option and the next turns the light off. 12 hour timeout.<br />
On/Off Light Option:<br />
The 1st press turns the light on. The 2nd press turns the light off; 12 hour timeout.<br />
RF MASTER PANEL<br />
Refer to the Master Control Panel basic function button operation<br />
instructions in your <strong>Hayward</strong> <strong>Operating</strong> <strong>Instructions</strong> or User’s<br />
Guide.<br />
To TURN ON the remote panel, push the TEMP DOWN button.<br />
The remote panel will turn off automatically 3 minutes after the last<br />
button press.<br />
Display will flash “SIG” when the main control is not turned on,<br />
when the remote is too far away, or when there is a large metallic<br />
object between the remote and the main.<br />
Display will flash “BAT” when the battery is low.<br />
4
BASIC PROGRAMMING OF MASTER CONTROL PANEL<br />
NOTE: BE SURE TO PROGRAM MASTER CONTROL PANEL USING THIS SEQUENCE.<br />
TO PROGRAM TIME OF DAY:<br />
1. Push Program button, display will blank out with the exception of the “SET” icon.<br />
2. Push Program again and current time of day will display. At this point, time of<br />
day may be adjusted by use of the Up and Down buttons. You will see the words<br />
“SET TIME OF DAY” on the display and the hours flashing. To set the hours and<br />
AM/PM, press the Up or Down button.<br />
3. After the hours have been set, press the Program button and the minutes will flash. Press Up or Down to adjust.<br />
4. Press Program to enter your correct time into the system.<br />
NOTE: In the “Time of Day Mode,” ºCelsius or ºFahrenheit can be chosen for the temperature display. After pressing the<br />
Program button twice to enter the time of day mode, press the Heater button. “SET ºF OR ºC” will appear on the display.<br />
Change the setting with the Up or Down buttons. Press Heater button again to go back to “SET TIME OF DAY.”<br />
NOTE: Air temperature and time displayed when filter is not running.<br />
Air temperature and water temperature is displayed when filter is running.<br />
For users of <strong>Hayward</strong> Swim Pure Cartridges, please note the following: In the “Time of Day Mode,” a “HAYWARD SWIM<br />
PURE” prompting message may be enabled. After pressing the Program button twice to enter the “Time of Day Mode,”<br />
press the Filter button. “SET,” “HSP” or “OFF” will appear on the display. Change the setting with the Up or Down buttons.<br />
Press the filter button again to go back to “SET TIME OF DAY.” Once enabled, the message “HSP” will appear every<br />
6 months. Push any button to reset message.<br />
TO PROGRAM FILTER PUMP:<br />
1. Push the Program button, display will blank out with the exception of the “SET” icon.<br />
2. Push the Filter button and display will show current filter duration in hours along<br />
with the icons “SET # OF HOURS TO RUN FILTER CYCLE 1.” Duration may be<br />
adjusted with the use of the Up and Down buttons. Range is 0 to 24 hours.<br />
3. Push Program again to program time of day and to start filter cycle. Display will<br />
show “SET TIME OF DAY TO START FILTER CYCLE 1.” Filter cycle start time may be adjusted by the Up and<br />
Down buttons in 30-minute increments.<br />
4. Push Program again to enable heater during the filter cycle. Press Up or Down to select on or off.<br />
NOTE: If a solar panel is being used for pool heating purposes, <strong>Hayward</strong> suggests: A) Leaving Heat Seek off (see page 39);<br />
B) Enabling the heater during filter cycles; and C) Programming filter cycles for daytime periods which will provide the most<br />
solar energy. This will allow solar heating only when it will work best and will prevent your solar panel from potentially cooling<br />
your pool at night.<br />
5. Push Program again to enable pool feature 1 during the filter cycle. Press Up or Down to select on or off.<br />
6. Push Program again to set number of filter cycles. Display will show “SET # OF FILTER CYCLES.” Push Up or<br />
Down to select between 1 or 2 filter cycles a day.<br />
7. If two cycles are selected, they will start 12 hours apart from each other. Push Program to exit if one filter cycle is chosen.<br />
8. If two filter cycles are chosen, push Program to begin entering settings for the second filter cycle as entered for the first.<br />
TO PROGRAM LIGHTS:<br />
1. Push the Program button, display will blank out with the exception of the “SET” icon.<br />
2. Push the Light button and display will show current light operation in hours along<br />
with the icons “SET # OF HOURS TO RUN LIGHT.” Duration may be adjusted with<br />
the use of the Up and Down buttons. Range is 0 to 12 hours.<br />
3. Push Program again to program time of day and to start automatic light cycle.<br />
Display will show “SET TIME OF DAY TO START LIGHT.” Light cycle start time may be adjusted by the Up and<br />
Down buttons in 30-minute increments.<br />
4. Push Program again to program light intensity. Push Up or Down to adjust between high, medium, and low<br />
intensity. Display will show “SET LIGHT LEVEL” along with the current light level. Push Program to exit.<br />
TO PROGRAM SPA:<br />
1. Push the Program button, display will blank out with the exception of the “SET” icon.<br />
2. Push Spa button and display will show current spa operation in hours along with<br />
the icons “SET # OF HOURS TO RUN SPA.” Duration may be adjusted with the<br />
use of the Up and Down buttons. Range is 0 to 12 hours.<br />
3. Push Program again to program time of day and to start automatic spa cycle.<br />
Display will show “SET TIME OF DAY TO START SPA”. Spa cycle start time may be adjusted by the Up and Down<br />
buttons in 30-minute increments.<br />
4. Push Program again to program whether or not the heater is enabled during spa operation. Display will show<br />
“HEAT SPA” along with the word “ON” or “OFF” (“ON” means the heater is enabled during spa operation).<br />
5. Push Program again to select spill-over mode. In spill-over mode, water will be drawn from the pool into the spa.<br />
(Dip switch 3 must be in the up position for this feature.) Press Up or Down to select. Display will show “OFLO”<br />
when spill-over mode is on, and “nOFLO” when off. Push Program to exit.<br />
Note: To disable the spa-side control, push Program, then push Spa twice. Push Program to select. Push Spa to exit.<br />
5
BASIC PROGRAMMING OF MASTER CONTROL PANEL (continued)<br />
TO PROGRAM POOL AND SPA SET TEMPERATURE:<br />
1. Push Program button, display will blank out with the exception of the “SET” icon.<br />
2. Push Heater button and display will show current desired set temperature of spa.<br />
Display will show “SET TEMPERATURE OF SPA.” Set temperature may be<br />
adjusted with the Up and Down buttons. Range is 70°F - 104°F (21°C - 40°C).<br />
3. Push Program again and display will show current desired set temperature of pool. Display will show “SET<br />
TEMPERATURE OF POOL..” Set temperature may be adjusted with the Up and Down buttons.<br />
Range is 50°F - 95°F (10°C - 35°C).<br />
4. Push Program again to display heating mode. Push Up or Down to select desired heating mode.<br />
Push Program to exit. The available heating modes are: A) Gas, B) Solar, C) Gas and Solar. Solar heating is<br />
only available when an optional valve actuator is installed (see plumbing schematics).<br />
NOTE: See Note on previous page (under “to program time of day”) for instructions on selecting °Celsius or °Fahrenheit.<br />
TO PROGRAM AUXILIARY 1:<br />
1. Push the Program button, display will blank out with the exception of the “SET” icon.<br />
2. Push the Aux 1 button and display will show current Aux 1 (POOL FEATURE) operation<br />
in hours along with the icons “SET # OF HOURS TO RUN POOL FEATURE 1.” Duration<br />
may be adjusted with the use of the Up and Down buttons. Range is 0 to 24 hours.<br />
3. Push Program again to program time of day and to start automatic Aux 1 cycle.<br />
Display will show “SET TIME OF DAY TO START POOL FEATURE 1.” Aux 1 cycle start time may be adjusted by<br />
the Up and Down buttons in 30-minute increments. Push Program to exit.<br />
TO PROGRAM AUXILIARY 2:<br />
1. Push the Program button, display will blank out with the exception of the “SET” icon.<br />
2. Push the Aux 2 button and display will show current Aux 2 operation in hours<br />
along with the icons “SET # OF HOURS TO RUN POOL FEATURE 2.” Duration<br />
may be adjusted with the use of the Up and Down buttons. Range is 0 to 12 hours.<br />
3. Push Program again to program time of day and to start automatic Aux 2 cycle. Display will show “SET TIME OF<br />
DAY TO START POOL FEATURE 2.” Aux 2 cycle start time may be adjusted by the Up and Down buttons in 30-<br />
minute increments. Push Program to exit.<br />
TO PROGRAM AUXILIARY 3<br />
1. Push the Program button, display will blank out with the exception of the “SET” icon.<br />
2. Push Aux 3 button and display will show current Aux 3 (POOL FEATURE) operation in<br />
hours along with the icons “SET # OF HOURS TO RUN POOL FEATURE 3.” Duration<br />
may be adjusted with the use of the Up and Down buttons. Range is 0 to 12 hours.<br />
3. Push Program again to program time of day and to start automatic Aux 3 cycle.<br />
Display will show “SET TIME OF DAY TO START POOL FEATURE 3.” Aux 3 cycle start time may be adjusted by<br />
the Up and Down buttons in 30-minute increments. Push Program to exit.<br />
TO PROGRAM AUXILIARY 4<br />
1. Push Program button, display will blank out with the exception of the “SET” icon.<br />
2. Push Aux 4 button and display will show current Aux 4 operation in hours along<br />
with the icons “SET # OF HOURS TO RUN POOL FEATURE 4.” Duration may be<br />
adjusted with the use of the Up and Down buttons. Range is 0 to 12 hours. Push<br />
Program again to program time of day and to start automatic Aux 4 cycle. Display<br />
will show “SET TIME OF DAY TO START POOL FEATURE 4.” Aux 4 cycle start time may be adjusted by the Up<br />
and Down buttons in 30-minute increments. Push Program to choose the F.O. Light or the On/Off Light option.<br />
Display will show either “Fo” or “Lt.” Choose mode by pressing Up or Down. Push Program to exit. Aux 4 option<br />
will not operate during programmed times.<br />
3. To choose between On/Off Light and the F.O. (fiber-optic) feature for Aux 4, push the program button once,<br />
followed by Aux 4. Press Program two more times after that. With the Up and Down arrows, you can toggle<br />
between “FO” and “LT.” Press Program to set and exit. “FO” allows you to access: light, light option on, light<br />
option off, light off. “Lt” allows you to turn the underwater light on and off.<br />
TO PROGRAM AUXILIARY 5<br />
1. Push the Program button, display will blank out with the exception of the “SET” icon.<br />
2. Push the Aux 5 button and display will show current Aux 5 (Aux 5 on expander<br />
board) operation in hours along with the icons “SET # OF HOURS TO RUN<br />
POOL FEATURE 5.” Duration may be adjusted with the use of the Up and Down<br />
buttons. Range is 0 to 24 hours.<br />
3. Push Program again to program time of day and to start automatic Aux 5 cycle. Display will show “SET TIME OF<br />
DAY TO START POOL FEATURE 5.” Aux 5 cycle start time may be adjusted by the Up and Down buttons in 30-<br />
minute increments. Push Program to exit.<br />
6
BASIC PROGRAMMING OF MASTER CONTROL PANEL (continued)<br />
TO PROGRAM OPTIONAL FILL VALVE<br />
1. Push the Program button and then the up button and display will show “SET #<br />
OF HOURS TO FILL (1 OR 2 HRS).” Number of hours to fill pool may be<br />
adjusted between 1 and 2 hours by pushing the Up button.<br />
2. To start filling the pool, push the Down button. This will turn on the fill valve.<br />
Display will show the “FILL” icon.<br />
3. When the pool is filling, pushing the Up button will turn the fill valve off.<br />
TO PROGRAM KEYPAD LOCK FEATURE<br />
1. Push Program, then push Spa twice. The display will show ON or OFF, push Program to select. ON means<br />
all keypads will function. OFF means all keypads on all panels and remotes will be locked except for the<br />
service panel.<br />
2. Press Spa to exit.<br />
3. To unlock, press Program.<br />
TROUBLESHOOTING<br />
THE FOLLOWING MESSAGES MAY APPEAR ON THE LCD SCREEN OF THE MASTER CONTROL PANEL:<br />
WARNING: THE SYSTEM IS NOT MEANT TO BE SERVICED BY THE CONSUMER.<br />
RISK OF ELECTRIC SHOCK EXISTS INSIDE THE MASTER CONTROL PANEL. CONTACT YOUR LOCAL SERVICE<br />
PERSON FOR APPROPRIATE ACTION.<br />
LCD<br />
MESSAGE<br />
OH<br />
SN1<br />
SN2<br />
ICE<br />
hot<br />
PROBLEM<br />
WATER TEMPERATURE<br />
HIGH LIMIT<br />
WATER TEMPERATURE<br />
SENSOR FAILURE<br />
AIR TEMPERATURE<br />
SENSOR FAILURE<br />
FREEZE PROTECTION<br />
ACTIVATED<br />
WATER TEMPERATURE<br />
GREAT THAN 110°<br />
RECOMMENDED ACTION<br />
This is displayed when the water in the pool/spa system reaches<br />
112 degrees. SYSTEM WILL RESET ITSELF ONCE THE WATER<br />
TEMPERATURE REACHES 110 DEGREES. IF PROBLEM PERSISTS,<br />
CONTACT YOUR SERVICE PERSON FOR APPROPRIATE ACTION.<br />
CONTACT SERVICE PERSON FOR REVIEW AND POSSIBLE SENSOR<br />
REPLACEMENT IF SENSOR IS FOUND TO BE DEFECTIVE.<br />
CONTACT SERVICE PERSON FOR REVIEW AND POSSIBLE SENSOR<br />
REPLACEMENT IF SENSOR IS FOUND TO BE DEFECTIVE.<br />
NO ACTION REQUIRED. Safety feature built into system to avoid damage to<br />
equipment. Activated when water temperature reaches 35 degrees. Pump will<br />
run for 1/2 hour intervals while temperature is at or below 35 degrees. This<br />
feature is only active when valves are in the pool mode.<br />
OH<br />
NO ACTION REQUIRED. OH message will appear if the water in the pipes does<br />
not cool to below 110° within 5 minutes.<br />
<strong>Hayward</strong> Corporate Headquarters<br />
<strong>Hayward</strong> Pool Products, Inc.<br />
900 Fairmount Avenue<br />
Elizabeth, NJ 07207, USA<br />
Tel: 908 351 5400<br />
Fax: 908 351 5675<br />
<strong>Hayward</strong> Pool Products, Inc.<br />
2875 Pomona Boulevard<br />
Pomona, CA 91768, USA<br />
Tel: 909 594 1600<br />
Fax: 909 598 6905<br />
<strong>Hayward</strong> Pool Products Worldwide Locations<br />
<strong>Hayward</strong> Pool Products Canada, Inc.<br />
2880 Plymouth Drive<br />
Oakville, Ontario, CANADA, L6H 5R4<br />
TEL: 905 829 2880<br />
FAX: 905 829 3636<br />
<strong>Hayward</strong> Pool Europe:<br />
ZA de l’Observatoire<br />
2, Avenue des Chaumes<br />
78182 St. Quentin en Yvelines Cedex,<br />
FRANCE<br />
TEL: 33 1 39 30 91 00<br />
FAX: 33 1 39 30 91 89<br />
7<br />
<strong>Hayward</strong> Iberica S.A.<br />
Carretera Nacional III, KM 333, 7 Nave 2<br />
E-46930 Quart De Poblet, Valencia,<br />
SPAIN<br />
TEL: 34 6 152 3454<br />
FAX: 34 6 152 3357<br />
<strong>Hayward</strong>/IMG<br />
International Marketing Group<br />
801 Corporate Center Drive, Suite 110<br />
Pomona, CA 91768, USA<br />
Tel: 909 620 4041<br />
Fax: 909 620 1249<br />
For further information or consumer technical support, please call 866-772-<strong>2100</strong><br />
or visit our web site at www.haywardnet.com