H4CL-T - Lubi Electronics
H4CL-T - Lubi Electronics
H4CL-T - Lubi Electronics

You also want an ePaper? Increase the reach of your titles
YUMPU automatically turns print PDFs into web optimized ePapers that Google loves.
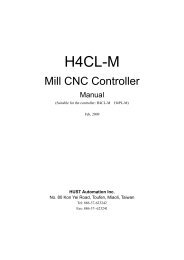
<strong>H4CL</strong>-T<br />
Lathe CNC Controller<br />
Manual<br />
Model: <strong>H4CL</strong>-TH4PL-T<br />
Version: Nov, 2008
Table of Contents<br />
TABLE OF CONTENTS<br />
1 Main Features of CNC Lathe Controller 1-1<br />
2 Operation 2-1<br />
2.1 Basic Operation 2-1<br />
Startup Screen 2-1<br />
Graph Mode Screen 2-2<br />
MPG – TEST Screen 2-3<br />
Auto Mode Screen 2-4<br />
MDI Mode Screen 2-5<br />
Home Mode Screen 2-5<br />
Jog Mode Screen 2-6<br />
Edit Mode display 2-7<br />
Program Selection Screen 2-8<br />
I/O Mode Screen 2-10<br />
Tool Compensation Screen 2-12<br />
Alarm Description Screen 2-15<br />
Software Version Screen 2-15<br />
System Parameter Screen 2-16<br />
Work Origin Setting Screen 2-17<br />
2.2 Program Editing 2-19<br />
2.2.1 Programming Overview 2-19<br />
2.2.1.1 Part Programs 2-19<br />
2.2.1.2 Programming Methods 2-19<br />
2.2.1.3 Program Composition 2-21<br />
2.2.1.4 Coordinate System 2-23<br />
Coordinate Axis 2-23<br />
Coordinate Positioning Control 2-24<br />
Work Origin 2-26<br />
Machine Origin 2-27<br />
2.2.1.5 Numerical Control Range 2-29<br />
2.2.2 Program Editing 2-30<br />
2.2.2.1 Creating a New Program 2-30<br />
2.2.2.2 Editing a Program 2-32<br />
I
HUST CNC-<strong>H4CL</strong>-T Manual<br />
2.2.2.3 Entering Decimal Fractions 2-36<br />
2.2.2.4 Editing Notes 2-36<br />
3 G/M Codes 3-1<br />
3.1 Command codes 3-1<br />
3.2 Rapid Positioning, G00 3-4<br />
3.3 Linear Cutting, G01 3-5<br />
3.4 G02, G03 Arc Cutting 3-7<br />
3.5 Dwell Command, G04 3-11<br />
3.6 Return to the First Reference Point, G28 3-11<br />
3.7 Return to Previous Position from Reference Point, G29 3-12<br />
3.8 Tool Moves to the 2nd Reference Point, G30 3-12<br />
3.9 Skip Function, G31 3-13<br />
3.10 Thread Cutting, G32 3-14<br />
3.11 Tap Cutting Canned Cycle, G33 3-18<br />
3.12 Canned Cycle Functions (For implication of programming) 3-19<br />
3.12.1 Single Cutting Canned Cycle, G90, G92, G94 3-19<br />
3.12.2 Compound Canned Cycle Functions, G70~G76 3-24<br />
3.13 Max. Spindle Speed Setting, G50 3-40<br />
3.14 Constant Surface Cutting Speed Setting, G96 3-40<br />
3.15 Constant Rotation Speed Setting<br />
(Constant Surface Cutting Speed Cancellation), G97 3-41<br />
3.16 Feed-rate Setting, G98, G99 3-41<br />
3.17 Inch/Metric Measurement Mode, G20, G21 3-41<br />
3.18 Auxiliary Functions, M-code, S-code 3-41<br />
3.19 Subprograms 3-42<br />
3.20 G40, G41, G42 Tool Radius Compensation 3-44<br />
3.20.1 Total Offset Compensation Setting and Cancellation 3-44<br />
3.20.2 Tool-tip Radius and the Direction of Fictitious Tool-tip 3-46<br />
3.20.3 Tool-tip Radius Compensation, G41 ,G42 ,G40 3-47<br />
3.20.4 Notes on Tool Radius Compensation 3-50<br />
II
Table of Contents<br />
4 MCM Parameters 4-1<br />
4.1 MCM Parameters 4-1<br />
4.1.1 Basic Parameters 4-1<br />
4.1.2 MCM Parameters 4-2<br />
4.2 Description of Parameters 4-5<br />
5 Connections 5-1<br />
5.1 System Connection Descriptions 5-1<br />
5.2 System Installation 5-2<br />
5.2.1 Operating Environment 5-2<br />
5.2.2 Notes on the Control Unit Case Design 5-2<br />
5.2.3 Thermal Case Design 5-3<br />
5.2.4 <strong>H4CL</strong>-T External Dimensions 5-4<br />
<strong>H4CL</strong>-T Panel 5-4<br />
<strong>H4CL</strong>-T CPU Main Board Connectors (Rear View) 5-5<br />
<strong>H4CL</strong>-T Series Case Dimensions (Rear view) 5-5<br />
<strong>H4CL</strong>-T Series Case Dimensions (Top View) 5-6<br />
<strong>H4CL</strong>-T Series MDI Panel Dimensions 5-6<br />
<strong>H4CL</strong>-T Series Cutout Dimensions 5-7<br />
<strong>H4CL</strong>-T Series MDI Panel Cutout Dimensions 5-7<br />
5.3 Input/Output Interface Connection (I/O) 5-8<br />
5.3.1 Input Board / Output Board (Terminal Block Type) 5-8<br />
NPN Type Standard Input Board (I bit)-24 IN 5-8<br />
NPN Type Standard Output Board (O bit)-16 OUT 5-8<br />
5.3.2 Input Board/Output Board- CE Standard 5-9<br />
Input Board 5-9<br />
Output Board 5-10<br />
5.3.3 I/O Connector Pin Assignment 5-13<br />
5.3.4 Input Signals 5-14<br />
Input Signal Specification<br />
(direct input to the control unit) 5-14<br />
Input Signal Connection Diagram 5-15<br />
5.3.5 Output Signals 5-15<br />
Output Signal Specification 5-15<br />
Output Signal Connection 5-15<br />
Output Signal Connection 5-16<br />
III
HUST CNC-<strong>H4CL</strong>-T Manual<br />
5.4 Connection Diagram 5-17<br />
5.4.1 Connector Type 5-17<br />
5.4.2 Connector Designation 5-17<br />
5.4.3 <strong>H4CL</strong>-T Connection (Y-shaped terminal) 5-18<br />
<strong>H4CL</strong>-T Main Connection Diagram 5-18<br />
Emergency-Stop Line-1 5-19<br />
Emergency-Stop Line-2 5-20<br />
<strong>H4CL</strong>-T Spindle Connection 5-21<br />
5.4.4 <strong>H4CL</strong>-T Connection (CE Standard) 5-22<br />
<strong>H4CL</strong>-T Main Connection Diagram 5-20<br />
Emergency-Stop Line-1 5-23<br />
Emergency-Stop Line-2 5-24<br />
Servo Motor Connection Diagram<br />
(The MITSUBISHI J2S motor is used as an example.) 5-25<br />
5.4.5 <strong>H4CL</strong>-T Auxiliary Panel + SIO Wring and Explanation 5-26<br />
Expansion Output Board size 5-27<br />
Expansion Input Board size 5-27<br />
5.4.6 Connection Method for Servo Driver & Pulse Generator 5-28<br />
5.4.7 System AC Power Connection 5-31<br />
5.4.8 MPG Connection 5-31<br />
5.4.9 RS232 Connector Pin Assignment and Connection 5-32<br />
5.4.10 D/A Explanation and Wiring (For Spindle) 5-33<br />
D/A Explanation 5-33<br />
D/A Wiring 5-33<br />
6 Error Messages 6-1<br />
7 Attachment 7-1<br />
Input Planning 7-1<br />
Output Planning 7-3<br />
Output Planning (Servo spindle mode) 7-3<br />
M-code and I/O 7-4<br />
G71~G76 Compound Canned Cycle Parameters 7-5<br />
PLC Parameters 7-6<br />
IV
Table of Contents<br />
8 Attachment B-ZDNC Operating Instructions 8-1<br />
Getting Started 8-1<br />
Open the Option Setting Screen 8-1<br />
Display Settings 8-2<br />
PC TO CNC 8-3<br />
CNC TO PC 8-4<br />
Attention 8-4<br />
V
HUST CNC-<strong>H4CL</strong>-T Manual<br />
VI
Chapter I Main-Features of HUST Lathe CNC Controller<br />
1<br />
<br />
Main-Features of HUST Lathe CNC Controller<br />
Controlled Axes: X, Z and Spindle Encoder Feedback<br />
Program Designed by CAD/CAM on PC. Program input from PC through<br />
RS232C interface.<br />
Memory Capacity for CNC main board - 512k.<br />
<br />
<br />
<br />
<br />
<br />
<br />
<br />
<br />
<br />
<br />
Battery Backup for CNC program storage in case of power-off.<br />
Backlash error compensation for worn lead screw.<br />
Provide 40 sets of tool-length offsets.<br />
Self-designed MACRO Program.<br />
Tool feed rate can be a millimeter per minute or a millimeter each turn.<br />
Single block and continuous commands.<br />
Optional Skip functions.<br />
Optional Stop and Feed hold functions.<br />
Simultaneous use of absolute and incremental programmable coordinates.<br />
Self-diagnostic and error signaling function.<br />
Direct use of “ R”, “ I” and “ J” incremental values for radius in circular<br />
cutting.<br />
<br />
<br />
MPG hand-wheel test and collision free function for cutting products at the<br />
speed controller by MPG.<br />
Equipped with 24 standard programmable inputs and 16 outputs.<br />
This operator’s manual includes basic operation, program editing, G/M code,<br />
parameter settings, connections and maintenance (plus warning descriptions)<br />
with examples and explanations for each command.<br />
If there are any problems with the application, please fill out a problem sheet<br />
indicating the nature of the problem. Send it by either fax or mail. We will<br />
respond as soon as possible.<br />
1 - 1
HUST CNC-<strong>H4CL</strong>-T Manual<br />
1 - 2
Chapter II Operation<br />
2 Operation<br />
2.1 Basic Operation<br />
Screen Description<br />
* Startup Screen<br />
After powering the controller, the following startup screen displays:<br />
Fig. 2-1<br />
After 3 seconds, the next screen displays according to the “Mode Selection”<br />
setting.<br />
When turning the “PRON” knob from left to right, the following modes are<br />
displayed in order:<br />
“Graph” “MPG - Test” “Auto” “MDI” “Edit” <br />
“Program Selection” “Computer Transmission” “Teaching” “Manual x 1”<br />
“Manual x 10” “Manual x 100”<br />
“Computer Transmission” and “Teaching” modes are not used. Perform<br />
transmission using a PC.<br />
2 - 1
HUSTCNC-<strong>H4CL</strong>-T Manual<br />
* Graph Mode Screen<br />
The following screen displays when the “Mode Selection” knob is set to “Graph”:<br />
PRNO<br />
EDIT<br />
MDI<br />
AUTO<br />
MPG-TEST<br />
GRAPH<br />
DNC<br />
TEACH<br />
JOG×1<br />
JOG×10<br />
JOG×100<br />
HOME<br />
Mode<br />
Fig. 2-2<br />
The “+” in the center of the screen indicates the zero position. It can be<br />
moved with the Cursor key, or via the characters on the top right corner of the<br />
screen.<br />
The number 256 at the top left corner of the screen represents the current<br />
horizontal ratio of the graph.<br />
To clear the image, press the "Clear" key.<br />
There are two graph methods: “Graphing While Moving”, “Quick Graphing”<br />
Switching method: Press the “Quick” in the graph mode before the program<br />
starts.<br />
(Press ON and OFF)<br />
HotKey Indicator ON “Quick Graphing”<br />
HotKey Indicator OFF “Graphing While Moving”<br />
“Graphing While Moving”: The positioning command of the servo axes and M, T,<br />
S codes are performed (the same as auto mode).<br />
“Quick Graphing”:<br />
The servo axes are locked but the M, T, and S codes are<br />
performed.<br />
The description of the soft keys “Block Execution”, “Restart”, and “Optional Stop”<br />
is the same as that in auto mode.<br />
2 - 2
Chapter II Operation<br />
* MPG – TEST Screen<br />
The following screen displays when the “Mode Selection” knob is set to “MPG –<br />
TEST”:<br />
PRNO<br />
EDIT<br />
MDI<br />
AUTO<br />
MPG-TEST<br />
GRAPH<br />
DNC<br />
TEACH<br />
JOG×1<br />
JOG×10<br />
JOG×100<br />
HOME<br />
Mode<br />
Fig. 2-3<br />
After this mode is selected, the movement of all axes in the program is<br />
controlled by the MPG when the program is running. The axis will stop moving<br />
when the MPG has no input.<br />
In this mode, the program process will proceed in order when the program is<br />
running, regardless of the direction of the hand-wheel. The program process will<br />
not return when the hand-wheel is rotated anti-clockwise.<br />
The description of the soft keys “Block Execution”, “Restart”, and “Optional Stop”<br />
is the same as in auto mode.<br />
The "HW Multiplication Factor" soft key is for speed adjustment of axial<br />
movement after entering the hand-wheel signal.<br />
2 - 3
HUSTCNC-<strong>H4CL</strong>-T Manual<br />
* Auto Mode Screen<br />
The following screen displays when the “Mode Selection” knob is set to “Auto”:<br />
PRNO<br />
EDIT<br />
MDI<br />
AUTO<br />
MPG-TEST<br />
GRAPH<br />
DNC<br />
TEACH<br />
JOG×1<br />
JOG×10<br />
JOG×100<br />
HOME<br />
Mode<br />
Fig. 2-4<br />
The “soft keys” in auto mode are:<br />
1. Single Step Execution: This function can be selected at any time<br />
regardless of whether the program is running or not.<br />
Whenever the "Start" key is pressed with this function selected, the next<br />
command line is executed instead of the entire program.<br />
2. Restart: This function needs to be selected before the program runs.<br />
When the restart program is selected, operation continues from the<br />
previously stopped block. You can search for the stopped block or reset on<br />
the edit screen to restart the block.<br />
3. Optional Stop: This function needs to be selected before the program runs.<br />
When the optional stop is selected, the M01 command in the program is<br />
considered a stop command. M01 has no function if this option is not<br />
selected.<br />
Part Numbers: The part number increments by 1 when the program runs to<br />
M15 and resets to zero when the program runs to M16. Press the "0" key<br />
twice to reset.<br />
O13 outputs when the part number reaches the machining count limit (a<br />
system parameter).<br />
Part Time: The current running time (sec.) is displayed. The timer is<br />
automatically reset when the controller is restarted after the program runs<br />
to completion.<br />
2 - 4
Chapter II Operation<br />
* MDI Mode Screen<br />
The following screen displays when the “Mode Selection” knob is in “MDI”:<br />
PRNO<br />
EDIT<br />
MDI<br />
AUTO<br />
MPG-TEST<br />
GRAPH<br />
DNC<br />
TEACH<br />
JOG×1<br />
JOG×10<br />
JOG×100<br />
HOME<br />
Mode<br />
Fig. 2-5<br />
Enter the block command and press the “Start” key in this mode to execute<br />
the block command.<br />
* HOME Mode Screen<br />
The following screen displays when the “Mode Selection” knob is set to “Home”:<br />
PRNO<br />
EDIT<br />
MDI<br />
AUTO<br />
MPG-TEST<br />
GRAPH<br />
DNC<br />
TEACH<br />
JOG×1<br />
JOG×10<br />
JOG×100<br />
HOME<br />
Mode<br />
Fig. 2-6<br />
Methods for returning to the origin:<br />
1. The letter X or Z on the screen is highlighted when an axis is selected using<br />
the “Axis Selection” knob.<br />
2. PressJOG+,JOG-, or the start key to execute homing on respective<br />
axes.<br />
2 - 5
HUSTCNC-<strong>H4CL</strong>-T Manual<br />
* Jog Mode Screen<br />
The following screen displays when the “Mode Selection” knob is set to “Manual<br />
x 1”, “Manual x 10”, or “Manual x 100”:<br />
PRNO<br />
EDIT<br />
MDI<br />
AUTO<br />
MPG-TEST<br />
GRAPH<br />
DNC<br />
TEACH<br />
JOG×1<br />
JOG×10<br />
JOG×100<br />
HOME<br />
Mode<br />
Fig. 2-7<br />
The jog mode provides the following functions:<br />
1. Axis positioning:(Three methods)<br />
a. Hand wheel:<br />
Use the “Axis Selection” knob to select an axis (the selected axis is<br />
highlighted.) Rotate the hand wheel.<br />
b. Continuous movement:<br />
After an axis is selected using the “Axis Selection” knob, continuously<br />
press the “JOG +” or “JOG -” to move the corresponding axis in a<br />
positive or negative direction. The axis moves at the highest speed<br />
when the “High Speed” key is pressed.<br />
(The movement speed of the axis is set from the Parameter page when<br />
the “High Speed” key is not pressed.)<br />
2. Manual Switch:<br />
a. Spindle: CW, CCW, stop.<br />
b. Coolant: Press the key to turn on and press it again to turn off.<br />
c. Lubricant: Press the key to provide lubricant after a 1 second delay.<br />
An LED indicates operation.<br />
2 - 6
Chapter II Operation<br />
* Edit Mode display<br />
The following screen displays when the “Mode Selection” knob is in “Edit”:<br />
PRNO<br />
EDIT<br />
MDI<br />
AUTO<br />
MPG-TEST<br />
GRAPH<br />
DNC<br />
TEACH<br />
JOG×1<br />
JOG×10<br />
JOG×100<br />
HOME<br />
Mode<br />
Fig. 2-8<br />
The program can be edited in this mode.<br />
a. Set to Restart: Use the key to move to the block to be restarted<br />
and press “Set to Restart” once. Press “Restart” during auto<br />
mode and “Start” while in edit mode. The pre-configured<br />
program block executes.<br />
b. Block Interruption: If the program is interrupted during machining, press the<br />
“Block Interruption” soft key in edit mode to search for the<br />
stopped block.<br />
Refer to the Program Editing section for more information about<br />
editing programs.<br />
2 - 7
HUSTCNC-<strong>H4CL</strong>-T Manual<br />
* Program Selection Screen<br />
The following screen displays when the “Mode Selection” knob is set to “PRON”:<br />
PRNO<br />
EDIT<br />
MDI<br />
AUTO<br />
MPG-TEST<br />
GRAPH<br />
DNC<br />
TEACH<br />
JOG×1<br />
JOG×10<br />
JOG×100<br />
HOME<br />
Mode<br />
Fig. 2-9<br />
Programmable line numbers range: 0 ~ 699. The controller system uses<br />
numbers after 700.<br />
You can enter program comments in this mode up to 12 characters.<br />
Example: To add the comment “ TYPE-201” to O001:<br />
1. Move the cursor to O001<br />
2. Press T Y P E 2 0 1 .<br />
3. Press .<br />
Enter<br />
Program selection methods:<br />
1. Select a program:<br />
a. Use the “Cursor ” key or “Page ” key to move the<br />
arrow to the desired program number.<br />
b. Press the “Select” or “Enter” key.<br />
2. Program comments:<br />
a. Use the “Cursor ” key or “Page ” key to move the<br />
arrow to the program number for which program comments are entered.<br />
b. Enter the desired comment using letters or numbers.<br />
2 - 8
Chapter II Operation<br />
c. Press the enter key.<br />
3. Delete a program:<br />
a. Use the “Cursor ” key or “Page ” key to move the arrow<br />
to the program number to be deleted.<br />
b. When you press the “Delete” key, a dialogue prompts for confirmation.<br />
Press the “YES” or “Y” soft key to delete the program.<br />
Press the “NO” or “N” soft key to cancel the operation.<br />
4. Copy a program:<br />
a. Press the “Copy” key to display the following screen:<br />
Fig. 2-10<br />
b. Use the “Cursor ” key or “Page ” key to move the arrow to<br />
the source program number.<br />
c. Press the “Source” key<br />
d. Use the “Cursor ” key or “Page ” key to move the arrow to<br />
the object (target) program number.<br />
e. Press the “Object” key<br />
f. When the source and target program numbers are confirmed, press the<br />
“Execution” key to begin copying.<br />
2 - 9
HUSTCNC-<strong>H4CL</strong>-T Manual<br />
* I/O (Input/Output) Mode Screen<br />
Press “I/O/MCM” once to enter I/O mode. The following screen displays:<br />
Fig. 2-11 “Input” Status of the Controller<br />
Press the “Output” soft key to display the following output status screen:<br />
Fig. 2-12 Controller “Output” Status<br />
Press the “Input” soft key to display the input status screen:<br />
2 - 10
Chapter II Operation<br />
Press the “MDI Panel” soft key to display the following MDI panel status screen :<br />
Fig. 2-13 “Input” and “Output” Status of the Controller<br />
.<br />
Fig. 2-13-1 Press the "Output" key on the auxiliary panel to check the output<br />
status (key type).<br />
The corresponding screen does not display when this page displays and the<br />
work mode knob is turned. This function is used to check the work mode knob is<br />
correct.<br />
Press the “Input” soft key to display the input status screen.<br />
Press the “Output” soft key to display the output status screen.<br />
2 - 11
HUSTCNC-<strong>H4CL</strong>-T Manual<br />
* Tool Compensation Screen<br />
Click the “T.Radius / T.Offset” once to enter tool compensation mode. The<br />
following screen displays:<br />
Fig. 2-14<br />
In this mode, it is possible to switch between three screens. Press the “soft key”<br />
to cycle between tool-wear compensation, tool-length compensation, and<br />
parameter screens.<br />
The tool length compensation screen is shown as follows:<br />
Fig. 2-15<br />
There are 40 groups respectively for tool-wear compensation and tool-length<br />
compensation.<br />
Note: Switching between pages is possible when the “Page” cursor icon<br />
is flashing.<br />
Follow the steps below to configure the parameters for tool-wear compensation<br />
2 - 12
Chapter II Operation<br />
and tool-length compensation:<br />
a. Use the “Cursor ” key to move the cursor to the parameter to be<br />
changed.<br />
b. 1. Enter numbers. (Absolute coordinates setting<br />
2. The parameter that is set corresponds to the X-axis and has a<br />
preamble U.<br />
(Incremental coordinates setting<br />
The parameter set corresponds to the Z-axis and has a preamble<br />
W.<br />
c. Press the Enter key.<br />
Revise values for tool compensation when the program is running:<br />
a. Only incremental coordinates can be set.<br />
b. The system parameter Maximum U/W Value during Execution<br />
should be set. (Default=0.000.)<br />
2 - 13
HUSTCNC-<strong>H4CL</strong>-T Manual<br />
2. Parameter Screen:<br />
The parameter screen displays as Fig. 2-16. Press<br />
between pages.<br />
to switch<br />
<br />
Fig. 2-16<br />
Fig. 2-17<br />
2 - 14
Chapter II Operation<br />
* Alarm Description Screen<br />
When the alarm is triggered, the system automatically displays a description of<br />
the cause. Press the “Alarm Description” soft key on the second page of the<br />
parameter screen to display the following alarm description screen:<br />
Fig. 2-18<br />
* Software Version Screen<br />
Press the “Software Version” soft key on the second page of the parameter<br />
screen to display the version screen:<br />
Find out the actual<br />
distance of the grid<br />
point by performing<br />
homing. (Reference<br />
value)<br />
Fig. 2-19<br />
The system time (year, month, and date) displays.<br />
PLC time (year, month, and date)<br />
Example: 2005 1205<br />
2006 428<br />
The time 2005 1205 stands for December 5 th , 2005.<br />
The time 2006 428 stands for April 28 th , 2006.<br />
2 - 15
HUSTCNC-<strong>H4CL</strong>-T Manual<br />
* System Parameter Screen<br />
Press the “System Parameter” soft key on the second page of the parameter<br />
screen to display the system parameter page.<br />
The advanced parameters are protected by a password the default is<br />
0 (password protection is optional)<br />
If the advanced parameters password is not “0” then Fig. 2-20 displays.<br />
If the advanced parameters password is corrected then Fig. 2-21<br />
displays.<br />
After pressing the “Password Change” key on the system parameter<br />
page. Enter the current password and the replacement password as<br />
shown in Fig. 2-22.<br />
Fig. 2-20<br />
Fig. 2-21<br />
2 - 16
Chapter II Operation<br />
Fig. 2-22<br />
* Work Origin Setting Screen<br />
Press the “Work Origin Setting” key to enter the work origin setting screen.<br />
Prerequisite:<br />
The work origin setting screen only displays after homing.<br />
The following work origin setting screen (1) displays:<br />
Fig. 2-23<br />
Work origin setting procedure: “Work-piece Cutting and Saving” and “Work-piece<br />
Measurements and Dimensions Input”<br />
1. Work-piece Cutting and Saving<br />
a. Clamp the work-piece for testing (using the foot switch or key switch on<br />
the external chuck)<br />
b. Save the X-axis position<br />
Select an axis for outer diameter cutting with the hand-wheel. Press the<br />
“Save the X-axis” key before the X-axis of the tool moves out of the<br />
cutting coordinate. The X-axis position of the machine coordinates is<br />
2 - 17
HUSTCNC-<strong>H4CL</strong>-T Manual<br />
saved.<br />
c. Save the Z-axis position<br />
Select an axis for outer diameter cutting with the hand-wheel. Press the<br />
“Save the Z-axis” key before the Z-axis of the tool moves out of the<br />
cutting coordinate. The Z-axis position of the machine coordinates is<br />
saved.<br />
Press the “Next Page” soft key to enter the work origin setting (2) screen<br />
2. Work-piece Measurement and Dimension Input<br />
The following work origin setting screen (2) displays:<br />
Parameter<br />
Field<br />
Fig. 2-24<br />
a. Work-piece Measurement<br />
Remove the tool and the work-piece to measure its dimensions.<br />
b. Enter the group and dimensions<br />
Use “Cursor ” to move to group, X-axis diameter, and Z-axis length to<br />
be set. After entering the desired value, press the “Enter” key.<br />
c. Write the Parameter<br />
Press the “Write” key have the controller write the given parameter<br />
field for tool length compensation and display immediately. See Fig.<br />
2-24.<br />
2 - 18
Chapter II Operation<br />
2.2 Program Editing<br />
2.2.1 Programming Overview<br />
2.2.1.1. Part Programs<br />
Prior to part machining, the part shape and machining conditions must be<br />
converted to a program. This program is called a part program. A comprehensive<br />
machining plan is required for writing the part program. The following factors<br />
must be taken into account when developing the machining plan:<br />
1. Determine the machining range requirements and select a suitable<br />
machine.<br />
2. Determine the work-piece loading method and select the appropriate tools<br />
and chucks.<br />
3. Determine the machining sequence and tool path.<br />
4. Determine the machining conditions, such as the spindle speed (S), feed<br />
rate (F), coolant, etc.<br />
A part program is a group of sequential commands formulated according to a part<br />
diagram, machining plan, and command code of the numerical control unit. It is<br />
used to plan the tool path with the assistance of the auxiliary functions of the<br />
machine. The part program can be transmitted to the memory of the control unit<br />
via a PC, punched paper tape, or keyboard.<br />
2.2.1.2. Programming Methods<br />
A numerical control unit executes actions exactly in accordance with the<br />
commands of the part program. So, programming is very important for numerical<br />
control machining. There are two ways to design a CNC part program and they<br />
are briefly described in the following:<br />
1. Good capability of reading part diagrams.<br />
2. Rich experience in machining processes.<br />
3. Familiar with the functionality, operation procedure and programming<br />
language of the machine.<br />
4. Basic capability in geometric, trigonometric, and algebraic operations.<br />
5. Good capability of determination of machining conditions.<br />
2 - 19
HUSTCNC-<strong>H4CL</strong>-T Manual<br />
6. Good capability in setting chucks.<br />
7. Good capability in determination of part material.<br />
Two programming methods are available for the part program of the numerical<br />
control unit: <br />
Manual Programming<br />
Automatic Programming<br />
Manual Programming<br />
All processes from drawing of the part diagram, machining design, numerically<br />
controlled program algorithm, programming, to the transmission of the program<br />
and the controller are performed manually.<br />
The coordinates and movements of the tool used in machining operations should<br />
be first calculated during the manual programming process. Calculation will be<br />
easier if the part shape is comprised of straight lines or 90-degree angles. For<br />
curve cutting, however, the calculation is more complicated. Both geometric and<br />
trigonometric operations are required for accurate curves. After acquiring the<br />
coordinates of the work-piece, create a complete numerically controlled part<br />
program in a specified format using the movement command, movement rate,<br />
and auxiliary functions. Check the program and make sure that there are no<br />
errors before transmitting it to the controller.<br />
Automatic Programming<br />
All processes from drawing the part diagram to transmitting the part program are<br />
performed with a PC.<br />
For complex part shapes, it is both time-consuming and error-prone to calculate<br />
the coordinate values manually, resulting in nonconforming-machined products.<br />
To make use of the high-speed capabilities of the computer, the programmer<br />
designs a simple part program to describe the machine actions and the shape,<br />
size, and cutting sequence of the part, reinforcing the communication and<br />
processing capability of the computer. The input data is translated into a CNC<br />
program using a PC, which is in turn transmitted to the CNC controller via the<br />
RS232C interface. This is called the CAD/CAM system and is used by many<br />
units using CNC machines to create a program especially machining a 3-D<br />
work-piece.<br />
2 - 20
Chapter II Operation<br />
2.2.1.3. Program Composition<br />
A complete program contains a group of blocks. A block has a serial number and<br />
several commands. Each command is composed of a command code (letters<br />
A~Z) and numeric values (,,0~9). An example of a complete part program<br />
containing 10 blocks is shown in the table below. A complete program is<br />
assigned with a program number, such as O001, for identification.<br />
A complete program:<br />
N10 G0 X40.000 Z10.000<br />
N20 G00 X30.000 Z5.000<br />
N30 M3 S3000<br />
N40 G1 X10.000 F200<br />
N50 W-5.000<br />
N60 X15.000 Z-10.000<br />
N70 X30.000 W-10.000<br />
N80 G0 X40.000 Z10.000<br />
N90 M5<br />
N100 M2<br />
Block is the basic unit of a program. A block contains one or more commands.<br />
No blank should be inserted between commands when transmitting a program.<br />
A block has the following basic format:<br />
N-____G____X(U)____Z(W)____F____S____T____M____<br />
N : Block Sequence Number<br />
G : Function Command<br />
X, Z : Coordinate positioning command (absolute movement<br />
command).<br />
U, W : Coordinate positioning command (incremental movement<br />
command).<br />
F : Feed rate.<br />
S : Spindle speed.<br />
T : Tool command.<br />
M : Auxiliary functions (machine control code).<br />
Except for the block serial number (N), the command group of a block can be<br />
classified into four parts:<br />
2 - 21
HUSTCNC-<strong>H4CL</strong>-T Manual<br />
1. Function Command: The G-code, for example, is used to instruct the<br />
machine to perform actions, such as linear cutting, arc cutting, or thread<br />
cutting.<br />
2. Positioning Command: X, Z, U, W commands, for example, instructs the<br />
G-code of the machine to stop at a specified position; i.e. destination or end<br />
point of the action.<br />
3. Feed Rate Command: This command instructs the tool to cut (G-code) at<br />
a specified speed.<br />
4. Auxiliary Function: The M, S, T, L commands, for example, determine the<br />
start, stop, spindle speed, tool selection, and execution times of the<br />
machine.<br />
However, not every block contains these four commands. Some blocks have<br />
only one command. This will be further discussed in Chapter III.<br />
Except for the block serial number of the block N___, all other components of the<br />
basic block format are commands. A command contains a command code<br />
(letter), a +/- sign, and some numbers.<br />
Basic Command Format (e.g. the positioning command):<br />
X-10.000<br />
X : Command code<br />
"-" : +/- sign (+ can be omitted)<br />
10.000 : Destination of a tool positioning action.<br />
The command codes include the function command code, positioning (or<br />
coordinate) command code, feed-rate command code, and auxiliary function<br />
command code. Each command code has its own definition and the machine<br />
behaves according to the command code given. The command codes of <strong>H4CL</strong>-T<br />
Series and their definitions are described below.<br />
F: Feed-per-rotation command. mm/rev or mm/min<br />
G: Function code<br />
I: The X-axis component of the arc radius.<br />
K: The Z-axis component of the arc radius<br />
L: Repetition counters<br />
M: Machine control code<br />
N: Program serial number<br />
P: Call subprogram code; parameter in canned cycles; tool number for<br />
2 - 22
Chapter II Operation<br />
tool compensation.<br />
Q: Parameter in canned cycles<br />
R: Arc radius or parameter in canned cycles<br />
S: Spindle speed.<br />
T: Tool command<br />
U: Incremental positioning command on X-axis<br />
W: Incremental coordinates on Z-axis<br />
X: Absolute positioning command on X-axis.<br />
Z: Absolute positioning command on Z-axis.<br />
Each block has a specified format and this format must be used during<br />
programming. Incorrect formatting can result in code rejection or major errors.<br />
Each block has a serial number for identification. Though the serial number is<br />
not essential, it is recommended to use it for easy search. The serial number<br />
contains the letter “N” followed by some digits. The number can be generated<br />
automatically or manually typed from the keyboard when editing the program.<br />
(Refer to Chapter IV). The line number order is not followed, but line numbers<br />
must be unique. The program runs in order of blocks from top to bottom rather<br />
than their serial numbers. For example:<br />
Ex: N10……(1) program execution order<br />
N30……(2)<br />
N20…....(3)<br />
N50…....(4)<br />
N40……(5)<br />
2.2.1.4. Coordinate System<br />
Fabrication of a work-piece with a lathe is accomplished by the rotation of the<br />
spindle and cutting motion of the tool mounted on the machine. The tool can<br />
move in an arc or straight line. A coordinate system is used to describe the<br />
geometrical position of the intersecting point and end point of an arc or line. The<br />
cutting action is done by the controlled change of these geometrical positions<br />
(positioning control).<br />
* Coordinate Axis<br />
The <strong>H4CL</strong>-T Series uses the well-known 2-D Cartesian coordinate system. The<br />
two axes used in the lathe series are defined as X-axis and Z-axis. The Z-axis is<br />
2 - 23
HUSTCNC-<strong>H4CL</strong>-T Manual<br />
the centerline of the lathe spindle. The intersection of the two axes is the zero<br />
point, i.e. X=0 and Z=0.<br />
Fig. 2-25 shows the relationship among each axis, tool motions, and rotation<br />
direction of a work-piece. This manual uses the rear tool post as an example.<br />
+X Top (rear) holder<br />
+Z<br />
G03<br />
G02<br />
+Z<br />
M04<br />
CCW<br />
M03<br />
CW<br />
+Z<br />
G02<br />
G03<br />
+X Bottom (front) holder<br />
Fig. 2-25 Coordinate System of the CNC Lathe<br />
When the spindle is rotating, your thumb points to the positive direction of the<br />
Z-axis and four fingers point to the direction of normal rotation.<br />
* Coordinate Positioning Control<br />
The coordinate of the <strong>H4CL</strong>-T Series is either absolute or incremental,<br />
depending on the command code of the coordinate axis, i.e.:<br />
X, Z: Absolute coordinate commands.<br />
U, W: Incremental (or decremental) coordinate commands.<br />
Please note the diameter is generally used to represent the X-axis coordinate for<br />
a lathe, regardless of incremental or absolute coordinates.<br />
Absolute Coordinate Commands<br />
Tool-positioning coordinates are acquired with reference to the origin (work<br />
origin or program origin) of the work coordinate system. Coordinates are either<br />
positive (+) or negative (-), depending on its position relative to the origin.<br />
Incremental Coordinate Commands<br />
The previous coordinates of the tool are the reference point for calculating the<br />
coordinate value of the next position. The incremental coordinate is either<br />
positive (+) or negative (-). The negative sign represents decrement. Facing<br />
toward the direction of movement, if the tool is heading towards the positive (+)<br />
2 - 24
Chapter II Operation<br />
direction, U, W represents an increment. If it is heading to the negative (-)<br />
direction, U, W represents decrement.<br />
X, Z and U, W are interchangeable in the program. The commands used for<br />
absolute and incremental coordinates are described as follows:<br />
Absolute Commands: (Fig. 2-26)<br />
P0 to P1 G01 X10.000 F0.200<br />
P0 to P2 X24.000 Z30.000<br />
P2 to P3 X32.000 Z10.000<br />
P3 to P4 Z0.000<br />
X<br />
38<br />
P4<br />
10<br />
P3<br />
30<br />
P2<br />
24/2 32/2 Z<br />
P1<br />
10/2<br />
P0<br />
Fig. 2-26 Absolute Commands<br />
Incremental Commands: (Fig. 2-27)<br />
P0 to P1 G01 U10.000 F0.200<br />
P1 to P2 U14.000 W-8.000<br />
P2 to P3 U8.000 W-20.000<br />
P3 to P4 W-10.000<br />
X<br />
38<br />
P4<br />
10<br />
P3<br />
30<br />
P2<br />
12 16 Z<br />
P1<br />
5<br />
X0. ZO.<br />
P0<br />
Fig. 2-27 Incremental Commands<br />
2 - 25
HUSTCNC-<strong>H4CL</strong>-T Manual<br />
Coordinate Interchange:<br />
P0 to P1 G01 X10.000 F0.200<br />
P1 to P2 X24.000 W-8.000<br />
P2 to P3 U8.000 Z10.000<br />
P3 to P4 W-10.000<br />
or<br />
P0 to P1 G01 X10.000 F0.200<br />
P1 to P2 U14.000 Z30.000<br />
P2 to P3 X32.000 W-20.000<br />
P3 to P4 Z0.000<br />
Simultaneous use of absolute and incremental coordinate systems in a part<br />
program is possible. For the absolute coordinate system, the input error of the<br />
previous position, if any, does not affect the coordinates of the next point. For the<br />
incremental coordinate system, however, all subsequent positioning is affected if<br />
the previous position is incorrect. Therefore, particular attention should be paid<br />
when the incremental coordinate system is used.<br />
There aren’t any rules about when to use the incremental or absolute coordinate<br />
system. It depends on machining requirements. If each machining point is<br />
positioned relative to the home position, it is recommended to use the absolute<br />
coordinate system.<br />
For diagonal (simultaneous positioning on the X and Z-axis) or arc movements,<br />
the coordinate value of each axis acquired from trigonometric operations will be<br />
rounded off. In this case, particular attention should be paid when the<br />
incremental coordinate system is used, as machining points may increase, and<br />
the more points there are, the greater the risk of error. Basically, whether an<br />
absolute or incremental coordinate is used depends on the programming<br />
requirements and the specifications of the machining diagram.<br />
* Work Origin<br />
The specifications of the machining diagram are converted to the coordinate<br />
system at the CNC lathe programming stage. Before the conversion, a point on<br />
the work-piece is selected as the zero point of the coordinate system (i.e. work<br />
origin) and the coordinates of other points on the work-piece are calculated<br />
based on this work origin.<br />
2 - 26
Chapter II Operation<br />
The programmer determines the position of the work origin. It can be any point<br />
on the centerline of the spindle. However, it is recommended to select an origin<br />
that makes reading of the work-piece coordinate easier. The X-axis of the work<br />
origin should be on the centerline of the lathe spindle. One of the following three<br />
points can be selected as the work origin of the Z-axis: (Fig 2-28)<br />
1. Left end of the work-piece.<br />
2. Right end of the work-piece.<br />
3. Front of the claw or chuck.<br />
1 3<br />
2<br />
Z<br />
Fig. 2-28 Work Origin Selection (1, 2, or 3)<br />
The work origin is also called work zero point or program origin, program zero<br />
point. In this manual, this zero point is always referred to as the work origin. The<br />
coordinate system based on the origin is called work coordinate system. The<br />
work coordinate origin is the work origin. Referring to section 3.12 for the G10 and<br />
G50 work origin setting.<br />
The work-piece after being cut with a CNC lathe is symmetrical. Perform<br />
machining of half the side of the work-piece. Therefore, only half of the<br />
work-piece should be drawn on the work-piece diagram when creating a<br />
program, as shown in Fig 2-29.<br />
Z<br />
Fig. 2-29 Work-Piece Symmetrical Diagram<br />
* Machine Origin<br />
There is a fixed point on the machine bed or bed rail. This point is used as a<br />
reference point for determination of the work coordinate (or work origin) and<br />
calibration of the tool length compensation. This reference point is called the<br />
machine origin.<br />
2 - 27
HUSTCNC-<strong>H4CL</strong>-T Manual<br />
For the <strong>H4CL</strong>-T Series controller, the machine origin is the stop position of the<br />
tool when the homing for each axis is complete. As Fig. 2-30 shows, the<br />
machine origin corresponding to the coordinate used to indicate the work origin<br />
varies depending on the position of the work origin. In general, the machine<br />
origin is determined based on the position where the positioning measurement<br />
device and the touch plate of the limit switch are installed on the machine. In this<br />
case, use the positioning measurement function of the controller to obtain the<br />
relationship between this position and the coordinate used for the work origin.<br />
The homing action should be performed after powering on the machine. If the<br />
current position is lost due to power failure, the homing action should be<br />
performed again.<br />
Z HOME<br />
Machine Origin<br />
X<br />
Z<br />
Work Origin<br />
X HOME<br />
+Z<br />
Fig. 2-30 Lathe Origin Diagram<br />
2 - 28
Chapter II Operation<br />
2.2.1.5. Numerical Control Range<br />
The numerical and functional control range of the <strong>H4CL</strong>-T controller is described<br />
in the following two tables.<br />
Min. setting unit<br />
Max. setting unit<br />
Min. moving unit<br />
Max. moving unit<br />
Max. stroke<br />
0.001 mm<br />
9,999.999 mm<br />
0.001 mm<br />
9,999.999 mm<br />
9,999.999 mm<br />
G- code G00~G99 (G01=G1)<br />
M-code<br />
M000~M999 (M01=M1)<br />
S-code<br />
S1~S9999 rpm<br />
F-code<br />
0.001~0~9999.999 mm/spin<br />
X, Z, U, W, I, K 0.001~+/-9,999.999 mm<br />
R (Radius) 0.001~+/-9,999.999 mm<br />
G04<br />
0 ~ 9999.999 seconds<br />
Program number 0 ~ 999<br />
1. There are two digits after T when no<br />
turret is mounted; select a tool<br />
compensation number.<br />
T-code<br />
2. There are four digits after a turret is<br />
mounted; the first two digits is the tool<br />
selection and the last two digits is<br />
compensation number.<br />
Memory capacity 512 K<br />
Lead screw<br />
0~255 pulses (related to tool resolution)<br />
compensation<br />
Max. Response<br />
500 KPPS<br />
Speed<br />
The numerical control range varies depending on the specifications of the<br />
numerical control unit. Refer to the operator’s manual of the machine for more<br />
information.<br />
2 - 29
HUSTCNC-<strong>H4CL</strong>-T Manual<br />
2.2.2 Program Editing<br />
The program editing operation includes:<br />
1. Program selection,<br />
2. New program editing, and<br />
3. Existing program change.<br />
2.2.2.1. New Program Editing<br />
Fig. 2-31<br />
The following keys are used to edit programs:<br />
1. Command keys.<br />
2. Numerical keys<br />
0 9 ~<br />
3. Cursors – Use or to move the cursor to the block to edit.<br />
4. Used the or key to switch to the pervious or next page of the program.<br />
5. Use the Insert key to create or insert a new block.<br />
Enter a new block in a new program or insert a new block in an existing<br />
program. Press the<br />
Insert<br />
key after entering a new block.<br />
Enter<br />
6. Use the key to apply/save the new changes.<br />
Use the Enter key after adding a command or changing a command value<br />
in an existing block.<br />
7. Use the Delete key to delete a program block.<br />
2 - 30
Chapter II Operation<br />
Creating a Program Example:<br />
Program 1<br />
N1 G0 X0.Z0.<br />
N2 G4 X1.<br />
N3 G0 U480.W-480.<br />
N4 G4 X1.<br />
N5 M99<br />
Action and Description:<br />
1. Make sure the controller is in the program-editing mode. Press the<br />
key or turn the knob to begin editing.<br />
<br />
<br />
2. Enter data:<br />
First block data:<br />
G 0 Insert<br />
Press the key to create a new block, as shown in Fig. 2-32:<br />
Insert<br />
Fig. 2-32<br />
Then enter:<br />
X 0 Enter<br />
Z O Enter<br />
The above-mentioned procedure is used to edit the first block data. Enter<br />
the following data for 2 nd ~ 5 th blocks:<br />
Second block:<br />
G<br />
4 Insert<br />
X 1 Enter<br />
2 - 31
HUSTCNC-<strong>H4CL</strong>-T Manual<br />
Third block:<br />
G 0 Insert<br />
U 4 8 0 Enter<br />
W 4 8 0 Enter<br />
(Note that the sign can be entered before the Enter key is pressed.)<br />
Fourth block:<br />
G<br />
4 Enter<br />
X 1 Enter<br />
Fifth block:<br />
M 9 9 Insert<br />
If the size of a program exceeds one page, use or to check the program on<br />
each page for correctness.<br />
2.2.2.2. Editing a Program<br />
We have created PROGRAM 1 in the previous section. The existing program<br />
change is described in this section. Changing a program includes the following<br />
procedure:<br />
Add (or Change) a Command<br />
Ex: The third block program N3 U480. W-480.<br />
Changed to N3 U480. W-480. F0.2<br />
Procedure:<br />
1. Make sure the system is in “EDIT” mode.<br />
2. Use / to move to the cursor to block N3.<br />
3. Enter a command code and value to be added (changed), e.g. F0.2.<br />
F 0 2 Enter<br />
2 - 32
Chapter II Operation<br />
The screen shows as Fig. 2-33.<br />
Fig. 2-33<br />
1. Change U480. by entering U360;<br />
U 3 6 0 Enter<br />
To change an incorrect command, enter the correct command and<br />
press .<br />
Enter<br />
Delete a Command<br />
Ex: The third block program N30 U480. W-480. F0.2<br />
Changed to<br />
N30 U480.W-480.<br />
Procedure:<br />
1. Make sure the system is in “EDIT” mode.<br />
2. Use the / key to move the cursor to block N3.<br />
3. Enter a command to be deleted without values, e.g; F<br />
Enter<br />
(No value is entered behind F). The screen shows as Fig. 2-34:<br />
Fig. 2-34<br />
2 - 33
HUSTCNC-<strong>H4CL</strong>-T Manual<br />
Insert a Block<br />
Ex: Insert the block N31 U20. W-20 between the third block N3 G0 U480.<br />
W-480 and between N4 G4 X1<br />
Procedure:<br />
1. Make sure the system is in “EDIT” mode.<br />
2. Use the / to move the cursor to block N3.<br />
3. Enter<br />
N 3 1 Insert<br />
U 2 0 Enter<br />
W 2 0 Enter<br />
The screen shows as Fig. 2-35.<br />
Fig. 2-35<br />
Delete a Block<br />
Ex: Delete the block N31 U20. W-20.<br />
Procedure:<br />
1. Make sure the system is in “EDIT” mode.<br />
2. Use / to move to the cursor to block N31.<br />
3. Press the key .The screen shows as Fig. 2-36.<br />
Delete<br />
Move the cursor to block N4 after the block N31 is deleted.<br />
2 - 34
Chapter II Operation<br />
Fig. 2-36<br />
Delete a Program<br />
In the “PRNO” mode, move the cursor to the program to be deleted and press<br />
the<br />
Delete<br />
key. The following message displays:<br />
Fig. 2-37<br />
At this time, press the Y key to delete the program O02. When you press<br />
the N key, no action is performed.<br />
To delete all programs 0~999, follow the procedures below: Procedure:<br />
Switch to the MDI mode and instruct the command G10 P2001. All contents in<br />
the program are deleted.<br />
Note: After the procedure is complete, all program data in memory is erased.<br />
Therefore, never perform this action unless it is absolutely necessary.<br />
2 - 35
HUSTCNC-<strong>H4CL</strong>-T Manual<br />
2.2.2.3. Entering Fractions<br />
A command value is entered in either integer or real-number format with a<br />
maximum of 7 digits. You cannot enter a fraction for a parameter that requires an<br />
integer. You can insert a decimal point at the specified position for a command<br />
that requires real-number input. The input is corrected after being processed by<br />
the control unit. An error may occur if an integer is entered for a command that<br />
requires a real-number. This is further explained in the following paragraphs.<br />
When an integer is entered for a command (such as X, Y, I, J) that requires a<br />
real-number, the control unit automatically puts a decimal point at the position<br />
specified in the given format. The table below shows various values after<br />
validation.<br />
Input 4/3 Format<br />
X2 X0.002 mm<br />
Z35 Z0.035mm<br />
U2500 U2.500 mm<br />
W125. 125.000 mm<br />
F300 F0.3 mm/spin<br />
For commands that require real-number input, the integer is changed. Although<br />
the screen still shows the entered data. The user should pay attention to this. To<br />
avoid errors, it is recommended to enter data with a decimal point. The "0" after<br />
the decimal point can be omitted. Integer codes, such as G, M, N, S, are not<br />
affected.<br />
G, M, N, S codes: Variables Integer input.<br />
X, Y, Z, U, V, W, I, J code Real input.<br />
F-code<br />
Integer input.<br />
Suggestion: To avoid confusion, except for the G, M, N, S, all other commands<br />
require real-number input. The "0" after the decimal point can be omitted.<br />
2.2.2.4. Editing Notes<br />
Block (Program) Serial number<br />
1. The letter N of the block serial number can be omitted if necessary.<br />
2. The number after N is only a symbol. The blocks are sorted in line order<br />
rather than the assigned line value.<br />
2 - 36
Chapter II Operation<br />
For instance, if N35 is inserted behind N30, the order is:<br />
Program 1<br />
N10 G0 X0. Y0. ...... First block<br />
N20 G4 X1. ...... Second block<br />
N30 U480. V-480. ...... Third block<br />
N35 U20. V-20. ...... Fourth block<br />
N40 G4 X1 ...... Fifth block<br />
N50 M99 ...... Sixth block<br />
If the block line number N35 is changed to N350 the program executes in<br />
the same order.<br />
3. The line number of a block is edited in the form of a "string". That is to say,<br />
N10, N010, N0010 represents different blocks and a complete string must<br />
be entered to search a block serial number.<br />
Block Notes<br />
1. Do not use two G-codes in the same block.<br />
2. Do not repeat any coordinate code of a command, such as X, Y, Z, U, V, I<br />
W, J and R, in the same block.<br />
3. If you specify absolute coordinates and incremental coordinates for the<br />
same axis in a block, only the incremental coordinates will be executed.<br />
Example:<br />
G1 X100. U50.----- Only U50 will be executed.<br />
4. A maximum of 80 characters can be entered in a bock, or the Err-08<br />
message displays.<br />
2 - 37
HUSTCNC-<strong>H4CL</strong>-T Manual<br />
2 - 38
Chapter III G/M Codes<br />
3 G/M Codes<br />
3.1 Command codes<br />
The previous chapters have introduced the format of part programs. This chapter<br />
will describe the command codes of the <strong>H4CL</strong>-T series and provide simple<br />
examples for each command to explain its applications.<br />
The definition of G-codes in the <strong>H4CL</strong>-T series is similar to other controllers.<br />
They are classified into two groups: (Table 3-1)<br />
1. One-shot G-codes<br />
A One-shot G-code (has no * mark in the table) is valid only in the defined<br />
program block.<br />
Ex: N10 G0 X30.000 Z40.000<br />
N20 G4 X2.000<br />
N30 G1 X20.000 Z50.000<br />
G4 is a one-shot G-code and is valid<br />
only in this block.<br />
G04 no longer valid in this block.<br />
2. Modal G-codes<br />
A Modal G-code (has a * mark in the table) is valid until it is replaced by another<br />
G-code of the same group.<br />
Wherein G00, G01, G02, G03 Same group.<br />
G40, G41, G42 Same group.<br />
G96, G97 Same group.<br />
G98, G99 Same group.<br />
Ex: N10 G0 X30.000 Z5.000<br />
N20 X50.000 Z10.000<br />
N30 G1 X30.000 F0.2<br />
G0 is defined.<br />
No G-code defined, G0 remains valid.<br />
G1 replaces G0 and becomes valid.<br />
3 - 1
HUST CNC-<strong>H4CL</strong>-T Manual<br />
The G-codes of <strong>H4CL</strong>-T controller are listed in Table 3-1.<br />
Table 3-1 G-Code Definitions<br />
G-code<br />
Function<br />
*00 Rapid positioning (fast feed-rate)<br />
*01 # Linear cutting (cutting feed-rate)<br />
*02 Arc cutting, CW (cutter at rear)<br />
*03 Arc cutting, CCW (cutter at rear)<br />
04 Temporary stop<br />
08 Clear machine coordinates in all axis<br />
10 Data input<br />
15 The servo main shaft makes a reservation<br />
20 System measurement in INCH mode<br />
21 System measurement in METRIC mode<br />
28 Tool moves to the 1st reference point<br />
29 Moves back to the specified position from the ref. point<br />
30 Tool moves to the 2nd reference point<br />
31 Skip function<br />
32 Thread cutting<br />
33 Taping Cutting Canned Cycle<br />
34 Variable thread cutting<br />
*40 # Tool radius compensation - cancel<br />
*41 Tool radius compensation - set (left)<br />
*42 Tool radius compensation - set (right)<br />
50 Coordinate system & max. spindle speed setting<br />
70<br />
71<br />
72<br />
73<br />
74<br />
75<br />
76<br />
Canned cycle, fine cut<br />
Canned cycle, rough cut, lateral direction<br />
Canned cycle, rough cut, traverse direction<br />
Contour canned cycle, rough cut<br />
Grooving cycle, lateral direction<br />
Grooving cycle, traverse direction<br />
Canned cycle, thread cut<br />
90<br />
92<br />
Lateral cutting cycle, single cycle<br />
Thread cutting cycle, single cycle<br />
3 - 2
Chapter III G/M Codes<br />
94 Traverse cutting cycle, single cycle<br />
*96 Setting surface cutting at constant speed<br />
*97 # Canceling surface cutting at constant speed<br />
*98 Feed-rate specified by mm/min or in/min<br />
*99 # Feed-rate specified by mm/revolution or in/revolution<br />
# -- G-codes with "#" are of power-on default setting.<br />
* -- G-codes with "*" are modal G-codes.<br />
-- G-codes with "" Spindle need encoder feedback<br />
3 - 3
HUST CNC-<strong>H4CL</strong>-T Manual<br />
3.2 Fast Positioning, G00<br />
Format:<br />
G00 X(U)____ Z(W)____<br />
X, Z : End point in absolute coordinates.<br />
U, W : End point in incremental coordinates relative to the block<br />
starting point.<br />
X<br />
Z<br />
2<br />
X<br />
G00<br />
W<br />
1<br />
U<br />
Z<br />
Fig. 3-1 Fast positioning<br />
G00 (or G0 ) is used to instruct the tool to move to the defined end point of a<br />
program block at the maximum speed of MCM #33. The start point is the position<br />
at which the tool is located before it moves. This command can control the<br />
movement of 1~2 axes simultaneously. The axis that is not set by the command<br />
does not execute any movement.<br />
Ex: Fig 3-2, A point moves to B point rapidly.<br />
G0 X4.00 Z5.60<br />
G0 U-6.00 W-3.05<br />
G0 X4.00 W-3.05<br />
X and Z-axes are set with absolute<br />
commands<br />
X and Z-axes are set with incremental<br />
commands<br />
X and Z-axes are set with absolute or<br />
incremental commands<br />
3 - 4
Chapter III G/M Codes<br />
x<br />
5.6<br />
3.05<br />
B<br />
A<br />
3.00<br />
2.00<br />
z<br />
Fig. 3-2 G00 Programming Example<br />
Tool moves to X4.00, Z5.60 rapidly. Since both X and Z axes are repositioning,<br />
the tool moves according to the lower feed-rate set in the parameter “Highest<br />
Feed-rate”.Ex: Fig. 3-2 assuming that the “Highest Feed-rate” is:<br />
X = 5000.00 mm/min, Z = 3000.00 mm/min,<br />
Then Fz =3000.00<br />
Z-axis feed-rate<br />
Fx = 3000.00 * (3.00/3.05)<br />
= 2950.82 (less than 5000.0, X- axis set value) X-axis feed-rate<br />
The feed rate of both axes is within the MCM parameter settings. Therefore, the<br />
tool will feed at the calculated rate on both axes.<br />
When only a single axis (X or Z) executes fast positioning, it moves at the<br />
respective speed set in the “Highest Feed-rate” parameter.<br />
3.3 Linear Cutting, G01<br />
Format:<br />
G01 X(U)____ Z(W)____ F____<br />
X, Z : End point in absolute coordinates<br />
U, W : End point in incremental coordinates relative to the start point<br />
of the program block.<br />
F<br />
: Cutting feed-rate (F-code can be used in combination with any<br />
G-code)<br />
The F-code can be used in the G00 block without affecting the<br />
fast positioning movement.<br />
3 - 5
HUST CNC-<strong>H4CL</strong>-T Manual<br />
G01 (or G1) is used for linear cutting work. It can control the X, Z-axes<br />
simultaneously. The cutting speed is determined by the F-code. The smallest setting<br />
value of the F-code is 0.02 mm/min or 0.2 in/min.<br />
The starting point is the coordinate of the tool when the command is given. The<br />
feed-rate defined after an F-code (Modal code) remains valid until it is replaced by a<br />
new feed-rate.<br />
The formula to calculate X, Z cutting feed-rate:<br />
(U and W are actual incremental values.)<br />
X feed-rate, Fx <br />
U<br />
U<br />
W<br />
2 2<br />
F<br />
(1)<br />
Z feed-rate, Fz <br />
U<br />
W<br />
W<br />
2 2<br />
F<br />
(2)<br />
Example: Start point is X=2.0 (diameter), Z=4.60.<br />
G01 X4.00 Z2.01 F0.300<br />
G01 U2.00 W-2.59 F0.300<br />
Absolute command<br />
Incremental command<br />
X<br />
2.0<br />
B<br />
A<br />
4.6 1.00<br />
Z<br />
Fig. 3-3 G01 Programming Example<br />
3 - 6
Chapter III G/M Codes<br />
3.4 G02, G03 Arc Cutting<br />
The arc-cutting program contains four command groups, as showed in the list<br />
below. The combination of these commands determine the arc path of the tool in<br />
a single block.<br />
Command Description<br />
1 Arc feed direction G02<br />
G03<br />
Clockwise<br />
Counter clockwise<br />
2 End point Absolute<br />
command<br />
Incremental<br />
command<br />
X, Z<br />
U, W<br />
End point in absolute<br />
coordinates<br />
Increment from arc start<br />
point to end point<br />
3 Difference from arc<br />
start point to center<br />
Arc radius<br />
I, K<br />
R<br />
I=X-axis, K=Z-axis<br />
Radius range<br />
-9999.~9999.mm<br />
4 Arc feed-rate F Minimum setting 0.01<br />
mm/rot.<br />
The end point can be defined either by absolute or incremental coordinates. The<br />
size of the arc can be defined either by the coordinate difference or radius. The<br />
arc cutting direction (CW or CCW) is relative to the center of the arc. Note that<br />
the CW or CCW direction is determined when the tool is at the top (rear) holder.<br />
The direction is reversed when the tool is at the bottom (front) holder.<br />
X<br />
X<br />
G02<br />
Z<br />
G03<br />
Z<br />
G02<br />
Z<br />
G03<br />
Z<br />
X<br />
X<br />
Top(rear) holder<br />
Bottom (front) holder<br />
Fig. 3-4 G02, G03 Direction<br />
Arc cutting command:<br />
Top (rear) holder Bottom (front) holder<br />
G02 Clockwise Counter clockwise<br />
G03 Counter clockwise Clockwise<br />
3 - 7
HUST CNC-<strong>H4CL</strong>-T Manual<br />
An arc comprises three elements, a start point, and end point and a center (See<br />
Fig. 3-5). The start point (S) is the tool coordinates when the G02 and G03<br />
execute.<br />
The end point (E) is the coordinates of X (U) and Z (W) in the program format.<br />
The center (C) is defined by I and K values. They are the coordinate difference<br />
between the arc start point and center. This value can be either positive or<br />
negative. Definition of the I and k values are same as the increments (U, W).<br />
The arc feed-rate is defined by F-value.<br />
End<br />
Center<br />
K<br />
Start<br />
S<br />
I<br />
X<br />
Z<br />
Fig. 3-5 Arc cutting<br />
The arc center can be defined by the radius instead of I and K.<br />
But if the arc angle is between -1° and 1° or 179° and 181°, only I and K can be<br />
used for setting.<br />
Format:<br />
G02 X(U)____ Z(W)____ I____ K____ F____<br />
X<br />
X/2<br />
Z<br />
E<br />
End<br />
S<br />
Start<br />
K<br />
I<br />
Z<br />
Fig 3-6 G02 Arc cutting<br />
3 - 8
Chapter III G/M Codes<br />
G03 X(U)____ Z(W)____ I____ K____ F____<br />
X<br />
X/2<br />
Z<br />
End<br />
E Start<br />
S<br />
I<br />
Z<br />
K<br />
Fig 3-7 G03 Arc Cutting<br />
G02 X(U)____ Z(W)____ R____ F____<br />
X<br />
X/2<br />
Z<br />
R<br />
E<br />
End<br />
Start<br />
S<br />
Z<br />
Fig. 3-8 Defined by Radius “R”<br />
Example: The following four commands are different in settings but execute the<br />
same arc cutting work.<br />
1. G02 X5.000 Z3.000 I2.500 F0.3<br />
2. G02 U2.000 W-2.000 I2.500 F0.3<br />
3. G02 X5.000 Z3.000 R2.500 F0.3<br />
4. G02 U2.000 W-2.000 R2.500 F0.3<br />
X<br />
3.0<br />
5/2<br />
End<br />
5.0<br />
R = 2.5<br />
E<br />
2/2<br />
Start S<br />
3/2<br />
Z<br />
Fig. 3-9 G02 Programming Example<br />
3 - 9
HUST CNC-<strong>H4CL</strong>-T Manual<br />
There are two different arc types available for arc cutting (Fig. 3-10):<br />
1. Use “+R" if arc angle < 180°.<br />
2. Use “-R" if arc angle > 180°.<br />
R is within the range from -4000.mm to +4000.mm.<br />
Ex: In Fig. 3-10, an arc is cut with an angle
Chapter III G/M Codes<br />
3.5 Dwell Command, G04<br />
Format:<br />
G04 X____<br />
X: Dwell time in sec (the X here indicates time rather than position).<br />
To meet machining requirements, the axial movement may need to be held<br />
during the execution of a program block, which completes before the command<br />
for the next block is executed. This command can be used for this purpose. The<br />
G04 function is used for this purpose.<br />
The minimum dwell time is 0.001 sec, the maximum is 8000.0 seconds.<br />
Ex: N1 G1 X10.000 Z10.000 F0.1<br />
N2 G4 X2.000<br />
hold for 2 seconds<br />
N3 G00 X0.000 Z0.000<br />
3.6 Return to the First Reference Point, G28<br />
Format:<br />
G28<br />
or<br />
or<br />
or<br />
G28 X____ Z____<br />
G28 X____<br />
G28 Z____<br />
The first reference point coordinates are set based on the X, Z, and settings in MCM<br />
parameter G28. The X, Z values in this format are not used. They only indicate which<br />
axis is to return to the reference point. Therefore, regardless of whether G28 is an<br />
independent block or contains X, Z commands simultaneously, the tools return to the<br />
reference point based on the X, Z settings of the MCM parameter.<br />
Note that prior to executing the G28 command, the tool compensation command<br />
must be canceled.<br />
Ex: T100<br />
G28 X10.<br />
Tool compensation is canceled (it cannot co-exist<br />
with G28 in the same block.<br />
Tool returns to the 1st reference point on the X-axis.<br />
3 - 11
HUST CNC-<strong>H4CL</strong>-T Manual<br />
3.7 Return to Previous Position from Reference Point, G29<br />
Format:<br />
G29 X____Z____<br />
The X, Z, values in this format are not used. They only indicate the set of axes to return<br />
to the previous position from the reference point. When the tool returns to the position<br />
before G28 is executed, use the G29 command. This command cannot be used<br />
separately. It must be executed following the G28 or G30 command.<br />
Ex: G01 X60. Z30. Tool moves to the position X60., Z30.<br />
N2 G28<br />
N3 G29<br />
Tool returns from X60, Z30 to the first<br />
reference point.<br />
Tool returns from the reference point to<br />
X60., Z30.<br />
As the example above, the N3 block may have the following combinations:<br />
N3 G29 Return to X60.00, Z30.00<br />
N3 G29 X _____ Z _____ Return to X60.00, Z30.00<br />
N3 G29 X _____ Tool returns to X60.00<br />
N3 G29 Z _____ Tool returns to Z30.00<br />
3.8 Tool Moves to the 2nd Reference Point, G30<br />
Format:<br />
G30 X____ Z____<br />
Execution of this command is the same as G28, but the reference point is set in MCM<br />
parameter G30.<br />
3 - 12
Chapter III G/M Codes<br />
3.9 Skip Function, G31<br />
Format:<br />
G31 X (U)____ Z(W)____<br />
X, Z: Predicted end point in absolute coordinates<br />
U, W: Predicted end point in incremental coordinates relative to the<br />
starting point.<br />
P: Defined skip point.<br />
To ensure a valid skip function G31, it must be used in combination with an I/O<br />
signal. G31 functions same as G01 until the skip function is established; i.e. G31<br />
executes linear cutting in the X, Z coordinates. Once an I/O signal is detected<br />
during cutting, the G31 skip function is established and the block G31 is skipped.<br />
When G31 is performing linear cutting, the feed-rate is determined by the<br />
currently effective F-value (G00 or G01). G31 is a one-shot G-code and only<br />
valid in the defined block.<br />
Ex:<br />
<br />
N50 G31 W100.000<br />
N60 G01 U50.000<br />
N70 Z90. X60.<br />
(Z90., X60./2)<br />
Signal<br />
received<br />
50/2<br />
X<br />
Z<br />
100.<br />
Fig. 3-11 G31 Skip Function<br />
In Fig. 3-11, the dashed line represents the original path without the SKIP<br />
function and the solid line is the actual tool path when the SKIP function signal is<br />
received.<br />
3 - 13
HUST CNC-<strong>H4CL</strong>-T Manual<br />
<br />
<br />
Note that G31 cannot be used in the tool radius compensation state. G40<br />
must be executed to cancel the tool radius compensation before G31 is<br />
given.<br />
The skip function is invalid during the program dry run, feed-rate<br />
adjustment and auto acceleration/deceleration.<br />
3.10 Thread Cutting, G32<br />
The G32 command is applicable to tapered and non-tapered thread cutting work.<br />
Fig. 3-12 G32 Thread cutting<br />
Format:<br />
G32 X(U)____ Z(W)____ F____<br />
X<br />
Z<br />
W<br />
U/2<br />
S2<br />
S1<br />
X/2<br />
Z<br />
20 mm<br />
Fig. 3-13 Thread Cutting<br />
(The U/2 Setting Should Not be Less Than Retraction Amount).<br />
X, Z : End point of thread cutting in absolute coordinates<br />
U, W : End point of thread cutting in incremental coordinates relative<br />
to the start point.<br />
F : Thread pitch<br />
3 - 14
Chapter III G/M Codes<br />
Both fine cut and rough cut of the thread cutting proceed along the same path. The<br />
cutting action on the Z-axis does not start until the Grid signal is received from the<br />
spindle. All repeated cutting actions start at the same point.<br />
Due to delay of the server system, imperfections could result at both ends of the<br />
thread (S1 and S2). To avoid this problem, the thread length specified in the<br />
program should be slightly longer than the actual length of the processed thread.<br />
S1 and S2 are leads. The length of S1 and S2 is estimated using the formula<br />
below.<br />
S1 = (S * F/1800) * (-1 - Ln A)<br />
S2 = (S * F/1800)<br />
S1, S2 : Imperfect thread length, mm<br />
S<br />
F<br />
A<br />
: Spindle speed, rpm<br />
: Thread pitch, mm<br />
: Acceptable thread error<br />
Relationship between A and (-1 - Ln A):<br />
A -1 - Ln A<br />
0.005 4.298<br />
0.010 3.605<br />
0.015 3.200<br />
0.020 2.912<br />
0.025 2.689<br />
Programming example 1: Non-tapered thread cutting<br />
Specifications: Thread pitch<br />
cutting lead starts<br />
cutting lead ends<br />
Thread depth<br />
F= 2 mm,<br />
S1 = 3 mm,<br />
S2 = 3 mm,<br />
= 1.4 mm (in diameter) by 2 cuts<br />
3 - 15
HUST CNC-<strong>H4CL</strong>-T Manual<br />
X<br />
17/2 mm<br />
3 3<br />
20 mm<br />
Z<br />
Fig. 3-14 Non-tapered Thread Cutting<br />
N10 G0 X30.0 Z50.0<br />
N20 M03 S2000<br />
N30 G0 U-17.000 (first cut = 1.0/2mm)<br />
N40 G32 W-26.000 F2.00<br />
N50 G0 U17.000<br />
N60 W26.000<br />
N70 G0 U-17.400 (second cut = 0.4/2mm)<br />
N80 G32 W-26.000 F2.00<br />
N90 G0 U17.400<br />
N100 W26.000<br />
N110 M05<br />
N120 M02<br />
Programming example 2: Tapered thread cutting<br />
G32 X(U) _____ Z(W) _____ F _____ R<br />
X, Z : End point of thread cutting in absolute coordinates.<br />
U, W : End point of thread cutting in incremental coordinates relative to<br />
the start point.<br />
F<br />
R<br />
: Thread pitch.<br />
: Half of the difference (diameter) between the greater and<br />
smaller ends of the tapered thread.<br />
3 - 16
Chapter III G/M Codes<br />
Specifications:<br />
Thread pitch<br />
F=2 mm<br />
Cutting lead starts S1 = 2 mm,<br />
Cutting lead ends<br />
Thread depth<br />
S2 = 2 mm,<br />
= 1.4 mm (diameter) formed by two cutting<br />
actions.<br />
X<br />
40 33<br />
2<br />
2<br />
24<br />
Z<br />
30 40<br />
Fig 3-15 Tapered Thread Cutting<br />
If the angle between the tapered thread and Z-axis is smaller than 45, the<br />
thread pitch is set based on Z-axis. Otherwise, X-axis applies.<br />
N10 GO X60.0 Z100.0<br />
N20 M03 S2000<br />
N30 G0 X23.0 Z72.0 (First cut = 1.0/2mm)<br />
N40 G32 X32.000 Z28.000 F2.00 R-4.5<br />
N50 G0 X40.000<br />
N60 Z72.000<br />
N70 G0 X22.6 (Second cut = 0.4/2mm)<br />
N80 G32 X31.6 Z28.0 F2.00 R-4.5<br />
N90 G0 X40.000<br />
N100 Z72.000<br />
N110 M05<br />
N120 M02<br />
3 - 17
HUST CNC-<strong>H4CL</strong>-T Manual<br />
3.11 Tap Cutting Canned Cycle G33<br />
Format:<br />
G33 Z (W)______ F______<br />
Z (W) : End point coordinate of taping length<br />
F<br />
: Thread pitch<br />
G33 Execution process of Z-axis tap cutting canned cycle<br />
1. Z-axis starts tap cutting<br />
2. Spindle off<br />
3. Wait for complete stop of spindle<br />
4. Spindle reverses (opposite direction to the previous round)<br />
5. Z-axis retraction<br />
6. Spindle stops<br />
Programming example: A single thread with a pitch of 1mm<br />
N10 M3 S800<br />
N20 G33 Z100. F1.0<br />
N30…<br />
Note 1: The rotating direction of the spindle should be determined based on the<br />
rotating direction of the tap before taping starts. The spindle stops when<br />
the cutting is complete. It needs to be restarted when further processing<br />
is required.<br />
Note 2: Since this command is applicable to rigid taping, a deceleration time is<br />
reserved for the spindle after the stop signal of the spindle becomes<br />
valid and the Z-axis keeps moving along with the rotation of the spindle<br />
until it completely stops. Therefore, the actual depth of the pitch is<br />
deeper than required.<br />
Note 3: Refer to G32 thread cutting for other notes.<br />
3 - 18
Chapter III G/M Codes<br />
3.12 Canned Cycle Functions (For implication of programming)<br />
The canned cycle function is a special G-code of command groups. It comprises<br />
canned cycle cutting actions commonly used in machining processes. The<br />
command groups of <strong>H4CL</strong>-T Series are classified into single canned cycle and<br />
compound canned cycle command groups. Both are handy and effective in<br />
programming and applications.<br />
3.12.1 Single Cutting Canned Cycle, G90, G92, G94<br />
This command group executes repeated cutting with a block. It should end with<br />
G01 after use; otherwise, the cutting cycle will repeat.<br />
1. Outer/Inner Diameter Linear Lateral Canned Cycle, G90<br />
Format:<br />
G90 X(U)____ Z(W)____ F____<br />
X, Z : End point C in absolute coordinates (Fig. 3-20)<br />
U, W : End point C in incremental coordinates relative to the start point<br />
A<br />
F<br />
: B~C~D feed-rate<br />
X<br />
W<br />
Z<br />
D<br />
A<br />
4<br />
3 1 U/2<br />
C<br />
2<br />
B<br />
X/2<br />
Z<br />
Fig. 3-20 G90 Linear Cutting Path<br />
In Fig. 3-20, the cutting paths 1 and 4 are fast positioned by G00. The cutting<br />
along the paths 2 and 3 is executed at the feed-rate F. Whenever the start button<br />
(CYCST) is pressed in a block, the tool moves along the paths 1~2~3~4 to<br />
execute a cutting cycle.<br />
2. Outer/Inner Diameter Tapered Lateral Canned Cycle, G90<br />
Format:<br />
G90 X(U)____ Z(W)____ R____ F____<br />
3 - 19
HUST CNC-<strong>H4CL</strong>-T Manual<br />
R<br />
: The difference between point B and C in radius.<br />
X, Z, U, W and F are identical to those in lateral linear canned cycle.<br />
X<br />
Z<br />
W<br />
D 4 A<br />
3 U/2<br />
1<br />
C<br />
R<br />
2 B X/2<br />
Z<br />
Fig. 3-21 G90 Tapered Cutting Path<br />
When using incremental coordinates, the signs (+/-) of U and W are determined<br />
by the tool's direction of movement. If the direction is positive, the increment of U<br />
and W is (+), and vice versa. R value is as Fig. 3-22.<br />
1. U-,W-,R-<br />
2. U+,W-,R+<br />
U/2<br />
W<br />
R<br />
R<br />
X<br />
U/2<br />
W<br />
Z<br />
3. U-,W-,R+<br />
4. U+,W-,R-<br />
U/2<br />
U/2<br />
R<br />
And |R| < |U/2|<br />
And |R| < |U/2|<br />
Fig. 3-22 G90 Cutting Path and Direction<br />
3. Linear Thread Cutting Canned Cycle, G92<br />
The advantage of the G92 block is that it functions as four G32 blocks.<br />
Format:<br />
G92 X(U) ___ Z(W) ___ I___ K___ L___ Q ___ F ___<br />
X, Z End point C in absolute coordinates<br />
U, W : End point C in incremental coordinates<br />
3 - 20
Chapter III G/M Codes<br />
F<br />
I<br />
K<br />
L<br />
: Thread pitch (metric)<br />
: The axial travel length on X-axis for ending of the thread cutting.<br />
If K 0, “I” will be omitted and regarded as 2*K (i.e. ending of<br />
the thread cutting at 45).<br />
: The axial distance on Z-axis from the start point to the end point<br />
for the end of thread cutting.<br />
: Multiple-thread setting. Range:1~9. For G92 only.<br />
”L” is a modular value and valid all the time once it is set. If L and<br />
"Q" are set at the same time, the L-value will be regarded as<br />
invalid.<br />
Q<br />
: Offset setting of the thread initial angle. Range: 0~360. For G92<br />
only.<br />
X<br />
Z<br />
W<br />
D<br />
4 A<br />
3<br />
1<br />
U/2<br />
C<br />
2<br />
B<br />
X/2<br />
Z<br />
F<br />
Fig. 3-23 G92 Linear Thread Cutting Canned Cycle<br />
<br />
<br />
The range of the thread lead and the speed limit of the spindle are same as<br />
G32 (thread cutting).<br />
Whenever the start button (CYCST) is pressed in a block, the tool moves<br />
along the paths 1~2~3~4 to execute a cutting cycle.<br />
Subject to the restrictions of G32.<br />
<br />
Where a feed hold command is given during the cutting, the linear thread<br />
cutting canned cycle does not stop until the cutting on path 3 is complete.<br />
4. Tapered Thread Cutting Canned Cycle, G92<br />
Format:<br />
G92 X(U) _____ Z(W) _____ R _____ L___ Q ___ F _____<br />
R : The difference between point B and C in radius.<br />
3 - 21
HUST CNC-<strong>H4CL</strong>-T Manual<br />
X, Z, U, W, L, Q, F are identical to those of the linear thread cutting canned<br />
cycle.<br />
Description of the tapered thread cutting is identical to linear thread cutting.<br />
X<br />
Z<br />
W<br />
D 4 A<br />
3 U/2<br />
1<br />
C<br />
2<br />
B<br />
R<br />
X/2<br />
Z<br />
Fig. 3-24 G92 Tapered Thread Cutting Canned Cycle<br />
5. Linear Traversed Canned Cycle, G94<br />
Format:<br />
G94 X(U)____ Z(W)____ F____<br />
X, Z : End point C in absolute coordinates<br />
U, W : End point C in incremental coordinates relative to the start point A<br />
F<br />
: B~C~D feed-rate<br />
X<br />
Z<br />
W<br />
B<br />
A<br />
2<br />
4 U/2<br />
C<br />
3<br />
D<br />
X/2<br />
Z<br />
Fig. 3-25 G94 Linear Traversed Cutting Path<br />
In Fig. 3-25, the cutting paths 1 and 4 are fast positioned by G00. The cutting<br />
along paths 2 and 3 is executed at the feed-rate F. Whenever the start button<br />
(CYCST) is pressed in a block, the tool moves along the paths 1~2~3~4 to<br />
execute a cutting cycle.<br />
3 - 22
Chapter III G/M Codes<br />
6. Tapered Traversed Canned Cycle, G94<br />
Format:<br />
G94 X(U) Z(W) R F<br />
R : The difference between point B and C in radius.<br />
X, Z, U, W and F are identical to those of the linear traversed canned cycle.<br />
X<br />
Z<br />
W<br />
B<br />
R<br />
2<br />
C<br />
1<br />
3<br />
A<br />
4 U/2<br />
D<br />
X/2<br />
Z<br />
Fig. 3-26 G94 Tapered Traversed Cutting Path<br />
When using incremental coordinates, the signs (+/-) of U and W are determined<br />
by the tool's moving directions. If the moving direction is positive, the increment<br />
of U and W is (+), and vice versa. R value is as Fig. 3-27.<br />
1<br />
2<br />
3<br />
R W<br />
3.U-,W-,R+<br />
R<br />
1<br />
4 U/2<br />
X<br />
1.U-,W-,R-<br />
2.U+,W-,R-<br />
R<br />
W<br />
3<br />
2 4 U/2<br />
1<br />
Z<br />
4.U+,W-,R+<br />
W<br />
3<br />
2<br />
4 U/2<br />
2<br />
4 U/2<br />
3<br />
R<br />
1<br />
W<br />
Fig. 3-27 G94 cutting Path and Direction<br />
3 - 23
8/2 16/2 24/2 26/2<br />
HUST CNC-<strong>H4CL</strong>-T Manual<br />
Note that G90, G94, G92 are modal codes and all the values for X(U), Z(W) and<br />
R remain valid unless they are redefined or another G-command is given.<br />
As shown in Fig. 3-28, if the length of movement on Z-axis is fixed, the canned<br />
cycle is repeated merely by executing the X-axis positioning command.<br />
X<br />
66<br />
Z<br />
Fig 3-28 G90 Programming Example<br />
N10 G0 X80.0 Z100.0<br />
N20 M3 S2000<br />
N30 G90 U-8.0 W-66.0 F2.00<br />
N40 U-16.0<br />
N50 U-24.0<br />
N60 G0 U-26.0<br />
N70 G1 W-66.0 F1.00<br />
Finishing cut with G01<br />
N80 U2.0<br />
N90 G0 X80.0 Z100.0<br />
N100 M5<br />
N110 M2<br />
3.12.2 Compound Canned Cycle Functions, G70~G76<br />
Compound canned cycles simplifies the operation of CNC commands, once the<br />
data of a work-piece is set for fine cut, the CNC automatically determines the<br />
tool path for the rough cut. Compound canned cycles are also used for thread<br />
cutting. This function is particularly suited for column cutting.<br />
1. Compound Canned Cycle, Lateral Rough Cut, G71<br />
Format:<br />
3 - 24
Chapter III G/M Codes<br />
G71 U(d) R(e)<br />
G71 P(ns) Q(nf) U(u) W(w) F(f) S(s) T(t)<br />
T____ X____ Z_____ S____<br />
N(ns) <br />
<br />
When changing the tool for fine cutting, the tool<br />
number T**** should be inserted in the line before<br />
N(ns). Repeated insertion of the number is allowed<br />
but the inserted T-codes (the tool numbers) must be<br />
the same. The X and Z of the first block with the<br />
T-code indicate the safe position to which the tool<br />
retracts for changing. The other blocks that contain<br />
T-codes indicate the safe path to return to (ns)(ns).<br />
No blocks with T-codes will be executed for the<br />
rough cut.<br />
<br />
N(nf)<br />
<br />
G70 P(ns) Q(nf) --- Fine cut (See the above description)<br />
C<br />
B<br />
e<br />
(G00)<br />
(F)<br />
A<br />
d<br />
G00-fast feeding at<br />
F– rate<br />
G70 fine cut (program) path<br />
A1<br />
U/2<br />
W<br />
Fig. 3-29 Tool Path of G71 Rough Cut Canned Cycle<br />
In Fig. 3-29, the fine cut path is A~A1~B. A~C is the distance reserved for fine<br />
cut tool retraction. The cutting depth is U(d). The amount of the material to be<br />
removed for fine cutting is (u/2) and (w). The amount of retraction after each<br />
cut is R(e). The path of the final rough cut is parallel to the path of the fine cut.<br />
The definition of command groups in the program format is described below:<br />
U(d) : Cutting depth (radius programming ,+).<br />
If not specified, the parameter "G71, G72 Feeding Amount" is<br />
used.<br />
R(e) : Amount of retraction after each rough cut (radius<br />
programming).<br />
If not specified, the parameter "G71, G72 Retraction Amount" is<br />
used.<br />
3 - 25
HUST CNC-<strong>H4CL</strong>-T Manual<br />
P(ns) : The number of the first block for a fine cut cycle.<br />
Q(nf) : The number of the last block for a fine cut cycle.<br />
U(u) : Amount of material to be removed for fine cut, X-axis.<br />
W(w) :<br />
Amount of material to be removed for final cut, Z-axis.<br />
F(f),S(s),T(t): F = feed-rate. S = spindle speed, T = tool selection.<br />
The F, S, and T functions of G71 and previous blocks are<br />
applicable to G71, but all F, S, and T functions from N(ns) to<br />
N(nf) are not applicable to G71. They are only applicable to<br />
the fine cut command G70.<br />
<br />
<br />
<br />
N(ns)~N(nf) specify the machining path of A1~B.<br />
A maximum of 50 blocks can be inserted from N(ns) to N(nf).<br />
No subprogram is available from N(ns) to N(nf).<br />
No assignment of positioning commands on Z-axis is allowed from A to A1.<br />
The feed-rate from A to A1 is either G00 or G01.<br />
<br />
<br />
The X and Z tool path from A1 to B must be incremental or decremental.<br />
The cutting depth U(d) and retraction amount of rough cut R(e) are modal<br />
codes. They remain valid until another value is specified.<br />
G71 is applicable to the following four cutting types. They are all parallel to the<br />
Z-axis. Whether U and W are positive or negative (Fig. 3-30) is determined by<br />
the direction of tool path.<br />
B<br />
U+,W+<br />
A<br />
A<br />
U+,W-<br />
B<br />
X<br />
Z<br />
A<br />
A<br />
A<br />
A<br />
B<br />
U-W+<br />
A<br />
A<br />
U-W-<br />
B<br />
Fig. 3-30 G71 Rough Cut Canned Cycle<br />
3 - 26
Chapter III G/M Codes<br />
Programming example of G70, G71 compound canned cycle:<br />
X<br />
G70, G71 start/end point<br />
Safe point to<br />
change tool<br />
(100/2,140)<br />
1 (retraction)<br />
7 (cutting depth)<br />
G70 fine cut path<br />
2<br />
100<br />
75<br />
50<br />
25<br />
2<br />
Z<br />
Reserved for fine cut<br />
45 15 15 15 20 20 10<br />
Fig. 3-31 Programming Example of G71, G70 Compound Canned Cycle<br />
N10 G00 X100.000 Z140.000<br />
N20 M03 S1000<br />
N30 G71 U7.000 R1.000<br />
N40 G71 P80 Q140 U4.000 W2.000 F3.00<br />
N50 T101 X100.000 Z140.000<br />
N60 T101 X<br />
N70 T101 Z<br />
N80 G01 X25.0 F1.50<br />
This box contains fine cut tool change commands. The<br />
blocks containing T-code are not executed for the<br />
rough-cut. However, they will be executed to change<br />
tools for fine cutting. N60 and N70 that contain<br />
T-codes can be added to N80 [P(ns)] (fine cut start<br />
point) repeatedly. They are used for programming a<br />
save path from the safe position for tool change to the<br />
fine cut start point to remove obstacles, if any.<br />
N90 W-10.000<br />
N100 X50.000 W-20.000<br />
N110 W-20.000<br />
N120 X75.000 W-15.000<br />
N130 W-15.000<br />
N140 X100.000 W-15.000<br />
N150 G70 P80 Q140<br />
3 - 27
HUST CNC-<strong>H4CL</strong>-T Manual<br />
N160 M05 S0<br />
N170 M02<br />
2. Compound Canned Cycle, Traversed Rough Cut, G72<br />
Format:<br />
G72 W(d) R(e)<br />
G72 P(ns) Q(nf) U(u) W(w) F(f) S(s) T(t)<br />
T____ X____ Z_____ S____<br />
N(ns) <br />
<br />
<br />
When changing the tool for fine cut, the tool number T****<br />
should be inserted in the line before N (ns). Repeated<br />
insertion of the number is allowed but the inserted T-codes<br />
(the tool numbers) must be same. The X and Z of the first<br />
block with the T-code indicate the safe position to which the<br />
tool retracts for changing. The other blocks that contain<br />
T-codes indicate the safe path to return to (ns). No blocks<br />
with T-codes will be executed for rough-cut.<br />
N(nf)<br />
<br />
G70 P(ns) Q(nf) --- Fine cut (See the description above.)<br />
W<br />
d<br />
A1<br />
A<br />
C<br />
U/2<br />
(F)<br />
e<br />
(G00)<br />
G00-fast feeding<br />
at F – rate<br />
G70 fine cut (program) path<br />
B<br />
Fig. 3-32 Cutting Path of G72 Compound Canned Cycle<br />
As shown in Fig. 3-32, all functions of G72 are same as G71, except that the cycle<br />
path is parallel to the X-axis.<br />
<br />
N(ns)~N(nf) define the machining path of A1~B.<br />
No assignment of positioning commands on X-axis is allowed from A to A1.<br />
The feed-rate from A to A1 is either G00 or G01.<br />
3 - 28
Chapter III G/M Codes<br />
<br />
<br />
The X and Z tool path from A1 to B must be incremental or decremental.<br />
No subprogram is available from N(ns) to N(nf).<br />
G72 is applicable to the following four cutting types. They are all parallel to<br />
X-axis. Whether U and W are positive or negative (Fig. 3-33) is determined by<br />
the direction of tool path.<br />
B<br />
B<br />
U-,W+<br />
U+,W-<br />
U-,W-<br />
A1<br />
A1<br />
A<br />
A<br />
A<br />
A<br />
A1<br />
A1<br />
X<br />
Z<br />
U+,W+<br />
B<br />
B<br />
Fig. 3-33 Cutting Path of G72 Compound Canned cycle<br />
Programming example of G72, G70 compound canned cycles:<br />
X<br />
1 (retraction)<br />
10 (cutting depth)<br />
G70 fine cut path<br />
(108/2,130)<br />
G72, G70 start/end point<br />
Tool change start point<br />
2<br />
100<br />
75<br />
50<br />
25<br />
2<br />
Z<br />
Reserved for fine cut<br />
45 15 15 15 20 20<br />
Fig. 3-34 Programming Example of G72, G70 Compound Canned Cycles<br />
3 - 29
HUST CNC-<strong>H4CL</strong>-T Manual<br />
N10 G00 X108.000 Z130.000<br />
N20 M03 S2000<br />
N30 G72 W10.000 R1.000<br />
N40 G72 P80 Q130 U4.0 W2.0 F3.00<br />
N50 T101 X108.000 130.000<br />
N60 T101 X Z<br />
This box contains fine cut tool change<br />
commands. The blocks containing T-code<br />
are not executed for the rough-cut.<br />
However, they will be executed to change<br />
tools for fine cut. N60 and N70 that contain<br />
T-codes can be added to N80 [P(ns)] (fine<br />
cut start point) repeatedly. They are used for<br />
programming a save path from the safe<br />
position for tool change to the fine cut start<br />
point to remove obstacles, if any.<br />
N70 T101 X<br />
N80 G00 Z45.000<br />
N90 G01 X75.000 W15.000 F1.50<br />
N100 W15.000<br />
N110 X50.000 W15.000<br />
N120 W20.000<br />
N130 X25.000 W20.000<br />
N140 G70 P80 Q130<br />
N150 M05 S0<br />
N160 M02<br />
3. Compound Contour Canned Cycle, Rough cut, G73<br />
To save machining time, G73 is used to cut a work-piece that has been<br />
machined in a rough cut, forging or casting process and formed with a shape<br />
similar to the finished-product.<br />
Format:<br />
G73 U(i) W(k) R(d)<br />
G73 P(ns) Q(nf) U(u) W(w) F(f) S(s) T(t)<br />
T____ X____ Z_____ S____<br />
N(ns) <br />
<br />
<br />
When changing the tool for fine cut, the tool number T****<br />
should be inserted in the line before N(ns). Repeated<br />
insertion of the number is allowed but the inserted T-codes<br />
(the tool numbers) must be same. The X and Z of the first<br />
block with the T-code indicate the safe position to which the<br />
tool retracts for changing. The other blocks that contain<br />
T-codes indicate the safe path to return to (ns). No blocks<br />
with T-codes are executed for the rough cut.<br />
3 - 30
Chapter III G/M Codes<br />
N(nf)<br />
<br />
G70 P(ns) Q(nf) --- Fine cut (See the description above.)<br />
A~ C retraction distance<br />
1,2,3 feed sequence<br />
A<br />
k+w<br />
1<br />
2<br />
3<br />
C<br />
i+u/2<br />
B<br />
A1<br />
u/2<br />
w<br />
Fig. 3-35 Cutting Path of G73 Compound Canned Cycle<br />
U(i)<br />
: Cutting amount on X-axis. (radius programming)<br />
If not defined, the parameter "G73 Total Cutting Amount " is used.<br />
W(k) : Cutting amount on Z-axis.<br />
If not defined, the parameter "G73 Total Cutting Amount" is used.<br />
R(d)<br />
: Rough Cutting Cycles<br />
I.e. times of cuts required to reach the defined cutting depth on X<br />
and Z-axes. If not defined, the parameter "G73 Cutting Cycles"<br />
is used.<br />
P(ns)<br />
Q(nf)<br />
: The first block number of a fine cut cycle.<br />
: The last block number of a fine cut cycle.<br />
U(u) : Amount of material to be removed for fine cut, X-axis.<br />
W(w) : Amount of material to be removed for final cut, Z-axis.<br />
F(f),S(s),T(t): F = feed-rate, S = spindle speed, T = tool selection.<br />
The F, S, and T functions of G73 and previous blocks are<br />
applicable to G73, but all F, S, and T functions from N(ns) to N(nf)<br />
are not applicable to G73. They are only applicable to the fine cut<br />
command G70.<br />
3 - 31
HUST CNC-<strong>H4CL</strong>-T Manual<br />
<br />
<br />
<br />
<br />
<br />
N(ns)~N(nf) define the machining path of AA1B.<br />
A maximum of 50 blocks can be inserted from N(ns) to N(nf).<br />
No subprogram is available from N(ns) to N(nf).<br />
The tool returns to A when the cycle finishes.<br />
The cutting amount U(i), W(k) and the cutting cycles R(d) are modal<br />
codes. They remain valid until another value is defined.<br />
Programming example of G70, G73 compound canned cycles:<br />
X<br />
G73, G70 start point<br />
First feeding<br />
(120/2,150)<br />
G70 fine cut path<br />
4.67=14/3<br />
Cutting depth<br />
2<br />
100<br />
75<br />
50<br />
25<br />
2<br />
Z<br />
Reserved for fine cut<br />
45 15 15 15 20 20 20<br />
Fig. 3-36 Programming example of G70, G73 Compound Canned Cycles<br />
N20 G00 X120.000 Z150.000<br />
N30 G73 U14.000 W14.000 R3<br />
N40 G73 P80 Q100 U4.000 W2.000 F3.00<br />
N50 T101 X120.000 X150.000<br />
N60 X Z<br />
N70 X<br />
N80 G00 X25.000 W-20.000<br />
This box contains fine cut tool change<br />
commands. The blocks containing T-code<br />
are not executed for the rough-cut.<br />
However, they will be executed to change<br />
tools for fine cutting. N60 and N70 that<br />
contain T-codes can be added to N80 [P<br />
(ns)] (fine cut starting point) repeatedly.<br />
They are used to program a save path from<br />
the safe position for tool changes to the fine<br />
cut starting point to remove any obstacles.<br />
N90 G01 X50.000 W-20.000 F1.5<br />
3 - 32
Chapter III G/M Codes<br />
N100 W-20.000<br />
N110 X75.000 W-15.000<br />
N120 W-15.000<br />
N130 G01 X100.000 W-15.000<br />
N140 G70 P80 Q100<br />
4. Canned Cycle, Fine Cut, G70<br />
After a work-piece undergoes rough cut with G71, G72 or G73, G70 is used for<br />
fine cut of the work-piece to ensure its precision.<br />
Format:<br />
G70 P(ns) Q(nf)<br />
P(ns)<br />
Q(nf)<br />
: The number of the first block for a fine cut cycle.<br />
: The number of the last block for a fine cut cycle.<br />
The F, S, and T functions of G71, G72, G73 and previous blocks are applicable<br />
to G70. wherer F, S, or T is changed in the blocked from P(ns) to Q(nf), the<br />
changed values praveil. When G70 is executed, the tool returns to the start point<br />
and reads the next block.<br />
5. Lateral Grooving Canned Cycle, G74<br />
Format:<br />
G74 Z(W)___ K(k) R(e) F ___<br />
X<br />
Tool width (AD) must be acquired to determine the position of D.<br />
<br />
C<br />
Z<br />
W<br />
k<br />
e<br />
k<br />
D<br />
A<br />
Tool<br />
Z<br />
Fig 3-37 Cutting Path of G74 Lateral Grooving Canned Cycle<br />
3 - 33
HUST CNC-<strong>H4CL</strong>-T Manual<br />
R(e)<br />
Z<br />
W<br />
: The retraction amount after each cut of k on Z-axis.<br />
If not defined, parameter "G74, G75 Retraction Amount" is<br />
used.<br />
: Absolute coordinates of point C on Z-axis.<br />
: Incremental coordinates of points A~C on Z-axis.<br />
K(k) : Cutting amount on Z-axis. (Integer m only)<br />
F<br />
: Feed-rate.<br />
<br />
<br />
The retraction amount R(e) is a modal code. It remains valid until another<br />
value is defined.<br />
To initialize axial drilling, X axis must be located in the center (X=0).<br />
Example:<br />
G0 X0. Z80. Move tool quickly to the position X0. Z80. is relative to the<br />
work origin.<br />
M03 S2000 Positive rotation of spindle, speed 2000(rpm).<br />
G74 Z30.K10.R3.F0.2 Drilling canned cycle: ”Z30” indicates that the drilling<br />
cycle ends at the absolute coordinate Z30. K10 indicates<br />
10,000 (m) per drilling. R3 indicates 3000 (m) per<br />
retraction.<br />
M05 SO Spindle stops.<br />
M02 Program ends.<br />
3 - 34
Chapter III G/M Codes<br />
X<br />
10 10<br />
30<br />
A<br />
3<br />
TOOL<br />
Z<br />
80<br />
Fig. 3-38<br />
6. Traverse Grooving Canned Cycle, G75<br />
The G75 function is the same as G74 except that the positioning direction of G75<br />
is on the X-axis.<br />
Format:<br />
G75 X(U) ___ K(k) R(e) F ___<br />
X<br />
A<br />
Tool<br />
D<br />
Tool width (AD) must be acquired to<br />
determine the position of D.<br />
A<br />
k/2<br />
k/2<br />
U/2<br />
k/2<br />
C<br />
X/2<br />
Z<br />
Fig. 3-39 Cutting Path of G75 Traverse Grooving Canned Cycle<br />
R(e)<br />
: The retraction amount after each cut of k on X-axis (diameter<br />
programming)<br />
If not defined, parameter "G74, G75 Retraction Amount" is<br />
used.<br />
3 - 35
HUST CNC-<strong>H4CL</strong>-T Manual<br />
X<br />
U<br />
: Absolute coordinates of Point C on X-axis.<br />
: Incremental coordinates of points A~C on the X-axis<br />
K(k) : X-axis cutting amount. (Integer m with diameter progrmming)<br />
F<br />
: Feed-rate.<br />
<br />
The retraction amount R(e) is a modal code. It remains valid until another<br />
value defined.<br />
Programming example of grooving canned cycle:<br />
N10 G0 X80.0 Z50.O<br />
N20 M03 S2000<br />
N30 G75 X60. K5. R1. F0.5<br />
N40 M5 S0<br />
N50 M2<br />
7. Compound Thread Cutting Canned Cycle, G76<br />
G76 is easier to operate than G32, G92. Cutting threads with this function can<br />
save much time programming and calculating.<br />
Format:<br />
G76 P(m)(r)(a) Q(d min) R(d)<br />
G76 X(U) _____ Z(W) _____ R(i) P(k) Q(d) F(l)<br />
X<br />
E<br />
(G00)<br />
(G00)<br />
A<br />
U/2<br />
D<br />
(F)<br />
(G00)<br />
B<br />
X/2<br />
Z<br />
i<br />
r<br />
W<br />
d<br />
C<br />
K<br />
Z<br />
Fig. 3-40 G76 Compound Thread Cutting Canned Cycle<br />
3 - 36
Chapter III G/M Codes<br />
m : Fine cut times (2-digit, 01~99)<br />
If not defined, parameter "G76 Fine Cut Times" is used.<br />
r<br />
a<br />
: Chamfering settings (2 digits)<br />
Length of chamfering = 0.1 × chamfering settings (r) × thread pitch.<br />
If not defined, the parameter "Chamfering Settings" is used.<br />
: Tool-tip angle (2 digits).<br />
The available angles are 0, 5,10,15,…to 90. If not defined, the<br />
parameter "Tool-tip Angle" is used.<br />
m, r, and a are defined simultaneously by the command code P.<br />
For m=2, r=12, a=60°, then the command is G76 P021260.<br />
Q(d min): Minimum cutting amount (integer m)<br />
When the cutting amount of the nth cutting (d n - d n-1)<br />
HUST CNC-<strong>H4CL</strong>-T Manual<br />
In Fig. 3-39,, the feed-rate between C and D is defined by F and fast feeding is<br />
applied to other paths. The (+)(-) values of the increments in Fig. 3-39 are as<br />
follows:<br />
U, W : Negative (determined by the directions of AC and CD).<br />
R<br />
: Negative (determined by the directions of AC).<br />
Fig. 3-40 provides more information about the depth of each cut.<br />
TOOL<br />
d<br />
d n<br />
k<br />
d<br />
Fig. 3-41 Cutting Description<br />
The thread height K is acquired from the thread pitch and the tool nose angle.<br />
The formula is:<br />
Thread height k= (pitch/2) / Tan (angle/2)<br />
Tan (angle/2),acquired from the trigonometric table.<br />
Ex: If tool nose angle a=60, Thread pitch F(l)=2 mm.<br />
Thread pitch (1)<br />
30 30<br />
Thread depth, k<br />
Thread height k = (2/2) / Tan(60/2)<br />
= (1) / Tan 30 = (1)/0.5774 = 1.732<br />
The first cutting depth (cutting amount) is d,the n th cutting depth is d n, the<br />
cutting amount will decrease progressively every time. Note that n should not<br />
exceed 30. Otherwise, an alarm will be generated. In this case, please use the<br />
normal thread cutting.<br />
3 - 38
Chapter III G/M Codes<br />
Programming example of G76 compound thread cutting canned cycle:<br />
If tool nose angle a=60, Thread pitch F (l)=2 mm.<br />
as shown in the above example, thread height k= 1.732<br />
X = 20 - 2 × 1.732 = 16.536<br />
X<br />
1.732<br />
20 16.536<br />
Z<br />
10 50<br />
2<br />
Fig. 3-42 G76 Programming Example<br />
N10 G0 X30.0 Z60.0<br />
N20 M03 S2000<br />
N30 G76 P011060 Q100 R0.200<br />
N40 G76 X16.536 Z10.000 P1732 Q900 F2.00<br />
N50 M05<br />
N60 M02<br />
Notes on thread cutting are identical to G32 and G92. The chamfering settings<br />
are also applicable to G92 thread cutting canned cycle.<br />
8. Notes on Compound Canned Cycle (G70~G76):<br />
Every command of a compound canned cycle must contain correct P, Q, X,<br />
Z, U, W and R values.<br />
<br />
<br />
<br />
In G71, G72, G73 blocks, the block defined by P must contain either G00 or<br />
G01.Otherwise, alarm will be generated.<br />
G70, G71, G72, and G73 are not allowed in MDI mode. Otherwise, an<br />
alarm is triggered.<br />
In G70, G71, G72, or G73, no M98 (call subprograms) and M99 (quit<br />
subprograms) are applicable to blocks defined by P and Q.<br />
3 - 39
HUST CNC-<strong>H4CL</strong>-T Manual<br />
<br />
<br />
When executing G70~G73, the serial numbers defined by P and Q should<br />
not be the same.<br />
In G70, G71, G72, and G73, chamfering and R angle should not be used to<br />
terminate the last positioning command used for fine cut shaping blocks<br />
defined by P and Q.<br />
3.13 Max. Spindle Speed Setting, G50<br />
The setting function fo the maximum spindle speed (G50) normally goes with<br />
setting function of the constant surface cutting (G96).<br />
Format:<br />
G50 S____<br />
S<br />
: Max. spindle speed (rpm or rev/min)<br />
3.14 Constant Surface Cutting Speed Setting, G96<br />
Format:<br />
G96 S____<br />
S<br />
: Surface cutting speed (m/min)<br />
The surface cutting speed refers to the relative velocity between the tool-tip and<br />
cutting point (on the surface) of the rotating work-piece. A tool has its advised<br />
surface cutting speed range for optimizing the cutting result. G96 is used to<br />
control the surface cutting speed. The relationship between the surface cutting<br />
speed, work-piece diameter and spindle rotation speed is expressed by:<br />
VDN<br />
V : The surface cutting speed is the S value of G96.<br />
D : Diameter of the surface is sut, m.<br />
N<br />
: Spindle rotation speed, rev/min.<br />
When the surface cutting speed is constant and the tool cuts the surface inwards,<br />
D will become lesser and N will become greater. Hence the max. rotation speed<br />
must be limited using G50 S__. Once this limit is reached, the speed will not<br />
increase any more.<br />
3 - 40
Chapter III G/M Codes<br />
Ex: N10 G50 S2000 Max. rotation speed of the spindle is 2000 rpm.<br />
N20 G96 S200 The constant surface cutting speed is 200 m/min.<br />
3.15 Constant Rotation Speed Setting (Constant Surface Cutting Speed<br />
Cancellation), G97<br />
Format:<br />
G97 S____<br />
This function maintains the spindle speed defined by S. It cancels the constant<br />
surface cutting speed at the same time.<br />
3.16 Feed-rate Setting, G98, G99<br />
G98<br />
G99<br />
: Feed per minute, mm/min<br />
: Feed per revolution, mm/rev<br />
The feed-rate F in <strong>H4CL</strong>-T turner series is defined by G98 and G99. G99 is the<br />
default value. The conversion formula is:<br />
Fm = Fr * S<br />
Fm<br />
Fr<br />
S<br />
: Feed per minute, mm/min.<br />
: Feed per revolution, mm/rev.<br />
: Spindle speed, rev/min.<br />
3.17 Inch/Metric Measurement Mode , G20, G21<br />
Format: G20 -- System measurement in INCH mode<br />
G21 -- System measurement in METRIC mode<br />
3.18 Auxiliary Functions, M-code, S-code<br />
The auxiliary function M-code is comprised of the letter M and 2 digits attached<br />
behind (M-codes for general). The range of the M-codes is 00 ~99 and different<br />
codes represents different functions as shown below:<br />
3 - 41
HUST CNC-<strong>H4CL</strong>-T Manual<br />
Currently, <strong>H4CL</strong>-T Series provides the following M-codes:<br />
M-CODE<br />
Function<br />
M00 Program Suspension.<br />
M01 Option Suspension.<br />
M02 Program End.<br />
M30 Program Finished.<br />
M98 Subprogram Call<br />
M99<br />
Subprogram ends or main<br />
program repeats.<br />
M** Customized M code (PLC)<br />
M03<br />
Spindle rotates in normal<br />
direction<br />
M04<br />
Spindle rotates in reversed<br />
direction<br />
M05 Spindle stops<br />
M08 Coolant ON.<br />
M09 Coolant OFF.<br />
M10 Spindle chuck unclamped<br />
M11 Spindle chuck clamped<br />
M15 Work -piece counter +1<br />
M16 Clear work piece counter<br />
The auxiliary function S-code is used to control the rpm of the spindle. The<br />
maximum setting is S999999.<br />
Ex: S1000 means that the spindle rotates at 1000 rev/min.<br />
3.19 Subprogram<br />
Where there are certain fixed programs or command groups in a main program<br />
that demand repeated execution, these commands could be saved in memory<br />
as subprograms, so that the main program could be designed with a simplified<br />
structure. Subprograms can be called out one after another in auto mode.<br />
1. Structure of the Subprogram<br />
The structure of the subprogram is the same as the main program except that<br />
the subprogram ends with an M99 command.<br />
3 - 42
Chapter III G/M Codes<br />
PROGRAM 05<br />
Subprogram number<br />
Content<br />
Content<br />
M99<br />
Subprogram ends<br />
If a subprogram is not called by the main program but executed directly by<br />
pressing “CYCST”, the program loops.<br />
2. Execution of the Subprogram<br />
Format:<br />
M98 P _____ L _____<br />
P<br />
L<br />
: Subprogram number<br />
: Execution times of the subprogram. If not defined, the<br />
subprogram is to be executed only once.<br />
Ex: M98 P05<br />
M98 P05 L3<br />
Execute subprogram No 5 once.<br />
Execute subprogram No 5 three times.<br />
Stepwise Call: the main program calls the first subprogram, and the first<br />
subprogram calls a second sub-prgrams. The <strong>H4CL</strong>-T Series controller provides<br />
a maximum of 5 levels stepwise calls:<br />
PROGRAM 1 PROGRAM 2 PROGRAM 3 PROGRAM 4 PROGRAM 5<br />
N1 ...<br />
.<br />
.<br />
N5M98P2<br />
.<br />
.<br />
N31 M2<br />
N1 ...<br />
.<br />
.<br />
N5M98P3<br />
.<br />
.<br />
N32 M99<br />
N1 ...<br />
.<br />
.<br />
N5M98P4<br />
.<br />
.<br />
N32 M99<br />
N1 ...<br />
.<br />
.<br />
N5M98P5<br />
.<br />
.<br />
N32 M99<br />
N1 ...<br />
.<br />
.<br />
.<br />
.<br />
.<br />
N32 M99<br />
Fig. 3-43 Subprogram Stepwise Call<br />
The M98 and M99 blocks should not contain any positioning commands, such as<br />
X…, Z… .<br />
3 - 43
HUST CNC-<strong>H4CL</strong>-T Manual<br />
3.20 G40 G41 G42 Tool Radius Compensation<br />
3.20.1 Total Offset Compensation Setting and Cancellation<br />
Total offset compensation = Length compensation + Wear compensation<br />
Format:<br />
Compensation<br />
Set<br />
Compensation<br />
Cancel<br />
Without Turret T T00<br />
With Turret T T00<br />
: Compensation number, indicating which set of compensation data<br />
is to be applied.<br />
: Tool number, indicating which tool is to be selected.<br />
When a compensation number is selected, the control unit will simultaneously<br />
select the X-axis and Z-axis compensation values for tool length and wear<br />
compensation. These values are be summed up for compensation of the tool<br />
path.<br />
Any small differences between the cut work-piece and specifications found<br />
during the cutting test after the tool is calibrated with G10, can be remedied by<br />
wear compensation (referring to the Tool Wear Compensation page). If the<br />
difference is very small, positive values should be used. If the difference is large,<br />
negative values should be used.<br />
Ex: N10 G01 X50.000 Z100.000 T0202<br />
N20 Z200.000<br />
N30 X100.000 Z250.000 T0200<br />
Path of program ref. point after comp.<br />
Comp. Ends<br />
Comp. Starts<br />
N30<br />
N10<br />
N20<br />
Path of program ref. point before comp.<br />
Fig. 3-44 Example of Tool Length Compensation<br />
3 - 44
Chapter III G/M Codes<br />
In this example, T0202(T202) indicates that the second tool and the second set<br />
of compensation data are selected. T0200 (or T200) indicates that the tool<br />
length compensation is cancelled.<br />
Notes:<br />
1. After powering the CNC, compensation is automatically cancelled and the<br />
compensation number is reset to “0” or “00”.<br />
2. Compensation must be cancelled to execute "Auto-CYCST".<br />
3. The length compensation command "T-code" can form an independent<br />
block in the program without positioning definition. CNC executes an<br />
internal computation for compensation, but the tool does not execute any<br />
positioning movement.<br />
As previously mentioned, the tool-tip of the disposable tool is arc-shaped, as Fig<br />
3-45. The A point is usually the contact point between the tool-tip and work-piece<br />
when executing outer/inner diameter cutting along the Z-axis. B is the contact<br />
point when executing linear cutting along the X-axis. P point is the tangential<br />
intersection point of A and B, usually called a fictitious tool-tip for it doesn’t<br />
actually exist. It is also called a program reference point for it moves along the<br />
programmed path when there is no radius compensation. In fact, this point is<br />
also a basis for programming.<br />
P<br />
A<br />
B<br />
r<br />
C<br />
B<br />
r<br />
C<br />
P<br />
A<br />
(Outer-dia. tool-tip)<br />
(Inner-dia. tool-tip)<br />
Fig. 3-45 An Arc Tool-tip<br />
When executing outer or inner diameter cutting along the Z-axis, A and P are on<br />
the same path. When executing linear cutting along the X-axis, B and P are on<br />
the same path. Therefore, though the actual cutting points are A and B (the<br />
oblique line is not reachable), the cutting sizes are both correct, as shown in Fig.<br />
3-46 (left). However, it would be very different when cutting an oblique line with 2<br />
axes moving simultaneously. As Fig. 3-46 (right), P1~P2 is the fictitious tool-tip<br />
path (it is also the programmed path) and the actual cutting path is the tool-tip<br />
path CD along the arc. Obviously some part of the material is missed. This could<br />
3 - 45
HUST CNC-<strong>H4CL</strong>-T Manual<br />
be remedied by radius compensation to position the cutting path from C~D to<br />
P1~P2. The amount of positioning is calculated by CNC internally.<br />
D<br />
B<br />
P2<br />
X<br />
P<br />
Z<br />
A<br />
Unreachable part<br />
P1<br />
C<br />
Fig. 3-46 Cutting Error without Radius Compensation (Taper)<br />
Similarly, an error occurs during arc-cutting, as shown in Fig 3-47. It could also<br />
be remedied by radius compensation, with the amount of compensation<br />
calculated by the CNC.<br />
Fictitious tool-tip path<br />
P2<br />
Uncut part<br />
0<br />
Fig. 3-47 Cutting Error without Radius Compensation (Arc)<br />
P1<br />
3.20.2 Tool-tip Radius and Direction of Fictitious Tool-tip<br />
When executing tool-tip radius compensation, the radius and arc must be<br />
accurate; otherwise, the cutting result will not be precise. Manufacturers of<br />
disposable tools always provide accurate tool-tip radius data. The radius data<br />
are to be entered in the "R" field on the Tool Length Compensation page (unit:<br />
mm).<br />
Besides the tool-tip radius, the direction of fictitious tool-tips must be acquired (refer<br />
to the position of P in Fig. 3-45). The direction is defined by integers 0~9 (Fig. 3-48).<br />
In the system with tools on the top (rear) holder, the direction 3 is for outer diameter<br />
3 - 46
Chapter III G/M Codes<br />
cutting, while the direction 2 is for inner diameter cutting. The data of fictitious tool-tip<br />
direction are to be entered in the "T" field on the Tool Length page<br />
Once these two data are acquired, the control unit compensates for the tool-tip<br />
properly by calculating "R" and "T" values internally after giving the tool-tip<br />
radius compensation command.<br />
The range of tool-tip radius compensation is 0 ~ +/- 999.999 mm.<br />
Direction-1<br />
Direction-2<br />
Direction-0,9<br />
Direction-3<br />
Direction-4<br />
Or simplified as below<br />
2 6 1<br />
Direction-5<br />
Direction-6<br />
7 0 9 5<br />
Direction-7<br />
Direction-8<br />
X<br />
3 8 4<br />
Z<br />
Fig. 3-48 Fictitious Tool-tip Direction<br />
3.20.3 Tool-tip Radius Compensation, G41 ,G42 ,G40<br />
Format:<br />
T or T<br />
G41(G42) X(U)___Z(W)___<br />
G40<br />
Call tool number<br />
Compensation setting<br />
Compensation cancellation<br />
The tool number must be declared to the CNC before giving the G41 or G42<br />
command. Selection of the command depends on the direction of the tool path<br />
and its relative position. As shown in Fig. 3-49, if the tool-tip radius is on the right<br />
side of the tool path (viewed from the direction of the tool path), G42 is used for<br />
compensation of the radius deviating to the right. If the tool-tip radius is on the<br />
left side of the tool path, G41 is used for compensation of the radius deviating to<br />
the left.<br />
3 - 47
HUST CNC-<strong>H4CL</strong>-T Manual<br />
G42 (right side)<br />
Direction of tool path<br />
Work<br />
piece<br />
X<br />
Z<br />
Direction of tool path<br />
G41 (left side)<br />
Fig. 3-49 G41 and G42 Applications<br />
Initial Setting for Tool Radius Compensation:<br />
When G41/G42 is executed, the tool moves in a linear motion to the X, Y<br />
coordinate defined in the G41/G42 block at G01 speed. When reaching the<br />
defined X, Y coordinates, the tool-tip deviates at a distance equivalent to the tool<br />
radius. The initial setting of the G41/G42 command is only available in the G00<br />
or G01 linear cutting model. The system sends an error message if it is executed<br />
in the G02 or G03 arc-cutting mode. A simple description of the tool initial setting<br />
function is given below (assuming that the direction of the tool-tip is 0,9):<br />
1. Tool radius compensation is executed when the tool travels from A to B.<br />
Insertion of the radius compensation is complete at B.<br />
N1 G01 X_____ Z_____ F_____ T_____<br />
N2 G41(G42) X_____ Z_____<br />
N3 Z_____<br />
G42<br />
A<br />
Program<br />
B<br />
G41<br />
N3<br />
N2<br />
Fig. 3-50 Initial Setting of the Tool Radius Compensation – 1<br />
2. Radius compensation is complete at the start point (B) of arc cutting.<br />
N1 G01 X_____ Z_____ F_____ T_____<br />
N2 G41(G42) X_____ Z_____<br />
N3 G02 X_____ Z_____ I_____ K_____<br />
3 - 48
Chapter III G/M Codes<br />
Program path<br />
B<br />
G42<br />
G41<br />
A<br />
N3<br />
N2<br />
Fig. 3-51 Initial Setting of the Tool Radius Compensation - 2<br />
Tool Radius Compensation Cancellation:<br />
Once G41 or G42 is executed successfully, G40 command must be used to<br />
cancel the tool radius compensation. The movement for cancellation of the<br />
radius compensation can only be executed in the G00 or G01 mode. G40 is not<br />
directly available for blocks G02 and G03. Cancellation can only be effective<br />
after successful arc cutting. Below are some examples of the cancellation of tool<br />
radius compensation (assume the direction of tool-tip is 0,9):<br />
1. N20 G41(G42) ..........<br />
<br />
<br />
N31 G01 Z_____ F______<br />
N32 G40 X_____ Z______<br />
Program path<br />
G41<br />
A<br />
B<br />
G42<br />
N31<br />
N32 G40<br />
Fig. 3-52 Tool Radius Compensation Cancellation -1<br />
3 - 49
HUST CNC-<strong>H4CL</strong>-T Manual<br />
2. N10 G41(G42) .............<br />
<br />
<br />
N15 G02 X____ Z____ I____ K____ F____<br />
N20 G01<br />
N25 G40 X____ Z____<br />
Program path<br />
G41<br />
A<br />
B<br />
N20<br />
G42<br />
N25 G40<br />
Fig 3-53 Tool Radius Compensation Cancellation - 2<br />
G40, G41, G42 are modal codes. Once G41 (or G42) is set, do not set it again<br />
before using G40 to cancel the compensation.<br />
3.20.4 Notes on Tool Radius Compensation<br />
1. When radius compensation is executed, there should be at least one block<br />
containing positioning commands between two neighboring blocks. The<br />
following commands do not perform tool positioning, though they have<br />
mechanical actions. Therefore they are not allowed for continuous blocks .<br />
M05<br />
S2100<br />
G4 X1.000<br />
G1 U0.000<br />
G98<br />
M-code output<br />
S-code output<br />
Suspension<br />
Feed distance=0<br />
G-code only<br />
2. Only G00 and G01 are applicable to blocks with tool-tip radius<br />
compensation. Arc commands G02, G03 are not allowed<br />
3. The tool radius compensation function is not available for MDI operation.<br />
3 - 50
Chapter III G/M Codes<br />
4. Tool-tip radius compensation is not allowed for G74, G75, or G76.<br />
5. When cutting an inside corner, the arc radius R of the inside corner must be<br />
equal or greater than the tool radius (r). Otherwise an alarm is generated.<br />
Cutting and outside corner of an arc is not subject to this regulation.<br />
6. If the corner is shaped like an arrowhead (Fig. 3-54), outside corner cutting<br />
will be correct. The correctness of cutting on the inside corner depends<br />
on the length of opening C. If the length is less than the tool diameter, no<br />
cutting is possible and an over-cutting alarm is generated. If it is greater<br />
than the tool diameter, the tool cuts toward the inside corner. However, part<br />
of the work-piece cannot be cut in the sharp inside corner. .<br />
G42<br />
G41<br />
A<br />
B<br />
P<br />
C<br />
Program path<br />
Fig. 3-54<br />
7. When cutting a stepwise work-piece with a step value smaller than the tool<br />
radius, an over-cutting alarm is generated as shown in Figure 3-55.<br />
Fig. 3-55 Over-cutting (Shaded Area)<br />
Tool-tip Radius Compensation Example:<br />
Tool number = 02, tool-tip direction = 3, tool-tip radius = 1.5 mm. The X-axis<br />
coordinate is defined by the diameter.<br />
3 - 51
HUST CNC-<strong>H4CL</strong>-T Manual<br />
X<br />
11<br />
10<br />
9<br />
8<br />
7<br />
S<br />
Start point<br />
R=25<br />
6<br />
5 4<br />
3<br />
2 1<br />
Z<br />
Fig. 3-56<br />
N10 G0 X100. Z120.<br />
Point S<br />
N20 G0 X0. Z110. Point 1<br />
N30 M3 S2000<br />
N40 G42 Z100. T02 F3.0<br />
insertion<br />
Point 2, compensation<br />
N50 G1 X20. Point 3<br />
N60 X30. Z91.34 Point 4<br />
N70 Z75. Point 5<br />
N80 G02 X44.644 Z57.322 I25. F1.5<br />
Point 6, arc cutting<br />
N90 G01 X76. Z37.644 F3.0 Point 7<br />
N100 Z20. Point 8<br />
N110 X80. Point 9<br />
N120 Z0. Point 10<br />
N130 G40 X90.<br />
cancellation<br />
N140 G0 X100. Z120.<br />
Point 11, compensation<br />
Point S<br />
N150 M05<br />
N160 M02<br />
3 - 52
Chapter III G/M Codes<br />
An over-cutting alarm is generated if you try to return to Point S directly<br />
from Point 10. This is because the angle of 9-10-S is too sharp. The alarm<br />
is also generated if the radius compensation is greater than 2.0 mm, which<br />
is the distance from 8 to 9.<br />
3 - 53
HUST CNC-<strong>H4CL</strong>-T Manual<br />
3 - 54
Chapter IV MCM Parameter Settings<br />
4 MCM Parameters<br />
4.1 MCM Parameters<br />
The MCM parameter setting function allows the user to define controller system<br />
constants according to mechanical specifications and machining conditions.<br />
These parameters are classified into two groups: basic parameters and MCM<br />
parameters.<br />
4.1.1 Basic Parameters<br />
Quickly press the<br />
shown below:<br />
I/O<br />
MCM<br />
key twice to enter the parameter setting screenas<br />
Fig 4-1<br />
Fig 4-2<br />
4 - 1
HUST CNC-<strong>H4CL</strong>-T Manual<br />
4.1.2 MCM Parameters<br />
The correct and proper setting of these parameters is important for operation of<br />
the mechanical system and fabrication of the work-piece. Make sure that the<br />
setting is correct. Press Reset to restart the machine when the MCM parameter<br />
is successfully set<br />
Press System Parameter on the second page of the basic parameters to<br />
enter the system parameter page below:<br />
(A password is required when the password protection function is active)<br />
Fig 4-3<br />
Fig 4-4<br />
4 - 2
Chapter IV MCM Parameter Settings<br />
Fig 4-5<br />
Fig 4-6<br />
Fig 4-7 X-axis Ball Screw Error Compensation<br />
4 - 3
HUST CNC-<strong>H4CL</strong>-T Manual<br />
Fig 4-8 Z-axis Ball Screw Error Compensation<br />
Fig 4-9 Server Spindle Parameter Setting - (1)<br />
Fig 4-10 Server Spindle Parameter Setting - (2)<br />
4 - 4
Chapter IV MCM Parameter Settings<br />
Fig 4-11 Server Spindle Parameter Setting - (3)<br />
4.2 Description of Parameters<br />
1. X-axis JOG speed setting, unit: mm/min.<br />
2. Z-axis JOG speed setting, unit: mm/min.<br />
Format= (Default 1000)<br />
3. Set the workpiece counting limit.<br />
Format= (Default=0)<br />
Set the maximum value for number of program executions to cooperate with<br />
utilization of M15 and M16.<br />
M15: Fabrication Number+ 1<br />
M16: Fabrication Number is reset to zero<br />
4. External chuck type setting. =0 hydraulic chuck; =1 normal chuck<br />
Format=(Default= 0)<br />
Setting=0 The clamp/unclamp chuck movement is controlled by output 004.<br />
The spindle can’t rotate when the chuck is not clamped.<br />
Setting=1 The external chuck is not hydraulic, please manually<br />
clamp/unclamp the chuck.<br />
5. Selective skip function setting=0 OFF; =1 ON<br />
Format=(Default=0)<br />
4 - 5
HUST CNC-<strong>H4CL</strong>-T Manual<br />
When setting=1 and input I05 is ON, a program block containing “/1” will be<br />
skipped.<br />
6. M12 feeding-delay setting<br />
Format=(Default= 50) unit:10ms<br />
M12 is the feeding command code. The countdown will be initiated after the<br />
PLC receives the M12 command code, and once the countdown is finished,<br />
the output 0011 (0011 feed output) will turn to ON.<br />
The command is for feeder. The feeding movement varies among<br />
manufacturers; this description is for reference only.<br />
7. Chuck release and return delay setting<br />
Format=(Default=50) unit:10ms<br />
Condition: Auto/Semi-auto mode the command is valid only in auto mode<br />
The countdown will be initiated when the PLC receives the Chuck release<br />
command code M10. After the countdown is finished the command is executed.<br />
8. The row number automatically generates the initial value.<br />
Set the starting number that is automatically generated by the single-section<br />
serial program number .<br />
Format= (Default= 0)<br />
9. The row number automatically generates the partition value.<br />
Set the increasing number between single-section serial program number .<br />
Format= (Default= 0)<br />
10. X-axis resolution denominator setting.<br />
11. X-axis resolution numerator setting.<br />
12. Z-axis resolution denominator setting.<br />
13. Z-axis resolution numerator setting.<br />
The numerator or denominator of the resolution is set based on the<br />
specifications of the mechanical axial gearing (such as ball screw) and the<br />
encoder pulses of the servomotor. No unauthorized change of setting is<br />
allowed.<br />
Resolution <br />
Ball screw pitch<br />
Motor encoder multiplication factor<br />
GR<br />
4 - 6
Chapter IV MCM Parameter Settings<br />
Example:<br />
X-axis ball screw pitch = 5.000mm<br />
Motor Encoder = 2500 pulses, multiplication factor = 4<br />
Gear Ratio= 5:1(Servomotor rotates 5 turns = ball screw Rotates 1 turn)<br />
Resolution =<br />
5000<br />
2500 4<br />
<br />
1<br />
5<br />
1<br />
<br />
10<br />
X-axis resolution denominator= 10<br />
X-axis resolution numerator= 1<br />
14. X-axis resolution multiplication factor<br />
15. Z-axis resolution multiplication factor<br />
Format= (Default=4)<br />
Setting= 1, encoder pulses multiplied by 1.<br />
Setting= 2, encoder pulses multiplied by 2.<br />
Setting= 4, encoder pulses multiplied by 4.<br />
Only one factor is selected at a time.<br />
Note:<br />
The multiplication factor setting is dependent on the rigidness of the<br />
structure. The vibration of the motor during structure power feeding<br />
suggests that the rigidness of the structure is too high. This can be<br />
corrected by reducing the multiplication factor of the axis concerned.<br />
Ex: When the encoder pulses at 2000 rpm, and the multiplication factor is<br />
set to 2, the pulses are 2000×2 = 4000.<br />
16. X-axis maximum feed rate setting.<br />
17. Z-axis maximum feed rate setting.<br />
Format=(Default =10000) Unit: mm/min<br />
Note: The setting is in integer format.<br />
Ex: If you set the Z-axis to 5000, it indicates that your highest feed rate is<br />
5000 mm per minute.<br />
4 - 7
HUST CNC-<strong>H4CL</strong>-T Manual<br />
The maximum feed rate is calculated as follows:<br />
Fmax = 0.95 x RPM (the maximum rpm of the servomotor) x Pitch (ball<br />
screw pitch) ÷ GR<br />
Ex: The highest rotation speed of the servomotor on X-axis is 3000 rpm,<br />
the ball screw pitch is 5mm.<br />
GR = 5:1 (Servomotor rotates 5 turns = ball screw Rotates 1 turn)<br />
Fmax 0.95×3000×5÷5 2850<br />
Recommended setting: 2850<br />
18. X-axis, direction of motor rotation.<br />
19. Z-axis, direction of motor rotation.<br />
Format =, Default=0<br />
Setting = 0, Motor rotates in the positive direction. (CW)<br />
Setting = 1, Motor rotates in the negative direction. (CCW)<br />
Machine design varies among manufacturers, and the position of the<br />
servomotor on the ball screw varies too. Parameters can be used to adjust<br />
the direction if the machine moves in opposite direction after the servomotor<br />
is installed. The parameters affect the direction of the machine coordinates.<br />
Note: the explanation below is not related to the setting of the motor<br />
direction but important to the wiring of the machine.<br />
Since design of the driver varies among manufacturers, the position signal<br />
decoder of a new driver might not be able to fit with the controller. In this<br />
case, the servomotor will become divergent (motor rotates at high rpm)<br />
because of the feedback error. For this reason, be sure to separate the<br />
servomotor and the machine until the accuracy of motor rotation direction is<br />
confirmed. When motor divergence occurs, change the position of A and<br />
(A-) with B and (B-)<br />
20. X-axis homing speed when tool returns to machine origin 1.<br />
21. Z-axis homing speed when tool returns to machine origin 1.<br />
Format= (Default=2500), Unit: mm/min<br />
22. X-axis homing speed when tool returns to machine origin 2.<br />
4 - 8
Chapter IV MCM Parameter Settings<br />
23. Z-axis homing speed when tool returns to machine origin 2.<br />
Format= (Default=40), Unit: mm/min<br />
When the tool returns to home, the machine moves to the limit switch at the<br />
first velocity and the length of the limit switch must be greater<br />
than the distance required for deceleration. Otherwise the<br />
machine will run over the limit switch and result in a homing error.<br />
The equation to calculate the length of the limit switch is:<br />
The length of the limit switch (FDCOM × ACC) ÷60000<br />
Note: ( FDCOM = Homing velocity 1<br />
( ACC = G01 acceleration/deceleration time<br />
( 60000 msec ( 60 secs×1000 = 60000 msec )<br />
Ex:<br />
FDCOM = Homing velocity 1 = 3000 mm/ min<br />
ACC acceleration/deceleration time = 100 ms<br />
Minimal length of limit switch = 3000 × 100 / 60000 = 5 mm<br />
24. X-axis homing direction when tool returns to machine origin.<br />
25. Z-axis homing direction when tool returns to machine origin.<br />
Format=, Default=0<br />
Setting = 0, tool returns to machine origin in the positive direction.<br />
Setting = 1, tool returns to machine origin in the negative direction<br />
26. X-axis software OT Limit in (+) direction setting.<br />
27. Z-axis software OT Limit in (+) direction setting.<br />
Format=. (Default=+9999.999), Unit: mm.<br />
The set value is the positive distance between software OT and the<br />
machine origin.<br />
28. X-axis software OT Limit in (-) direction setting.<br />
29. X-axis software OT Limit in (-) direction setting.<br />
Format=. (Default= -9999.999), Unit: mm.<br />
4 - 9
HUST CNC-<strong>H4CL</strong>-T Manual<br />
The setting value is the negative distance between software OT and the<br />
machine origin.<br />
The concept and description of OT limit:<br />
EM-STOP<br />
Software OT limit<br />
Machine Origin<br />
Software OT limit (MCM #171~182)<br />
EM-STOP<br />
About5~10mm<br />
About 5~10mm<br />
Fig 4-11<br />
30. X-axis backlash compensation setting.<br />
31. Z-axis backlash compensation setting.<br />
Format=. (Default 0), Unit: mm<br />
32. X-axis ball screw pitch error compensation setting.<br />
33. Z-axis ball screw pitch error compensation setting.<br />
Format= (Default=0)<br />
Setting = 0, compensation cancel<br />
Setting = -1, negative compensation<br />
Setting = 1, positive compensation<br />
34. X-axis segment length of pitch error compensation.<br />
35. Z-axis segment length of pitch error compensation.<br />
Format=. (Default=20.000), Unit: mm<br />
4 - 10
Chapter IV MCM Parameter Settings<br />
Press the "Ball Screw Compensation" soft key to set the compensation for each<br />
segment (max. 40 segments).<br />
36. X-axis origin signal format setting.<br />
37. Z-axis origin signal format setting.<br />
Format= (Default=0)<br />
Setting = 0, Origin signal format: NC<br />
Setting = 1, Origin signal format: NO<br />
38. X-axis MPG hand-wheel resolution denominator setting.<br />
39. X-axis MPG hand-wheel resolution numerator setting.<br />
40. Z-axis MPG hand-wheel resolution denominator setting.<br />
41. Z-axis MPG hand-wheel resolution numerator setting.<br />
Format= (Default=100), See the following examples.:<br />
Example: Resolution denominator=100<br />
Resolution numerator=100<br />
Hand-wheel multiplication factor R222=100 (PLC setting)<br />
Hand-wheel moves one block=100 pulses<br />
When the hand-wheel moves one block, the feed distance on<br />
X-axis = 100×(100÷100)<br />
= 0.1 mm<br />
= 100 μm<br />
Example: Resolution denominator=200<br />
Resolution numerator=500<br />
Hand-wheel multiplication factor R222=100 (PLC setting)<br />
Hand-wheel moves one block=100 pulses<br />
When the hand-wheel moves one block, the feed distance on<br />
Y-axis = 100×(500÷200)<br />
=0.250mm<br />
= 250 μm<br />
42. Maximum "U" value during execution.<br />
4 - 11
HUST CNC-<strong>H4CL</strong>-T Manual<br />
43. Maximum "W" value during execution.<br />
Format=.(Default: 0.000)<br />
During execution, only increments are allowed for change of tool<br />
compensation data.These settings define the maximum input value.<br />
Setting = 0.000 indicates that no change of tool compensation data is<br />
allowed during execution.<br />
44. Accel./decel. type.<br />
Format=, Default=0<br />
Setting = 0, Linear type. Setting = 1, "S" curve.<br />
When the setting = 1, all linear types are replaced by "S" curve types.<br />
45. G00 accel./decel. time setting.<br />
Format=(Default=100), Unit: msec<br />
Setting range: 4~512 ms.<br />
When the accel./decel. type is set to 0, the G00 accel./decel. type is linear.<br />
When the accel./decel. type is set to 0, the G00 accel./decel. type is "S"<br />
curve. In this case, the setting remains same as the linear type, but the<br />
actual acceleration/deceleration time is the double of the setting.<br />
46. G99 accel./decel. time setting.<br />
Format= (Default=100), Unit: msec<br />
Setting range: 4 ~ 1024 msec. 100 msec is recommended for both G00<br />
and G01.<br />
47. Spindle accel./ decel. time setting.<br />
Format= (Default=100) ; Unit: msec<br />
48. MPG hand-wheel accel./decel. time setting.<br />
Format= (Default=64), Unit: msec<br />
Setting range: 4~512 ms.<br />
49. Number of spindles in use setting<br />
4 - 12
Chapter IV MCM Parameter Settings<br />
Format=(Default=1). Maximum=3.<br />
First spindle SPINDLE adapter<br />
Second spindle Y-AXIS adapter<br />
Third spindle D/A holder<br />
Condition: when the first spindle is the server spindle (angle controlled by first<br />
spindle), one spindle at a time.<br />
50. Drilling canned cycle buffer distance setting<br />
Format=. (Default=0.000)<br />
Execute the G83 drilling command to make the respective axis adopt the<br />
feeding buffer distance setting of G01 from G00 fast positioning.<br />
51. Spindle control methods<br />
Format=(Default=0)<br />
Setting= 0, Open-loop AC motor control.<br />
Setting= 1, Closed-loop spindle positioning control (working with the<br />
spindle motor)<br />
52. Spindle encoder amplification factor setting<br />
Format= (Default=4)<br />
Setting = 1, encoder pulses multiplied by 1.<br />
Setting = 2, encoder pulses multiplied by 2.<br />
Setting = 4, encoder pulses multiplied by 4.<br />
Only one factor is selected at a time.<br />
53. Spindle encoder pulses setting.<br />
Format= (Default = 4096)<br />
Setting = encoder pulses × spindle encoder amplification factor<br />
54. Spindle accel./ decel. time setting.<br />
Format= (Default=100) ; Unit: msec<br />
Setting range: 4~3000 ms<br />
55. Spindle motor rpm at output voltage = 10V<br />
Format= (Default=3000), Unit: RPM<br />
The spindle motor rpm is calculated as follows:<br />
Motor RPM = F602<br />
P<br />
FInverter Frenquency<br />
PPoles(A regular AC motor has 4 poles )<br />
4 - 13
HUST CNC-<strong>H4CL</strong>-T Manual<br />
There is a 2%~3% slip when the motor operates at the highest rpm. The<br />
actual slip depends on design of the motor.<br />
56. Spindle rotating direction settings.<br />
Format= (Default=0)<br />
Setting=0 , CW<br />
Setting=1 , CCW<br />
57. Spindle rotating direction when switching to standard axial control<br />
Format= (Default= 0)<br />
Setting=0, CW<br />
Setting=1, CCW<br />
58. Spindle accel./ decel. time when switching to standard axial control<br />
Format=, (Default=100), Unit: (msec).<br />
Setting range= 4~3000 ms<br />
59. Spindle maximum rpm when switching to standard axial control<br />
Format=,(Default=1000), Unit: RPM.<br />
Setting range= 1~nominal rpm<br />
60. The ratio of the horizontal axis (Z axis) in graph mode<br />
Format=. ,<br />
61. Radius or diameter programming.<br />
Format= (Default=0)<br />
Setting= 0, X-axis is radius programming.<br />
Setting= 1, X-axis is diameter programming.<br />
62. Set number of blades used.<br />
Format=, Default= 0<br />
This function cooperates with the use of a blade switching component for a<br />
maximum of 8 blades.<br />
Since the blade switching component for each company varies, this setting is for<br />
reference only.<br />
63. CW rotation time for tool search setting<br />
4 - 14
Chapter IV MCM Parameter Settings<br />
Format=, Default 50, Unit:10ms.<br />
Please pause this setting once the tool is found in CW rotation, and then<br />
execute CCW rotation.<br />
The design varies among manufacturers; the description is for reference<br />
only.<br />
64. CCW rotation time for tool search setting<br />
Format=, Default 50, Unit:10ms.<br />
Setting for CCW rotation time<br />
The design varies among manufacturers; this description is for reference<br />
only.<br />
65. Lubricant interval setting<br />
Format=, Default 18000, Unit:10ms.<br />
66. Lubrication time setting<br />
Format=, Default 1000, Unit:10ms.<br />
67. Use of U232 storage device.<br />
Format= (Default = 0) [ U232 is optional ]<br />
Setting=0 , U232 storage device is not used.<br />
Setting=1 , U232 storage device is used.<br />
When setting =1 (U232 storage device is used),U232 will be connected to<br />
the controller via RS232. When the startup procedure of U232 is completed,<br />
a "U232" function softkey appears on the JOG screen.<br />
68. Mode selection setting 0: Auxiliary panel; 1: key<br />
Select an operation mode for the controller,<br />
Setting=0 , Select the operation mode from the auxiliary panel; the mode key is<br />
invalid.<br />
Setting=1 , Select the operation mode with the mode key.<br />
69. Auxiliary panel type setting 0: knob; 1: key<br />
Setting=0, The auxiliary panel is operated with knobs (5 knobs)<br />
Setting=1, The auxiliary panel is opearted with keys (only an operation<br />
mode key is available)<br />
G71 ~ G76 compound cutting parameters: See Chapter III "G/M Codes"<br />
4 - 15
HUST CNC-<strong>H4CL</strong>-T Manual<br />
" Time – 1~4" and "Number of Tools": See Chapter VII "Attachment".<br />
The parameters below are applicable to the close-loop spindle positioning control.<br />
70. Spindle rotating direction settings.<br />
Format= (Default=0)<br />
Setting=0 , CW<br />
Setting=1 , CCW<br />
71. Spindle homing grid settings.<br />
Format=, (Default=0)<br />
Setting=0 , the spindle searches for grid.<br />
Setting=1 , the spindle does not search for grid.<br />
72. Spindle homing grid direction settings.<br />
Format= (Default=0)<br />
Setting=0 , CW<br />
Setting=1 , CCW<br />
73. Rotation direction setting for spindle positioning.<br />
Format= (Default=0)<br />
Setting=0 , CW<br />
Setting=1 , CCW<br />
74. Spindle homing grid rpm setting.<br />
Format= (Default=1)<br />
75. Spindle positioning rpm setting.<br />
Format= (Default=1)<br />
4 - 16
Chapter IV MCM Parameter Settings<br />
76. Spindle positioning angle in the JOG mode.<br />
Format=. (Default=0.000)<br />
77. Value to be displayed per rotation of the spindle Format=<br />
(Default=0).<br />
This parameter is only available at the Recommended value of 360000<br />
78. Spindle homing origin signal setting<br />
Format= (Default=0) (First spindle only)<br />
Setting=0, first spindle searches for grid directly<br />
Setting=1, First spindle searches for external input signal (I022 and I023 are on)<br />
before searching for grid<br />
79. Spindle homing origin signal rpm setting<br />
Format= (Default 0) (First spindle only)<br />
Setting for spindle searching origin signal (I022 and I 023) rpm<br />
4 - 17
HUST CNC-<strong>H4CL</strong>-T Manual<br />
4 - 18
Chapter V Connection<br />
5 Connection<br />
5.1 Connecting System Descriptions<br />
This connection manual explains the electrical connections and system<br />
structure of the <strong>H4CL</strong>-T Series numerical control unit to ensure adequate<br />
connection between the numerical unit and machine.<br />
Fig. 5-1 shows the <strong>H4CL</strong>-T Series externally connected command devices.<br />
They are categorized as follows:<br />
(1) The control unit can be connected to a PC via the RS232 interface.<br />
(2) A PLC ladder application is built in it.<br />
(3) The system can control both AC servo and stepper motors.<br />
(4) The system provides 24 DI / DO 16 points. Also included are connections<br />
for the MPG, spindle encoder and skip sensor.<br />
PC<br />
RS232C<br />
Spindle Encoder<br />
X-axis<br />
AC Servo<br />
Driver<br />
HUST CNC<br />
<strong>H4CL</strong>-T<br />
Internal PLC<br />
(ROM/RAM)<br />
Skip<br />
MPG<br />
Z-axis<br />
Driver<br />
AC Servo<br />
Invertor<br />
(Inveter)<br />
Spindle<br />
Spindle<br />
DI/DO Board<br />
(Relay)<br />
Fig. 5-1 Applications of the <strong>H4CL</strong>-T Series<br />
5 - 1
HUST CNC-<strong>H4CL</strong>-T Manual<br />
5.2 System Installation<br />
5.2.1 Operating Environment<br />
The control unit used for the <strong>H4CL</strong>-T Series must be installed under the<br />
following conditions. Any failure to observe these conditions may lead to<br />
abnormal operation.<br />
* Ambient temperature<br />
Operation<br />
Storage or transportation<br />
0C ~ 45C.<br />
-20C ~ 55C.<br />
* Temperature variation Max. 1.1 C / min.<br />
* Humidity<br />
Normal<br />
Short time<br />
* Vibration limit<br />
Operation<br />
* Noise<br />
Operation<br />
< 80 RH.<br />
Max. > 95 RH.<br />
Max. 0.075 mm at 5 HZ.<br />
up to 2000 V / 0.110 -6 sec.<br />
per 0.01 second.<br />
* Others<br />
Please consult us before installing the system in an environment exposed<br />
to a high degree of dust, coolant, or organic solution.<br />
5.2.2 Notes on the Control Unit Case Design<br />
* A sealed case with dust proof design should be used for the control unit<br />
and MDI panel.<br />
* The internal temperature of the case should not be 10C higher than the<br />
ambient temperature.<br />
* The cable inlet/outlet should be properly sealed.<br />
* To avoid noise interference, the cable, each unit, AC power and CRT<br />
should be mounted at least more than 100 mm apart. In a magnetic field<br />
environment, this distance should be increased to at least 300 mm.<br />
* Refer to the operator’s manual for servo driver mounting information.<br />
5 - 2
Chapter V Connection<br />
5.2.3 Thermal Case Design<br />
The internal temperature of the case should not be 10C higher than the<br />
ambient temperature. The main factors are the heat source and heat transfer<br />
area. For customers, the heat source is more uncontrollable than the heat<br />
transfer area. The allowable internal temperature rise of the case is shown as<br />
follows:<br />
(1) With a cooling fan, the allowable temperature rise is 1C /6 W/1 m 2.<br />
(2) Without a cooling fan, the allowable temperature rise is 1C /4 W/1 m 2 .<br />
This means that a case with a heat transfer area of 1 m 2 and a cooling fan<br />
should have an allowable internal temperature rise of 1C if a heating unit of 6<br />
W (4W without a cooling fan) is installed in the case. The heat transfer area of a<br />
case is acquired by subtracting its overall surface area from its area in contact<br />
with the floor.<br />
Ex 1: (With a cooling fan)<br />
Heat Transfer Area = 2 square meter.<br />
Allowable Internal Temperature Rise = 10C.<br />
Maximum Allowable Heat Source = 6W210120W.<br />
Other cooling devices, such as the cooling fin, must be incorporated for<br />
calculation if the heat source is more than 120W.<br />
Ex 2: (Without a cooling fan)<br />
Heat Transfer Area = 2 square meters.<br />
Allowable Internal Temperature Rise = 10C.<br />
Maximum Allowable Heat Source = 4W21080W.<br />
Other cooling devices, such as the cooling fins, must be incorporated for<br />
calculation if the heat source is more than 80W.<br />
5 - 3
HUST CNC-<strong>H4CL</strong>-T Manual<br />
5.2.4 <strong>H4CL</strong>-T External Dimensions<br />
* <strong>H4CL</strong>-T Panel<br />
RESET<br />
I/O<br />
MCM<br />
TAPE<br />
TEACH<br />
JOG<br />
HOME<br />
EDIT<br />
PRONO<br />
AUTO<br />
MDI<br />
X Y Z<br />
U V W<br />
A B C<br />
I<br />
O<br />
J<br />
P<br />
K<br />
Q<br />
R<br />
D<br />
S<br />
E<br />
T<br />
L<br />
G F M N<br />
H<br />
NEW<br />
LINE<br />
ENTER<br />
DEL.<br />
CLEAR<br />
CURSOR<br />
PAGE<br />
START<br />
F F F F F F F F<br />
Fig. 5-2 <strong>H4CL</strong>-T Control Unit Panel<br />
PRNO<br />
EDIT<br />
DNC<br />
TEAC<br />
Z<br />
MDI<br />
AUTO<br />
JOG<br />
JOG<br />
X<br />
A<br />
MPG-TEST<br />
GRAPH<br />
JOG<br />
HOME<br />
MODE<br />
AXIS<br />
G01 MFO<br />
G00 MFO<br />
SSO<br />
HUST<br />
FEED<br />
HOLD<br />
START<br />
Toll<br />
Chage<br />
SP-<br />
CW<br />
JOG<br />
Lub.<br />
SP-<br />
STOP<br />
RAPID<br />
Coolant<br />
SP-<br />
CCW<br />
JOG<br />
Ref-<br />
Point<br />
Tool<br />
Radius<br />
D1<br />
Servo<br />
Release<br />
Tool<br />
Offset<br />
D2<br />
ON<br />
POWER<br />
OFF<br />
EM-STOP<br />
Fig. 5-3 <strong>H4CL</strong>-T MDI Panel<br />
5 - 4
Chapter V Connection<br />
* <strong>H4CL</strong>-T CPU Main Board Connectors (Rear View)<br />
INPUT OUTPUT<br />
ODD 2<br />
EVN 2<br />
ODD 1<br />
SIO<br />
D/A<br />
X-AXIS<br />
Y-AXIS<br />
Z-AXIS<br />
A-AXIS<br />
MPG<br />
EVN 1<br />
LCD.ADJ<br />
RS232<br />
AC110 220V10%<br />
RT<br />
Fig. 5-4 <strong>H4CL</strong>-T CPU Main Board Connectors<br />
* <strong>H4CL</strong>-T Series Case Dimensions (Rear view)<br />
430<br />
139 140 139<br />
<br />
258<br />
248<br />
237.4<br />
INPUT OUTPUT<br />
ODD 2<br />
EVN 2<br />
ODD 1<br />
SIO<br />
D/A<br />
X-AXIS<br />
Y-AXIS<br />
Z-AXIS<br />
A-AXIS<br />
MPG<br />
EVN 1<br />
LCD.ADJ<br />
RS232<br />
AC110 220V10%<br />
RT<br />
Fig. 5-5 <strong>H4CL</strong>-T Control Unit Dimensions (Rear View)<br />
5 - 5
HUST CNC-<strong>H4CL</strong>-T Manual<br />
* <strong>H4CL</strong>-T Series Case Dimensions (Top view)<br />
78.8<br />
408<br />
Fig. 5-6 <strong>H4CL</strong>-T Control Unit Dimensions (Top View)<br />
* <strong>H4CL</strong>-T Series MDI Panel Dimensions<br />
PRNO<br />
EDIT<br />
DNC<br />
TEAC<br />
Z<br />
MDI<br />
AUTO<br />
JOG<br />
JOG<br />
X<br />
A<br />
MPG-TEST<br />
GRAPH<br />
JOG<br />
HOME<br />
MODE<br />
AXIS<br />
G01 MFO<br />
G00 MFO<br />
SSO<br />
HUST<br />
FEED<br />
HOLD<br />
START<br />
Toll<br />
Chage<br />
SP-<br />
CW<br />
JOG<br />
Lub.<br />
SP-<br />
STOP<br />
RAPID<br />
Coolant<br />
SP-<br />
CCW<br />
JOG<br />
Ref-<br />
Point<br />
Tool<br />
Radius<br />
D1<br />
Servo<br />
Release<br />
Tool<br />
Offset<br />
D2<br />
ON<br />
POWER<br />
OFF<br />
EM-STOP<br />
Fig. 5-7 <strong>H4CL</strong>-T MDI Panel Dimensions<br />
5 - 6
Chapter V Connection<br />
* <strong>H4CL</strong>-T Series Cutout Dimensions<br />
<br />
<br />
<br />
<br />
<br />
<br />
<br />
<br />
<br />
<br />
<br />
<br />
<br />
<br />
<br />
<br />
<br />
Cutout<br />
(H)(W))<br />
<br />
<br />
<br />
<br />
Fig. 5-8 <strong>H4CL</strong>-T Control Unit Cutout Dimensions<br />
<br />
<br />
<br />
<br />
<br />
* <strong>H4CL</strong>-T Series MDI Panel Cutout Dimensions<br />
<br />
<br />
<br />
<br />
<br />
<br />
<br />
<br />
<br />
<br />
<br />
<br />
<br />
<br />
<br />
Cutout<br />
(H)(W))<br />
<br />
<br />
<br />
<br />
<br />
<br />
Fig. 5-9 <strong>H4CL</strong>-T MDI Panel Cutout Dimensions<br />
5 - 7
HUST CNC-<strong>H4CL</strong>-T Manual<br />
5.3 Input/Output (I/O) Interface Connections<br />
5.3.1 Input Board / Output Board (Terminal Block Type)<br />
* NPN standard input board – 24 IN.<br />
200 mm<br />
52 44 mm<br />
64 mm 65 mm 64 mm<br />
Fig. 5-10 NPN type 1 Input Board<br />
* NPN type standard output board – 16 Outputs.<br />
143 mm<br />
75 mm<br />
113 mm<br />
135 mm<br />
Fig. 5-11 NPN type 1 Output Board<br />
5 - 8
Chapter V Connection<br />
5.3.2 Input Board / Output Board (CE Standard)<br />
* Input Board<br />
The standard NPN input board provides an interface of 24 input points.<br />
When the signal is correctly received, the corresponding indicator illuminates.<br />
Note: Voltages exist at the +24V terminal of each input when the DC 24V<br />
power supply begins operation.<br />
107<br />
99<br />
+24V<br />
+24V<br />
+24V<br />
GND<br />
GND<br />
GND<br />
I07<br />
I15<br />
I23<br />
+24V<br />
GND<br />
I06<br />
+24V<br />
GND<br />
I05<br />
+24V<br />
GND<br />
I14<br />
+24V<br />
GND<br />
I13<br />
+24V<br />
GND<br />
I22<br />
+24V<br />
GND<br />
I21<br />
+24V GND +24V<br />
DC 24V<br />
Power<br />
155<br />
+24V<br />
GND<br />
I04<br />
+24V<br />
GND<br />
I12<br />
+24V<br />
GND<br />
I20<br />
147<br />
+24V<br />
+24V<br />
+24V<br />
GND<br />
GND<br />
GND<br />
I03<br />
I11<br />
I19<br />
+24V<br />
+24V<br />
+24V<br />
GND<br />
GND<br />
GND<br />
I02<br />
I10<br />
I18<br />
+24V<br />
+24V<br />
+24V<br />
GND<br />
GND<br />
GND<br />
I01<br />
I09<br />
I17<br />
+24V<br />
+24V<br />
+24V<br />
GND<br />
GND<br />
GND<br />
I00<br />
I08<br />
I16<br />
Unit: mm<br />
Fig. 5-12 Input Board<br />
5 - 9
HUST CNC-<strong>H4CL</strong>-T Manual<br />
* Output Board<br />
<br />
<br />
<br />
<br />
<br />
<br />
<br />
<br />
<br />
<br />
<br />
<br />
<br />
<br />
<br />
<br />
<br />
<br />
<br />
<br />
<br />
<br />
<br />
<br />
<br />
<br />
<br />
<br />
<br />
<br />
<br />
<br />
<br />
<br />
<br />
<br />
Fig. 5-13 Output Board<br />
5 - 10
Chapter V Connection<br />
<br />
<br />
<br />
“”<br />
<br />
<br />
<br />
<br />
<br />
<br />
<br />
<br />
<br />
<br />
Fig.5-14<br />
<br />
<br />
<br />
<br />
<br />
<br />
<br />
<br />
<br />
<br />
<br />
<br />
<br />
<br />
<br />
<br />
<br />
<br />
<br />
<br />
<br />
<br />
<br />
<br />
Fig.5-15<br />
<br />
<br />
<br />
“”<br />
<br />
<br />
<br />
<br />
<br />
<br />
<br />
<br />
<br />
<br />
<br />
<br />
Fig.5-16<br />
<br />
<br />
<br />
<br />
<br />
<br />
<br />
<br />
<br />
<br />
<br />
<br />
<br />
<br />
<br />
<br />
5 - 11
HUST CNC-<strong>H4CL</strong>-T Manual<br />
<br />
<br />
<br />
<br />
<br />
<br />
<br />
<br />
<br />
<br />
<br />
<br />
<br />
<br />
<br />
<br />
<br />
<br />
Fig.5-17<br />
<br />
<br />
<br />
<br />
<br />
<br />
<br />
Fig.5-18<br />
<br />
<br />
<br />
<br />
<br />
<br />
<br />
<br />
<br />
<br />
<br />
<br />
<br />
<br />
<br />
<br />
5 - 12
Chapter V Connection<br />
5.3.3 I/O Connector Pin Assignment<br />
The I/O connections and pin assignment are described in this section.<br />
The I/O connector designation and pin assignment are shown in Table 5-1 and<br />
Fig. 5-14. Note that there are 24 input points and 16 output points.<br />
Table 5-1 I/O Connector Designations and Pin Assignment<br />
HUST CNC<br />
<strong>H4CL</strong>-T<br />
Connector<br />
Designation<br />
Output<br />
Input<br />
I/O Pin Assignment<br />
O000 ~ O015<br />
I000 ~ I023<br />
INPUT (Female) Connector Input<br />
(I points) Pin<br />
OUTPUT (Male) Connector Output<br />
(O points) Pin<br />
Ground(24V<br />
23<br />
22<br />
21<br />
20<br />
19<br />
18<br />
17<br />
16<br />
15<br />
14<br />
13<br />
25<br />
24<br />
23<br />
22<br />
21<br />
20<br />
19<br />
18<br />
17<br />
16<br />
15<br />
14<br />
13<br />
12<br />
11<br />
10<br />
9<br />
8<br />
7<br />
6<br />
5<br />
4<br />
3<br />
2<br />
1<br />
12<br />
11<br />
10<br />
09<br />
08<br />
07<br />
06<br />
05<br />
04<br />
03<br />
02<br />
01<br />
00<br />
13<br />
14<br />
15<br />
24V(externally supplied)<br />
+24V<br />
+24V<br />
Ground(24V)<br />
Ground(24V)<br />
14<br />
15<br />
16<br />
17<br />
18<br />
19<br />
20<br />
21<br />
22<br />
23<br />
24<br />
25<br />
1 00<br />
2 01<br />
3 02<br />
4<br />
03<br />
5 04<br />
6 05<br />
7 06<br />
8 07<br />
9 08<br />
10<br />
09<br />
11<br />
10<br />
12 11<br />
13 12<br />
Fig. 5-19 I/O Connector Pin Assignment (NPN-type)<br />
I/O signals are directly connected to the I/O points when these boards are<br />
used.<br />
I/O signals are connected to the input and output connectors when the input<br />
board and output board are not used. (In this case, the transistors in the<br />
controller are likely to blow if the line fails or the current existing on the<br />
circuit exceeds the rated current.)<br />
The output points of the <strong>H4CL</strong>-T Series are transistor circuit of the open<br />
collector.<br />
5 - 13
HUST CNC-<strong>H4CL</strong>-T Manual<br />
5.3.4 Input Signals<br />
The input signal is transmitted to the control unit from an external machine<br />
through the button, limit switch, relay board contact, or proximity switch. The<br />
<strong>H4CL</strong>-T has 24 input points.<br />
* Input Signal Specification:<br />
Input voltage: 0 V.<br />
Input current: 8 mA.<br />
The <strong>H4CL</strong>-T Series should be fed with the DC 24V power supply from the<br />
output board.<br />
The DC 24 power supply will not provided.<br />
* Input Signal Connection Diagram (direct input to the control unit)<br />
The input signal is directly connected to the input points (the input connectors of<br />
the <strong>H4CL</strong>-T) of the numerical control unit when the input board is not used.<br />
Signal Contact<br />
24V<br />
3.3K Resistance<br />
5V<br />
R<br />
0V<br />
Machine<br />
Control Unit Circuit<br />
5V Ground<br />
DB25LFConnector Pin (I- point)<br />
Fig. 5-20 Input Signal Connection (direct input to the control unit)<br />
5 - 14
Chapter V Connection<br />
* Input Signal Connection Diagram (input to the control unit via the input<br />
board)<br />
INPUT Board<br />
Signal Contact<br />
24V<br />
3.3K Resistance<br />
5<br />
24V<br />
R<br />
Machine<br />
0V<br />
I - point<br />
Control Unit Circuit<br />
5V Ground<br />
DB25LFConnector Pin (I- point)<br />
Fig. 5-21 Input Signal Connection (input to the control unit via the input board)<br />
5.3.5 Output Signals<br />
The output signal is transmitted to the external machine from the control unit.<br />
The output circuit of the <strong>H4CL</strong>-T is a transistor circuit that is used to drive the<br />
relay or LED of the machine.<br />
* Output Signal Specification<br />
(a) Each contact on the output relay board can withstand up to AC<br />
voltage of 250V and 1A current.<br />
(b) Each contact of the <strong>H4CL</strong>-T transistor circuit supplies up to 24V<br />
voltage and 100mA current when the output relay board is not used.<br />
* Output Signal Connection (direct input to the machine from the control<br />
unit)<br />
The output signal is directly connected to the output points (the output<br />
connectors of the <strong>H4CL</strong>-T) of the numerical control unit when the output relay<br />
board is not used.<br />
When the <strong>H4CL</strong>-T control unit is directly connected to an inductive load, such<br />
as a relay on the machine, the inductive load should be connected to a spark<br />
killer in parallel that should be as close to the load as possible. (See. Fig 5-17)<br />
5 - 15
HUST CNC-<strong>H4CL</strong>-T Manual<br />
Pin assignment (output) of DB25LM<br />
RELAY<br />
Spark Killer<br />
(diode)<br />
Controller output circuit<br />
Machine<br />
Fig. 5-22 Output Line (without the output relay board)<br />
* Output Signal Connection (the signal is transmitted to the machine via the<br />
output relay board)<br />
DB25LM Connect Pin (O point)<br />
OUTPUT Relay Board<br />
Surge absorber<br />
NO<br />
Control Unit Output Line<br />
0V<br />
Machine<br />
Fig. 5-23 (to the machine via the output relay board)<br />
5 - 16
Chapter V Connection<br />
5.4 Connection Diagram<br />
5.4.1 Connector Type<br />
The connector types on the back of the <strong>H4CL</strong>-T control unit are listed below.<br />
Each connector symbol is followed by a letter of either M (for male) or F (for<br />
female).<br />
DB9L<br />
DB25L<br />
TBxx<br />
9-pin connector.<br />
25-pin connector.<br />
Terminal connector and its pin is represented with "XX".<br />
5.4.2 Connector Designation<br />
The <strong>H4CL</strong>-T connector designation is marked on the back of the control unit<br />
case and their corresponding types are listed below:<br />
Connector Name<br />
Output Interface<br />
Input Interface<br />
I/O (expandable)<br />
D/A Spindle Analog Output<br />
X-axis Servo<br />
Z-axis Servo<br />
Spindle<br />
MPG<br />
RS232C Interface Connector<br />
Connector<br />
Designation<br />
Output<br />
Input<br />
SIO<br />
D / A<br />
X-AXIS<br />
Z-AXIS<br />
SPINDLE<br />
MPG<br />
RS232<br />
Connector<br />
Type<br />
DB25LM<br />
(Male)<br />
DB25LF<br />
(Female)<br />
DB15LM<br />
(Male)<br />
DB15LF<br />
(Female)<br />
DB9LF<br />
(Female)<br />
DB9LF<br />
(Female)<br />
DB9LF<br />
(Female)<br />
DB9LM<br />
(Male)<br />
DB9LF<br />
(Female)<br />
Table 5-2 <strong>H4CL</strong>-T Connector Designations and Types<br />
5 - 17
HUST CNC-<strong>H4CL</strong>-T Manual<br />
5.4.3 <strong>H4CL</strong>-T Connection (Y-shaped terminal)<br />
* <strong>H4CL</strong>-T Main Connection Diagram<br />
<br />
24V<br />
PowerSupply<br />
<br />
<br />
INPUT OUTPUT SIO<br />
ODD 2<br />
EVN 2<br />
ODD 1<br />
EVN 1<br />
D/A<br />
X-AXIS<br />
Y-AXIS<br />
Z-AXIS<br />
A-AXIS<br />
MPG<br />
RS232<br />
X-axis<br />
Y-axis<br />
Z-axis<br />
Spindle<br />
MPG<br />
AC110 220V10%<br />
RT<br />
AC IN: only for AC 220V<br />
Fig. 5-24<br />
<br />
5 - 18
Chapter V Connection<br />
* Emergency-Stop Line-1<br />
It is recommended to connect as Fig. 5-25. In doing so, the software and<br />
hardware is controlled in series and the user can press the emergency button to<br />
turn off the servo even if an abnormality is found in the software.<br />
24V GND (0V)<br />
Limit Switch<br />
(E-Stop)<br />
Emergency<br />
Button<br />
I00<br />
I01<br />
I02<br />
Reset Button (Forced)<br />
X-axis Origin LIMIT<br />
24V GND (0V)<br />
Z-axis Origin LIMIT<br />
O15<br />
COM<br />
INPUT Board<br />
OUTPUT Board<br />
Servo Driver<br />
Servo-On<br />
Signal<br />
X-axis<br />
Servo Start<br />
Command<br />
24V<br />
Servo Driver<br />
Servo-On<br />
Signal<br />
Z-axis<br />
External SERVO ON RELAY<br />
Fig. 5-25<br />
5 - 19
HUST CNC-<strong>H4CL</strong>-T Manual<br />
* Emergency-Stop Line-2<br />
Fig.5-26 is a simplified connection diagram.<br />
24V GND (0V)<br />
Limit Switch<br />
(E-Stop)<br />
Emergency<br />
Button<br />
I00<br />
I01<br />
I02<br />
Reset Button (Forced)<br />
X-axis Origin LIMIT<br />
24V GND (0V)<br />
Z-axis Origin LIMIT<br />
O15<br />
COM<br />
O14<br />
COM<br />
INPUT Board<br />
OUTPUT Board<br />
Servo Driver<br />
Servo-On<br />
Signal<br />
X-axis<br />
Servo Driver<br />
Servo-On<br />
Signal<br />
Z-axis<br />
Fig. 5-26<br />
5 - 20
Chapter V Connection<br />
* <strong>H4CL</strong>-T Spindle Connection<br />
B- B A- A<br />
DB9LF Definition<br />
Pin 1 A<br />
Pin 2 A-<br />
Pin 3 B<br />
Pin 4 B-<br />
Pin 5 Z<br />
Pin 6 Z-<br />
Pin 7 10V<br />
Pin 8 0V<br />
Pin 9 5V<br />
<br />
<br />
5 4 3 2 1<br />
9 8 7 6<br />
<br />
<br />
SPINDLE<br />
(Female)<br />
Control Unit (Rear View)<br />
FUJI G9S-2JE<br />
<br />
FWD REV CM 12 11<br />
COM<br />
R S T E P1 P+ DB U V W<br />
O02<br />
COM<br />
O01<br />
Inverter<br />
OUTPUT Board<br />
3200 ~ 230V<br />
GND<br />
30,500W<br />
M<br />
ENCODER<br />
Fig. 5-27<br />
Note: It is recommended to connect 24V for the contacts on the output board.<br />
If a part (such as oil and water pumps, and motor) requiring 110V or 220V voltage<br />
needs to be powered on, an additional relay is powered via the output board.<br />
5 - 21
HUST CNC-<strong>H4CL</strong>-T Manual<br />
5.4.4 <strong>H4CL</strong>-T Connection (CE Standard)<br />
* <strong>H4CL</strong>-T Main Connection Diagram<br />
<br />
<br />
<br />
<br />
<br />
<br />
<br />
INPUT OUTPUT SIO<br />
ODD 2<br />
EVN 2<br />
ODD 1<br />
EVN 1<br />
D/A<br />
X-AXIS<br />
Y-AXIS<br />
Z-AXIS<br />
A-AXIS<br />
MPG<br />
RS232<br />
X-axis<br />
Y-axis<br />
Z-axis<br />
Spindle<br />
MPG<br />
AC110 220V10%<br />
RT<br />
AC IN: only for AC 220V<br />
Fig. 5-28<br />
<br />
5 - 22
Chapter V Connection<br />
** Emergency-Stop Line-1<br />
It is recommended to connect as Fig. 5-29. In doing so, the software and<br />
hardware is controlled in series and the user can press the emergency button to<br />
turn off the servo even if an abnormality is found in the software.<br />
24V GND (0V)<br />
Limit Switch<br />
(E-Stop)<br />
Emergency<br />
Button<br />
Reset Button (Forced)<br />
+24V<br />
COM15<br />
NOO15<br />
+24V<br />
GND<br />
I02<br />
+24V<br />
GND<br />
I01<br />
+24V<br />
GND<br />
I00<br />
Input Board<br />
OUTPUT Board<br />
X-axis Origin LIMIT<br />
Servo Driver<br />
Servo-On<br />
Singnal<br />
X-axis<br />
Z-axis Origin LIMIT<br />
24V GND (0V)<br />
Servo Start Command<br />
24V<br />
Servo Driver<br />
Servo-On<br />
Singnal<br />
Z-axis<br />
External SERVO ON RELAY<br />
Fig. 5-29<br />
5 - 23
HUST CNC-<strong>H4CL</strong>-T Manual<br />
* Emergency-Stop Line-2<br />
Fig.5-30 is a simplified connection diagram.<br />
24V GND (0V)<br />
Limit Switch<br />
(E-Stop)<br />
Emergency<br />
Button<br />
Reset Button (Forced)<br />
<br />
<br />
<br />
+24V<br />
COM14<br />
NOO14<br />
+24V<br />
GND<br />
I02<br />
+24V<br />
GND<br />
I01<br />
+24V<br />
GND<br />
I00<br />
Input Board<br />
X-axis Origin LIMIT<br />
OUTPUT Board<br />
Servo Driver<br />
Z-axis Origin LIMIT<br />
24V GND (0V)<br />
Servo-On<br />
Singnal<br />
X-axis<br />
Servo Driver<br />
Servo-On<br />
Singnal<br />
Z-axis<br />
Fig. 5-30<br />
5 - 24
Chapter V Connection<br />
* Servo Motor Connection Diagram (The MITSUBISHI J2S motor is used as<br />
an example.)<br />
To the control unit axis<br />
To SERVO-ON RELAY<br />
3 AC 220V<br />
U V W<br />
Grounding<br />
Side View<br />
Fig. 5-31<br />
5 - 25
HUST CNC-<strong>H4CL</strong>-T Manual<br />
5.4.5 <strong>H4CL</strong>-L Auxiliary panel + SIO wring and explanation<br />
<br />
<br />
<br />
<br />
ODD 2<br />
EVN 2<br />
ODD 1<br />
EVN 1<br />
<br />
<br />
<br />
<br />
<br />
<br />
<br />
<br />
<br />
<br />
<br />
<br />
<br />
<br />
<br />
<br />
<br />
<br />
<br />
<br />
<br />
<br />
<br />
<br />
Expansion Output Board<br />
<br />
Expansion Input Board<br />
Fig. 5-32<br />
CNC<br />
PANEL<br />
BOARD<br />
Attention of wiring SIO for <strong>H4CL</strong>-L<br />
1. The signal will decay without input the 24V for<br />
each expansion Input or Output board.<br />
2. All DB 15 PIN wire must used isolate the paired cable.<br />
3. Expansion INPUT boardOnly one you can used<br />
The start input signal from PLC : I144~I159<br />
4. Expansion OUTPUT boardOnly two you can used<br />
The first output signal from PLC :O128~O143<br />
The second output signal from PLC :O144~O159<br />
5. It must have the SIO Module then you can used<br />
the expansion I/O board.<br />
<strong>H4CL</strong> type Used the Hcon software to check<br />
#10889= 0 None the SIO Module.<br />
#10889=10 The expansion I/O board is validity.<br />
5 - 26
Chapter V Connection<br />
* Expansion Output Board size<br />
<br />
1. There have 16 output for one piece of expansion OUTPUT board.<br />
2. O000O013 is the type of Open-Collector.24V 100 mA<br />
3. The other two is for Contact type.5A<br />
<br />
<br />
<br />
<br />
<br />
<br />
<br />
<br />
<br />
<br />
<br />
<br />
158<br />
RELAY 1<br />
RELAY 2<br />
<br />
<br />
<br />
<br />
<br />
<br />
<br />
<br />
<br />
<br />
<br />
<br />
<br />
<br />
<br />
<br />
<br />
<br />
<br />
<br />
<br />
<br />
<br />
<br />
<br />
<br />
<br />
<br />
<br />
<br />
<br />
<br />
<br />
<br />
<br />
86<br />
Fig. 5-33 Expansion OUTPUT board<br />
* Expansion Input Board size<br />
<br />
1. There have 16 input for one piece of expansion INPUT board. Input is for<br />
NPN type.<br />
<br />
<br />
<br />
<br />
<br />
<br />
<br />
<br />
<br />
<br />
<br />
<br />
<br />
158<br />
<br />
<br />
<br />
<br />
<br />
<br />
<br />
<br />
<br />
<br />
<br />
<br />
<br />
<br />
<br />
<br />
<br />
<br />
<br />
<br />
<br />
<br />
<br />
<br />
<br />
<br />
<br />
<br />
<br />
<br />
<br />
<br />
<br />
<br />
<br />
<br />
<br />
<br />
<br />
<br />
<br />
<br />
<br />
<br />
<br />
<br />
<br />
<br />
Fig. 5-34 Expansion INPUT board<br />
<br />
<br />
86<br />
5 - 27
HUST CNC-<strong>H4CL</strong>-T Manual<br />
5.4.6 Connection Method for Servo Drivers & Pulse Generators<br />
The servo driver is connected to the connectors of the X-, and Z-axis, and the<br />
spindle encoder and inverter to the spindle. As shown in Fig. 5-35, the pulse<br />
generator is connected to the MPG. Servo driver and pulse generator<br />
connections vary depending on their brands. Refer to their operating manuals<br />
for details.<br />
CPU<br />
Main Board<br />
X-axis<br />
X A<br />
A-<br />
B<br />
B-<br />
Z<br />
Z-<br />
VCMD<br />
+5V Ground<br />
+5V<br />
1<br />
2<br />
3<br />
4<br />
5<br />
6<br />
7<br />
8<br />
9<br />
The servo driver and pulse generator connection vary<br />
Servo<br />
Signal<br />
Positioning Command -10 ~ +10V<br />
+5VGround<br />
Case Ground<br />
Z-axis<br />
Z A<br />
A-<br />
B<br />
B-<br />
Z<br />
Z-<br />
VCMD<br />
+5V Ground<br />
+5V<br />
1<br />
2<br />
3<br />
4<br />
5<br />
6<br />
7<br />
8<br />
9<br />
Servo<br />
Signal<br />
Positioning Command -10 ~ +10V<br />
+5VGround<br />
Case Ground<br />
Spindle<br />
SP<br />
A<br />
A-<br />
B<br />
B-<br />
1<br />
2<br />
3<br />
4<br />
5<br />
6<br />
Spindle<br />
Encoder<br />
DAC<br />
GND<br />
+5V<br />
7<br />
8<br />
9<br />
Inverter<br />
Case Ground<br />
A<br />
1<br />
(MPG)<br />
B<br />
2<br />
MPG<br />
+5V<br />
3<br />
Signal<br />
0V<br />
7.8<br />
Fig. 5-35 Axes, Spindle, and MPG connection<br />
Case Ground<br />
5 - 28
Chapter V Connection<br />
5 - 29<br />
H4 Pulse Connection:
HUST CNC-<strong>H4CL</strong>-T Manual<br />
Difference in Display Frame<br />
Pulse Type: 0=Pulse + Direction 1:Positive Pulse + Negative Pulse 2:A+B<br />
5 - 30
Chapter V Connection<br />
5.4.7 System AC Power Connection<br />
CNC Power-on<br />
servo on delay<br />
Servo Power-on<br />
Time<br />
Time<br />
AC220V R<br />
AC220V S<br />
AC220V T<br />
<br />
To CPU Power supply R<br />
To CPU Power supply T<br />
power-off<br />
power-on<br />
Power-On Relay<br />
Power-On Timer Relay<br />
Servo<br />
Driver<br />
Items with a dotted<br />
rectangle <br />
can be<br />
optionally<br />
connected.<br />
AC 220V R T0 Servo AMP Power TB P<br />
Fan<br />
AC 220V S T0 Servo AMP Power TB N<br />
R<br />
S<br />
T<br />
Fig. 5-36 System AC Power Connection<br />
5.4.8 MPG Connection<br />
If the tool moves in the opposite direction marked by the MPG, please<br />
exchange the signal line A and B in the MPG.<br />
CPU Main Board<br />
1<br />
2<br />
3<br />
4<br />
5<br />
6<br />
0V 7<br />
0V 8<br />
MPG<br />
+5V 0V A B<br />
Fig. 5-37 MPG Connection<br />
5 - 31
HUST CNC-<strong>H4CL</strong>-T Manual<br />
5.4.9 RS232 Connector Pin Assignment and Connection<br />
Fig. 38 shows the connection method for the <strong>H4CL</strong>-T control unit and PC.<br />
Observe the following notes when connecting:<br />
1. The connection between the RS232 C port and PC should not be more<br />
than 15 meters.<br />
2. If the connection is established in an environment exposed to electrical<br />
noise, such as an electric discharge machine or welding machine, establish<br />
the connection with twisted cables or avoid installing in such an<br />
environment. The control unit and PC should not share the same power<br />
outlet with the electric discharge machine or welding machine.<br />
3. The interface voltage of the PC should range from 10 to 15V.<br />
I / <br />
<br />
<br />
<br />
<br />
<br />
<br />
<br />
<br />
<br />
HUST Control Unit <strong>H4CL</strong>-T RS232 PC COM2<br />
DB9LM<br />
CONNECTOR<br />
TXD 2<br />
RXD 3<br />
DSR 4<br />
SG 5<br />
DTR 6<br />
CTS 7<br />
RTS 8<br />
3 RXD<br />
2 TXD<br />
20 DTR<br />
7 SG<br />
6 DSR<br />
4 RTS<br />
5 CTS<br />
DB25LF<br />
CONNECTOR<br />
HUST Control Unit <strong>H4CL</strong>-T RS232 PC COM1<br />
DB9LM<br />
CONNECTOR<br />
TXD 2<br />
RXD 3<br />
DSR 4<br />
SG 5<br />
DTR 6<br />
CTS 7<br />
RTS 8<br />
2 RXD<br />
3 TXD<br />
4 DTR<br />
5 SG<br />
6 DSR<br />
7 RTS<br />
8 CTS<br />
DB9LF<br />
CONNECTOR<br />
Fig. 5-38 RS232 C Connection<br />
5 - 32
Chapter V Connection<br />
5.4.10 D/A Explanation and Wiring (For Spindle)<br />
<br />
D/A for spindle control, the explanation and wiring is below:<br />
* D/A Explanation<br />
<br />
<br />
<br />
<br />
GND<br />
<br />
-12V<br />
<br />
+12V<br />
<br />
(5V) VCC<br />
<br />
<br />
<br />
<br />
<br />
* D/A Wiring<br />
<br />
<br />
<br />
<br />
<br />
<br />
<br />
<br />
<br />
<br />
<br />
<br />
<br />
<br />
<br />
Fig 5-39 D/A Connector<br />
VCMD<br />
B<br />
A<br />
B<br />
A<br />
<br />
<br />
<br />
<br />
<br />
<br />
<br />
<br />
<br />
<br />
<br />
<br />
<br />
<br />
<br />
<br />
<br />
<br />
<br />
<br />
<br />
<br />
<br />
<br />
Encoder<br />
Signal<br />
Signal 0 ~ 10V<br />
0V<br />
GND<br />
<br />
<br />
<br />
<br />
Fig 5-40 D/A Wiring<br />
5 - 33
HUST CNC-<strong>H4CL</strong>-T Manual<br />
5 - 34
Chapter VI Maintenance – Error Message Explanations<br />
6 Error Message Explanations<br />
When an error occurs during the execution of the program, the error message is<br />
displayed on the LCD of the <strong>H4CL</strong>-T Series controller. (Fig 6-1). Possible error<br />
messages of the <strong>H4CL</strong>-M Series controller and their solutions are described in<br />
the following:<br />
Error message<br />
Error 02. X AXIS ERR<br />
Fig. 6-1<br />
* ERROR-01 MCM DATA ERROR OR BATTERY FAIL<br />
Message:<br />
MCM parameter settings are incorrect or the memory battery has failed.<br />
Recommended Remedy:<br />
1. Check the MCM parameters are correct.<br />
2. If the controller has not been switched on for more than one year, the data<br />
in the memory will be lost. Where the controller generates a (BT1) low<br />
power message, turn on the controller for 4 hours to recharge the battery. If<br />
the problem persists after recharging, contact your dealer to replace the<br />
battery.<br />
* ERROR-02 -- Servo Alarm, Please Home Again<br />
Message:<br />
An error occurred in the servo loop system. The possible error status includes:<br />
1. The control unit sends commands too quickly, and the servomotor cannot<br />
respond in time.<br />
2. The control unit does not receive feedback.<br />
Recommended Remedy:<br />
1. Check the F value is set appropriately.<br />
6 - 1
HUST CNC-<strong>H4CL</strong>-T Manual<br />
2. Check the resolution is correct. Also check the MCM parameter settings.<br />
3. Make sure that the machine and motor functions appropriately and the<br />
wiring is correct.<br />
4. Check the connections.<br />
* ERROR 8 -- Exceed 80 Characters For One Block<br />
Message:<br />
A block in the program contains more than 80 characters.<br />
Recommended Remedy:<br />
Check the program block and make sure each the block contains less than 80<br />
characters.<br />
* ERROR 10 – RS232 Error<br />
Message:<br />
An error occurred in RS232C communication signal of the controller.<br />
Recommended Remedy:<br />
1. Check and make sure that the baud rate of the controller is same as the<br />
baud rate of the computer or MMI.<br />
2. Check the cable connection between the controller and the computer or<br />
MMI.<br />
* ERROR 11 -- Program Memory Error<br />
Message:<br />
An error occurred in program memory. The battery may have no power or the<br />
data exceeds the memory capacity.<br />
Recommended Remedy:<br />
Enter “MDI” mode and execute the “G10 P2001” command. Clear all program<br />
data and check the battery. If the controller generates (BT1) low power<br />
message, turn on the controller to recharge the battery. If the problem persists<br />
after recharging, contact your dealer to replace the battery. (if the controller has<br />
not been switched on for more than one year, the data in the memory is lost.)<br />
* ERROR 13 -- Error G-Code Command<br />
Message:<br />
An incorrect G-code exists in the program data of the <strong>H4CL</strong>-T Series controller<br />
and cannot be accepted.<br />
Recommended Remedy:<br />
Check the program and make sure the G-code is correct.<br />
* ERROR 14 -- X-axis Over-travel<br />
6 - 2
Chapter VI Maintenance – Error Message Explanations<br />
Message:<br />
The X-axis tool moves beyond the pre-set hardware over-travel limit.<br />
Recommended Remedy:<br />
Manually move the X-axis tool back to the travel limit.<br />
* ERROR 16 -- Z-axis Over-travel<br />
Message:<br />
The Z-axis tool moves beyond the pre-set hardware over-travel limit.<br />
Recommended Remedy:<br />
Manually move the Z-axis tool back to the travel limit.<br />
* ERROR 18 -- End Of File Not Found<br />
Message:<br />
Program end error (M02, M30 missing).<br />
Recommended Remedy:<br />
Check the end of the program and add an M02 or M30 block.<br />
* ERROR 20 --Software Over-Travel<br />
Message:<br />
The program runs beyond the software over-travel limit.<br />
Recommended Remedy:<br />
Check the program or reset the MCM “Software Over-Travel Limit”. range<br />
* ERROR 22 -- EM-Stop, Home Again<br />
Message:<br />
The controller is now in the emergency stop state.<br />
Recommended Remedy:<br />
After the cause of the emergency is removed, restore the emergency stop<br />
button and press “reset”.<br />
* ERROR 24 -- M98 Exceed 8 Level<br />
Message:<br />
Subprogram calls exceeds 8 levels.<br />
Recommended Remedy:<br />
Modify the part program and make sure subprogram calls do not exceed 8<br />
levels.<br />
* ERROR 25 -- Wrong Circle Format or Data Error<br />
Message:<br />
The arc command or data format in the program is incorrect.<br />
6 - 3
HUST CNC-<strong>H4CL</strong>-T Manual<br />
Recommended Remedy:<br />
Check the part program and recalculate the intersection of the arc. Make sure<br />
the coordinates of the intersecting point are correct.<br />
* ERROR 30.1 –Battery is Low<br />
Message:<br />
The controller battery (BT1) has failed.<br />
Recommended Remedy:<br />
Turn on the controller for four hours to recharge the battery. If the problem<br />
persists after recharging, contact your dealer to replace the battery.<br />
* ERROR 31 -- None PLC<br />
Message:<br />
The PLC program does not exist.<br />
Recommended Remedy:<br />
Check that the PLC exists in the FLASHROM.<br />
* ERROR 36 –Error in RS232 Program Number<br />
Message:<br />
The part program number transmitted from RS232C is incorrect.<br />
Recommended Remedy:<br />
Check DNC10 or HCON part program number for correctness.<br />
* ERROR 37 -- NC Alarm<br />
Message:<br />
An error occurred in the external control device.<br />
Recommended Remedy:<br />
Check the external control device. Remove the error and RESET the function.<br />
* ERROR 50~99<br />
Message:<br />
The user defined G65 error signal is incorrectly set.<br />
Recommended Remedy:<br />
Check that the user defined G65 error signal is correctly set.<br />
6 - 4
Chapter VII Maintenance – Attachment A<br />
At 7 Attachment - A<br />
Input Planning<br />
INPUT Description Remarks<br />
I00 EM-STOP NC<br />
I01 X-axis Home LIMIT NC<br />
I02 Z-axis Home LIMIT NC<br />
I03 Foot Switch (turned on using the pedal) Restorative<br />
I04<br />
I05<br />
Auto/Semi-auto<br />
Selective skip<br />
I06 Program lock <br />
I07 Selective dwell <br />
I08<br />
I09<br />
I10 Reset (button) Reserved for external<br />
I11<br />
l<br />
I12<br />
I13<br />
I14<br />
I15<br />
I16<br />
I17<br />
I18<br />
I19<br />
I20<br />
I21<br />
I22<br />
I23<br />
Tool 1 Positioning Signal<br />
Tool 2 Positioning Signal<br />
Tool 3 Positioning Signal<br />
Tool 4 Positioning Signal<br />
Tool 5 Positioning Signal<br />
Tool 6 Positioning Signal<br />
Tool 7 Positioning Signal<br />
Tool 8 Positioning Signal<br />
Tool Locking Signal<br />
Charging Signal<br />
First spindle origin signal (motor side)<br />
First spindle origin signal (spindle side)<br />
First spindle closed-loop<br />
spindle positioning control<br />
Applicable only when GR is<br />
not 1:1<br />
I05 Descriptions<br />
“Optional Skip”<br />
When I05 = 1, the “Optional Skip” is selected and the material charging process<br />
is interrupted.<br />
I05 = 1 (High) The Optional Skip is selected.<br />
I05 = 0 (Low) The Optional Skip is not selected.<br />
When I05 = 1, the block with “/1” in the program will be skipped. When I05 = 0,<br />
the block with “/1” in the program is executed.<br />
7 - 1
HUST CNC-<strong>H4CL</strong>-T Manual<br />
Example:<br />
N10 M03 S1000<br />
N20 G01 X20. F1.2<br />
N30 X50. /1 If I04 of block N30 is 1, this block is skipped and<br />
block N40 will be executed directly after block N20.<br />
N40 X0.<br />
M05<br />
M02<br />
“Charging”<br />
When I104=0, the “Charging” function is selected.<br />
When I04 = 0, “manual” charging is available in the manual mode using the foot<br />
switch (I03).<br />
When I04 = 0, “automatic” charging is available in the auto mode using the M10<br />
(Chuck Open) and M11 (Chuck Close) commands.<br />
7 - 2
Chapter VII Maintenance – Attachment A<br />
Output Planning<br />
Output Description Remarks<br />
O00 Spindle Rotation CW<br />
O01 Spindle Rotation CCW<br />
O02 Coolant<br />
O03 Alarm Indicator<br />
O04 Spindle Chuck<br />
O05 Lubricant<br />
O06 Chuck Release Indicator - ON<br />
O07<br />
O08 Tool Changing Rotation CW<br />
O09 Tool Changing Rotation CCW<br />
O10<br />
O11 Charging Output<br />
O12<br />
O13 Workpiece count reached preset target - ON<br />
O14 SERVO-ON X<br />
O15 SERVO-ON Z<br />
OUTPUT PLANNING (Servo spindle mode)<br />
OUTPUT Description Note<br />
O00<br />
O01<br />
O02<br />
O03<br />
O04<br />
O05<br />
s SERVO ON<br />
Coolant<br />
Alarm light<br />
Spindle chuck<br />
Lubricant<br />
O06 Power head 3 M24 ON ; M25 OFF<br />
O07 Spindle dwell M84 ON ; M85 OFF<br />
O08<br />
O09<br />
Tool changing CW<br />
Tool changing CCW<br />
O10 Power head 1<br />
O11<br />
Feeding output<br />
O12 Power head 2<br />
O13<br />
O14<br />
O15<br />
On when Counter reaches the default setting.<br />
SERVO-ON X<br />
SERVO-ON Z<br />
When using multiple spindles, O010 is for the second spindle SERVO ON ;<br />
O012 is for the third spindle SERVO ON<br />
7 - 3
HUST CNC-<strong>H4CL</strong>-T Manual<br />
M-code and I/O<br />
M-code Description I/O Remarks<br />
M03 Spindle Rotation CW O00=1 <br />
M04 Spindle Rotation CCW O01=1 <br />
M05 Spindle Stop O00=0,O01=0 <br />
<br />
<br />
M08 Coolant ON O02=1 <br />
M09 Coolant OFF O02=0 <br />
M10 Chuck Released O04=1 <br />
M11 Chuck Closed O04=0 <br />
M15 Counter +1 #6501+1<br />
M20 Power head 1 ON O010=1<br />
M21 Power head 1 OFF O010=0<br />
M22 Power head 2 ON O012=1<br />
M23 Power head 2 OFF O012=0<br />
Applicable while spindle<br />
number =1<br />
Applicable while spindle<br />
number =1<br />
Applicable while spindle<br />
number =1<br />
Applicable while spindle<br />
number =1<br />
M24 Power head 3 ON O006=1<br />
M25 Power head 3 OFF O006=0<br />
Applicable while the first<br />
spindle positioning control is<br />
closed-loop<br />
M84 Spindle dwell ON O007=1<br />
M85 Spindle dwell OFF O007=0<br />
Applicable while the first<br />
spindle positioning control is<br />
closed-loop<br />
M63<br />
M64<br />
M65<br />
M73<br />
M74<br />
M75<br />
Second spindle rotating CW<br />
Second spindle rotating CCW<br />
Second spindle stop<br />
Third spindle rotating CW<br />
Third spindle rotating CCW<br />
Third spindle stop<br />
O010:enable second spindle<br />
junction<br />
O012: enable third spindle<br />
junction<br />
7 - 4
Chapter VII Maintenance – Attachment A<br />
M-code Description I/O Remarks<br />
M50<br />
First spindle switches to<br />
standard axial mode<br />
C axis<br />
M51<br />
First spindle switches to<br />
spindle mode<br />
M60<br />
Second spindle switches to<br />
standard axial mode<br />
A axis<br />
M61<br />
First spindle switches to<br />
spindle mode<br />
C axis<br />
G71 ~ G76 Compound Canned Cycle Parameters<br />
Refer to Chapter III “G/M-Code” for more information about G-codes.<br />
Fig. 7-1<br />
7 - 5
HUST CNC-<strong>H4CL</strong>-T Manual<br />
PLC Parameters<br />
Fig. 7-2<br />
Tool Counts:<br />
Lathe tool changing steps:<br />
1. Tool Changing rotation CW O08=1<br />
2. Turn to the desired tool number (INPUT). Manually change the next tool.<br />
3. O08=0<br />
4. Pause 50×5=250 ms (Timer =79)<br />
5. Tool changing rotation CCW O09=1<br />
6. Wait for the tool locking signal I20=1<br />
7. CCW rotation continues for (Time-4) time (Timer=78)<br />
8. O09=0; Tool changing is completed.<br />
Note: Tool Counts Setting<br />
1 or 8 No changing<br />
1 and 8 Changing tools<br />
2 ~ 8 tools can be specified<br />
Example: Tools =5<br />
The cycle "1,2,3,4,5,1,2,3…" is applicable to manual tool changing. If T-code is<br />
used for tool changing, T202 indicates that the current tool will be changed with<br />
the second tool and the second Tool Offset is selected. T603 indicates that no<br />
tool is selected for changing because 6 is greater than 5, but the third Tool Offset<br />
is selected.<br />
7 - 6
Chapter VIII Attachment B – ZDNC Operating Instructions<br />
8. Attachment - B - zDNC Operating Instructions<br />
1. Getting Started<br />
Click on the desktop to execute zDNC<br />
zDNC<br />
2. Open the Option Setting Screen<br />
Enable Option is<br />
required for parameter<br />
configuration<br />
Right-click<br />
Fig 8-1<br />
8 - 1
HUST CNC-<strong>H4CL</strong>-T Manual<br />
3. Display Settings<br />
Corresponding<br />
to controller<br />
settings<br />
To avoid<br />
connection<br />
failure, do not<br />
check boxes<br />
other than<br />
those indicated<br />
here.<br />
Save the changes<br />
To change the settings, press<br />
DisConnect. When the settings are<br />
configured, press Connect.<br />
Fig 8-2<br />
8 - 2
Chapter VIII Attachment B – ZDNC Operating Instructions<br />
4. PC TO CNC<br />
Job file path<br />
Trans. progress<br />
Start trans<br />
Select a file<br />
0: Transmit the part program to CNC<br />
1:Transmit the part program to CNC and execute simultaneously (PLC required)<br />
2: Transmit variables to CNC<br />
Fig 8-3<br />
8 - 3
HUST CNC-<strong>H4CL</strong>-T Manual<br />
5. CNC TO PC<br />
Start reading<br />
Select a file name<br />
0>transmit the current file<br />
1>transmit all part programs<br />
2-9&M>transmit variables<br />
Fig 8-4<br />
6. Attention<br />
DNC function is required to transmit huge part programs.<br />
PLC should not restrict the availability of R100, R239, C04 when DNC is<br />
required, because the system needs to change the value of these three items<br />
to enter DNC mode.<br />
For DNC operation, settings are only required at the ZDNC (computer) end<br />
rather than the controller end, if PLC does not give any restrictions.<br />
8 - 4