genugate Version 7.1 Release Notes - GeNUA
genugate Version 7.1 Release Notes - GeNUA
genugate Version 7.1 Release Notes - GeNUA
Create successful ePaper yourself
Turn your PDF publications into a flip-book with our unique Google optimized e-Paper software.
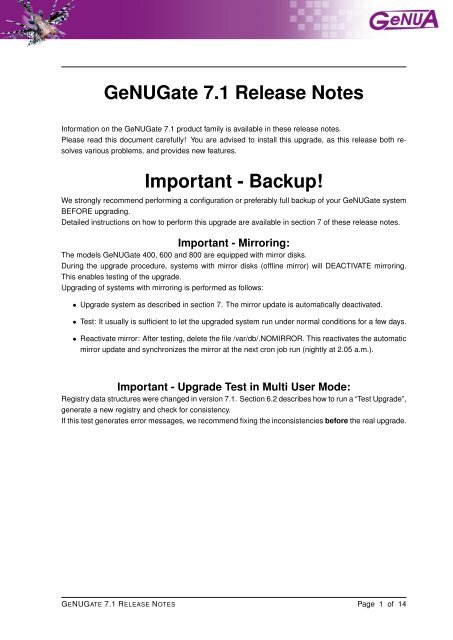
GeNUGate <strong>7.1</strong> <strong>Release</strong> <strong>Notes</strong><br />
Information on the GeNUGate <strong>7.1</strong> product family is available in these release notes.<br />
Please read this document carefully! You are advised to install this upgrade, as this release both resolves<br />
various problems, and provides new features.<br />
Important - Backup!<br />
We strongly recommend performing a configuration or preferably full backup of your GeNUGate system<br />
BEFORE upgrading.<br />
Detailed instructions on how to perform this upgrade are available in section 7 of these release notes.<br />
Important - Mirroring:<br />
The models GeNUGate 400, 600 and 800 are equipped with mirror disks.<br />
During the upgrade procedure, systems with mirror disks (offline mirror) will DEACTIVATE mirroring.<br />
This enables testing of the upgrade.<br />
Upgrading of systems with mirroring is performed as follows:<br />
• Upgrade system as described in section 7. The mirror update is automatically deactivated.<br />
• Test: It usually is sufficient to let the upgraded system run under normal conditions for a few days.<br />
• Reactivate mirror: After testing, delete the file /var/db/.NOMIRROR. This reactivates the automatic<br />
mirror update and synchronizes the mirror at the next cron job run (nightly at 2.05 a.m.).<br />
Important - Upgrade Test in Multi User Mode:<br />
Registry data structures were changed in version <strong>7.1</strong>. Section 6.2 describes how to run a “Test Upgrade”,<br />
generate a new registry and check for consistency.<br />
If this test generates error messages, we recommend fixing the inconsistencies before the real upgrade.<br />
GENUGATE <strong>7.1</strong> RELEASE NOTES Page 1 of 14
CONTENTS<br />
Contents<br />
1 <strong>Release</strong> Note Contents 3<br />
2 New Features in GeNUGate <strong>7.1</strong> 3<br />
2.1 Additional High Availability Features . . . . . . . . . . . . . . . . . . . . . . . . . . . . . . 3<br />
2.1.1 Address Types . . . . . . . . . . . . . . . . . . . . . . . . . . . . . . . . . . . . . . 3<br />
2.1.2 Passive Systems . . . . . . . . . . . . . . . . . . . . . . . . . . . . . . . . . . . . . 3<br />
2.1.3 Limitations and Further Development . . . . . . . . . . . . . . . . . . . . . . . . . 3<br />
2.1.4 Established HA Installations . . . . . . . . . . . . . . . . . . . . . . . . . . . . . . . 4<br />
2.1.5 Usability . . . . . . . . . . . . . . . . . . . . . . . . . . . . . . . . . . . . . . . . . . 4<br />
2.2 New Policy: SMTP2SMTP . . . . . . . . . . . . . . . . . . . . . . . . . . . . . . . . . . . . 4<br />
2.3 Product Manual Restructured . . . . . . . . . . . . . . . . . . . . . . . . . . . . . . . . . . 4<br />
2.4 GeNUGate version 7.0 Patches . . . . . . . . . . . . . . . . . . . . . . . . . . . . . . . . . 5<br />
2.4.1 System Status in the Admin Web Interface . . . . . . . . . . . . . . . . . . . . . . 5<br />
2.4.2 Logging . . . . . . . . . . . . . . . . . . . . . . . . . . . . . . . . . . . . . . . . . . 5<br />
2.4.3 Further Security Improvements . . . . . . . . . . . . . . . . . . . . . . . . . . . . . 6<br />
3 Software Updates and New Product Behavior 6<br />
3.1 Operating System . . . . . . . . . . . . . . . . . . . . . . . . . . . . . . . . . . . . . . . . 6<br />
3.2 Web Cache: Squid <strong>Version</strong> 3.1.16 . . . . . . . . . . . . . . . . . . . . . . . . . . . . . . . 6<br />
3.3 SSH <strong>Version</strong> 1 Deprecated and Removed . . . . . . . . . . . . . . . . . . . . . . . . . . . 6<br />
3.4 Changed Status when Blocking E-Mails with the SMTP Policy . . . . . . . . . . . . . . . . 7<br />
3.5 Sophos Virus Scanner: Manual Pattern Update Necessary . . . . . . . . . . . . . . . . . 7<br />
4 Central Administration by GeNUCenter 7<br />
5 Overview: <strong>Version</strong>s with Update Support 7<br />
6 Before Upgrading 7<br />
6.1 System . . . . . . . . . . . . . . . . . . . . . . . . . . . . . . . . . . . . . . . . . . . . . . 7<br />
6.2 Test Upgrade in Multi User Mode . . . . . . . . . . . . . . . . . . . . . . . . . . . . . . . . 8<br />
7 Upgrade Installation 8<br />
<strong>7.1</strong> Upgrade Path . . . . . . . . . . . . . . . . . . . . . . . . . . . . . . . . . . . . . . . . . . . 8<br />
7.2 Data Backup . . . . . . . . . . . . . . . . . . . . . . . . . . . . . . . . . . . . . . . . . . . 8<br />
7.3 Minimum Available Disk Space . . . . . . . . . . . . . . . . . . . . . . . . . . . . . . . . . 9<br />
7.4 Performing the Upgrade . . . . . . . . . . . . . . . . . . . . . . . . . . . . . . . . . . . . . 9<br />
8 Information in the Web 14<br />
9 How to Contact Us 14<br />
Page 2 of 14<br />
GENUGATE <strong>7.1</strong> RELEASE NOTES
2 NEW FEATURES IN GENUGATE <strong>7.1</strong><br />
1 <strong>Release</strong> Note Contents<br />
These release notes describe the changes, bugfixes and new features available by updating from GeNU-<br />
Gate 7.0 to the current version <strong>7.1</strong>. The detailed product configuration is described in the GeNUGate<br />
<strong>7.1</strong> manual.<br />
An electronic version of these release notes, the software itself, and the updated product manuals are<br />
available at http://www.genua.de/index.en.html in the Internal Customers Area. Please mail<br />
us at auftrag@genua.de if you prefer us to send you a CD-ROM.<br />
2 New Features in GeNUGate <strong>7.1</strong><br />
2.1 Additional High Availability Features<br />
Upgrading from GeNUGate 7.0 to <strong>7.1</strong> adds two new address types to the HA option. This is a major<br />
change, as the new feature is based on CARP (“Common Address Redundancy Protocol” as already<br />
implemented on GeNUScreen and GeNUBox) instead of OSPF. This protocol reduces takeover times<br />
and facilitates distribution of connections between cluster nodes in balancing mode, thus increasing<br />
maximum throughput. The established HA mode of operation with OSPF will continue to be supported<br />
in this and future releases.<br />
Further information is available in the GeNUGate Administration Manual in chapter 5.3.9 “GeNUGate<br />
with CARP and PF”. A configuration scenario is described in chapter 2.11 “Load Balancing with CARP-<br />
HA”.<br />
2.1.1 Address Types<br />
The new “failover” and “balancing” addresses now are available. Failover addresses behave much like<br />
OSPF takeover addresses, but will switch over more quickly. Every system in a given cluster is assigned<br />
a dedicated failover address via which to contact it. If a system fails, another node will take over the<br />
address within seconds. The balancing address is the other new address type. It adds new functionality<br />
to the GeNUGate HA setup. These addresses always are configured for the entire cluster and simultaneously<br />
activated. Based on the packet source and destination addresses, the kernel decides which<br />
system handles the connection via its balancing address. All other systems drop the packets. Thus<br />
connections can be automatically distributed over the entire cluster. Performance improvement depends<br />
on how well connections are distributed, as well as the protocol used.<br />
2.1.2 Passive Systems<br />
When using balancing addresses, individual systems within an HA cluster can be reconfigured to passive<br />
mode. These systems will finish handling existing connections, but will not accept new ones. This is<br />
useful to gradually initiate maintenance, as only very long running connections need to be terminated.<br />
This mode can be activated in the Web interface in the menu HA → CHECKS → BALANCING PASSIVE<br />
2.1.3 Limitations and Further Development<br />
The use of the new address types on GeNUGate version <strong>7.1</strong> still is somewhat limited:<br />
GENUGATE <strong>7.1</strong> RELEASE NOTES Page 3 of 14
2 NEW FEATURES IN GENUGATE <strong>7.1</strong><br />
• OSPF still needs to be configured<br />
• The GeNUGate intermediate networks need to be connected on layer 2<br />
• The address ranges for OSPF and the new addresses CANNOT be shared<br />
These limitations are described in detail in the Administration Manual, section 2.11.1. The upcoming 7.2<br />
release will resolve part of these issues and add functionality.<br />
2.1.4 Established HA Installations<br />
Depending on whether the network topology can be modified as described above, the new address types<br />
can be used in existing installations. Otherwise, we recommend not to use CARP-based (“balancing”<br />
and “failover”) addresses after upgrading to this release.<br />
A PFL DMZ is well suited for testing the new features, as the addresses are isolated by the DMZ and<br />
probably do not have to be modified.<br />
2.1.5 Usability<br />
The HA configuration menus have also been reworked for usability. All relevant configuration is now<br />
available under the top level HA navigation.<br />
2.2 New Policy: SMTP2SMTP<br />
Previously, only the SMTP policy was available for secure delivery of e-mails by the GeNUGate. This<br />
configuration defined the GeNUGate as a fully functional mail server, but a result incoming e-mails were<br />
temporarily stored on the firewall. In addition, only a single policy could be configured for delivery to any<br />
and all destinations defined on the entire GeNUGate system.<br />
<strong>Version</strong> <strong>7.1</strong> now provides the addition SMTP2SMTP policy, which implements the critical parts of the<br />
SMTP policy without storing mail on the firewall. This is done by directly contacting the destination<br />
server configured for an incoming connection. Much like a classic proxy, the incoming commands are<br />
directly copied to the destination. Activating the option “Virus Scan” causes incoming data to stored,<br />
scanned and transmitted before successful delivery is signaled to the sender.<br />
Security still can be centrally enforced at the perimeter before e-mails enter the internal network by<br />
using SSL bridging and the virus scanner. At the same time, the new policy conserves resources<br />
and improves performance. It is especially suitable for protection of dedicated anti-spam appliances,<br />
signature gateways in the ALG DMZ, or for setting up a complex e-mail infrastructure.<br />
Further information is available in chapter 1.4.11 “SMTP2SMTP Relay” of the Administration Manual.<br />
2.3 Product Manual Restructured<br />
The previous GeNUGate Manual was restructured to three separate documents:<br />
• Installation Manual<br />
• Administration Manual<br />
• GUI Reference<br />
Page 4 of 14<br />
GENUGATE <strong>7.1</strong> RELEASE NOTES
2 NEW FEATURES IN GENUGATE <strong>7.1</strong><br />
The Installation Manual contains all information needed for the initial GeNUGate installation right up to<br />
the first login on the GUI. This manual (presently only in German) is on the CD-ROM under<br />
docs/install-de.pdf.<br />
The English version will shortly be available on the <strong>GeNUA</strong> Web server.<br />
The Administration Manual covers concepts and configurations in depth. Specific setup examples and<br />
scenarios are provided. This manual (presently only in German) is on the CD-ROM under<br />
docs/admin-de.pdf.<br />
The English version will shortly be available on the <strong>GeNUA</strong> Web server.<br />
The GUI Reference describes every menu available in the GUI in detail with screenshots. This manual<br />
(presently only in German) is on the CD-ROM under<br />
docs/guiref-de.pdf.<br />
The English version will shortly be available on the <strong>GeNUA</strong> Web server.<br />
2.4 GeNUGate version 7.0 Patches<br />
The following changes already have been published in patches for GeNUGate version 7.0 and therefore<br />
are included in the <strong>7.1</strong> release. As they were not described in the previous <strong>Release</strong> <strong>Notes</strong>, they are<br />
listed here. Many of the fixes mentioned were due to the CC EAL4+ certification process for version 7.0.<br />
2.4.1 System Status in the Admin Web Interface<br />
The status overview for the administrator was greatly extended, especially to catch HA problems.<br />
• HA status with remote monitoring: Every member of an HA cluster now queries the others to<br />
assess the cluster status. Problems on individual systems are thus more easily identified.<br />
• NTP: Large time errors between HA systems cause them to discontinue synchronization of files<br />
and configuration. This state now is prominently displayed on the start and status pages.<br />
• Bootinstall scripts: Certain areas of the GeNUGate configuration (e.g. the processmaster) can<br />
only be modified by using bootinstall scripts. To stress the fact that the configuration displayed in<br />
the GUI was not yet activated, active bootinstall scripts now are displayed in the status overview<br />
and the respective pages.<br />
2.4.2 Logging<br />
Minor improvements were made in logging usability and operational transparency.<br />
• Operating key warnings removed: Warnings about not finding an operating key (e.g., during<br />
boot) were removed.<br />
• SSL logging: Accounting now logs for the respective policies if SSL was decrypted, and if connections<br />
were encrypted in the client or the server direction. In addition, in case of accepted SMTP<br />
connections (SMTP-Policy), a message is added to the mail header if an SSL secured (“START-<br />
TLS”) connection was used.<br />
• Improved logwatch: Repeated logwatch alarms now are summarized.<br />
GENUGATE <strong>7.1</strong> RELEASE NOTES Page 5 of 14
3 SOFTWARE UPDATES AND NEW PRODUCT BEHAVIOR<br />
2.4.3 Further Security Improvements<br />
General security improvements in various areas are listed here:<br />
• “localhost” in /etc/hosts: The “localhost” now is directly resolved via the /etc/hosts file,<br />
thus protecting it from DNS problems.<br />
• Revokation of SSL certificates: For the case in that a certificate has been compromised, the<br />
certificate authority can revoke it by using certificate revocation lists (CRL). The GeNUGate is<br />
now shipped with some important CRLs activated. Furthermore URLs for downloading CRLs are<br />
collected, so the administrator can extend the configuration as necessary.<br />
• Weak cryptographic algorithmens replaced: MD5 and SHA1 algorithmens were replaced in all<br />
security critical areas by SHA256 and SHA512.<br />
• Robust proxy processes: The existing GeNUGate code now is audited in depth with statistical<br />
code analysis tools. In addition, smtp-gwd now runs in a more secure mode to prevent incoming<br />
mail from having any effect on operations.<br />
• Errors and banners: Any reference to the “GeNUGate” and “<strong>GeNUA</strong>” were edited from error<br />
messages and banners to remove any indication a GeNUGate firewall is involved in a connection.<br />
• IPv6 kernel security: Kernel modifications were implemented to improve IPv6 operational security.<br />
3 Software Updates and New Product Behavior<br />
3.1 Operating System<br />
• Included patches: This version includes all changes and patches of version 7.0 up to and including<br />
patch 6.<br />
• Update to OpenBSD version 4.9: The operating system OpenBSD, including all components,<br />
was updated to version 4.9.<br />
3.2 Web Cache: Squid <strong>Version</strong> 3.1.16<br />
The Squid Web cache was updated to the current version.<br />
3.3 SSH <strong>Version</strong> 1 Deprecated and Removed<br />
In the course of the GeNUGate 7.0 certification, SSH version 1 was completely deactivated for security<br />
reasons. Only the current version 2 is available. This affects:<br />
• Remote access<br />
• Admin login<br />
• Paniclogin<br />
Please update your client software and any old SSH keys assigned to users, if necessary.<br />
Page 6 of 14<br />
GENUGATE <strong>7.1</strong> RELEASE NOTES
6 BEFORE UPGRADING<br />
3.4 Changed Status when Blocking E-Mails with the SMTP Policy<br />
Starting with version <strong>7.1</strong>, rules associated with the SMTP policy return the permanent error ‘550’ (instead<br />
of ‘421’) when blocking mails based on RBL checks. Thus, SMTP and SMTP2SMTP policies behave in<br />
the same way.<br />
3.5 Sophos Virus Scanner: Manual Pattern Update Necessary<br />
As already is the case with the Avira virus scanner, the Sophos scanner will only be available in the<br />
newer streaming version after the upgrade. If the Sophos virus scanner is used, a manual update is<br />
necessary after upgrading 7.0 to <strong>7.1</strong>. This can be done on the Web interface menu SYSTEM → VIRUS<br />
SCANNER → UPDATE<br />
4 Central Administration by GeNUCenter<br />
Central administration of GeNUGate <strong>7.1</strong> by GeNUCenter is not available. Starting May 2012, the future<br />
GeNUGate release will be integrated in the GZ 3 product line.<br />
Please use GeNUGate version 7.0 if you need to administrate GeNUGate with GeNUCenter. This has<br />
the added advantage of using a certified version and extended product support until October 2014.<br />
5 Overview: <strong>Version</strong>s with Update Support<br />
GeNUGate version 7.0 as well as the following GeNUGate versions are currently provided with patches<br />
and security updates:<br />
• GeNUGate 6.3: This CC EAL4+ certified GeNUGate version will be supported until the end of<br />
2012.<br />
• GeNUGate 7.0: Certification to CC EAL 4+ is expected for version 7.0 Z. Patch/ security update<br />
support will be available until October 2014.<br />
As described in our contract conditions, software versions previous to GeNUGate 7.0 may not be fully<br />
supported, especially GeNUGate 6.2. Please upgrade older systems as soon as possible.<br />
<strong>Version</strong> 7.2 already will be released in April 2012, as a six month release cycle has been instituted.<br />
Therefore, patch support for GeNUGate <strong>7.1</strong> will only be available until April 2013. After 7.0, certification<br />
of GeNUGate 8.0 is planned for October 2013. These certified versions also have extended patch<br />
support.<br />
6 Before Upgrading<br />
6.1 System<br />
• The upgrade to version <strong>7.1</strong> is supported by any version 7.0 patch level.<br />
• At least 512MB RAM in the ALG, and 128 MB RAM in the PFL system are needed to run version<br />
<strong>7.1</strong>.<br />
GENUGATE <strong>7.1</strong> RELEASE NOTES Page 7 of 14
7 UPGRADE INSTALLATION<br />
• Sufficient hard drive space is needed on the ALG to perform the upgrade.<br />
determine hard drive space is described in chapter 7.3.<br />
The procedure to<br />
6.2 Test Upgrade in Multi User Mode<br />
A “test upgrade” of the GeNUGate system is recommended to detect and handle problems and inconsistencies.<br />
The procedure is as follows:<br />
• In normal multi user mode, insert the CD-ROM in the system’s drive.<br />
• Execute the command ggupgrade as the user root.<br />
The first thing the test upgrade does is to convert the registry and write the result to the human readable<br />
file /etc/configfw/fw.cfg.pretty-G710 000.<br />
The running system’s registry itself is not modified. Any occurring inconsistency will trigger error messages,<br />
and serious problems must be explicitly acknowledged.<br />
Please note the test upgrade cannot diagnose if there is sufficient hard drive space in older hardware.<br />
To determine needed space, follow the procedure described in chapter 7.3.<br />
After the registry test conversion, the command configfw is executed to check if configuration files are<br />
correctly generated from the converted data.<br />
Afterwards, normal system operation can continue with the original, unconverted configuration, or the<br />
actual upgrade can be performed as described in chapter 7.<br />
Please contact your service partner for further support. Detailed information is available in the files<br />
/var/gg/patches/G710 000.upgrade.log (registry upgrade) and<br />
/var/gg/patches/G710 000.configfw.log.<br />
7 Upgrade Installation<br />
<strong>7.1</strong> Upgrade Path<br />
Beginning from version 7.0, GeNUGate systems can be upgraded to version <strong>7.1</strong>.<br />
No specific patch level within version 7.0 is necessary.<br />
7.2 Data Backup<br />
The upgrade to GeNUGate <strong>7.1</strong> will not affect log files and e-mails in the system spool directory.<br />
Nevertheless, please back up your configuration before upgrade with:<br />
# cfgbu -s<br />
To back up log files and e-mails, a full system backup is necessary, as described in the product manual,<br />
chapter “Backup and Restore”.<br />
Page 8 of 14<br />
GENUGATE <strong>7.1</strong> RELEASE NOTES
7 UPGRADE INSTALLATION<br />
7.3 Minimum Available Disk Space<br />
Sufficient space in the partitions on the hard drive is needed for a successful upgrade. Above all, the<br />
partitions / and /usr need more than 50% available space. Enter the command df to determine file<br />
system usage:<br />
admin@ggd132:˜# df -h<br />
Filesystem Size Used Avail Capacity Mounted on<br />
/dev/sd0a 126M 40.8M 78.9M 34% /<br />
/dev/sd0f 1.5G 113M 1.3G 8% /cage<br />
mfs:6239 62.9M 2.0K 59.8M 0% /tmp<br />
/dev/sd0d 502M 238M 239M 50% /usr<br />
/dev/sd0e 251M 33.5M 205M 14% /var<br />
The column “Capacity” states the used percentage of the respective file system.<br />
7.4 Performing the Upgrade<br />
Please note:<br />
Physical access to the GeNUGate system itself, or to a connected serial console is necessary,<br />
as a CD-ROM and possibly a USB stick need to be inserted or switched.<br />
Insert the GeNUGate <strong>7.1</strong> CD-ROM in the drive, log on to the system as the user “admin”, and become<br />
“root” with the command su.<br />
admin@ggd132:˜# su -<br />
Password:<br />
Sep 18 08:06:33 ggd132 su: admin to root on /dev/console<br />
root@ggd132:˜#<br />
Enter the command ggupgrade to start the upgrade.<br />
root@ggd132:˜# /usr/local/gg/sbin/ggupgrade<br />
Executing upgrade script from cdrom.<br />
Starting /cdrom/usr/local/gg/sbin/ggupgrade ...<br />
Before the upgrade starts, the patches for the new release are<br />
transferred. This ensures your GeNUGate system will be running with<br />
the latest patchlevel immediately after upgrade.<br />
Get upgrade patch from cdrom ...<br />
Retrieving G710_000.tar<br />
The patches for the new version can be fetched from <strong>GeNUA</strong> over the<br />
Internet.<br />
Patches from <strong>GeNUA</strong> (yes no) [yes]? yes<br />
You can check for published patches before restarting the system by typing yes.<br />
At this point, you will be asked some questions for the installation. Simply enter [RETURN] here - the<br />
upgrade procedure will skip these questions and continue.<br />
Now a registry test upgrade and test run of configfw is performed to check for problems during the<br />
procedure. If any problems occur, please contact your service partner.<br />
Reboot the system now.<br />
GENUGATE <strong>7.1</strong> RELEASE NOTES Page 9 of 14
7 UPGRADE INSTALLATION<br />
root@ggd132:˜# reboot<br />
/etc/rc.shutdown in progress...<br />
2/2 addresses added.<br />
/etc/rc.shutdown complete.<br />
syncing disks... done<br />
rebooting...<br />
Be sure the system boots from the inserted GeNUGate <strong>7.1</strong> CD-ROM by checking for the message<br />
CDBOOT 3.15 in the boot prompt.<br />
>> OpenBSD/i386 CDBOOT 3.15<br />
boot><br />
booting cd0a:bsd.install: 5476020+1003244 [61+247792+227242]=0x6a1f18<br />
entry point at 0x200120<br />
[ using 475512 bytes of bsd ELF symbol table ]<br />
Copyright (c) 1982, 1986, 1989, 1991, 1993<br />
The Regents of the University of California. All rights reserved.<br />
Copyright (c) 1995-2011 OpenBSD. All rights reserved. http://www.OpenBSD. org<br />
OpenBSD 4.9 (ALG.install) #0: Wed Nov 9 19:14:45 CET 2011<br />
bluhm@g711.genua.de:/build/gg.71/71.D009/ALG.install<br />
cpu0: Intel(R) Xeon(R) CPU X5570 @ 2.93GHz ("GenuineIntel" 686-class) 2.94 GHz<br />
cpu0: FPU,V86,DE,PSE,TSC,MSR,PAE,MCE,CX8,APIC,SEP,MTRR,PGE,MCA,CMOV,PAT,PS E36,CF<br />
LUSH,DS,ACPI,MMX,FXSR,SSE,SSE2,SS,HTT,TM,SBF,SSE3,MWAIT,DS-CPL,VMX,E ST,TM2,SSSE3<br />
,CX16,xTPR,PDCM,DCA,SSE4.1,SSE4.2,POPCNT<br />
...<br />
After loading the kernel, the GeNUGate <strong>7.1</strong> installation routine will prompt you for the installation language<br />
and keyboard mapping. Afterwards, please select the installation mode upgrade.<br />
GeNUGate Installation<br />
Sprache auswaehlen.<br />
Sprache/Language (de en) [de] ? en<br />
Select the layout of the keyboard connected to the GeNUGate.<br />
Keyboard layout (us de de.nodead ... pl hu si cf cf.nodead) [cf.nodead] ?<br />
us<br />
kbd: keyboard mapping set to us<br />
Probing system.<br />
Choose installation, upgrade or recovery from backup.<br />
Mode (install upgrade recover) [upgrade] ? upgrade<br />
The hard drives and file systems are checked, mounts performed and the upgrade is started.<br />
Mount hard disk.<br />
Select boot hard disk.<br />
Detecting hard drives in system.<br />
Boot hard disk selected.<br />
Unmount all partitions.<br />
Read in fstab.<br />
Check file systems.<br />
/dev/rwd0a: file system is clean; not checking<br />
/dev/rwd0f: file system is clean; not checking<br />
/dev/rwd0d: file system is clean; not checking<br />
/dev/rwd0e: file system is clean; not checking<br />
Page 10 of 14<br />
GENUGATE <strong>7.1</strong> RELEASE NOTES
7 UPGRADE INSTALLATION<br />
Mount all partitions.<br />
Remove flags.<br />
GeNUGate licenses.<br />
Initialize license.<br />
You are prompted for the GeNUGate license number and hardware serial number. The values from<br />
GeNUGate 7.0 still are valid. Press [RETURN] to accept them.<br />
Enter license.<br />
The value to be entered has the format 1234-GG-ABCD-EFGH-IJKL-MNOP.<br />
License [1234-GG-ABCD-EFGH-IJKL-MNOP] ? [RETURN]<br />
Enter serial number.<br />
The value to be entered has the format XXXXX-XX-XXXX.<br />
Serial number [12345-CD-89AB] ? [RETURN]<br />
You now can transfer patches from USB stick, an HA peer or over the network.<br />
Get patches from USB stick.<br />
Fetch patches from USB medium (yes no) [no] ? [RETURN]<br />
Get patches from HA peer.<br />
Fetch patches from HA network (yes no) [no] ? [RETURN]<br />
Get patches from <strong>GeNUA</strong>.<br />
Fetch patches from network (yes no) [no] ? [RETURN]<br />
Upgrade begins now. The new software is copied to the system and configuration starts.<br />
Begin upgrade.<br />
Copy upgrade patch from cdrom.<br />
Retrieving G710_000.tar<br />
...<br />
At the end of the upgrade, you are prompted to set new passwords for the administrative accounts<br />
“admin” and “root”. Alternatively, keep the existing passwords by pressing [RETURN] to select no.<br />
Set administrator passwords.<br />
Set passwords (yes no) [no] ? no<br />
The upgrade is done. Press [RETURN] to restart the system and remove the CD-ROM from the drive.<br />
Press to reboot, remove the cdrom after the ’rebooting...’<br />
message.<br />
Reboot now (reboot) [reboot] ? [RETURN]<br />
The system now starts the new software. After the kernel has been loaded, you are prompted for<br />
the “root” password, as a bootinstall script needs to be run to upgrade the PFL (packet filter) system<br />
component.<br />
GENUGATE <strong>7.1</strong> RELEASE NOTES Page 11 of 14
7 UPGRADE INSTALLATION<br />
At least one bootinstall script was found. You can only run them as root.<br />
You will be askied for the root password now. If you do not know it, enter<br />
an empty string three times, and boot will continue without<br />
executing the bootinstall scripts. Enter your root password now.<br />
You have 60 seconds to authenticate!<br />
Enter root password!<br />
Password:<br />
Select the script with 1 and [RETURN]. Start the script by entering y.<br />
Select a list of bootinstall scripts by entering their numbers or by<br />
entering * to select all.<br />
================================================================<br />
1) /var/gg/boot/bootinst..2011.11.02-15.12.02.exe<br />
Create PFL boot medium<br />
Auswahl (1) []: 1<br />
1) /var/gg/boot/bootinst.2011.11.02-15.12.02.exe<br />
Create PFL boot medium<br />
Is this ok? (y/n) [n]: y<br />
Insert the PFL USB stick in an available USB slot of the ALG, and rewrite the PFL medium. Follow the<br />
displayed instructions to restart the PFL.<br />
After restart, log on to the ALG. A banner will displayed with the new version number.<br />
Page 12 of 14<br />
GENUGATE <strong>7.1</strong> RELEASE NOTES
7 UPGRADE INSTALLATION<br />
login: admin<br />
Password:<br />
Last login: Mon Nov 02 15:05:02 on console<br />
Welcome to your GeNUGate Firewall System.<br />
This system is running GeNUGate <strong>Version</strong> <strong>7.1</strong> 000 based on OpenBSD 4.9<br />
admin@ggd132:/var/home/admin$<br />
Enter the command su to become “root”, and execute the command configfw. This is necessary to<br />
perform syntax checks of configuration files (the upgrade does not perform these checks):<br />
root@ggd132:˜# configfw<br />
zone file /cage/ALG_2_INTERN/etc/namedb/gg.de.db: new serial<br />
(2009081061)
9 HOW TO CONTACT US<br />
If the option GeNUScan is installed on your system, be sure to update the virus scanner! As root,<br />
execute the command getpatterns:<br />
root@ggd132:˜#<br />
...<br />
getpatterns<br />
Enjoy your new GeNUGate system!<br />
8 Information in the Web<br />
These release notes also are available on our Web server in the “Customer Service” area:<br />
http://www.genua.de/customer/index.en.html ,<br />
“Internal Customers Area”.<br />
Further information is available in the “Internal Customers Area”, “GeNUGate Support” –> “Knowledge<br />
Base” (login required).<br />
9 How to Contact Us<br />
<strong>GeNUA</strong> Gesellschaft fuer Netzwerk– und Unix–Administration mbH<br />
Domagkstrasse 7, 85551 Kirchheim/ Munich,<br />
Tel. +49 89 99 19 50-0, Fax. +49 89 99 19 50-999<br />
E-Mail: info@genua.de, WWW: http://www.genua.de/<br />
© 2011 <strong>GeNUA</strong> mbH, Kirchheim, All rights reserved. GeNUGate and <strong>GeNUA</strong> are registered trade<br />
marks of <strong>GeNUA</strong> mbH.<br />
Page 14 of 14<br />
GENUGATE <strong>7.1</strong> RELEASE NOTES


