Configuration - MEZON
Configuration - MEZON
Configuration - MEZON

You also want an ePaper? Increase the reach of your titles
YUMPU automatically turns print PDFs into web optimized ePapers that Google loves.
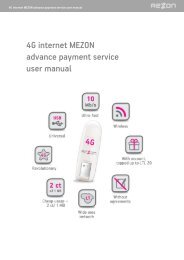
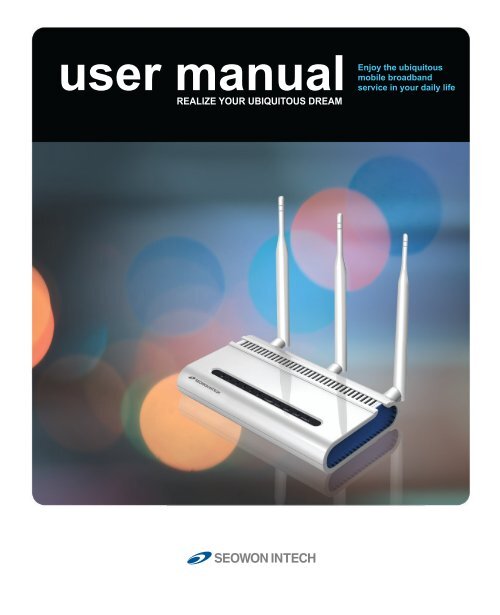
user manual<br />
REALIZE YOUR UBIQUITOUS DREAM<br />
Enjoy the ubiquitous<br />
mobile broadband<br />
service in your daily life
Contents<br />
Introduction to the Product .......................................................... 04<br />
Functional Features ................................................................................... 04<br />
Front side of CPE ......................................................................................... 04<br />
Rear side of CPE .......................................................................................... 05<br />
<strong>Configuration</strong> ........................................................................................ 06<br />
Network <strong>Configuration</strong> ............................................................................... 06<br />
Package <strong>Configuration</strong> ............................................................................... 07<br />
PC <strong>Configuration</strong> (Windows XP) ................................................................ 08<br />
How to check your IP address ................................................................... 11<br />
CPE Built-in Web Server Access<br />
................................................. 12<br />
CPE Setup on the web page<br />
1.1 LAN (LAN <strong>Configuration</strong>)<br />
........................................................... 13<br />
............................................................... 13<br />
1.2 LAN (LAN Status) ............................................................................. 14<br />
2.1 Switch (Switch Status) .................................................................... 15<br />
3.1 WLAN (WiFi Setup)<br />
3.2 WLAN (WiFi DHCP)<br />
3.3 WLAN (WiFi Status)<br />
.......................................................................... 16<br />
.......................................................................... 18<br />
.......................................................................... 19<br />
4.1 VoIP (VoIP Status) ............................................................................ 20<br />
5.1 Application (Firewall) ..................................................................... 21<br />
5.2 Application (DMZ & Port Forwarding) ........................................... 22<br />
5.3 Application (VPN pass through) .................................................... 24<br />
5.4 Application (UPNP)<br />
5.5 Application (QoS)<br />
5.6 Application (DDNS)<br />
5.7 Application (MTU)<br />
......................................................................... 25<br />
........................................................................... 26<br />
......................................................................... 28<br />
........................................................................... 29<br />
6.1 Admin (Version)<br />
6.2 Admin (Password)<br />
.............................................................................. 30<br />
............................................................................ 30<br />
6.3 Admin (CPE Upgrade) ...................................................................... 31<br />
6.4 Admin (Reboot/Default Setting) .................................................... 33<br />
Trouble Shooting ................................................................................. 34<br />
Operating Information ...................................................................... 36<br />
Safety Information<br />
Legal Information<br />
............................................................................. 37<br />
............................................................................... 38<br />
Warranty Information ...................................................................... 39
Introduction to the Product<br />
Thank you for choosing our Indoor VoIP CPE, SWC-5x00W series. The VoIP CPE<br />
allows you to share a superior data communication by Ethernet and WiFi network, and<br />
to make Voice over Internet Protocol calls. The VoIP CPE comes with easy installation,<br />
reliable network connection, advanced security & authentication and mores.<br />
Please read this User Guide carefully to learn about SWC-5x00W series. It will help your<br />
various communication needs properly served at home and offices.<br />
Functional Features<br />
SEOWONINTECH Proprietary-Contents may change without notice<br />
Function<br />
IEEE802.16e WiMAX Support<br />
IEEE802.3u Ethernet Support<br />
VoIP Support<br />
LAN Port<br />
Cable Auto Sense<br />
NAT function<br />
Firewall function<br />
Front side of CPE<br />
LED Indicator<br />
PWR<br />
LAN1 / LAN2<br />
PHONE<br />
RSSI<br />
Features<br />
Wave2 = DL : 30Mbps / UL : 6Mbps<br />
10/100Mbps wired LAN connectable<br />
1 x RJ-11 for Analog Telephone Service<br />
2 x Ports 10/100Mbps Ethernet Switch built-in<br />
Straight (Direct) or Cross Cable auto sensing<br />
Supports up to 253 wired and wireless connections and<br />
internet router*<br />
Manages basic firewall and IP/Port/based access<br />
Function<br />
Power Supply status (On at Power ON)<br />
ON when connected to PC, Flashing at communication<br />
ON when connected to Telephone, Flashing at communication<br />
Representation WiMAX received signal strength indication(RSSI), on<br />
when the mode was selected router.<br />
04
Rear side of CPE<br />
Antenna3 WiFi<br />
Power Switch<br />
Antenna2<br />
WiMAX Main<br />
Antenna1<br />
WiMAX<br />
Diversity<br />
PC<br />
Telephone<br />
Power<br />
Adapter<br />
Hardware<br />
Reset<br />
Item<br />
Details<br />
Antenna1 : WiMAX Diversity<br />
Antenna2 : WiMAX Main<br />
Antenna3 : WiFi<br />
Separable external antenna<br />
External Antenna<br />
User external type antenna attachable<br />
* Antenna Classifi cation<br />
- 2.3G : M23<br />
- 2.5G : M25<br />
- 3.5G : M35<br />
- WiFi : WiFi<br />
LAN1 / LAN2 PC or Hub connection<br />
PHONE<br />
Telephone connection<br />
DC 12V Power Adapter connection (DC 12V 2.0A)<br />
POWER<br />
Power On/Off Switch (Switch between On/Off by pressing right or left)<br />
RESET<br />
Restore the VoIP CPE Factory Default<br />
NOTE<br />
If you lost LOGIN password for router or IP address after change, use the Reset<br />
switch to restore its original Factory Default settings.<br />
This Document cannot be used without the authorization of SEOWONINTECH<br />
05
<strong>Configuration</strong><br />
Network <strong>Configuration</strong><br />
Local Network<br />
Gateway<br />
External Network<br />
PC<br />
WiMAX<br />
Telephone<br />
Internet<br />
To verify the normal operation of the router, check the following LEDs after connecting<br />
the router, modem, and PC with a LAN cable, as follows:<br />
SEOWONINTECH Proprietary-Contents may change without notice<br />
LED Normal Operation Actions to take if not illuminated<br />
PWR ON when connecting adapter Check for adapter power failure<br />
LAN1 / LAN2 ON when cable is connected normally Check for adapter power failure<br />
PHONE<br />
WiMAX<br />
RSSI<br />
On when Phone cable is connected<br />
normally<br />
Represents WiMAX received signal<br />
strength indication (RSSI), ON when in<br />
router mode<br />
Check cable connection and<br />
Telephone<br />
Check that router mode is selected<br />
If one or more LED lights is not in“normal operation”, take the actions specifi ed in the table.<br />
Install a router after connecting to the network.<br />
If normal connection between router and PC is checked, you have to set up the PC and router.<br />
PC setup is to control network confi guration for Windows 98, Windows 2000, or Windows XP<br />
to use the Internet while the PC is connected to a router.<br />
Router setup is to connect a router to the Internet. Please refer to the CPE Setup chapter.<br />
06
Package <strong>Configuration</strong><br />
Main Unit Antenna X 3 User Manual<br />
LAN Cable<br />
Tel Line<br />
Adapter<br />
This Document cannot be used without the authorization of SEOWONINTECH<br />
07
<strong>Configuration</strong><br />
PC <strong>Configuration</strong> (Windows XP)<br />
This procedure is used to restore Windows XP’s TCP/IP setup to the default values. If<br />
Windows has just been installed for the first time on the PC, no changes should be required,<br />
but you should check to confirm that all values are normal according to the following.<br />
After completing the TCP/IP setup of the PC, connect PC and CPE with a LAN cable and<br />
turn CPE on before Windows starts up to determine whether an IP address is obtained<br />
from CPE automatically.<br />
■ Click the Windows Start button, and select Settings >> Control Panel from the menu.<br />
■ Double-click the “Network Connection” icon in the Control Panel.<br />
Double-click the Network and Internet Connections<br />
SEOWONINTECH Proprietary-Contents may change without notice<br />
Double-click the Network Connection<br />
08
■ Double-click the Local Area Connection from the Network Connection list to select it.<br />
Double-click the Local Area Connection<br />
■ Click “Properties” in the Local Area Connection Status window.<br />
Click Properties<br />
This Document cannot be used without the authorization of SEOWONINTECH<br />
09
<strong>Configuration</strong><br />
■ Double-click Internet Protocol (TCP/IP) to open its Properties window, and then select<br />
“Obtain an IP address automatically” and “Obtain a DNS Server address automatically”.<br />
SEOWONINTECH Proprietary-Contents may change without notice<br />
Double-click TCP/IP<br />
■ After completing setup, click OK and close all of the Local Area Connection Properties windows.<br />
■ When TCP/IP setup is completed, an IP address is automatically assigned by CPE.<br />
For automatic assignment, the PC and the CPE should be connected with a LAN cable.<br />
If they are not connected with a cable, connect them with a LAN cable and restart the PC.<br />
■ You can check the automatic IP address assignment by using the ipconfig command<br />
from the Command Prompt.<br />
Select the‘Obtain an IP address automatically’<br />
‘Obtain a DNS Server address automatically’<br />
and click OK<br />
10
How to check your IP address<br />
■ To run the Command Prompt, click the Start button at the lower left corner of the<br />
Windows screen. Click Run, then enter “cmd” in the Open box, and click OK.<br />
Run cmd<br />
■ When the Command Prompt window opens, enter the “ipconfig” command to<br />
verify the IP address, Subnet mask, and Gateway, which are automatically assigned to PC.<br />
NOTE<br />
All PCs connected to CPE will receive their own assigned IP address.<br />
Verify IP address<br />
NOTE<br />
If an IP address is not assigned, check the following, and then restart the PC and<br />
check whether an IP address is assigned.<br />
LAN cable connection between PC and CPE<br />
Check TCP/IP setup details<br />
This Document cannot be used without the authorization of SEOWONINTECH<br />
11
CPE Built-in Web Server Access<br />
The WEB GUI is used to manage a CPE and view its current status.<br />
You can access the web server that is built into the CPE, even when not connected to the<br />
Internet.<br />
To access the web server, open Internet Explorer or your Browser and type “192.168.1.1”,<br />
which is the IP address of CPE, in the address bar, as shown below:<br />
NOTE<br />
If the PC is connected to the CPE but is not connected to the Internet, entering the<br />
IP address of 192.168.1.1 in the address box will connect the PC to the CPE web<br />
server. This function may not operate in some environments.<br />
Upon accessing the CPE, the following Login screen will be displayed.<br />
The default user ID and password are admin, which you can change on the web server.<br />
ID / Password = admin/admin<br />
SEOWONINTECH Proprietary-Contents may change without notice<br />
NOTE<br />
If you have no input activity for 1 hour, your web connection is terminated. In this<br />
Case, please login again through the login page.<br />
12
LAN Setup<br />
CPE Setup on the web page<br />
01 LAN <strong>Configuration</strong><br />
■ Select “LAN” → “LAN <strong>Configuration</strong>” from the menu.<br />
■ Configure LAN IP address<br />
LAN IP address is used in the LAN that the CPE manages.<br />
Setup LAN IP address in “IP Address/Subnet Mask” text boxes.<br />
Initial Value is “192.168.1.1/255.255.255.0” and only the last byte in “Subnet<br />
Mask” box can be modified.<br />
■ Configure DHCP server<br />
Enable DHCP server to lease IP address to the computer connecting to CPE with wired LAN.<br />
Setup Maximum lease time (in seconds), IP Starting address, Number of users and<br />
WINS server address.<br />
■ Finish setup by clicking the “Save” button. Then, you will be moved to the Rebooting Screen.<br />
■ If you have finished CPE setup and want to reboot the CPE, click “Yes” to reboot the CPE.<br />
■ Changed configuration is applied after rebooting the system.<br />
This Document cannot be used without the authorization of SEOWONINTECH<br />
13
CPE Setup on the web page<br />
02 Status<br />
SEOWONINTECH Proprietary-Contents may change without notice<br />
■ Select “LAN” → “Status” from the menu.<br />
■ You can see the details of the LAN configuration.<br />
14
Switch Setting<br />
01 Status<br />
■ Select “Switch” → “Status” from the menu.<br />
■ You can see the various configurations related to switch configuration, such as Switch<br />
mode and several filters.<br />
This Document cannot be used without the authorization of SEOWONINTECH<br />
15
WLAN(WiFi) Setup<br />
01 WiFi Setup<br />
CPE Setup on the web page<br />
WiFi configuration can be modified when Switch mode is Router (NAT) Mode.<br />
Be careful when you select WiFi Bridge mode.<br />
When WiFi Bridge mode is enabled.<br />
Wired LAN and WiFi interfaces are member of a single bridge. Wired LAN and WiFi<br />
interfaces have the same MAC address.<br />
When WiFi Bridge mode is disabled.<br />
Wired LAN and WiFi interfaces work as independent interfaces from each other.<br />
Therefore, the Wired LAN and WiFi interfaces have a different IP address. To lease IP<br />
addresses to PC connected with WiFi, the WiFi DHCP server can be configured.<br />
SEOWONINTECH Proprietary-Contents may change without notice<br />
16
NOTE<br />
The Wired LAN interface’s IP address can be changed according to the WiFi Bridge<br />
mode. If you can’t access SWC-5x00W with WiFi after the modification of WiFi<br />
Bridge mode, try to access with “192.168.2.1”.<br />
■ Select “WLAN” → “WiFi Setup” from the menu.<br />
■ Configure WiFi Basic<br />
Select whether WiFi is enabled or disabled.<br />
Select whether WiFi Bridge Mode is enabled or disabled.<br />
Configure SSID of wireless AP.<br />
Select wireless mode(11b/g mixed, 11B only, 11G only)<br />
■ Configure WiFi Security<br />
Select Authentication Mode(Open, Shared, WPA-PSK, WPA2-PSK)<br />
Set whether encryption mode using WEP will be used or not.<br />
Set network key if using WEP encryption.<br />
■ Finish setup by clicking “Save”. Then, you will be moved to the Rebooting Screen.<br />
■ If you have finished CPE setup and want to reboot the CPE, click “Yes” button to<br />
reboot the CPE.<br />
■ Changed configuration is applied after rebooting the system.<br />
This Document cannot be used without the authorization of SEOWONINTECH<br />
17
CPE Setup on the web page<br />
02 WiFi DHCP<br />
WiFi DHCP can be configured when WiFi Bridge Mode is disabled.<br />
SEOWONINTECH Proprietary-Contents may change without notice<br />
■ Select “WLAN” → “WiFi DHCP” from the menu.<br />
■ Configure a WiFi IP Address<br />
WiFi IP address is used in the wireless LAN that CPE manages.<br />
Configure LAN IP address in “IP Address/Subnet Mask” text boxes.<br />
Initial Value is “192.168.2.1/255.255.255.0” and only last byte in “Subnet Mask”<br />
box can be modified.<br />
■ Configure WiFi DHCP Server<br />
DHCP server should be enabled for the purpose of leasing IP address to the computer<br />
connecting to CPE via WiFi.<br />
Setup Maximum lease time (in seconds), IP Starting address, Number of users and<br />
WINS server address.<br />
■ Finish setup by clicking the “Save” button. Then, you will be moved to the Rebooting Screen.<br />
■ If you have finished CPE setup and want to reboot the CPE, click “Yes” button to<br />
reboot the CPE.<br />
■ Changed configuration is applied after rebooting the system.<br />
18
03 WiFi Status<br />
■ Select “WLAN” → “Status” from the menu.<br />
■ You can see a lot of information related to the WiFi configuration.<br />
This Document cannot be used without the authorization of SEOWONINTECH<br />
19
01 Status<br />
CPE Setup on the web page<br />
VoIP Settings<br />
■ Select “VoIP” → “Status” from the menu.<br />
■ You can see a lot of information related to the VoIP configuration.<br />
SEOWONINTECH Proprietary-Contents may change without notice<br />
20
Application Setup<br />
01 Firewall<br />
Firewall enables you to set the CPE so that it is not affected by external hacking attempts,<br />
including Ping Flooding or DoS. Internal LAN PCs are usually isolated/protected from<br />
external Internet attacks even when a firewall is not used, but it is still preferable to set<br />
the firewall to ON as much as possible. By default, the firewall is set to ON.<br />
■ Select “Application” → “Firewall” from the menu.<br />
■ If you want to use the Firewall function, check the “Enable” checkbox.<br />
■ Finish setup by clicking the“Apply”button. Then, you will be moved to the Rebooting Screen.<br />
■ Changed configuration is applied immediately.<br />
This Document cannot be used without the authorization of SEOWONINTECH<br />
21
CPE Setup on the web page<br />
02 DMZ & Port Forwarding<br />
The DMZ feature allows you to specify one computer on your network to be placed<br />
outside of NAT firewall. This may be necessary if the NAT feature is causing problems<br />
with an application such as a game or video conferencing application. Use this feature on<br />
a temporary basis, as the computer in the DMZ is not protected from attacks by hackers.<br />
Port Forwarding function is used to forward incoming packets of specific TCP/IP port<br />
from outside to the assigned PC. This function is useful if you have to use VoIP or P2P<br />
applications, or have to operate HTTP or FTP servers from a PC in the internal LAN.<br />
SEOWONINTECH Proprietary-Contents may change without notice<br />
22
■ Select “Application” → “DMZ & Port Forwarding” from the menu.<br />
■ Configure DMZ(Demilitarized Zone)<br />
Select whether or not to enable the DMZ function.<br />
Set the IP address to have all ports opened in “Private LAN IP” content.<br />
■ Finish setup by clicking the “Apply” button. Then, you will be moved to the<br />
Rebooting Screen.<br />
■ Configure Port Forwarding<br />
The port forwarding function can be configured when DMZ is disabled.<br />
Enter the information for Port Forwarding.<br />
Enter all information required for Port Forwarding<br />
After entering all the specific PC information to connect, press the “Add” button to<br />
see the added Port Forwarding information<br />
Then, you will be moved to the Rebooting Screen.<br />
To modify/delete the existing Port Forwarding, use the “Edit”/”Delete” button.<br />
Changed configuration is applied immediately<br />
This Document cannot be used without the authorization of SEOWONINTECH<br />
23
CPE Setup on the web page<br />
03 VPN pass through<br />
The VPN (Virtual Private Network) function is used to obtain access to a security<br />
network installed in a company or an organization via the Internet network.<br />
If there is a VPN Server outside, and one has access to the VPN Server via the Internet<br />
network by using CPE, this screen shows how to activate the security protocol supported<br />
by the appropriate VPN Server.<br />
SEOWONINTECH Proprietary-Contents may change without notice<br />
■ Select “Application” → “VPN pass through” from the menu.<br />
■ SWC-5x00W supports 3 types of service: PPTP, L2TP and IPSEC.<br />
■ Select the type(s) of VPN pass-through to use with the checkboxes.<br />
■ Finish setup by clicking the “Apply” button. Then, you will be moved to the Rebooting Screen<br />
■ Changed configuration is applied immediately.<br />
24
04 UPNP<br />
UPnP (Universal Plug and Play) is the standard for automatically detecting each other<br />
by using the internet and web protocol when a PC, peripheral devices, intelligent home<br />
appliances, or wireless equipment is connected to the network. When a user can add a<br />
certain device to the network using UPnP, the device will complete its own organization,<br />
receive the TCP/IP address, and discover the HTTP-based discovery protocol to publicize its<br />
existence to other devices.<br />
■ Select “Application” → “UPNP” from the menu.<br />
■ Set the UPNP.<br />
If you want to set the UPNP, check “Enable” in the checkbox.<br />
Finish setup by clicking the “Apply” button. Then, you will be moved to the<br />
Rebooting Screen.<br />
This Document cannot be used without the authorization of SEOWONINTECH<br />
25
CPE Setup on the web page<br />
05 QoS<br />
QoS (Quality of Service). On the internet or other network, the QoS can measure and<br />
improve transmission and error rates. It is a concept of attributes that can be guaranteed<br />
to a certain degree. If some high frequency video or multi video information needs to be<br />
transmitted consistently, it has a very special meaning. It is very challenging to transmit<br />
such types of contents through the public network reliably (only at the best you can do).<br />
Using the internet RSVP, the packets passing through the gateway hosts can be quickly<br />
processed according to the predefined policy and reservation standards. If a company<br />
or a user applies the ATM where the service quality can be selected in advance, the QoS<br />
can be measured in various forms such as average delays, delay changes of a cell in<br />
the group, cell losses and transmission error rates, and therefore guaranteed by them.<br />
SEOWONINTECH Proprietary-Contents may change without notice<br />
26
■ Select “Application” → “QoS” from the menu.<br />
■ To set the QoS, check“Shaping”or“Priority”.<br />
The desirable service quality class can be set.<br />
■ Set the priority.<br />
Check “Priority” and click “Apply”. The input window will appear.<br />
After entering all the inputs necessary for Priority Setting, press the<br />
“Add” button to see the added priority.<br />
■ Check the Shaping environment.<br />
By checking “Upload” and “Download” in the checkbox, you can adjust<br />
each speed.<br />
After entering all the necessary inputs for shaping,<br />
press the “Add” button to see the added shaping.<br />
This Document cannot be used without the authorization of SEOWONINTECH<br />
27
CPE Setup on the web page<br />
06 DDNS<br />
DDNS (Dynamic DNS) is a method for easily maintaining the DNS information of a PC that uses<br />
a dynamic IP address. In general, when a user accesses the internet, the internet service provider<br />
arbitrarily assigns one of the IP addresses not used at the moment, and this address is exclusively<br />
provided for the user while accessing the internet. Using this method, you can support many more<br />
computers with the same number of IP addresses compared to the method that assigns a fixed<br />
IP address to each PC.<br />
However, if your own domain name and IP address are registered in the DNS, each time you<br />
access the internet, a new IP address is assigned. This is very inconvenient. The DDNS service<br />
provider uses a special program run on the user’s computer in order to automatically update the<br />
DNS database when a new IP address is assigned by the internet service provider.<br />
In this way, although the IP address corresponding to a specific domain name is changed<br />
frequently, there is no need to know the IP address that other users use to access the computer.<br />
As a result, using the same domain name as before, you can easily access the network.<br />
SEOWONINTECH Proprietary-Contents may change without notice<br />
■ Select “Application” → “DDNS” from the menu.<br />
■ Set the DDNS environment.<br />
If you want to set the DDNS, check “Enable” in the checkbox to enter necessary inputs.<br />
Select the desirable Service Provider, and the input information will be changed.<br />
After entering all the necessary information for DDNS setting, finally, click the<br />
“Apply” button to finish setting.<br />
28
07 MTU<br />
The MTU (Maximum Transmission Unit) is the maximum sized packet or frame that can<br />
be transmitted in a packet or frame-based network such as TCP/IP. In general, the unit<br />
of octet is used. TCP determines each packet size for all types of transmission. If the<br />
MTU is too large, retransmission is sometimes required when a router cannot handle the<br />
too large packet. On the contrary, if the MTU is to small, the overhead size for header<br />
and transmission/receiving check tends to be large. For most computer operating<br />
systems, you should follow the recommendations from your internet service providers<br />
on whether to change the MTU setting and what value it should be changed to.<br />
■ Select “Application” → “MTU” from the menu.<br />
■ Set the maximum transmittable packet size.<br />
Enter a value between 500 and 1500.<br />
Finally, click the “Apply” button to finish setting.<br />
This Document cannot be used without the authorization of SEOWONINTECH<br />
29
01 Version<br />
CPE Setup on the web page<br />
Admin Setup<br />
■ Select “Admin” → “Version” from the menu.<br />
■ You can see the versions of the SWC-5x00W firmware and the WiMAX firmware in use.<br />
02 Password<br />
SEOWONINTECH Proprietary-Contents may change without notice<br />
■ Select “Admin” → “Password” from the menu.<br />
■ Set the Password to be given to the Administrator who manages the CPE.<br />
■ Enter the new password, and re-type it to confirm.<br />
■ Finish setup by clicking the “Apply” button. Then, you will be moved to the Rebooting Screen.<br />
■ Changed configuration is applied immediately.<br />
30
03 CPE Upgrade<br />
■ Select “Admin” → “CPE Upgrade” from the menu.<br />
■ Input the CPE firmware path directly, or search for the firmware file by clicking the<br />
“Browser” button.<br />
■ To start the firmware update, click “Apply” button.<br />
This Document cannot be used without the authorization of SEOWONINTECH<br />
31
CPE Setup on the web page<br />
■ This will take several minutes, and time will vary according to the environment.<br />
SEOWONINTECH Proprietary-Contents may change without notice<br />
■ In some case, a pop-up window asking to rebuild the system will be opened due to<br />
a version difference. If this occurs, click “Yes” to rebuild the system.<br />
■ CPE is rebooted automatically after the upgrade process is complete.<br />
Cau-<br />
To avoid failure of the CPE, do not power off the CPE during the upgrading process.<br />
32
04 Reboot/Default Setting<br />
■ Select “Admin” → “Reboot/Default Setting” from the menu.<br />
■ Select “Reboot” to reboot CPE.<br />
■ Select “Reset to all default settings” to reboot CPE and initialize all CPE configuration.<br />
■ To reboot the CPE, click “Apply” button.<br />
■ CPE is rebooted automatically. It takes about 40 seconds.<br />
This Document cannot be used without the authorization of SEOWONINTECH<br />
33
Trouble Shooting<br />
Actions to be taken when the Internet is disconnected<br />
01 Check the status of external type modem.<br />
- Check that the Link lamps of cable, modem are illuminated.<br />
02 Check the LED status of CPE.<br />
- Check that the POWER LED is illuminated.<br />
- Check if the LEDs of WiMAX are illuminated.<br />
- For LAN port, check that the lamp of the port connected to the PC is illuminated.<br />
03 Check the IP address of PC.<br />
For Windows 98/ME<br />
- Click [Start] >> [Run] and enter the [winipcfg] command to open the [IP Address]<br />
window, and then check the [IP Address].<br />
For Windows 2000/XP<br />
- Run [Command Prompt] and enter the [ipconfig] command to check the [IP address].<br />
SEOWONINTECH Proprietary-Contents may change without notice<br />
04 If IP Address is not normal - Set the IP Address of the PC manually.<br />
For Windows 98/ME<br />
- Execute [Run >> Control Panel >> Network], and then click Properties of [TCP/IP] for LAN card.<br />
- Check [Use the assigned IP address], enter [192.168.1.100] for [IP Address] and<br />
[255.255.255.0] for [Subnet Mask].<br />
- Select [Gateway] and enter [192.168.1.1] for [New Gateway], and then click [Add].<br />
- Select [DNS <strong>Configuration</strong>], check [Use DNS], enter any name for [Host], enter [DNS Server<br />
Address to search], and click [Add].<br />
- Click [OK], click [OK] again in the [Network Properties] window, and then click [OK]<br />
from the [Change System Setup] window to reboot the PC.<br />
For Windows 2000<br />
- Execute [Start -> Control Panel -> Network and Dial-UP Connections], double-click<br />
[Local Area Connection], and click [Properties].<br />
- Click Properties of [Internet Protocol (TCP/IP)] among Components.<br />
- Click [Use the following IP address].<br />
34
- Enter [192.168.1.100] for [IP Address], [255.255.255.0] for [Subnet Mask], and [192.168.1.1]<br />
for [Default Gateway].<br />
- Click [Use the following DNS Server Address].<br />
- For [Basic Setup DNS Server], enter the communication company server of each country.<br />
- Click [OK]. Click [OK] again in the [Local Area Connection Properties] window.<br />
For Windows XP<br />
- [Start -> Control Panel -> Network and Internet Connection], double-click [Local Area<br />
Connection], and click [Properties]. Click Properties of [Internet Protocol (TCP/IP)] among<br />
Components.<br />
- Click [Use the following IP address].<br />
- Enter [192.168.1.100] for [IP Address], [255.255.255.0] for [Subnet Mask], and [192.168.1.1]<br />
for [Default Gateway].<br />
- Click [Use the following DNS Server Address].<br />
- For [Basic Setup DNS Server], enter the communication company server of each country.<br />
- Click [OK]. Click [OK] again in the [Local Area Connection Properties] window.<br />
For MAC OS X<br />
- From the “Apple” menu, Choose “System Preference..“<br />
- Click on the [Network] icon in the [Internet & Network] category.<br />
- Click on the [Ethernet] option from the left hand side of the Network setting window.<br />
- Select [Manually] option from the [Configure] drop-down menu.<br />
- Enter [192.168.1.100] for [IP Address], [255.255.255.0] for [Subnet Mask], and [192.168.1.1]<br />
for [Router].<br />
- For [DNS Server], enter the communication company server of each country.<br />
- Click [Apply].<br />
05 Run [MS-DOS] or [Command Prompt] and then perform<br />
PING Test with [192.168.1.100]<br />
A message [Reply from 192.168.1.1: bytes=32 time=1ms TTL=64] should appear<br />
when running [ping 192.168.1.1] command. If the result of the Ping test does not arrive<br />
properly, please contact the Customer Support Center.<br />
This Document cannot be used without the authorization of SEOWONINTECH<br />
35
Operating Information<br />
Temperature Range for the SWC-5x00W<br />
- Operating temperature for the units is 0 ~ 40 C<br />
Power Rating AC for the SWC-5x00W<br />
- 110-240V ~ 50/60Hz 0.6A Max<br />
SEOWONINTECH Proprietary-Contents may change without notice<br />
36
Safety Information<br />
Caution<br />
When minor injury or product damage can<br />
occur from violation of the following directions.<br />
■<br />
■<br />
■<br />
■<br />
■<br />
■<br />
Do not put any object on the product.<br />
Avoid heating devices.<br />
Never disassemble, repair or redeign the product.<br />
Be careful not to let any alien particle get inside the product.<br />
Do not leave the Product at a location where static electricity is severe,<br />
it can cause malfuction to the product.<br />
Do not put any metallic object (coin, hair pin) or flammable object<br />
inside the product or drop the product.<br />
This Document cannot be used without the authorization of SEOWONINTECH<br />
37
Legal Information<br />
WEEE Notice<br />
The disposal of this device is subject to the Waste from Electrical and Electronic<br />
Equipment(WEEE) Diretive of the European Union.<br />
The Drective aims to promote environmentally-friendly handling of WEEE by ecological<br />
disposal or reuse/refurbishment of the collected WEEE.<br />
This symbol on the device signifies that the device ought not to be<br />
discarded with mormal household garbage. You are obliged to hand over<br />
this device to a certified collection point at the end of its life. Separating.<br />
WEEE from other waste helps minimize any of their hazardous effects on<br />
environment and human beings. For more information, Please contact<br />
a municipal office or the retail stores where you purchased this device.<br />
EU Regulatory Conformance<br />
SEOWONINTECH Proprietary-Contents may change without notice<br />
Hereby, SEOWON INTECH Co., Ltd. declares that this device is in compliance with the<br />
essential requirements and other relevant provisions of Directive 1999/5/EC.<br />
For the declaration of conformity, visit the Web site<br />
Http://www.seowonintech.co.kr/en/customer/regulatory.asp<br />
1588<br />
38
Warranty Information<br />
Quality Warranty<br />
This product is the result of high-class craftsmanship based on strict quality<br />
control procedures.<br />
■ In case of Product failure or malfunction during normal usage, your product will be<br />
repaired free of charge within the Limited Warranty period.<br />
■ The Consumer shall bear any labor or parts charges not covered by this Limited Warranty.<br />
■ At the request for repair, you must provide the proof of purchase and the warranty.<br />
■ Keep the warranty in a safe location because it is not reissued.<br />
Purcahse date<br />
The Consumers shall have no coverage or benefits under this Limited Warranty<br />
if the Product has been:<br />
■ Subjected to inappropriate use, improper storage, unauthorized repair, unauthorized<br />
modifications, neglect abuse, inadequate installation, misuse, damage caused<br />
by shipping, etc.<br />
■ Damaged from fire, flooding, windstrom, lighting, earthquake, theft, blown fuse,<br />
internet viruses, worms, Trojan Horses, etc.<br />
■<br />
Quality warranty period<br />
Seller<br />
Telephone number<br />
Consumer<br />
1(one) year<br />
Name<br />
Address<br />
Telephone number<br />
E-mail<br />
Removed of its Product serial # plate.<br />
This Document cannot be used without the authorization of SEOWONINTECH<br />
39
Memo