Sailing aboard the ARGONAUT - San Juan Sailing
Sailing aboard the ARGONAUT - San Juan Sailing
Sailing aboard the ARGONAUT - San Juan Sailing

You also want an ePaper? Increase the reach of your titles
YUMPU automatically turns print PDFs into web optimized ePapers that Google loves.
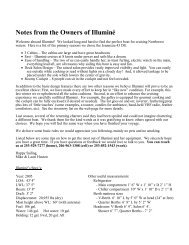
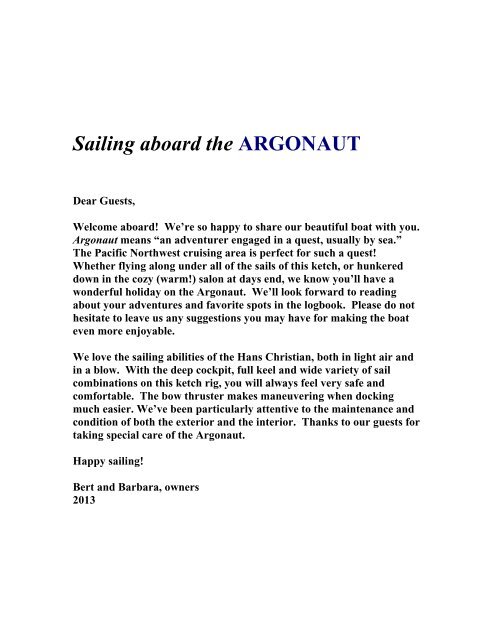
<strong>Sailing</strong> <strong>aboard</strong> <strong>the</strong> <strong>ARGONAUT</strong><br />
Dear Guests,<br />
Welcome <strong>aboard</strong>! We’re so happy to share our beautiful boat with you.<br />
Argonaut means “an adventurer engaged in a quest, usually by sea.”<br />
The Pacific Northwest cruising area is perfect for such a quest!<br />
Whe<strong>the</strong>r flying along under all of <strong>the</strong> sails of this ketch, or hunkered<br />
down in <strong>the</strong> cozy (warm!) salon at days end, we know you’ll have a<br />
wonderful holiday on <strong>the</strong> Argonaut. We’ll look forward to reading<br />
about your adventures and favorite spots in <strong>the</strong> logbook. Please do not<br />
hesitate to leave us any suggestions you may have for making <strong>the</strong> boat<br />
even more enjoyable.<br />
We love <strong>the</strong> sailing abilities of <strong>the</strong> Hans Christian, both in light air and<br />
in a blow. With <strong>the</strong> deep cockpit, full keel and wide variety of sail<br />
combinations on this ketch rig, you will always feel very safe and<br />
comfortable. The bow thruster makes maneuvering when docking<br />
much easier. We’ve been particularly attentive to <strong>the</strong> maintenance and<br />
condition of both <strong>the</strong> exterior and <strong>the</strong> interior. Thanks to our guests for<br />
taking special care of <strong>the</strong> Argonaut.<br />
Happy sailing!<br />
Bert and Barbara, owners<br />
2013
Unique to <strong>the</strong> Argonaut . . . Ketch rig (with new<br />
sails in 2009)<br />
1 Bow thruster<br />
2 Perception Sonoma 10 kayak<br />
Getting acquainted with <strong>the</strong> boat:<br />
1. Anchors<br />
2. Anchor windlass<br />
3. Barbeque<br />
4. Batteries<br />
5. Berths<br />
6. Bilge pumps<br />
7. Bow thruster<br />
8. Cell phone booster<br />
9. Cell phone charger<br />
10.Charging<br />
11.Chartplotter<br />
12. Deck wash down pump<br />
13.Depth sounder<br />
14. Dingy<br />
15. Docking<br />
16. Dodger<br />
17. Electrical panel<br />
18. Emergency/safety equipment<br />
19. Engine<br />
20. Fuel tank<br />
21. Head and holding tank<br />
22. Heater<br />
23. Hot water<br />
24. Internet connection<br />
25. Inverter
26. Kayak<br />
27. Knot meter<br />
28. Life jackets<br />
29. Link 2000/Heart Interface<br />
30. Microwave<br />
31 Outboard motor<br />
32. Outlets<br />
33. Ports<br />
34. Propane<br />
35. Radar<br />
36. Refrigerator and freezer<br />
37. Sails and rigging<br />
38. Shower<br />
39. Spares<br />
40. Stereo<br />
41. Stove and oven<br />
42. Stowing your gear<br />
43. Tank tender<br />
44. Television<br />
45. VHF radio<br />
46. Water tanks and pressure<br />
47. Wind instrument<br />
1. Anchors – The Argonaut is equipped with two anchors: a 60 lb.CQR,<br />
with 180’ of chain and 60’ of rode and a secondary 45 lb.CQR with 80’<br />
of chain and 60’ of rode. Both are set manually and easily raised<br />
manually or by hydraulic windlass. The primary chain is marked with<br />
yellow line at 20’ intervals (1 section at 20', 40', 60', 80', 2 at 100’, 120',<br />
140', 180') and 10’ of solid yellow line before <strong>the</strong> end of <strong>the</strong> chain.<br />
Please use <strong>the</strong> deck wash down pump to clean <strong>the</strong> chain when raising<br />
<strong>the</strong> anchor. The green wash down hose is located in <strong>the</strong> large, forward<br />
deck box. To activate <strong>the</strong> pump, insert <strong>the</strong> blue activator plug and hose<br />
into <strong>the</strong> stainless wash down deck plate aft and to port of <strong>the</strong> windlass<br />
before you turn on “deck pump” on <strong>the</strong> main panel for use (<strong>the</strong><br />
pressure is too much to attach or remove <strong>the</strong> plug. ) Return <strong>the</strong> hose to<br />
<strong>the</strong> deck box when you are finished.<br />
The stern tie line is a yellow polypropylene line on <strong>the</strong> large spool under<br />
<strong>the</strong> helmsman's seat.
2. Anchor windlass – Before operating <strong>the</strong> windlass, make sure <strong>the</strong><br />
hydraulic control valve (at <strong>the</strong> base of <strong>the</strong> windlass/aft) is OFF (counter<br />
clockwise 2 turns). See caution below. With <strong>the</strong> engine running, turn on<br />
<strong>the</strong> windlass switch at <strong>the</strong> helm, above <strong>the</strong> ignition switch. You will see<br />
a light and hear a buzzer. Both will remain engaged as reminders to<br />
turn off <strong>the</strong> switch when you have finished using <strong>the</strong> windlass. There is<br />
an alternate switch and red light in <strong>the</strong> galley next to <strong>the</strong> ignition switch.<br />
1 To lower <strong>the</strong> port, primary anchor:<br />
2 Take off <strong>the</strong> chain cap, grab some chain, and go up on <strong>the</strong><br />
sprit to drop <strong>the</strong> anchor a bit manually so <strong>the</strong> anchor clears <strong>the</strong><br />
dolphin striker. Make sure <strong>the</strong> chain is securely on <strong>the</strong><br />
wildcat.<br />
3 Put <strong>the</strong> windlass handle (which is found in <strong>the</strong> deck box) in <strong>the</strong><br />
port brake (<strong>the</strong> one with <strong>the</strong> knurled knob on <strong>the</strong> end). Slowly<br />
loosen <strong>the</strong> brake by pushing <strong>the</strong> handle forward (counterclockwise),<br />
but leave it tight enough to hold <strong>the</strong> anchor.<br />
4 Remove <strong>the</strong> handle and put it into <strong>the</strong> hand-operating lever<br />
(large chrome tube). Pull handle aft with <strong>the</strong> handle dog (pawl)<br />
still engaged in <strong>the</strong> gypsy ratchet, turning until <strong>the</strong> forward<br />
dog can be released by pushing <strong>the</strong> black knob down.<br />
5 Remove <strong>the</strong> handle and push <strong>the</strong> chrome tube forward,<br />
disengaging <strong>the</strong> handle ratchet, leaving <strong>the</strong> anchor and chain<br />
now held by <strong>the</strong> clutch brake.<br />
6 Put <strong>the</strong> handle back into <strong>the</strong> port brake nut and slowly loosen<br />
<strong>the</strong> brake by pushing <strong>the</strong> handle forward (counter-clockwise).<br />
This will allow <strong>the</strong> anchor to run out. Pull <strong>the</strong> handle back to<br />
slow chain speed. When <strong>the</strong> anchor is down, lock <strong>the</strong> brake by<br />
full/aft movement of <strong>the</strong> lever. Pull <strong>the</strong> black knob back to set<br />
<strong>the</strong> dog.<br />
Please use <strong>the</strong> chain grabber (iron hook located in <strong>the</strong> deck box) and<br />
mooring line on <strong>the</strong> forward cleat to take <strong>the</strong> anchor chain strain, ra<strong>the</strong>r<br />
than relying on <strong>the</strong> windlass. A yoke is even better.<br />
To lower <strong>the</strong> secondary anchor, repeat <strong>the</strong> procedure, remembering<br />
that <strong>the</strong> starboard brake knob operates in <strong>the</strong> opposite direction.<br />
2 To raise <strong>the</strong> anchor hydraulically, make sure <strong>the</strong> hydraulic
control valve at <strong>the</strong> base of <strong>the</strong> windlass is OFF! Again, follow <strong>the</strong><br />
same procedure for turning on <strong>the</strong> windlass switch in <strong>the</strong> cockpit.<br />
o Put handle into <strong>the</strong> starboard brake (knurled knob) and<br />
loosen brake by pulling handle aft (counter-clockwise).<br />
o<br />
Move handle back to port brake and check that it is tight<br />
by pulling handle back (clockwise). Remove handle!<br />
CAUTION: The power of <strong>the</strong> hydraulic windlass is high<br />
enough to coil <strong>the</strong> handle up if it jams on <strong>the</strong> deck with <strong>the</strong><br />
windlass turning. Be sure <strong>the</strong> handle is OFF when using <strong>the</strong><br />
handle.<br />
o To raise <strong>the</strong> anchor, turn <strong>the</strong> hydraulic control valve<br />
clockwise. As <strong>the</strong> chain is being raised, release <strong>the</strong> dog by<br />
pushing <strong>the</strong> black knob forward. This is a safety<br />
precaution, because if <strong>the</strong> anchor is pulled up tight by <strong>the</strong><br />
windlass it is impossible to release <strong>the</strong> dog. Stop <strong>the</strong> anchor<br />
before it gets to <strong>the</strong> dolphin striker by turning OFF <strong>the</strong><br />
hydraulic valve (counter-clockwise).<br />
o<br />
o<br />
Set <strong>the</strong> dog by pulling back on <strong>the</strong> black knob.<br />
Put <strong>the</strong> handle back in <strong>the</strong> port brake and loosen by<br />
pushing <strong>the</strong> handle forward.<br />
o Raise <strong>the</strong> anchor with <strong>the</strong> hand operating lever (chrome<br />
tube) to set. Retighten port and starboard brakes. Tie <strong>the</strong><br />
anchor off to <strong>the</strong> bow pulpit.<br />
o<br />
Turn off <strong>the</strong> windlass switch. CAUTION: Make sure you<br />
do this before operating engine at high RPM’s. This pump<br />
is capable of providing damaging pressures at high RPM’s.<br />
3 To raise <strong>the</strong> anchor manually:<br />
o Put <strong>the</strong> handle in <strong>the</strong> operating lever (chrome tube), and<br />
release <strong>the</strong> dog by pushing <strong>the</strong> black knob forward while<br />
pulling back on <strong>the</strong> hand operating lever.<br />
o Put <strong>the</strong> handle back in <strong>the</strong> port brake (knurled knob) and<br />
loosen <strong>the</strong> brake by pushing <strong>the</strong> handle forward (counterclockwise).<br />
o Change <strong>the</strong> handle to <strong>the</strong> starboard brake and loosen <strong>the</strong><br />
brake by pulling <strong>the</strong> handle back.<br />
o Change handle to <strong>the</strong> operating lever (chrome tube) and<br />
starting with <strong>the</strong> lever fully forward, pull back and forth<br />
until anchor is out of <strong>the</strong> water. Slow down as you<br />
maneuver around <strong>the</strong> dolphin striker.
o<br />
Set <strong>the</strong> dog (black knob) to secure and tighten both <strong>the</strong> port<br />
and starboard brakes.<br />
Most coves are 15’ – 30’ deep so expect to pay out 60’ – 120’ of rode.<br />
The scope to use in <strong>the</strong> islands is about 4-to-1 for <strong>the</strong> highest water<br />
depth you’ll encounter in <strong>the</strong> spot where you’ve dropped anchor. Check<br />
<strong>the</strong> tide table to know how much <strong>the</strong> water will ebb and flow during<br />
your stay. The Argonaut has a full keel with a 6’ draft. Check <strong>the</strong><br />
depth sounder (see “depth sounder” in notes). After you have paid out<br />
<strong>the</strong> suitable amount of rode, 1 minute of idle reverse both sets <strong>the</strong><br />
anchor and will test its holding power. For storm conditions (25+ knots<br />
of wind) extend your scope to 7 or 10-to-1, providing you have room to<br />
leeward. O<strong>the</strong>rwise, set both anchors in a “v” pattern for extra holding<br />
power.<br />
3. Barbeque - The stainless propane Magma barbeque sits on <strong>the</strong> aft<br />
cap rail. The wire brush for clean up and <strong>the</strong> cutting shelf store inside.<br />
Please remove both before “firing up” <strong>the</strong> barbeque. We didn’t – <strong>the</strong><br />
first time – and melted <strong>the</strong> brush AND <strong>the</strong> shelf! The barbeque is<br />
hooked directly to <strong>the</strong> main propane system. To light <strong>the</strong> barbeque turn<br />
on <strong>the</strong> propane switch on <strong>the</strong> main panel and <strong>the</strong> LP switch in <strong>the</strong> galley<br />
as you do to light <strong>the</strong> stove. Place a flame up to <strong>the</strong> burner on <strong>the</strong><br />
barbeque through <strong>the</strong> match light hole, depress <strong>the</strong> valve and turn<br />
counter-clockwise to "high". Visually confirm ignition and adjust.<br />
(The complete manual for using <strong>the</strong> barbeque is located in <strong>the</strong> white<br />
notebook.) As a courtesy to us all, please always clean up afterward<br />
with <strong>the</strong> brass wire brush.<br />
4. Batteries – 3 AGM 8D house batteries are located under <strong>the</strong> aft<br />
berths. The start battery is located between <strong>the</strong> two aft berths. The dual<br />
circuit battery switch and 4 fuses are located under <strong>the</strong> aft/port berth.<br />
You will have no need to change <strong>the</strong> battery switch from <strong>the</strong> current<br />
setting – “On”. In <strong>the</strong> unlikely event that <strong>the</strong> power supply runs so low<br />
that you cannot start <strong>the</strong> engine, only <strong>the</strong>n will you need to turn <strong>the</strong><br />
switch to “combine batteries”, for a short time only, before returning<br />
<strong>the</strong> switch to “On”. CAUTION: Never turn a battery to “off” while <strong>the</strong><br />
engine is running. This will blow <strong>the</strong> diodes on <strong>the</strong> alternator, and your<br />
batteries will no longer charge.<br />
Monitor <strong>the</strong> batteries using <strong>the</strong> Link 2000 located above <strong>the</strong> chart table.
Check amps or volts by pushing “amps” or “volts” and battery bank #1<br />
(house) or #2 (start). (Manual is in <strong>the</strong> white notebook.)<br />
5. Berths - Our boat sleeps six very comfortably: two forward in <strong>the</strong><br />
private, spacious, queen sized v-berth stateroom, two aft/port in <strong>the</strong><br />
private berth, one in <strong>the</strong> private aft/strbrd quarter berth, and one on <strong>the</strong><br />
salon 9’ settee, which pulls out as a wide berth. Two additional guests<br />
are accommodated in <strong>the</strong> comfortable pilot berth above <strong>the</strong> dinette and<br />
on <strong>the</strong> long dinette berth. Just for information - <strong>the</strong> headroom in <strong>the</strong><br />
salon is well over 6’6”.<br />
6. Bilge pumps/bilge alarm – Argonaut is equipped with 3 bilge pumps.<br />
The electric bilge pumps are always hot from <strong>the</strong> house battery. The<br />
fuses are under <strong>the</strong> bunk in <strong>the</strong> port/aft stateroom. The automatic float<br />
switch is under <strong>the</strong> aft passageway floor panel. The manual bilge pump<br />
on/off switches are located on a panel just above <strong>the</strong> sole on <strong>the</strong> port side<br />
of <strong>the</strong> galley entrance. These switches will operate <strong>the</strong> pump manually,<br />
but will not turn pump off if automatic switch has been activated. The<br />
top switch is for pumping <strong>the</strong> sump. The second switch is for large<br />
volumes of water. The third switch is inactive. The secondary, manual,<br />
emergency bilge pump is in <strong>the</strong> deck plate to starboard of <strong>the</strong><br />
helmsman’s seat. The key to <strong>the</strong> deck plate is in <strong>the</strong> helmsman’s seat.<br />
The handle for <strong>the</strong> emergency bilge pump is stored under <strong>the</strong> inboard<br />
side of <strong>the</strong> aft/port berth mattress.<br />
High bilge water alarms – The float switches for both alarms are under<br />
<strong>the</strong> aft passageway floor panel. The Rule switch activates a LOUD<br />
siren. This system is always on. The fuse is under <strong>the</strong> bunk in <strong>the</strong> port<br />
aft stateroom. Should <strong>the</strong> alarm sound unnecessarily, push down on <strong>the</strong><br />
float switch or remove <strong>the</strong> fuse. The non-Rule float switch operates <strong>the</strong><br />
Aqualarm monitor located above <strong>the</strong> chart table. It is only active when<br />
<strong>the</strong> engine ignition is on.<br />
7. Bow thruster – Argonaut is equipped with a bow thruster, which is<br />
very handy for intermittent use while maneuvering in tight quarters. It<br />
draws a lot of power and can overheat. The manual says that it can run<br />
for 2-3 minutes continuously. The installer feels that, because of <strong>the</strong><br />
close proximity of <strong>the</strong> batteries beneath <strong>the</strong> forward berth, it will run<br />
longer. In any case, if <strong>the</strong> motor should overheat, <strong>the</strong> unit will start
eeping, after which you will have 10 seconds to continue operation<br />
before <strong>the</strong> unit automatically shuts down. Please don’t use it as a toy.<br />
You will note that a 1 second burst will move <strong>the</strong> boat dramatically!<br />
1 Turning ON <strong>the</strong> bow thruster – The thruster main switch is<br />
located on <strong>the</strong> front of <strong>the</strong> forward v-berth settee. Turn it on<br />
before getting underway. It may be left on, but is <strong>the</strong>re as a safety<br />
shutoff should <strong>the</strong> cockpit controls malfunction. To turn ON <strong>the</strong><br />
thruster use <strong>the</strong> control panel on <strong>the</strong> starboard side of <strong>the</strong><br />
binnacle. Push down on <strong>the</strong> red push-button, while pushing <strong>the</strong><br />
joystick to <strong>the</strong> right, for 1 second.<br />
2 OPERATING <strong>the</strong> bow thruster – Incline <strong>the</strong> joystick to <strong>the</strong> left<br />
and <strong>the</strong> bow of <strong>the</strong> boat moves left. Incline joystick to <strong>the</strong> right,<br />
‘boat moves to <strong>the</strong> right. When maneuvering, take into<br />
consideration <strong>the</strong> inertia effects. Remember <strong>the</strong> boat’s<br />
momentum continues after you release <strong>the</strong> joystick, <strong>the</strong>refore,<br />
release <strong>the</strong> control prior to reaching your desired position.<br />
3 Turning OFF <strong>the</strong> thruster – If <strong>the</strong> thruster has not been used for<br />
10 minutes it will automatically switch off. To warn you, a beep<br />
will sound once, followed by a second beep a few seconds later,<br />
before <strong>the</strong> unit switches off.<br />
The bow thruster batteries are charged by <strong>the</strong> alternator or by <strong>the</strong><br />
inverter/charger as controlled by <strong>the</strong> Echo charger through <strong>the</strong> house<br />
batteries. The Echo is mounted under <strong>the</strong> cockpit and is accessed by<br />
removing a wall panel in <strong>the</strong> aft/port stateroom.<br />
(See white notebook for manual and details on <strong>the</strong> Max Power thruster<br />
and Echo charger.)<br />
8. Cell phone booster – is <strong>the</strong> interior white antenna located in <strong>the</strong> shelf<br />
area above <strong>the</strong> settee. The amplifier is located in <strong>the</strong> cabinet ahead of<br />
<strong>the</strong> nav station. The exterior antenna is located on <strong>the</strong> mizzen spreader.<br />
(Complete tips and instructions found in <strong>the</strong> manuals commonly used<br />
<strong>aboard</strong> <strong>the</strong> Argonaut in <strong>the</strong> large notebooks.)<br />
9. Cell phone charger receptacle - (turn on “nav sta accy” on panel) – is<br />
located on <strong>the</strong> bulkhead above <strong>the</strong> chart table.<br />
10. Charging – If you have charging problems from <strong>the</strong> alternator or
egulator, read through <strong>the</strong> troubleshooting guide in <strong>the</strong> manual for <strong>the</strong><br />
Balmar regulator. Both a spare alternator and a new model 612<br />
regulator are on board, should you need to replace ei<strong>the</strong>r. (If<br />
replacement is necessary, refer to <strong>the</strong> Argonaut alternator, regulator<br />
instructions packaged with <strong>the</strong> replacement parts and/or call our boat<br />
professional.)<br />
11. Chart plotter – (For power turn on “nav/ckpit instr” on electric<br />
panel) Install <strong>the</strong> Raymarine C80 chartplotter on <strong>the</strong> bracket on <strong>the</strong><br />
portside of <strong>the</strong> binnacle guard. This chartplotter is a combination<br />
chart, gps, and radar. It is a valuable addition to your primary<br />
navigation aids – <strong>the</strong> Maptech chart book and <strong>the</strong> roll charts, all<br />
carefully marked in red with “killer rocks” and off-limits harbors and<br />
coves. Nothing replaces always knowing where you are on <strong>the</strong> paper<br />
chart! With <strong>the</strong> chartplotter powered on you will know exactly where<br />
your boat is on it’s chart at every moment, have a clear radar overlay,<br />
and <strong>the</strong> immediate ability to move a cursor to tide, current, waypoints,<br />
and cartographic object details. (The quick start manual and <strong>the</strong> full<br />
operating manual in <strong>the</strong> maroon Raymarine folder are in <strong>the</strong> nav<br />
station.) While navigating <strong>the</strong> <strong>San</strong> <strong>Juan</strong>s and Gulf Islands is often line of<br />
sight with <strong>the</strong> normal clear visibility, a chartplotter is useful to<br />
confirming your course (from a ways off, <strong>the</strong> islands often look <strong>the</strong><br />
same!) You will also use it in <strong>the</strong> unlikely event you are enveloped by<br />
fog. As a word of caution: ALWAYS “ZOOM IN” ON AN AREA TO<br />
CHECK FOR OBSTACLES THAT MAY NOT SHOW ON THE<br />
LARGER SCALE, LESS DETAILED CHART. In this “zoomed”<br />
mode, <strong>the</strong> chartplotter is particularly helpful when navigating a narrow<br />
pass or approaching <strong>the</strong> entrance to a secluded cove.<br />
12. Deck wash down pump – The blue and white activator for <strong>the</strong> hose<br />
is in <strong>the</strong> forward deck box. Turn on “deck pump” on <strong>the</strong> main panel,<br />
place <strong>the</strong> fitting in <strong>the</strong> forward deck/ with hose attached, and wash <strong>the</strong><br />
chain and anchor as it is coming up. It makes a huge difference in <strong>the</strong><br />
cleanliness and “odoriferousness” of <strong>the</strong> chain locker!<br />
13. Depth sounder (turn on “nav/ckpit instr” on <strong>the</strong> panel) –The depth<br />
sounder is adjusted to read from <strong>the</strong> transducer. (Manual in white<br />
notebook for operating instructions) It is an aid to navigation in<br />
shallow water and to anchoring. However, <strong>the</strong> key to avoiding those<br />
sharp rocks and assuring safe mooring in changing tides is knowing
where you are on <strong>the</strong> chart at all times and reading tide and current<br />
tables carefully.<br />
14. Dinghy – The dingy tows well if brought up close to <strong>the</strong> stern, with<br />
<strong>the</strong> painter tied off twice (for good measure) – once on a cleat and <strong>the</strong><br />
bitter end around <strong>the</strong> stern rail. Please take special care when beaching<br />
<strong>the</strong> dinghy. As you will find, when you step onto <strong>the</strong> shore, <strong>the</strong> islands<br />
are not sandy beaches, but most often are rocky and equipped with<br />
sharp foot and rubber cutter barnacles. Here’s what works best:<br />
launch a person off <strong>the</strong> dinghy bow as you approach shore to hold <strong>the</strong><br />
boat and <strong>the</strong>n offload everyone else over <strong>the</strong> bow or sides. If you can, lift<br />
<strong>the</strong> dinghy above barnacle height and deposit it gently on <strong>the</strong> shore.<br />
Secure <strong>the</strong> painter under a rock or onto a log – a rising tide can leave<br />
you high and dry and dinghyless! The boarding ladder for <strong>the</strong> dingy (or<br />
kayak – or swimming!) is under <strong>the</strong> helmsman’s seat in <strong>the</strong> lazarette<br />
and attaches port side at <strong>the</strong> lifeline gate.<br />
15. Docking – The Fender Step is convenient for putting <strong>the</strong> crew at a<br />
level for accessibility to <strong>the</strong> dock. In most situations <strong>the</strong> stern or midship<br />
line should be secured first, relying on <strong>the</strong> bow thruster to position<br />
<strong>the</strong> bow until it is tied. When docking, and handling <strong>the</strong> Argonaut in<br />
close situations, be careful to allow extra room to accommodate <strong>the</strong> long<br />
bowsprit and <strong>the</strong> inertia resulting from such a heavy boat. The bow<br />
thruster is a welcome addition! Never turn off <strong>the</strong> engine until <strong>the</strong> boat<br />
is securely tied to <strong>the</strong> dock. You’ll need to use your engine – in reverse<br />
– to stop <strong>the</strong> boat. It’s very difficult for <strong>the</strong> people holding <strong>the</strong> lines to<br />
stop <strong>the</strong> forward momentum of such a heavy boat. If you need<br />
assistance when coming into our <strong>San</strong> <strong>Juan</strong> <strong>Sailing</strong> dock, particularly in<br />
high wind, just hail SJS on VHF channel 80 and someone will be<br />
available to catch your lines or offer help.<br />
16. Dodger – The dodger protects <strong>the</strong> crew from <strong>the</strong> wea<strong>the</strong>r when <strong>the</strong>y<br />
are in <strong>the</strong> vicinity of <strong>the</strong> companionway and at <strong>the</strong> forward part of <strong>the</strong><br />
cockpit. The “glass” is particularly vulnerable to scratching from salt<br />
crystals so when cleaning please use generous amounts of water to<br />
“flood” <strong>the</strong> windows to dissolve those crystals. It’s just like rubbing <strong>the</strong><br />
glass with sand paper if you don’t! Thanks to you and o<strong>the</strong>r guests for<br />
keeping <strong>the</strong> Plexiglas clear.<br />
17. Electrical panel – is located under <strong>the</strong> companionway stairs and is
lit by a small light in <strong>the</strong> upper, right-hand corner. The A/C (120V)<br />
master breaker is located to <strong>the</strong> left. The rest of <strong>the</strong> panel is D/C (12<br />
volt) breakers. The center part of <strong>the</strong> panel is for cabin, running, bow,<br />
steaming, anchor, spreader lights, as well as water pressure, bilge<br />
pump, compass and refrigerator/freezer. The right side has breakers<br />
for <strong>the</strong> macerator and sump pump (shower/wash down), floor lights,<br />
aft/spreader light, cockpit navigation instruments<br />
(chartplotter/instruments), nav station accessories (VHF, broadband,<br />
cell booster, and stereo), propane and fans. There is also a strobe<br />
breaker that is not connected.<br />
1 Using A/C shore power – Plug in <strong>the</strong> power cord (turn on <strong>the</strong><br />
harbor master switch) and <strong>the</strong>n turn on <strong>the</strong> AC master breaker.<br />
Make sure <strong>the</strong> reverse polarity light above it is NOT on. Make<br />
sure <strong>the</strong> “inverter/charger” breaker is ON. (If not, <strong>the</strong> outlets<br />
won’t work!) Check <strong>the</strong> Link 2000, over <strong>the</strong> chart table, and<br />
make sure that <strong>the</strong> AC LED light is lit. This takes 30 seconds<br />
after <strong>the</strong> AC breaker is turned on. Select “charge” on <strong>the</strong> Link<br />
2000 to maintain charge on <strong>the</strong> battery banks. When getting<br />
underway, before turning off <strong>the</strong> harbor master switch, turn OFF<br />
<strong>the</strong> AC master breaker on <strong>the</strong> main electric panel. Unplug and<br />
stow <strong>the</strong> power cord(s).<br />
2 Inverter (converting 12 volt house battery to A/C) – See detailed<br />
instructions under “Link 2000/Heart Interface”, number 29 on<br />
<strong>the</strong>se owner’s notes.<br />
Just a note – use of <strong>the</strong> running lights will only be necessary during<br />
severely limited daytime visibility, since <strong>San</strong> <strong>Juan</strong> <strong>Sailing</strong> does not<br />
permit night passage. However, you will need to turn on <strong>the</strong> “anchor<br />
light” all night in an anchorage. ‘Just remember to turn it off in <strong>the</strong><br />
morning to save <strong>the</strong> batteries!<br />
18. Emergency /Safety Equipment:<br />
1 Emergency tiller – is stored under <strong>the</strong> helmsman’s seat in <strong>the</strong><br />
lazarette. (Accessible by tilting <strong>the</strong> entire helmsman’s seat<br />
forward.) Slip it on to <strong>the</strong> rudder post which is below a hole in <strong>the</strong><br />
lazarette floor in <strong>the</strong> center of <strong>the</strong> helmsman’s seat opening.<br />
2 Fire extinguishers (BC rated – electrical, grease, wood or fiber<br />
fires) are located immediately below <strong>the</strong> companionway to
starboard inside <strong>the</strong> cabin door, to port in <strong>the</strong> cabin closet, in <strong>the</strong><br />
main salon hanging locker, forward in <strong>the</strong> v-berth.<br />
3 First aid kit is located in <strong>the</strong> cupboard forward/starboard in <strong>the</strong><br />
main salon.<br />
4 Flares, visual day/night distress signals, are located in <strong>the</strong><br />
cupboard forward/starboard in <strong>the</strong> main salon. There is also an<br />
SOS flag.<br />
5 Foghorn is in <strong>the</strong> helmsman's seat. Additional foghorns are<br />
located with <strong>the</strong> flares.<br />
6 Leaks – Determine <strong>the</strong> source of <strong>the</strong> leak. Fresh water and<br />
holding tank leaks are a cause for concern but will not endanger<br />
<strong>the</strong> boat. (See “emergency bilge pump” in section 6 above.)<br />
Wooden plugs are attached to every seacock and can be inserted if<br />
needed. Extras are in <strong>the</strong> chart table.<br />
7 Lifesling is mounted on <strong>the</strong> stern pulpit. Read <strong>the</strong> directions<br />
before you depart.<br />
8 Radar reflector is mounted permanently on <strong>the</strong> mizzen mast.<br />
9 Tools are under <strong>the</strong> seat of <strong>the</strong> nav station. Small spare parts<br />
are also located in <strong>the</strong> chart table.<br />
10 Wetsuit and booties are located under <strong>the</strong> floor of <strong>the</strong> closet in<br />
<strong>the</strong> aft/port stateroom. Mask, snorkel and light are in <strong>the</strong><br />
cupboard with <strong>the</strong> flares.<br />
Hitting a rock or large log – Immediately contact <strong>San</strong> <strong>Juan</strong> <strong>Sailing</strong>.<br />
Proceed to <strong>the</strong> nearest harbor and have a dive performed to check <strong>the</strong><br />
condition of <strong>the</strong> keel and <strong>the</strong> hull.<br />
19. Engine – The Argonaut has an Isuzu 60 hp engine. The engine is<br />
located under <strong>the</strong> large sink area in <strong>the</strong> galley and easily accessed from<br />
3 sides by removable panels. The engine light is on <strong>the</strong> bulkhead on <strong>the</strong><br />
port side of <strong>the</strong> engine. To access <strong>the</strong> forward panel to check and/or<br />
add oil or coolant, remove <strong>the</strong> cushions from <strong>the</strong> aft table seat and rock<br />
<strong>the</strong> seat forward and lean it against <strong>the</strong> table.<br />
The engine is equipped with an Aqualarm Ultimate Systems monitor in<br />
addition to standard cockpit instruments. The system and alarm bell<br />
are activated when <strong>the</strong> ignition is turned on. The lcd display above <strong>the</strong><br />
chart table provides alarm detail. Following are <strong>the</strong> engine sensors<br />
monitored:<br />
Cooling water flow
High temp<br />
Low oil pressure<br />
Exhaust temp<br />
High bilge water is also monitored in addition to <strong>the</strong> separate high bilge<br />
water alarm.<br />
1 Prior to starting:<br />
2 Check <strong>the</strong> oil level with <strong>the</strong> oil dipstick located on <strong>the</strong> port<br />
side of engine, aft of <strong>the</strong> alternator. Make sure <strong>the</strong> oil level<br />
is within dipstick min/max levels. Add Delo 15/40 wt. oil<br />
(on engine compartment shelf) as necessary to black fill cap<br />
on <strong>the</strong> red valve cover. Use small amounts – do not overfill.<br />
3 Check <strong>the</strong> coolant level by removing <strong>the</strong> radiator type cap<br />
on top of <strong>the</strong> white tank on <strong>the</strong> port side of <strong>the</strong> engine while<br />
<strong>the</strong> engine is cold. The coolant level is adequate if you can<br />
touch it when inserting your finger. Add, as necessary, only<br />
<strong>the</strong> Delo pre-mix found on <strong>the</strong> engine compartment shelf.<br />
Do not fill completely to <strong>the</strong> top.<br />
4 Do not remove <strong>the</strong> transmission dipstick. Check for<br />
transmission fluid in <strong>the</strong> bilge. If you note any red fluid,<br />
please call Hal Thesen (360-961-0455)<br />
5 Check <strong>the</strong> raw water strainer to make sure it is free of grass<br />
and debris. It is located at <strong>the</strong> front edge of <strong>the</strong> shelf on <strong>the</strong><br />
starboard side of <strong>the</strong> engine. If it is necessary to open it for<br />
cleaning, do not bo<strong>the</strong>r closing <strong>the</strong> seacock, since <strong>the</strong><br />
strainer is above <strong>the</strong> waterline.<br />
6 Starting <strong>the</strong> engine:<br />
7 Place shift lever (port) on binnacle in neutral (straight up).<br />
Throttle lever (starboard) can also be straight up. The<br />
engine usually starts right away at idle. If not, advance <strong>the</strong><br />
throttle. Make sure <strong>the</strong> shift lever is pushed all <strong>the</strong> way<br />
forward or backward when shifting.<br />
8 The start battery switch is always on. In <strong>the</strong> rare event that<br />
is does not start because of a low battery, turn <strong>the</strong> battery<br />
switch to “combine batteries”. After starting, return<br />
promptly to “on” position.<br />
9 Insert engine key (found in <strong>the</strong> chart table) in <strong>the</strong> ignition<br />
switch found below <strong>the</strong> galley counter at <strong>the</strong> aft end of <strong>the</strong><br />
engine compartment. It can only be inserted in <strong>the</strong> “off”<br />
position. When <strong>the</strong> engine is cold, preheat by turning key
left for 20 seconds. Release key. It will return to “off”<br />
position. Turn <strong>the</strong> key to right to start. An alarm will<br />
sound until <strong>the</strong> engine is running.<br />
10 Once <strong>the</strong> engine is warm, you can use <strong>the</strong> ignition switches<br />
in <strong>the</strong> cockpit. Turn <strong>the</strong> circuit breaker on that is located<br />
next to <strong>the</strong> ignition switch below at <strong>the</strong> galley counter. It is<br />
labeled “engine instruments”. This powers all switches at<br />
<strong>the</strong> helm. WHEN YOU LEAVE THE BOAT AND LOCK<br />
UP, TURN THIS BREAKER OFF.<br />
11 Let engine warm-up for several minutes before putting<br />
under load.<br />
12 The oil pressure should read 25-50 psi.<br />
13 Temperature should read between 160’-190’ F.<br />
14 Ammeter should indicate charge.<br />
15 Check for water gurgling out of <strong>the</strong> exhaust. Also note any<br />
kelp or debris that could foul <strong>the</strong> propeller.<br />
16 Check <strong>the</strong> transmission while tied up by shifting into<br />
forward and reverse, for a moment, at idle.<br />
17 Release <strong>the</strong> wheel brake knob on <strong>the</strong> starboard side of <strong>the</strong><br />
binnacle.<br />
18 Cruising RPM’s @ 1800 for about 7 knots of speed.<br />
· Stopping <strong>the</strong> engine:<br />
o Bring <strong>the</strong> engine to idle and shift to neutral.<br />
o Pull “T” handle at base of helmsman’s seat to kill engine.<br />
Push handle in when engine stops. Turn key off below. OR<br />
o Go below and push and hold stop switch to <strong>the</strong> right until<br />
<strong>the</strong> engine stops (switch located below <strong>the</strong> ignition switch).<br />
Turn key off.<br />
· Engine overheating:<br />
1 If <strong>the</strong> buzzer sounds while <strong>the</strong> engine is running,<br />
immediately check <strong>the</strong> oil pressure and temperature gauges<br />
and make sure water is gurgling out with <strong>the</strong> exhaust. Shut<br />
off <strong>the</strong> engine.<br />
2 If water is not coming out with <strong>the</strong> exhaust, ei<strong>the</strong>r <strong>the</strong>re is a<br />
broken belt or <strong>the</strong> raw water strainer is clogged with<br />
eelgrass. Check <strong>the</strong> belts and clean <strong>the</strong> strainer as outlined<br />
in <strong>the</strong> “prior to starting” section above.<br />
3 If water IS coming normally from <strong>the</strong> exhaust, check <strong>the</strong>
engine’s coolant levels and <strong>the</strong>rmostat, check for leaking<br />
hoses, and check <strong>the</strong> tension on <strong>the</strong> belt for <strong>the</strong> water pump.<br />
There are spare parts and rebuild kits in <strong>the</strong> engine<br />
compartment, below <strong>the</strong> main salon hanging locker, under<br />
<strong>the</strong> starboard quarter berth, and outboard of <strong>the</strong> settee.<br />
20. Fuel tank – The two 60 gallon (approximate) diesel tanks sit under<br />
<strong>the</strong> aft berths. Check fuel levels with tank tender, buttons #3 and #4.<br />
The fuel tank selection valves are below <strong>the</strong> sole panel, located between<br />
<strong>the</strong> engine and <strong>the</strong> nav station. There are 2 valves for each tank – a<br />
supply and a return. The green handled valves are for <strong>the</strong> starboard<br />
tank and <strong>the</strong> red for <strong>the</strong> port tank. Open both greens and close both<br />
reds for <strong>the</strong> starboard tank or vice versa. The Espar system draws only<br />
from <strong>the</strong> starboard tank through a separate system that is not affected<br />
by <strong>the</strong>se selection valves. The fills are located in <strong>the</strong> stern just inside <strong>the</strong><br />
rail. They are both marked “diesel” and are opened with <strong>the</strong> deepreach<br />
chrome deck key attached by cable in <strong>the</strong> helmsman’s seat. Be<br />
very careful when filling. We put down a fueling cloth under <strong>the</strong> vent<br />
(located on <strong>the</strong> port side below <strong>the</strong> cockpit rail) and listen carefully for<br />
<strong>the</strong> “hiss” when <strong>the</strong> diesel is approaching <strong>the</strong> full point. Fuel spills<br />
make a mess of lines (remove <strong>the</strong>m from <strong>the</strong> deck before fueling), stain<br />
<strong>the</strong> fiberglass, are slippery and if overboard, can result in costly Coast<br />
Guard fines. Stanadyne fuel treatment will be added by <strong>the</strong> boat<br />
professional.<br />
21. Head and holding tank–<strong>San</strong> <strong>Juan</strong> <strong>Sailing</strong> will discuss holding tanks,<br />
use of heads and pump outs upon your arrival. Listen carefully! This<br />
Wilcox/Crittenden Skipper head is amazingly easy to pump and to<br />
empty. ‘Just hold down <strong>the</strong> lever (lower right side of <strong>the</strong> bowl) with<br />
your foot, pump to “flush”, and <strong>the</strong>n dry <strong>the</strong> bowl. (Detailed<br />
instructions are on <strong>the</strong> lid of <strong>the</strong> head.) The valve that controls <strong>the</strong><br />
direction of <strong>the</strong> discharge is <strong>the</strong> “Y” valve located under <strong>the</strong> head sink.<br />
To send <strong>the</strong> discharge directly from <strong>the</strong> head to <strong>the</strong> ocean, simply match<br />
blue tape to blue tape. To switch it to holding tank, move <strong>the</strong> handle<br />
180’ in <strong>the</strong> opposite direction. The holding tank, a welded poly 30-gallon<br />
tank, is located under <strong>the</strong> forward berth. Monitor <strong>the</strong> level in <strong>the</strong> tank<br />
with <strong>the</strong> tank tender located by <strong>the</strong> nav station. (See instructions under<br />
“Tank tender”)
There are no valves to change before or after emptying <strong>the</strong> tank to <strong>the</strong><br />
sea. To empty <strong>the</strong> tank with <strong>the</strong> macerator pump, just turn on <strong>the</strong><br />
“macerator/sump” on <strong>the</strong> main panel and activate <strong>the</strong> top (grey) switch<br />
above <strong>the</strong> sink in <strong>the</strong> head. An indicator light shows when <strong>the</strong> switch is<br />
on. Running <strong>the</strong> pump dry will not damage <strong>the</strong> pump. When <strong>the</strong> tank<br />
is empty, just turn <strong>the</strong> macerator switch off.<br />
We recommend that you do not fill <strong>the</strong> tank. It is so easy to empty that<br />
you should just flip <strong>the</strong> switch daily when you are under way. In<br />
addition, you can rinse <strong>the</strong> tank, pump and clean <strong>the</strong> hoses as often as<br />
you like, just by putting water down <strong>the</strong> deck fill with <strong>the</strong> deck wash<br />
down hose. Please rinse <strong>the</strong> system at least weekly.<br />
To empty <strong>the</strong> tank through <strong>the</strong> deck fitting at a pump out station, just<br />
hook up and pump. The deck fitting has an independent tank<br />
connection. Pump out, fill with water, pump again, fill with water, and<br />
pump one final time. Rinse off <strong>the</strong> deck. While rinsing, run <strong>the</strong><br />
macerator a short time, with <strong>the</strong> last rinse, to clean that line.<br />
22. Heater –The hydronic Espar heater has vents throughout <strong>the</strong> boat<br />
and is easily controlled by central <strong>the</strong>rmostat located in <strong>the</strong> nav station<br />
area. The heat is dry, comfortable and makes a huge difference in<br />
cruising comfort. Just flip <strong>the</strong> rocker switch on and set <strong>the</strong> <strong>the</strong>rmostat.<br />
The red light comes on when <strong>the</strong> system is on. The green light is added<br />
when <strong>the</strong> system is calling for heat. The Espar has a warm up cycle that<br />
lasts a few minutes before <strong>the</strong> heat comes on and a cool down cycle<br />
when <strong>the</strong> heater goes off. There are high/low fan switches in <strong>the</strong> salon<br />
(under <strong>the</strong> table), in <strong>the</strong> v-berth (for vents in <strong>the</strong> v-berth and head), in<br />
<strong>the</strong> aft port cabin under <strong>the</strong> reading lamp (for cabin and galley), and<br />
ano<strong>the</strong>r that will be activated in <strong>the</strong> strd/aft cabin soon. In addition to<br />
<strong>the</strong> <strong>the</strong>rmostat and fan switches, <strong>the</strong> euro vents can be adjusted to<br />
balance <strong>the</strong> system. (See manual “2” for detailed instructions or<br />
troubleshooting) Note: Should <strong>the</strong> Espar heater continue to run when<br />
<strong>the</strong> <strong>the</strong>rmostat temperature in <strong>the</strong> cabin is met and <strong>the</strong> water is hot in<br />
<strong>the</strong> tank, a probable cause is a defective aqua stat (hot water<br />
<strong>the</strong>rmostat). To disable <strong>the</strong> aqua stat, lift <strong>the</strong> helmsman’s seat and<br />
loosen 1 of <strong>the</strong> yellow or red wires to starboard on <strong>the</strong> bottom of <strong>the</strong><br />
Espar control panel, <strong>the</strong> zone “4” label marked with <strong>the</strong> blue friction<br />
tape. OR. . .just turn off <strong>the</strong> main Espar switch in <strong>the</strong> cabin. To heat<br />
water when away from dock power, in this situation, turn <strong>the</strong> heater on
and <strong>the</strong> <strong>the</strong>rmostat up and <strong>the</strong> individual blowers off or run <strong>the</strong> engine.<br />
23. Hot water – If connected to shore power, turn on <strong>the</strong> “water heater”<br />
breaker on <strong>the</strong> main panel. If cruising, and not connected to shore<br />
power, water is heated by running <strong>the</strong> engine or by turning on <strong>the</strong><br />
Espar rocker switch by <strong>the</strong> nav station. (Storage is in <strong>the</strong> large stainless<br />
container under <strong>the</strong> pilot berth.)<br />
24. Internet connection – We use a MiFi connection. You may check<br />
with <strong>San</strong> <strong>Juan</strong> <strong>Sailing</strong> regarding an internet connection in Squalicum<br />
harbor. The o<strong>the</strong>r alternative is to try Broadband Express. There is a<br />
blue e<strong>the</strong>rnet cord in <strong>the</strong> chart table which can be connected to <strong>the</strong> LAN<br />
bridge mounted in <strong>the</strong> area under <strong>the</strong> tank tender in <strong>the</strong> nav station.<br />
The power cube for <strong>the</strong> bridge is also in <strong>the</strong> table and is plugged into <strong>the</strong><br />
back of <strong>the</strong> bridge as well as <strong>the</strong> outlet. Connect <strong>the</strong> blue cord to your<br />
e<strong>the</strong>rnet port, set <strong>the</strong> computer to your internet connection, and wait<br />
for <strong>the</strong> Broadband Express sign-in page. You can sign up for<br />
Broadband Express for your week on <strong>the</strong> water, or by day or longer.<br />
With <strong>the</strong> wifi antenna that is mounted on <strong>the</strong> mizzen mast, Broadband<br />
Express states that reception can be 2 to 3 miles from one of <strong>the</strong>ir<br />
antenna locations (see list in <strong>the</strong> manual). (Complete directions or<br />
trouble shooting in manual.)<br />
25. Inverter – See Link 2000/Heart Interface in <strong>the</strong>se owner’s notes.<br />
(#29, bullet 3)<br />
26. Kayak – The yellow Sonoma 10 airalite kayak sits comfortably, out<br />
of <strong>the</strong> way, on <strong>the</strong> cabin top, lashed to available fittings. It weighs a<br />
mere 34 lbs. and is easily launched from deck, always being careful to<br />
lift it over and outside <strong>the</strong> varnished cap rail. The amazing gloss of <strong>the</strong><br />
airalite material will make you want to be careful when arriving on a<br />
barnacle covered beach! The spray skirt for <strong>the</strong> kayak is in <strong>the</strong> area<br />
under <strong>the</strong> aft/port cabin’s closet.<br />
27. Knot meter (“nav/ckpit instr” on panel) – Speed is indicated in<br />
knots, or nautical miles, and is approximately 1.15 times a statute mile.<br />
If <strong>the</strong> digital knot meter shows a reading of “0.00” while underway, <strong>the</strong><br />
impeller is most likely clogged with eelgrass. If it doesn’t float off<br />
overnight, you can also try removing it by traveling in reverse. The<br />
impeller is located under <strong>the</strong> floorboard by <strong>the</strong> head and you may wish
to clear it manually. Be prepared for <strong>the</strong> geyser of seawater if you<br />
remove <strong>the</strong> impeller. Have <strong>the</strong> plug, which is nearby in <strong>the</strong> bilge, ready<br />
to insert! (Ano<strong>the</strong>r handy option is just to use <strong>the</strong> “sog” reading on <strong>the</strong><br />
chartplotter!)<br />
28. Life jackets – Six adult life jackets properly embroidered for <strong>the</strong><br />
"argonaut" are located in <strong>the</strong> forward hanging locker. 6 additional<br />
jackets are under <strong>the</strong> forward compartment of <strong>the</strong> dinette.<br />
29. Link 2000/ Heart Interface – This is <strong>the</strong> instrument located to <strong>the</strong><br />
right above<br />
<strong>the</strong> chart table.<br />
1 The led on <strong>the</strong> lower left hand corner is lit when <strong>the</strong> AC is<br />
connected and functioning properly.<br />
2 Select “charge” (second switch on left side) and turn on<br />
“inverter/charger” switch on <strong>the</strong> main panel to keep <strong>the</strong><br />
batteries fully charged. The panel switch controls <strong>the</strong><br />
battery charger function of <strong>the</strong> inverter. When you turn on<br />
<strong>the</strong> charger it will go though a series of lights: charge,<br />
accept, and float, which is <strong>the</strong> full charge position.<br />
3 Select “inverter” (upper left) when you are at anchor or<br />
underway and want to use outlets to plug in small 110<br />
appliances (not hair dryers – inverter won’t handle that<br />
much power) or to run <strong>the</strong> microwave. (Also turn on<br />
“outlet” switches on <strong>the</strong> main panel) You don’t need to turn<br />
on AC master or “inverter/charger”.<br />
Monitor amps and volts on this instrument by pushing “amps” or<br />
“volts” and battery bank #1 or #2 (both house batteries). (Manual is in<br />
white notebook).<br />
30. Microwave – The GE microwave is handy for quick “heat-ups.”<br />
When <strong>the</strong> boat is connected to shore power, it runs just like yours at<br />
home. Just make sure <strong>the</strong> “outlets” breaker is on. When you are off<br />
shore, turn on <strong>the</strong> inverter on <strong>the</strong> Link 2000 (<strong>the</strong> switch is located in <strong>the</strong><br />
upper left hand corner). Make sure <strong>the</strong> “outlet” breaker on <strong>the</strong> main<br />
panel is still on. Operate <strong>the</strong> microwave as usual. You will notice that is<br />
runs a bit slower and things do not heat quite as quickly. It is best to<br />
use <strong>the</strong> oven for anything that would require more than a few minutes<br />
to heat.<br />
31. Outboard – All <strong>San</strong> <strong>Juan</strong> boats are equipped with a Honda 2.0
outboard engine.<br />
32. Outlets – When on shore power, make sure <strong>the</strong> “inverter/charger”<br />
is flipped on, as well as <strong>the</strong> port and starboard “outlets” to use <strong>the</strong><br />
outlets. When off shore <strong>the</strong> inverter will operate <strong>the</strong> outlets. All are<br />
protected by GFCI (ground fault) and circuit breakers. If <strong>the</strong> outlets on<br />
one side of <strong>the</strong> boat or <strong>the</strong> o<strong>the</strong>r fail to work, check <strong>the</strong> GFCI in <strong>the</strong><br />
corresponding aft stateroom.<br />
33. Ports – Be sure to tightly secure all ports and hatches before getting<br />
underway. Most “leaks” seem to occur from loosely tightened port<br />
lights. The butterfly has a perpetual leak no matter what we do, but<br />
seems to be fine in inclement wea<strong>the</strong>r when <strong>the</strong> cover is in place. In fine<br />
wea<strong>the</strong>r, however, it is delightful to have open, both for light in <strong>the</strong><br />
salon and for <strong>the</strong> breeze.<br />
34. Propane - Two propane tanks are located in boxes on <strong>the</strong> cabin roof<br />
near <strong>the</strong> companionway. Turn on and leave open, one tank valve at a<br />
time. To change tanks, close one valve and open <strong>the</strong> o<strong>the</strong>r and flip <strong>the</strong><br />
black lever on <strong>the</strong> regulator so that <strong>the</strong> supply arrow points to <strong>the</strong> o<strong>the</strong>r<br />
tank. The tank valves must always point up for <strong>the</strong> internal pick-up<br />
tubes on <strong>the</strong>se horizontal tanks to operate properly. One canister will<br />
last a long time for your cooking needs.<br />
35. Radar - Detailed instructions are located on page 5 -6 in <strong>the</strong><br />
Raymarine C-series Display reference manual. Basically, use <strong>the</strong><br />
chartplotter to control <strong>the</strong> power to <strong>the</strong> radar. Press <strong>the</strong> POWER<br />
button and use <strong>the</strong> appropriate key or menu to select <strong>the</strong> required<br />
operating mode. Select Scanner off when you don’t need <strong>the</strong> radar.<br />
When you select “on” <strong>the</strong>n select “radar tx” to activate <strong>the</strong> scanner or<br />
select “radar stdby” when you are not operating <strong>the</strong> radar for short<br />
periods.<br />
36. Refrigerator and freezer – The freezer is <strong>the</strong> smaller box<br />
immediately forward of <strong>the</strong> stove. The refrigerator is <strong>the</strong> next larger<br />
box. Thermostats control <strong>the</strong> two Nova Cool units – <strong>the</strong> freezer<br />
<strong>the</strong>rmostat is located by <strong>the</strong> microwave in <strong>the</strong> galley area and <strong>the</strong><br />
refrigerator has a <strong>the</strong>rmostat inside <strong>the</strong> box. Both units get very cold.<br />
Watch <strong>the</strong> temperature as you get “acquainted” so as to freeze <strong>the</strong> ice<br />
cream but not <strong>the</strong> lettuce. We start both <strong>the</strong> freezer and <strong>the</strong>
efrigerator settings at “1” and look at <strong>the</strong>ir temperatures on <strong>the</strong> gauges<br />
aft of <strong>the</strong> stove, before turning <strong>the</strong> dial any higher. The inboard gauge<br />
is <strong>the</strong> refrigerator, and <strong>the</strong> outboard, <strong>the</strong> freezer. Experiment, too, with<br />
placement of food in <strong>the</strong> deep boxes – generally it’s warmer at <strong>the</strong> top!<br />
The “refrig and freezer” switch is located on <strong>the</strong> main panel and must<br />
be in <strong>the</strong> “on” position.<br />
37. Sails and rigging – The Argonaut is ketch rigged, regularly sailed<br />
with a mizzen, main, furling staysail and furling genoa. Both mizzen<br />
and main are battenless and have easily accessed reef points.<br />
· Main – Halyards on <strong>the</strong> mast include those for <strong>the</strong> main, topping<br />
lift/extra main, staysail and spinnaker. There is a boom-mounted<br />
winch for reefing. The blue sheet on <strong>the</strong> boom is for <strong>the</strong> first reef<br />
point and <strong>the</strong> red for <strong>the</strong> second. The rule of thumb is to “reef<br />
early and reef often” – thus keeping <strong>the</strong> crew happy and to keep<br />
you from rounding up. The belaying pins are extremely handy<br />
for tying off unused halyards and stowing lines. The winch<br />
handles (located in <strong>the</strong> helmsman’s seat or chart table) are<br />
conveniently stowed in a box mounted just port of <strong>the</strong><br />
companionway when under way and in <strong>the</strong> winch handle pocket<br />
on <strong>the</strong> mast. Sail ties looped securely over <strong>the</strong> deck rails are<br />
conveniently available when taking down <strong>the</strong> sails.<br />
· Mizzen – The boom has been raised to accommodate headroom in<br />
<strong>the</strong> cockpit. The mast steps are a boon to tending <strong>the</strong> lines and<br />
cover.<br />
· Headsail – When unfurling <strong>the</strong> sail, keep slight tension on <strong>the</strong><br />
roller furling line, and on <strong>the</strong> sheets when furling, to prevent<br />
problems of a “rat’s nest” on <strong>the</strong> drum. To reef, ease <strong>the</strong> sheet<br />
and pull in on <strong>the</strong> furling line to <strong>the</strong> desired position.<br />
· Staysail – To furl and unfurl, observe <strong>the</strong> same procedures as<br />
noted above.<br />
38. Shower – The separate, tile shower has a convenient seat, hand held<br />
faucet, and feels warm and refreshing. To heat <strong>the</strong> water see<br />
instructions for “hot water” above. If <strong>the</strong> water has not been heated<br />
and/or stored recently, turn on <strong>the</strong> switch an hour before you wish to<br />
shower. Turn on “macerator/sump” on <strong>the</strong> panel. Set <strong>the</strong> faucets to<br />
water temperature that is comfortable, get wet, push small button on<br />
<strong>the</strong> hand held faucet to turn off <strong>the</strong> water temporarily, soap up, turn on
<strong>the</strong> water with <strong>the</strong> button, rinse off, and turn off main faucets. It<br />
doesn’t take much water to feel wonderful.<br />
39. Spares – Argonaut is well equipped with engine and general spares.<br />
They are located under <strong>the</strong> seat in <strong>the</strong> nav station (Tools), behind <strong>the</strong><br />
dinette (General spares/ light bulbs and alternator), under <strong>the</strong><br />
aft/starboard (general spares), and in <strong>the</strong> engine compartment (Engine<br />
spares). Coolant for <strong>the</strong> espar is located under <strong>the</strong> helmsman’s seat.<br />
40. Stereo – Stereo is located above <strong>the</strong> chart table. The Bose speakers<br />
provide full stereo sound. By adjusting <strong>the</strong> “fade” from forward to rear<br />
you may also enjoy <strong>the</strong> stereo in <strong>the</strong> cockpit. For <strong>the</strong> XM full<br />
complement of selections, turn on <strong>the</strong> XM power button and set <strong>the</strong><br />
stereo to “aux”. (The XM is powered through <strong>the</strong> 12 volt system and<br />
much be plugged into <strong>the</strong> receptacle located on <strong>the</strong> bulkhead above <strong>the</strong><br />
chart table. The “nav sta accy” switch on <strong>the</strong> main panel must be “on”.)<br />
If you have trouble finding “aux”, turn on <strong>the</strong> stereo by pressing <strong>the</strong><br />
“src” button. Select “standby”. Use <strong>the</strong> button on <strong>the</strong> lower left of <strong>the</strong><br />
right hand knob to select “menu”. Rotate <strong>the</strong> knob to select “built in<br />
aux”. Push right knob to right and choose “on”. Return to standby<br />
screen and scroll to select “aux”. Push to play. To activate <strong>the</strong> “fade”<br />
function, use <strong>the</strong> left knob. Push several times to select “fade” and <strong>the</strong>n<br />
rotate to adjust cabin or cockpit speakers (front, rear).<br />
41. Stove and oven – To use <strong>the</strong> stove, turn on <strong>the</strong> “propane” switch on<br />
<strong>the</strong> main panel and turn on <strong>the</strong> LP switch in <strong>the</strong> galley, aft of <strong>the</strong> stove.<br />
To light a burner, just turn on <strong>the</strong> knob, press and hold it while lighting<br />
<strong>the</strong> burner with <strong>the</strong> igniter (found in <strong>the</strong> utensils drawer). The burner<br />
switches are, from <strong>the</strong> left, 1, 3 and 4. To light <strong>the</strong> oven, remove <strong>the</strong><br />
plate in <strong>the</strong> bottom of <strong>the</strong> oven, press and hold <strong>the</strong> small red button on<br />
<strong>the</strong> right side of <strong>the</strong> stove top, use <strong>the</strong> igniter to light <strong>the</strong> pilot at <strong>the</strong><br />
back and right side of <strong>the</strong> oven burner. Keep pushing <strong>the</strong> red button for<br />
several seconds, <strong>the</strong>n release slowly. Turn on <strong>the</strong> oven knob to desired<br />
heat (above 250’). (If <strong>the</strong> pilot goes out, I just keep pushing <strong>the</strong> button<br />
while turning <strong>the</strong> oven dial to 350 or more. It seems to take awhile<br />
sometimes.) To light <strong>the</strong> broiler follow a procedure similar to <strong>the</strong> oven.<br />
Press and hold <strong>the</strong> red button on <strong>the</strong> left side of <strong>the</strong> stovetop. Light <strong>the</strong><br />
broiler pilot at <strong>the</strong> back of <strong>the</strong> broiler burner. Turn on <strong>the</strong> 2 nd knob<br />
from <strong>the</strong> left on <strong>the</strong> stove face to fully light <strong>the</strong> element. The stove is<br />
gimbaled for use under way by releasing <strong>the</strong> bolt on <strong>the</strong> lower right
hand side. CAUTION: Always turn off <strong>the</strong> LP switch AND <strong>the</strong><br />
“propane” switch on <strong>the</strong> main panel after use. If you see <strong>the</strong> green light<br />
on <strong>the</strong> panel, you forgot!<br />
42. Stowing your gear – The forward berth area has large cupboards,<br />
drawers, shelves and a hanging locker. Next aft (strbrd) is a large, deep<br />
hanging locker - useful for jackets. The next cabinet port is empty for<br />
your use. Open shelves above <strong>the</strong> settee hold books and charts and are<br />
good space for duffle bags and food. There is also storage in a<br />
compartment behind <strong>the</strong> settee back cushion. The next two cabinets aft<br />
hold all of <strong>the</strong> boats pots/pans/ containers (See Finding Things Aboard<br />
<strong>the</strong> Argonaut), and is followed by an empty cabinet for your cruising<br />
needs. The chart table opens up and is a treasure trove of goodies and<br />
essentials. Look in <strong>the</strong>re for <strong>the</strong> Canadian courtesy flag. Both aft<br />
cabins have hanging lockers and <strong>the</strong> port cabin has drawer space as<br />
well. Each cabin has shelves for pillows, duffels, and clo<strong>the</strong>s. The galley<br />
has an empty cabinet for your provisions. Beverage storage is cleverly<br />
added behind every corner of <strong>the</strong> settee area. Cabinets in <strong>the</strong> head and<br />
in <strong>the</strong> shower have space for “kits” and personal items. The pilot berth<br />
is also good space for duffels and o<strong>the</strong>r large items. Be sure to secure all<br />
of <strong>the</strong>se items, as well as all of <strong>the</strong> exterior covers, before getting<br />
underway<br />
43. Tank tender – This instrument, located forward of <strong>the</strong> nav station,<br />
monitors <strong>the</strong> water tanks, fuel tanks, and holding tank. IMPORTANT:<br />
To operate, push <strong>the</strong> tank button desired and pump SLOWLY and<br />
GENTLY, one or two times ONLY. We have again had <strong>the</strong> pump<br />
rebuilt due to aggressive pumpers – and, thus, inaccurate readings! #1<br />
is <strong>the</strong> forward water tank and is full at 15*. #2 is <strong>the</strong> aft water tank and<br />
is full at 10*. #3 is <strong>the</strong> strbrd diesel tank and is full at 11.5 and #4 is <strong>the</strong><br />
port diesel tank which is full at 16.25. #5 is <strong>the</strong> holding tank: 6” – 4 gal,<br />
16” – 16 gal, 20” – 24 gal and 24” – 30 gal. Read <strong>the</strong> water or diesel<br />
scale, as appropriate. If checking <strong>the</strong> holding tank, operate <strong>the</strong> purge<br />
toggle first and pump gently to clear <strong>the</strong> line. Return <strong>the</strong> purge toggle<br />
to <strong>the</strong> left position or your readings will be inaccurate. Caution: Do not<br />
operate pump in a manner that will cause <strong>the</strong> needle to pass <strong>the</strong> red line,<br />
as this could damage <strong>the</strong> gauge. The tank tender does not work<br />
properly if <strong>the</strong> fill pipe or vent tube is full. Try not to overfill. * These<br />
readings will be much higher when filling because <strong>the</strong> fill pipe is full.<br />
Even after use from one tank <strong>the</strong>re can be a distorted reading as water
transfers through <strong>the</strong>ir common vent from <strong>the</strong> unused tank. These<br />
details are posted inside <strong>the</strong> cabinet door forward of <strong>the</strong> tank tender.<br />
44. Television – The flat screen television rests safely on <strong>the</strong> bookshelf<br />
above <strong>the</strong> settee and mounts on a swinging arm located in <strong>the</strong> cabinet<br />
ahead of <strong>the</strong> nav table. Plug in <strong>the</strong> AC cord in <strong>the</strong> same cabinet. Be<br />
sure to turn on <strong>the</strong> “inverter” if not connected to shore power. The<br />
DVD slot in <strong>the</strong> TV is NOT operational. Be SURE to use <strong>the</strong> DVD<br />
player on <strong>the</strong> shelf by <strong>the</strong> television and set <strong>the</strong> TV external input from<br />
<strong>the</strong> TV startup mode to video 1, not to DVD.<br />
45. VHF radio – (“vhf/ckpit instr” on <strong>the</strong> panel) It is recommended that<br />
you monitor Channel 16 during your cruise. It is reserved for<br />
emergencies and boat-to-boat initial contact. After contact, move to<br />
channels 68, 69 or 79. Channels 28 and 85 are Bellingham and may be<br />
used for placing long distance calls (but <strong>the</strong>y are much more expensive<br />
than a cell phone!) Listen to wea<strong>the</strong>r channels 1, 2, 3, 4 or 8 (which ever<br />
has <strong>the</strong> best reception) before sailing in <strong>the</strong> morning and anchoring in<br />
<strong>the</strong> evening. Listen for <strong>the</strong> “inland waters of western Washington”<br />
which will cover <strong>the</strong> <strong>San</strong> <strong>Juan</strong> Islands and <strong>the</strong> Canadian Gulf Islands.<br />
You will also hear “Strait of <strong>Juan</strong> de Fuca” (south of <strong>the</strong> <strong>San</strong> <strong>Juan</strong>s),<br />
“Georgia Strait” (north) and “Rosario Strait” (eastern part of <strong>the</strong> <strong>San</strong><br />
<strong>Juan</strong>s). <strong>San</strong> <strong>Juan</strong> <strong>Sailing</strong> monitors channel 80 during office hours<br />
(closed Sundays). The office number is 1-800-677-7245 or you may call<br />
SJS’s owner, Roger Van Dyken, at 360-224-4300 on cell or 360-354-5770<br />
at home. You can also call our boat professional, Hal Thesen (360-961-<br />
0455). The Argonaut also has a “handheld” VHF, located in <strong>the</strong> nav<br />
station, which is very handy for use in <strong>the</strong> cockpit. Just remember to<br />
keep it charged.<br />
46. Water tanks and pressure – The Argonaut has two large water<br />
tanks. The sole panel located between <strong>the</strong> aft dinette seat and <strong>the</strong> settee<br />
removes to allow easy access to <strong>the</strong> water tank selection valves. The<br />
forward valve controls <strong>the</strong> tank located under <strong>the</strong> dinette table. The aft<br />
valve, <strong>the</strong> aft tank. To change tanks, simply close one valve (clockwise)<br />
and open <strong>the</strong> o<strong>the</strong>r (counter clockwise). To fill an empty tank(s),<br />
remove forward and/or aft deck plate(s) marked “water” just inside <strong>the</strong><br />
port rail. The “key” is in helmsman’s seat or extras in <strong>the</strong> chart table.<br />
If <strong>the</strong> water gurgles and erupts, just wait a few seconds and continue<br />
filling. The small spigot by <strong>the</strong> galley sink is an air vent, which you will
hear “hissing” when you fill <strong>the</strong> tanks. Stop filling before a continuous<br />
flow of water comes from this overflow. The “water pressure” switch is<br />
located on <strong>the</strong> main panel. Turn this off when a tank runs dry and you<br />
hear <strong>the</strong> motor straining to run. As a safety precaution, <strong>the</strong> switch<br />
should also be in <strong>the</strong> “off” position when you are underway. Check<br />
tank levels with <strong>the</strong> “tank tender.”<br />
47. Wind instrument – is a Raymarine ST 50 to measure wind speed and<br />
direction.<br />
Just so you remember:<br />
The Argonaut has a very helpful bow thruster.<br />
The windlass is powerful and straightforward to use once you read <strong>the</strong><br />
owner’s notes<br />
The deck pump needs to be connected . . .and used!<br />
The butterfly cover keeps <strong>the</strong> rain leaks out. Take it off and open <strong>the</strong><br />
butterfly for glorious sunshiny days.<br />
The kayak ( “Percy” for Perception) loves to go exploring, but hates<br />
those barnacly beaches.)<br />
Bon Voyage.