Notes from the Owners of Illuminé - San Juan Sailing
Notes from the Owners of Illuminé - San Juan Sailing
Notes from the Owners of Illuminé - San Juan Sailing

You also want an ePaper? Increase the reach of your titles
YUMPU automatically turns print PDFs into web optimized ePapers that Google loves.
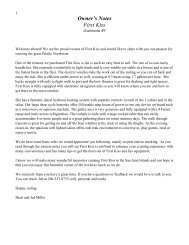
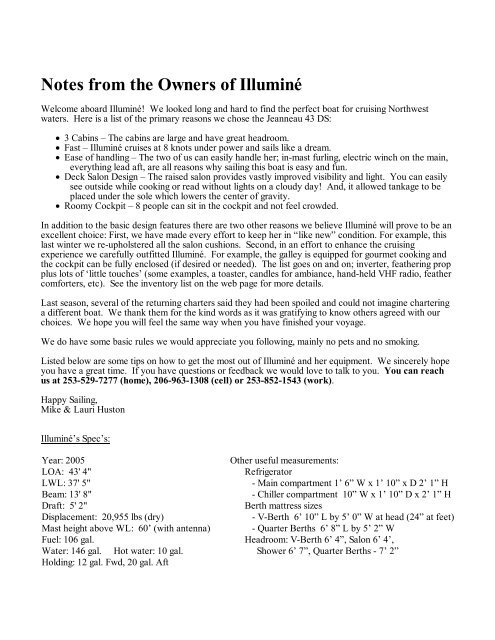
<strong>Notes</strong> <strong>from</strong> <strong>the</strong> <strong>Owners</strong> <strong>of</strong> Illuminé<br />
Welcome aboard Illuminé! We looked long and hard to find <strong>the</strong> perfect boat for cruising Northwest<br />
waters. Here is a list <strong>of</strong> <strong>the</strong> primary reasons we chose <strong>the</strong> Jeanneau 43 DS:<br />
• 3 Cabins – The cabins are large and have great headroom.<br />
• Fast – Illuminé cruises at 8 knots under power and sails like a dream.<br />
• Ease <strong>of</strong> handling – The two <strong>of</strong> us can easily handle her; in-mast furling, electric winch on <strong>the</strong> main,<br />
everything lead aft, are all reasons why sailing this boat is easy and fun.<br />
• Deck Salon Design – The raised salon provides vastly improved visibility and light. You can easily<br />
see outside while cooking or read without lights on a cloudy day! And, it allowed tankage to be<br />
placed under <strong>the</strong> sole which lowers <strong>the</strong> center <strong>of</strong> gravity.<br />
• Roomy Cockpit – 8 people can sit in <strong>the</strong> cockpit and not feel crowded.<br />
In addition to <strong>the</strong> basic design features <strong>the</strong>re are two o<strong>the</strong>r reasons we believe Illuminé will prove to be an<br />
excellent choice: First, we have made every effort to keep her in “like new” condition. For example, this<br />
last winter we re-upholstered all <strong>the</strong> salon cushions. Second, in an effort to enhance <strong>the</strong> cruising<br />
experience we carefully outfitted Illuminé. For example, <strong>the</strong> galley is equipped for gourmet cooking and<br />
<strong>the</strong> cockpit can be fully enclosed (if desired or needed). The list goes on and on; inverter, fea<strong>the</strong>ring prop<br />
plus lots <strong>of</strong> ‘little touches’ (some examples, a toaster, candles for ambiance, hand-held VHF radio, fea<strong>the</strong>r<br />
comforters, etc). See <strong>the</strong> inventory list on <strong>the</strong> web page for more details.<br />
Last season, several <strong>of</strong> <strong>the</strong> returning charters said <strong>the</strong>y had been spoiled and could not imagine chartering<br />
a different boat. We thank <strong>the</strong>m for <strong>the</strong> kind words as it was gratifying to know o<strong>the</strong>rs agreed with our<br />
choices. We hope you will feel <strong>the</strong> same way when you have finished your voyage.<br />
We do have some basic rules we would appreciate you following, mainly no pets and no smoking.<br />
Listed below are some tips on how to get <strong>the</strong> most out <strong>of</strong> Illuminé and her equipment. We sincerely hope<br />
you have a great time. If you have questions or feedback we would love to talk to you. You can reach<br />
us at 253-529-7277 (home), 206-963-1308 (cell) or 253-852-1543 (work).<br />
Happy <strong>Sailing</strong>,<br />
Mike & Lauri Huston<br />
Illuminé’s Spec’s:<br />
Year: 2005<br />
O<strong>the</strong>r useful measurements:<br />
LOA: 43' 4"<br />
Refrigerator<br />
LWL: 37' 5"<br />
- Main compartment 1’ 6” W x 1’ 10” x D 2’ 1” H<br />
Beam: 13' 8"<br />
- Chiller compartment 10” W x 1’ 10” D x 2’ 1” H<br />
Draft: 5' 2"<br />
Berth mattress sizes<br />
Displacement: 20,955 lbs (dry)<br />
- V-Berth 6’ 10” L by 5’ 0” W at head (24” at feet)<br />
Mast height above WL: 60’ (with antenna) - Quarter Berths 6’ 8” L by 5’ 2” W<br />
Fuel: 106 gal. Headroom: V-Berth 6’ 4”, Salon 6’ 4’,<br />
Water: 146 gal. Hot water: 10 gal. Shower 6’ 7”, Quarter Berths - 7’ 2”<br />
Holding: 12 gal. Fwd, 20 gal. Aft
INDEX:<br />
1. Emergencies 13. Fuel Tanks and System<br />
2. Anchors & Windlass 14. Galley<br />
3. Barbecue 15. Heads and Holding Tanks<br />
4. Batteries & Inverter 16. Refrigeration<br />
5. Berths 17. Repairs (Tools & Spares)<br />
6. Cabin Heat 18. Sails and Rigging<br />
7. Dinghy & Outboard 19. <strong>Sailing</strong> Characteristics<br />
8. Docking 20. Showers<br />
9. Dodger & Bimini 21. Stove<br />
10. Electrical Panel 22. Water<br />
11. Electronics 23. What’s Unique about Illuminé<br />
12. Engine and Operating Under Power<br />
Key to Markings: Throughout <strong>the</strong>se notes we have use <strong>the</strong> following convention:<br />
• Italics – are used for headings.<br />
• ALL CAPS – is used for safety and operational warnings.<br />
• Underlining – indicates <strong>the</strong> location <strong>of</strong> things.<br />
• bold – indicates important knowledge or data.<br />
1. Emergencies:<br />
Fire – There are three ABC rated fire extinguishers on board. They are located (a) forward cabin<br />
port side (b) by your feet if you are standing at <strong>the</strong> stove and (c) aft cabin port side. All are ABC<br />
fire extinguishers which are effective against electrical, grease, wood, and fuel fires. If you have a<br />
fire at <strong>the</strong> stove turn <strong>of</strong>f <strong>the</strong> gas solenoid switch at <strong>the</strong> electrical panel.<br />
Hitting a Rock, Log, or Running A Ground – In case <strong>of</strong> striking a rock, log, or running<br />
aground, immediately check for leaks in <strong>the</strong> bilge and <strong>the</strong>n check for cracks in <strong>the</strong> fore and aft<br />
sections <strong>of</strong> <strong>the</strong> bilge where <strong>the</strong> keel attaches to <strong>the</strong> hull. Also check all keel bolts. Once you are<br />
sure no water is entering <strong>the</strong> hull contact <strong>San</strong> <strong>Juan</strong> <strong>Sailing</strong> at 800-677-7245 and proceed to <strong>the</strong><br />
nearest harbor and have a pr<strong>of</strong>essional diver check <strong>the</strong> hull, keel, prop, and rudder before<br />
proceeding on your vacation.<br />
Leaks – First determine <strong>the</strong> source <strong>of</strong> <strong>the</strong> water, check <strong>the</strong> prop shaft first and <strong>the</strong>n <strong>the</strong> throughhulls.<br />
You cannot get to <strong>the</strong> shaft seal easily since <strong>the</strong> wall between <strong>the</strong> aft cabins needs to be<br />
removed first but you should be able see water flowing at <strong>the</strong> back <strong>of</strong> <strong>the</strong> engine if <strong>the</strong> seal is<br />
broken. There is a diagram showing <strong>the</strong> location <strong>of</strong> <strong>the</strong> through hulls in <strong>the</strong> notebook. Also, be<br />
sure <strong>the</strong> bilge pumps are running. Get <strong>the</strong> crew on deck and into life jackets. Call for help as<br />
needed (use a PAN PAN call if <strong>the</strong> situation does not appear life threatening and a MAYDAY if it<br />
is). There are wood plugs taped in each area where <strong>the</strong>re are through hulls.<br />
There are two bilge pumps. The manual bilge pump is located on <strong>the</strong> port side <strong>of</strong> <strong>the</strong> cockpit, just<br />
behind <strong>of</strong> <strong>the</strong> steering wheel. The handle is in <strong>the</strong> port aft cockpit locker just above <strong>the</strong> pump.<br />
The electric bilge pump has an automatic float switch but <strong>the</strong> switch on <strong>the</strong> electrical panel can<br />
be used to power <strong>the</strong> pump manually (this breaker is normally <strong>of</strong>f). The float switch and pump<br />
intakes are located under <strong>the</strong> salon sole about 2 feet aft <strong>of</strong> <strong>the</strong> mast.<br />
Steering Failure – If <strong>the</strong> steering system fails <strong>the</strong>re is an emergency tiller in <strong>the</strong> port cockpit<br />
locker. It fits on rudder post which is accessed through <strong>the</strong> cap in <strong>the</strong> helm seat. You will want to<br />
reduce sail or power when using <strong>the</strong> tiller since <strong>the</strong> rudder is large and <strong>the</strong> tiller is small.<br />
Emergency Equipment – Flares, air and manual horns, etc. are in <strong>the</strong> aft portside cockpit locker.<br />
Crew Overboard – Throw a Type IV PFD or cockpit cushion to <strong>the</strong> person in <strong>the</strong> water first.<br />
Second, hit <strong>the</strong> mob button on <strong>the</strong> chart plotter so you will know where <strong>the</strong>y are. There are
several procedures one can use to get <strong>the</strong> boat back to <strong>the</strong> person in <strong>the</strong> water and <strong>San</strong> <strong>Juan</strong> sailing<br />
will discuss <strong>the</strong>se in <strong>the</strong> skipper’s meeting. However, <strong>the</strong>y all include <strong>the</strong> use <strong>of</strong> <strong>the</strong> LifeSling to<br />
aid in getting <strong>the</strong> person back on board. We keep <strong>the</strong> LifeSling mounted on <strong>the</strong> stern rail, port<br />
side, at all times.<br />
2. Anchors and Windlass: Illuminé is equipped with two anchors, one forward (44# Delta with<br />
300’ <strong>of</strong> chain) and a Fortress in <strong>the</strong> starboard cockpit locker along with 70’ <strong>of</strong> chain and 200’ <strong>of</strong> rode.<br />
The primary chain is marked with poly line threaded into <strong>the</strong> links every 25 feet and <strong>the</strong>re are two<br />
lines in a row at 100 ft. and 200 ft. Additionally, <strong>the</strong>re is a chain counter at <strong>the</strong> helm.<br />
The scope normally used in <strong>the</strong> islands is 4 to 1, definitely not 7 to 1 (unless conditions call for it, i.e.<br />
sustained winds over 25 knots). Most <strong>of</strong> <strong>the</strong> anchorages are well protected and popular, so you will likely<br />
have someone anchored nearby. Most coves are 20’- 40’ deep; so expect to pay out about 90’-180’ <strong>of</strong><br />
chain. After you have paid out <strong>the</strong> suitable amount <strong>of</strong> chain, 1-2 minutes <strong>of</strong> idle reverse sets <strong>the</strong> anchor.<br />
Also, <strong>the</strong> tides can change water depth up 15 feet in <strong>the</strong> islands so be aware <strong>of</strong> where you are in <strong>the</strong> cycle<br />
when choosing an anchorage and deciding how much chain to put out. Here is an easy formula for how<br />
much chain you need; add <strong>the</strong> water depth on sounder, plus any tide increase expected during <strong>the</strong><br />
night, plus 5’ (to account for <strong>the</strong> distance <strong>from</strong> sounder to roller on bow) and take that total and<br />
multiply by 4 (typical example would be 25’ <strong>of</strong> water + 6’ <strong>of</strong> tide increase + 5’ = 36’ x 4 = 144’).<br />
The electric anchor windlass receives power <strong>from</strong> <strong>the</strong> dedicated start battery. The circuit breaker (i.e., <strong>the</strong><br />
“on” and “<strong>of</strong>f” switch) for <strong>the</strong> windlass is located behind <strong>the</strong> companionway steps in <strong>the</strong> port quarter<br />
berth. Please note <strong>the</strong> windlass will not run unless <strong>the</strong> engine is running. In addition, if <strong>the</strong> engine<br />
has just been started it may be necessary to up <strong>the</strong> PPM’s a bit to get <strong>the</strong> windlass to work.<br />
Basically, <strong>the</strong> system voltage needs to be higher for <strong>the</strong> windlass to work. This does not happen all<br />
<strong>the</strong> time but is worth noting.<br />
The up-down controller for <strong>the</strong> windlass is secured inside <strong>the</strong> forward locker. Please do not use <strong>the</strong><br />
windlass controls at <strong>the</strong> helm as it is very easy to ding <strong>the</strong> bow with <strong>the</strong> anchor; anchoring should be a two<br />
person job! Also, be sure to take <strong>the</strong> tension <strong>of</strong>f <strong>of</strong> <strong>the</strong> windlass by attaching <strong>the</strong> snubber to <strong>the</strong> chain and<br />
a cleat (not <strong>the</strong> windlass), and <strong>the</strong>n running out more chain until <strong>the</strong> chain on <strong>the</strong> drum is slack.<br />
Detailed operating instructions are listed bellow:<br />
Lowering <strong>the</strong> anchor:<br />
a. Turn on <strong>the</strong> circuit breaker for <strong>the</strong> windlass (port aft berth, behind stairs).<br />
b. Reset chain counter at helm (if desired).<br />
c. Untie <strong>the</strong> line holding <strong>the</strong> anchor in place (this line doubles as <strong>the</strong> snubber).<br />
d. Lower <strong>the</strong> anchor until <strong>the</strong> needed chain is paid out.<br />
e. Secure <strong>the</strong> chain with <strong>the</strong> snubber and run out enough chain to take <strong>the</strong> load <strong>of</strong>f <strong>of</strong> <strong>the</strong><br />
windlass. DO NOT LEAVE THE LOAD ON THE DRUM. If you are expecting wind during <strong>the</strong><br />
night it is a good idea to run <strong>the</strong> snubber over port roller and secure it to <strong>the</strong> port cleat. The<br />
reason is this, if <strong>the</strong> snubber line stays on <strong>the</strong> starboard side along with <strong>the</strong> chain it slides <strong>from</strong><br />
side to side as <strong>the</strong> boat swings and bangs <strong>the</strong> chain into <strong>the</strong> roller brackets. It is quite noisy for<br />
anyone sleeping in <strong>the</strong> V-berth.<br />
f. Set <strong>the</strong> anchor by reversing <strong>the</strong> engine at 1100 RPM for about a minute.<br />
g. Turn <strong>of</strong>f <strong>the</strong> circuit breaker and turn on <strong>the</strong> anchor light if appropriate.<br />
Raising <strong>the</strong> anchor:<br />
a. Start <strong>the</strong> engine.<br />
b. Turn on <strong>the</strong> circuit breaker for <strong>the</strong> windlass and, if needed, turn <strong>of</strong>f <strong>the</strong> anchor light.<br />
c. Turn on <strong>the</strong> wash down pump, located on <strong>the</strong> main panel.<br />
d. Take in enough chain to retrieve <strong>the</strong> snubber.<br />
e. When retrieving <strong>the</strong> anchor, never use <strong>the</strong> windlass to pull <strong>the</strong> boat; instead, slowly power<br />
toward <strong>the</strong> anchor while using <strong>the</strong> windlass (up button on <strong>the</strong> remote control) to take up <strong>the</strong><br />
slack. Also, if <strong>the</strong> anchor is really stuck in <strong>the</strong> mud (you will hear <strong>the</strong> windlass slow under <strong>the</strong><br />
load) stop <strong>the</strong> windlass and drive <strong>the</strong> boat forward to free <strong>the</strong> anchor.
f. Please use <strong>the</strong> wash down hose to ‘wash’ <strong>the</strong> anchor and chain as it is retrieved. The will keep<br />
<strong>the</strong> boat and anchor locker a lot cleaner.<br />
g. The incoming chain will pile up against <strong>the</strong> aft end <strong>of</strong> <strong>the</strong> chain locker so <strong>the</strong> operator needs to<br />
reach in and push <strong>the</strong> pile <strong>of</strong> chain forward every 20-30 feet <strong>of</strong> chain. Also be aware <strong>the</strong> lines<br />
used to mark <strong>the</strong> chain length tends to catch in <strong>the</strong> outlet <strong>of</strong> <strong>the</strong> windlass and may cause a jam.<br />
Just lift up <strong>the</strong> chain and let it fall through or run <strong>the</strong> windlass back out for a second to clear.<br />
h. Once <strong>the</strong> anchor is out <strong>of</strong> <strong>the</strong> water, please wash it down and retrieve it by hand. Please do not<br />
pull <strong>the</strong> anchor up onto <strong>the</strong> rollers using <strong>the</strong> power <strong>of</strong> <strong>the</strong> windlass. BE VERY CARFUL WHEN<br />
THE ANCHOR IS OUT OF THE WATER, Illuminé HAS A VERY PLUMB BOW AND IT IS<br />
EASY TO HIT THE BOW WITH THE ANCHOR.<br />
i. Secure <strong>the</strong> anchor by hooking <strong>the</strong> snubber onto <strong>the</strong> chain and tying it to <strong>the</strong> windlass drum (<strong>the</strong><br />
chain over <strong>the</strong> drum should not be <strong>the</strong> only thing keeping <strong>the</strong> anchor onboard).<br />
j. Switch <strong>the</strong> windlass breaker “<strong>of</strong>f” to prevent draining <strong>the</strong> start battery and turn <strong>of</strong>f <strong>the</strong><br />
seawater pump on <strong>the</strong> main panel.<br />
Stern Ties: There are times when<br />
adding a stern tie to shore will be handy,<br />
especially in Desolation Sound.<br />
Illuminé has 600’ <strong>of</strong> line on a spool for<br />
this purpose. It is stored in <strong>the</strong> swim<br />
step locker along with a 2’ piece <strong>of</strong><br />
PVC pipe. We use <strong>the</strong> pipe to mount<br />
<strong>the</strong> spool in <strong>the</strong> transom walk-through<br />
so that <strong>the</strong> line can easily be deployed<br />
and recovered. The recovered line is<br />
usually very wet so we leave <strong>the</strong> spool<br />
sitting on end in <strong>the</strong> walk-through for a<br />
couple hours to dry before we put it<br />
away.<br />
3. Barbecue: The stainless steel propane barbecue is mounted on <strong>the</strong> stern pulpit. There is a line<br />
plumbed <strong>from</strong> <strong>the</strong> main propane tanks inside <strong>the</strong> propane locker to <strong>the</strong> BBQ. However, you will need to<br />
turn on <strong>the</strong> valve located inside <strong>the</strong> propane locker. Be sure <strong>the</strong> BBQ controller is <strong>of</strong>f when opening this<br />
valve or <strong>the</strong> tank valve; having it on will cause <strong>the</strong> safety system in <strong>the</strong> main tank to engage and severely<br />
limit <strong>the</strong> flow to <strong>the</strong> BBQ. When done with <strong>the</strong> BBQ turn <strong>of</strong>f this valve; DO NOT RELY ON THE<br />
CONTOLLER AT THE BBQ AS THE ONLY SHUTOFF FOR THE PROPANE.<br />
4. Batteries & Inverter: Illuminé has 6 batteries on board, one for starting <strong>the</strong> engine and five to<br />
power <strong>the</strong> cabin accessories. We have her wired for maximum convenience. These two battery systems<br />
are separated <strong>from</strong> each o<strong>the</strong>r so it should be impossible to drain <strong>the</strong> start battery. The batteries are<br />
located under <strong>the</strong> forward portion <strong>of</strong> <strong>the</strong> quarter berths, two on each side and two under <strong>the</strong> salon sole in<br />
front <strong>of</strong> <strong>the</strong> aft head door. There are also two battery chargers, one for each system; <strong>the</strong> inverter for <strong>the</strong><br />
house system and <strong>the</strong> original charger is now used for <strong>the</strong> start battery. The inverter has been listed in this<br />
section for two reasons: first, it is also <strong>the</strong> battery charger for house system and second it can have a large<br />
impact on <strong>the</strong> batteries when used excessively.<br />
CAUTION: NEVER TURN A BATTERY SWITCH TO “OFF” WHILE THE ENGINE IS RUNNING!<br />
THIS WILL BLOW THE DIODES ON THE ALTERNATOR, AND YOUR BATTERIES WILL NO<br />
LONGER CHARGE.<br />
Battery Monitor – Illuminé has a Link 2000 which can be used to monitor <strong>the</strong> batteries (see picture<br />
below). You can monitor <strong>the</strong> voltage as well as <strong>the</strong> amp-hrs. used. However, to do so you will need to<br />
reset <strong>the</strong> amp-hrs. when you disconnect <strong>from</strong> shore power or run <strong>the</strong> engine long enough to completely<br />
charge <strong>the</strong> batteries. The house batteries have 550 amp-hrs <strong>of</strong> total capacity but only half <strong>of</strong> this is<br />
<strong>of</strong> useable power. So, when 275 amp-hrs have been used it is time to recharge. If you have
forgotten to reset <strong>the</strong> amp-hrs <strong>the</strong> voltage can be used to tell when it is time to recharge; <strong>the</strong> voltage<br />
normally starts at 13.5 when fully charged. It will <strong>the</strong>n drop to 12.45 and levels <strong>of</strong>f for quite a while<br />
and <strong>the</strong>n start dropping again. When it starts dropping this second time you have very little reserve<br />
left. And it is time to recharge when <strong>the</strong> voltage gets to 12.0 volts – PLEASE DO NOT RUN THE<br />
VOLTAGE BELOW 12.0 OR 275 AMP-HRS – DOING SO DAMAGES THE BATTERIES.<br />
Battery Selection<br />
1 = Start<br />
2 = House<br />
Shows Voltage for<br />
selected battery set.<br />
Amps – shows current draw on<br />
selected battery set.<br />
A hrs – Shows amp-hrs used <strong>from</strong> selected<br />
battery set since last charge. Negative number<br />
indicates normal draw down on batteries. This<br />
function counts back up to zero when recharging<br />
and automatically resets when charging stops<br />
after a complete recharge.<br />
Inverter/House Battery Charger – We<br />
have installed a 2000 watt inverter so<br />
110V power can be used at any time. Be<br />
careful as it is easy to draw <strong>the</strong> batteries<br />
down. We suggest leaving <strong>the</strong> inverter<br />
turned <strong>of</strong>f unless you need 110V power;<br />
<strong>the</strong> main risk is running <strong>the</strong> house<br />
batteries low without realizing it. The<br />
inverter control is located in <strong>the</strong> port<br />
quarter berth behind <strong>the</strong> companionway<br />
stairs. There are three toggle switches on<br />
<strong>the</strong> inverter controller in <strong>the</strong> port quarter<br />
berth, <strong>the</strong> first controls <strong>the</strong> display (use as<br />
needed), <strong>the</strong> second turns on <strong>the</strong> inverter<br />
(turn on as needed) and <strong>the</strong> third turns on<br />
<strong>the</strong> house battery charger (please leave on<br />
at all times).<br />
Start Battery Charger – There is a second<br />
battery charger which charges <strong>the</strong> start<br />
battery. This charger is normally left on at<br />
all times.<br />
Inverter ON/OFF<br />
Switch – Leave <strong>of</strong>f<br />
when not in use.<br />
Batter Charger<br />
Switch – Leave on!<br />
5. Berths: Our boat sleeps seven; two in <strong>the</strong> private cabin forward, two in each <strong>of</strong> <strong>the</strong> quarter berths<br />
and one in <strong>the</strong> main salon. All three double berths are quite roomy, each about equal to a queen bed.<br />
Also, each <strong>of</strong> <strong>the</strong> berths has a 2” thick memory foam topper to add extra comfort.<br />
6. Cabin Heat: Illuminé has two ways to heat <strong>the</strong> cabin: <strong>the</strong> first is a Webasto 5000 forced air<br />
furnace and <strong>the</strong> second is a small hydronic heater run <strong>of</strong>f <strong>the</strong> engine cooling system.<br />
Furnace – The Wabasto is diesel fueled and is mounted in <strong>the</strong> starboard cockpit locker. The<br />
<strong>the</strong>rmostat is located on <strong>the</strong> main panel to <strong>the</strong> right <strong>of</strong> <strong>the</strong> stereo. Simply turn on <strong>the</strong> switch on <strong>the</strong><br />
<strong>the</strong>rmostat and set <strong>the</strong> temperature you want. There is a 2-3 minute delay <strong>from</strong> when you turn it on<br />
to when you will hear <strong>the</strong> fan running. There is a toggle switch on <strong>the</strong> controller with a fan and<br />
flame on it; when <strong>the</strong> fan is pushed in <strong>the</strong> furnace is in fan only mode, when <strong>the</strong> flame is pushed it
is in heating mode. The furnace breaker is located in <strong>the</strong> port quarter berth behind <strong>the</strong><br />
companionway stairs.<br />
Set to about here<br />
for 70 deg.<br />
Rock this switch<br />
down for heat.<br />
When <strong>the</strong> furnace is running you may notice a clicking noise, this is <strong>the</strong> electric fuel pump pulling<br />
<strong>from</strong> <strong>the</strong> main diesel tank. Also, we do not recommend running <strong>the</strong> furnace all night (although it is<br />
doable) as its draw on <strong>the</strong> batteries is sizable. It is also fairly noisy, especially <strong>from</strong> outside <strong>the</strong> boat,<br />
so your neighbors will appreciate it being <strong>of</strong>f most <strong>of</strong> <strong>the</strong> night. The heat is dry, comfortable, and on<br />
those occasional rainy days or cool evenings, makes a huge difference in cruising comfort!<br />
Hydronic Heater – This heater is located under <strong>the</strong> aft end <strong>of</strong> <strong>the</strong> outer settee seat; it is in <strong>the</strong> same<br />
compartment as <strong>the</strong> hot water heater. The switch to run <strong>the</strong> fan is on <strong>the</strong> main panel and <strong>the</strong> hot air<br />
<strong>from</strong> it blows into <strong>the</strong> space under <strong>the</strong> settee table. There is a flap on <strong>the</strong> vent which is normally<br />
closed to prevent unwanted heat <strong>from</strong> entering <strong>the</strong> cabin – be sure to open this when you turn on<br />
<strong>the</strong> fan. Also, this heater works only when <strong>the</strong> engine is running as its heat comes <strong>from</strong> <strong>the</strong><br />
engines cooling system. It is plumbed into <strong>the</strong> loop that runs engine coolant to <strong>the</strong> hot water heater<br />
and is placed after <strong>the</strong> hot water tank. This means it will not work at full capacity until <strong>the</strong> hot water<br />
tank is up to temperature. The intent <strong>of</strong> this heater is to take <strong>the</strong> chill out <strong>of</strong> <strong>the</strong> cabin when running, it<br />
not big enough to fully heat <strong>the</strong> boat..<br />
7. Dinghy and Outboard: Illuminé is equipped with a 10’ Walker Bay hard bottom dinghy and<br />
a 2 hp Honda outboard. The dinghy is roomy (easily holds 4 adults) and <strong>the</strong> outboard is easy to operate.<br />
The dinghy tows with <strong>the</strong> least drag if brought close to <strong>the</strong> boat--about a foot <strong>of</strong>f <strong>the</strong> stern. This<br />
guarantees that you won't accidentally wrap <strong>the</strong> painter around <strong>the</strong> propeller when you back up! Also, it<br />
tows best when tied to <strong>the</strong> stern pulpit base just inboard <strong>of</strong> <strong>the</strong> dinghy prop. If it is tied to <strong>the</strong> port<br />
cleat it tends to hunt, moving inboard to <strong>the</strong> stantion eliminates <strong>the</strong> hunting and having it on <strong>the</strong><br />
port side keeps it away <strong>from</strong> <strong>the</strong> engine exhaust.<br />
Tie dinghy here<br />
for towing.
As owners, we would very much appreciate your special care when beaching <strong>the</strong> dinghy. Beaches in <strong>the</strong><br />
<strong>San</strong> <strong>Juan</strong>s are seldom gentle, sandy beaches; most <strong>of</strong>ten <strong>the</strong>y are rocky and covered by barnacles<br />
equipped with extra sharp rubber cutters. Here’s what works best: launch a person <strong>of</strong>f <strong>the</strong> dinghy bow as<br />
you approach shore; <strong>the</strong>n <strong>of</strong>fload everyone over <strong>the</strong> bow. Now lift <strong>the</strong> dinghy above barnacle height and<br />
deposit it gently on <strong>the</strong> beach. We also secure <strong>the</strong> painter under a rock or to a log – a rising tide can leave<br />
you high, dry and dinghyless!<br />
The outboard is a four stroke engine, so do not add oil to <strong>the</strong> gasoline mixture – it uses straight<br />
gasoline. The fill cap is located at <strong>the</strong> top <strong>of</strong> <strong>the</strong> engine. <strong>San</strong> <strong>Juan</strong> <strong>Sailing</strong> will be sure you have a full gas<br />
can tied in <strong>the</strong> dinghy. If you need to store this can somewhere else, place it in <strong>the</strong> swim platform locker.<br />
This is <strong>the</strong> only locker where <strong>the</strong> gas fumes will not get into <strong>the</strong> boat.<br />
The outboard is light so it’s easy to transfer <strong>from</strong> <strong>the</strong> stern rail mount to <strong>the</strong> dinghy transom (and vice<br />
versa). Please do not cruise with <strong>the</strong> outboard on <strong>the</strong> dinghy as a large wake or gust <strong>of</strong> wind can<br />
overturn <strong>the</strong> dinghy. We also recommend taking <strong>the</strong> outboard <strong>of</strong>f <strong>the</strong> dinghy at night.<br />
Starting <strong>the</strong> Outboard<br />
a. Push <strong>the</strong> fuel valve lever (starboard aft corner <strong>of</strong> <strong>the</strong> outboard) aft to open.<br />
b. Pull out <strong>the</strong> choke switch (starboard forward corner <strong>of</strong> <strong>the</strong> outboard).<br />
c. Open <strong>the</strong> air vent on <strong>the</strong> top <strong>of</strong> <strong>the</strong> fuel cap by turning counter-clockwise.<br />
d. Make sure <strong>the</strong> black U-shaped kill clip (with <strong>the</strong> red lanyard) is clipped into <strong>the</strong> red shut-<strong>of</strong>f<br />
knob (port forward corner <strong>of</strong> <strong>the</strong> outboard).<br />
e. Turn <strong>the</strong> handle throttle ¼ turn counter-clockwise.<br />
f. Pull <strong>the</strong> rip cord until it starts (you shouldn’t have to pull it more than 5 times).<br />
While Running<br />
a. Push <strong>the</strong> choke back in shortly after <strong>the</strong> engine starts (after about 10 seconds).<br />
b. There is no transmission--just throttle up to go forward and throttle down to stop. If you want<br />
to go in reverse--just swivel <strong>the</strong> outboard around 180 degrees.<br />
To Shut Off<br />
a. Shut <strong>the</strong> outboard <strong>of</strong>f by pushing in <strong>the</strong> red shut-<strong>of</strong>f knob (where <strong>the</strong> kill clip is clipped in). Or<br />
just pull <strong>the</strong> red lanyard until <strong>the</strong> clip pops <strong>of</strong>f.<br />
b. To avoid prop damage, shut <strong>the</strong> outboard <strong>of</strong>f and raise it out <strong>of</strong> <strong>the</strong> water before you reach <strong>the</strong><br />
shore. Pull <strong>the</strong> outboard forward and out <strong>of</strong> <strong>the</strong> water until it clicks at stays in place.<br />
c. To put <strong>the</strong> outboard shaft back in <strong>the</strong> water, release <strong>the</strong> stainless steel lever on <strong>the</strong> starboard<br />
side <strong>of</strong> <strong>the</strong> shaft.<br />
When Not in Use<br />
a. Put <strong>the</strong> outboard back on <strong>the</strong> outboard mount on <strong>the</strong> stern rail and tighten both braces.<br />
b. Push <strong>the</strong> fuel valve lever forward to close (starboard aft corner <strong>of</strong> <strong>the</strong> outboard).<br />
c. Close <strong>the</strong> air vent on top <strong>of</strong> <strong>the</strong> fuel cap (top <strong>of</strong> outboard) by turning it clockwise.<br />
d. Secure <strong>the</strong> outboard fur<strong>the</strong>r by tying <strong>the</strong> safety lanyard with to <strong>the</strong> stern rail.<br />
Troubleshooting<br />
If <strong>the</strong> engine won’t start, review steps 1-6 above to make sure you’ve done all 6 steps. There is a<br />
spare spark plug and spark plug wrench in with <strong>the</strong> safety equipment in case you need <strong>the</strong>m. A<br />
new spark plug solves myriad outboard problems. If you use <strong>the</strong> spare spark plug, notify your<br />
check-in skipper upon your return so a new one can be placed aboard for future guests. If <strong>the</strong><br />
outboard is running and you’re heading toward shore, and <strong>the</strong> engine suddenly quits, it’s usually<br />
that someone has forgotten to vent <strong>the</strong> fuel cap. If <strong>the</strong> engine is running fine but <strong>the</strong> propeller isn’t<br />
moving, <strong>the</strong> shear pin is probably broken – just take <strong>the</strong> cotter pin out to remove <strong>the</strong> propeller and<br />
replace <strong>the</strong> broken shear pin (a spare pin is located forward <strong>of</strong> <strong>the</strong> shaft under <strong>the</strong> handle grip).<br />
8. Docking: Illuminé has a shoal keel and a relatively high freeboard; this combination can create<br />
some sideslip in heavy winds. We find it is helpful for <strong>the</strong> person handling <strong>the</strong> lines to take a line <strong>from</strong> <strong>the</strong>
mid-ship cleat, this allows <strong>the</strong>m to pull <strong>the</strong> boat to <strong>the</strong> dock without ‘losing’ <strong>the</strong> stern. The o<strong>the</strong>r<br />
important issue is prop-walk – Illuminé has some walk to port. Be aware <strong>of</strong> this when planning your<br />
docking. For example, if you can get a bow-in, port tie slip <strong>the</strong> prop-walk will pull <strong>the</strong> stern into <strong>the</strong> dock<br />
when you go into reverse.<br />
9. Dodger & Bimini: As with all dodgers, please be gentle. If <strong>the</strong> glass becomes spotted with salt<br />
please get a pot <strong>of</strong> fresh water <strong>from</strong> <strong>the</strong> galley sink and “flood” <strong>the</strong> salt crystals <strong>of</strong>f <strong>the</strong> plastic. Our<br />
dodger has some very handy rails on <strong>the</strong> back and sides that make staying upright and onboard easier.<br />
The connector canvas between <strong>the</strong> dodger and bimini can be removed by unzipping it. But when you do<br />
please fold and store it so <strong>the</strong> windows to not crease. Also, if you want, <strong>the</strong> bimini can be folded up at <strong>the</strong><br />
stern (<strong>the</strong>re is a “sock” to cover it in <strong>the</strong> port cockpit locker).<br />
We also have <strong>the</strong> panels to create a full enclosure around <strong>the</strong> cockpit. However, when not zipped in place<br />
<strong>the</strong>y are a bit bulky to store, <strong>the</strong>refore we do not have <strong>the</strong>se on <strong>the</strong> boat for summer charters. If you are<br />
doing a spring or fall charter and would like to use <strong>the</strong>m please let SJS know ahead <strong>of</strong> your boarding.<br />
10. Electrical Panels: The electrical panels on Illuminé are straight forward and clearly marked.<br />
When you leave <strong>the</strong> boat at <strong>the</strong> end <strong>of</strong> your trip <strong>the</strong> only 12V switch that needs to be left on is <strong>the</strong><br />
refrigerator. On <strong>the</strong> 110V panel <strong>the</strong> battery charger and inverter switches should be on (<strong>the</strong> outlets can be<br />
left on if desired). The heater switch and inverter switch in <strong>the</strong> quarter berth should both be turned <strong>of</strong>f.<br />
The left AC Outlet breaker services all <strong>the</strong> aft, galley and starboard salon outlets. The right breaker<br />
services <strong>the</strong> port salon, V-berth and forward head outlets. We have also added a string <strong>of</strong> LED rope<br />
lights for cockpit lighting. They are mounted under <strong>the</strong> bimini and can be turned on using <strong>the</strong> breaker<br />
under <strong>the</strong> refrigerator breaker.<br />
IMPORTANT: There are two o<strong>the</strong>r breakers not show in <strong>the</strong> pictures; one is <strong>the</strong> main 110V breaker<br />
which is located in <strong>the</strong> aft port side cockpit locker (same locker as <strong>the</strong> safety equip.). And <strong>the</strong> second<br />
breaker is <strong>the</strong> DC breaker feeding power <strong>from</strong> <strong>the</strong> batteries to <strong>the</strong> inverter; it is located in <strong>the</strong> starboard<br />
quarter berth under forward end <strong>of</strong> <strong>the</strong> berth.<br />
Left Side <strong>of</strong> Panel<br />
Water Heater<br />
AC Outlets 2<br />
Charger for Start<br />
Battery<br />
-Leave On-<br />
AC From<br />
Inverter to<br />
Outlets<br />
-Leave On-<br />
AC Outlets 1<br />
Nav. Lights<br />
Steaming Light<br />
Instrument<br />
Lights<br />
Chart Plotter<br />
and Radar<br />
Anchor Light<br />
Radio/Stereo<br />
Deck Light<br />
Instruments<br />
Horn/12 VDC<br />
Plug Outside<br />
12V DC Plug on Panel<br />
Cabin Lights<br />
Autopilot
Right Side <strong>of</strong> Panel<br />
12V DC Plug<br />
Water Usage<br />
Meter<br />
Bilge Pump<br />
Man. Override<br />
Water Pressure<br />
Shower Sumps<br />
Refrigerator<br />
-Leave On-<br />
Wash Down<br />
Pump (hose in<br />
anchor locker)<br />
Cockpit Rope<br />
Lighting<br />
Propane Solenoid<br />
Hydronic.<br />
Heater Fan<br />
Fuel Transfer<br />
Pump<br />
Panel in Port Quarter<br />
Berth (behind stairs)<br />
Furnace<br />
Breaker<br />
House Battery<br />
Switch<br />
Inverter Control<br />
(see details in<br />
Batteries section.)<br />
System Ground<br />
Switch<br />
Electric Winch<br />
Breaker<br />
Windlass Breaker<br />
Start Battery<br />
Switch
11. Electronics/Instruments:<br />
Cellular Telephones – There are two 12-volt cigarette lighter type outlets for recharging your<br />
cellular telephones, one on <strong>the</strong> main panel and one on <strong>the</strong> back <strong>of</strong> <strong>the</strong> instrument pod in <strong>the</strong> cockpit.<br />
Also, since we have an inverter you can charge using a normal 110-volt charger. Cell phone coverage<br />
is good in Friday Harbor and Roche Harbor. It is spotty elsewhere.<br />
Chain Counter/Windlass Controller – We have installed a chain counter with its readout located<br />
at <strong>the</strong> helm. This allows <strong>the</strong> person at <strong>the</strong> helm to see exactly how much chain is out. This same<br />
instrument provides control <strong>of</strong> <strong>the</strong> windlass. It is not practical to bring <strong>the</strong> anchor in <strong>from</strong> this position<br />
since <strong>the</strong> chain will pile up and <strong>the</strong> windlass will jam. However, it is possible, although not<br />
recommended, to let <strong>the</strong> anchor out using this controller. Obviously, <strong>the</strong> anchor would need to be<br />
untied and lowered into <strong>the</strong> water by hand first. Note <strong>the</strong> power to this controller comes <strong>from</strong> <strong>the</strong><br />
windlass breaker, not <strong>the</strong> instrument breakers.<br />
Chart Plotter/Radar – We have a large-screen color chart plotter installed at <strong>the</strong> helm. It is<br />
integrated with <strong>the</strong> radar. The “G.P.S.” breaker must be on at <strong>the</strong> electrical panel power <strong>the</strong> unit.<br />
Then press <strong>the</strong> red power button at <strong>the</strong> unit. It will default to <strong>the</strong> chart plotter screen. Then press<br />
“Find Ship” s<strong>of</strong>t key to display <strong>the</strong> ship’s position on <strong>the</strong> screen (usually accurate to within a few feet<br />
<strong>of</strong> your true position). By pushing <strong>the</strong> “Page” button, you can select <strong>the</strong> radar display or a split-screen<br />
with chart plotter and radar. The manuals for <strong>the</strong> chart plotter and radar are in <strong>the</strong> chart table<br />
pedestal.<br />
To turn on <strong>the</strong> radar press <strong>the</strong> red button in <strong>the</strong> lower left corner once. This will bring up a menu on<br />
<strong>the</strong> bottom <strong>of</strong> <strong>the</strong> screen with two options on <strong>the</strong> left side: Radar and Scanner, see simulation below:<br />
RADAR<br />
TX STDBY<br />
SCANNER<br />
ON OFF<br />
The scanner needs to be on before <strong>the</strong> radar will work so if Off is highlighted press <strong>the</strong> button below<br />
Scanner once (if On is highlighted skip this step). The scanner takes about 70 seconds to warm up<br />
so it will look like nothing is happening – be patient. Once <strong>the</strong> scanner is on <strong>the</strong> Radar option will<br />
be available – press <strong>the</strong> button below it to start transmitting. If you want to stop transmitting push <strong>the</strong><br />
button below Radar once more to go to standby mode. If you are done with <strong>the</strong> radar for <strong>the</strong> day push<br />
<strong>the</strong> button below Scanner to turn it <strong>of</strong>f. Please note this process also takes over a minute. When not<br />
using <strong>the</strong> radar it is recommended to be “standby” as it uses a fair amount <strong>of</strong> power when active.<br />
We recommend that in addition to using your PRIMARY navigation aids – namely, <strong>the</strong> Maptech<br />
waterpro<strong>of</strong> chart book or <strong>the</strong> roll charts (with <strong>the</strong> most active “killer rocks” marked in red) – up in <strong>the</strong><br />
cockpit while underway, you also utilize <strong>the</strong> chartplotter for added safety. It helps you to see if you<br />
are where you think you are on <strong>the</strong> chart book or paper charts. The best way to stay <strong>of</strong>f <strong>the</strong> rocks is<br />
by knowing where you are at all times. And <strong>the</strong> primary role <strong>of</strong> <strong>the</strong> chart plotter is to verify that you<br />
are where you think you are.<br />
You should have little need <strong>of</strong> <strong>the</strong> radar except for <strong>the</strong> highly unlikely event that you are suddenly<br />
enveloped by fog, which is rare in this area. The fog that we’ve encountered in <strong>the</strong> islands usually<br />
forms in <strong>the</strong> wee hours <strong>of</strong> <strong>the</strong> morning and burns <strong>of</strong>f by mid-day. So if it’s a little soupy after<br />
breakfast, we put on an extra pot <strong>of</strong> c<strong>of</strong>fee until it lifts. Never depart <strong>from</strong> a safe location into <strong>the</strong> fog!<br />
To do so, even with radar, would be contrary to prudent seamanship. FYI – Fog becomes “reduced<br />
visibility” when you can see ¼ mile (about 4 football fields) in all directions. It is safe to proceed<br />
CAREFULLY in reduced visibility using your radar to “see” beyond <strong>the</strong> haze, but be sure to look up<br />
<strong>from</strong> <strong>the</strong> screen about every 10 seconds and use your eyes to scan <strong>the</strong> horizon forward, behind, and<br />
side to side. A motoryacht, tanker or freighter traveling at 20 knots takes only 39 seconds to travel ¼<br />
mile! You need to see <strong>the</strong>se fast-moving vessels sooner-ra<strong>the</strong>r-than-later so you can prepare, if<br />
indicated, to quickly take evasive action to avoid an impending collision.<br />
Depth Sounder – The digital depth sounder will not give accurate readings beyond 400’. It is<br />
designed for use in shallow waters. In deeper water, <strong>the</strong> sensitivity on <strong>the</strong> unit increases as <strong>the</strong><br />
transducer tries to get some reading back. Consequently, when you are in deep water false readings
caused by currents, changes in water temperature, fish, etc are common. These false reading <strong>of</strong>ten<br />
report very shallow water so knowing you are in deep water is important. Also, if <strong>the</strong> reading is<br />
blinking on and <strong>of</strong>f it means <strong>the</strong> unit is not getting a return signal (i.e. you are in very deep water).<br />
The depth showing on <strong>the</strong> sounder is being measured <strong>from</strong> <strong>the</strong> transducer (about 18” under true water<br />
level) so <strong>the</strong> water under <strong>the</strong> boat is really a bit deeper than <strong>the</strong> reading. But we strongly recommend<br />
leaving 10-12 feet <strong>of</strong> water under <strong>the</strong> boat at all times (noted exception is Bellingham’s harbor at low<br />
tide – it gets down to about 8 feet).<br />
We suggest using <strong>the</strong> depth sounder mainly as an aid to navigation in shallow water. However, <strong>the</strong><br />
key to avoiding rocks is not <strong>the</strong> depth sounder – but knowing where you are on <strong>the</strong> chart at all times.<br />
ROCKS ARE THE SINGLE BIGGEST NAVIGATIONAL AND SAFETY HAZARD IN THE<br />
ISLANDS – BUT THEY ARE ALL MARKED ON THE CHARTS. We do not recommend using <strong>the</strong><br />
alarm. Experience in <strong>the</strong> islands tells us that it goes <strong>of</strong>f at <strong>the</strong> wrong time – usually <strong>the</strong> middle <strong>of</strong> <strong>the</strong><br />
night as a seal or fish passes underneath.<br />
Knot Meter – If <strong>the</strong> digital knot meter shows a reading <strong>of</strong> “0.00” while underway, <strong>the</strong> impeller is<br />
most likely clogged. Sometimes it will clear its self; wakes <strong>from</strong> big powerboats are good for this.<br />
You can also try clearing it by traveling in reverse. The instrument transponders are under <strong>the</strong> forward<br />
end <strong>of</strong> <strong>the</strong> salon just port <strong>of</strong> <strong>the</strong> mast. You can remove <strong>the</strong> impeller to clear it but only if you are<br />
experienced in such things. If needed, <strong>the</strong> SOG (speed over ground) reading on <strong>the</strong> chart plotter will<br />
work as a standby knot meter.<br />
Chart Plotter, AIS & Radar<br />
Horn Button<br />
(horn mounted on<br />
mast)<br />
Chain Counter<br />
Wind Instr.<br />
Depth and<br />
Speed<br />
Auto Pilot<br />
A.I.S. – Illuminé is equipped with an Automatic Identification System. This system will show most<br />
commercial vessels on chart plotter screen as triangles. The triangle points in <strong>the</strong> direction that vessel<br />
is moving and if you move <strong>the</strong> cursor over <strong>the</strong> triangle <strong>the</strong> system will give you addition information<br />
(such as name, size, speed, etc.) about <strong>the</strong> vessel. The system also transmits this same type <strong>of</strong><br />
information about Illuminé to o<strong>the</strong>r vessels with A.I.S. This system should come on with <strong>the</strong> VHS<br />
radio as it uses <strong>the</strong> radio to transmit and receive its information.
Stereo – We have installed a good quality car stereo/CD player on <strong>the</strong> electrical panel and with<br />
speakers in <strong>the</strong> cabin and cockpit. Please be aware <strong>of</strong> o<strong>the</strong>r boats when you are in harbor and adjust<br />
<strong>the</strong> fader so that <strong>the</strong> cockpit speakers are turned <strong>of</strong>f when not in use.<br />
TV/DVD Player – We have an HDTV with built-in DVD player on board for your enjoyment. We<br />
left it portable so <strong>the</strong> kids can watch a movie in one <strong>of</strong> <strong>the</strong> staterooms while <strong>the</strong> adults enjoy <strong>the</strong> salon.<br />
The main risk in this is having <strong>the</strong> TV fall to <strong>the</strong> floor. So, please buffer <strong>the</strong> TV with some pillows or<br />
<strong>the</strong> like, especially if you are underway. You will need <strong>the</strong> inverter on to use <strong>the</strong> TV unless you are<br />
hooked to shore power. The remote control is normally stored in <strong>the</strong> chart table and we store <strong>the</strong> TV<br />
in <strong>the</strong> bottom <strong>of</strong> <strong>the</strong> V-berth hanging locker with a life jacket on ei<strong>the</strong>r side <strong>of</strong> it.<br />
VHF Radio – The main radio is mounted at <strong>the</strong> nav station and a RAM mic is available for <strong>the</strong><br />
cockpit it desired. If you plan on using <strong>the</strong> RAM mic it has to be plugged in before <strong>the</strong> radio is turned<br />
on, THE RADIO CAN BE DAMAGED IF YOU PLUG IN THE RAM MIC WITH THE RADIO ON.<br />
The RAM mic is normally stored in <strong>the</strong> nav table in <strong>the</strong> salon when not in use but during <strong>the</strong> summer<br />
please just leave it plugged in and in <strong>the</strong> cockpit. There is also a hand held unit for use in <strong>the</strong> cockpit<br />
or ashore.<br />
We recommend that you monitor Channel 16 during your cruise. It is reserved for emergencies<br />
and boat-to-boat initial contact. After contact, move to channels 68, 69, or 80. We listen to wea<strong>the</strong>r<br />
channels 1, 2, 3, 4 or 8 (whichever gives <strong>the</strong> best reception) before we sail in <strong>the</strong> morning and prior to<br />
anchoring for <strong>the</strong> evening. This is generally a light wind region but wea<strong>the</strong>r changes can be sudden.<br />
Listen for <strong>the</strong> reports identified as “Camano Island to Point Roberts” and/or “Inland Waters <strong>of</strong><br />
Western Washington”. <strong>San</strong> <strong>Juan</strong> <strong>Sailing</strong> monitors channel 80 during <strong>of</strong>fice hours (closed Sundays).<br />
The <strong>San</strong> <strong>Juan</strong> <strong>Sailing</strong> <strong>of</strong>fice phone is 1-800-677-7245.<br />
Wind Instruments – Wind speed and direction are displayed at <strong>the</strong> helm.<br />
12. Engine and Operating Under Power:<br />
Check sea water strainer<br />
here<br />
Check coolant level<br />
here.<br />
Check oil level here<br />
Add oil here
Starting<br />
a. Check <strong>the</strong> oil level. The dipstick is easily accessed on <strong>the</strong> starboard side <strong>of</strong> <strong>the</strong> engine.<br />
The best access for this procedure is had by tipping <strong>the</strong> companion way steps forward. The<br />
dipstick is about half way back on <strong>the</strong> starboard side <strong>of</strong> <strong>the</strong> engine (see picture above).<br />
b. Make sure <strong>the</strong> gearshift is in neutral (approx. vertical).<br />
c. Turn <strong>the</strong> key all <strong>the</strong> way to <strong>the</strong> right to engage starter. The buzzer should sound. This is<br />
<strong>the</strong> warning buzzer you would hear if <strong>the</strong> engine overheats or if <strong>the</strong>re is loss <strong>of</strong> oil pressure.<br />
d. After she starts, check for water flowing out <strong>the</strong> exhaust.<br />
e. Please allow 4-5 minutes <strong>of</strong> warm up before placing a load on <strong>the</strong> engine. Pushing a<br />
cold engine is very hard on diesels.<br />
Operation – We have found <strong>the</strong> 75 HP Yanmar engine to be very reliable. Cruising should be<br />
done at engine RPMs <strong>of</strong> 2400 to 2800. Because <strong>the</strong> engine is turbocharged it is not good to run it<br />
below 2400 for long periods <strong>of</strong> time. The following table gives approximate cruising information:<br />
RPM’s Boat Speed Fuel Consumption Range - Main<br />
tank only<br />
Total Range<br />
using all tanks<br />
2400 7.5 Knots Approx. 1.2 gal/hr 250 Naut. Mi. 560 Naut. Mi.<br />
2600 7.8 Knots Approx. 1.33 gal/hr 235 Naut. Mi. 530 Naut. Mi.<br />
2800 8.0 Knots Approx. 1.5 gal/hr 210 Naut. Mi. 475 Naut. Mi.<br />
The ranges listed assume a 25% reserve in <strong>the</strong> 53 gal fuel tank. We find pushing <strong>the</strong> engine<br />
beyond 3100 RPM or 8.3 knots does little good as <strong>the</strong> boat reaches hull speed at about that point.<br />
Please do not exceed 3100 RPM because it's hard on <strong>the</strong> engine to push past hull speed and simply<br />
increases fuel consumption.<br />
Also, <strong>the</strong>re is a blower in <strong>the</strong> engine compartment which is vented in <strong>the</strong> transom walkway between<br />
<strong>the</strong> cockpit and <strong>the</strong> swim step. This blower is temperature controlled so do not be surprised if it<br />
comes on automatically.<br />
Stop Button (Fuel Cut<strong>of</strong>f)<br />
Tachometer<br />
Oil Pressure<br />
Switch to engage<br />
fuel level gauge<br />
Engine Overheat – If <strong>the</strong> buzzer sounds while <strong>the</strong> engine is running, immediately check <strong>the</strong> oil<br />
pressure and temperature gauges. If oil pressure is low, shut down <strong>the</strong> engine, check <strong>the</strong> oil level,
and contact <strong>San</strong> <strong>Juan</strong> <strong>Sailing</strong>. (We have never had an oil pressure problem and we hope you don't<br />
ei<strong>the</strong>r). Most likely a buzzer means <strong>the</strong> engine has overheated. Check for water flowing out with<br />
<strong>the</strong> exhaust. If flowing, check <strong>the</strong> coolant level. If <strong>the</strong>re is no water flow <strong>the</strong> water strainer is likely<br />
plugged. If something like eelgrass gets sucked into <strong>the</strong> engine cooling water intake, it jams <strong>the</strong> raw<br />
water strainer (located on <strong>the</strong> starboard side <strong>of</strong> <strong>the</strong> engine compartment). The strainer has been<br />
installed above <strong>the</strong> waterline, so <strong>the</strong>re is no need to shut <strong>of</strong>f <strong>the</strong> raw water intake through-hull<br />
seacock (at <strong>the</strong> hull, below and forward <strong>of</strong> <strong>the</strong> engine) prior to removing <strong>the</strong> lid to clear debris. To<br />
clear it unscrew <strong>the</strong> top <strong>of</strong> <strong>the</strong> strainer and remove <strong>the</strong> eelgrass or o<strong>the</strong>r materials. Replace <strong>the</strong> lid<br />
and tighten <strong>the</strong> wing-nut, being careful to reinsert <strong>the</strong> O-ring properly. If <strong>the</strong> engine overheats<br />
again upon restarting, check to be sure <strong>the</strong> O-ring is in place and <strong>the</strong> wing-nut is tight; if it draws air,<br />
it won't draw water (also, if you shut <strong>the</strong> raw water intake seacock, even though unnecessary, make<br />
sure it’s in <strong>the</strong> open position). If still overheating, call <strong>San</strong> <strong>Juan</strong> <strong>Sailing</strong> for assistance.<br />
Engine Shutdown – PLEASE DO NOT TURN OFF THE KEY WHILE THE ENGINE IS<br />
RUNNING (it can blow <strong>the</strong> alternator!) First make sure <strong>the</strong> engine is at idle and <strong>the</strong> gearshift in<br />
neutral. Then push <strong>the</strong> red fuel cut<strong>of</strong>f button next to <strong>the</strong> key. When <strong>the</strong> engine dies, turn <strong>of</strong>f <strong>the</strong><br />
key. If you are sailing when you turn <strong>of</strong>f <strong>the</strong> engine you may need to put <strong>the</strong> gearshift into reverse<br />
just for a second; this helps fea<strong>the</strong>r <strong>the</strong> Maxprop. If <strong>the</strong> prop needs fea<strong>the</strong>ring you will likely hear<br />
<strong>the</strong> shaft turning when you go below.<br />
Engine Troubleshooting and Emergency Starting – If <strong>the</strong> engine is totally unresponsive to <strong>the</strong><br />
key or start button check to be sure that <strong>the</strong> start battery switch is on; it is located behind <strong>the</strong><br />
companionway steps in <strong>the</strong> port quarter berth. Also, should you lose <strong>the</strong> keys (plural because <strong>the</strong>re<br />
is a spare in <strong>the</strong> chart table) <strong>the</strong>re is an emergency start button located in <strong>the</strong> engine<br />
compartment, right side about 2 feet above <strong>the</strong> sole.<br />
13. Fuel Tanks and System: The main tank feeding <strong>the</strong> engine holds 53-gallons and sits under<br />
<strong>the</strong> salon floor (under aft large hatch next to sinks). The fuel shut-<strong>of</strong>f valve is located on top <strong>of</strong> <strong>the</strong> tank.<br />
The fuel gauge is located at <strong>the</strong> helm and can be activated by <strong>the</strong> switch in <strong>the</strong> same area (see notes under<br />
Engine operation above). When filling <strong>the</strong> tank listen closely and stop as soon as you hear fuel coming<br />
up <strong>the</strong> fill pipe. It will foam out <strong>the</strong> vent if you go much fur<strong>the</strong>r. The deck fitting for <strong>the</strong> main tank is on<br />
<strong>the</strong> port side about mid-ship.<br />
There are two additional fuel tanks which are not normally used, nor are <strong>the</strong>y really needed for a normal<br />
charter. If you are chartering for more than one week and going far enough (say to Desolation Sound) to<br />
warrant using <strong>the</strong> additional tanks please request <strong>the</strong> Fuel System Supplement to <strong>the</strong>se notes. Your checkout<br />
person will provide some additional training along with <strong>the</strong> extra notes.<br />
14. Galley: For those <strong>of</strong> you who are interested in fine dining while on vacation, we have done our<br />
best to setup Illuminé with a well-equipped galley. We have place settings for eight on board and most <strong>of</strong><br />
<strong>the</strong> pots, pans and utensils needed for food preparation. There is usually a large assortment <strong>of</strong> spices<br />
condiments and supplies on board. The following list is intended to give you a flavor <strong>of</strong> what we try to<br />
keep on board. Please note that no refrigerated items are included.<br />
• Spices – most common spices are <strong>the</strong>re, i.e. salt, pepper, oregano, sage, thyme, garlic salt,<br />
dried chopped onions, etc. The assortment is really quite good.<br />
• Condiments – Cooking oil, olive oil, red wine vinegar, Worcestershire sauce, A-1 sauce,<br />
Tabasco sauce. Some spices are in rack above stover and more, along with <strong>the</strong> condiments<br />
are located in storage under galley sole.<br />
• Supplies – saran wrap, aluminum foil, baggies, a few containers for leftovers, garbage bags<br />
and c<strong>of</strong>fee filters (stored under sink).<br />
All we ask is when you use <strong>the</strong> last <strong>of</strong> something that you replace it. There is also an assortment <strong>of</strong><br />
cleaning supplies should you need <strong>the</strong>m, some under <strong>the</strong> sink and more in <strong>the</strong> cabinet in <strong>the</strong> shower.<br />
Microwave – We have installed a microwave in <strong>the</strong> galley for convenience. You will need to be<br />
sure <strong>the</strong> inverter is on before using unless you are hooked to shore power. Also, <strong>the</strong> AC Outlets<br />
switch on <strong>the</strong> left side <strong>of</strong> <strong>the</strong> 110V Panel will need to be on.<br />
Toaster – Same story as <strong>the</strong> microwave.
15. Heads and Holding Tanks: Please do not put anything in <strong>the</strong> toilet that has not been eaten.<br />
Experienced sailors deposit toilet paper in a wastebasket, not down <strong>the</strong> toilet because paper tends to clog<br />
<strong>the</strong> vents. The heads each have <strong>the</strong>ir own holding tanks, <strong>the</strong> aft one holds 20 gallons and <strong>the</strong> forward<br />
one holds 12 gallons. There are Y-valves located in each head under <strong>the</strong> sink. They are normally set to<br />
have <strong>the</strong> head pump into <strong>the</strong> holding tanks. On <strong>the</strong> Y-valves <strong>the</strong>re are silver arrows indicating flow in and<br />
out; <strong>the</strong> arrows that are showing indicate <strong>the</strong> direction <strong>of</strong> <strong>the</strong> flow. This is backward <strong>from</strong> what is intuitive<br />
when you look at <strong>the</strong> handles.<br />
Picture <strong>of</strong> Aft Head Y-Valve (Fwd layout is similar)<br />
Flow follows visible<br />
arrows; position<br />
shown flows to tank.<br />
To holding tank<br />
Discharge<br />
<strong>from</strong> head<br />
Note: position <strong>of</strong><br />
handle is over <strong>the</strong><br />
blocked hose.<br />
This hose goes<br />
directly<br />
overboard<br />
The tanks can <strong>the</strong>n be dumped overboard (if you are in Canada) by opening <strong>the</strong> drain valves: In <strong>the</strong> aft<br />
head <strong>the</strong> tank drain valve is under <strong>the</strong> sink and in <strong>the</strong> forward head it is located behind <strong>the</strong> toilet, open<br />
lower door outboard <strong>of</strong> toilet to access. The valve under <strong>the</strong> forward sink is NOT <strong>the</strong> correct valve.<br />
Please note <strong>the</strong>se are gravity drain tanks, <strong>the</strong>re is no need for a macerator. They will normally drain in<br />
less than a minute (you will hear <strong>the</strong>m finish with a ‘woosh’ if <strong>the</strong> engine is not running); or pump out<br />
when in harbor. If you want to pump out <strong>the</strong> tanks <strong>the</strong> deck fittings are on <strong>the</strong> port side. If you have four<br />
people on board and have ‘normal’ usage, <strong>the</strong> tanks will need to be emptied every o<strong>the</strong>r day. If you have<br />
more onboard or heavy usage, please dump or pump every day. There is no level indicator so being<br />
‘regular’ with your dumping is important – sorry about <strong>the</strong> pun (-:.<br />
Picture <strong>of</strong> under Aft Head Sink<br />
(<strong>the</strong>re is a similar valve in fwd<br />
head behind <strong>the</strong> toilet)<br />
To drain holding tank simply<br />
open this valve. The flow is<br />
gravity fed, <strong>the</strong>re is no<br />
macerator.
<strong>San</strong> <strong>Juan</strong> <strong>Sailing</strong> staff will discuss holding tanks and pump outs on your arrival. Our one plea is this: don’t<br />
over fill <strong>the</strong> holding tank as leaking sewage is most unpleasant! Thank you.<br />
16. Refrigerator: The on/<strong>of</strong>f switch is on <strong>the</strong> panel and <strong>the</strong> <strong>the</strong>rmostat is in <strong>the</strong> cupboard next to <strong>the</strong><br />
microwave. We usually keep <strong>the</strong> <strong>the</strong>rmostat set a little above 5. Any higher and things start to<br />
freeze. Also, we normally leave <strong>the</strong> unit running 24 hrs a day without battery issues. The box is<br />
broken into two sections; <strong>the</strong> larger one (aft) has <strong>the</strong> coils in it and keeps things <strong>the</strong> coldest. The forward<br />
one is smaller and does not have coils, just holes letting cold air in <strong>from</strong> <strong>the</strong> aft box. It works best for<br />
fruits and vegetables that do not need to be really cold. The aft section is not cold enough to keep things<br />
frozen or make ice effectively (this is why we take a bag <strong>of</strong> ice with us). We find that our ice lasts longer<br />
(usually several days) if we put <strong>the</strong> ice against <strong>the</strong> coils. If you have meat you want to keep good and cold<br />
this same area is useful.<br />
Drain Pump – As your ice melts you will need to pump out <strong>the</strong> water that collects in <strong>the</strong> bottom <strong>of</strong><br />
<strong>the</strong> icebox. We have installed an electric pump for this purpose. The switch is to <strong>the</strong> right <strong>of</strong> <strong>the</strong><br />
sink just under <strong>the</strong> counter lip.<br />
17. Repairs (Tools & Spares): It is our goal and hope that you will not need to make repairs<br />
during your trip. That being said, we have also provided a good selection <strong>of</strong> tools and spares in case you<br />
need <strong>the</strong>m. The tools are stored in one <strong>of</strong> two locations: <strong>the</strong> smaller tools used most <strong>of</strong>ten are under <strong>the</strong><br />
sole <strong>of</strong> <strong>the</strong> dinette, forward end. In this same location we have miscellaneous hardware, tape, wire ties,<br />
etc. The rest <strong>of</strong> <strong>the</strong> tools and <strong>the</strong> spare parts are under <strong>the</strong> forward end <strong>of</strong> <strong>the</strong> dinette. The spares include<br />
engine filters and belts along with a replacement head pump. If you have problems that you are not<br />
comfortable handling please call <strong>San</strong> <strong>Juan</strong> <strong>Sailing</strong> or our maintenance pro Steve Pinley at 360-303-6668.<br />
18. Sails and Rigging:<br />
Mainsail – The mainsail is easily unfurled <strong>from</strong> <strong>the</strong> cockpit. You do not need to be facing directly<br />
into <strong>the</strong> wind to raise <strong>the</strong> mainsail but it is best not to load it fully. Here are <strong>the</strong> procedures for<br />
furling and unfurling:<br />
Unfurling:<br />
a. Un-cleat <strong>the</strong> boom vang, furling line, outhaul and main sheet.<br />
b. Usually we wrap <strong>the</strong> main sheet 2 turns on <strong>the</strong> port winch but do not cleat it. The idea being<br />
to not have it tight but also to keep it <strong>from</strong> running out freely.<br />
c. Next, push boom up a foot or two. This allows <strong>the</strong> outhaul to pull <strong>the</strong> sail out evenly.<br />
Turning to a reach so <strong>the</strong>re is wind in <strong>the</strong> sail also helps <strong>the</strong> sail come out evenly.<br />
d. Take a couple wraps on <strong>the</strong> starboard winch with <strong>the</strong> outhaul line. Pulling <strong>the</strong> sail out by<br />
hand is recommended. If you do use <strong>the</strong> winch DO NOT try to force <strong>the</strong> sail out. At<br />
<strong>the</strong> first sign that <strong>the</strong> sail is not coming out freely stop and loosen <strong>the</strong> outhaul. Then,<br />
go forward to <strong>the</strong> mast, grab <strong>the</strong> foot <strong>of</strong> <strong>the</strong> sail and give it a yank out <strong>of</strong> <strong>the</strong> mast (aft).<br />
This method works 100% <strong>of</strong> <strong>the</strong> time for us with very little fanfare. Once <strong>the</strong> sail if<br />
fully deployed putting <strong>the</strong> outhaul on <strong>the</strong> winch is reasonable and necessary.<br />
e. Tighten boom vang and sheet in as needed. It is okay and normal to use <strong>the</strong> electric winch<br />
on <strong>the</strong> sheet.<br />
Furling:<br />
a. Loosen boom vang<br />
b. Travel over and loosen <strong>the</strong> sheet (don’t need it flapping, just loose enough to let <strong>the</strong> boom<br />
lift up 6 to 10 inches. And it is best to keep some wind in <strong>the</strong> main as it helps tension it for<br />
a tight wrap on <strong>the</strong> furling drum.<br />
c. Take a wrap on <strong>the</strong> port winch with <strong>the</strong> outhaul line. Use this to keep tension on <strong>the</strong> sail so<br />
it wraps tightly around <strong>the</strong> furler.<br />
d. Take a couple wraps on <strong>the</strong> starboard winch with <strong>the</strong> furling line. Pull by hand. You may<br />
need to use a winch handle, lightly, just to get is started.<br />
e. The entire sail does not go into <strong>the</strong> mast, please leave <strong>the</strong> last foot or so exposed (it is<br />
covered with UV protection and designed to be out).
f. Tighten boom vang and sheet to keep boom <strong>from</strong> swinging too much but not so tight <strong>the</strong><br />
boom comes down to <strong>the</strong> dodger or bimini.<br />
IMPORTANT: Be sure to keep plenty <strong>of</strong> tension on <strong>the</strong> outhaul in order to get a nice tight<br />
wrap <strong>of</strong> <strong>the</strong> mainsail inside <strong>the</strong> mast. Some wind in <strong>the</strong> sail will help you get a nice tight wrap.<br />
Remember, if you furl <strong>the</strong> main without any wind pressure on it (if you’re head-to-wind in high<br />
winds or if you are simply becalmed), tension on <strong>the</strong> outhaul line is <strong>the</strong> ONLY force that will get<br />
you a nice tight wrap inside <strong>the</strong> mast. And a loosely furled main inside <strong>the</strong> mast could mean a tough<br />
next deployment or, in <strong>the</strong> worse case, a jammed main.<br />
Headsail - Our genoa is a 135 and is roller<br />
furling and takes a good sail shape at <strong>the</strong> full<br />
out position. Its size helps in lighter air but<br />
during periods <strong>of</strong> heavier winds you may furl<br />
<strong>the</strong> headsail as desired. Please keep moderate<br />
tension on <strong>the</strong> roller furling line when<br />
deploying <strong>the</strong> headsail to prevent a rat's nest<br />
on <strong>the</strong> drum and similar tension on <strong>the</strong><br />
sheets when furling to prevent ‘candy<br />
striping’ <strong>of</strong> <strong>the</strong> furled sail.<br />
Electric Winch – The electric winch should<br />
be used only for sheeting in <strong>the</strong> main sail or<br />
running a person up <strong>the</strong> mast on <strong>the</strong> boson’s<br />
chair. IT SHOULD NOT BE USED TO<br />
ADJUST FURLING OR OTHER LINES. It is<br />
too powerful and can easily break sails, lines or<br />
fittings, all <strong>of</strong> which will break before <strong>the</strong> winch<br />
does. The circuit breaker for <strong>the</strong> winch is<br />
behind <strong>the</strong> companionway steps in <strong>the</strong> port<br />
quarter berth.<br />
19. <strong>Sailing</strong> Characteristics: Illuminé is a very solid vessel with surprisingly well balance handling<br />
characteristics. I cannot think <strong>of</strong> what else to say, you will simply find sailing Illuminé a pleasure. This<br />
being said, as with most modern cruising boats, Illuminé has a beamy stern and a shoal draft keel. This<br />
causes her have excessive wea<strong>the</strong>r helm if she heels over too far. Therefore, it is necessary to trim for<br />
less heel when <strong>the</strong> wind hits 15-20 knots. Here are <strong>the</strong> basics: Move <strong>the</strong> jib cars back and sheet in to<br />
flatten <strong>the</strong> lower part <strong>of</strong> <strong>the</strong> jib, this will also twist <strong>of</strong>f <strong>the</strong> top. On <strong>the</strong> main tighten <strong>the</strong> outhaul to flatten<br />
<strong>the</strong> sail and loosen <strong>the</strong> sheet some to twist <strong>of</strong>f <strong>the</strong> top. Then use <strong>the</strong> traveler to trim for <strong>the</strong> amount <strong>of</strong><br />
heel you want. These steps seem to work well up to about 20 knots, beyond that reefing <strong>the</strong> main<br />
becomes necessary. We have sailed in 35 knot winds with just a 90% jib and no main; she handled it<br />
beautifully, <strong>the</strong> steering was balanced and we were doing over 8 knots to windward. She does not like to<br />
sail on <strong>the</strong> main alone.<br />
20. Showers: Experienced cruisers know <strong>the</strong> sailor's shower: get wet, turn it <strong>of</strong>f, soap up, rinse <strong>of</strong>f.<br />
CAUTION: THE ENGINE CAN HEAT THE WATER TO SCALDING TEMPERATURES! Each<br />
shower has a sump pump with a switch located in <strong>the</strong> shower area. These pumps also have breakers on<br />
<strong>the</strong> main panel and are labeled as such (we normally leave <strong>the</strong>se breakers turned <strong>of</strong>f). There are<br />
strainers located between <strong>the</strong> sumps and <strong>the</strong> pumps which need to get cleaned out every 4-5 showers<br />
(<strong>the</strong>y quickly fill with hair and lint). The strainer for <strong>the</strong> aft shower is located under <strong>the</strong> sink and <strong>the</strong><br />
strainer for <strong>the</strong> forward head is under <strong>the</strong> holding tank (door just outboard and above toilet bowl).<br />
There is also a shower fixture back at <strong>the</strong> swim platform. This is useful for washing <strong>of</strong>f shoes after<br />
returning <strong>from</strong> <strong>the</strong> beach. This fixture is located on <strong>the</strong> transom to port <strong>of</strong> <strong>the</strong> aft storage locker.<br />
21. Stove: The gimbaled propane stove has two burners and an oven. Propane is heavier than air and<br />
requires caution. For your safety, please follow <strong>the</strong>se procedures:
a. Make sure all stove controls are in <strong>the</strong> “<strong>of</strong>f” position. As with <strong>the</strong> BBQ, having <strong>the</strong> stove valves<br />
open when <strong>the</strong> solenoid is opened will cause <strong>the</strong> safety system to kick in. This will severely limit<br />
<strong>the</strong> flow to <strong>the</strong> stove. If this happens close all <strong>the</strong> valves, including <strong>the</strong> one on top <strong>of</strong> <strong>the</strong> tank.<br />
Then open <strong>the</strong> tank valve, <strong>the</strong>n <strong>the</strong> solenoid and final open <strong>the</strong> valves at <strong>the</strong> stove.<br />
b. Turn on propane solenoid valve switch on <strong>the</strong> electrical panel.<br />
c. Light a match or <strong>the</strong> butane lighter and push in <strong>the</strong> stove knob and turn to high. The burners will<br />
take a while to light on <strong>the</strong> first use. When <strong>the</strong> flame lights, hold in <strong>the</strong> knob for about 3 seconds<br />
to allow <strong>the</strong> <strong>the</strong>rmocouple to sense <strong>the</strong> flame.<br />
d. When you are finished with <strong>the</strong> stove, immediately turn <strong>the</strong> solenoid switch at <strong>the</strong> panel <strong>of</strong>f.<br />
To light <strong>the</strong> oven you will need to push in and turn <strong>the</strong> “oven” control knob on <strong>the</strong> front <strong>of</strong> <strong>the</strong> stove.<br />
Then put your butane lighter through one <strong>of</strong> <strong>the</strong> two holes in <strong>the</strong> bottom metal “floor” <strong>of</strong> <strong>the</strong> oven. You<br />
should hear (and see through <strong>the</strong> hole) <strong>the</strong> oven burner ignite. If you have trouble lighting it, remove <strong>the</strong><br />
metal floor/bottom <strong>of</strong> <strong>the</strong> oven, exposing <strong>the</strong> U-shape oven burner. You’ll easily be able to light it when<br />
exposed. Replace <strong>the</strong> metal floor/bottom after it is lit.<br />
Please note that both propane valves are located in <strong>the</strong> propane locker in <strong>the</strong> aft starboard side <strong>of</strong> <strong>the</strong><br />
cockpit, which is vented and isolated <strong>from</strong> <strong>the</strong> rest <strong>of</strong> <strong>the</strong> boat. That way, any leaks will be vented away<br />
<strong>from</strong> <strong>the</strong> boat.<br />
<strong>San</strong> <strong>Juan</strong> <strong>Sailing</strong>’s staff fills <strong>the</strong> propane tank every 3 weeks. One tank normally lasts 6 weeks or more<br />
and Illuminé has two tanks (one connected and a spare); so you should be in good shape.<br />
22. Water:<br />
Water pressure – The water pressure switch is located on <strong>the</strong> electrical panel. Please switch this<br />
<strong>of</strong>f when motoring or sailing. You could burn out <strong>the</strong> water pump should one <strong>of</strong> <strong>the</strong> tanks run dry<br />
(and you would not hear <strong>the</strong> pump running over <strong>the</strong> sounds <strong>of</strong> motoring or sailing). There is a<br />
pressure accumulator so you will be able to get some water even with <strong>the</strong> pump turned <strong>of</strong>f.<br />
Water tanks – Illuminé has three water<br />
tanks, a 40 gal. tank located under <strong>the</strong> V-<br />
berth, a 40 gal. tank under <strong>the</strong> settee<br />
(starboard side) and a 60 gal. tank located<br />
under <strong>the</strong> salon (middle section).<br />
Selection valves are behind <strong>the</strong> panel<br />
under <strong>the</strong> nav table. We normally use <strong>the</strong><br />
forward tank until it runs out and <strong>the</strong>n<br />
switch to <strong>the</strong> starboard side tank. If<br />
needed, we use <strong>the</strong> center tank last; <strong>the</strong><br />
reason for this is <strong>the</strong> weight in this tank<br />
helps as ballast. Only have one valve<br />
open at a time, o<strong>the</strong>rwise water flows<br />
<strong>from</strong> tank to tank and <strong>the</strong> meter readings<br />
become useless.<br />
There is a digital readout on <strong>the</strong> main<br />
panel which indicates <strong>the</strong> liters <strong>of</strong> water<br />
used (at least in <strong>the</strong>ory, it appears to read<br />
more like .6 liters). This meter should be<br />
reset to zero when you change <strong>from</strong> one<br />
tank to ano<strong>the</strong>r or refill all <strong>the</strong> tanks at<br />
<strong>the</strong> dock. Listed below are <strong>the</strong><br />
approximate sizes and counts on <strong>the</strong><br />
meter:<br />
Bow Tank – 300 counts (40 gal.)<br />
Center Tank – 450 counts (60 gal.)<br />
Under aft side <strong>of</strong> nav. table.<br />
Bilge Pump<br />
(Water pump on fwd<br />
side <strong>of</strong> table)<br />
Bow Tank Valve<br />
(closed as shown)<br />
Center Tank Valve<br />
(open as shown)<br />
Starboard Tank Valve<br />
(closed as shown)
Starboard Tank – 300 counts (40 gal.)<br />
The deck fitting for <strong>the</strong> bow tank is on <strong>the</strong> port side forward <strong>of</strong> mid-ship. The fitting for <strong>the</strong> starboard<br />
and center tanks are on <strong>the</strong> starboard side about mid-ship. The center tank fills <strong>from</strong> <strong>the</strong> inboard<br />
fitting and <strong>the</strong> starboard tank fill <strong>from</strong> <strong>the</strong> outboard fitting.<br />
Water Heater – The water is heated automatically when <strong>the</strong> engine runs under load (it takes about<br />
45 minutes), running it at idle in <strong>the</strong> morning doesn’t work, sorry. CAUTION: THE ENGINE CAN<br />
HEAT THE WATER TO SCALDING TEMPERATURES! The hot water is stored in <strong>the</strong> insulated<br />
10-gallon tank located under <strong>the</strong> dinette seat just in front <strong>of</strong> <strong>the</strong> galley. It can also be heated<br />
electrically when shore power is available. The switch is located on <strong>the</strong> 110 V panel.<br />
Salt Water Wash Down Pump – We have a salt water pump installed with a fitting and hose in <strong>the</strong><br />
forward anchor locker. The hose is long enough to reach <strong>the</strong> stern so that you can use seawater to<br />
wash down <strong>the</strong> swim step after returning <strong>from</strong> shore. The switch for <strong>the</strong> pump is on <strong>the</strong> main panel<br />
and is marked as such. Please turn <strong>of</strong>f <strong>the</strong> pump when not in use, thanks.<br />
23. What’s Unique about Illuminé: In many ways she is similar to o<strong>the</strong>r charter boats.<br />
Therefore, you are likely to find most <strong>of</strong> her systems will be familiar and easy to operate. There are a few<br />
things about her that are not ‘typical’. These are <strong>the</strong> things that may require special attention or where it<br />
may be best to deviate <strong>from</strong> customary operating procedures. And, some are listed here because we<br />
believe <strong>the</strong>y will help you plan your charter.<br />
Electrical System – Illuminé’s electrical system is a little different as compared to ‘normal’<br />
sailboats. First, <strong>the</strong> start battery is isolated <strong>from</strong> all o<strong>the</strong>r systems. This was done to prevent it <strong>from</strong><br />
accidentally being used as a house battery. Also, instead <strong>of</strong> <strong>the</strong> usual 1, 2 or Both battery switch,<br />
Illuminé has On/Off switches (located behind <strong>the</strong> companionway steps, port side). We normally<br />
leave <strong>the</strong>se switches in <strong>the</strong> ‘On’ position (unless we are working on something). Charging <strong>of</strong> <strong>the</strong><br />
house system is done by <strong>the</strong> inverter and <strong>the</strong> start system by its own charger. So, <strong>the</strong>re is really<br />
nothing to do; just get on board and enjoy.<br />
Galley – We try to keep a good supply <strong>of</strong> spices, condiments (olive oil, vinegar, A-1 Sauce, etc.)<br />
and consumables, (saran wrap, baggies, etc.) on board. All we ask is when you use something up<br />
please replenish <strong>the</strong> supply, thanks. Also, please put <strong>the</strong> spices and condiments back under <strong>the</strong> sole<br />
when you return to Bellingham as <strong>the</strong> cleaning crews tend to throw out items left in <strong>the</strong> galley.<br />
Maxprop – There are two main advantages to Illuminé’s fea<strong>the</strong>ring prop; <strong>the</strong> first is speed. In light<br />
winds she will sail up to a knot faster with <strong>the</strong> prop fea<strong>the</strong>red. The second advantage shows up<br />
when you are backing up under power. Fixed propellers are not very efficient in reverse so <strong>the</strong>y<br />
require high engine RPM;s to get any real power. Because <strong>the</strong> Maxprop’s blades rotate when in<br />
reverse <strong>the</strong>y are just as efficient in reverse as <strong>the</strong>y are in forward. When you put Illuminé in<br />
reverse you will notice <strong>the</strong> she responds faster than a boat with a fixed prop.<br />
Bilge Pump – The electric bilge pump has a timed relay wired to <strong>the</strong> float switch which will<br />
continue running <strong>the</strong> pump for about 30 sec. after <strong>the</strong> float has dropped. Also, this relay is<br />
wired straight to <strong>the</strong> battery so <strong>the</strong> breaker for <strong>the</strong> bilge pump is normally in <strong>the</strong> <strong>of</strong>f position.<br />
Turning on <strong>the</strong> breaker will cause <strong>the</strong> pump to run continuously. This time delay was added to<br />
allow enough time for <strong>the</strong> pump to empty <strong>the</strong> line so water would not drain back into <strong>the</strong> bilge and<br />
re-activate <strong>the</strong> switch.<br />
* * *<br />
We hope this information helps. Have a great time.<br />
Mike & Lauri Huston