NComputing IP Utility (NIU) User Guide
NComputing IP Utility (NIU) User Guide
NComputing IP Utility (NIU) User Guide

You also want an ePaper? Increase the reach of your titles
YUMPU automatically turns print PDFs into web optimized ePapers that Google loves.
USER GUIDE<br />
<strong>NIU</strong><br />
<strong>NComputing</strong> <strong>IP</strong> <strong>Utility</strong> (<strong>NIU</strong>) <strong>User</strong> <strong>Guide</strong><br />
Contents<br />
<strong>NComputing</strong> <strong>IP</strong> <strong>Utility</strong> (<strong>NIU</strong>)<br />
Executive Summary 1<br />
Applications 1<br />
<strong>NIU</strong> Installation 2<br />
Using and verifying <strong>NIU</strong><br />
operation 8<br />
Uninstall <strong>NIU</strong> 12<br />
Configuring selected third<br />
party applications for use<br />
with <strong>NIU</strong> 14<br />
Known limitations or errata<br />
on your release 17<br />
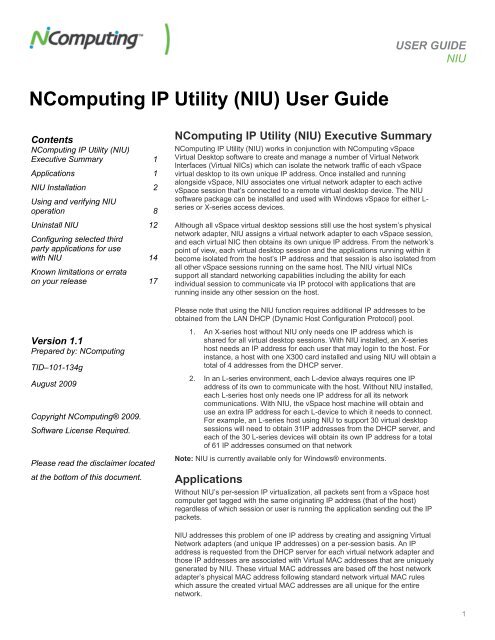
<strong>NComputing</strong> <strong>IP</strong> <strong>Utility</strong> (<strong>NIU</strong>) Executive Summary<br />
<strong>NComputing</strong> <strong>IP</strong> <strong>Utility</strong> (<strong>NIU</strong>) works in conjunction with <strong>NComputing</strong> vSpace<br />
Virtual Desktop software to create and manage a number of Virtual Network<br />
Interfaces (Virtual NICs) which can isolate the network traffic of each vSpace<br />
virtual desktop to its own unique <strong>IP</strong> address. Once installed and running<br />
alongside vSpace, <strong>NIU</strong> associates one virtual network adapter to each active<br />
vSpace session that’s connected to a remote virtual desktop device. The <strong>NIU</strong><br />
software package can be installed and used with Windows vSpace for either L-<br />
series or X-series access devices.<br />
Although all vSpace virtual desktop sessions still use the host system’s physical<br />
network adapter, <strong>NIU</strong> assigns a virtual network adapter to each vSpace session,<br />
and each virtual NIC then obtains its own unique <strong>IP</strong> address. From the network’s<br />
point of view, each virtual desktop session and the applications running within it<br />
become isolated from the host’s <strong>IP</strong> address and that session is also isolated from<br />
all other vSpace sessions running on the same host. The <strong>NIU</strong> virtual NICs<br />
support all standard networking capabilities including the ability for each<br />
individual session to communicate via <strong>IP</strong> protocol with applications that are<br />
running inside any other session on the host.<br />
Please note that using the <strong>NIU</strong> function requires additional <strong>IP</strong> addresses to be<br />
obtained from the LAN DHCP (Dynamic Host Configuration Protocol) pool.<br />
Version 1.1<br />
Prepared by: <strong>NComputing</strong><br />
TID–101-134g<br />
August 2009<br />
Copyright <strong>NComputing</strong>® 2009.<br />
Software License Required.<br />
Please read the disclaimer located<br />
at the bottom of this document.<br />
1. An X-series host without <strong>NIU</strong> only needs one <strong>IP</strong> address which is<br />
shared for all virtual desktop sessions. With <strong>NIU</strong> installed, an X-series<br />
host needs an <strong>IP</strong> address for each user that may login to the host. For<br />
instance, a host with one X300 card installed and using <strong>NIU</strong> will obtain a<br />
total of 4 addresses from the DHCP server.<br />
2. In an L-series environment, each L-device always requires one <strong>IP</strong><br />
address of its own to communicate with the host. Without <strong>NIU</strong> installed,<br />
each L-series host only needs one <strong>IP</strong> address for all its network<br />
communications. With <strong>NIU</strong>, the vSpace host machine will obtain and<br />
use an extra <strong>IP</strong> address for each L-device to which it needs to connect.<br />
For example, an L-series host using <strong>NIU</strong> to support 30 virtual desktop<br />
sessions will need to obtain 31<strong>IP</strong> addresses from the DHCP server, and<br />
each of the 30 L-series devices will obtain its own <strong>IP</strong> address for a total<br />
of 61 <strong>IP</strong> addresses consumed on that network<br />
Note: <strong>NIU</strong> is currently available only for Windows® environments.<br />
Applications<br />
Without <strong>NIU</strong>’s per-session <strong>IP</strong> virtualization, all packets sent from a vSpace host<br />
computer get tagged with the same originating <strong>IP</strong> address (that of the host)<br />
regardless of which session or user is running the application sending out the <strong>IP</strong><br />
packets.<br />
<strong>NIU</strong> addresses this problem of one <strong>IP</strong> address by creating and assigning Virtual<br />
Network adapters (and unique <strong>IP</strong> addresses) on a per-session basis. An <strong>IP</strong><br />
address is requested from the DHCP server for each virtual network adapter and<br />
those <strong>IP</strong> addresses are associated with Virtual MAC addresses that are uniquely<br />
generated by <strong>NIU</strong>. These virtual MAC addresses are based off the host network<br />
adapter’s physical MAC address following standard network virtual MAC rules<br />
which assure the created virtual MAC addresses are all unique for the entire<br />
network.<br />
1
USER GUIDE<br />
<strong>NIU</strong><br />
Therefore for LANs or WANs, once <strong>NIU</strong> has assigns the unique <strong>IP</strong> addresses,<br />
each session and its associated user terminal is now viewed by the outside world<br />
with a unique <strong>IP</strong> address.<br />
Some third party applications need to uniquely identify the source of <strong>IP</strong> packets<br />
sent by a host computer onto the network. And some terminal services aware<br />
applications such as <strong>IP</strong> based messaging or print control and auditing software<br />
need the ability to uniquely identify each of its running instances to correctly<br />
exchange messages between sessions and hosts. <strong>NIU</strong> will allow some of these<br />
applications to fetch the individual virtual <strong>IP</strong>'s in an <strong>NComputing</strong> virtual desktop<br />
environment (if the application has the ability to read the virtual NIC and its <strong>IP</strong><br />
address).<br />
<strong>NIU</strong> Installation<br />
Prerequisites:<br />
• Genuine <strong>NComputing</strong> hardware devices<br />
• The current release of <strong>NComputing</strong> vSpace Terminal Services software<br />
• LAN connection (and OS driver) must be installed in the host and active.<br />
• Each <strong>NIU</strong> created Virtual NIC initially uses DHCP to get its <strong>IP</strong> address;<br />
so, make sure you actually have a DHCP server available for this<br />
system before you install <strong>NIU</strong>.<br />
• Ensure the DHCP server has enough available unassigned <strong>IP</strong><br />
addresses for the vNICs you plan to create. Otherwise, vNIC creation<br />
may take up to a minute each because the DHCP requests must each<br />
“time out” before Windows finally realizes there is no new <strong>IP</strong> to assign.<br />
Installation<br />
• Please close all running programs and stop any active <strong>NComputing</strong><br />
virtual desktop sessions.<br />
• Prior to launching the <strong>NIU</strong> installer, Login to the host with appropriate<br />
Administrator rights<br />
• Verify that the host already has vSpace installed<br />
• Copy the installation file to a known location on the host system<br />
• Double-click the “<strong>NIU</strong>Inst.exe” icon to start the install<br />
Note: This document’s install screen illustrations are from <strong>NIU</strong> version 1.9.1, but<br />
this user guide also applies to <strong>NIU</strong> version 1.9.2<br />
2
USER GUIDE<br />
<strong>NIU</strong><br />
1. End-<strong>User</strong> License Agreement (EULA)<br />
Please read the EULA carefully, please select “I agree” and click “Next” to<br />
continue.<br />
Figure 1<br />
If you press the “Readme” button you can view the contents of the “Readme.txt”<br />
file. This file contains information about the current release.<br />
Click the “OK” button (Figure 2) to return to the EULA window.<br />
Figure 2<br />
3
USER GUIDE<br />
<strong>NIU</strong><br />
2. <strong>NComputing</strong> <strong>IP</strong> <strong>Utility</strong><br />
Available Network Card selection<br />
In Figure 3, the detected network card(s) are displayed; please select the<br />
appropriate network card to which <strong>NComputing</strong> <strong>IP</strong> <strong>Utility</strong> will be bound. Click<br />
“Next” to continue.<br />
Figure 3<br />
3. <strong>NComputing</strong> <strong>IP</strong> <strong>Utility</strong><br />
Create Virtual NICs<br />
In this step, you select how many Virtual Network Adapters you wish to install.<br />
1. For X-series implementations, the number of virtual NICs to create is<br />
deterministic. For example, in a 2-card X300 installation, the maximum<br />
needed is 6 Virtual Interfaces, and for a 2-card X550 host system, up to 10<br />
virtual NICs should be added.<br />
2. When setting up an L-series environment that has frequent log on and log off<br />
activity, such as in a school environment, the number of virtual <strong>IP</strong> allotted<br />
should exceed the number of users by about 5 <strong>IP</strong> addresses. This will allow<br />
for inactive sessions (disconnected for the L-device but not yet terminated)<br />
to properly exit and the new user’s replacement session to grab an available<br />
virtual NIC.<br />
4
USER GUIDE<br />
<strong>NIU</strong><br />
Please use the pull-down option to select the number of interfaces desired. For<br />
this example (Figure 4), we’ll add 2 Virtual NICs.<br />
Figure 4<br />
Click “Next” to start installing the virtual NICs.<br />
Note: In X-series deployments, only one virtual NIC is required per physical<br />
station but ports are assigned in the physical port order of the PCI card (1, 2, 3,<br />
etc.). Port 1 is at the top of the card, port 2 next, then port 3 (and up to 5 ports on<br />
an X550). Therefore if you are using Port 3 on the card then three virtual NICS<br />
and three <strong>IP</strong> addresses must be generated to cover that port, even if only one<br />
physical station will be connected. If you want to create and use only one virtual<br />
NIC, then plug the one physical station into port 1 instead of port 3.<br />
<strong>NIU</strong> will always allocate and initialize the number of <strong>IP</strong> addresses specified; so,<br />
your DHCP server must have enough <strong>IP</strong> addresses available in its address pool<br />
to service all hosts on the network. The next screen (Figure 5) provides a<br />
reminder and gives an opportunity to stop before the virtual NICs are created and<br />
<strong>IP</strong> addresses consumed from the DHCP pool.<br />
Figure 5<br />
Click “Yes” to continue.<br />
PLEASE NOTE: The NIC configuration process within Windows is individual and<br />
sequential; therefore, each new <strong>NIU</strong> <strong>IP</strong> address created also increases the host<br />
system’s boot time.<br />
5
USER GUIDE<br />
<strong>NIU</strong><br />
4. Installation, progress and completion of the Virtual Network Interfaces /<br />
<strong>NIU</strong> Virtual network cards.<br />
At this point, <strong>NIU</strong> performs the following actions:<br />
• Generates Virtual MAC addresses.<br />
• Installs the Virtual Network adapters.<br />
• Requests the required number of <strong>IP</strong> addresses from the DHP<br />
server<br />
Virtual NICs generated by <strong>NIU</strong> initially get addresses assigned from the DHCP<br />
server attached to the network card selected on the previous install menu (Figure<br />
3). To make static <strong>IP</strong> assignments, please go to the Windows Control Panel ><br />
Network Connections and make appropriate changes to the Virtual NIC settings<br />
(Figure 13).<br />
Figure 6<br />
Registration:<br />
<strong>NIU</strong> has a built-in 30-day TRIAL license to allow testing compatibility in your<br />
network environment. If you don’t have a key, choose “No” when asked to<br />
activate (Figure 7), and continue with a 30 day evaluation: An <strong>NIU</strong> license key<br />
can be added at a later time to extend the license.<br />
Figure 7<br />
6
USER GUIDE<br />
<strong>NIU</strong><br />
If you have been provided an <strong>NIU</strong> license key, click “Yes” on the above activation<br />
question, and enter the key in the following window (Figure 8).<br />
Figure 8<br />
After the “Get License” button is clicked, <strong>NIU</strong> contacts the <strong>NComputing</strong> license<br />
activation server (Figure 9) and checks the activation key entered.<br />
Figure 9<br />
If the activation key has not already been used, <strong>NIU</strong> obtains the necessary<br />
license (Figure 10), <strong>NIU</strong> is activated and locked to the system on which it’s<br />
installed.<br />
Figure 10<br />
7
USER GUIDE<br />
<strong>NIU</strong><br />
<strong>NIU</strong> installation is now complete, please close any running applications, and click<br />
“Restart” to restart your PC (Figure 11) and start using <strong>NComputing</strong> <strong>IP</strong> <strong>Utility</strong>.<br />
Figure 11<br />
Using and verifying <strong>NIU</strong> operation<br />
By default, <strong>NIU</strong> places an icon in the System Tray that can be used to launch the<br />
<strong>NIU</strong> Console.<br />
Figure 12<br />
All the new virtual network interfaces will be displayed under “Network<br />
Connections” (See Figure 13 below), and this is where you can set any or all the<br />
virtual NICs to use static <strong>IP</strong> addresses.<br />
Figure 13<br />
8
USER GUIDE<br />
<strong>NIU</strong><br />
Figure 14<br />
The <strong>NIU</strong> Console can also be invoked from the Start Menu (Figure 12) by<br />
navigating:<br />
Start All Programs <strong>NComputing</strong> vSpace <strong>NComputing</strong> <strong>IP</strong> <strong>Utility</strong> <strong>NIU</strong><br />
Console<br />
The <strong>NIU</strong> console window explained<br />
From the System Tray (Figure 12), double click the “<strong>NIU</strong>” icon to open the <strong>NIU</strong><br />
console (Figure 15).<br />
The “<strong>NIU</strong> <strong>IP</strong> address” column displays the <strong>IP</strong> addresses which were assigned by<br />
the DHCP server (or manually in using the Network Connections screen) to each<br />
Virtual MAC address generated by <strong>NIU</strong>. Virtual network interface (VNIC) “0”<br />
(Zero) is an abstraction of the Host’s main network adapter and is always<br />
assigned to the host’s main session.<br />
Figure 15<br />
9
USER GUIDE<br />
<strong>NIU</strong><br />
Each L-Series device that connects to the host is assigned to a Virtual NIC and<br />
the logged-in user’s session is associated with an <strong>IP</strong> address. After each session<br />
login, usernames can be displayed in the <strong>NIU</strong> Console. Please click the<br />
“Refresh” button in the lower right-hand corner of the console to refresh the<br />
screen and see the current session to <strong>IP</strong> address “mapping.” See figure 16<br />
below.<br />
Figure 16<br />
Note: The mapping from Virtual NIC connections on the host to L-devices are<br />
displayed in the <strong>NIU</strong> Console. The Virtual NIC <strong>IP</strong> addresses assigned to the user<br />
sessions are used for:<br />
• communications between session applications running on the same<br />
host,<br />
• between session applications (e.g. Printing Control software) and other<br />
computers on the LAN or the Internet.<br />
IMPORTANT! The vSpace console only displays the local <strong>IP</strong> address used by<br />
the L-Series device itself (Figure 17).<br />
Figure 17<br />
10
USER GUIDE<br />
<strong>NIU</strong><br />
Uninstall <strong>NIU</strong><br />
Important! Before uninstalling <strong>NIU</strong>; please use the vSpace Console to<br />
STOP all running Stations,<br />
Right click the station you want to stop (Figure 16), and select “Stop Station”<br />
Figure 18<br />
The following screenshot (Figure 19) shows the vSpace console warning<br />
message to verify that you want to stop an active session.<br />
Figure 19<br />
11
USER GUIDE<br />
<strong>NIU</strong><br />
This following screenshot shows a station in the process of stopping.<br />
Figure 20<br />
<strong>NIU</strong> uninstall<br />
Figure 21<br />
To uninstall <strong>NIU</strong>, select the Uninstall <strong>NIU</strong> command from the start menu under:<br />
<strong>NComputing</strong> vSpace <strong>NComputing</strong> <strong>IP</strong> <strong>Utility</strong> Uninstall <strong>NIU</strong> (Figure 19)<br />
Select “Yes” (Figure 22) to verify you wish to remove <strong>NIU</strong>.<br />
Figure 22<br />
12
USER GUIDE<br />
<strong>NIU</strong><br />
If there are still any active remote sessions, the <strong>NIU</strong> uninstaller provides a<br />
warning message (Figure 23). .<br />
Figure 23<br />
<strong>NIU</strong> Uninstall progress window (Figure 24) shows the Virtual NICs are being<br />
removed.<br />
Figure 24<br />
13
USER GUIDE<br />
<strong>NIU</strong><br />
<strong>NIU</strong> uninstall is complete (Figure 25). Please restart Windows® to finish the<br />
uninstall process and enable <strong>NIU</strong> to function.<br />
Figure 25<br />
Configuring select third party applications for<br />
use with <strong>NIU</strong><br />
iTALC Classroom Management Software with <strong>NComputing</strong> X-series kits<br />
iTALC management software doesn’t need <strong>NIU</strong>, and the normal configuration for<br />
iTALC is documented in an <strong>NComputing</strong> Install Tips document called<br />
“Configuring iTALC Management Software for use with <strong>NComputing</strong> Systems.”<br />
However, if <strong>NIU</strong> is used on the <strong>NComputing</strong> host system to meet some other<br />
software product’s requirements, then the iTALC configuration procedure needs<br />
to be modified so <strong>NIU</strong> and iTALC both function at the same time.<br />
Each individual iTALC client that runs in a virtual desktop session doesn’t need to<br />
know its own <strong>IP</strong> address, and it just responds to any request it “sees” on its<br />
specified TCP/<strong>IP</strong> port. So we need to combine information from the <strong>NComputing</strong><br />
vSpace Console with that from the <strong>NIU</strong> console to correctly configure classroom<br />
“<strong>IP</strong>-address:TCP-port” definitions for each virtual desktop session.<br />
14
USER GUIDE<br />
<strong>NIU</strong><br />
The following diagram and screen shots illustrate the configuration process for an<br />
example with the “iTALC classroom master” running on one PC, and vSpace with<br />
<strong>NIU</strong> running on a second PC to isolate each virtual desktop session’s network<br />
traffic into a separate <strong>IP</strong> address.<br />
Router<br />
Switching-hub<br />
#03 X550<br />
Master PC<br />
Host PC<br />
<strong>IP</strong> Address : 10.1.1.104 <strong>IP</strong> Address : 10.1.1.102<br />
iTALC Master installed<br />
iTALC Client installed<br />
#05 X550<br />
We make use of the fact that we know how the TCP/<strong>IP</strong> ports are assigned to the<br />
iTALC clients when they are started by the “italc_config_X.bat" file, and in this<br />
example, we see that “station 3” will always listen on TCP/<strong>IP</strong> port 5902, and<br />
“station 5” will always listen on port 5904.<br />
Relevant section from italc_config_X.bat file<br />
15
USER GUIDE<br />
<strong>NIU</strong><br />
Using the vSpace Console, we can see (screen shot below) that “station 3” has<br />
“user3” logged-in and “station 5” has user2 logged-in. (For X-series<br />
configurations where the <strong>NIU</strong> vNICs have static <strong>IP</strong> addresses assigned, you only<br />
need to determine the physical station number to <strong>IP</strong>-address mapping once, and<br />
that mapping will stay the same between host reboots.)<br />
vSpace Console showing which stations have user3 and user2 logged-in<br />
Now, we use the <strong>NIU</strong> Console to determine that user3’s virtual desktop session<br />
has <strong>IP</strong>-address 10.1.1.108, and user2 is logged-in to the virtual desktop session<br />
that has <strong>IP</strong>-address 10.1.1.106<br />
<strong>NIU</strong> Console showing <strong>IP</strong> Address mapping to Sessions and <strong>User</strong>s<br />
vSpace console Info <strong>NIU</strong> Console Info “italc_config_X.bat" file knowledge<br />
<strong>User</strong>3 on Station 4 <strong>IP</strong>-address 10.1.1.108 TCP/<strong>IP</strong> port 5902<br />
<strong>User</strong>2 on Station 5 <strong>IP</strong>-address 10.1.1.106 TCP/<strong>IP</strong> port 5904.<br />
16
USER GUIDE<br />
<strong>NIU</strong><br />
Combining these three sets of information tells us how to properly define this<br />
“classroom PCs” on the iTALC Master PC (as in screen shot below).<br />
iTALC Classroom defined with session <strong>IP</strong>-address and iTALC client TCP/<strong>IP</strong> port<br />
Known limitations or errata on your release<br />
Please see the current <strong>NIU</strong> readme document.<br />
ncomputing.com<br />
©Copyright 2003-2009 <strong>NComputing</strong>, Inc. All rights reserved. <strong>NComputing</strong> is the property of <strong>NComputing</strong>.<br />
Microsoft and Windows are registered trademarks of Microsoft Corporation. Other trademarks and trade<br />
names are the property of their respective owners. Specifications subject to change without notice.<br />
Performance may vary, depending on the configuration of the shared computer.<br />
No part of this document may be used or reproduced in any manner whatsoever without permission of <strong>NComputing</strong>.<br />
Disclaimer: Information contained in this document may have been obtained from internal testing or from a<br />
third party. This information is for informational purposes only. Information may be changed or updated without notice.<br />
TID 101-134g – August 2009<br />
USERGUIDE <strong>NIU</strong> REV2<br />
17