Basix Plus - Sark Products
Basix Plus - Sark Products
Basix Plus - Sark Products
You also want an ePaper? Increase the reach of your titles
YUMPU automatically turns print PDFs into web optimized ePapers that Google loves.
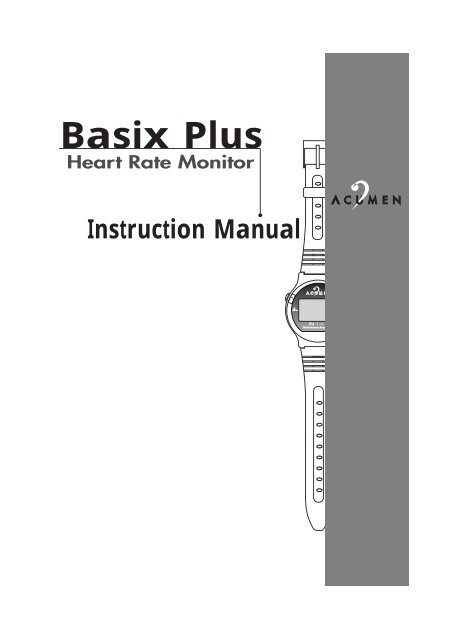
<strong>Basix</strong> <strong>Plus</strong><br />
Instruction Manual
Table Of Contents<br />
Congratulations...........................................................................................................p1<br />
Mission Statement.......................................................................................................p1<br />
Warning.......................................................................................................................p1<br />
1 Year Limited Warranty...............................................................................................p1<br />
<strong>Basix</strong>plus Features........................................................................................................p2<br />
<strong>Basix</strong>plus Components.................................................................................................p2<br />
Buttons And Functions..................................................................................................p2<br />
Modes Of Operation....................................................................................................p3<br />
Basic Use Of Setting Modes.........................................................................................p3<br />
Setting The Clock.........................................................................................................p4<br />
Setting Alarm Sound On & Off.....................................................................................p4<br />
Setting Your Target Zone.............................................................................................p5<br />
Determining Your Target Zone.....................................................................................p6<br />
Basic Fitness Tips And Target Zone Explanation..........................................................p7<br />
Operating Your <strong>Basix</strong>plus............................................................................................p8<br />
Troubleshooting..........................................................................................................p10<br />
Taking Care Of Your <strong>Basix</strong>plus....................................................................................p11<br />
Technical Specifications................................................................................................p12<br />
Technical Display Guide.............................................................................................p13
Congratulations!<br />
Welcome to the future of wireless heart rate technology! Your purchase today shows that you are<br />
serious about your exercise and are committed to achieving your best. Today, getting the most from<br />
your exercise doesn’t necessarily mean you have to spend longer periods of time to achieve those<br />
goals. With Target Heart Rate Training, you will increase the effectiveness of your workout by monitoring<br />
and quantifying your results every step of the way. For most individuals as little as 20 minutes in your<br />
target heart rate zone each session is enough to achieve substantial health improvements. The Acumen<br />
<strong>Basix</strong>plus will act as your personal coach and guide you to your fitness goals more effectively.<br />
Mission Statement<br />
At Acumen we have listened to what people such as yourself have been asking for in a heart rate<br />
monitor and are committed to your satisfaction. We know you will enjoy the all of the added features,<br />
along with those never found before in other heart rate monitors,and the ease of use incorporated<br />
into our products. If you ever have any questions, comments or suggestions, please write or call our<br />
staff. We greatly value your feedback and look forward to continuing to provide you with products<br />
and support that’s second to none. Thank you for your purchase and anticipated support.<br />
Product Development Team<br />
warning<br />
Overexertion can cause serious injury, including heart attacks. Some individuals cannot safely elevate their heart rate to<br />
the levels of typically used heart rate training zones. No one should begin an exercise program without first obtaining<br />
medical clearance, especially if there is a personal or family history of heart disease, high blood pressure, or if you are<br />
over age 40, have diabetes, high cholesterol, smoke cigarettes, are overweight or are taking certain medications. Stop<br />
exercising and seek medical attention if you notice signs of overexertion or heart problems, such as pain or pressure in<br />
the left or mid-chest area or left neck, shoulder or arm, light-headedness, cold sweat, unusual paleness or fainting. Also<br />
note that the signals used by this monitor may interfere with a pacemaker or other implanted devices, consult the manufacturer<br />
of the implant device and/ or your physician prior to using this monitor.<br />
1 Year Limited Warranty<br />
This product is warranted by Acumen, Inc. for a period of one year from date of original purchase<br />
(with the exception of batteries and elastic chest strap) under normal use, to be free from defects in<br />
material and workmanship. This warranty does not cover damage caused by accidents, misuse, abuse,<br />
tampering or disassembling of the product. Acumen, Inc. reserves the right to determine the cause of<br />
malfunction and will repair or replace your Acumen HRM at no charge except for shipping and handling.<br />
For warranty service, you must provide proof of purchase & date of purchase, along with a check or<br />
money order for $7.50 to cover the costs of shipping and handling. For service, please see the insert<br />
attached at back of the user’s manual. Warranty is voided if repairs have been made by individuals<br />
not authorized by Acumen, Inc..<br />
No responsibility is assumed for any incidental or consequential damages, including but without limitation<br />
damages or injuries resulting from possible measurement inaccuracies or malfunctions.<br />
Page 1 of 13
<strong>Basix</strong>plus Features Include:<br />
• Shock resistant design<br />
• Water resistant to 30 meters<br />
• Nite Site Electroluminescent Night Light<br />
• EZ-Set Target Zone Pat Pend automatic programming<br />
• Target Zone (TZ) audible and visual alarm indicators<br />
• Wireless ECG accurate heart rate chest belt<br />
• 12/24hr Time/Date display with daily alarm<br />
• Quick Release Bike Mount Design ( Optional )<br />
• Memory Recall of Time in Target Zone, Calories &<br />
Fitness Index.<br />
<strong>Basix</strong>plus Components<br />
The Acumen <strong>Basix</strong> plus comes in 2 models, Standard and Slide Mount. If you purchased the Standard<br />
<strong>Basix</strong> plus , your package includes:<br />
A.) Pulse watch receiver (Heart Rate Monitor)<br />
•Sleek, sporty styling with a easy to read<br />
display and comfortable button locations.<br />
B.) Chest transmitter<br />
•Soft flexible electrodes comfortably hug your<br />
chest providing optimum stability.<br />
C.) Adjustable elastic strap with EZ-Fit Belt Clip<br />
•Easy to adjust and includes a unique angled<br />
design patented clip which helps eliminate<br />
slippage and provides added comfort.<br />
A<br />
C<br />
Elastic Strap<br />
B Chest Transmitter<br />
"Angle-Fit" Belt Clip<br />
Page 2 of 13
If you purchased the Slide Mount <strong>Basix</strong>plus your package includes:<br />
A.) Pulse watch receiver with detachable face<br />
B.) Chest transmitter<br />
C.) Adjustable elastic strap with EZ-Fit Belt Clip<br />
D.) Acumen Bike Mount<br />
A<br />
D<br />
Buttons And Functions<br />
•MODE/SET- Press momentarily to change modes. Press & hold for SET.<br />
MODE /<br />
STAR<br />
T/<br />
STOP<br />
•LIGHT ( )/ALARM ( )<br />
- Press momentarily to light display 3 sec. Press and hold to keep light on longer & hold 3 sec. to<br />
toggle alarm ON/OFF for the current mode displayed.<br />
•START/STOP/RESET-Press momentarily for START/STOP. Press & hold to RESET stopwatch.<br />
Note: All buttons produce one short beep when pressed. Press and hold commands also produce another beep.<br />
Modes Of Operation<br />
To switch through different modes, click the MODE button.<br />
Page 3 of 13
Time/Date<br />
Press & Hold SET<br />
Set Time<br />
Press MODE<br />
Clear<br />
Workout Data<br />
Press & Hold SET<br />
Heart Rate<br />
Press MODE<br />
Press & Hold SET<br />
Set Target<br />
Zone and<br />
Exercise Factor<br />
Time in<br />
Target Zone<br />
Press MODE<br />
Calories<br />
Press MODE<br />
Fitness Index<br />
Press MODE<br />
Basic Use Of Setting Modes<br />
The two setting modes are accessed from the Time of Day & HR/Stopwatch modes.<br />
•Press & hold the SET button to enter setting mode.<br />
• Adjust blinking digits with the RESET or ALARM<br />
buttons.<br />
•Press RESET to increase the digits. Press ALARM<br />
to decrease the digits. Press and hold changes<br />
the digits fast.<br />
•Proceed to the next setting option, with the SET button.<br />
•To exit setting mode when finished, just press<br />
and hold the SET button.<br />
Note: If no button is pressed for 1 minute the watch will automatically exit the setting mode.<br />
Setting the Clock<br />
Start from the Time-of-Day mode.<br />
1. Press & hold the SET button to enter the time setting mode.<br />
2. Hour (blinking) - set using the RESET or ALARM button. Press the SET button to<br />
proceed to the next item.<br />
3. Minutes (blinking) - set using the RESET or ALARM button. Press the SET button<br />
to proceed to the next item.<br />
4. 12/24hr. time display(blinking) - set using the RESET or ALARM button. Press<br />
the SET button to proceed to the next item.<br />
5. Year (blinking) - set using the RESET or ALARM button. Press the SET button to<br />
proceed to the next item.<br />
6. Month (blinking) - set using the RESET or ALARM button. Press the SET button<br />
to proceed to the next item.<br />
7. Day (blinking) - set using the RESET or ALARM button. Press the SET button to<br />
input information and proceed to Alarm settings.<br />
8. Daily Alarm (blinking) - set on or off with the RESET or ALARM button. Press<br />
the SET button to proceed to the next item.<br />
TZ<br />
TZ<br />
TZ<br />
TZ<br />
TZ<br />
TZ<br />
TZ<br />
TZ<br />
Page 4 of 13
9. Alarm hour (blinking) - set using the RESET or ALARM button. Press the SET button<br />
to proceed to the next item.<br />
10. Alarm minutes (blinking) - set using the RESET or ALARM button. Press the<br />
SET button to proceed to the next item.<br />
TZ<br />
TZ<br />
11. Smart Lite ( blinking ) - set on or off using the RESET or ALARM button. Press<br />
the SET button to exit the setting mode.<br />
<br />
Setting Alarm Sound ON & OFF<br />
The alarm sound for both the Daily Alarm and the Target Zone Range can be turned ON/OFF by<br />
pressing and holding the “ ” button. To indicate this, the alarm indicator “ ” on the display will<br />
switch ON or OFF.<br />
To switch the Daily Alarm ON/OFF press and hold the “ ” button while in the Time Mode. (When this<br />
alarm is beeping it can be silenced by pressing any button.)<br />
To switch the Target Zone Alarm ON/OFF simply press and hold the “ ” button while in the Heart<br />
Rate/Stopwatch Mode.<br />
Setting Your Target Zone<br />
Start from the Heart Rate Mode<br />
TZ<br />
1. Press & hold the SET button to enter the setting mode.<br />
2. Age (blinking) - set using the RESET or ALARM button (Range is 7-99, default is 30.).<br />
Press the SET button to proceed to the next item. (If you want to use the built-in EZ-Setting<br />
of 65-85% of your max, set only your age and skip steps 3, 4 & 5 by pressing SET 3 times.)<br />
3. Target Zone Alarm (blinking) - set ON/OFF using the RESET or ALARM button.<br />
Press the SET button to proceed to the next item.<br />
4. Target Zone High (blinking) - set using the RESET or ALARM button (TZ High autosets<br />
based on age setting, modifying it is optional.). Press the SET button to proceed to the<br />
next item.<br />
5. Target Zone Low (blinking) - set using the MODE or LIGHT button (TZ Low also<br />
auto-sets based on age setting, modifying it is optional.). Press the SET button to exit setting<br />
mode.<br />
TZ<br />
TZ<br />
TZ<br />
TZ<br />
TZ<br />
[Note: Any items not set, will default to standard average values. The TZ limits automatically set to 65-85% of your max.<br />
based on your age setting (where Max. = 220 - Age) (every time the age setting is changed). This watch will allow you<br />
to program your upper and lower<br />
limits within one beat of each other. It will also allow you to set either limit to the “off” position, but it will not let you set<br />
the lower limit higher than the upper or the upper to less than the lower.]<br />
6. Exercise Factor (blinking) - set using the RESET or ALARM button. This feature is<br />
used for calculating calories. (See the exercise chart on page 8 for details). Press the SET<br />
button to exit setting mode.<br />
TZ<br />
CALORIE NOTE: The calorie consumption can vaty drastically from one individual to another. The calorie on this designed to provide you with only an<br />
estimate based on standard average rates of consumption. In most cases, it’s a good idea to program the monitor to underestimate your calories by<br />
calories by setting the Exercise Factor low.<br />
Determining Your Exercise Factor<br />
This Setting is one of the variables used by this monitor to estimat the amount of calories burned during<br />
your workout. The most common forms of exercise are listed in the chart below. These numbers represent<br />
Page 5 of 13
a moderate to high-effort level range. Select a number based on how hard you plan to exercise for a<br />
given activity and set your unit accordingly. (See Setting instructions on page 7.)<br />
We’ve highlighted the most common activities. If you do not find the particular activity you are looking<br />
for, refer to one that’s similar.<br />
Table of Exercise Factor Settings<br />
Exercise<br />
Aerobics<br />
Basketball (game)<br />
Bowling<br />
Cycling<br />
Dancing<br />
Football<br />
Golf (walking w/bag)<br />
Jumping Rope<br />
Running<br />
Skating (Ice/Inline)<br />
Skiing (Cross-Country)<br />
Skiing (snow/Water)<br />
Stair Climbing<br />
Swimming<br />
Tennis<br />
Volleyball<br />
Walking<br />
Weight Training<br />
Intensity Level<br />
Light Medium High<br />
6 7 9<br />
7 8, 9 10, 11,12<br />
2 3 4<br />
3-5 6-8 9,10<br />
3 4-6 7, 8<br />
6-7 8 9, 10<br />
4 6 7<br />
8 9, 10 11, 12<br />
8-10 11-15 16, 17<br />
5 6 7, 8<br />
6-7 8-10 11,12<br />
5 6 7, 8<br />
4 5,6 7, 8<br />
4 5-7 8-10<br />
4-5 6-7 8, 9<br />
3 4 5, 6<br />
3 4, 5 6, 7<br />
3-4 5-8 9, 10<br />
Determining Your Target Zone<br />
What is Target Zone Heart Rate Training? In order to benefit the most from your workout, you<br />
need to become familiar with your heart rate training zone. By working within the correct range, you<br />
will achieve your fitness goals and strengthen your cardiovascular system in less time. Here is basically<br />
how it works.<br />
Effective conditioning requires that you maintain your heart rate at the proper level for at least 20<br />
minutes per workout (or per day). At too high of a heart rate your activity can become counter effective.<br />
For most people, as your heart rate exceeds 85% (the upper limit), your body begins to become<br />
anaerobic and produce acids. This also burns less fat which can begin to burn and strain muscles, and<br />
even start storing fat. As for the Lower limit, this number tells you when you have reached a level of<br />
intensity that is productive. A heart monitor will tune you into your body’s internal activity level and<br />
helps prevent injury or worse.<br />
To make this part easy for you, this monitor automatically sets the correct target zone for you, after<br />
you enter in your age in the heart rate setup mode. The internal auto-setting is based on a generally<br />
accepted standard range of 65 to 85% of your Max HR (where mHR = 220- Age).<br />
There are many variations of formulas for calculating target zones. In most cases they will come up<br />
with a range very close to or the same as the auto-setting of this watch. If you prefer to fine-tune or<br />
program your own limits, this can also be done in the HR Setting Mode (see page 7). The internal<br />
automatic TZ calculation is based on the following example:<br />
220 - Your Age = Max HR<br />
(For a 30 year old, your calculations would be as follows.)<br />
220 - 30 = 190 Maximum heart rate (mHR)<br />
65% of this number = 123.5<br />
85% of this number = 161.5<br />
Page 6 of 13
Heart Rate - Beats per Minute<br />
The calculated exercise range for a 30 year old would be a low of 124 and a high of 162 beats per<br />
minute.<br />
(You should never exercise near your maximum heart rate (mHR) for any period of time.)<br />
The calculated exercise range for a 30 year old would be a low of 124 and a high of 162 beats per<br />
minute.<br />
(You should never exercise near your maximum heart rate (mHR) for any period of time.)<br />
Basic Fitness Tips And Target Zone Explanation<br />
Depending on your specific goals, individual fitness level or just on how energetic you feel, you may<br />
want to modify your range from one day to the next based on the following chart:<br />
200<br />
180<br />
160<br />
140<br />
Aerobic Zone<br />
% of max.<br />
Heart rate<br />
120<br />
100<br />
Fat Burning Zone<br />
65% to 85%<br />
55% to 65%<br />
80<br />
Age: 20 25 30 35 40 45 50 55 60 65+<br />
Stretching- Begin and end every workout with stretching. Stretching done before your workout<br />
increases flexibility to help prevent muscle strain or injury and stretching after, loosens tight muscles<br />
and helps prevent soreness.<br />
• Stretch before warm up & after cool down.<br />
• Stretch slowly & gently, never bounce or stretch to a point of pain.<br />
• Hold each stretch 30-60 sec. & exhale as you extend stretches.<br />
Warm Up & Cool Down, 55% or less - Start every exercise with a slow and gradual warm up and<br />
end with a slow and gradual cool down. Smoothly easing into and out of strenuous activity helps your<br />
body prepare your metabolism and blood flow to efficiently break down fat and change over from<br />
one intensity level to another. Going into your target zone too quickly can cause your heart rate to<br />
increase too rapidly causing you to loose your energy too soon, strain yourself or possibly worse.<br />
• Slowly bring your heart rate to a level just below the lower limit of your target zone.<br />
• Maintain heart rate at this level for 5-10 min.<br />
• Maintain heart rate at this level for 5-10 min.<br />
The Fat Burning Zone, 55-65% -This range is recommended for those who haven’t worked out in<br />
a long time, are trying to loose weight, those at a high risk for heart problems or if you’re just not<br />
feeling 100% one day. It is intended for low intensity and/or long duration exercise. The lower intensity<br />
helps you maintain your exercise for longer periods of time. When exercising for weight loss or starting<br />
a new exercise routine, longer duration is more important and much healthier than higher intensity.<br />
• Build up gradually to 30 to 60 min. per workout.<br />
• Workout 3 or 4 times per week.<br />
Page 7 of 13
The Aerobic Zone, 65-85% -This range is recommended for those in good physical condition who<br />
have been exercising on a consistent basis for an extended period of time. Exercising at this range<br />
helps improve your fitness level and prevent injury caused from overtraining.<br />
• Duration: 20-30 min. per workout.<br />
• Frequency: At least 3 or 4 times per week.<br />
The Anaerobic Zone, 85%-mHR - To be used by ultra-athletes only and never recommended<br />
without close medical approval or supervision. This range is used only for those in extremely<br />
good physical condition during races or training for competition. It is typically used for interval training<br />
(or short sprints) to help improve or measure endurance levels.<br />
Monitor Your Progress - Track yourself to determine how your overall health and fitness improves<br />
and become aware of your various heart rate levels. As your cardiovascular system improves, your<br />
normal resting heart rate will decrease. It will take longer to reach your target zone, it will take less<br />
and less time for your heart rate to come back down after working out.<br />
If you ever notice your resting heart rate to be higher than usual, it may be a good idea to take a rest<br />
from exercise, or at least workout easier that day, Similarly, if you notice that your heart rate doesn’t<br />
come back down as quickly as usual at the end of your workout, it could be an indication that your<br />
workout was more (or too) strenuous, or that you haven’t recovered well enough from a previous<br />
extraneous workout or injury. These signals in your heart rate could also be an indication of an illness<br />
coming on, stress, or a good reason for a check up with your doctor.<br />
Enjoy your new heart monitor and have fun! We’ll see you at the finish line.<br />
Operating Your <strong>Basix</strong>plus<br />
Attaching Your Heart Monitor<br />
1.) Attach the adjustable strap to one side of the transmitter. Push the round tab of the belt clip through<br />
the back side of the attaching hole on the transmitter and twist it into place (Fig. 1). The unique angled<br />
clip is designed to prevent the belt from slipping down your chest. It can be attached in either the up<br />
or down position (keeping both the same). Depending on the contour of your torso, one direction may<br />
be more comfortable than the other.<br />
2.) Adjust the tension of the strap to fit snugly but comfortably, around your chest. Wrap the belt<br />
around your chest as shown (Fig.2).<br />
Fig.1<br />
Transmitter<br />
Elastic<br />
Strap<br />
Transmitter<br />
Belt Clip<br />
Belt Clip<br />
Elastic<br />
Strap<br />
3.) Center and position the belt as shown, at heart level, just below your pectoral muscles or breasts (but not too low) and attach the<br />
other end of the strap to the transmitter. The logo should be positioned at the center of your chest.<br />
Page 8 of 13
4.) Moisten the transmitter electrodes. For best results, the belt should be worn directly on your skin.<br />
A small amount of moisture is needed to assist in conducting the electrical impulses generated from<br />
your heart beats to the transmitter. Gently pull belt away from skin and<br />
apply a small drop of water or saline solution to each of the two electrodes (one on each side) (Fig.<br />
3).<br />
Electrodes<br />
If you prefer to wear your belt over a light shirt you will need to generously moisten the areas of the<br />
shirt directly beneath the electrodes in order to insure proper signal pick-up. You may wear as many<br />
layers of clothing as desired over the transmitter belt without effecting the operating range.<br />
5.) Put your wrist monitor on. The watch doesn’t have to be attached to your wrist to register your<br />
heart rate it just has to be within 3 feet of your chest.<br />
Exercising with your <strong>Basix</strong>plus<br />
6.) Heart Rate -From Time of Day mode click MODE button once to go to Heart Rate mode and begin<br />
your exercise. If your transmitter is correctly attached, the running man indicator on the watch display<br />
should begin to blink and your current heart rate in beats per minute will come up on the display. If<br />
no heart rate is detected for 5 min. the heart rate circuit will switch itself off. The “ ” indicator tells if<br />
the heart rate circuit is on. To switch it back on after it has shut off, simply restart the Heart Rate mode<br />
by clicking the MODE button.<br />
7.) The Target Zone -Your watch will provide both a visual indicator (by flashing the heart rate digits)<br />
and an audible alarm (beeping) if your heart rate is above or below your set target zone range. The<br />
”TZ” indicator with the “ ” or “ ” will indicate if your heart rate is within, above or below the<br />
set target zone, respectively. Press and hold the ALARM button to turn the beeping alarm on or off<br />
(indicated by the “ “ on the display).<br />
8 .) The Stopwatch -From the Heart Rate mode simply press the START/STOP button to activate the<br />
stopwatch. You can pause and restart by pressing the START/STOP button. You can also press the<br />
MODE button to view<br />
the Recall or Time modes without interupting the stopwatch. When you have finished, simply press the<br />
STOP button to end the recording. Press the MODE button to proceed to the Recall or Time mode.<br />
*Quick Start -This feature instantly takes you to the Heart Rate/Stopwatch mode and starts or<br />
stops the stopwatch and recordings from any mode, at one simple press of the START/STOP<br />
button.<br />
9 .) Nite-Site night light operation - simply press<br />
the LIGHT button once to light the display for 3 seconds.<br />
10 .) Smart-Light between the hours of 6 PM & 6AM any button press will activate the night light for<br />
2 seconds.<br />
Page 9 of 13
Using the Memory Recall Mode<br />
From the Time mode, click the MODE button 2 times to go to the Recall mode. The upper display will<br />
show your Total Elapsed Time for your workout and the lower display will show how much time you<br />
have spent in your TZ.<br />
*Smart-Recall Display -This feature allows you to view the Recall display in real time while the stopwatch<br />
is running. To use of during your workout, switch to the Recall mode.<br />
Using the Fitness Index Recording<br />
This feature is used to monitor your fitness efficiency level by monitoring how quickly your heart<br />
rate starts to come back down after your workout. As your cardiovascular system improves it will<br />
take less and less time for you heart rate to come back down to a resting level after your workouts.<br />
This measurement is automatically activated at the end of your workout when you press the STOP<br />
button. To use it correctly, it’s best to activate it immediately as soon as you have completed your<br />
exercise (or as soon as you finish your cool-down).When you stop the stopwatch, the display will<br />
automatically switch to the Fitness Index Mode and begin a 60 sec, countdown timer. During this<br />
countdown you should be concentrating on bringing your body down to a comfortable rest, by<br />
taking deep slow breaths and relaxing your muscles. When the countdown timer reaches zero,<br />
the watch will beep twice and display a number between 0 and 99. The higher this number, the<br />
better your recovery rate.<br />
Note: The transmitter belt needs to remain attached to your chest for this feature to work.<br />
Resetting the Stopwatch & Clearing Workout Data<br />
To reset the Stopwatch and clear workout data, press and hold the RESET button for 3 sec, while<br />
in the Heart Rate/Stopwatch mode and with the Stopwatch timer stopped. You will hear a second<br />
beep and the stopwatch timer display will go to all zeros. This will allow you to record a new<br />
workout starting from zero. Keep in mind that the previous data will remain in the memory recall<br />
displays until it is replaced with new data by restarting the stopwatch and recording a new<br />
workout.<br />
Troubleshooting<br />
•I can't get a Heart Rate reading? -The most common cause for the heart rate not turning on or<br />
working erratically is that the belt is not positioned correctly or not moistened properly. Make sure that<br />
the belt is positioned high enough on your chest (too high is better than too low) and properly moistened.<br />
The tension should be comfortable but it shouldn’t be so loose that it slides down the chest. Also make<br />
sure that your watch is within the 3ft. transmitting distance of the transmitter and check the angle of<br />
its position (at further distances, the watch face should be parallel and facing the transmitter, instead<br />
of on an angle).<br />
It is also known that a small percentage of the population may have trouble getting an accurate heart<br />
rate reading with this type of device due to the many various intricacies of the heart rate signal. The<br />
signal may be too weak on the surface of the skin, stronger in a different location of the chest or<br />
irregular in waveform. Also, if the user has had recent heart problems, surgery, or other various<br />
differentiatingfactors, they might have irregularities in HR readings. If you are experiencing difficulties<br />
in picking up a steady signal, you may want to try your monitor on another person, or try positioning<br />
the belt higher on your chest. Shifting it more to the left or right of your chest (instead of centering the<br />
logo) might also work.<br />
Page 10 of 13
•I have a blank screen or missing digits? -This can be an indication of mechanical shock damage,<br />
a dead battery or possibly moisture damage. If this occurs, you could first try a Global Reset (see<br />
below) otherwise send it in for service. Repairs should only be done by Acumen or an authorized<br />
Acumen service center.<br />
*Global Reset -If your monitor should ever get stuck or act erratically due to dropping it, static shock<br />
or some other unforeseen reason, this feature will allow you to reset the unit and return all settings<br />
back to their internal defaults. To perform this function press and hold all 3 buttons at once. Caution:<br />
THIS WILL CLEAR EVERYTHING! including all of your personal settings.<br />
•My heart rate readings act strange while in my car or on an airplane? -Though the <strong>Basix</strong><br />
is<br />
designed with high integrity interference elimination circuitry, extremely excessive electrical or magnetic<br />
fields like those in a vehicle (or on board an aircraft) can cause disturbances in the heart rate readings.<br />
When your monitor detects too much interference such as this, it will usually display ”00” or ”- -” and<br />
eventually turn its heart rate circuit off. The ” ” indicator tells you if the heart rate circuit is on. In<br />
most cases holding the watch within a foot of the front of the chest belt will allow your watch to recieve<br />
the signal and display your heart rate accurately.<br />
My Fitness Index Reads Zero or Low-<br />
This feature tracks how quickly your heart rate comes down within one minute’s time. If your rate<br />
remains the same, increases, or only decreases by a very small amount within that time, it will produce<br />
a zero (or a low) reading. To insure a more accurate measurement, it is important to activate this feature<br />
at the correct time. If you activate it too soon, such as before you have finishing your exercise, there’s<br />
a good chance that your heart rate could stay high or increase within that time. If you activate it too<br />
late, your heart rate may have already reached it’s resting level and therefor could be higher or nearly<br />
or same within that time,(which would also produce a zero or low reading). For best results, activate<br />
the Fitness Index recording as soon as you stop your activity and try to completely relax during the<br />
countdown recording.<br />
Taking Care Of Your <strong>Basix</strong>plus<br />
Your Acumen Heart Rate Monitor was built with a commitment to quality and dependability. To extend<br />
the life of your monitor and keep it operating at its peak, please read your instructions carefully and<br />
keep the following tips in mind:<br />
Care & Maintenance<br />
•To maximize the life of your heart monitor it is important that you keep all of its components clean<br />
and always dry off any moisture before putting it away. For cleaning, use only mild soap and water.<br />
Be careful to never use abrasive cleansers or chemicals as they will cause permanent damage.<br />
•For safekeeping, always store your monitor in its original box and in a safe, mild and dry location.<br />
Be sure not to expose it to extreme temperatures such as, leaving it in direct sunlight or in a hot or<br />
freezing cold car for extended periods of time.<br />
General Precautions<br />
•Although your Heart Rate Monitor is water resistant, be sure not to operate its buttons under water<br />
as pressure can cause them to leak.<br />
•The transmitter will automatically shut itself off once you have disconnected it from your chest. However,<br />
it is important to thoroughly dry it off after every use, since moisture on the electrodes can cause it to<br />
remain on longer.<br />
Page 11 of 13
•Be sure not to excessively twist or bend the electrode portions of the belt (never bend backwards),<br />
especially when storing it. This can permanently damage their<br />
conductivity and cause mechanical damage to the internal circuit.<br />
Battery Replacement<br />
Should your monitor need battery replacement we recommend that you take it to a local jewelry<br />
store or an authorized Acumen service center in order to guarantee that it will maintain it's water<br />
resistance. Improper battery replacement or service will void the warranty. Repairs should only be<br />
performed by an Acumen service center. Refer to the service card in the back of this instruction manual<br />
for details.<br />
Technical Specifications<br />
Shock Resistant Standard shock resistance.<br />
Water Resistance 30 meters. Not intended for diving.<br />
Operating Temperature 0 to 50°C (32 to 122°F)<br />
Battery Type Watch-Lithium CR2032 Trans.-Lithium CR2032<br />
Battery Life Approx. 2 years, Avg. HR use of 1 hr/day, 7 days/wk.<br />
Memory Recall Items Total Elapsed Time, Time in TZ. Calories, Fitness Index.<br />
Time Default Mode After 5 minutes of no key press, no heart rate and stopwatch not running,<br />
watch returns to the time of-day mode (when in Setting Mode it returns<br />
after just 1 minute).<br />
Global Reset This feature will clear all memory data and user settings and return all<br />
settings to the default values listed. Press and hold all 3buttons for 2<br />
seconds. (Also happens at battery replacement.)<br />
Page 12 of 13
Technical Display Guide<br />
Display Items<br />
Time<br />
Alarm Time<br />
Date<br />
Age<br />
Heart Rate Display<br />
TZ Alarm<br />
Upper Target Zone Limit<br />
Lower Target Zone Limit<br />
Default Setting<br />
8 AM/12Hr<br />
*AM & PM indicators<br />
active only in the Setting<br />
Mode.<br />
8 AM/ OFF<br />
01-01-1996<br />
30 years<br />
OFF<br />
162 beats per minute<br />
124 beats per minute<br />
Range<br />
12/24hr. clock<br />
ON/OFF<br />
to 12/31/2095<br />
7 - 99<br />
0 (20) - 250 bpm<br />
ON/OFF<br />
OFF - 250<br />
OFF - 250<br />
Note: TZ High cannot be set less than TZ Low and TZ Low cannot be<br />
set greater than TZ High. However, they can be set within 1 beat of each<br />
other, or either one can be set to OFF.<br />
Stopwatch Capacity<br />
23:59.59 (rolls over at 24 hours)<br />
Exercise Factor 5 0-20<br />
Calorie Display 0-9999kcal. (rolls over at 10000)<br />
Fitness Index 0 0-99<br />
©Copyright 1998 ACUMEN, INC., 101A Executive<br />
Drive Suite 200 Sterling, VA 20166 USA<br />
All rights reserved. No part of this manual may be<br />
used or reproduced in any form or by any means<br />
without prior written permission of ACUMEN, INC.<br />
Acumen & EZ-Set Target Zone are trademarks<br />
of Acumen, Inc.<br />
EZ-Set TargetZone<br />
Angled Belt Clip<br />
Pat Pend<br />
Patented<br />
PATENTS PENDING<br />
Revised 9/98<br />
Page 13 of 13


