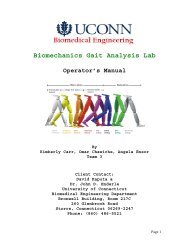
Biomechanics Gait Analysis Lab - Biomedical Engineering ...
Biomechanics Gait Analysis Lab - Biomedical Engineering ...
Biomechanics Gait Analysis Lab - Biomedical Engineering ...

Create successful ePaper yourself
Turn your PDF publications into a flip-book with our unique Google optimized e-Paper software.
Alternative Design 1 Report<br />
<strong>Biomechanics</strong> <strong>Gait</strong> <strong>Analysis</strong> <strong>Lab</strong><br />
By<br />
Kimberly Carr, Omar Chawiche, Angela Ensor<br />
Team 3<br />
Client Contact:<br />
Dr. John D. Enderle<br />
University of Connecticut<br />
<strong>Biomedical</strong> <strong>Engineering</strong> Department<br />
Bronwell Building, Room 217C<br />
260 Glenbrook Road<br />
Storrs, Connecticut 06269-2247<br />
Phone: (860) 486-5521
1. Alternative Design <strong>Gait</strong> <strong>Analysis</strong> <strong>Lab</strong> I<br />
1.1 Introduction<br />
The gait analysis laboratory design 1 will incorporate a<br />
hands-on approach to gait analysis through the use of an<br />
integrated force plate, platform, two digital camcorders,<br />
National Instruments equipment, and an interactive National<br />
Instruments <strong>Lab</strong>VIEW® software program.<br />
A drawing of the overall system design is shown in Figure<br />
1. The force plate will be designed and built using four<br />
load cells that were previously purchased by the department<br />
and withstands up to 300kg each. Data acquisition will be<br />
accomplished using the two digital cameras, a force plate,<br />
and the National Instruments PXI-1031 and SC-2345. The<br />
<strong>Lab</strong>VIEW® program will be able to determine the<br />
acceleration, velocity, position, angles, and forces for<br />
one complete gait cycle.<br />
To accurately measure the ground force reaction from foot<br />
strike, a force plate, imbedded flush into a platform, will<br />
be used in this design. The force plate will use four load<br />
cells that will measure the exerted force and send this<br />
data to the National Instruments SC-2345, which houses the<br />
SCC-SG24 modules, and the SC-2345 will be connected to the<br />
PXI-6040E data acquisition card in the National Instruments<br />
PXI-1031, from which the data acquired will be sent to the<br />
<strong>Lab</strong>VIEW® program. This force measurement device will allow<br />
the user to determine the dynamic forces exerted on the<br />
ground during the gait cycle, where previously this<br />
measurement was taken statically using a weigh scale.<br />
Digital cameras will be used to record a full gait cycle,<br />
each providing 2-D data. External markers will be placed<br />
laterally on the hip, knee, ankle, and toe of the right<br />
leg. In considering the use of multiple cameras, two<br />
cameras will provide the software with the data necessary<br />
to create 3-D analysis. The use of more than two cameras<br />
would aid in keeping the markers in view as they become<br />
obscured by arm swing or patient rotation, improving the<br />
tracking accuracy, but the markers could still be missed<br />
during parts of the gait cycle. A white screen will be<br />
placed behind the person walking, to reduce glare, picked<br />
up by the cameras from natural light, and prevent any<br />
unwanted circular shapes to be picked up by the <strong>Lab</strong>VIEW®<br />
program. The walkway location, as shown in Figure 2, was<br />
Page 1
chosen to accommodate for the proper placement of the<br />
cameras.<br />
Each camera records the gait cycle and the software<br />
determines the horizontal and vertical coordinates for each<br />
marker throughout the gait cycle, which is transformed into<br />
3-D by the computer software. Tracking the markers<br />
provides the data needed to determine angles and distance<br />
over a gait cycle time period, which will further allow for<br />
determining velocity and acceleration. The images acquired<br />
will be received by the National Instruments PXI-1411 and<br />
sent to the <strong>Lab</strong>VIEW® program.<br />
The <strong>Lab</strong>VIEW® program, along with Vision Development Module,<br />
will aggregate and synthesize the data received from the<br />
National Instruments PXI-1031 and display angles, forces,<br />
and acceleration vs. time, velocity vs. time, and position<br />
vs. time graphs, as well as the average acceleration and<br />
velocity. This portion of the lab is unique in that, some<br />
components of this program will allow the opportunity for<br />
students to build certain portions of the program, such as<br />
the force measurement function.<br />
Platform<br />
<strong>Gait</strong> <strong>Lab</strong><br />
Force Plate<br />
text<br />
Complete System<br />
Camera 1<br />
National<br />
Instruments<br />
BNC-2120<br />
CPU with<br />
National<br />
Instruments<br />
<strong>Lab</strong>VIEW®<br />
Program<br />
Output<br />
Display<br />
(Computer<br />
Monitor and<br />
Printer)<br />
PXI 6040E<br />
Camera 2<br />
PXI 1411<br />
National<br />
Instruments<br />
PXI-1031<br />
PXI 1411<br />
Figure 1: Complete System Drawing<br />
1.2 Subunits<br />
Page 2
1.2.1 Force Measuring Device – Force Plate<br />
1.2.1.1 Background<br />
A force plate is a device that measures the ground reaction<br />
forces exerted by a subject as they step on it during gait.<br />
Force plates consist of a top plate which is separated from<br />
the bottom frame by force transducers at each corner. The<br />
forces exerted on the top surface are transmitted through<br />
the force transducers. Force plates allocate the<br />
measurement of both vertical and shear forces, as well as<br />
the center of pressure for the subject throughout gait.<br />
1.2.1.2 Force Transducers<br />
For this design we will use four Thames Side-Maywood<br />
(Southwood, Farnborough, England) 350a strain gauges/load<br />
cells that were previously purchased by the University of<br />
Connecticut <strong>Biomedical</strong> <strong>Engineering</strong> program shown in Figure<br />
1 on the top of the next page.<br />
(a)<br />
Figure 1 (a) & (b): Thames Side-Maywood 350a Load Cell 1<br />
The technical specifications for the load cells are shown<br />
in Table 1 below.<br />
(b)<br />
Table 1: Thames Side-Maywood 350a Load Cell<br />
Technical Specifications<br />
Load Cell Capacity<br />
Units<br />
Standard Load Ranges 300 kg<br />
Rated Output 2 mV/V ± 0.1%<br />
Accuracy Class 3000 n.OIML<br />
Combined Error < ± 0.017 %*<br />
Page 3
Non-repeatability < ± 0.015 %*<br />
Creep (30 minutes) < ± 0.016 %*<br />
Temperature Effect on Zero Balance < ± 0.01 %*/ºC<br />
Temperature Effect on Span < ± 0.006 %*/ºC<br />
Compensated Temperature Range –10 to +40 ºC<br />
Operating Temperature Range –20 to +70 ºC<br />
Safe Overload 150 %*<br />
Ultimate Overload 200 %*<br />
Zero Balance < ± 2 %*<br />
Input Resistance 400 Ω ± 30<br />
Output Resistance 350 Ω ± 1.5<br />
Insulation Resistance > 5000 MΩ @ 100V<br />
Recommended Supply Voltage 10 V<br />
Maximum Supply Voltage 15 V<br />
Environmental Protection IP66 -<br />
The load cell dimensions are shown in Figure 2 and Table 2<br />
below.<br />
Figure 2: Thames Side-Maywood 350a Load Cell Dimensions 1<br />
Table 2: Thames Side-Maywood 350a Load Cell Dimensions<br />
A B C D E F G H J K L M Weight<br />
31.5 15 24.6 51.6 31.5 130 13.5 18 M12 76.2 25.4 15.8 0.9 kg<br />
All dimensions are in mm<br />
In order to measure strain with a bonded resistance strain<br />
gauge, it must be connected to an electrical circuit that<br />
Page 4
is capable of measuring the minute changes in resistance<br />
corresponding to strain. The Thames Side-Maywood strain<br />
gauge transducers employ four strain gauge elements<br />
electronically connected to form a Wheatstone bridge<br />
circuit shown in Figure 3 below.<br />
Figure 3: Thames Side-Maywood 350a Load Cell Electrical<br />
Circuit 1<br />
Testing the Load Cells<br />
To test the load cells at zero balance (electrical output<br />
with no load)a millivoltmeter is used to measure the load<br />
cell’s output under a “no load” condition. The output of a<br />
trimmed cell should typically be within ± 0.1% of the rated<br />
output.<br />
To test for bridge resistance the resistance across each<br />
pair of input and output leads is measured. The input and<br />
output resistance is typically 350 ± 3.5 Ω (Ohms); if the<br />
resistance readings are 'out of spec' than the load cell<br />
requires repair.<br />
1.2.1.3 Top Plate<br />
The top plate for the force plate needs to be made out of a<br />
material that is relatively light weight, durable, strong,<br />
and cost-efficient. The material that will be used for the<br />
top plate of the force plate in this gait analysis<br />
laboratory is 6061 aluminum alloy. The composition and<br />
mechanical properties for 6061 aluminum alloy are shown in<br />
Table 3 and Table 4 below.<br />
Page 5
Table 3: Composition of 6061 Aluminum Alloy<br />
Weight Percent (wt%)<br />
Element<br />
97.9 Aluminum (Al)<br />
1.0 Mercury (Mg)<br />
0.6 Silicon (Si)<br />
0.3 Copper (Cu)<br />
0.2 Chromium (Cr)<br />
Table 4: Mechanical Properties of 6061 Aluminum Alloy<br />
Condition<br />
(Temper Designation)<br />
Tensile Strength<br />
(MPa)<br />
Yield Strength<br />
(MPa)<br />
Ductility<br />
(%EL in 50 mm)<br />
Heat Treated<br />
(T4)<br />
240 145 22-25<br />
The Schematics of the force plate for the gait analysis<br />
laboratory are shown on the top of the next page in Figures<br />
4, 5, and 6.<br />
Figure 4: Top View of Force Plate<br />
Figure 5: Side View of Force Plate<br />
Page 6
Figure 6: Front View of Force Plate<br />
1.2.1.4 Ground Reaction Forces and Center of Pressure<br />
Due to gravity, we constantly maintain contact with the<br />
ground, and therefore, interactions occur between the body<br />
and the ground. The ground reaction force (GRF) is the<br />
reaction force supplied by the ground and is basically the<br />
reaction to the force that the body exerts on the ground.<br />
The GRF of a subject can be calculated using a force plate<br />
and Figure 7a below shows the reference frame of the force<br />
plate, with the Z-axis being the vertical while Figure 7b<br />
below shows the reaction force vectors acting on small<br />
areas. A force plate has four tri-axial force sensors<br />
embedded that measure the force acting between the foot and<br />
the ground in three axes: transverse (X), anteroposterior<br />
(Y), and vertical (Z). Figure 7c below shows the four<br />
reaction force vectors measured by the sensors. Since the<br />
sum of all of the reaction forces from the ground (Figure<br />
7b) is equivalent to the sum of the four forces measured by<br />
the sensors F 1 , F 2 , F 3 , and F 4 (Figure 7c), the system is<br />
equivalent to the system in Figure 7c.<br />
Page 7
Figure 7: Ground Reaction Force<br />
Figure 7d shows a single force, F (F 1 + F 2 + F 3 + F 4 ), and a<br />
torque, T z . F here is the ground reaction force. T z shown<br />
in the figure is the so-called free torque and has the<br />
vertical (Z) component only. The free torque is caused by<br />
the coupling effects of the forces about the vertical axis.<br />
System (d), F + T z , is again equivalent to system (c). The<br />
ground reaction force has three components: F x , F y & F z .<br />
Among these, F y is along the direction of the motion which<br />
reflects the propulsive or braking force. F z always thrusts<br />
the body upward.<br />
As Shown in Figure 7 above, all of the forces acting<br />
between the foot and the ground can be summed up to yield a<br />
single ground reaction force vector (F) and a free torque<br />
vector (T z ). The point of application of the ground<br />
reaction force on the plate is the center of pressure (CP).<br />
All the small reaction forces collectively exert on the<br />
surface of the plate at the CP.<br />
Generally, the true origin of the strain gauge force-plate<br />
is not at the geometric center of the plate surface. Here,<br />
we assume that the true origin (O' shown in Figure 8) is at<br />
(a, b, c). The Z component of the CP position is always 0.<br />
The moment measured from the plate is equal to the moment<br />
caused by F about the true origin plus T z :<br />
Page 8
Figure 8: True Origin of Center of Pressure<br />
Equations:<br />
or:<br />
(1)<br />
Eventually:<br />
(2)<br />
(3)<br />
Therefore, the position of the CP can be computed from the<br />
moment caused by the ground reaction force about the true<br />
origin, M x , M y & M z , the ground reaction force, F x , F y & F z ,<br />
and the location of the true origin, a, b & c. M x , M y , M z ,<br />
F x , F y & F z can be directly measured from the data output<br />
from the force transducers 2 .<br />
References for Section 1.2.1<br />
1. http://www.accuweigh.com.au/Spare5/350.pdf<br />
Page 9
2. http://kwon3d.com/theory/grf.html<br />
1.2.2 Optoelectronic System<br />
For this design project, two digital Sony Handycam DCR TRV27<br />
cameras (shown in Figures 1 and 2 below) are used to create<br />
a 3-D coordinate system. The two digital cameras record the<br />
instantaneous position of each marker in order analyze the<br />
movement of the body in 3-D system.<br />
Figure 1: Sony Handycam DCR TRV27 Digital Camera-side view<br />
Features of the Sony Handycam DCR TRV27 digital cameras<br />
include:<br />
• An advanced hole accumulation diode imager with 690k<br />
pixels, in which it will provide us with an excellent<br />
detailed and clarity of an image.<br />
• MiniDV digital recording format delivers 3x the color<br />
bandwidth of VHS and lower signal to noise ratio<br />
compared to analogue formats, providing stunning video<br />
performance comparable to DVD.<br />
• A clear color view of video subjects, and makes<br />
spotting or following subjects easier.<br />
• A high speed bi-directional digital video/audio<br />
communication between two compatible devices equipped<br />
with an IEEE1394 interface, including camcorders,<br />
digital VTRs, capture cards, and PCs.<br />
• It converts and records any analog NTSC video source<br />
to digital video via the analog inputs.<br />
• A digital still memory mode captures high quality<br />
Megapixel still images at 1152 * 864 or 640 * 480<br />
resolution directly to memory stick media.<br />
• A playback zoom: during video playback, pause mode or<br />
while viewing still images stored on memory stick<br />
media, it can zoom up to 5x closer.<br />
Page 10
• An MPEG movie EX mode: in which it will allow us to<br />
record uninterrupted to the full capacity of the<br />
memory stick media. For example a 128MB memory stick<br />
will record up to 85 minutes of non-stop MPEG1 video.<br />
• 10X Optical/120X Precision digital zoom: the optical<br />
zoom brings the action close up from far away. In<br />
addition, precision digital zoom interpolation<br />
technology means that extreme digital zooming is<br />
clearer, with less distortion than previous types of<br />
digital zoom 1<br />
Figure 2: Sony Handycam DCR TRV27 Digital Camera-back view<br />
Three Styrofoam balls shown in Figure 3 below will be used<br />
as the motion markers that will be placed on the hip, knee,<br />
and ankle joints of the subject’s leg. The video<br />
recordings of these markers will allow us to calculate the<br />
position vs. time, velocity vs. time, and acceleration vs.<br />
time for each marker on the subject.<br />
Figure 3: Styrofoam balls used as motion markers 3<br />
The cameras will record a complete gait cycle of the<br />
subject, as depicted in Figure 4 below.<br />
Page 11
Figure 4: Complete <strong>Gait</strong> Cycle<br />
In order to achieve a high-quality recording that will lead<br />
to optimal results, the digital cameras will be spaced<br />
several feet apart as shown in Figure 5 on the top of the<br />
next page.<br />
Figure 5: Camera Spacing Diagram<br />
References for section 1.2.2<br />
1. http://www.sonystyle.com/intershoproot/eCS/Store/en/<br />
documents/specifications/DCR-TRV33.pdf<br />
2. http://www.ni.com/pdf/manuals/371226b.pdf<br />
3. www.bjcraftsupplies.com<br />
Page 12
1.2.3 National Instrument Devices<br />
Figure 1: National Instruments PXI-1031<br />
PXI-1031, as shown in Figures 1-3, combines 4-slots PXI<br />
backplane with a structural design that gives it the<br />
ability to be used in a wide range of applications.<br />
The key features of the NI PXI-1031 include the following:<br />
• Accepts 3U PXI and Compact PCI (PICMG 2.0 R 3.0)<br />
modules<br />
• 4-slot chassis with universal AC input, and automatic<br />
voltage/frequency ranging<br />
• DC power input (PXI-1031DC only)<br />
• On/Off (Standby) power switch on the front panel for<br />
easy access<br />
• AUTO/HIGH temperature-controlled fan speed based on<br />
air-intake temperature to minimize audible noise<br />
• (Optional) Carrying handle for portability<br />
• Rack mountable 1 Page 13
Figure 2: National Instruments PXI-1031 Front View<br />
Figure 3: National Instruments PXI-1031 Rear View<br />
Figures 2-3 show the rear and front view of the PXI-1031.<br />
As mentioned before, this device contains 4 different<br />
slots. One of these slots contains the NI-1411, shown in<br />
Fig. 4, which consists of a PXI plug-in image acquisition<br />
device that accepts digital video input from standard color<br />
or monochrome cameras. It also includes image acquisition<br />
driver software. The PXI-1411 Series includes features<br />
that improve overall image acquisition and image processing<br />
speed, using the onboard programmable ROI feature, only a<br />
portion of the image would be acquired. The National<br />
Instruments PXI-1411 can be used with several different<br />
software programs include <strong>Lab</strong>VIEW®, Measurement Studio, and<br />
C/C++. The National Instruments PXI-1411 will receive<br />
images from both cameras and send it to the computer.<br />
Page 14
Figure 4: National Instruments PXI-1411<br />
The force plate will be connected to the National<br />
Instruments BNC-2120, shown in Fig. 5, which is connected<br />
to the PXI-1031, where it will read the data from the force<br />
plate and convert it to digital data that the computer will<br />
be able to read.<br />
Figure 5: National Instruments BNC-2120<br />
This National Instruments BNC-2120 is generally used to<br />
connect analog input, analog output, digital I/O and<br />
counter/timer signal. The National Instruments BNC-2120<br />
also provides a function generator, quadrature encoder,<br />
temperature reference, thermocouple connector, and LED so<br />
the functionality of the hardware can be tested. This<br />
device will be connected to the force plate, as well as the<br />
National Instruments PXI-1031, so the information will be<br />
received from the force plate through the National<br />
Instruments BNC-2120 and PXI-1031, which will convert the<br />
signal to digital data before being received by the<br />
computer.<br />
References for Section 1.2.3<br />
Page 15
1. http://www.ni.com/pdf/manuals/371226b.pdf<br />
1.2.4 Computer Program<br />
The computer program used for this design will be able to<br />
receive the digital signal, or bytes of data, from the<br />
digital camcorder and the force measuring device, which has<br />
been converted from analog data by the National Instruments<br />
BNC-2120. The products and specifications required to<br />
accomplish the necessary data acquisition to produce the<br />
desired results, is listed as follows in Figure 2 below.<br />
Operating System<br />
Windows 2000/NT/XP/Me/9x<br />
Hardware<br />
Pentium III or later (600 MHz Celeron)<br />
Microsoft Internet Exployer 5.0 or later<br />
256 MB of RAM<br />
Software Applications<br />
National Instruments <strong>Lab</strong>VIEW® 7.1 or later<br />
National Instruments Vision Development Module<br />
- IMAQ Vision 8.0<br />
- Vision Builder for Automated Inspection (AI)<br />
Figure 2: Operating System, Hardware and Software<br />
Application Requirements<br />
All software applications are produced by National<br />
Instruments and will be referred to by the application<br />
name, through the remainder of section 1.2.3.<br />
1.2.4.1 Digital Image Acquisition and Displays<br />
The digital data, or bytes of data, are received from the<br />
National Instruments PXI-1031, by the Vision Development<br />
Module, IMAQ software, serving as the interface path<br />
between <strong>Lab</strong>VIEW® and the PXI-6040E, to deal with any issues<br />
such as programming interrupts, and performs the functions<br />
that acquire and saves the images. IMAQ Vision performs<br />
functions such as image analysis, interpretation,<br />
Page 16
manipulation, processing, storage and display. IMAQ Vision<br />
Builder for Automated Inspection has abilities that include<br />
setting up coordinate systems, performing pattern matching,<br />
geometric analysis, and measurements. Examples of the IMAQ<br />
Vision Builder for Automated Inspection are shown in Figs.<br />
3-4.<br />
Figure 3: IMAQ Vision Builder for Automated Inspection 1 Page 17
Figure 4: IMAQ Vision Builder for Automated Inspection 2<br />
The Vision Builder for Automated Inspection generates<br />
<strong>Lab</strong>VIEW® code that allows for custom and optimal inspection<br />
algorithms that, used in conjunction with <strong>Lab</strong>VIEW®<br />
software, will meet our application and display<br />
requirements.<br />
1.2.4.2 Force Signal Processing<br />
The signal from the force transducers will need to go<br />
through a circuit board, such as the National Instruments<br />
PXI-4204 or PXI-4220, and the National Instrument BNC-2120<br />
and PXI-1031 to produce data that may be used by the<br />
<strong>Lab</strong>VIEW® program. Once the signal from the force<br />
measurement device is sent to the computer, the <strong>Lab</strong>VIEW®<br />
software will translate this data into a displayable<br />
measurement in engineering units. An example of a<br />
displayable measurement is a graph, such as the graphs<br />
shown in Figures 5-6 on the top of the next page.<br />
Page 18
Figure 5: Digital Waveform Graph (graphical indicator from<br />
<strong>Lab</strong>VIEW® 7.1)<br />
Figure 6: Waveform Graph (graphical indicator from <strong>Lab</strong>VIEW®<br />
7.1)<br />
References for Section 1.2.4<br />
1. http://www.ni.com/pdf/products/us/vbai_datasheet.pdf<br />
2. http://www.ni.com/pdf/manuals/373379b.pdf<br />
2. Realistic Constraints<br />
<strong>Engineering</strong> standards are very important when designing a<br />
biomedical device. For this design project, we are using<br />
the International System of Units (SI units) in order to<br />
keep with engineering standards around the world. Also, we<br />
are utilizing basic static laws of applied loads, moments,<br />
and points of application in order to analyze the raw data<br />
that is output from the force transducers.<br />
Some economic considerations for this design project<br />
include the proposed budget (although not yet specified)<br />
and the longevity of the device itself. Although currently<br />
we do not have a limited budget, our design needs to be<br />
Page 19
within a reasonable cost, ranging from approximately $450<br />
to $1,500. The gait analysis laboratory that is being<br />
designed will need to be used in the University of<br />
Connecticut’s biomechanics laboratory which is presently<br />
offered in the Fall semesters. Therefore, our device<br />
should be able to last at least five years of operation.<br />
A major environmental consideration for this design project<br />
is the weather conditions and temperature ranges in<br />
Connecticut. The gait analysis laboratory will need to be<br />
stored in a closet that may or may not have a good source<br />
of heat and will hence need to survive the relatively harsh<br />
temperatures of Connecticut winters.<br />
Two very important ethical constraints for this design<br />
project come from the Code of Ethics for Engineers. The<br />
first ethical constraint is the statement “Strive to<br />
prevent a person from being placed at risk due to the use<br />
of technology”. This constraint demands that the gait<br />
analysis laboratory be set-up in such a way that will keep<br />
the subjects and testers’ safe at all times of operation<br />
and assembly. The second ethical constraint is the<br />
statement “Work toward the containment of costs by the<br />
better management and utilization of technology”. This<br />
constraint asks that we utilize existing materials that are<br />
on hand or that are cheaper than others on the market as<br />
well as to make things ourselves which is more costeffective<br />
than purchasing from suppliers.<br />
3. Safety Issues<br />
Safety consideration is one of the most important issues in<br />
any project, especially when dealing with electricity. In<br />
general, any equipment or device uses electricity and, when<br />
it is in contact with people, it must be electrically<br />
isolated from the power main or battery power. Even if the<br />
instrument is not in direct contact with the person, it<br />
must be grounded.<br />
In our design for the gait analysis lab, the students will<br />
only be in contact with the force plate that is<br />
electrically wired. Besides walking and stepping on the<br />
force plate, students will only have to run the PXI-1031<br />
and BNC-2120 equipment which were built by the National<br />
Page 20
Instruments and the safety of these devices were taken into<br />
consideration by the company, prior to building and during<br />
testing of the equipment.<br />
All of the wires that are connecting the force plate,<br />
National Instruments equipment, cameras, and the computer,<br />
will be placed in a cable tunnel or conduits, as shown in<br />
Fig. 1, so that wires are not hazardously placed, in such a<br />
way that somebody may trip on them, and that also will<br />
reduce the chances of somebody receiving an electrical<br />
chock.<br />
Also the right size of electrical cable will be used so<br />
that the power voltage will not be so large as to cause the<br />
cables to heat up and potential produce a fire. Another<br />
safety issue to take into consideration is the material<br />
that will be used in the force plate and the connection<br />
circuitry of the load cells. In this design, the force<br />
plate will be created using metals. Metal is a good<br />
electrical conductor and could dangerous if the circuitry<br />
is set-up properly. For that reason, the circuitry that is<br />
connecting the load cells together should be isolated from<br />
contact with the metal force plate.<br />
By using conduits to arrange the wires and the right<br />
voltage source, students will be safe to use this lab.<br />
Overall, our main safety concern in building the design is<br />
the electrical components that include cables, circuitry,<br />
and voltage source.<br />
Figure 1: Cable Tunnels and Conduits<br />
4. Impact of <strong>Engineering</strong> Solutions<br />
Page 21
Designing a gait analysis program can have many impacts<br />
that are global, societal, economic, and environmental.<br />
Learning about gait analysis and its applications will<br />
provide a better understanding of the impact of biomedical<br />
engineering solutions for students and, hopefully, the<br />
students will be able to discover some of the global,<br />
societal, economic, and environmental impacts in the gait<br />
analysis lab. Some of those impacts will be discussed<br />
next.<br />
Globally, in researching applications of gait analysis,<br />
these types of programs were found in countries such as<br />
Australia, United Kingdom, China, and all across the United<br />
States. The Hugh Williamson <strong>Gait</strong> <strong>Analysis</strong> <strong>Lab</strong>oratory, as<br />
part of the Royal Children’s Hospital in Melbourne, uses<br />
their lab to perform research and to develop ways of<br />
providing useful information to surgeons and therapists,<br />
primarily for children with Cerebral Palsy and also Spina<br />
Bifida. The Derby <strong>Gait</strong> and Motion <strong>Lab</strong>oratory, in the<br />
United Kingdom, evaluate adults and children with Cerebral<br />
Palsy, stroke, and amputated limbs. The Institute of<br />
<strong>Biomedical</strong> <strong>Engineering</strong>, Tsinghua University, in Beijing,<br />
China has been involved in the use of gait analysis for<br />
analyzing Cerebral Palsy. Clinical gait analysis is also<br />
used at the <strong>Gait</strong> <strong>Analysis</strong> <strong>Lab</strong>oratory at the Connecticut<br />
Children's Medical Center.<br />
The use of gait analysis to treat diseases and disabilities<br />
has a positive impact on society. By discovering ways to<br />
treat physical conditions, people with disabilities may be<br />
able to receive better medical treatment or therapy, and<br />
assistive devices. These treatments could help patients<br />
become more productive and independent. Research and use<br />
of gait analysis for patients with Cerebral Palsy has been<br />
performed on a global scale, at all of the institutes<br />
mentioned previously. Cerebral Palsy is an incurable<br />
disorder that hinders the control of muscle movement and<br />
can affect the use of one or any combination of limbs. The<br />
lack of motor control makes walking very difficult, for<br />
which gait analysis could be a great tool in determining<br />
proper treatment.<br />
The economic impact can affect consumers, both patients and<br />
providers. The cost of building a gait analysis laboratory<br />
is extremely expensive. The patients that use the<br />
facilities that use “state-of-the-art” equipment often have<br />
higher fees, which may exceed insurance coverage or may not<br />
Page 22
e covered at all. The benefit to the patient, and the<br />
usefulness in determining proper treatment by the health<br />
professional, must outweigh the cost. The growing<br />
expectation for a quality life, demands tools to better<br />
serve the recovery or treatment process and gait analysis<br />
is one of those tools. A patient may require treatment in<br />
order to regain the ability to work, which could provide a<br />
better income than disability compensation, thereby<br />
improving the individual’s economic situation.<br />
Environmentally, the impact can be found in the creation of<br />
materials and electronics that must eventually be thrown<br />
out. As materials and electronics age, they must be<br />
replaced to ensure operational safety and quality results.<br />
While some materials can be recycled, this is not true for<br />
all materials and, unless the user is environmentally<br />
conscious, all of the materials could conceivably be thrown<br />
away. Recycling is very expensive, but the cost to the<br />
environment may be irreversible and every effort should be<br />
made to recycle as much of the used materials as possible.<br />
Depending on how one views the definition of ‘environment,’<br />
the patient’s environment could be impacted as well. The<br />
environment in which the patient lives could improve and<br />
expand greatly. This may mean the patient becomes mobile,<br />
or more easily mobile, and is able to gain access to areas<br />
of their environment that were previously restricted by<br />
their condition. The recommended treatment from gait<br />
analysis may allow the patient to re-enter the workforce<br />
and regain involvement in the environment of society.<br />
Designing a gait analysis program has already greatly<br />
impacted the world in a global, societal, economic, and<br />
environmental sense and shows how engineering solutions can<br />
make a positive difference in the world, if put to good<br />
use.<br />
5. Life-Long Learning<br />
In the <strong>Biomechanics</strong> gait analysis lab, we learned about<br />
gait analysis processes in general, including ‘what is gait<br />
analysis?’ and ‘what is it used for in the medical field?’<br />
We also learned about the gait cycle and how is it divided<br />
into different parts. We have increased our understanding<br />
of this process and will highlight some of the knowledge<br />
gained with comparisons to what we had previously learned.<br />
Page 23
During the biomechanics lab, we built a simple <strong>Lab</strong>VIEW®<br />
program to process the information recorded from the<br />
digital camera. In this design, by building the gait<br />
analysis program, we acquire more details and learn more<br />
about the different parts of the program and how each part<br />
functions and communicates to produce the desired, complex<br />
results.<br />
By building the program, we will learn more modules in<br />
<strong>Lab</strong>VIEW® and gain more in-depth knowledge of the data the<br />
program receives and how it is used. The difference between<br />
creating this program and the one used in the biomechanics<br />
class is that we are building the program and not simply<br />
using it. The students using the new design will be given<br />
portions of the program to get started and will be expected<br />
to build a portion of it. Due to time constraints, were<br />
students only have one lab section, building the entire<br />
program and finishing the entire lab would be impossible.<br />
As far as the optical device, we learned the differences<br />
between using one or two cameras, and which one is the<br />
better option. We have also learned how the cameras should<br />
be placed, to include how far apart the two cameras should<br />
be place in order to give an accurate motion recording.<br />
Also getting to know the quality of the cameras and how the<br />
quality affects the results has been a learning experience.<br />
Concerning the markers used in gait analysis lab, we have<br />
found that, in order to detect 3-D motion properly using<br />
the cameras, three markers should be placed on each body<br />
segment instead of one, as was done in the previous<br />
<strong>Biomechanics</strong> gait analysis lab.<br />
The PXI-1031 and BNC-2120 national instrument equipments<br />
are being used for the first time in this lab, meaning that<br />
we had no prior knowledge about these devices. After<br />
creating the first alternative design for the new lab, we<br />
have gained more knowledge about how these instruments<br />
functions to transform the data from the cameras and the<br />
load cells, so that the collected data can be analyzed.<br />
Page 24